任务管理应用实战:@Observed 和 @ObjectLink 在 HarmonyOS6 PC 中的完整应用
对象属性变化不触发更新?这是每个人都会踩的坑
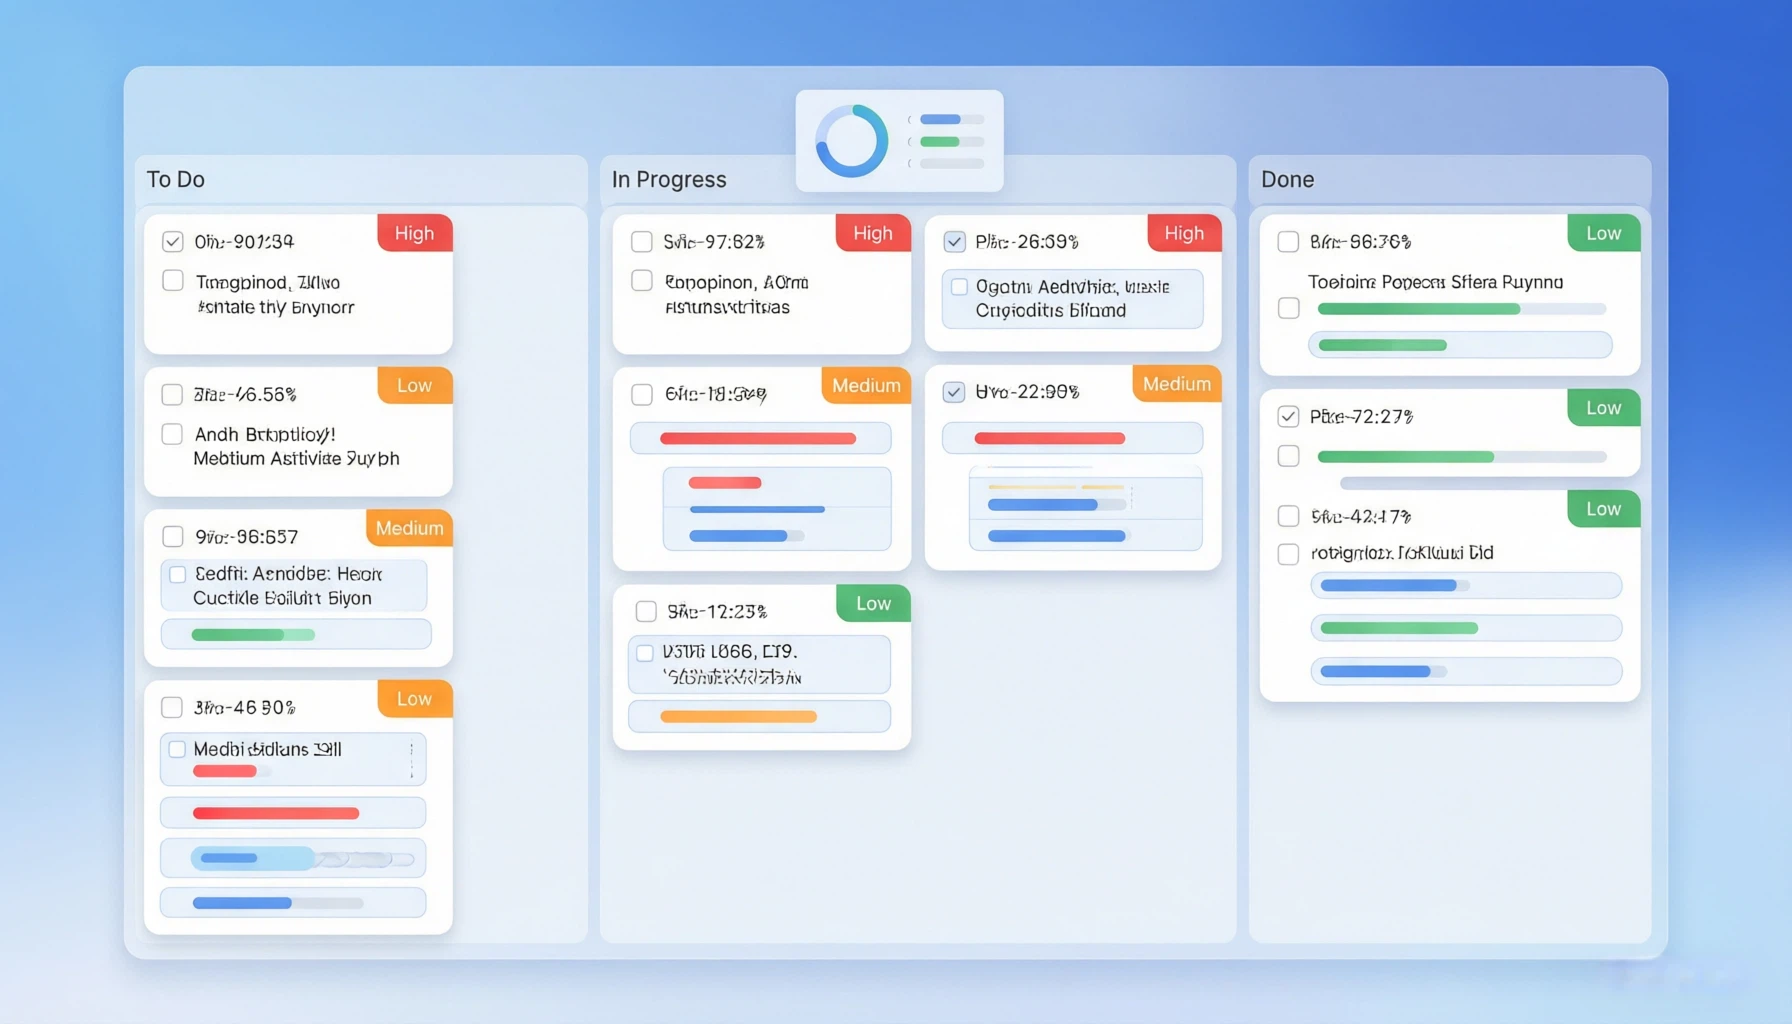
上个月我在做一个 HarmonyOS6 PC 的任务管理应用时,遇到了一个让人抓狂的问题:任务列表里每个任务都是一个对象,我修改了某个任务的"完成状态",UI 完全没反应。检查了状态变量,值确实变了,但界面就是不动。
后来翻文档才知道,这是 ArkUI 状态管理的一个核心机制——@State 只监听变量的引用变化,不监听对象内部属性的变化。你把 task.isCompleted 从 false 改成 true,task 这个对象的引用没变,所以框架认为"什么都没发生"。
解决方案就是 @Observed 和 @ObjectLink 这对组合。今天用一个完整的任务管理应用,把这套方案从头到尾讲清楚。
数据模型:用 @Observed 标记可观察类
定义任务数据结构
任务管理应用的第一步是定义数据模型。一个完整的任务包含这些信息:标题、描述、是否完成、优先级、截止日期、分类标签。我们用 @Observed 来标记这个类,告诉框架"这个类的属性变化需要被追踪":
@Observed
class TaskItem {
  id: string
  title: string
  description: string
  isCompleted: boolean
  priority: 'high' | 'medium' | 'low'
  category: string
  dueDate: string
  createdAt: string

  constructor(title: string, priority: 'high' | 'medium' | 'low' = 'medium') {
    this.id = Date.now().toString() + Math.random().toString(36).slice(2, 6)
    this.title = title
    this.description = ''
    this.isCompleted = false
    this.priority = priority
    this.category = '默认'
    this.dueDate = ''
    this.createdAt = new Date().toLocaleDateString()
  }
}
@Observed 的作用是给类加一层"代理"——框架会拦截所有属性的读写操作,从而在属性变化时通知 UI 更新。这是深层监听,不管你的对象嵌套了多少层,只要被 @Observed 标记了,属性变化都能被捕获。
任务分类也是一个可观察类
为了让分类统计也能实时更新,分类信息也做成 @Observed 的:
@Observed
class TaskCategory {
  name: string
  color: string
  count: number

  constructor(name: string, color: string) {
    this.name = name
    this.color = color
    this.count = 0
  }
}
核心组件:用 @ObjectLink 接收可观察对象
单个任务的展示组件
每个任务卡片是一个独立组件,它接收一个 TaskItem 对象并展示。这里用 @ObjectLink 而不是 @Prop——因为 @ObjectLink 是引用传递,而且能监听对象内部的属性变化:
@Component
struct TaskCard {
  @ObjectLink task: TaskItem
  onDelete: (id: string) => void = () => {}
  onEdit: (task: TaskItem) => void = () => {}

  private getPriorityConfig(): { label: string, color: string, bg: string } {
    switch (this.task.priority) {
      case 'high':
        return { label: '高', color: '#FFFFFF', bg: '#FF4D4F' }
      case 'medium':
        return { label: '中', color: '#FFFFFF', bg: '#FAAD14' }
      case 'low':
        return { label: '低', color: '#FFFFFF', bg: '#52C41A' }
      default:
        return { label: '中', color: '#FFFFFF', bg: '#FAAD14' }
    }
  }

  private isOverdue(): boolean {
    if (!this.task.dueDate || this.task.isCompleted) return false
    return new Date(this.task.dueDate) < new Date()
  }

  build() {
    Row() {
      // 完成状态勾选框
      Column() {
        Column()
          .width(20).height(20)
          .borderRadius(10)
          .border({ width: 2, color: this.task.isCompleted ? '#52C41A' : '#D9D9D9' })
          .backgroundColor(this.task.isCompleted ? '#52C41A' : '#FFFFFF')
          .onClick(() => {
            this.task.isCompleted = !this.task.isCompleted
          })
      }
      .width(30)
      .justifyContent(FlexAlign.Center)

      // 任务内容
      Column({ space: 4 }) {
        Row({ space: 6 }) {
          Text(this.task.title)
            .fontSize(14)
            .fontWeight(FontWeight.Medium)
            .fontColor(this.task.isCompleted ? '#BBBBBB' : '#333333')
            .decoration({
              type: this.task.isCompleted ? TextDecorationType.LineThrough : TextDecorationType.None,
              color: '#BBBBBB'
            })
            .layoutWeight(1)

          // 优先级标签
          Text(this.getPriorityConfig().label)
            .fontSize(10)
            .fontColor(this.getPriorityConfig().color)
            .backgroundColor(this.getPriorityConfig().bg)
            .borderRadius(4)
            .padding({ left: 6, right: 6, top: 2, bottom: 2 })
        }
        .width('100%')

        Row({ space: 8 }) {
          // 分类标签
          Text(this.task.category)
            .fontSize(10)
            .fontColor('#007DFF')
            .backgroundColor('#E8F4FF')
            .borderRadius(4)
            .padding({ left: 6, right: 6, top: 2, bottom: 2 })

          // 截止日期
          if (this.task.dueDate) {
            Row({ space: 2 }) {
              Text('📅').fontSize(10)
              Text(this.task.dueDate)
                .fontSize(10)
                .fontColor(this.isOverdue() ? '#FF4D4F' : '#999999')
                .fontWeight(this.isOverdue() ? FontWeight.Bold : FontWeight.Normal)
            }
          }
        }
      }
      .layoutWeight(1)
      .alignItems(HorizontalAlign.Start)

      // 操作按钮
      Column({ space: 8 }) {
        Text('✏️').fontSize(14).onClick(() => { this.onEdit(this.task) })
        Text('🗑️').fontSize(14).onClick(() => { this.onDelete(this.task.id) })
      }
    }
    .width('100%')
    .padding(12)
    .backgroundColor(this.task.isCompleted ? '#FAFAFA' : '#FFFFFF')
    .borderRadius(10)
    .shadow({ radius: 2, color: '#0A000000', offsetX: 0, offsetY: 1 })
  }
}
@ObjectLink 和 @Prop 的关键区别
这里必须停下来讲讲 @ObjectLink 和 @Prop 的区别,因为这是很多人搞不清楚的地方。
@Prop 做的是值拷贝。父组件传一个对象给子组件,子组件拿到的是一个全新的副本。修改副本不影响原始数据。
@ObjectLink 做的是引用传递。子组件拿到的是原始对象的引用,修改任何属性都会同步到父组件,并且触发 UI 更新。
对于 TaskItem 这种"需要在子组件中修改属性"的场景,@ObjectLink 是唯一正确的选择。你用 @Prop 传进去,在子组件里改了 task.isCompleted,UI 是不会更新的。
主页面:任务列表和增删改查
完整的任务管理页面
@Entry
@Component
struct TaskManagerPage {
  @State taskList: TaskItem[] = []
  @State newTaskTitle: string = ''
  @State newTaskPriority: 'high' | 'medium' | 'low' = 'medium'
  @State newTaskCategory: string = '默认'
  @State filterCategory: string = '全部'
  @State filterPriority: string = '全部'
  @State showAddForm: boolean = false

  // 分类列表
  private categories: string[] = ['全部', '默认', '工作', '学习', '生活', '紧急']

  // 统计数据(自动计算)
  private get completedCount(): number {
    return this.taskList.filter(t => t.isCompleted).length
  }

  private get totalCount(): number {
    return this.taskList.length
  }

  private get overdueCount(): number {
    return this.taskList.filter(t => {
      if (!t.dueDate || t.isCompleted) return false
      return new Date(t.dueDate) < new Date()
    }).length
  }

  private get filteredTasks(): TaskItem[] {
    return this.taskList.filter(task => {
      if (this.filterCategory !== '全部' && task.category !== this.filterCategory) return false
      if (this.filterPriority !== '全部' && task.priority !== this.filterPriority) return false
      return true
    })
  }

  aboutToAppear() {
    // 加载一些初始数据
    let task1 = new TaskItem('完成项目需求文档', 'high')
    task1.category = '工作'
    task1.dueDate = '2026-06-10'
    task1.description = '整理并提交Q3产品需求文档'

    let task2 = new TaskItem('复习 HarmonyOS6 PC 状态管理', 'medium')
    task2.category = '学习'
    task2.dueDate = '2026-06-08'

    let task3 = new TaskItem('买菜做饭', 'low')
    task3.category = '生活'

    this.taskList = [task1, task2, task3]
  }

  addTask() {
    if (this.newTaskTitle.trim().length === 0) return
    let task = new TaskItem(this.newTaskTitle, this.newTaskPriority)
    task.category = this.newTaskCategory
    this.taskList = [...this.taskList, task]
    this.newTaskTitle = ''
    this.showAddForm = false
  }

  deleteTask(id: string) {
    this.taskList = this.taskList.filter(t => t.id !== id)
  }

  build() {
    Column() {
      // 页面标题
      Row() {
        Text('任务管理')
          .fontSize(22).fontWeight(FontWeight.Bold)
        Blank()
        Text(`共 ${this.totalCount} 项`)
          .fontSize(12).fontColor('#999999')
      }
      .width('100%')

      // 统计卡片
      Row({ space: 8 }) {
        this.StatBox('待完成', (this.totalCount - this.completedCount).toString(), '#007DFF', '#E8F4FF')
        this.StatBox('已完成', this.completedCount.toString(), '#52C41A', '#F0FFF0')
        this.StatBox('已逾期', this.overdueCount.toString(), '#FF4D4F', '#FFF1F0')
      }
      .width('100%')
      .margin({ top: 12 })

      // 筛选栏
      Scroll() {
        Row({ space: 6 }) {
          ForEach(this.categories, (cat: string) => {
            Text(cat)
              .fontSize(12)
              .fontColor(this.filterCategory === cat ? '#FFFFFF' : '#666666')
              .backgroundColor(this.filterCategory === cat ? '#007DFF' : '#F0F0F0')
              .borderRadius(14)
              .padding({ left: 12, right: 12, top: 5, bottom: 5 })
              .onClick(() => { this.filterCategory = cat })
          })
        }
      }
      .scrollable(ScrollDirection.Horizontal)
      .scrollBar(BarState.Off)
      .width('100%')
      .margin({ top: 12 })

      // 任务列表
      List({ space: 8 }) {
        ForEach(this.filteredTasks, (task: TaskItem) => {
          ListItem() {
            TaskCard({
              task: task,
              onDelete: (id: string) => { this.deleteTask(id) },
              onEdit: (t: TaskItem) => {
                // 编辑逻辑(简化为直接在列表中修改)
                console.info(`编辑任务: ${t.title}`)
              }
            })
          }
        })
      }
      .width('100%')
      .layoutWeight(1)
      .margin({ top: 12 })

      // 添加任务按钮
      Button(this.showAddForm ? '收起' : '+ 添加新任务')
        .width('100%')
        .height(40)
        .fontSize(14)
        .backgroundColor(this.showAddForm ? '#F0F0F0' : '#007DFF')
        .fontColor(this.showAddForm ? '#666666' : '#FFFFFF')
        .onClick(() => { this.showAddForm = !this.showAddForm })
        .margin({ top: 8 })

      // 添加任务表单
      if (this.showAddForm) {
        Column({ space: 8 }) {
          TextInput({ placeholder: '输入任务标题', text: this.newTaskTitle })
            .width('100%')
            .onChange((value: string) => { this.newTaskTitle = value })

          Row({ space: 8 }) {
            Text('优先级:').fontSize(12)
            ForEach(['high', 'medium', 'low'], (p: string) => {
              let labels: Record<string, string> = { high: '高', medium: '中', low: '低' }
              let colors: Record<string, string> = { high: '#FF4D4F', medium: '#FAAD14', low: '#52C41A' }
              Text(labels[p])
                .fontSize(11)
                .fontColor(this.newTaskPriority === p ? '#FFFFFF' : colors[p])
                .backgroundColor(this.newTaskPriority === p ? colors[p] : '#FFFFFF')
                .borderRadius(12)
                .padding({ left: 10, right: 10, top: 4, bottom: 4 })
                .border({ width: 1, color: colors[p] })
                .onClick(() => { this.newTaskPriority = p as 'high' | 'medium' | 'low' })
            })
          }

          Row({ space: 8 }) {
            Text('分类:').fontSize(12)
            ForEach(this.categories.filter(c => c !== '全部'), (cat: string) => {
              Text(cat)
                .fontSize(11)
                .fontColor(this.newTaskCategory === cat ? '#FFFFFF' : '#007DFF')
                .backgroundColor(this.newTaskCategory === cat ? '#007DFF' : '#FFFFFF')
                .borderRadius(12)
                .padding({ left: 10, right: 10, top: 4, bottom: 4 })
                .border({ width: 1, color: '#007DFF' })
                .onClick(() => { this.newTaskCategory = cat })
            })
          }

          Button('确认添加')
            .width('100%')
            .height(36)
            .fontSize(14)
            .backgroundColor('#007DFF')
            .onClick(() => { this.addTask() })
        }
        .width('100%')
        .backgroundColor('#FFFFFF')
        .borderRadius(12)
        .padding(16)
        .margin({ top: 8 })
      }
    }
    .width('100%').height('100%').backgroundColor('#F5F6FA').padding(16)
  }

  @Builder
  StatBox(label: string, value: string, color: string, bg: string) {
    Column() {
      Text(value).fontSize(22).fontWeight(FontWeight.Bold).fontColor(color)
      Text(label).fontSize(11).fontColor('#999999').margin({ top: 2 })
    }
    .layoutWeight(1)
    .backgroundColor(bg)
    .borderRadius(10)
    .padding({ top: 12, bottom: 12 })
    .alignItems(HorizontalAlign.Center)
  }
}
深入理解 @Observed/@ObjectLink 的工作机制
代理模式的魔法
@Observed 的底层实现是基于代理(Proxy)模式的。当你用 @Observed 标记一个类时,框架会在运行时为这个类的实例创建一个代理对象。代理对象会拦截所有属性的 get 和 set 操作。
当你在 @ObjectLink 修饰的组件里访问 this.task.isCompleted 时,框架会记录"这个组件依赖了 task.isCompleted 这个属性"。之后当 isCompleted 被修改时,框架就知道需要刷新这个组件。
这种机制的好处是精准更新。修改一个任务的标题,只有展示这个任务的组件会刷新,其他任务的组件完全不受影响。在任务列表很长的时候,这种精准更新对性能的意义很大。
嵌套对象的观察
@Observed 支持嵌套。如果你有一个 TaskItem 里面包含一个 SubTaskList 对象,只要两个类都被 @Observed 标记了,嵌套属性的变化也能被追踪。
比如给任务加上子任务功能:
@Observed
class SubTask {
  id: string
  title: string
  isCompleted: boolean

  constructor(title: string) {
    this.id = Date.now().toString() + Math.random().toString(36).slice(2, 6)
    this.title = title
    this.isCompleted = false
  }
}

@Observed
class TaskItem {
  // ... 原有属性
  subTasks: SubTask[] = []

  addSubTask(title: string) {
    this.subTasks = [...this.subTasks, new SubTask(title)]
  }

  get subTaskProgress(): number {
    if (this.subTasks.length === 0) return 0
    return Math.round(
      (this.subTasks.filter(s => s.isCompleted).length / this.subTasks.length) * 100
    )
  }
}
子任务的展示组件:
@Component
struct SubTaskList {
  @ObjectLink task: TaskItem

  build() {
    Column({ space: 4 }) {
      Row() {
        Text(`子任务 (${task.subTaskProgress}%)`)
          .fontSize(11).fontColor('#999999')
        Blank()
        // 进度条
        Stack() {
          Column().width(80).height(4).backgroundColor('#F0F0F0').borderRadius(2)
          Column()
            .width(80 * task.subTaskProgress / 100)
            .height(4)
            .backgroundColor('#007DFF')
            .borderRadius(2)
        }
      }

      ForEach(task.subTasks, (sub: SubTask) => {
        Row({ space: 6 }) {
          Column()
            .width(14).height(14)
            .borderRadius(7)
            .backgroundColor(sub.isCompleted ? '#52C41A' : '#FFFFFF')
            .border({ width: 1.5, color: sub.isCompleted ? '#52C41A' : '#D9D9D9' })
            .onClick(() => { sub.isCompleted = !sub.isCompleted })

          Text(sub.title)
            .fontSize(12)
            .fontColor(sub.isCompleted ? '#BBBBBB' : '#666666')
            .decoration({
              type: sub.isCompleted ? TextDecorationType.LineThrough : TextDecorationType.None
            })
        }
      })
    }
    .width('100%')
    .padding({ left: 30, top: 6 })
  }
}
分类统计:实时更新的图表
用数据驱动可视化
任务管理应用里加一个简单的统计图表会让整个应用的专业感上升不少。我们用 @Observed 的 TaskCategory 来做一个分类统计:
@State categories: TaskCategory[] = [
  new TaskCategory('工作', '#007DFF'),
  new TaskCategory('学习', '#52C41A'),
  new TaskCategory('生活', '#FAAD14'),
  new TaskCategory('紧急', '#FF4D4F')
]

// 计算各分类的任务数量
private updateCategoryCounts() {
  this.categories.forEach(cat => {
    cat.count = this.taskList.filter(t => t.category === cat.name).length
  })
}

// 在 build 方法中添加统计区域
Column({ space: 8 }) {
  Text('分类统计').fontSize(14).fontWeight(FontWeight.Medium)

  ForEach(this.categories, (cat: TaskCategory) => {
    Row() {
      // 分类颜色标记
      Column().width(8).height(8).borderRadius(4).backgroundColor(cat.color)

      Text(cat.name).fontSize(12).layoutWeight(1).margin({ left: 8 })

      // 统计条
      Stack() {
        Column()
          .width(120).height(8)
          .backgroundColor('#F0F0F0').borderRadius(4)
        Column()
          .width(Math.max(4, 120 * (this.totalCount > 0 ? cat.count / this.totalCount : 0)))
          .height(8)
          .backgroundColor(cat.color)
          .borderRadius(4)
      }

      Text(cat.count.toString())
        .fontSize(12).fontColor('#999999').width(24).textAlign(TextAlign.End)
    }
    .width('100%')
  })
}
.width('100%').backgroundColor('#FFFFFF').borderRadius(12).padding(16).margin({ top: 10 })
@Observed 的使用限制和注意事项
只能标记类,不能标记接口
@Observed 只能用在 class 上,不能用在 interface 或 type 上。因为代理模式需要一个真实的对象实例,接口只是类型定义,运行时不存在。
数组需要特殊处理
@Observed 不能直接标记数组类型。如果你需要观察数组的变化,应该把数组包装在一个 @Observed 的类里,或者在父组件用 @State 管理数组,通过创建新数组来触发更新(就像我们上面 this.taskList = [...this.taskList, task] 的写法)。
性能考量
@Observed 的代理是有开销的。每个被观察的属性都会增加一些内存占用和访问时间。对于只有几个属性的简单对象,这点开销可以忽略。但如果你的对象有成百上千个属性,或者你在一个页面里同时渲染了几百个 @Observed 对象,性能影响就会显现。
建议是:只把真正需要在子组件中修改属性的对象标记为 @Observed。如果一个对象在子组件里只是展示、不修改,用 @Prop 传值更轻量。
任务持久化的思路
这个示例里任务数据是存在内存里的,应用一关就没了。实际应用中你需要把任务持久化。在 HarmonyOS6 PC 上有几种方案:
轻量级方案是用 AppStorage(上一篇设置页面文章讲过),但 AppStorage 适合存简单的键值对,不太适合存复杂的任务列表。
推荐方案是用关系型数据库(RDB)。HarmonyOS6 PC 提供了完整的关系型数据库 API,支持 CRUD 操作和事务。把 TaskItem 映射到一张表,每个属性对应一列,查询和筛选都很方便。
还有一种方案是用 preferences(用户首选项),适合数据量不大的场景。它的 API 比 RDB 简单,但不支持复杂查询。
小结
@Observed 和 @ObjectLink 解决的是 ArkUI 里一个核心痛点:如何让对象内部属性的变化触发 UI 更新。在任务管理这种"列表中每个条目都是复杂对象"的场景下,这对组合几乎是必选方案。
这篇文章我们构建了一个完整的任务管理应用,包括任务增删、完成状态切换、优先级标记、分类筛选、子任务、统计图表等功能。核心架构是:TaskItem 用 @Observed 标记,TaskCard 用 @ObjectLink 接收,父组件用 @State 管理数组。三层结构各司其职,数据流动清晰明了。

讨论HarmonyOS开发技术,专注于API与组件、DevEco Studio、测试、元服务和应用上架分发等。
更多推荐


 3
3 0
0- 0


 已为社区贡献387条内容

所有评论(0)