鸿蒙原生应用实战(四):分类浏览与个人中心的多维数据展示
鸿蒙原生应用实战(四):分类浏览与个人中心的多维数据展示
系列目录:
- 第一篇:项目搭建与页面架构设计
- 第二篇:首页开发与全局数据流设计
- 第三篇:笔记详情与编辑页面的路由与CRUD
- 第四篇:分类浏览与个人中心的多维数据展示 ← 当前
- 第五篇:构建调试、异常处理与HAP发布
一、前言
前三篇我们完成了首页、详情页、编辑页,实现了笔记的完整 CRUD 和数据流。本篇将开发最后两个页面——分类浏览页(CategoryPage) 和 个人中心页(ProfilePage)。
这两个页面的特点是:
- 数据聚合:对原始笔记数据进行分类统计和汇总
- 多维展示:卡片网格、色条列表、统计图表等多种视觉形式
- ArkTS 严格模式:涉及较多 UI 组合,更容易踩严格模式的坑
二、分类浏览页 (CategoryPage)
2.1 页面布局
Column
├── 顶部导航栏
│   ├── 返回按钮
│   ├── "分类浏览" 标题
│   └── 占位图标
├── 分类统计卡片 (Row × 2)
│   ├── [全部]  [工作]  [学习]  ← 第一行
│   └── [生活]  [灵感]          ← 第二行
├── 当前分类标题 + 笔记数
└── 笔记列表 (ListItem 带色条)
    ├── ┃ 工作笔记标题    2024-12-15
    ├── ┃ 学习笔记标题    2024-12-01
    └── ...
└── 底部导航
2.2 分类统计数据
分类卡片需要展示每个分类的笔记数量,我们在 CategoryStat 接口中定义:
interface CategoryStat {
  name: string;    // 分类名称
  count: number;   // 笔记数量(动态计算)
  color: string;   // 颜色
  icon: number;    // 图标索引
}
数据加载时动态计算各分类计数:
loadData(): void {
  let stored: string | undefined = AppStorage.get<string>('notes');
  this.notes = stored ? JSON.parse(stored) as Note[] : [];
  this.updateCategoryCounts();
  this.filterByCategory();
}

updateCategoryCounts(): void {
  for (let cat of this.categories) {
    if (cat.name === '全部') {
      cat.count = this.notes.length;
    } else {
      cat.count = this.notes.filter((n: Note) => n.category === cat.name).length;
    }
  }
}
2.3 分类卡片网格
第一行展示 3 个卡片(全部、工作、学习),第二行展示 2 个(生活、灵感):
// 第一行:全部 + 工作 + 学习
Row() {
  ForEach([this.categories[0], this.categories[1], this.categories[2]], (cat: CategoryStat) => {
    Column() {
      Text(cat.name)
        .fontSize($r('app.float.body_font_size'))
        .fontColor(Color.White)
      Text(String(cat.count))
        .fontSize($r('app.float.title_font_size'))
        .fontColor(Color.White).fontWeight(FontWeight.Bold)
      Text('篇笔记')
        .fontSize($r('app.float.tiny_font_size'))
        .fontColor('rgba(255,255,255,0.7)')
    }
    .layoutWeight(1).height(100)
    .backgroundColor(cat.color)
    .borderRadius($r('app.float.card_radius'))
    .opacity(this.selectedCategory === cat.name ? 1.0 : 0.75)  // 选中高亮
    .onClick(() => this.selectCategory(cat.name))
  })
}

// 第二行:生活 + 灵感(省略相似代码)
设计要点:
- 每个卡片使用
layoutWeight(1)均分宽度 - 选中时
opacity: 1.0,未选中时0.75制造层次感 - 背景色使用分类专属颜色
- 白色文字 + 半透明辅助文字,适配彩色背景
2.4 色条笔记列表
分类页的笔记列表与首页不同,左侧加了一条分类色条:
ListItem() {
  Row() {
    // 分类色条
    Column()
      .width(4)
      .height('100%')
      .backgroundColor(this.getCategoryColor(note.category))
      .borderRadius(2)

    Column() {
      Text(note.title)
        .fontSize($r('app.float.body_font_size'))
        .fontWeight(FontWeight.Medium)
        .maxLines(1).textOverflow({ overflow: TextOverflow.Ellipsis })

      Text(note.date)
        .fontSize($r('app.float.tiny_font_size'))
        .fontColor($r('app.color.text_tertiary'))
    }
    .layoutWeight(1)
    .padding({ left: 12, right: 12 })
  }
  .height(64)
  .backgroundColor($r('app.color.card_bg'))
  .borderRadius($r('app.float.card_radius'))
}
色条的设计让分类更加直观——用户一眼就能从色条颜色判断笔记属于哪个分类。
2.5 分类筛选联动
点击卡片时切换 selectedCategory,更新笔记列表:
selectCategory(name: string): void {
  this.selectedCategory = name;
  this.filterByCategory();
}

filterByCategory(): void {
  if (this.selectedCategory === '全部') {
    this.categoryNotes = this.notes;
  } else {
    this.categoryNotes = this.notes.filter(
      (n: Note) => n.category === this.selectedCategory
    );
  }
}
分类页也注册了 onPageShow 生命周期,确保从编辑页返回后计数刷新:
onPageShow(): void {
  this.loadData();
}
三、个人中心页 (ProfilePage)
3.1 页面布局
Column
├── 顶部导航栏
├── Scroll
│   └── Column
│       ├── 用户头像区
│       │   ├── 头像占位
│       │   ├── "我的知识笔记"
│       │   └── "记录每一个灵感瞬间"
│       ├── 统计概览
│       │   ├── 左侧:总笔记数(大号蓝色数字)
│       │   └── 右侧:分类分布 2×2
│       │       ├── [工作 3] [学习 2]
│       │       └── [生活 1] [灵感 1]
│       ├── 最近笔记
│       │   └── 最新创建的笔记标题
│       └── 设置菜单
│           ├── 关于 → "知识笔记 v1.0.0"
│           └── 版本 → "v1.0.0"
└── 底部导航
3.2 用户头像区域
Column() {
  Image($r('app.media.foreground'))
    .width(64).height(64)
    .opacity(0)  // 占位,实际项目中替换为真实头像
  Text('我的知识笔记')
    .fontSize($r('app.float.subtitle_font_size'))
    .fontWeight(FontWeight.Bold)
  Text('记录每一个灵感瞬间')
    .fontSize($r('app.float.small_font_size'))
    .fontColor($r('app.color.text_tertiary'))
}
.width('100%')
.padding({ top: 20, bottom: 20 })
.backgroundColor($r('app.color.card_bg'))
3.3 统计概览(核心难点)
统计概览将总笔记数和分类分布组合成一个 2-2 网格布局,是个人中心页最复杂的 UI:
Row() {
  // 左侧:总笔记数
  Column() {
    Text(String(this.totalNotes))
      .fontSize(40).fontWeight(FontWeight.Bold)
      .fontColor($r('app.color.primary'))
    Text('总笔记数')
      .fontSize($r('app.float.tiny_font_size'))
      .fontColor($r('app.color.text_tertiary'))
  }
  .layoutWeight(1).height(80)
  .justifyContent(FlexAlign.Center)
  .backgroundColor(Color.White)
  .borderRadius(10)

  Blank().width(8)

  // 右侧:分类分布 2×2
  Column() {
    // 第一行:工作 + 学习
    Row() {
      this.StatBadge('工作', String(this.workCount), '#007AFF')
      Blank().width(8)
      this.StatBadge('学习', String(this.studyCount), '#34C759')
    }
    .layoutWeight(1)

    Blank().height(8)

    // 第二行:生活 + 灵感
    Row() {
      this.StatBadge('生活', String(this.lifeCount), '#FF9500')
      Blank().width(8)
      this.StatBadge('灵感', String(this.inspirationCount), '#AF52DE')
    }
    .layoutWeight(1)
  }
  .layoutWeight(2)
}
3.4 StatBadge 自定义组件
使用 @Builder 实现可复用的统计徽章:
@Builder
StatBadge(label: string, value: string, color: string) {
  Column() {
    Text(value)
      .fontSize($r('app.float.subtitle_font_size'))
      .fontWeight(FontWeight.Bold)
      .fontColor(color)              // 数字使用分类颜色
    Text(label)
      .fontSize($r('app.float.tiny_font_size'))
      .fontColor($r('app.color.text_tertiary'))
      .margin({ top: 2 })
  }
  .layoutWeight(1)
  .height('100%')
  .justifyContent(FlexAlign.Center)
  .backgroundColor(Color.White)
  .borderRadius(8)
}
注意:这里 StatBadge 使用 3 个独立参数 (label, value, color) 而不是对象参数。这是为了避免 ArkTS 严格模式下的 arkts-no-untyped-obj-literals 错误。
3.5 数据加载与统计
loadStats(): void {
  let stored: string | undefined = AppStorage.get<string>('notes');
  let notes: Note[] = stored ? JSON.parse(stored) as Note[] : [];

  this.totalNotes = notes.length;
  this.workCount = notes.filter((n: Note) => n.category === '工作').length;
  this.studyCount = notes.filter((n: Note) => n.category === '学习').length;
  this.lifeCount = notes.filter((n: Note) => n.category === '生活').length;
  this.inspirationCount = notes.filter((n: Note) => n.category === '灵感').length;

  // 最近笔记 = 数组第一个(最新创建的在最前面)
  if (notes.length > 0) {
    this.recentNote = notes[0].title;
  } else {
    this.recentNote = '暂无笔记';
  }
}
3.6 设置菜单
Column() {
  Text('设置')
    .fontSize($r('app.float.body_font_size'))
    .fontWeight(FontWeight.Medium)

  // 关于
  Row() {
    Text('关于')
    Blank()
    Text('知识笔记 v1.0.0')
      .fontColor($r('app.color.text_tertiary'))
  }
  .height(48)
  .backgroundColor(Color.White)
  .borderRadius({ topLeft: 8, topRight: 8, bottomLeft: 0, bottomRight: 0 })

  Divider().color($r('app.color.divider')).width('92%')

  // 版本
  Row() {
    Text('版本')
    Blank()
    Text('v1.0.0')
      .fontColor($r('app.color.text_tertiary'))
  }
  .height(48)
  .backgroundColor(Color.White)
  .borderRadius({ topLeft: 0, topRight: 0, bottomLeft: 8, bottomRight: 8 })
}
关于 borderRadius 的语法:在 ArkUI 中,borderRadius 接受一个 BorderRadiuses 对象来分别控制四个角:
// ✅ 正确:对象形式
.borderRadius({ topLeft: 8, topRight: 8, bottomLeft: 0, bottomRight: 0 })

// ❌ 错误:不能传两个参数
.borderRadius(8, { topLeft: 8, ... })  // 编译错误!
四、页面间数据同步
4 个消费数据的页面都需要在显示时刷新:
| 页面 | 刷新时机 | 实现方式 |
|---|---|---|
| Index | 返回时 | onPageShow() |
| CategoryPage | 返回时 | onPageShow() |
| ProfilePage | 返回时 | onPageShow() |
| NotePage | 进入时 | aboutToAppear()(读参数) |
// 所有消费数据的页面
onPageShow(): void {
  this.loadData();   // 从 AppStorage 重新读取
}
编辑页保存后调用 router.back(),上一页的 onPageShow() 自动触发,数据刷新。
五、本篇总结
本篇我们完成了:
- ✅ 分类浏览页:统计卡片网格 + 色条笔记列表 + 筛选联动
- ✅ 个人中心页:用户头像区 + 统计概览 2×2 网格 + 设置菜单
- ✅ @Builder 组件复用与边界 borderRadius 的正确用法
- ✅ 多页面数据同步:onPageShow 生命周期刷新机制
至此,知识笔记 App 全部 5 个页面已完成开发!
下一篇(最终篇) 将进入构建和发布环节:编译构建、模拟器调试、运行时错误诊断与修复、HAP 包生成。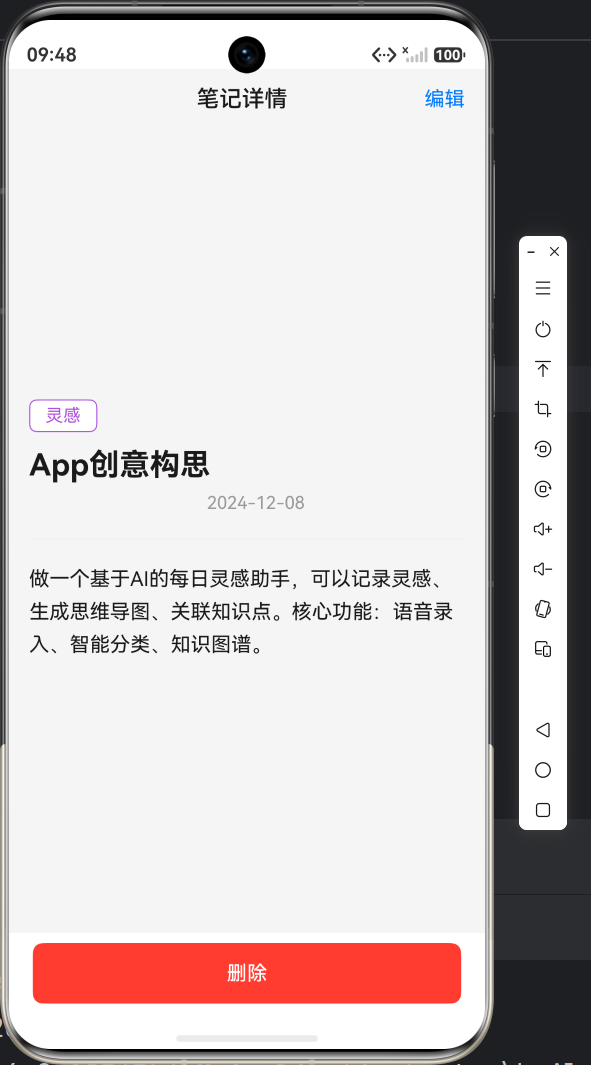
如果本系列对你有帮助,欢迎收藏关注,我们最终篇见!

讨论HarmonyOS开发技术,专注于API与组件、DevEco Studio、测试、元服务和应用上架分发等。
更多推荐


 11
11 0
0- 0


 已为社区贡献22条内容

所有评论(0)