#跟着坚果学鸿蒙#XML 创建布局
#跟着坚果学鸿蒙#XML 声明布局的方式更加简便直观。每一个 Component 和 ComponentContainer 对象大部分属性都支持在 XML 中进行设置,它们都有各自的 XML 属性列表。某 些属性仅适用于特定的组件,例如:只有 Text 支持“text_color”属性,但不支持 该属性的组件如果添加了该属性,该属性则会被忽略。具有继承关系的组件子类 将继承父类的属性列表,Component 作为组件的基类,拥有各个组件常用的属性, 比如:ID、布局参数等。
ID
ohos:id="$+id:text" 在 XML 中使用此格式声明一个对开发者友好的 ID,它会在编译过程中转换成一 个常量。尤其在 DependentLayout 布局中,组件之间需要描述相对位置关系, 描述时要通过 ID 来指定对应组件。
布局中的组件通常要设置独立的 ID,以便在程序中查找该组件。如果布局中有 不同组件设置了相同的 ID,在通过 ID 查找组件时会返回查找到的第一个组件, 因此尽量保证在所要查找的布局中为组件设置独立的 ID 值,避免出现与预期不 符合的问题。
布局参数
ohos:width="20vp"
ohos:height="10vp"
与代码中设置组件的宽度和高度类似,在 XML 中它们的取值可以是:
⚫ 具体的数值:10(以像素为单位)、10vp(以屏幕相对像素为单位)。 ⚫ MATCH_PARENT:表示组件大小将扩展为父组件允许的最大值,它将占据 父组件方向上的剩余大小,在 XML 中用“match_parent”表示。 ⚫ MATCH_CONTENT:表示组件大小与它的内容占据的大小范围相适应,在 XML 中用数值“match_content”表示。 更多的组件属性列表可参考组件的 XML 属性文档。
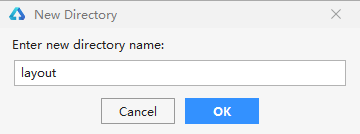
创建 XML 布局文件 1. 在 DevEco Studio 的“Project”窗口,打开“entry > src > main > resources > base”, 右键点击“base”文件夹,选择“New > Directory”,命名为“layout”。
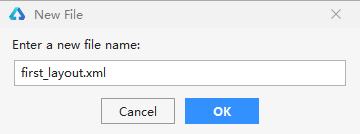
2. 右键点击“layout”文件夹,选择“New > File”,命名为“first_layout.xml”。
修改 XML 布局文件 打开新创建的 first_layout.xml 布局文件,修改其中的内容,对布局和组件的属 性和层级进行描述。
<?xml version="1.0" encoding="utf-8"?>
<DirectionalLayout
 xmlns:ohos="http://schemas.huawei.com/res/ohos"
 ohos:width="match_parent"
 ohos:height="match_parent"
 ohos:orientation="vertical"
 ohos:padding="32">
 <Text ohos:id="$+id:text"
 ohos:width="match_content"
 ohos:height="match_content"
 ohos:layout_alignment="horizontal_center"
 ohos:text="My name is Text."
 ohos:text_size="25vp"/>
 <Button ohos:id="$+id:button"
 ohos:width="match_content"
 ohos:height="match_content"
 ohos:layout_alignment="horizontal_center"
 ohos:text="My name is Button."
 ohos:text_size="50"/>
</DirectionalLayout>
加载 XML 布局 在代码中需要加载 XML 布局,并添加为根布局或作为其他布局的子 Component。
@Override
public void onStart(Intent intent) {
 super.onStart(intent);
 // 加载 XML 布局作为根布局
 super.setUIContent(ResourceTable.Layout_first_layout);
 // 查找布局中组件
 Button button = (Button)
findComponentById(ResourceTable.Id_button);
 if (button != null) {
 // 设置组件的属性 ShapeElement background = new ShapeElement();
 background.setRgbColor(new RgbColor(0,125,255));
 background.setCornerRadius(25);
 button.setBackground(background);

 button.setClickedListener(new Component.ClickedListener() {
 @Override
 // 在组件中增加对点击事件的检测
 public void onClick(Component Component) {
 // 此处添加按钮被点击需要执行的操作
 } });
 }
}
常用组件开发指导 Text 文本(Text)是用来显示字符串的组件,在界面上显示为一块文本区域。Text 作 为一个基本组件,有很多扩展,常见的有按钮组件 Button,文本编辑组件 TextField。
使用 Text 创建 Text
<Text
 ohos:id="$+id:text"
 ohos:width="match_content"
 ohos:height="match_content"
 ohos:text="Text"
 ohos:background_element="$graphic:color_gray_element"/>
color_gray_element.xml:
<?xml version="1.0" encoding="utf-8"?>
<shape xmlns:ohos="http://schemas.huawei.com/res/ohos"
 ohos:shape="rectangle">
 <solid
 ohos:color="#ff888888"/>
</shape> 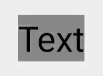
• 设置背景 常用的背景如常见的文本背景、按钮背景,可以采用 XML 格式放置在 graphic 目录下。
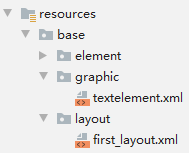
在“Project”窗口,打开“entry > src > main > resources > base”,右键 点击“base”文件夹,选择“New > Directory”,命名为“graphic”。右键 点击“graphic”文件夹,选择“New > File”,命名为“textelement.xml”。
在 textelement.xml 中定义文本的背景:
<?xml version="1.0" encoding="utf-8"?> <shape xmlns:ohos="http://schemas.huawei.com/res/ohos"
 ohos:shape="rectangle">
 <corners
 ohos:radius="20"/>
 <solid
 ohos:color="#ff888888"/>
</shape>
在 first_layout.xml 中引用上面定义的文本背景:
<Text
 ohos:id="$+id:text"
 ohos:width="match_content"
 ohos:height="match_content"
 ohos:text="Text"
 ohos:background_element="$graphic:textelement"/>
设置字体大小和颜色
<Text
 ohos:id="$+id:text"
 ohos:width="match_content"
 ohos:height="match_content"
 ohos:text="Text"
 ohos:text_size="28fp"
 ohos:text_color="blue"
 ohos:left_margin="15vp"
 ohos:bottom_margin="15vp"
 ohos:right_padding="15vp"
ohos:left_padding="15vp"
ohos:background_element="$graphic:textelement"/> 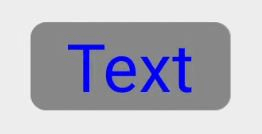
• 设置字体风格和字重
<Text
ohos:id="$+id:text"
ohos:width="match_content"
ohos:height="match_content"
ohos:text="Text"
ohos:text_size="28fp"
ohos:text_color="blue"
ohos:italic="true" ohos:text_weight="700"
ohos:text_font="serif"
ohos:left_margin="15vp"
ohos:bottom_margin="15vp"
ohos:right_padding="15vp"
ohos:left_padding="15vp"
ohos:background_element="$graphic:textelement"/> 
• 设置文本对齐方式
<Text ohos:id="$+id:text" ohos:width="300vp" ohos:height="100vp" ohos:text="Text" ohos:text_size="28fp" ohos:text_color="blue" ohos:italic="true" ohos:text_weight="700" ohos:text_font="serif" ohos:left_margin="15vp" ohos:bottom_margin="15vp" ohos:right_padding="15vp" ohos:left_padding="15vp" ohos:text_alignment="horizontal_center|bottom" ohos:background_element="$graphic:textelement"/> 
• 设置文本换行和最大显示行数
<Text
 ohos:id="$+id:text"
 ohos:width="75vp"
 ohos:height="match_content"
 ohos:text="TextText"
 ohos:text_size="28fp"
 ohos:text_color="blue"
 ohos:italic="true"
 ohos:text_weight="700"
 ohos:text_font="serif"
 ohos:multiple_lines="true" ohos:max_text_lines="2"
 ohos:background_element="$graphic:textelement"/>

讨论HarmonyOS开发技术,专注于API与组件、DevEco Studio、测试、元服务和应用上架分发等。
更多推荐


 0
0 0
0- 0


 已为社区贡献50条内容

所有评论(0)