#跟着坚果学鸿蒙#鸿蒙next 实现登录弹窗案例
·
前言导读
鸿蒙next 中实现弹窗方法是有很多 我们今天是用我们的 CustomDialog 实现我们的登录弹窗案例
效果图:
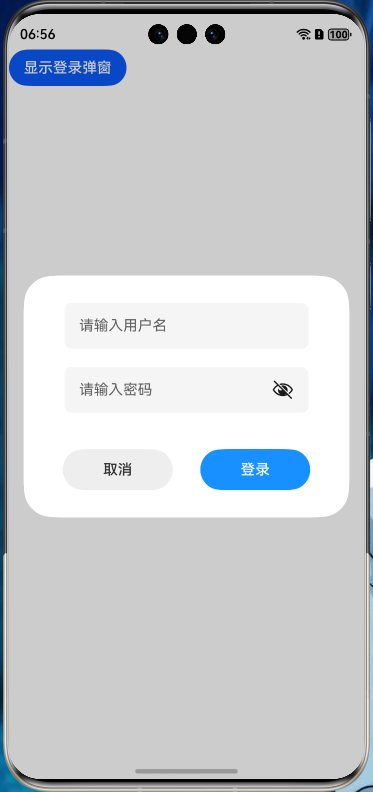
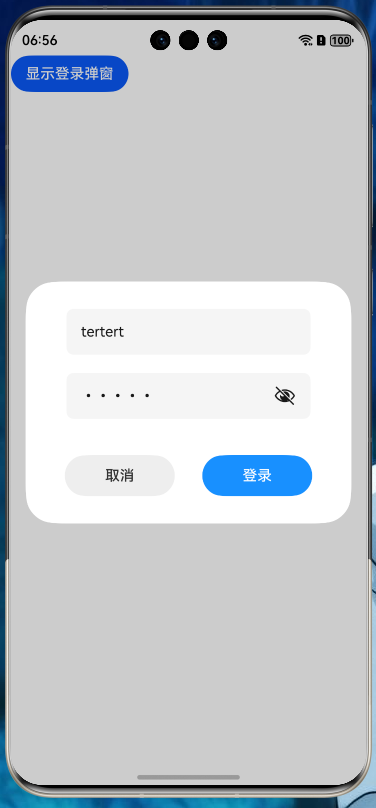
具体实现:
-
1弹窗代码布局逻辑
@CustomDialog export struct LoginDialog { controller: CustomDialogController @State username: string = '' @State password: string = '' build() { Column({ space: 20 }) { TextInput({ placeholder: '请输入用户名' }) .width('90%') .height(50) .borderRadius(8) .backgroundColor('#F5F5F5') .onChange((value: string) => { this.username = value }) TextInput({ placeholder: '请输入密码' }) .width('90%') .height(50) .type(InputType.Password) .borderRadius(8) .backgroundColor('#F5F5F5') .onChange((value: string) => { this.password = value }) Row({ space: 30 }) { Button('取消') .width(120) .height(45) .fontColor('#333333') .backgroundColor('#EEEEEE') .onClick(() => this.controller.close()) Button('登录') .width(120) .height(45) .fontColor('#FFFFFF') .backgroundColor('#1890FF') .onClick(() => { // 登录逻辑处理 this.controller.close() }) }.margin({ top: 20 }) } .width('100%') .padding(30) .backgroundColor('#FFFFFF') .borderRadius(12) } } -
2 注册弹窗controller
private dialogController: CustomDialogController = new CustomDialogController({ builder: LoginDialog(), alignment: DialogAlignment.Center }) -
3 调用显示弹窗
build() {
  Column() {
    Button('显示登录弹窗')
      .onClick(() => this.dialogController.open())
  }
}
最后总结
鸿蒙ark ui 里面的自定义弹窗和我们安卓还有flutter里面的差不多我们学会自定义弹窗理论上那些 警告弹窗 列表选择器弹窗, 日期滑动选择器弹窗 ,时间滑动选择器弹窗 ,文本滑动选择器弹窗 ,我们都是可以自己自定义实现的。这里就不展开讲有兴趣的同学可以自己多花时间研究实现一下,最后呢 希望我都文章能帮助到各位同学工作和学习 如果你觉得文章还不错麻烦给我三连 关注点赞和转发 谢谢

讨论HarmonyOS开发技术,专注于API与组件、DevEco Studio、测试、元服务和应用上架分发等。
更多推荐

 0
0 0
0- 0


 已为社区贡献16条内容

所有评论(0)