#跟着晓明学鸿蒙# RelativeContainer自适应表单之UI实现
·

目录
- 案例介绍
- 代码实现
- 代码详解
- 1. 整体布局结构
- 2. 表单项布局
- 3. 自适应定位逻辑
- 4. 样式处理
- 5. 事件处理
- 总结
案例介绍
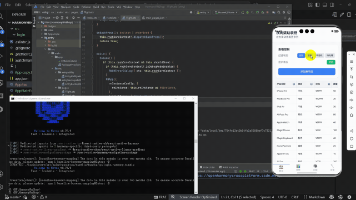
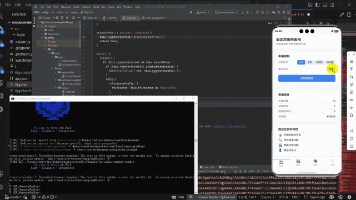
本篇文章将介绍如何使用RelativeContainer组件实现自适应表单的UI部分,包括表单项的布局结构和自适应定位逻辑。
代码实现
build() {
  Column() {
    // 表单标题
    Text('用户信息表单')
      .fontSize(24)
      .fontWeight(FontWeight.Bold)
      .margin({ top: 20, bottom: 30 })

    // 表单内容
    List() {
      ForEach(this.formItems, (item) => {
        ListItem() {
          // 使用RelativeContainer实现自适应表单项布局
          RelativeContainer() {
            // 表单项标签
            Text(item.label)
              .fontSize(16)
              .fontColor('#333333')
              .id('label_' + item.id)
              .alignRules({
                top: { anchor: '__container__', align: VerticalAlign.Top },
                left: { anchor: '__container__', align: HorizontalAlign.Start }
              })
              .margin({ top: this.isWideScreen ? 12 : 0 })

            // 表单项输入框
            TextInput({ placeholder: item.placeholder, text: this.formData[item.id] })
              .type(item.type as InputType)
              .maxLength(item.maxLength || 100)
              .height(40)
              .borderRadius(4)
              .backgroundColor('#F5F5F5')
              .padding({ left: 12, right: 12 })
              .onChange((value: string) => {
                this.formData[item.id] = value
              })
              .id('input_' + item.id)
              .alignRules({
                top: this.isWideScreen
                  ? { anchor: '__container__', align: VerticalAlign.Top }
                  : { anchor: 'label_' + item.id, align: VerticalAlign.Bottom },
                left: this.isWideScreen
                  ? { anchor: 'label_' + item.id, align: HorizontalAlign.End }
                  : { anchor: '__container__', align: HorizontalAlign.Start },
                right: { anchor: '__container__', align: HorizontalAlign.End }
              })
              .margin({
                top: this.isWideScreen ? 0 : 8,
                left: this.isWideScreen ? 20 : 0
              })
          }
          .width('100%')
          .height(this.isWideScreen ? 64 : 88)
        }
        .padding({ left: 16, right: 16 })
      })
    }
    .width('100%')
    .layoutWeight(1)

    // 提交按钮
    Button('提交')
      .width('90%')
      .height(50)
      .margin({ bottom: 20 })
      .onClick(() => this.submitForm())
  }
  .width('100%')
  .height('100%')
  .backgroundColor('#FFFFFF')
}
代码详解
1. 整体布局结构
使用Column作为最外层容器:
- 顶部显示表单标题
- 中间是表单内容列表
- 底部是提交按钮
2. 表单项布局
RelativeContainer() {
  // 表单项标签
  Text(item.label)
    .alignRules({
      top: { anchor: '__container__', align: VerticalAlign.Top },
      left: { anchor: '__container__', align: HorizontalAlign.Start }
    })

  // 表单项输入框
  TextInput({ placeholder: item.placeholder })
    .alignRules({
      top: this.isWideScreen
        ? { anchor: '__container__', align: VerticalAlign.Top }
        : { anchor: 'label_' + item.id, align: VerticalAlign.Bottom },
      left: this.isWideScreen
        ? { anchor: 'label_' + item.id, align: HorizontalAlign.End }
        : { anchor: '__container__', align: HorizontalAlign.Start }
    })
}
布局实现要点:
- 使用RelativeContainer实现自适应布局
- 根据isWideScreen调整对齐规则
- 动态设置间距和高度
3. 自适应定位逻辑
宽屏模式下:
- 标签和输入框水平排列
- 输入框左边缘对齐标签右边缘
- 统一的垂直居中对齐
窄屏模式下:
- 标签和输入框垂直排列
- 输入框顶部对齐标签底部
- 输入框占满容器宽度
4. 样式处理
// 标签样式
.fontSize(16)
.fontColor('#333333')
.margin({ top: this.isWideScreen ? 12 : 0 })

// 输入框样式
.height(40)
.borderRadius(4)
.backgroundColor('#F5F5F5')
.padding({ left: 12, right: 12 })
样式设计:
- 合理的字号和颜色
- 统一的圆角和内边距
- 动态调整外边距
5. 事件处理
.onChange((value: string) => {
  this.formData[item.id] = value
})

.onClick(() => this.submitForm())
交互实现:
- 输入框值变化更新数据
- 提交按钮触发表单提交
总结
本文通过使用RelativeContainer组件实现了自适应表单的UI部分,展示了如何根据屏幕宽度动态调整表单项的布局结构。通过合理的布局规则设计,表单在宽屏模式下采用水平排列,在窄屏模式下采用垂直排列,实现了良好的自适应效果。同时,统一的样式处理确保了表单的美观性和一致性,而完整的事件处理机制则保证了表单的功能性。这种实现方式不仅提升了用户体验,还为表单在不同设备上的展示提供了灵活的解决方案。
更多推荐
 已为社区贡献104条内容


所有评论(0)