基于 Canvas 实现翻页转场动画鸿蒙示例代码
本文原创发布在华为开发者社区,更多鸿蒙场景化示例请见华为开发者联盟官网“行业实践与常见问题”专题页。
介绍
本示例通过自绘制渲染节点 RenderNode 和 @ohos.graphics.drawing 绘制模块,绘制书页翻页动画效果。可用于页面切换等场景。
效果预览
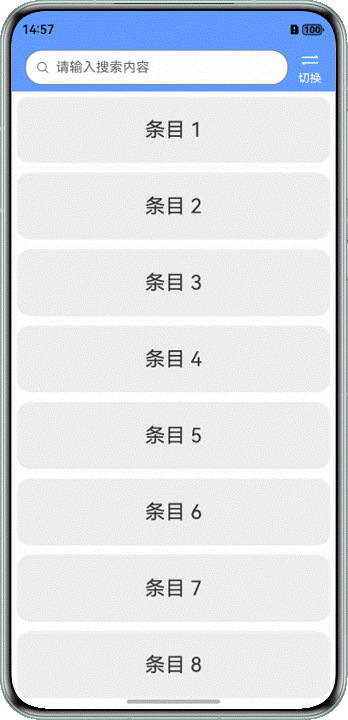
使用说明
点击右上角 “切换” 图标,切换到新页面。再次点击,切换回原页面。
实现思路
根据书页翻页动画的图形特征,在对原页面截图后,通过 drawing.Canvas 分别绘制原页面和翻页区域动画,通过定时器实现过渡动画。
1. 分析翻页图形特征

翻页时的图案可分为三个区域:绿色为原页面,记为 A;红色为原页面背部,记为 C;黄色为下一页内容,记为 B。
对图形进行数学化之后,可以得到点 c、d、b 是以点 e 为控制点的贝塞尔曲线上的点。同理,点 j、i、k 是以点 h 为控制点的贝塞尔曲线上的点。点 a 为翻角的顶点,线段 eh 是线段 af 的中垂线。
我们可以假设,线段 ce = 线段 ef * 0.5,点 p 为线段 cb 的中点,点 d 是线段 pe 的中点,点 b 则是线段 ae 与 cj 的交点。
由此,在已知点 a 和 点 f 坐标时,可通过计算得到其他点的坐标。
private calculate(): void {
  this.pointG.x = (this.pointA.x + this.pointF.x) / 2;
  this.pointG.y = (this.pointA.y + this.pointF.y) / 2;

  this.pointE.x = this.pointG.x -
    (this.pointF.y - this.pointG.y) * (this.pointF.y - this.pointG.y) / (this.pointF.x - this.pointG.x);
  this.pointE.y = this.pointF.y;

  this.pointH.x = this.pointF.x;
  this.pointH.y = this.pointG.y -
    (this.pointF.x - this.pointG.x) * (this.pointF.x - this.pointG.x) / (this.pointF.y - this.pointG.y);

  this.pointC.x = this.pointE.x - (this.pointF.x - this.pointE.x) / 2;
  this.pointC.y = this.pointF.y;

  this.pointJ.x = this.pointF.x;
  this.pointJ.y = this.pointH.y - (this.pointF.y - this.pointH.y) / 2;

  let slopeKcj = (this.pointJ.y - this.pointC.y) / (this.pointJ.x - this.pointC.x);
  let slopeKae = (this.pointA.y - this.pointE.y) / (this.pointA.x - this.pointE.x);
  let slopeKah = (this.pointA.y - this.pointH.y) / (this.pointA.x - this.pointH.x);

  this.pointB.x = (this.pointA.y - slopeKae * this.pointA.x + slopeKcj * this.pointJ.x - this.pointJ.y) / (slopeKcj - slopeKae);
  this.pointB.y = slopeKcj * (this.pointB.x - this.pointJ.x) + this.pointJ.y;

  this.pointK.x = (this.pointA.y - slopeKah * this.pointA.x + slopeKcj * this.pointJ.x - this.pointJ.y) / (slopeKcj - slopeKah);
  this.pointK.y = slopeKcj * (this.pointK.x - this.pointJ.x) + this.pointJ.y;

  this.pointD.x = this.pointE.x / 2 + (this.pointC.x + this.pointB.x) / 4;
  this.pointD.y = this.pointE.y / 2 + (this.pointC.y + this.pointB.y) / 4;

  this.pointI.x = this.pointH.x / 2 + (this.pointJ.x + this.pointK.x) / 4;
  this.pointI.y = this.pointH.y / 2 + (this.pointJ.y + this.pointK.y) / 4;
}
2. 绘制翻页图形
通过计算点,就可以绘制出 A 区域和 C 区域。由于 C 区域的路径曲线无法直接得到,我们可以大致绘制 C 区域轮廓,再通过叠加绘制 A 区域,得到两区域相交位置曲线。
A 区域需要绘制原页面,通过 componentSnapshot.getSync 获取组件截图 pixelMap,再绘制到 Canvas 上。需要确保原组件长度足够覆盖住下面的组件,否则动画时会遮挡不住下面的组件。启用沉浸式状态栏时,需要额外长度截图以补足状态栏安全区偏移。
async draw(context: DrawContext) {
  const canvas = context.canvas;

  let pointF = new PathPoint(viewWidth, 0);
  let pointA = new PathPoint(this.posX, this.posY);
  this.pathInfo.updatePoint(pointA, pointF);

  let pathCBrush = new drawing.Brush();
  pathCBrush.setColor({
    alpha: 255,
    red: 225,
    green: 225,
    blue: 220
  });

  let pathC = this.pathInfo.getPathC();
  canvas.attachBrush(pathCBrush);
  canvas.drawPath(pathC);

  let pathA = this.pathInfo.getPathA(viewWidth, viewHeight);
  canvas.clipPath(pathA, drawing.ClipOp.INTERSECT, true);
  canvas.drawImage(this.pixelMap, 0, 0);
}
需要注意的是,如果开启沉浸式状态栏效果,则需要对画布位置进行调节。
makeNode(uiContext: UIContext): FrameNode {
  this.rootNode = new FrameNode(uiContext);
  if (this.rootNode === null) {
    return this.rootNode;
  }

  const renderNode = this.rootNode.getRenderNode();
  if (renderNode !== null) {
    renderNode.frame = {
      x: 0,
      y: -px2vp(statusBarHeight), // 如果设置了沉浸式状态栏需要在这里进行偏移,否则直接设置 0
      width: px2vp(viewWidth),
      height: px2vp(viewHeight)
    };
    renderNode.pivot = { x: 50, y: 50 };
  }
  return this.rootNode;
}
3. 动画转场
因为使用 Canvas 自绘制效果,需要通过定时器来实时计算各点的位置,实现动画过渡
// 开始翻页转场
startFlipSwitch() {
  this.showFlipAnimation = true;
  this.positionX = this.windowWidth;
  this.positionY = 0;
  this.progress = 0;
  this.pixelMap = componentSnapshot.getSync('page', { waitUntilRenderFinished: true });
  this.paperNodeController.newRectNode(this.positionX, this.positionY, this.pixelMap);

  // 渲染存在延迟,防止出现截图闪烁,加一个延时
  setTimeout(() => {
    this.switchPage = !this.switchPage;
  }, 50);

  // 通过定时器来控制动画
  this.timerId = setInterval(() => {
    this.updateAnimationPos();
  }, 20);
}

// 更新 A 点坐标
updateAnimationPos() {
  this.progress++;
  this.positionY = this.progress * 10;
  this.positionX = this.windowWidth * (1 - this.progress / 30);
  this.paperNodeController.newRectNode(this.positionX, this.positionY, this.pixelMap);

  if (this.progress >= 100) {
    clearInterval(this.timerId);
    this.progress = 0;
    this.showFlipAnimation = false;
  }
}

讨论HarmonyOS开发技术,专注于API与组件、DevEco Studio、测试、元服务和应用上架分发等。
更多推荐
 0
0 0
0- 0


 已为社区贡献127条内容

所有评论(0)