H5交互事件归一开发指导
概述
移动应用开发中,悬浮、点击、双击、长按、上下文菜单、拖拽、轻扫、滚动/平移、缩放和旋转这10种交互事件,在不同的移动端设备上可以分别由触控屏、触控板或键鼠这三类输入设备的不同操作方式触发。使用交互归一组件,保证不同交互场景下的体验一致性,开发者只需要调用归一后的交互事件接口,无需为每种输入设备单独适配,从而大幅简化开发流程。本文将详细介绍 H5交互归一组件库实现交互归一开发、适配指导以及具体的场景案例。
使用场景
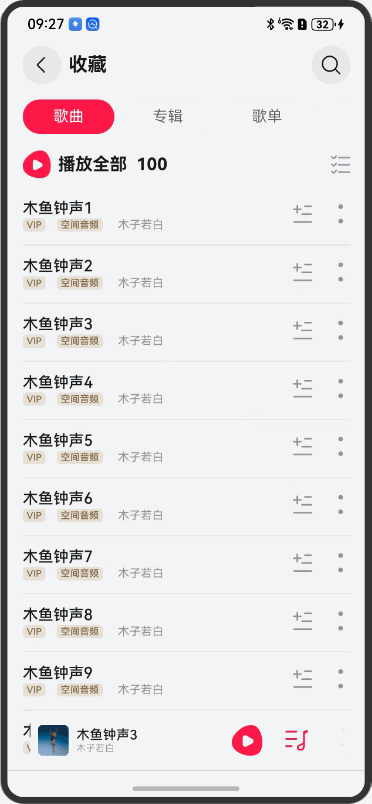
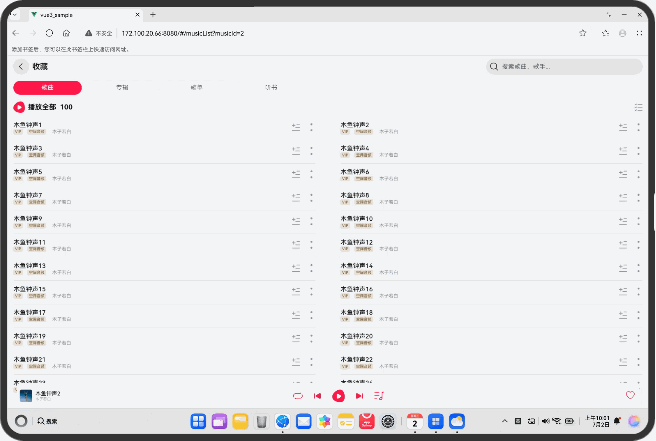
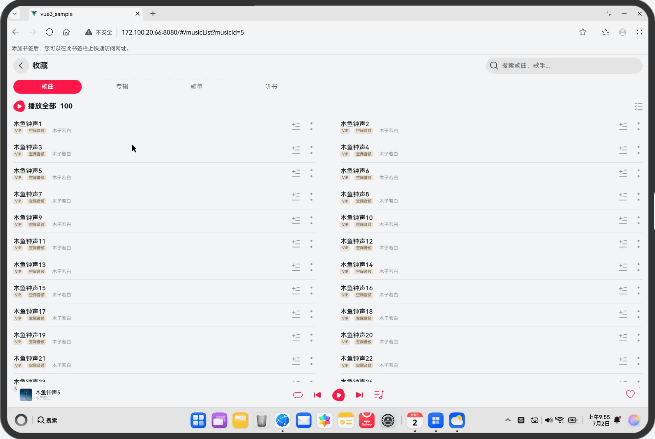
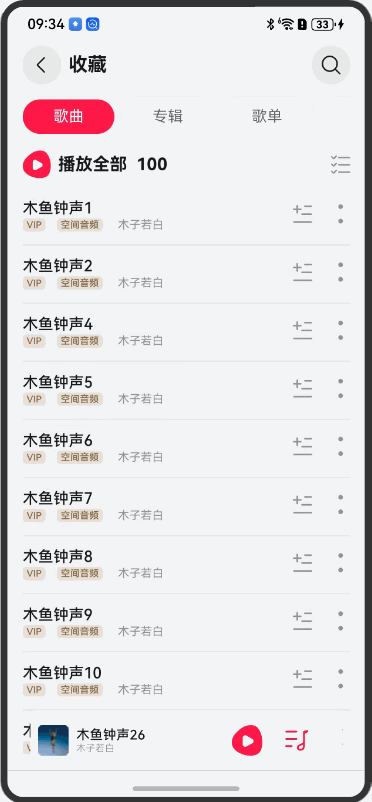
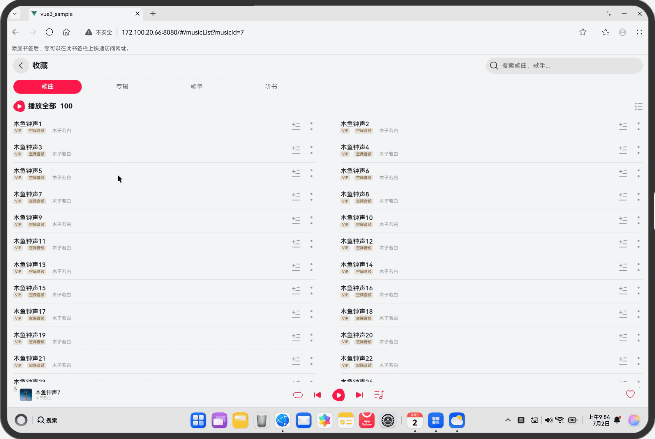
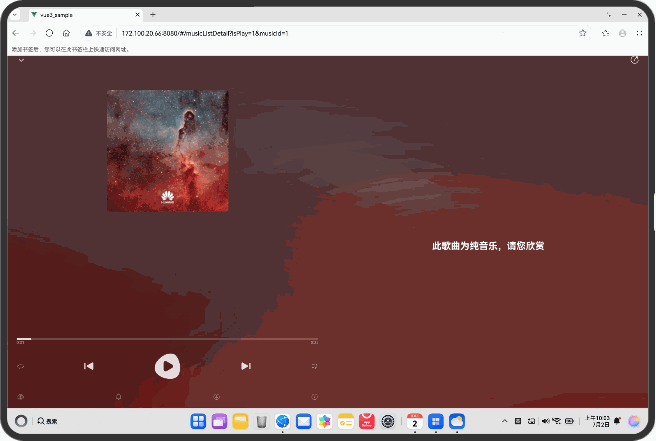
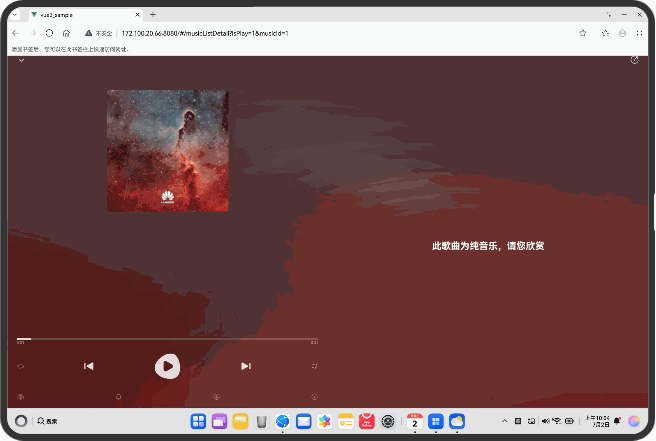
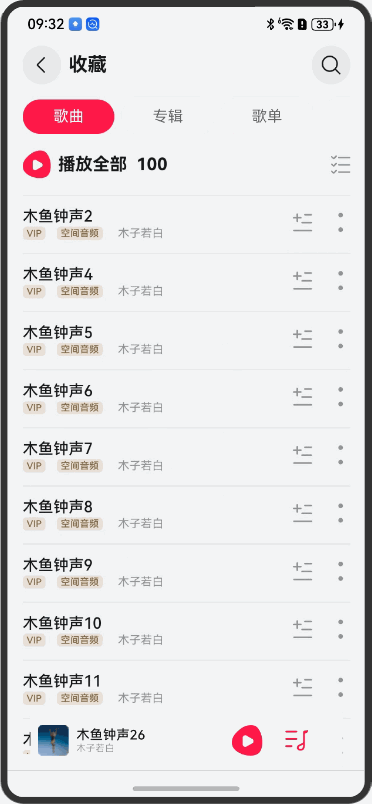
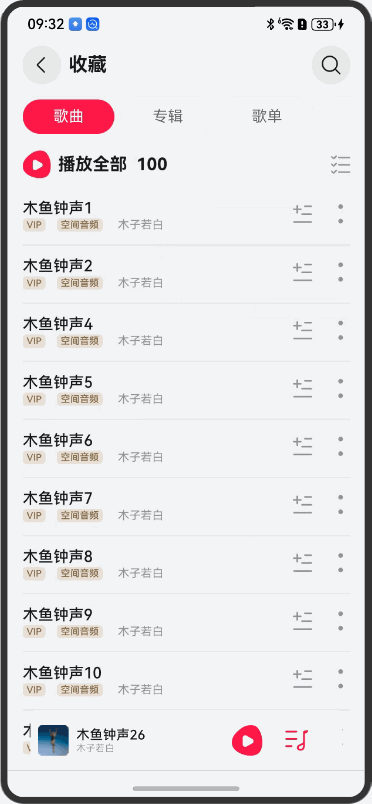
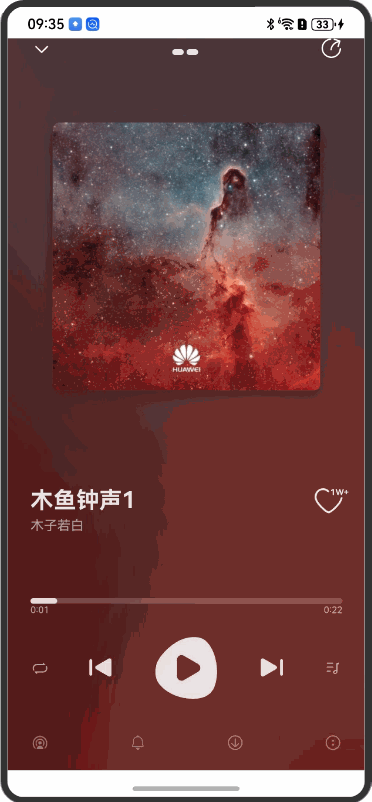
音乐播放器的列表页面以及播放详情页体现10种交互事件。
|
手机端 |
PC端 |
|
|
|
交互归一能力分析
web_uni_input:交互归一组件库,提供10种交互事件,根据不同属性事件实现不同交互能力。
|
输入 |
触控 屏 |
触控板 |
鼠标 |
封装原理 |
|
悬浮 |
NA |
光标移动到元素上 |
光标移动到元素上 |
监听pointerover、pointerout把event原生对象透传给onHover。 监听pointermove把原生event对象透传给onHoverMove。 |
|
单击 |
单指点击 |
单指轻点/单指按压 |
单击鼠标左键 |
监听pointerdown、pointerup把原生event重新封装透传给onClick。 |
|
双击 |
单指双击 |
轻点两下/按压两下 |
双击左键 |
监听pointerdown、pointerup把原生event对象重新封装透传给onDoubleClick。 |
|
长按 |
单指长按 |
单指按压 |
长按左键 |
监听pointerdown把原生event对象重新封装透传给onLongPressStart。 监听pointerup、把原生event对象重新封装透传给onLongPressEnd。 监听pointercancel把原生event对象重新封装透传给onLongPressCancel。 |
|
上下文菜单 |
单指长按 |
双指轻点/按压或单指长按 |
单击右键 |
监听contextmenu把原生event对象透传给onContextMenu。 |
|
拖拽 |
单指长按并移动 |
按压并滑动以拖动 |
按压左键并移动鼠标 |
监听dragstart、dragenter、dragover、dragleave、drop把原生event对象透传给onDragstart、onDragEnter、onDragMove、onDragLeave、onDrop。 |
|
轻扫 |
单指快速滑动 |
双指快速移动 |
滚动一格或快速滚动后停止 |
PC:监听wheel把原生event对象重新封装透传给onSwipe。 移动端:监听pointerdown、pointerup把原生event对象重新封装透传给onSwipe。 |
|
滚动/平移 |
单指滑动 |
双指移动 |
滚轮/滚轮+shift |
PC:监听wheel把原生event对象重新封装透传给onScroll。 移动端:监听pointerdown、pointerup把原生event对象重新封装透传给onScroll。 |
|
缩放 |
双指捏合或张开 |
双指捏合或张开 |
ctrl+滚动滚轮 |
PC:监听wheel+Ctrl把原生event对象重新封装透传给onPinchStart、onPinchMove、onPinchEnd。 移动端:监听touchstart、touchmove、touchend把原生event对象重新封装透传给onPinchStart、onPinchMove、onPinchEnd。 |
|
旋转 |
双指互相以对方为中心旋转 |
NA |
NA |
监听touchstart、touchmove、touchend把原生event对象重新封装透传给onPinchStart、onPinchMove、onPinchEnd。 |
1、悬浮事件
1.1 主要方法
onHover:悬浮进入或退出事件。
onHoverMove:悬浮事件,在onHoverMove方法实现悬浮的具体效果。
1.2 示例
<template>
  <div ref="testDom" id="testId"></div>
</template>
<script lang="ts" setup>
import { onMounted, onUnmounted, ref } from "vue";
import {
  PointerGestureManager,
  PointerOptions,
  GestureHandlers,
  PointerState,
} from "@hadss/web_uni_input";
const handleHover = (state: PointerState) => {
  // 代码编辑
};
const handleHoverMove = (state: PointerState) => {
  // 代码编辑
};
const testDom = ref<HTMLElement | null>(null);
const instance = ref(null);
onMounted(() => {
  // 如果要获取DOM元素,请在DOM元素挂载之后获取,比如VUE3生命周期的onMounted中获取DOM元素
  const handlers: GestureHandlers = {
    onHover: handleHover,
    onHoverMove: handleHoverMove,
  };
  const configs: PointerOptions = {
    enableHover: true,
  };
  if (testDom.value) {
    instance.value = PointerGestureManager(testDom.value, handlers, configs);
  }
});
onUnmounted(() => {
  //destroy销毁实例,实例销毁以后交互归一事件不再触发
  if (instance.value) {
    instance.value.destroy();
  }
});
</script>
<style scoped>
#testId {
  width: 200px;
  height: 200px;
  background-color: aquamarine;
}
</style>
2、点击和双击事件
|
手机端 |
PC端 |
|
|
|
2.1 主要方法
onClick:单击事件,在onClick方法实现单击具体操作。
onDoubleClick:双击事件,在onDoubleClick方法实现双击具体操作。
2.2 示例
<template>
  <div ref="testDom" id="testId"></div>
</template>
<script lang="ts" setup>
import { onMounted, onUnmounted, ref } from "vue";
import {
  PointerGestureManager,
  PointerOptions,
  GestureHandlers,
  PointerState,
} from "@hadss/web_uni_input";
const handleClick = (state: PointerState) => {
  // 代码编辑
};
const handleDoubleClick = (state: PointerState) => {
  // 代码编辑
};
const testDom = ref<HTMLElement | null>(null);
const instance = ref(null);
onMounted(() => {
  // 如果要获取DOM元素,请在DOM元素挂载之后获取,比如VUE3生命周期的onMounted中获取DOM元素
  const handlers: GestureHandlers = {
    onClick: handleClick, // 点击
    onDoubleClick: handleDoubleClick // 双击
  };
  const configs: PointerOptions = {
    enableClick: true,
    enableDoubleClick: true,
  };
  if (testDom.value) {
    instance.value = PointerGestureManager(testDom.value, handlers, configs);
  }
});
onUnmounted(() => {
  //destroy销毁实例,实例销毁以后交互归一事件不再触发
  if (instance.value) {
    instance.value.destroy();
  }
});
</script>
<style scoped>
#testId {
  width: 200px;
  height: 200px;
  background-color: aquamarine;
}
</style>
3、长按事件
|
手机端 |
PC端 |
|
|
|

3.1 主要方法
onLongPressStart:长按开始事件,在onLongPressStart方法实现长按的具体操作。
onLongPressEnd:长按结束事件。
onLongPressCancel:长按取消事件,在onLongPressCancel方法实现长按取消的具体操作。
3.2 示例
<template>
  <div ref="testDom" id="testId"></div>
</template>
<script lang="ts" setup>
import { onMounted, onUnmounted, ref } from "vue";
import {
  PointerGestureManager,
  PointerOptions,
  GestureHandlers,
  PointerState,
} from "@hadss/web_uni_input";
const handlePressStart = (state: PointerState) => {
  // 代码编辑
};
const handlePressEnd = (state: PointerState) => {
  // 代码编辑
};
const handlePressCancel = (state: PointerEvent) => {
  // 代码编辑
};
const testDom = ref<HTMLElement | null>(null);
const instance = ref(null);
onMounted(() => {
  // 如果要获取DOM元素,请在DOM元素挂载之后获取,比如VUE3生命周期的onMounted中获取DOM元素
  const handlers: GestureHandlers = {
    onLongPressStart: handlePressStart, // 长按开始
    onLongPressEnd: handlePressEnd, // 长按结束
    onLongPressCancel: handlePressCancel, // 长按取消
  };
  const configs: PointerOptions = {
    enableLongPress: true,
  };
  if (testDom.value) {
    instance.value = PointerGestureManager(testDom.value, handlers, configs);
  }
});
onUnmounted(() => {
  // destroy销毁实例,实例销毁以后交互归一事件不再触发
  if (instance.value) {
    instance.value.destroy();
  }
});
</script>
<style scoped>
#testId {
  width: 200px;
  height: 200px;
  background-color: aquamarine;
}
</style>
4、上下文菜单事件

4.1 主要方法
onContextMenu:下拉菜单功能,鼠标或者触控点位置存在的情况下,显示上下文菜单UI效果。
4.2 示例
<template>
  <div ref="testDom" id="testId"></div>
</template>
<script lang="ts" setup>
import { onMounted, onUnmounted, ref } from "vue";
import {
  PointerGestureManager,
  PointerOptions,
  GestureHandlers,
  PointerState,
} from "@hadss/web_uni_input";
const handleContextMenu = (state: MouseEvent) => {
  // 代码编辑
};
const testDom = ref<HTMLElement | null>(null);
const instance = ref(null);
onMounted(() => {
  // 如果要获取DOM元素,请在DOM元素挂载之后获取,比如VUE3生命周期的onMounted中获取DOM元素
  const handlers: GestureHandlers = {
    onContextMenu: handleContextMenu, // 上下文菜单
  };
  const configs: PointerOptions = {
    enableContextMenu: true,
  };
  if (testDom.value) {
    instance.value = PointerGestureManager(testDom.value, handlers, configs);
  }
});
onUnmounted(() => {
  // destroy销毁实例,实例销毁以后交互归一事件不再触发
  if (instance.value) {
    instance.value.destroy();
  }
});
</script>
<style scoped>
#testId {
  width: 200px;
  height: 200px;
  background-color: aquamarine;
}
</style>
5、拖拽事件
|
手机端 |
PC端 |
|
|
|

5.1 主要方法
onDragStart:拖拽开始事件,绑定A组件,在触控屏上长按并移动或长按鼠标左键并移动触发。
onDragEnter:拖拽进入事件,绑定B组件,进入B组件时触发。
onDragMove:拖拽移动事件,绑定B组件,在B组件移动时触发。
onDragLeave:拖拽离开事件,绑定B组件,离开B组件时触发。
onDrop:拖拽结束事件,松开鼠标左键或手指在触控屏抬起触发。
5.2 示例
<template>
  <div id="testId">
    <div ref="dragStart" draggable="true" class="dragStart"></div>
    <div ref="drag" class="drag"></div>
  </div>
</template>
<script lang="ts" setup>
import { onMounted, onUnmounted, ref } from "vue";
import {
  PointerGestureManager,
  PointerOptions,
  GestureHandlers,
  PointerState,
} from "@hadss/web_uni_input";
const dragStart = ref<HTMLElement | null>(null);
const drag = ref<HTMLElement | null>(null);
const instance1 = ref(null);
const instance2 = ref(null);
const handleDragStart = (state: DragEvent) => {
  // 代码编辑
};
const handleDragEnter = (state: DragEvent) => {
  // 代码编辑
};
const handleDragMove = (event: DragEvent) => {
  event.preventDefault();
  // 代码编辑
};
const handleDragLeave = (state: DragEvent) => {
  // 代码编辑
};
const handleDrop = (state: DragEvent) => {
  // 代码编辑
};
onMounted(() => {
  // 如果要获取DOM元素,请在DOM元素挂载之后获取,比如VUE3生命周期的onMounted中获取DOM元素
  const handlers1: GestureHandlers = {
    onDragStart: handleDragStart, // 拖拽开始
  };
  const handlers2: GestureHandlers = {
    onDragEnter: handleDragEnter, // 拖拽进入
    onDragMove: handleDragMove, // 拖拽中
    onDragLeave: handleDragLeave, // 拖拽离开
    onDrop: handleDrop, // 拖拽放下
  };
  const configs: PointerOptions = {
    enableDrag: true,
  };
  if (dragStart.value) {
    instance1.value = PointerGestureManager(dragStart.value, handlers1, configs);
  }
  if (drag.value) {
    instance2.value = PointerGestureManager(drag.value, handlers2, configs);
  }
});
onUnmounted(() => {
  // destroy销毁实例,实例销毁以后交互归一事件不再触发
  if (instance1.value) {
    instance1.value.destroy();
  }
  if (instance2.value) {
    instance2.value.destroy();
  }
});
</script>
<style scoped>
#testId {
  width: 100%;
  height: 900px;
}
.dragStart {
  width: 100px;
  height: 100px;
  background-color: aquamarine;
}
.drag {
  width: 100px;
  height: 100px;
  background-color: red;
}
</style>
6、轻扫事件
6.1 主要方法
onSwipe:轻扫事件,onSwipe和onScroll不要同时使用,会存在冲突。
6.2 示例
<template>
  <div id="testId" ref="testDom"></div>
</template>
<script lang="ts" setup>
import { onMounted, onUnmounted, ref } from "vue";
import {
  PointerGestureManager,
  PointerOptions,
  GestureHandlers,
  PointerState,
} from "@hadss/web_uni_input";
const testDom = ref<HTMLElement | null>(null);
const instance = ref(null);
const handleSwipe = (state: PointerState) => {
  // 代码编辑
};
onMounted(() => {
  // 如果要获取DOM元素,请在DOM元素挂载之后获取,比如VUE3生命周期的onMounted中获取DOM元素
  const handlers: GestureHandlers = {
    onSwipe: handleSwipe, // 轻扫
  };
  const configs: PointerOptions = {
    enableSwipe: true,
  };
  if (testDom.value) {
    instance.value = PointerGestureManager(testDom.value, handlers, configs);
  }
});
onUnmounted(() => {
  // destroy销毁实例,实例销毁以后交互归一事件不再触发
  if (instance.value) {
    instance.value.destroy();
  }
});
</script>
<style scoped>
#testId {
  width: 100%;
  height: 900px;
  background-color: aquamarine;
}
</style>
7、滚动/平移事件
|
手机端 |
PC端 |
|
|
|

7.1 主要方法
onScroll:滚动事件,PC端根据滚轮的滚动或者手机端根据手势的移动进行触发,以此实现相应的滚动效果。
7.2 示例
<template>
  <div id="testId" ref="testDom"></div>
</template>
<script lang="ts" setup>
import { onMounted, onUnmounted, ref } from "vue";
import {
  PointerGestureManager,
  PointerOptions,
  GestureHandlers,
  PointerState,
} from "@hadss/web_uni_input";
const testDom = ref<HTMLElement | null>(null);
const instance = ref(null);
const handleScroll = (state: PointerState) => {
  // 代码编辑
};
onMounted(() => {
  // 如果要获取DOM元素,请在DOM元素挂载之后获取,比如VUE3生命周期的onMounted中获取DOM元素
  const handlers: GestureHandlers = {
    onScroll: handleScroll, // 轻扫
  };
  const configs: PointerOptions = {
    enableScroll: true,
  };
  if (testDom.value) {
    instance.value = PointerGestureManager(testDom.value, handlers, configs);
  }
});
onUnmounted(() => {
  // destroy销毁实例,实例销毁以后交互归一事件不再触发
  if (instance.value) {
    instance.value.destroy();
  }
});
</script>
<style scoped>
#testId {
  width: 100%;
  height: 900px;
  background-color: aquamarine;
}
</style>
8、缩放事件
8.1 主要方法
onPinchStart:缩放开始事件,在执行这个事件会默认禁止旋转事件。
onPinchMove:缩放中事件,通过event.scale缩放比例判断是放大还是缩小。
onPinchEnd:缩放结束事件,默认放开旋转事件。
8.2 示例
<template>
  <div id="testId" ref="testDom"></div>
</template>
<script lang="ts" setup>
import { onMounted, onUnmounted, ref } from "vue";
import {
  PointerGestureManager,
  PointerOptions,
  GestureHandlers,
  PointerState,
} from "@hadss/web_uni_input";
const testDom = ref<HTMLElement | null>(null);
const instance = ref(null);
const handlePinchStart = (state: PointerState) => {
  // 代码编辑
};
const handlePinchMove = (state: PointerState) => {
  // 代码编辑
};
const handlePinchEnd = (state: PointerState) => {
  // 代码编辑
};
onMounted(() => {
  // 如果要获取DOM元素,请在DOM元素挂载之后获取,比如VUE3生命周期的onMounted中获取DOM元素
  const handlers: GestureHandlers = {
    onPinchStart: handlePinchStart, // 缩放开始
    onPinchMove: handlePinchMove, // 缩放中
    onPinchEnd: handlePinchEnd, // 缩放结束
  };
  const configs: PointerOptions = {
    enableScale: true,
  };
  if (testDom.value) {
    instance.value = PointerGestureManager(testDom.value, handlers, configs);
  }
});
onUnmounted(() => {
  // destroy销毁实例,实例销毁以后交互归一事件不再触发
  if (instance.value) {
    instance.value.destroy();
  }
});
</script>
<style scoped>
#testId {
  width: 100%;
  height: 900px;
  background-color: aquamarine;
}
</style>
9、旋转事件

9.1 主要方法
onRotateStart:旋转开始事件,在执行这个事件会默认禁止缩放事件。
onRotateMove:缩放中事件,通过event.angle旋转角度判断是正向旋转还是逆向旋转。
onRotateEnd:旋转结束事件,默认放开缩放事件。
9.2 示例
<template>
  <div id="testId" ref="testDom"></div>
</template>
<script lang="ts" setup>
import { onMounted, onUnmounted, ref } from "vue";
import {
  PointerGestureManager,
  PointerOptions,
  GestureHandlers,
  PointerState,
} from "@hadss/web_uni_input";
const testDom = ref<HTMLElement | null>(null);
const instance = ref(null);
const handleRotateStart = (state: PointerState) => {
  // 代码编辑
};
const handleRotateMove = (state: PointerState) => {
  // 代码编辑
};
const handleRotateEnd = (state: PointerState) => {
  // 代码编辑
};
onMounted(() => {
  // 如果要获取DOM元素,请在DOM元素挂载之后获取,比如VUE3生命周期的onMounted中获取DOM元素
  const handlers: GestureHandlers = {
    onRotateStart: handleRotateStart, // 旋转开始
    onRotateMove: handleRotateMove, // 旋转中
    onRotateEnd: handleRotateEnd, // 旋转结束
  };
  const configs: PointerOptions = {
    enableRotate: true,
  };
  if (testDom.value) {
    instance.value = PointerGestureManager(testDom.value, handlers, configs);
  }
});
onUnmounted(() => {
  // destroy销毁实例,实例销毁以后交互归一事件不再触发
  if (instance.value) {
    instance.value.destroy();
  }
});
</script>
<style scoped>
#testId {
  width: 100%;
  height: 900px;
  background-color: aquamarine;
}
</style>
PC按键控制(非手势库)

1、上键:歌曲详情页,PC端上键控制歌曲上一曲。
2、下键:歌曲详情页,PC端下键控制歌曲下一曲。
3、左键:歌曲详情页,PC端左键控制歌曲快退5s。
4、右键:歌曲详情页,PC端右键控制歌曲快进5s。
5、space键:当详情页歌曲处于播放状态,PC端space键控制歌曲暂停。
6、enter键:当详情页歌曲处于暂停状态,PC端enter键控制歌曲播放。
7、esc键:歌曲详情页,PC端按esc键可以回到列表页。
示例说明:通过document.addEventListener('keyup', (event) => { })监听键盘行为。
document.addEventListener("keyup", (event) => {
  switch (event.key) {
    case "ArrowUp":
      //上键:切换歌曲为上一曲
      break;
    case "ArrowDown":
      //下键:切换歌曲为下一曲
      break;
    case "ArrowLeft":
      //左键:控制播放器快退5s播放
      break;
    case "ArrowRight":
      //右键:控制播放器快进5s播放
      break;
    case "Enter":
      //enter:当歌曲暂停状态时,按下enter键歌曲开始播放
      break;
    case "Escape":
      //esc:回到上一级页面
      break;
    case " ":
      //空格:当歌曲播放状态时,按下空格键歌曲暂停
      break;
  }
})
示例代码
sample地址:uni_input_sample,开发者可以通过该地址查看完整的交互事件归一示例代码,并根据自己的需求进行修改和扩展。

讨论HarmonyOS开发技术,专注于API与组件、DevEco Studio、测试、元服务和应用上架分发等。
更多推荐

 0
0 0
0- 0


 已为社区贡献233条内容

所有评论(0)