鸿蒙特色功能开发:CodeGenie万能卡片生成实战指南
前言:AI编程时代的鸿蒙革命
最近鸿蒙生态的发展速度真的让人惊叹。从HarmonyOS NEXT的正式发布,到原生应用生态的快速壮大,每一个节点都标志着鸿蒙正在从"追赶者"变成"引领者"。而在这个关键时刻,鸿蒙推出了一个让我眼前一亮的工具——CodeGenie。
说实话,作为一个在移动开发领域摸爬滚打了好几年的程序员,我见过太多所谓的"革命性"AI工具,但大多数都是雷声大雨点小,根本没办法写Arkts语言。但CodeGenie不一样,它是首款专门为开发鸿蒙原生应用而生的AI辅助编程工具。
最近也是深度体验了下 CodeGenie,发现它有个“万能卡片生成”的功能,居然能帮我省掉一大半重复劳动。下面我就结合几个实战例子,和大家聊聊这东西到底好不好用。
万能卡片到底是什么?
官方的话就不重复了,用我的话来说:
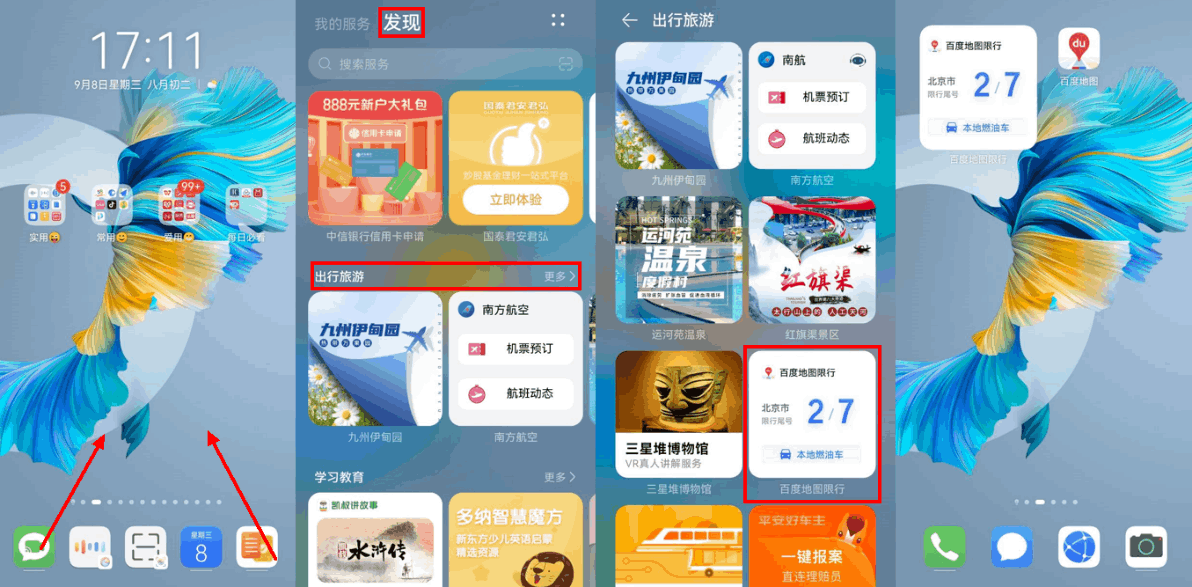
- 信息直达:比如看天气,不用点开 App,直接卡片上就能显示。
- 交互轻便:常见的收藏、跳转、预订按钮都能塞进卡片。
- 视觉统一:风格贴合鸿蒙系统,看起来比传统小部件高级美观。
简单点说,它就是鸿蒙生态里“低门槛高体验”的特色功能。
最近在做鸿蒙项目的时候,发现万能卡片这个功能真的是鸿蒙生态的一大亮点。
但说实话,大家在刚开始接触的时候还是挺头疼的,各种尺寸适配、数据绑定、交互逻辑,传统的开发方式非常繁琐。直到用了CodeGenie,才发现原来卡片开发可以这么轻松!今天就来分享一下我的实战经验。
用 CodeGenie 来写卡片,爽在哪?
说白了我白说啦,爽就爽在——它帮我把重复无聊且易出错的事情都干了,我只需要专注在“想要的效果”。
首先就是:
- 节省时间
以前我要写一个 2×2 的万能卡片:先新建 ArkTS 文件,再写 Column、Row、Text,一个个属性调边距、字号、颜色。光是“标题加一个副标题”的卡片,起码要 20 多行代码。看上去代码很简单,但是耗时间的是在哪一点一点跳字体边距等等,效率很低。
现在我在 CodeGenie 输入一句话:
“生成一个2x2的美食推荐卡片,包含图片、餐厅名、评分和一个预订按钮。”
它十几秒钟就吐出一个初版代码,结构完整,样式也有个雏形。虽然可能需要我再改一两个地方,但总体比手写快了至少五六倍。
- 减少错误
手写卡片代码最烦的是小错误,比如:
- 忘记给 Text 加 .maxLines(1),结果文字溢出;
- Button 样式不对,点击区域太小;
- 不同尺寸下卡片变形。
CodeGenie 生成的代码虽然不是完美,但它一般都会带上这些“基础保护”:文字溢出处理、圆角阴影设置、点击按钮的 onClick 占位。这样我不用担心低级错误,调试时间大大减少。
- 自定义
以前我写卡片,精力大部分都花在“怎么实现”上,比如 margin 到底是 8 还是 10,圆角要不要 12dp。
现在我可以直接说:
“我想要一个4x4的清新自然风格的旅游推荐卡片,上面有大图,下面有景点名和一句亮点文案。”
它就生成了一个大致符合的卡片,我只要稍微调整配色、字体,就能得到我想要的效果。
这样我的大部分时间就可以用在业务逻辑上面,而不是代码细枝末节。
实战演练:CodeGenie万能卡片生成体验
城市天气预报
我先试了个天气场景。写卡片之前,我通常得考虑:图片放哪儿?天气怎么展示?按钮要不要突出?布局是怎么样的?这些问题如果纯手写,至少要写上百行 ArkTS 代码。
这次我直接丢给 CodeGenie 这么一句:
生成一个2×4的天气信息类万能卡片,主题为“城市天气预报”。卡片左侧显示城市名称(如北京)和当前温度(如10°C),下方显示日期和农历;右侧展示天气图标、空气质量(良好、优等)、风力等级、湿度和紫外线强度。整体背景采用蓝紫渐变,白色文字,圆角矩形卡片,风格清爽自然。底部以时间轴形式展示未来几小时的天气趋势(温度+天气图标)。
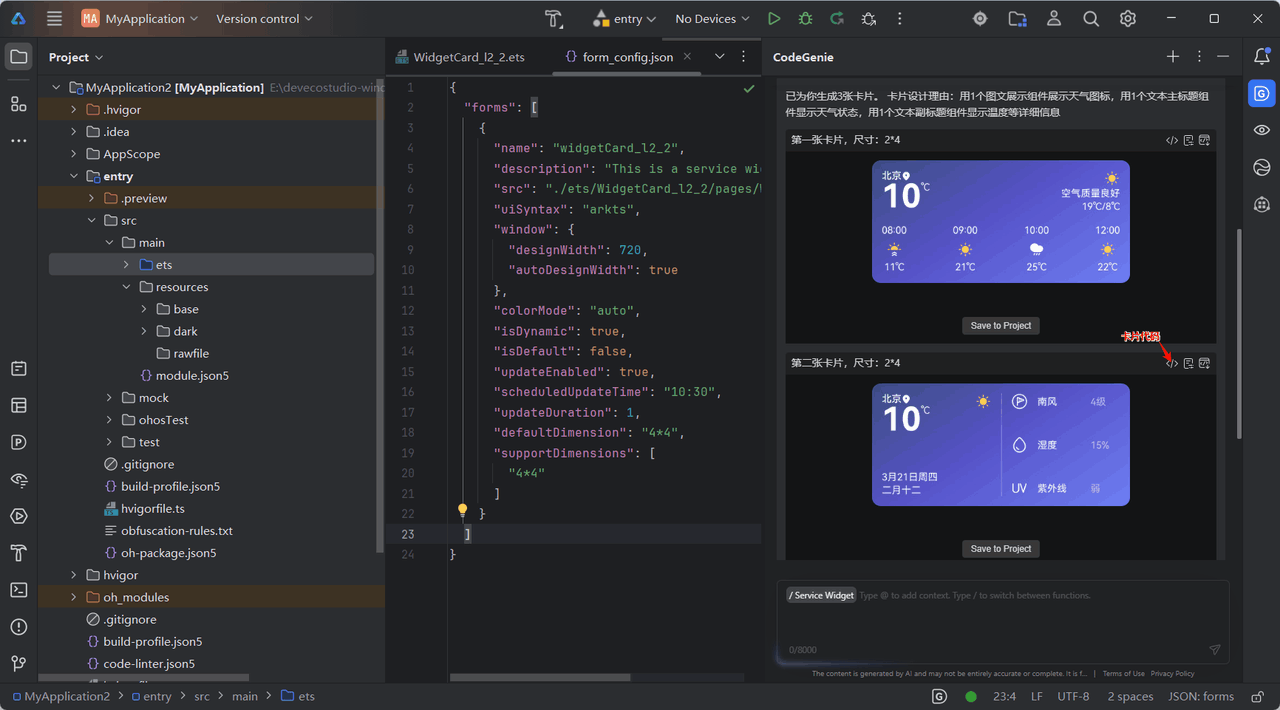
生成完成的卡片组件后,我们可以直接查看它的源代码,或者点击卡片下方的 “Save to Project” 按钮,一键将其导入到自己的项目中。
let storage1302651101 = new LocalStorage()

@Entry(storage1302651101)
@Component
export struct ClockWeatherInformationDisplayCard1 {
  @LocalStorageProp('hourTime3') hourTime3: string = '10:00'
  @LocalStorageProp('textSubTitleG1') textSubTitleG1: string = '空气质量良好'
  @LocalStorageProp('hourTime1') hourTime1: string = '08:00'
  @LocalStorageProp('hourTime2') hourTime2: string = '09:00'
  @LocalStorageProp('hourTime5') hourTime5: string = '12:00'
  @LocalStorageProp('temperature5') temperature5: string = '22℃'
  @LocalStorageProp('locationIcon') locationIcon: Resource = $r('app.media.icon_location')
  @LocalStorageProp('weatherIcon_current') weatherIcon_current: Resource = $r('app.media.ic_weather_current')
  @LocalStorageProp('backgroundImg') backgroundImg: Resource = $r('app.media.backgroundImg1')
  @LocalStorageProp('cityName') cityName: string = '北京'
  @LocalStorageProp('weatherIcon1') weatherIcon1: Resource = $r('app.media.ic_weather_sunrise')
  @LocalStorageProp('temperature3') temperature3: string = '25℃'
  @LocalStorageProp('weatherIcon2') weatherIcon2: Resource = $r('app.media.ic_weather_sunny')
  @LocalStorageProp('temperature2') temperature2: string = '21℃'
  @LocalStorageProp('temperature1') temperature1: string = '11℃'
  @LocalStorageProp('weatherIcon3') weatherIcon3: Resource = $r('app.media.ic_weather_rain')
  @LocalStorageProp('weatherIcon5') weatherIcon5: Resource = $r('app.media.ic_weather_sunny1')
  @LocalStorageProp('digitTitleFText1') digitTitleFText1: string = '10'
  @LocalStorageProp('textSubTitleG2') textSubTitleG2: string = '19℃/8℃'
  @LocalStorageProp('digitTitleFText2') digitTitleFText2: string = '℃'
  ClickToHome = () : void => {
    postCardAction(this, {
      "action": "router",
      // Configuring the UIAbility name for jumping.
      'abilityName': 'EntryAbility',
      // Configuring the parameters to be transferred.
      "params": {
        'targetPage': 'page1'
      }
    });
}
  build() {
    Column() {
      Row() {
        Column() {
          Row() {
            Text(this.cityName)
              .fontColor(Color.White)
              .fontSize('12')
              .fontWeight(FontWeight.Medium)
              .textOverflow({ overflow: TextOverflow.Ellipsis })
              .lineHeight('14')
              .maxLines(1)
            Image(this.locationIcon)
              .width('11')
              .height('11')
          }
          .alignItems(VerticalAlign.Center)
          Row() {
            Text(this.digitTitleFText1)
              .fontColor(Color.White)
              .fontSize('40')
              .fontWeight(FontWeight.Bold)
              .textOverflow({ overflow: TextOverflow.Ellipsis })
              .lineHeight('40')
              .maxLines(1)
            Text(this.digitTitleFText2)
              .fontColor(Color.White)
              .fontSize('12')
              .textOverflow({ overflow: TextOverflow.Ellipsis })
              .maxLines(1)
          }
          .alignItems(VerticalAlign.Top)
        }
        .alignItems(HorizontalAlign.Start)
        Column() {
          Image(this.weatherIcon_current)
            .width('20')
            .height('20')
          Text(this.textSubTitleG1)
            .fontColor(Color.White)
            .fontSize('12')
            .fontWeight(FontWeight.Regular)
            .textOverflow({ overflow: TextOverflow.Ellipsis })
            .lineHeight('16')
            .maxLines(1)
          Text(this.textSubTitleG2)
            .fontColor(Color.White)
            .fontSize('12')
            .fontWeight(FontWeight.Regular)
            .textOverflow({ overflow: TextOverflow.Ellipsis })
            .lineHeight('16')
            .maxLines(1)
        }
        .alignItems(HorizontalAlign.End)
      }
      .width('100%')
      .alignItems(VerticalAlign.Top)
      .justifyContent(FlexAlign.SpaceBetween)
      Row() {
        Column() {
          Text(this.hourTime1)
            .fontColor(Color.White)
            .fontSize('12')
            .fontWeight(FontWeight.Regular)
            .textOverflow({ overflow: TextOverflow.Ellipsis })
            .lineHeight('16')
            .maxLines(1)
          Image(this.weatherIcon1)
            .margin({ top: '6' })
            .width('20')
            .height('20')
          Text(this.temperature1)
            .margin({ top: '3' })
            .fontColor(Color.White)
            .fontSize('12')
            .fontWeight(FontWeight.Regular)
            .textOverflow({ overflow: TextOverflow.Ellipsis })
            .lineHeight('16')
            .maxLines(1)
        }
        Column() {
          Text(this.hourTime2)
            .fontColor(Color.White)
            .fontSize('12')
            .fontWeight(FontWeight.Regular)
            .textOverflow({ overflow: TextOverflow.Ellipsis })
            .lineHeight('16')
            .maxLines(1)
          Image(this.weatherIcon2)
            .margin({ top: '6' })
            .width('20')
            .height('20')
          Text(this.temperature2)
            .margin({ top: '3' })
            .fontColor(Color.White)
            .fontSize('12')
            .fontWeight(FontWeight.Regular)
            .textOverflow({ overflow: TextOverflow.Ellipsis })
            .lineHeight('16')
            .maxLines(1)
        }
        Column() {
          Text(this.hourTime3)
            .fontColor(Color.White)
            .fontSize('12')
            .fontWeight(FontWeight.Regular)
            .textOverflow({ overflow: TextOverflow.Ellipsis })
            .lineHeight('16')
            .maxLines(1)
          Image(this.weatherIcon3)
            .margin({ top: '6' })
            .width('20')
            .height('20')
          Text(this.temperature3)
            .margin({ top: '3' })
            .fontColor(Color.White)
            .fontSize('12')
            .fontWeight(FontWeight.Regular)
            .textOverflow({ overflow: TextOverflow.Ellipsis })
            .lineHeight('16')
            .maxLines(1)
        }
        Column() {
          Text(this.hourTime5)
            .fontColor(Color.White)
            .fontSize('12')
            .fontWeight(FontWeight.Regular)
            .textOverflow({ overflow: TextOverflow.Ellipsis })
            .lineHeight('16')
            .maxLines(1)
          Image(this.weatherIcon5)
            .margin({ top: '6' })
            .width('20')
            .height('20')
          Text(this.temperature5)
            .margin({ top: '3' })
            .fontColor(Color.White)
            .fontSize('12')
            .fontWeight(FontWeight.Regular)
            .textOverflow({ overflow: TextOverflow.Ellipsis })
            .lineHeight('16')
            .maxLines(1)
        }
      }
      .width('100%')
      .alignItems(VerticalAlign.Bottom)
      .justifyContent(FlexAlign.SpaceBetween)
    }
    .backgroundImage(this.backgroundImg)
    .backgroundImageSize({ width: '100%', height: '100%' })
    .padding('12')
    .width('100%')
    .height('100%')
    .onClick(this.ClickToHome)
    .justifyContent(FlexAlign.SpaceBetween)
  }
}
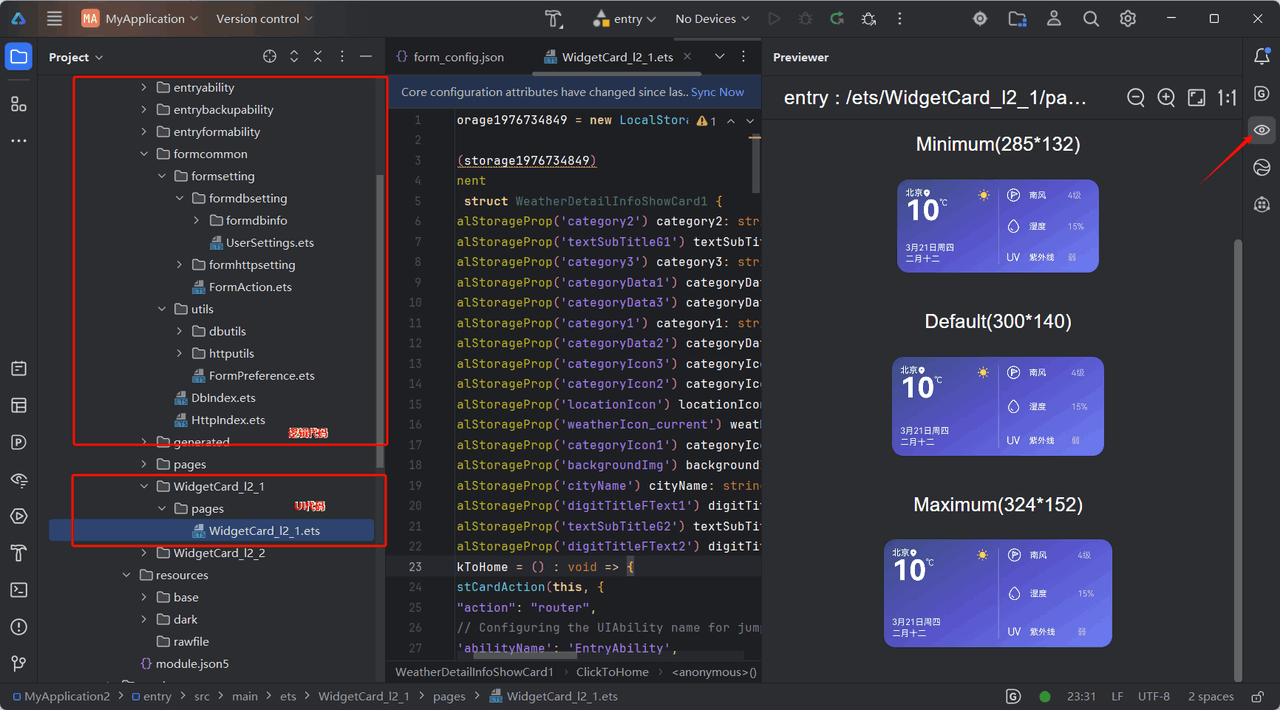
接下来只需稍作调整,比如替换图片、优化文字或调整样式,就能快速落地使用,整个流程既高效又直观。
个人心得与总结
说实话,第一次用 CodeGenie 生成万能卡片时,我的反应是“这也太快了吧”。
以前写一个卡片,少说也得折腾一两个小时——布局、样式、交互都要自己一点点调。现在只要写几句话的描述,就能看到一个能直接跑起来的结果。虽然生成的代码还需要自己微调,但这个“起点”已经帮我省掉了大量机械劳动。
在几次实践下来,我总结出几个感受:
- CodeGenie 生成的卡片代码,逻辑清晰、结构完整,但最终呈现是否出彩和满意,还得靠开发者的二次设计。“AI 是效率放大器,不是创意终结者”。
- 让信息展示更轻巧,尤其是在HarmonyOS生态下,卡片几乎成了应用曝光的第二入口,许多用户喜欢自定义桌面,因此做好它比你想象中更重要。
- 提示词必须写得越具体、越场景化,生成效果就越贴合业务。AI理解力强,但是首先得要能理解你说的话。
总的来说,CodeGenie + 万能卡片 的组合让我感受到鸿蒙开发也不像以前那样难啦,AI时代真的给我们带来了很多便利,AI更加百花齐放,但最终真正能让人坚持用下去的,是那些贴近开发者痛点、能融入日常工作流的工具。
对我来说,CodeGenie就是这样一个“好伙伴”。
更多精彩内容,请关注 HarmonyOS开发者技术公众号
或加入 鸿蒙知识共建交流群:
👉 https://work.weixin.qq.com/gm/afdd8c7246e72c0e94abdbd21bc9c5c1
更多实用技巧和深度解析,欢迎访问:
👉 https://blog.csdn.net/weixin_58930839/article/details/152087354
#学鸿蒙# 跟着落鱼科技

讨论HarmonyOS开发技术,专注于API与组件、DevEco Studio、测试、元服务和应用上架分发等。
更多推荐
 23
23 22
22- 0


 已为社区贡献22条内容

所有评论(0)