【鸿蒙版-钓鱼云助手】第四章:首页金刚区-路由跳转实现详解
代码如诗,而交互是诗的韵律。当指尖触碰屏幕的瞬间,功能被唤醒,需求被满足,这大概就是开发最美的时刻。
前言
在首页布局篇章中,我们已经预留出了金刚区的内容,但是只是基础的展示,没有实现具体的点击跳转事件,本文主要实现金刚区导航的这个功能,并添加伪页面,模拟路由跳转的整个过程。
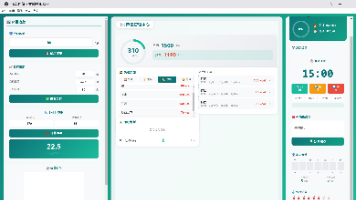
先看看我们之前设置的金刚区模块:

路由跳转方式介绍
现在有了起点(金刚区)和终点(目标页面),我们需要用路由把它们连接起来。我们先简单的介绍下鸿蒙的路由方式。
在鸿蒙(HarmonyOS)ArkTS开发中,有两种路由跳转的方式分别是组件导航(Navigation)和页面路由(@ohos.router),官方推荐使用Navigation组件实现页面跳转。
Navigation 是一个完整的导航框架,采用组件化思维,提供结构化的导航容器。它更像是一个"导航管家",帮你管理整个应用的页面层级关系。
Router 是基础的路由能力,采用API调用思维,提供页面跳转的底层支持。它更像是一个"导航工具",让你可以在任何地方进行页面跳转。
- 在组件导航(Navigation)框架下,“页面”通过NavDestination组件承载,特指一个NavDestination组件包含的内容。
- 在页面路由(@ohos.router)框架下,“页面”特指@Entry装饰的自定义组件。
功能对比
| 对比维度 | Navigation (导航组件) | Router (页面路由) |
|---|---|---|
| 定位性质 | UI组件,声明式导航容器 | 系统API,命令式路由跳转 |
| 使用方式 | 组件声明式使用 | API调用式使用 |
| 核心功能 | 提供导航框架和容器 | 提供页面跳转能力 |
| 导航模式 | 堆栈式导航管理 | 基于URL的页面路由 |
| 生命周期 | 自动管理子页面生命周期 | 需要手动管理页面生命周期 |
| 参数传递 | 通过组件属性传递 | 通过URL参数传递 |
| 导航栏 | 内置导航栏,支持自定义 | 需要自行实现导航栏 |
| 适用场景 | 应用内主导航结构 | 任意页面间的跳转 |
| 代码示例 | Navigation() {<br> NavDestination() {<br> // 页面内容<br> }<br>} |
router.pushUrl({<br> url: 'pages/Detail'<br>}) |
| 后退处理 | 自动处理后退栈 | 需要手动管理路由栈 |
| 页面关系 | 明确的父子页面关系 | 松散的页面关联 |
| 类型安全 | 强类型,编译时检查 | 字符串URL,运行时检查 |
| 开发范式 | 声明式开发范式 | 兼容两种开发范式 |
因为首页之前创建直接使用了@Entry,生成的代码也没有定义Navigation ,这里暂时就直接使用Router 的方式了,后续看情况有需要再切换成Navigation 。
Router切换Navigation的方式可以参考官方论坛的地址:Router切换Navigation
功能实现
1. 添加点击事件
是时候让这些图标活起来了。我要给每个功能项加上点击事件,让用户一点就能到达想去的地方。
- 首先调整数据模型,添加跳转的地址
url。
interface MenuItem {
  id: number;
  title: string;
  icon: Resource;
  url: string;
}

  // 金刚区-功能菜单
  @State menuItems: Array<MenuItem> = [
    { id: 1, title: '钓点地图', icon: $r('app.media.diaodian'), url: 'pages/FishForecast' },
    { id: 2, title: '鱼情预测', icon: $r('app.media.yuqing'), url: 'pages/Spot' },
    { id: 3, title: '活动报名', icon: $r('app.media.huodong'), url: '' },
    { id: 4, title: '我的发布', icon: $r('app.media.fabu'), url: '' },
    { id: 5, title: '高手秘籍', icon: $r('app.media.zhinan'), url: '' }
  ]
- 调整
FeatureItem组件,添加点击视觉反馈:透明度变化、文字变色、背景色变化。通知添加点击时间,跳转到对应的url。
// 功能入口组件
@Component
struct FeaturesSection {

  @Prop menuItems: MenuItem[];
  build() {
    Column() {
      Row() {
        ForEach(this.menuItems, (item: MenuItem) => {
          FeatureItem({
            icon: item.icon,
            title: item.title,
            url: item.url
          })
        }, (item: FishingSpot) => item.id)
      }
      .width('100%')
      .justifyContent(FlexAlign.SpaceAround)
      .padding({ top: 15, bottom: 10 })
      .backgroundColor('#fff')
    }
  }
}

// 增强版功能项组件
@Component
struct FeatureItem {
  @Prop icon: Resource;
  @Prop title: string;
  @Prop url: string;
  @State isPressed: boolean = false; // 按压状态

  build() {
    Column() {
      Stack() {
        Image(this.icon)
          .width(30)
          .height(30)
          .opacity(this.isPressed ? 0.7 : 1.0) // 按压时变透明
      }

      Text(this.title)
        .fontSize(12)
        .margin({ top: 5 })
        .fontColor(this.isPressed ? '#ff3a7a2b' : '#333333')
    }
    .alignItems(HorizontalAlign.Center)
    .padding(8)
    .borderRadius(8)
    .backgroundColor(this.isPressed ? '#F0F8FF' : '#FFFFFF') // 按压背景色
    .onClick(() => {
      this.getUIContext().getRouter().pushUrl({
        url: this.url // 目标url
      }, router.RouterMode.Standard, (err) => {
        if (err) {
          return;
        }
      })
    })
    .onTouch((event: TouchEvent) => {
      if (event.type === TouchType.Down) {
        this.isPressed = true;
      } else if (event.type === TouchType.Up) {
        this.isPressed = false;
      }
    })
  }
}
2. 创建目标页面
根据前面配置的url。我们先来创建几个伪页面:
2.1 钓点地图页面
这里我直接使用CodeGenie进行页面生成了,因为是跳转展示示例。当然自动生成的页面,可能有一些问题,后续我们需要再进行略微调整。
帮我创建一个钓点地图的伪页面,包含地图内容,附近钓点列表等信息

当然生成的代码会有一些错误,如果存在编译相关的,可以使用CodeGenie再进行修复。

具体代码如下:
import router from '@ohos.router';

// 钓点地图页面
@Entry
@Component
struct Spot {
  @State mapLoaded: boolean = false;
  @State currentLocation: string = '杭州市西湖区';
  @State nearbySpots: string[] = ['西湖垂钓区', '钱塘江钓点', '西溪湿地钓场'];

  build() {
    Column() {
      // 顶部导航
      Row() {
        Image($r('app.media.background'))
          .width(24)
          .height(24)
          .onClick(() => {
            this.getUIContext().getRouter().pushUrl({
              url: 'pages/Index' // 目标url
            }, router.RouterMode.Standard, (err) => {
              if (err) {
                console.error(`Invoke pushUrl failed, code is ${err.code}, message is ${err.message}`);
                return;
              }
              console.info('Invoke pushUrl succeeded.');
            })
          })

        Text('钓点地图')
          .fontSize(18)
          .fontWeight(FontWeight.Bold)
          .layoutWeight(1)
          .textAlign(TextAlign.Center)

        Image($r('app.media.fabu'))
          .width(24)
          .height(24)
      }
      .width('100%')
      .padding(16)
      .backgroundColor('#FFFFFF')

      // 地图区域
      Column() {
        if (this.mapLoaded) {
          // 地图内容
          Text('地图显示区域')
            .fontSize(16)
            .textAlign(TextAlign.Center)
            .width('100%')
            .height(300)
            .backgroundColor('#E8F4FD')
            .borderRadius(12)

          // 附近钓点列表
          Column() {
            Text(`当前位置: ${this.currentLocation}`)
              .fontSize(14)
              .fontColor('#666666')
              .margin({ bottom: 16 })

            ForEach(this.nearbySpots, (spot: string, index?: number) => {
              Row() {
                Text(spot)
                  .fontSize(16)
                  .layoutWeight(1)
                Text('2.5km')
                  .fontSize(14)
                  .fontColor('#999999')
                Image($r('app.media.diaodian'))
                  .width(20)
                  .height(20)
                  .margin({ left: 8 })
              }
              .width('100%')
              .padding(12)
              .backgroundColor('#F9F9F9')
              .borderRadius(8)
              .margin({ bottom: 8 })
            })
          }
          .padding(16)
        } else {
          // 加载中
          Text('地图加载中...')
            .fontSize(16)
            .textAlign(TextAlign.Center)
            .width('100%')
            .height(300)
        }
      }
      .layoutWeight(1)
      .width('100%')
    }
    .onAppear(() => {
      // 模拟地图加载
      setTimeout(() => {
        this.mapLoaded = true;
      }, 1000);
    })
  }
}
2.2 鱼情预测页面
同样进行生成,代码如下:
帮我创建一个鱼情预测的伪页面,包含日期,鱼情活跃度等信息
interface ForecastItem {
  time: string;
  level: string;
  desc: string;
}

// 鱼情预测页面
@Entry
@Component
struct FishForecast {
  @State selectedDate: string = '2025-10-15';
  @State forecastData: ForecastItem[] = [
    { time: '06:00-08:00', level: '★★★★☆', desc: '活跃期' },
    { time: '08:00-10:00', level: '★★★☆☆', desc: '一般活跃' },
    { time: '10:00-12:00', level: '★★☆☆☆', desc: '低迷期' }
  ];

  build() {
    Column() {
      // 页面标题
      Text('鱼情预测')
        .fontSize(20)
        .fontWeight(FontWeight.Bold)
        .margin({ top: 20, bottom: 20 })

      // 日期选择
      Row() {
        Text('选择日期:')
          .fontSize(16)
        Text(this.selectedDate)
          .fontSize(16)
          .fontColor('#007DFF')
          .margin({ left: 8 })
      }
      .margin({ bottom: 20 })

      // 预测列表
      List() {
        ForEach(this.forecastData, (item: ForecastItem, index?: number) => {
          ListItem() {
            Row() {
              Column() {
                Text(item.time)
                  .fontSize(16)
                  .fontWeight(FontWeight.Medium)
                Text(item.desc)
                  .fontSize(12)
                  .fontColor('#666666')
                  .margin({ top: 4 })
              }
              .layoutWeight(1)

              Text(item.level)
                .fontSize(16)
                .fontColor('#FF6B00')
            }
            .width('100%')
            .padding(16)
            .backgroundColor('#FFFFFF')
            .borderRadius(12)
          }
        })
      }
      .layoutWeight(1)
      .padding(16)
    }
  }
}
3. 实现页面路由
需要在resources/base/profile/main_page.json文件中添加页面信息,如下图所示:

时间按钮在上文已经添加,具体代码如下:
.onClick(() => {
    this.getUIContext().getRouter().pushUrl({
        url: this.url // 目标url
    }, router.RouterMode.Standard, (err) => {
        if (err) {
            return;
        }
    })
成果展示
让我们一起看下功能实现的效果:点击地图可以跳转到地图页面,点击首页按钮可以跳回。效果如下:

因为底部导航栏暂时没有去实现具体的功能,后面可能会将Router路由的方式切换Navigation的方式

讨论HarmonyOS开发技术,专注于API与组件、DevEco Studio、测试、元服务和应用上架分发等。
更多推荐

 23
23 24
24- 0


 已为社区贡献5条内容

所有评论(0)