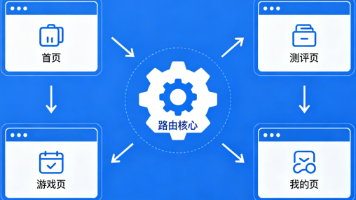
鸿蒙next 蓝牙连接穿戴设备数据交互流程
连接之前为app开启后台长时任务防止app在后台被挂起或者冻结,导致收不到设备指令。获取apptokenId,然后判断蓝牙的可接近权限。我们以正常同步数据为例一般是为蓝牙设备写入特征码值。监听蓝牙特征码改变用于手表与手机之间同步数据。获取权限后若系统蓝牙未开启要进行开启。手动开启蓝牙扫描并监听蓝牙扫描结果。1.检查app是否有授予蓝牙权限。解析数据,以同步数据为例。
·
一、扫描周围的蓝牙设备
1.检查app是否有授予蓝牙权限
获取apptokenId,然后判断蓝牙的可接近权限
function checkPermissions(permissions: Array<Permissions>): boolean {
    let atManager: abilityAccessCtrl.AtManager = abilityAccessCtrl.createAtManager();

    // 获取应用程序的accessTokenID
    let tokenId: number = -1;
    bundleManager.getBundleInfoForSelf(bundleManager.BundleFlag.GET_BUNDLE_INFO_WITH_APPLICATION)
        .then((data) => {
            let bundleInfo: bundleManager.BundleInfo = data
            let appInfo: bundleManager.ApplicationInfo = bundleInfo.appInfo;
            tokenId = appInfo.accessTokenId;
        })
        .catch((err: BusinessError) => {
            LogUtils.e(TAG, `Failed to request permissions from user. Code is ${err.code}, message is ${err.message}`);
        })
    if (tokenId == -1) {
        return false
    }

    // 校验应用是否被授予权限
    try {
        for (let i = 0; i < permissions.length; i++) {
            let p = permissions[i]
            let grantStatus = atManager.checkAccessTokenSync(tokenId, p)
            if (grantStatus !== abilityAccessCtrl.GrantStatus.PERMISSION_GRANTED) {
                return false
            }
        }
    } catch (error) {
        const err: BusinessError = error as BusinessError;
        LogUtils.e(TAG, `Failed to check access token. Code is ${err.code}, message is ${err.message}`);
    }
    return true;
}
未开启则请求权限
function reqPermissions(permissions: Array<Permissions>, context: common.Context, callback: AsyncCallback<boolean>) {
    let atManager: abilityAccessCtrl.AtManager = abilityAccessCtrl.createAtManager();
    // requestPermissionsFromUser会判断权限的授权状态来决定是否唤起弹窗
    atManager.requestPermissionsFromUser(context, permissions).then((data) => {
        let grantStatus: Array<number> = data.authResults;
        let length: number = grantStatus.length;
        for (let i = 0; i < length; i++) {
            if (grantStatus[i] !== 0) {
                callback(null, false)
                return
            }
        }
        // 授权成功
        callback(null, true)
    }).catch((err: BusinessError) => {
        LogUtils.e(TAG, `Failed to request permissions from user. Code is ${err.code}, message is ${err.message}`);
        callback(err, false)
    })
}
获取权限后若系统蓝牙未开启要进行开启
                            if (access.getState() == access.BluetoothState.STATE_ON) {
                                router.pushNamedRoute({ name: RouterName.ADD_DEVICE_VIEW })
                                return
                            }
                            access.enableBluetooth()
                            access.on('stateChange', (data) => {
                                let btStateMessage = '';
                                switch (data) {
                                    case 2:
                                        btStateMessage += 'STATE_ON';
                                        break;
                                }
                                if (btStateMessage == 'STATE_ON') {
                                    router.pushNamedRoute({ name: RouterName.ADD_DEVICE_VIEW })
                                    return
                                }
                            }
手动开启蓝牙扫描并监听蓝牙扫描结果
 ble.on('BLEDeviceFind', (data) => {
                if (data.length <= 0) {
                    return
                }
                const device = data[0]
                const deviceId = device.deviceId
                if (deviceList.find((item) => item == deviceId)) {
                    return
                }
                deviceList.push(deviceId)
                const bleName = device.deviceName
                if (bleNames.indexOf(device.deviceName) != -1) {
                    let dev = new ScanDevice(deviceId, bleName, device.rssi, device.data)
                    LogUtils.i(TAG, `scan device: ${JSON.stringify(dev, ["deviceId", "deviceName", "rssi"])}`)
                    callback(null, dev)
                }
    });
ble.startBLEScan([scanFilter], scanOptions);
二、与蓝牙穿戴设备进行连接
连接之前为app开启后台长时任务防止app在后台被挂起或者冻结,导致收不到设备指令
 startBLEContinuousTask(deviceId: string, deviceName: string, mac: string) {
    let wantAgentInfo: wantAgent.WantAgentInfo = {
      wants: [
        {
          bundleName: this.context.applicationInfo.name,
          abilityName: "EntryAbility"
        }
      ],
      operationType: wantAgent.OperationType.START_ABILITY,
      requestCode: 0,
      wantAgentFlags: [wantAgent.WantAgentFlags.UPDATE_PRESENT_FLAG]
    };
    try {
      wantAgent.getWantAgent(wantAgentInfo).then((wantAgentObj) => {
        // 开启任务后台长时间运行
        try {
          backgroundTaskManager.startBackgroundRunning(
            this.context,
            backgroundTaskManager.BackgroundMode.BLUETOOTH_INTERACTION,
            wantAgentObj
          ).then(() => {
            console.info("Operation startBackgroundRunning succeeded");
            WKBleMgr.connectByDeviceId(deviceId, deviceName, mac)
          })
        } catch (error) {
          console.error(`Operation startBackgroundRunning failed. Code: ${error.code}, Message: ${error.message}`);
        }
      });
    } catch (error) {
      console.error(`Operation getWantAgent failed. Code: ${error.code}, Message: ${error.message}`);
    }
  }
建立蓝牙连接
const device: ble.GattClientDevice = ble.createGattClientDevice(deviceId);
device.on("BLEConnectionStateChange", this.onConnectionStateChange)
device.connect()
 private onConnectionStateChange = (state: ble.BLEConnectionChangeState) => {
      if (state.state === constant.ProfileConnectionState.STATE_CONNECTED) {
            setTimeout(() => {
                this.discoverService()
            }, 2 * 1000)
        }
 }
监听蓝牙特征码改变用于手表与手机之间同步数据
  this.dev.on("BLECharacteristicChange", this.onCharacteristicChange)
  this.dev.setCharacteristicChangeNotification(characteristics, true, (err) => {
            if (err) {
                LogUtils.i(TAG, `notify fail code: ${err.code}, message: ${err.message}`);
                this.notifyCallback?.onNotifyFail(this.device.deviceId, new BleError(-100, "notify fail setCharacteristic fail"))
                return
            }
            LogUtils.i(TAG, `notify success`);
            this.notifyCallback?.onNotifySuccess(this.device.deviceId)
    })
    onNotifySuccess(){
       mgr.writeCommand(WKCommand.sendPhoneSystem())
    }
    onCharacteristicChange(characteristic: ble.BLECharacteristic){
       let value = characteristic.characteristicValue;
        this.notifyCallback?.onCharacteristicChanged(value)
    }
    onCharacteristicChanged: (data: ArrayBuffer): void => {
            const mac = this.getConnectedMac()
            const dataView = new Uint8Array(data)
            const first = dataView[0]

            let realData = data
            if (first == 0xAB || first == 0xEA || this.packager.isPackageIng()) {
                if (!this.packager.packageData(data)) {
                    return
                }
                realData = this.packager.getData()
                this.packager.clear()
            }
            LogUtils.i(TAG, `receive <<<<<< ${BleUtils.bytesToHex(realData)}`)
            for (let parser of this.parsers) {
                parser.onParser(mac ? mac : "", realData)
            }
    }
三、数据交互
我们以正常同步数据为例一般是为蓝牙设备写入特征码值
 let data = "xx" //同步数据指令
 let characteristics = service.characteristics.find((item) => item.characteristicUuid === characteristicUUID)
 characteristics.characteristicValue = data
 this.dev.writeCharacteristicValue(characteristics, ble.GattWriteType.WRITE_NO_RESPONSE, (err) => {})
触发特征码监听回调函数onCharacteristicChanged:
  onCharacteristicChanged: (data: ArrayBuffer): void => {
            const mac = this.getConnectedMac()
            const dataView = new Uint8Array(data)
            const first = dataView[0]

            let realData = data
            if (first == 0xAB || first == 0xEA || this.packager.isPackageIng()) {
                if (!this.packager.packageData(data)) {
                    return
                }
                realData = this.packager.getData()
                this.packager.clear()
            }
            LogUtils.i(TAG, `receive <<<<<< ${BleUtils.bytesToHex(realData)}`)
            for (let parser of this.parsers) {
                parser.onParser(mac ? mac : "", realData)
            }
    }
解析数据,以同步数据为例
以下是简化步骤
onParser(mac: string, data: ArrayBuffer) {
    // 例子同步心率数据
    DataMgr.saveMeasureHR(mac, dataView)
}
saveMeasureHR(mac,data: HealthData){
    DatabaseMgr.SaveHealth(data)
}
 class DatabaseMgr {
     private store?: relationalStore.RdbStore = undefined
     // 使用鸿蒙自带的关系数据库RdbStore进行大量健康数据的持久化存储
     public async initDatabase(context: Context) {
            relationalStore.getRdbStore(context, DB_CONFIG, (err, store) => {
                if (!store) {
                    LogUtils.i(TAG, `initDatabase fail store is undefined`)
                    return
                }
                this.store = store
            })
    }
    private async SaveHealth(mac,data: HealthData) {
            try {
                let have = await this.haveData("tab_health", data.type, data.time)
                if (have) {
                    return
                }
                const currTime = (new Date().getTime() / 1000) | 0
                const buket: relationalStore.ValuesBucket = {
                    mac,
                    value: data
                }
                const result = await this.store?.insert("tab_health", buket)
            } catch (err) {
                LogUtils.e(TAG, `realSaveHealth err: ${err.code}, msg: ${err.message}`)
            }
        }
 }

讨论HarmonyOS开发技术,专注于API与组件、DevEco Studio、测试、元服务和应用上架分发等。
更多推荐
 3
3 0
0- 0


 已为社区贡献1条内容

所有评论(0)