统一扫码服务
Scan Kit(统一扫码服务)作为软硬协同的系统级扫码服务,创新性地推出了更简单的“扫码直达”接入能力。只需少量的接入工作,无需在应用中开发专门的扫码模块,即可通过系统级扫码入口实现扫码到应用的跳转。同时还为开发者提供了面向各种场景的码图识别和生成能力。在本案例中,开发者将学习如何通过调用Scan Kit的API实现以上功能。
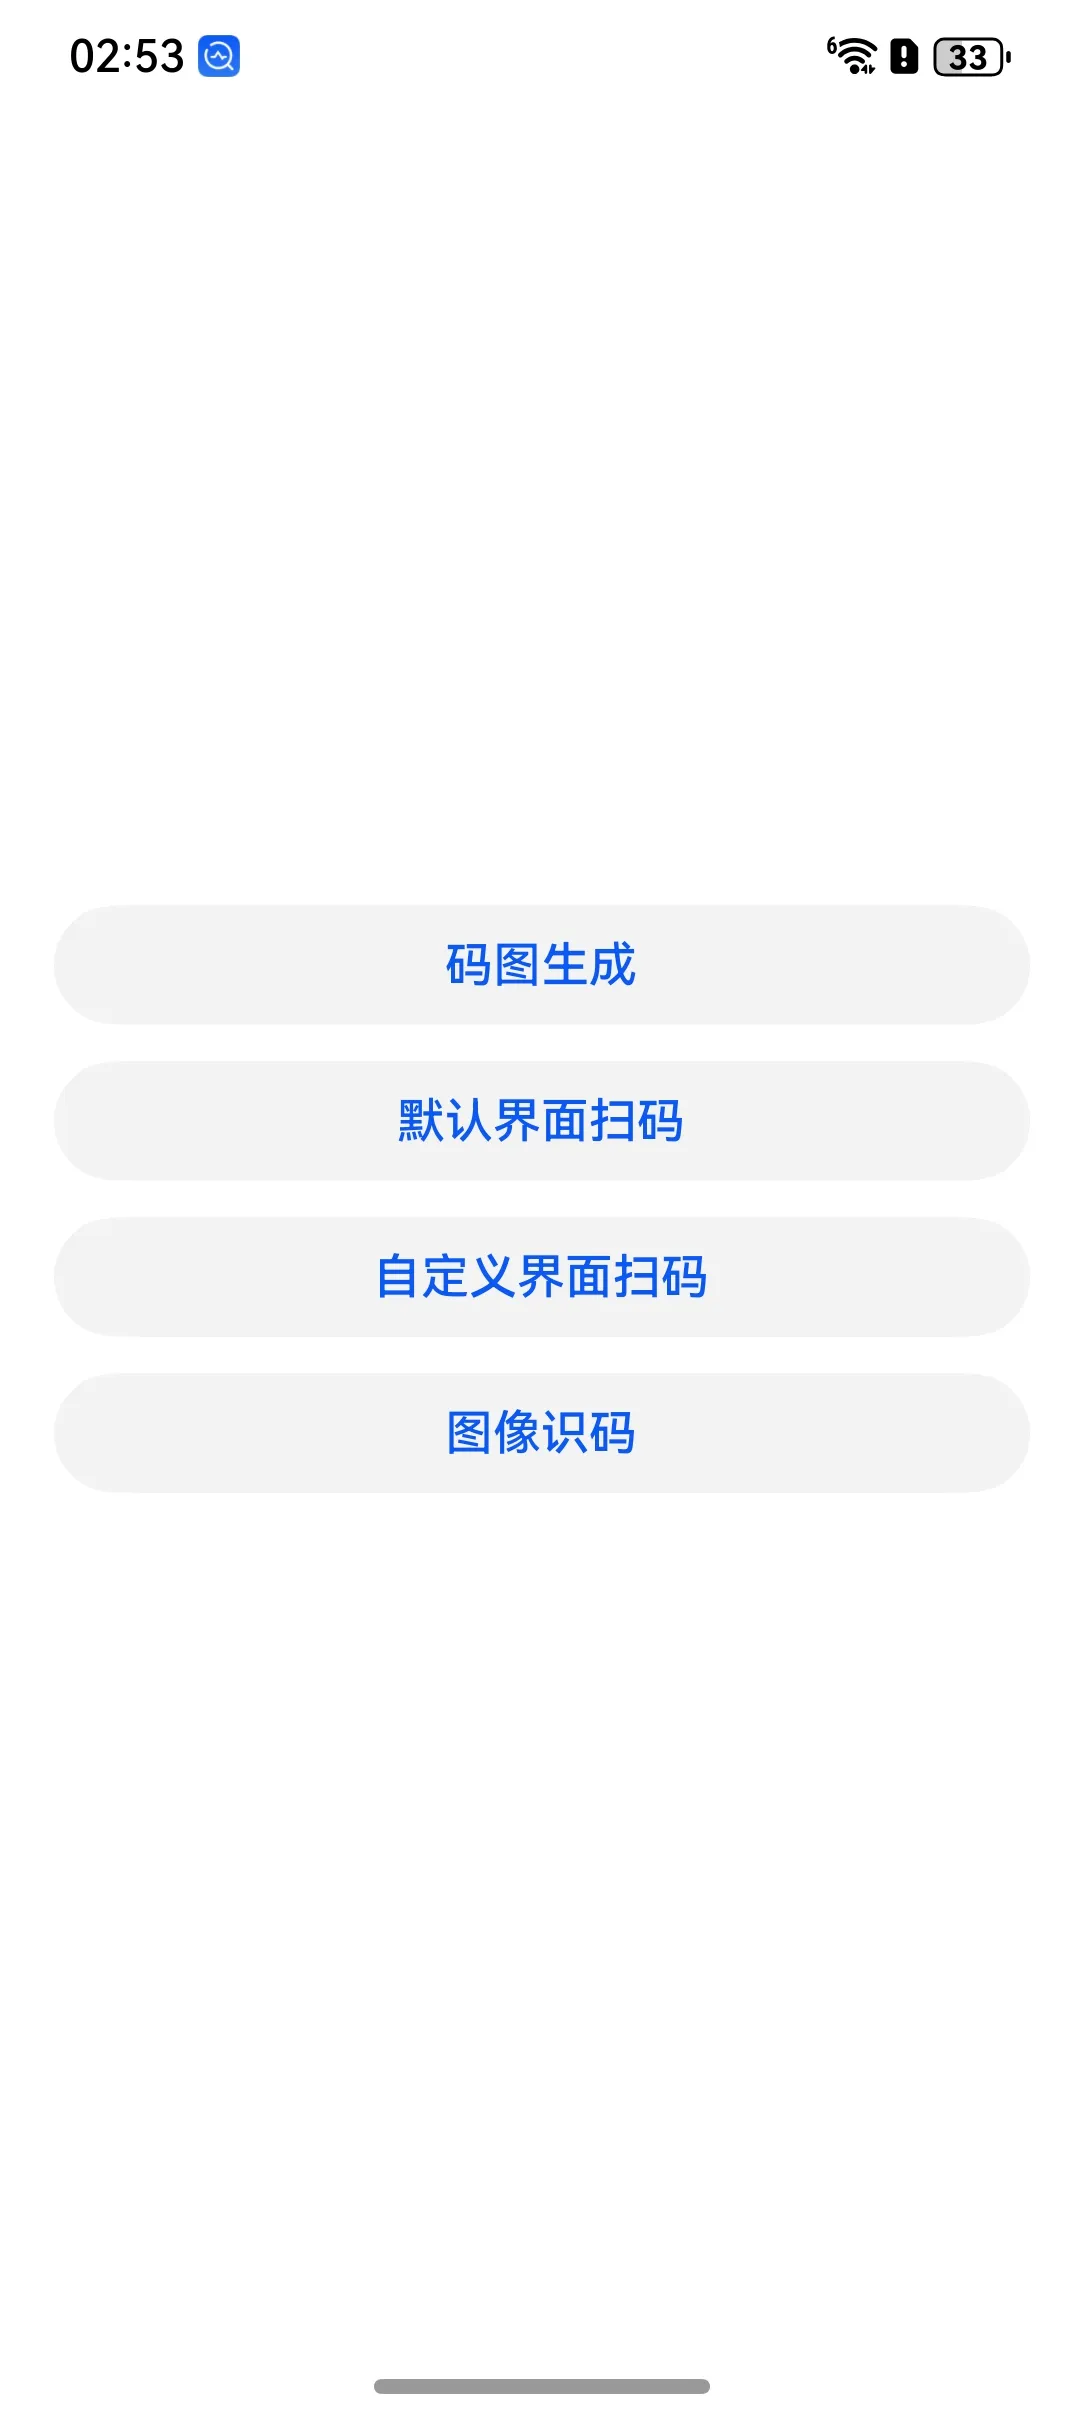
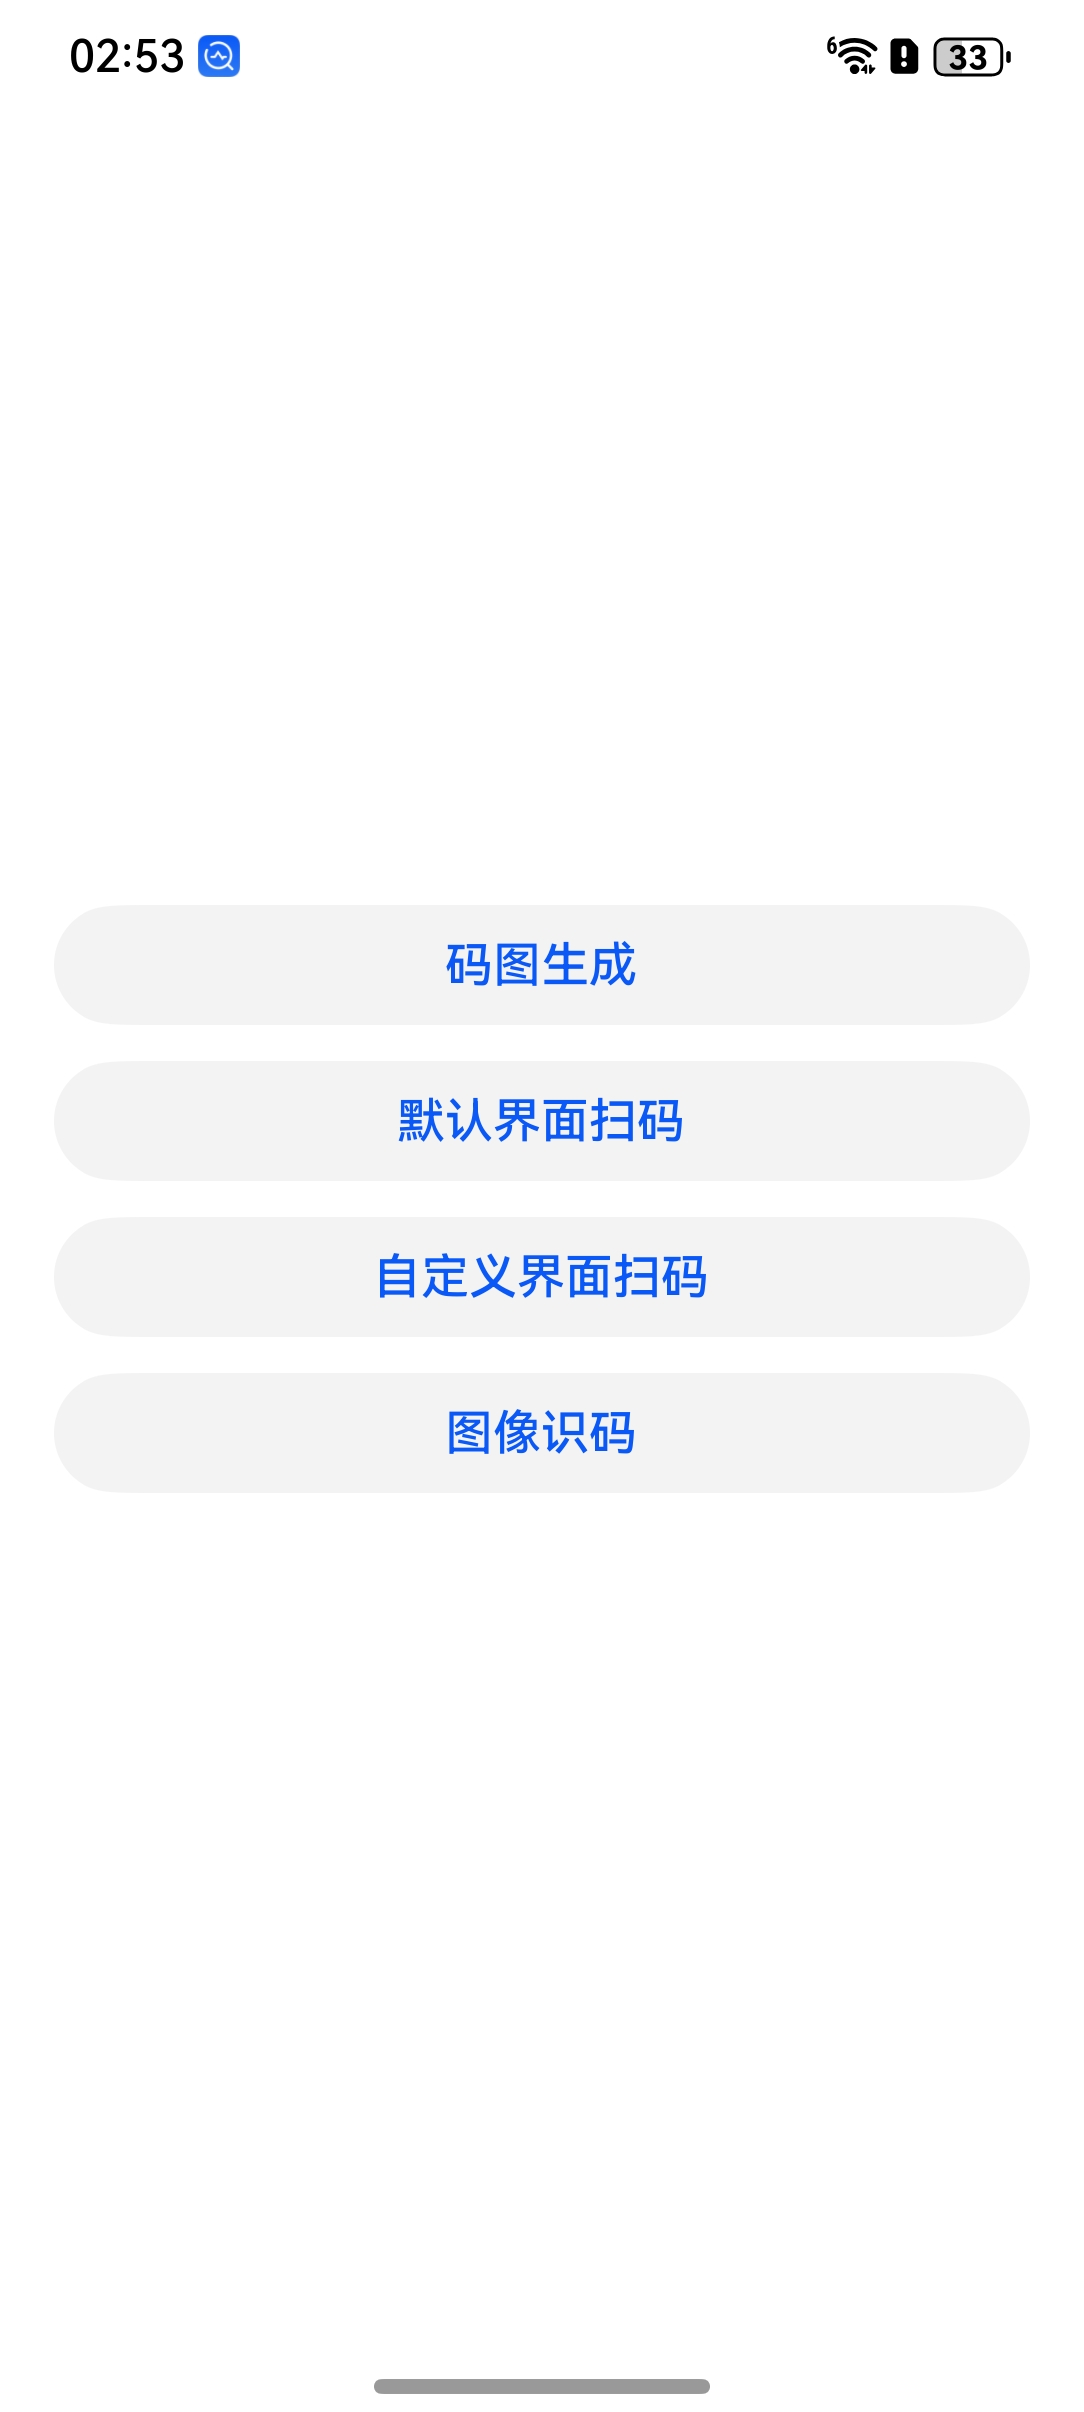
一、案例效果截图
|
首页 |
码图生成 |
默认界面扫码 |
自定义界面扫码 |
图像识码 |
|
|
|
|
|
|
二、案例运用到的知识点
- 核心知识点
- 接入App Linking:仅针对“扫码直达”必选
- 接入“扫码直达”服务
- 默认界面扫码
- 自定义界面扫码
- 图像识码
- 码图生成
- 其他知识点
- ArkTS 语言基础
- V2版状态管理:@ComponentV2/@Local/@Param
- 自定义组件和组件生命周期
- 内置组件:Stack/Scroll/Flex/Column/Row/Text/Image/Button
- 提示框:promptAction
- 图形绘制:Canvas
- UI范式渲染控制:ForEach/if
- 日志管理类的编写
- 常量与资源分类的访问
- MVVM模式
三、相关权限
由于自定义扫码功能需要申请相机权限,因此开发者需要在配置文件“module.json5”里添加相机权限:ohos.permission.CAMERA。
四、代码结构
├──entry/src/main/ets
│  ├──entryability
│  │  ├──EntryAbility.ts       // 本地启动ability
│  └──pages
│  │  ├──BarcodePage.ets       // 默认界面扫码
│  │  ├──CreateBarcode.ets     // 码图生成的界面
│  │  ├──CustomPage.ets        // 自定义界面扫码
│  │  ├──CustomResultPage.ets  // 自定义界面扫码的结果界面
│  │  ├──DetectBarcode.ets     // 图片识码的界面
│  │  ├──Index.ets             // 选择功能入口
│  │  └──ResultPage.ets        // 图片识码的结果界面
│  │  └──ScanAccess.ets        // 扫码直达服务界面
│  └──utils
│  │  ├──Common.ets            // 获取预览流XComponent布局方法
│  │  ├──PermissionsUtil.ets   // 请求用户授权相机权限
└──entry/src/main/resources    // 资源文件目录
五、功能入口页
// entry/src/main/ets/pages/Index.ets

import { router } from '@kit.ArkUI'

@Entry
@ComponentV2
struct Index {
  build() {
    Flex({
      direction: FlexDirection.Column,
      alignItems: ItemAlign.Center,
      justifyContent: FlexAlign.Center
    }) {

      CustomButton({
        mText: $r('app.string.generate_QR_code'), mOnClick: () => {
          router.pushUrl({
            url: 'pages/CreateBarcode'
          })
        }
      })

      CustomButton({
        mText: $r('app.string.default_view_decode'), mOnClick: () => {
          router.pushUrl({
            url: 'pages/BarcodePage'
          })
        }
      })

      CustomButton({
        mText: $r('app.string.customized_view_decode'), mOnClick: () => {
          router.pushUrl({
            url: 'pages/CustomPage',
            params: {
              hasOptions: true,
              isCallback: false
            }
          })
        }
      })

      CustomButton({
        mText: $r('app.string.bitmap_view_decode'), mOnClick: () => {
          router.pushUrl({
            url: 'pages/DetectBarcode'
          })
        }
      })

    }
    .width('100%')
    .height('100%')
  }
}

@ComponentV2
export struct CustomButton {
  @Param mText: string | Resource = ''
  private mHeight: number = 40
  @Param mOnClick: () => void = () => {}

  build() {
    Column() {
      Button(this.mText)
        .backgroundColor($r('sys.color.ohos_id_color_button_normal'))
        .fontColor($r('sys.color.ohos_id_color_text_primary_activated'))
        .align(Alignment.Center)
        .type(ButtonType.Capsule)
        .margin({ bottom: 12 })
        .width('90%')
        .height(this.mHeight)
        .onClick(this.mOnClick)
    }
  }
}
六、接入“扫码直达”服务
在日常生活中,人们会使用各种应用扫各式各样的码,而“扫码直达”服务则为用户带来一种全新的扫码体验。
开发者将域名注册到“扫码直达”服务后,用户可通过控制中心等系统级的常驻入口,扫描应用的二维码、条形码并跳转到应用对应服务页,实现一步直达服务的体验。
- 开发示例:
- 开发者参考App Linking集成指导完成域名注册,并生成应用发行二维码。
- 通过控制中心扫码入口,扫描该二维码。
- 开发步骤:
步骤1. 参考《统一扫码服务》随书配套视频完成域名注册。
步骤2. 创建的包名,配置好的域名映射关系,应用签名配置到应用项目中(项目创建的名称和应用包名“bundleName”一致)。
步骤3. 打开HarmonyOS扫码入口(控制中心扫码入口),扫描应用发行的二维码(已注册域名生成的二维码)。
步骤4. 扫码拉起已安装的应用并直达目标服务页。
七、码图生成
码图生成能力支持将文本或字节数组转换为自定义格式的条形码和二维码,其中通过字节数组生成的码图只支持QR Code。条形码、二维码支持对码图的背景、颜色、边距大小进行设置,QR码可以对码纠错率进行设置。
- 开发示例
- 开发者需要输入符合要求的参数,将参数转换为QR码。
- 建议开发者将通过文本生成的码图保存至手机图库以及本地文件夹,后续将使用此码图进行图像识码、默认界面扫码、自定义界面扫码的开发。
- 开发步骤
步骤1:将示例代码放入需要的项目中,修改如下参数内容。
步骤2:输入符合要求的参数。
- 必选参数:
-
- 码图内容(content):'123' // 需要生成码图的字符串;示例代码中字节数组由字符串转换,方法为buffer.from(content, 'hex').buffer
- 码值类型(scanType):scanCore.ScanType.QR_CODE // QR码
- 码图宽度(width):800 // 像素
- 码图高度(height):800 // 像素
- 可选参数:
-
- 边距(margin):1 // 像素
- 容错率(level):generateBarcode.ErrorCorrectionLevel.LEVEL_H // 百分之三十容错率
- 码图背景色(backgroundColor):0xffffff // 白色
- 码图颜色(pixelMapColor):0x000000 // 黑色
步骤3:点击“码图生成”按钮,通过Promise方式回调进行码图生成,并返回生成的pixelMap格式的二维码图片,即黑色白底的QR码。
- 码图生成页面
// entry/src/main/ets/pages/CreateBarcode.ets

// CreateBarcode.ets 生成条形码图像页面
// 导入必要的模块
import { image } from '@kit.ImageKit'
import { hilog } from '@kit.PerformanceAnalysisKit'
import { promptAction } from '@kit.ArkUI'
import { BusinessError } from '@kit.BasicServicesKit'
import { scanCore, generateBarcode } from '@kit.ScanKit'
import { buffer } from '@kit.ArkTS'

// 日志标签常量
const TAG: string = 'ScanKit CreateBarcode'

// 统一样式扩展定义
@Extend(Text)
function textTitle() {
  .width(60)
  .height(35)
  .fontSize(14)
  .fontColor(0x000000)
  .textAlign(TextAlign.Start)
}

@Extend(TextInput)
function textInput() {
  .caretColor(Color.Blue)
  .fontSize(14)
  .fontWeight(FontWeight.Bold)
  .height(35)
  .width('60%')
}

@Extend(TextArea)
function textTitleArea() {
  .caretColor(Color.Black)
  .fontSize(14)
  .fontColor(Color.Black)
  .fontWeight(FontWeight.Bold)
  .width('80%')
}

@Extend(Select)
function demoSelect() {
  .font({ size: 14 })
  .selectedOptionFont({ size: 14 })
  .optionFont({ size: 14 })
  .width('60%')
  .height(30)
  .backgroundColor('#eeeeee')
}

@Extend(Row)
function rowLine() {
  .justifyContent(FlexAlign.Center)
}

@Extend(Button)
function genButton() {
  .backgroundColor($r('sys.color.ohos_id_color_button_normal'))
  .fontColor($r('sys.color.ohos_id_color_text_primary_activated'))
  .align(Alignment.Center)
  .type(ButtonType.Capsule)
  .width('90%')
  .height(40)
}

// 页面组件入口定义
@Entry
@ComponentV2
struct CreateBarcodePage {
  // 定义状态变量(可响应式更新)
  @Local pixelMap: image.PixelMap | undefined = undefined // 条形码图片
  @Local codeContext: string = '123' // 条形码内容默认值
  @Local codeScanType: number = scanCore.ScanType.QR_CODE // 条形码类型,默认 QR_CODE
  @Local codeWidth: string = '800' // 宽度(px)
  @Local codeHeight: string = '800' // 高度(px)
  @Local codeMargin: number = 1 // 边距
  @Local codeLevel: generateBarcode.ErrorCorrectionLevel = generateBarcode.ErrorCorrectionLevel.LEVEL_H // 容错级别
  @Local codeBackgroundColor: number = 0xffffff // 背景色
  @Local codePixelMapColor: number = 0x000000 // 前景色(条码颜色)
  @Local pixelMapWidth: number = 300 // 条形码显示宽度

  build() {
    Column() {
      Column() {
        // 设置条码内容
        Row() {
          Text($r('app.string.barcode_content')).textTitle()
          TextArea({ placeholder: this.codeContext })
            .textTitleArea()
            .onChange((value: string) => {
              this.codeContext = value
            })
        }.width('100%').rowLine()

        // 设置宽高
        Row() {
          Row() {
            Text($r('app.string.barcode_width')).textTitle()
            TextInput({ placeholder: this.codeWidth }).textInput()
              .type(InputType.Number)
              .onChange((value: string) => {
                this.codeWidth = value
              })
          }.width('50%').rowLine()

          Row() {
            Text($r('app.string.barcode_height')).textTitle()
            TextInput({ placeholder: this.codeHeight }).textInput()
              .type(InputType.Number)
              .onChange((value: string) => {
                this.codeHeight = value
              })
          }.width('50%').rowLine()
        }

        // 设置类型与边距
        Row() {
          Row() {
            Text($r('app.string.barcode_type')).textTitle()
            Column() {
              Select(ScanConstant.codeTypeItems)
                .value('QR_CODE')
                .selected(10)
                .demoSelect()
                .onSelect((index: number, value?: string) => {
                  hilog.info(0x0001, TAG, `Succeeded in selecting scanType, index is ${index}`)
                  this.codeScanType = getTypeNum(value)
                })
            }
          }.width('50%').rowLine()

          Row() {
            Text($r('app.string.barcode_margin')).textTitle()
            TextInput({ placeholder: '1' }).textInput()
              .type(InputType.Number)
              .onChange((value: string) => {
                this.codeMargin = Number.parseInt(value)
              })
          }.width('50%').rowLine()
        }

        // 设置颜色与背景色
        Row() {
          Row() {
            Text($r('app.string.barcode_color')).textTitle()
            Column() {
              Select(ScanConstant.colorItems)
                .selected(0)
                .value('Black')
                .width(100)
                .demoSelect()
                .onSelect((index: number, value?: string) => {
                  hilog.info(0x0001, TAG, `Succeeded in selecting pixelMapColor, index is ${index}`)
                  this.codePixelMapColor = getColorType(value)
                })
            }
          }.width('50%').rowLine()

          Row() {
            Text($r('app.string.barcode_backgroundcolor')).textTitle()
            Column() {
              Select(ScanConstant.colorItems)
                .selected(7)
                .value('White')
                .width(80)
                .demoSelect()
                .onSelect((index: number, value?: string) => {
                  hilog.info(0x0001, TAG, `Succeeded in selecting backgroundColor, index is ${index}`)
                  this.codeBackgroundColor = getColorType(value)
                })
                .align(Alignment.Center)
            }
          }.width('50%').rowLine()
        }

        // 设置容错等级
        Row() {
          Row() {
            Text($r('app.string.barcode_error_level')).textTitle()
            Column() {
              Select(ScanConstant.errorLevelItems)
                .selected(3)
                .value('LEVEL_H')
                .demoSelect()
                .onSelect((index: number, value?: string) => {
                  hilog.info(0x0001, TAG, `Succeeded in selecting errorLevel, index is ${index}`)
                  this.codeLevel = getLevelType(value)
                })
            }
          }.width('50%').rowLine()

          Row() {
          }.width('50%').rowLine()
        }

        // 按钮:根据文本生成条形码
        Button($r('app.string.generate_barcode')).genButton()
          .onClick(() => {
            this.pixelMap = undefined
            let content = this.codeContext
            let options: generateBarcode.CreateOptions = {
              scanType: this.codeScanType,
              width: Number(this.codeWidth),
              height: Number(this.codeHeight),
              margin: Number(this.codeMargin),
              level: this.codeLevel,
              backgroundColor: this.codeBackgroundColor,
              pixelMapColor: this.codePixelMapColor,
            }
            try {
              generateBarcode.createBarcode(content, options).then((result: image.PixelMap) => {
                this.pixelMap = result
              }).catch((error: BusinessError) => {
                showError(error)
                hilog.error(0x0001, TAG, `Failed to get pixelMap by promise with options. Code: ${error.code}, message: ${error.message}`)
              })
            } catch (error) {
              showError(error)
              hilog.error(0x0001, TAG, `Failed to createBarCode. Code: ${error.code}, message: ${error.message}`)
            }
          })

        // 按钮:根据十六进制字节数组生成条形码
        Button($r('app.string.generate_trip_barcode')).genButton()
          .onClick(() => {
            this.pixelMap = undefined
            let content = this.codeContext
            let pattern = /^[0-9a-fA-F]+$/
            if (content.length && !pattern.test(content)) {
              promptAction.showToast({
                message: $r('app.string.trip_barcode_tip'),
                duration: 2000
              })
              return
            }
            if (content.length % 2 !== 0) {
              content = '0' + content
            }
            let contentBuffer: ArrayBuffer = buffer.from(content, 'hex').buffer
            let options: generateBarcode.CreateOptions = {
              scanType: this.codeScanType,
              height: Number(this.codeHeight),
              width: Number(this.codeWidth),
              margin: Number(this.codeMargin),
              level: this.codeLevel,
              backgroundColor: this.codeBackgroundColor,
              pixelMapColor: this.codePixelMapColor,
            }
            try {
              generateBarcode.createBarcode(contentBuffer, options).then((result: image.PixelMap) => {
                this.pixelMap = result
                hilog.info(0x0001, TAG, 'Succeeded in creating barCode.')
              }).catch((error: BusinessError) => {
                showError(error)
                hilog.error(0x0001, TAG, `Failed to createBarcode. Code: ${error.code}, message: ${error.message}`)
              })
            } catch (error) {
              showError(error)
              hilog.error(0x0001, TAG, `Failed to catch createBarcode. Code: ${error.code}, message: ${error.message}`)
            }
          })
      }
      .width('100%')
      .height(340)
      .margin({ bottom: 10 })
      .justifyContent(FlexAlign.SpaceBetween)

      // 显示生成的条码图像
      Column() {
        if (this.pixelMap) {
          Image(this.pixelMap).width(this.pixelMapWidth).height(this.pixelMapWidth).objectFit(ImageFit.Contain)
        }
      }
      .width('100%')
      .margin(10)
      .layoutWeight(1)
      .onAreaChange((_: Area, newvalue: Area) => {
        // 根据区域变化自适应图像宽度
        let min = Math.min(newvalue.width as number, newvalue.height as number)
        if (min < 320) {
          this.pixelMapWidth = min - 20
        }
      })
    }
    .width('100%')
    .height('100%')
    .backgroundColor('#eeeeee')
    .padding({
      left: 10,
      top: 40,
      right: 10,
      bottom: 10
    })
  }
}

// 显示错误提示函数
function showError(businessError: BusinessError): void {
  try {
    promptAction.showToast({
      message: `Error Code: '${businessError.code}', message: ${businessError.message}`,
      duration: 2000
    })
  } catch (error) {
    if (error) {
      hilog.error(0x0001, TAG, `Failed to ShowToast. Code: ${error.code}, message: ${error.message}`)
    }
  }
}

// 常量类:包含下拉选择内容
export default class ScanConstant {
  // 色彩列表
  static readonly colorItems: Array<SelectOption> = [
    {
      value: 'Black'
    },
    {
      value: 'Blue'
    },
    {
      value: 'Brown'
    },
    {
      value: 'Gray'
    },
    {
      value: 'Green'
    },
    {
      value: 'Orange'
    },
    {
      value: 'Red'
    },
    {
      value: 'White'
    },
    {
      value: 'Yellow'
    }]
  // 容错级别
  static readonly errorLevelItems: Array<SelectOption> = [
    {
      value: 'LEVEL_L'
    },
    {
      value: 'LEVEL_M'
    },
    {
      value: 'LEVEL_Q'
    },
    {
      value: 'LEVEL_H'
    }]
  // 条码类型
  static readonly codeTypeItems: Array<SelectOption> = [
    {
      value: 'AZTEC_CODE'
    },
    {
      value: 'CODABAR_CODE'
    },
    {
      value: 'CODE93_CODE'
    },
    {
      value: 'CODE39_CODE'
    },
    {
      value: 'CODE128_CODE'
    },
    {
      value: 'DATAMATRIX_CODE'
    },
    {
      value: 'EAN8_CODE'
    },
    {
      value: 'EAN13_CODE'
    },
    {
      value: 'ITF14_CODE'
    },
    {
      value: 'PDF417_CODE'
    },
    {
      value: 'QR_CODE'
    },
    {
      value: 'UPC_A_CODE'
    },
    {
      value: 'UPC_E_CODE'
    }]
}

// 获取容错级别枚举值
function getLevelType(type?: string): generateBarcode.ErrorCorrectionLevel {
  const LEVEL_TYPE: Record<string, number> = {
    'LEVEL_L': generateBarcode.ErrorCorrectionLevel.LEVEL_L,
    'LEVEL_M': generateBarcode.ErrorCorrectionLevel.LEVEL_M,
    'LEVEL_Q': generateBarcode.ErrorCorrectionLevel.LEVEL_Q,
    'LEVEL_H': generateBarcode.ErrorCorrectionLevel.LEVEL_H
  }
  return type ? LEVEL_TYPE[type] || LEVEL_TYPE['LEVEL_H'] : LEVEL_TYPE['LEVEL_H']
}

// 获取颜色十六进制编码
function getColorType(type?: string): number {
  const COLOR_MAP: Record<string, number> = {
    'Black': 0x000000,
    'Blue': 0x0000ff,
    'Brown': 0xa52a2a,
    'Gray': 0x808080,
    'Green': 0x008000,
    'Orange': 0xffa500,
    'Red': 0xff0000,
    'White': 0xffffff,
    'Yellow': 0xffff00,
    'Default': 0x1e1e1e
  }
  return type ? COLOR_MAP[type] || COLOR_MAP['Black'] : COLOR_MAP['Black']
}

// 获取扫码类型枚举值
function getTypeNum(type?: string): scanCore.ScanType {
  const SCAN_TYPE: Record<string, number> = {
    'AZTEC_CODE': scanCore.ScanType.AZTEC_CODE,
    'CODABAR_CODE': scanCore.ScanType.CODABAR_CODE,
    'CODE39_CODE': scanCore.ScanType.CODE39_CODE,
    'CODE93_CODE': scanCore.ScanType.CODE93_CODE,
    'CODE128_CODE': scanCore.ScanType.CODE128_CODE,
    'DATAMATRIX_CODE': scanCore.ScanType.DATAMATRIX_CODE,
    'EAN8_CODE': scanCore.ScanType.EAN8_CODE,
    'EAN13_CODE': scanCore.ScanType.EAN13_CODE,
    'ITF14_CODE': scanCore.ScanType.ITF14_CODE,
    'PDF417_CODE': scanCore.ScanType.PDF417_CODE,
    'QR_CODE': scanCore.ScanType.QR_CODE,
    'UPC_A_CODE': scanCore.ScanType.UPC_A_CODE,
    'UPC_E_CODE': scanCore.ScanType.UPC_E_CODE
  }
  return type ? SCAN_TYPE[type] || SCAN_TYPE['QR_CODE'] : SCAN_TYPE['QR_CODE']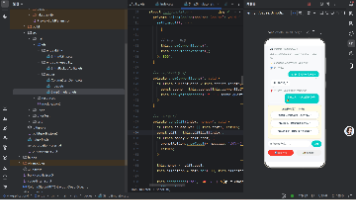
}- 效果图

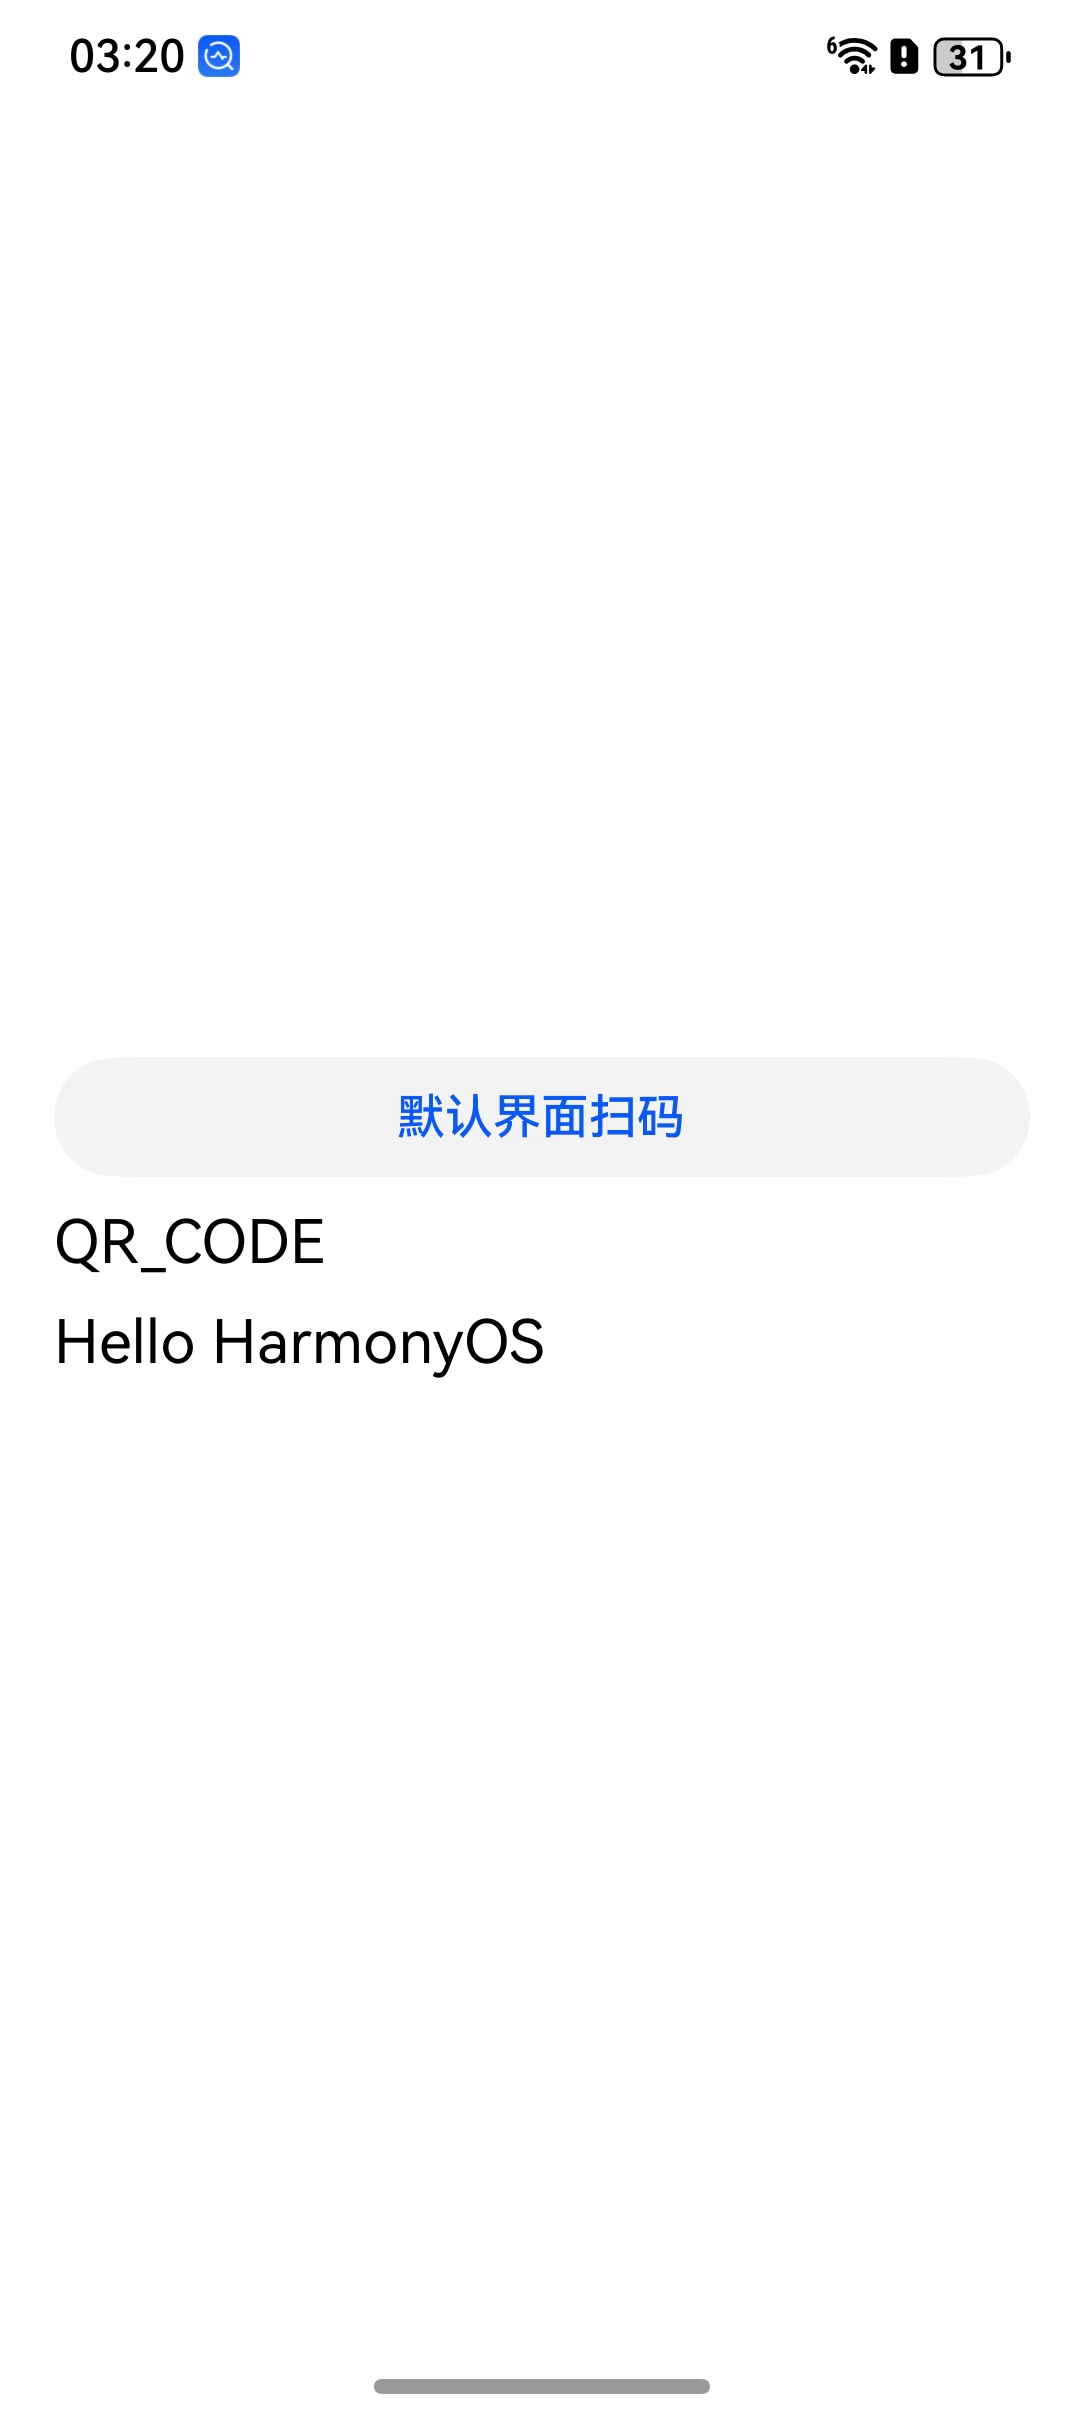
八、默认界面扫码
Scan Kit在HarmonyOS提供了系统级扫码接口,当前提供了默认界面扫码能力,支持单码和多码识别,且无需再使用传统方式集成SDK,助力您的应用快速构建强大的扫码能力。
- 开发示例:
- 开发者需要将通过码图生成功能生成的QR码作为码源,进行扫码识别。
- 识别结果与码图生成功能中的字符串信息('huawei')以及码值类型(scanCore.ScanType.QR_CODE)一致。
- 开发步骤:
步骤1. 将示例代码放入需要的项目中并编译。
步骤2. 手动点击“默认界面扫码”按钮,显示默认界面后,完成扫码操作,并获取到扫码结果。
- 默认界面扫码页
// entry/src/main/ets/pages/BarcodePage.ets

// BarcodePage.ets 使用默认 UI 扫描条形码或二维码。
import { hilog } from '@kit.PerformanceAnalysisKit' // 引入日志工具,用于调试输出
import { scanCore, scanBarcode } from '@kit.ScanKit' // 引入扫码核心和扫码功能模块
import { BusinessError } from '@kit.BasicServicesKit' // 引入通用错误处理模块

// 日志标签,用于在日志输出中标识当前模块
const TAG: string = 'ScanKit scanBarcode'

// 定义扫描类型与其对应名称的映射关系,便于展示识别结果的类型
const SCAN_TYPE: Record<number, string> = {
  0: 'FORMAT_UNKNOWN',
  1: 'AZTEC_CODE',
  2: 'CODABAR_CODE',
  3: 'CODE39_CODE',
  4: 'CODE93_CODE',
  5: 'CODE128_CODE',
  6: 'DATAMATRIX_CODE',
  7: 'EAN8_CODE',
  8: 'EAN13_CODE',
  9: 'ITF14_CODE',
  10: 'PDF417_CODE',
  11: 'QR_CODE',
  12: 'UPC_A_CODE',
  13: 'UPC_E_CODE',
  14: 'MULTIFUNCTIONAL_CODE',
  100: 'ONE_D_CODE',
  101: 'TWO_D_CODE'
}

// 主页面组件,负责渲染扫码按钮并处理扫码结果
@Entry
@ComponentV2
struct ScanBarcodePage {
  // 用于存储扫码结果的内容
  @Local inputValue: string = ''
  // 用于存储扫码结果的类型编号
  @Local scanType: number = -1

  // 页面构建函数
  build() {
    Column() {
      // 按钮:点击后启动扫码
      Button($r('app.string.default_view_decode')) // 按钮显示文本从资源中获取
        .backgroundColor($r('sys.color.ohos_id_color_button_normal')) // 背景颜色
        .fontColor($r('sys.color.ohos_id_color_text_primary_activated')) // 字体颜色
        .align(Alignment.Center) // 居中对齐
        .type(ButtonType.Capsule) // 胶囊按钮类型
        .margin({ bottom: 12 }) // 外边距
        .width('90%')
        .height(40)
        .margin({ top: 5, bottom: 5 })
        .onClick(() => {
          // 定义扫码参数
          let options: scanBarcode.ScanOptions = {
            scanTypes: [scanCore.ScanType.ALL], // 支持所有类型
            enableMultiMode: true,              // 支持多码识别
            enableAlbum: true                   // 支持从相册识别
          }

          try {
            // 调用扫码方法,并使用 Promise 获取结果
            scanBarcode.startScanForResult(getContext(this), options).then((result: scanBarcode.ScanResult) => {
              // 成功获取扫码结果
              this.scanType = result.scanType // 存储扫码类型编号
              this.inputValue = result.originalValue // 存储扫码内容
              hilog.debug(0x0001, TAG, `Succeeded in getting ScanResult by promise with options.`)
            }).catch((error: BusinessError) => {
              // 扫码过程中用户取消服务
              if (error.code === scanCore.ScanErrorCode.SCAN_SERVICE_CANCELED) {
                hilog.info(0x0001, TAG, `Disabling the Scanning Service.`)
              } else {
                // 扫码失败日志
                hilog.error(0x0001, TAG,
                  `Failed to start the scanning service. Code: ${error.code}, message: ${error.message}`)
              }
            })
          } catch (error) {
            // 扫码启动失败异常处理
            hilog.error(0x0001, TAG, `Failed to start scan. Code: ${error.code}, message: ${error.message}`)
          }
        })

      // 自定义组件显示扫码结果和类型
      CustomTextBox({ scanType: this.getScanTypeKey(this.scanType), inputValue: this.inputValue })
    }
    .width('100%')
    .height('100%')
    .justifyContent(FlexAlign.Center) // 垂直方向居中
    .alignItems(HorizontalAlign.Center) // 水平方向居中
  }

  // 根据扫码类型编号获取对应字符串标签
  public getScanTypeKey(type: number): string {
    return SCAN_TYPE[type] || ''
  }
}

// 自定义组件:展示扫码类型和内容
@Component
export struct CustomTextBox {
  @Prop inputValue: string = '' // 扫码结果内容
  @Prop scanType: string = ''   // 扫码类型名称

  build() {
    Column() {
      Column() {
        // 显示扫码类型
        Text(this.scanType)
          .fontSize(20)
          .fontColor(Color.Black)
          .fontWeight(FontWeight.Normal)
          .align(Alignment.Center)
          .width('90%')
          .margin({ top: 5, bottom: 5 })
      }

      Column() {
        // 显示扫码内容
        Text(this.inputValue)
          .fontSize(20)
          .fontColor(Color.Black)
          .fontWeight(FontWeight.Normal)
          .align(Alignment.Center)
          .width('90%')
          .margin({ top: 5, bottom: 5 })
      }
    }
  }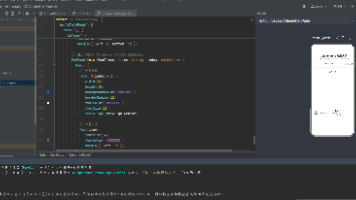
}- 界面效果


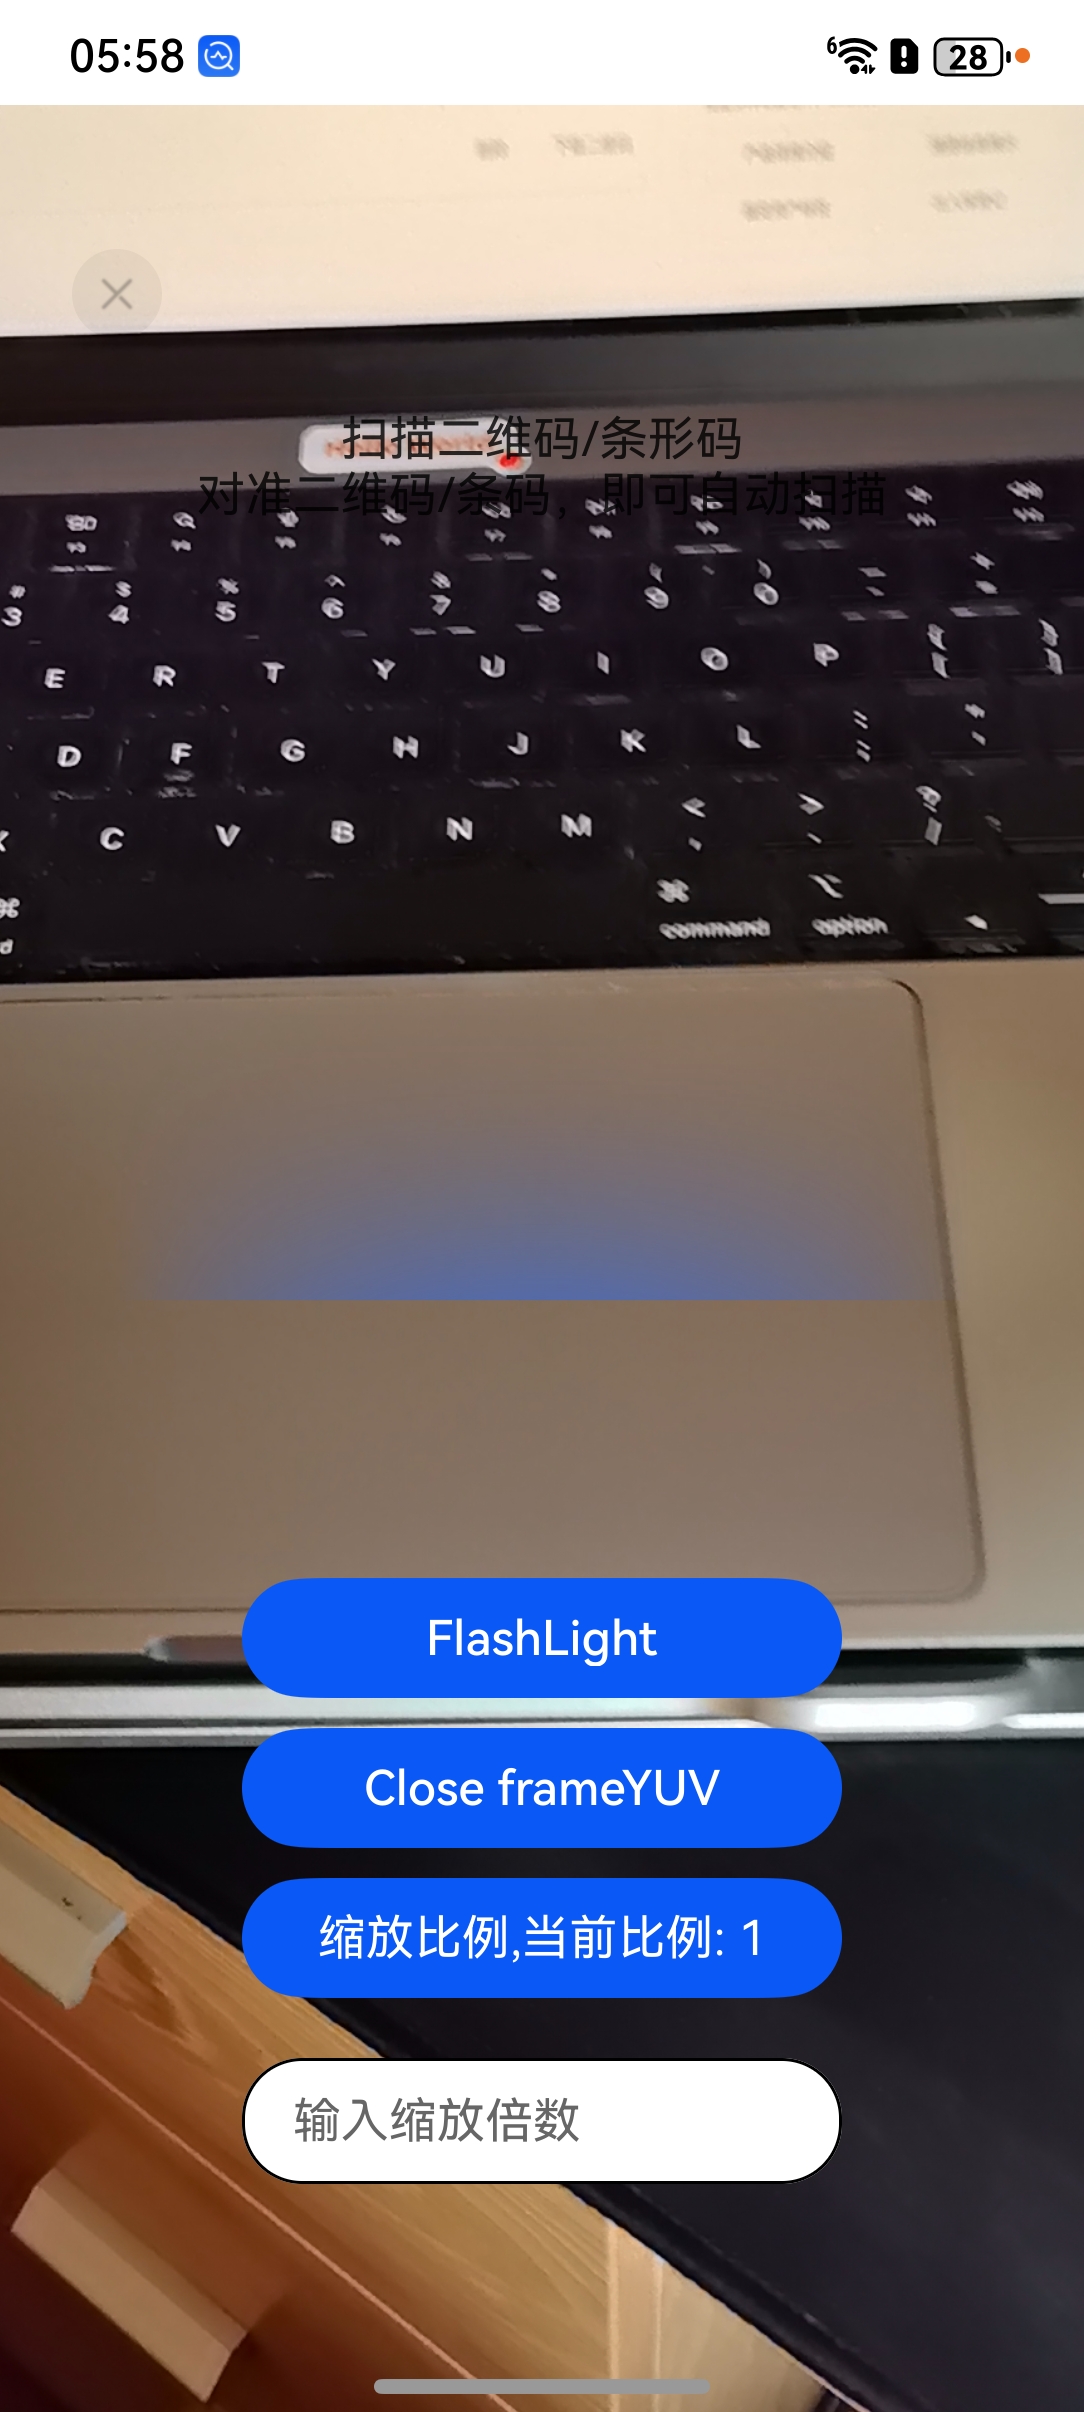
九、自定义界面扫码
自定义扫码提供了扫码相机流控制接口,支持扫码界面自定义并实现基本的扫码功能。您可根据相应场景来开启、暂停和释放相机流,还可根据相应的光线条件来控制闪光灯的打开和关闭,便于用户进行扫码。
- 开发示例:
- 您需要将通过码图生成功能生成的QR码作为码源,保存或者另外准备码图进行扫码识别。
- 识别结果与码图生成功能中的字符串信息('huawei')以及码值类型(scanCore.ScanType.QR_CODE)一致,返回当前图片中码图的位置信息。
- 开发步骤:
步骤1. 在“entry/src/main/module.json5”文件中配置相机权限。
"requestPermissions": [
  {
    "name": "ohos.permission.CAMERA",
    "reason": "$string:permission_reason_camera",
    "usedScene": {
      "abilities": [
        "EntryAbility"
      ],
      "when": "always"
    }
  }
]步骤2. 根据扫码场景,调用扫码相机流控制接口,通过Callback方式获取扫码结果和相机预览流(YUV)。
//entry/src/main/ets/pages/CustomPage.ets

// CustomPage.ets - 使用自定义UI组件扫描条形码
import { curves, display, promptAction, router } from '@kit.ArkUI'
import { hilog } from '@kit.PerformanceAnalysisKit'
import { scanCore, scanBarcode, customScan } from '@kit.ScanKit'
import { AsyncCallback, BusinessError } from '@kit.BasicServicesKit'
import { xComDisplay, getXComDisplay } from '../utils/Common'
import { PermissionsUtil } from '../utils/PermissionsUtil'
import { abilityAccessCtrl, Permissions } from '@kit.AbilityKit'

const TAG: string = 'ScanKit CustomPage' // 日志标签
let setInterFlag: number // "未找到条形码"消息的定时器ID
let toResultPage: number // 跳转到结果页的定时器ID

// 为Row组件扩展扫描区域尺寸设置
@Extend(Row)
function scanSizes(position: scanBarcode.ScanCodeRect, xDisplay: xComDisplay) {
  .width(position.right - position.left)
  .height(position.bottom - position.top)
  .position({ x: position.left + xDisplay.offsetX, y: position.top + xDisplay.offsetY })
}

// 为Image组件扩展扫描中心点定位
@Extend(Image)
function scanCenter(position: scanBarcode.ScanCodeRect, xDisplay: xComDisplay) {
  .width(40)
  .height(40)
  .markAnchor({ x: 20, y: 20 })
  .position({
    x: (position.left + position.right)/2 + xDisplay.offsetX,
    y: (position.top + position.bottom)/2 + xDisplay.offsetY
  })
}

// 按钮样式扩展
@Extend(Button)
function button() {
  .backgroundColor($r('sys.color.ohos_id_color_text_primary_activated'))
  .fontColor(Color.White)
  .align(Alignment.Center)
  .type(ButtonType.Capsule)
  .margin({ bottom: 10 })
  .width(200)
  .height(40)
  .borderRadius(20)
}

// 按钮行的Row样式扩展
@Extend(Row)
function btnRow() {
  .backgroundColor($r('sys.color.ohos_id_color_text_primary_activated'))
  .align(Alignment.Center)
  .margin({ bottom: 10 })
  .width(200)
  .height(40)
  .borderRadius(20)
  .justifyContent(FlexAlign.Center)
}

// 按钮行文本样式扩展
@Extend(Text)
function btnTextRow() {
  .fontColor(Color.White)
  .align(Alignment.Center)
  .height(40)
}

// 条形码四角指示器样式扩展
@Extend(Row)
function angleSizes(x: number, y: number, borderOption: BorderOptions, xDisplay: xComDisplay) {
  .width(20)
  .height(20)
  .border(borderOption)
  .borderColor($r('sys.color.comp_background_list_card'))
  .position({ x: x + xDisplay.offsetX, y: y + xDisplay.offsetY })
}

@Entry
@ComponentV2
struct CustomScanPage {
  @Local userGrant: boolean = false // 相机权限状态
  @Local surfaceId: string = '' // 相机预览的surface ID
  @Local isShowScanResult: boolean = false // 是否检测到条形码
  @Local isFlashLightEnable: boolean = false // 闪光灯状态
  @Local isSensorLight: boolean = false // 环境光线状态
  @Local isStopCamera: boolean = false // 相机是否已停止
  @Local zoomValue: number = 1 // 当前缩放值
  @Local setZoomValue: number = 1 // 显示的缩放值
  @Local count: number = 0 // 帧计数器
  @Local isShowFrameResult: boolean = true // 显示帧检测结果
  @Local scaleValue: number = 1 // 屏幕缩放比例
  @Local pinchValue: number = 1 // 双指缩放值
  @Local displayHeight: number = 640 // 屏幕高度
  @Local displayWidth: number = 360 // 屏幕宽度

  // XComponent的显示配置
  @Local xComDisplay: xComDisplay = {
    width: 360,
    height: 640,
    offsetX: 0,
    offsetY: 0
  }

  // 自定义扫描的视图控制参数
  @Local viewControl: customScan.ViewControl =
    { width: this.xComDisplay.width, height: this.xComDisplay.height, surfaceId: this.surfaceId }

  // 存储扫描结果的数组
  @Local scanCodeRectCallback: Array<scanBarcode.ScanCodeRect> = []
  @Local scanCodeRect: Array<scanBarcode.ScanResult> = []
  @Local scanCodeRectLength: number = 0
  @Local scanCodeRectFrameCallback: Array<scanBarcode.ScanCodeRect> = []

  // 扫描线动画状态
  @Local scanLineY: string = '0'

  // XComponent控制器
  private mXComponentController: XComponentController = new XComponentController()

  // 扫描结果回调
  private callback: AsyncCallback<Array<scanBarcode.ScanResult>> = async (error: BusinessError, result:
    Array<scanBarcode.ScanResult>) => {
    if (error) {
      hilog.error(0x0001, TAG, `获取ScanResult回调失败. 错误码: ${error.code}, 消息: ${error.message}`)
      return
    }
    this.scanCodeRect = result
    this.scanCodeRectCallback = []
    this.scanCodeRectLength = 0
    this.showScanResult(result)
  }

  // YUV数据处理的帧回调
  private frameCallback: AsyncCallback<customScan.ScanFrame> =
    async (error: BusinessError, frameResult: customScan.ScanFrame) => {
      if (error || !this.isShowFrameResult) {
        hilog.error(0x0001, TAG, `帧回调失败, 错误码: ${error.code}, 消息: ${error.message}`)
      } else {
        customScan.off('lightingFlash')
        hilog.info(0x0001, TAG, `帧回调宽度: ${frameResult.width}, 高度: ${frameResult.height}`)

        // 降低处理频率(当前每帧处理)
        if ((this.count++ % 1) === 0) {
          let ratio: number
          ratio = this.xComDisplay.width / frameResult.height

          // 处理检测到的条形码矩形区域
          if (frameResult.scanCodeRects && frameResult.scanCodeRects.length > 0) {
            this.scanCodeRectFrameCallback = []
            frameResult.scanCodeRects?.forEach((item: scanBarcode.ScanCodeRect) => {
              let reactConverts: scanBarcode.ScanCodeRect = {
                left: (frameResult.height - item.bottom) * ratio,
                top: item.left * ratio,
                right: (frameResult.height - item.top) * ratio,
                bottom: item.right * ratio
              }
              this.scanCodeRectFrameCallback.push(reactConverts)
            })
          }
        }
      }
    }

  // 生命周期 - 页面即将显示时调用
  aboutToAppear(): void {
    this.setDisplay()
  }

  // 页面显示时调用
  async onPageShow() {
    hilog.info(0x0001, TAG, `onPageShow - 请求相机权限前 this.userGrant: ${this.userGrant}`)

    // 检查并请求相机权限
    const permissions: Array<Permissions> = ['ohos.permission.CAMERA']
    let grantStatus = await PermissionsUtil.checkAccessToken(permissions[0])
    if (grantStatus === abilityAccessCtrl.GrantStatus.PERMISSION_GRANTED) {
      this.userGrant = true
    } else {
      let grantStatus = await PermissionsUtil.reqPermissionsFromUser()
      let length: number = grantStatus.length
      for (let i = 0; i < length; i++) {
        if (grantStatus[i] === 0) {
          hilog.info(0x0001, TAG, `用户权限请求成功`)
          this.userGrant = true
          break
        }
      }
    }

    // 如果权限已授予,检查是否为折叠设备
    if (this.userGrant) {
      if (display.isFoldable()) {
        this.foldStatusSubscribe()
      }
    }
  }

  // 页面隐藏时调用
  async onPageHide() {
    this.userGrant = false
    this.isFlashLightEnable = false
    this.isSensorLight = false
    this.customOffLightingFlash()
    clearTimeout(setInterFlag)
    await this.customScanRelease() // 释放相机资源
  }

  // 页面即将消失时调用
  aboutToDisappear(): void {
    if (display.isFoldable()) {
      display.off('foldStatusChange') // 取消折叠状态监听
    }
  }

  // 构建顶部工具栏UI
  @Builder
  TopTool() {
    Column() {
      Flex({ direction: FlexDirection.Row, justifyContent: FlexAlign.SpaceBetween, alignItems: ItemAlign.Center }) {
        Image($rawfile('scan_back.svg'))
          .fillColor(Color.Black)
          .width(30)
          .height(30)
          .objectFit(ImageFit.Contain)
          .onClick(async () => {
            router.back()
          })
      }.padding({ left: 24, right: 24, top: 24 })

      Column() {
        Text($r('app.string.Scan_barcode'))
        Text($r('app.string.Scan_barcode_tips'))
      }.margin({ left: 24, right: 24, top: 24 })
    }
    .height(146)
    .width('100%')
    .margin({ top: 24 })
  }

  // 主构建函数
  build() {
    Stack() {
      if (this.userGrant) {
        Column() {
          // 相机预览的XComponent
          XComponent({
            id: 'componentId',
            type: XComponentType.SURFACE,
            controller: this.mXComponentController
          })
            .onLoad(async () => {
              hilog.info(0x0001, TAG, 'XComponent加载成功,onLoad被调用')
              this.surfaceId = this.mXComponentController.getXComponentSurfaceId()
              hilog.info(0x0001, TAG, `成功获取surfaceId: ${this.surfaceId}`)
              this.customScanInit() // 初始化扫描
            })
            .width(this.xComDisplay.width)
            .height(this.xComDisplay.height)
            .position({ x: this.xComDisplay.offsetX, y: this.xComDisplay.offsetY })
        }
        .height('100%')
        .width('100%')
      }

      // 扫描线动画(未检测到条形码时显示)
      if (this.scanCodeRectLength === 0) {
        Column() {
          Image($rawfile('scan_shadow.png')).width('100%')
            .position({ x: 0, y: this.scanLineY })
            .rotate({
              x: 1,
              angle: 180,
              centerX: 0,
              centerY: 0
            })
        }
        .position({ x: '10%', y: '35%' })
        .width('80%')
        .height('30%')
      }

      // 底部控制栏
      Column() {
        this.TopTool()
        Column() {
        }
        .layoutWeight(1)
        .width('100%')

        Column() {
          // 闪光灯按钮
          Button('闪光灯').button()
            .onClick(() => {
              try {
                if (customScan.getFlashLightStatus()) {
                  customScan.closeFlashLight()
                  this.isFlashLightEnable = false
                } else {
                  customScan.openFlashLight()
                  this.isFlashLightEnable = true
                }
              } catch (error) {
                hilog.error(0x0001, TAG, `闪光灯操作失败. 错误码: ${error.code}, 消息: ${error.message}`)
              }
            })
            .visibility((this.userGrant && this.scanCodeRectLength === 0) ? Visibility.Visible : Visibility.None)

          // 重新扫描按钮
          Button('扫描').button()
            .onClick(() => {
              this.scanCodeRectCallback = []
              this.scanCodeRectFrameCallback = []
              this.isShowScanResult = false
              this.scanCodeRectLength = 0
              this.scanLineY = '0%'
              clearTimeout(toResultPage)
              this.customScanInit()
            })
            .visibility(this.isShowScanResult ? Visibility.Visible : Visibility.None)

          // 帧结果可见性切换按钮
          if (this.userGrant && !this.isShowScanResult) {
            Button(this.isShowFrameResult ? '关闭帧YUV' : '打开帧YUV').button()
              .onClick(() => {
                this.scanCodeRectCallback = []
                this.scanCodeRectFrameCallback = []
                this.isShowFrameResult = !this.isShowFrameResult
                clearTimeout(toResultPage)
              })
          }

          // 缩放控制
          if (this.userGrant && !this.isShowScanResult) {
            Row() {
              Row() {
                Text($r('app.string.decode_zoom_current')).btnTextRow()
                Text('' + this.setZoomValue).btnTextRow()
              }
              .btnRow()
              .onClick(() => {
                if (!this.isShowScanResult) {
                  if (this.zoomValue) {
                    this.setZoomValue = this.zoomValue
                    customScan.setZoom(this.zoomValue)
                  } else {
                    this.setZoomValue = customScan.getZoom()
                  }
                }
              })
            }
            .margin({ bottom: 10 })

            // 缩放输入框
            Row() {
              TextInput({ placeholder: $r('app.string.decode_zoom_enter') })
                .width(200)
                .type(InputType.Number)
                .borderWidth(1)
                .backgroundColor(Color.White)
                .onChange(value => {
                  this.zoomValue = Number(value)
                })
            }
          }
        }
        .height(250)
      }
      .width('100%')
      .height('100%')

      // 显示YUV数据检测到的条形码框
      if (this.isShowFrameResult) {
        ForEach(this.scanCodeRectFrameCallback, (item: scanBarcode.ScanCodeRect) => {
          // 绘制检测到的条形码四角指示器
          Row()
            .angleSizes(item.left, item.top, { width: { left: 3, top: 3 } }, this.xComDisplay)
            .markAnchor({ x: 0, y: 0 })
          Row()
            .angleSizes(item.right, item.top, { width: { right: 3, top: 3 } }, this.xComDisplay)
            .markAnchor({ x: 20, y: 0 })
          Row()
            .angleSizes(item.right, item.bottom, { width: { right: 3, bottom: 3 } }, this.xComDisplay)
            .markAnchor({ x: 20, y: 20 })
          Row()
            .angleSizes(item.left, item.bottom, { width: { left: 3, bottom: 3 } }, this.xComDisplay)
            .markAnchor({ x: 0, y: 20 })

          // 中心点(通过opacity 0隐藏)
          Image($rawfile('scan_selected.svg'))
            .scanCenter(item, this.xComDisplay)
            .opacity(0)
        }, (item: scanBarcode.ScanCodeRect, index: number) => {
          return index + '__' + JSON.stringify(item)
        })
      }

      // 显示回调检测到的条形码区域
      if (this.scanCodeRectCallback.length > 0) {
        ForEach(this.scanCodeRectCallback, (item: scanBarcode.ScanCodeRect, index: number) => {
          // 条形码区域背景
          Row() {
          }.scanSizes(item, this.xComDisplay)

          // 可点击查看结果的中心点
          Image(this.scanCodeRectLength > 1 ? $rawfile('scan_selected2.svg') : $rawfile('scan_selected.svg'))
            .scanCenter(item, this.xComDisplay)
            .onClick(() => {
              let result: Array<scanBarcode.ScanResult> = []
              let scanResult: scanBarcode.ScanResult = {
                scanType: this.scanCodeRect[index].scanType,
                originalValue: this.scanCodeRect[index].originalValue,
                scanCodeRect: this.scanCodeRect[index].scanCodeRect
              }
              result.push(scanResult)
              router.replaceUrl({
                url: 'pages/CustomResultPage',
                params: {
                  result: result
                }
              })
            })
        }, (item: scanBarcode.ScanCodeRect, index: number) => {
          return index + '__' + JSON.stringify(item)
        })
      }
    }
    .width('100%')
    .height('100%')
    .onClick((event: ClickEvent) => {
      // 处理屏幕点击对焦
      if (this.scanCodeRectLength > 0) {
        return
      }
      let pointX = event.displayY / (this.displayHeight + 0.0)
      let pointY = 1.0 - (event.displayX / (this.displayWidth + 0.0))
      try {
        customScan.setFocusPoint({ x: pointX, y: pointY })
      } catch (error) {
        hilog.error(0x0001, TAG, `设置焦点失败. 错误码: ${error.code}, 消息: ${error.message}`)
      }
      setTimeout(() => {
        try {
          customScan.resetFocus()
        } catch (error) {
          hilog.error(0x0001, TAG, `重置焦点失败. 错误码: ${error.code}, 消息: ${error.message}`)
        }
      }, 200)
    })
  }

  // 显示扫描结果
  public async showScanResult(result: Array<scanBarcode.ScanResult>) {
    this.scanCodeRectLength = result.length
    if (result.length > 0) {
      this.customScanStop()
      clearTimeout(toResultPage)

      // 处理检测到的条形码位置
      result.forEach((item: scanBarcode.ScanResult) => {
        if (item.scanCodeRect) {
          this.scanCodeRectCallback.push(item.scanCodeRect)
        }
      })

      clearTimeout(setInterFlag)
      hilog.info(0x0001, TAG, `成功获取ScanResult`)
      this.isShowScanResult = true

      // 如果检测到单个条形码则自动跳转
      if (this.scanCodeRectLength === 1) {
        toResultPage = setTimeout(() => {
          router.replaceUrl({
            url: 'pages/CustomResultPage',
            params: {
              result: result
            }
          })
        }, 1000)
      }
    }
  }

  // 设置显示尺寸
  public setDisplay() {
    this.xComDisplay = getXComDisplay()
    this.displayHeight = this.xComDisplay.height + this.xComDisplay.offsetY * 2
    this.displayWidth = this.xComDisplay.width + this.xComDisplay.offsetX * 2
  }

  // 初始化自定义扫描
  public customScanInit() {
    if (!this.userGrant) {
      return
    }
    this.isStopCamera = false
    let options: scanBarcode.ScanOptions = {
      scanTypes: [scanCore.ScanType.ALL],
      enableMultiMode: true, // 启用多码扫描
      enableAlbum: true // 显示相册按钮
    }

    try {
      customScan.init(options)
    } catch (error) {
      hilog.error(0x0001, TAG, `扫描初始化失败. 错误码: ${error.code}, 消息: ${error.message}`)
    }

    this.viewControl = {
      width: this.xComDisplay.width,
      height: this.xComDisplay.height,
      surfaceId: this.surfaceId
    }

    try {
      // 启动带回调的扫描
      customScan.start(this.viewControl, this.callback, this.frameCallback)

      // 扫描线动画
      animateTo({
        duration: 1500, // 动画时长
        curve: curves.cubicBezierCurve(0.33, 0, 0.67, 1), // 动画曲线
        delay: 100,
        iterations: -1,
        playMode: PlayMode.Normal,
      }, () => {
        this.scanLineY = '100%'
      })

      // 5秒后显示"未找到条形码"提示
      setInterFlag = setTimeout(() => {
        if (this.userGrant && this.scanCodeRectLength === 0) {
          promptAction.showToast({
            message: $r('app.string.Scan_diaLog_not_found'),
            duration: 2000
          })
        }
      }, 5000)

      this.customOnLightingFlash()
    } catch (error) {
      hilog.error(0x0001, TAG, `启动扫描失败. 错误码: ${error.code}, 消息: ${error.message}`)
    }
  }

  // 停止扫描
  public async customScanStop(): Promise<void> {
    if (!this.isStopCamera) {
      try {
        this.isStopCamera = true
        await customScan.stop().catch((error: BusinessError) => {
          hilog.error(0x0001, TAG, `停止customScan承诺失败. 错误码: ${error.code}`)
        })
      } catch (error) {
        hilog.error(0x0001, TAG, `停止customScan失败. 错误码: ${error.code}, 消息: ${error.message}`)
      }
    }
  }

  // 释放扫描资源
  public async customScanRelease(): Promise<void> {
    await this.customScanStop()
    try {
      await customScan.release().catch((error: BusinessError) => {
        hilog.error(0x0001, TAG, `释放扫描失败. 错误码: ${error.code}, 消息: ${error.message}`)
      })
    } catch (error) {
      hilog.error(0x0001, TAG, `停止扫描失败. 错误码: ${error.code}, 消息: ${error.message}`)
    }
  }

  // 注册闪光灯监听器
  public customOnLightingFlash() {
    try {
      customScan.on('lightingFlash', (error, isLightingFlash) => {
        if (error) {
          hilog.error(0x0001, TAG,
            `监听闪光灯失败. 错误码: ${error.code}, 消息: ${error.message}`)
          return
        }
        if (isLightingFlash) {
          this.isFlashLightEnable = true
          customScan.openFlashLight()
        } else {
          if (!customScan.getFlashLightStatus()) {
            this.isFlashLightEnable = false
            customScan.closeFlashLight()
          }
        }
      })
    } catch (error) {
      hilog.error(0x0001, TAG, `监听闪光灯失败. 错误码: ${error.code}, 消息: ${error.message}`)
    }
  }

  // 取消注册闪光灯监听器
  public customOffLightingFlash() {
    try {
      customScan.off('lightingFlash')
    } catch (error) {
      hilog.error(0x0001, TAG, `取消闪光灯监听失败. 错误码: ${error.code}, 消息: ${error.message}`)
    }
  }

  // 处理折叠设备状态变化
  public foldStatusSubscribe(): void {
    try {
      display.on('foldStatusChange', async (foldStatus: display.FoldStatus) => {
        // 处理设备展开/折叠状态
        if (foldStatus === display.FoldStatus.FOLD_STATUS_EXPANDED ||
          foldStatus === display.FoldStatus.FOLD_STATUS_FOLDED) {
          this.scanCodeRectCallback = []
          this.scanCodeRectFrameCallback = []
          clearTimeout(toResultPage)
          clearTimeout(setInterFlag)
          this.customScanRelease()
          setTimeout(() => {
            this.setDisplay()
            this.customScanInit()
          }, 300)
        }
      })
    } catch (error) {
      hilog.error(0x0001, TAG, `折叠状态变化处理失败. 错误码: ${error.code}, 消息: ${error.message}`)
    }
  }
}
// entry/src/main/ets/pages/CustomResultPage.ets
// CustomResultPage.ets 显示自定义 UI 下的扫码结果页面
import { router } from '@kit.ArkUI' // 导入页面路由管理模块
import { scanBarcode, scanCore } from '@kit.ScanKit' // 导入扫码相关模块
import { MockSetup } from '@ohos/hamock' // 导入模拟数据功能(用于调试)
// 扩展 Text 样式 - 名称字段样式
@Extend(Text)
function textName() {
.fontSize(20)
.fontColor($r('sys.color.black'))
.fontWeight(FontWeight.Medium)
.width('100%')
.margin({ bottom: 5 })
}
// 扩展 Text 样式 - 值字段样式
@Extend(Text)
function textValue() {
.fontSize(16)
.fontWeight(FontWeight.Normal)
.width('100%')
.margin({ bottom: 5 })
}
// 定义扫码类型与其对应的字符串映射
const SCAN_TYPE: Record<number, string> = {
0: 'FORMAT_UNKNOWN',
1: 'AZTEC_CODE',
2: 'CODABAR_CODE',
3: 'CODE39_CODE',
4: 'CODE93_CODE',
5: 'CODE128_CODE',
6: 'DATAMATRIX_CODE',
7: 'EAN8_CODE',
8: 'EAN13_CODE',
9: 'ITF14_CODE',
10: 'PDF417_CODE',
11: 'QR_CODE',
12: 'UPC_A_CODE',
13: 'UPC_E_CODE',
14: 'MULTIFUNCTIONAL_CODE',
100: 'ONE_D_CODE',
101: 'TWO_D_CODE'
}
// 定义页面参数类型结构体
class ParamsType {
public result: scanBarcode.ScanResult[] = [] // 扫码结果数组
public uri: string = '' // 图片路径或资源URI(如有)
public infoW: number = 0 // 图像宽度
public infoH: number = 0 // 图像高度
}
// 页面组件入口定义
@Entry
@ComponentV2
struct CustomResultPage {
@Local params: ParamsType = router.getParams() as ParamsType // 获取传入参数
private result: Array<scanBarcode.ScanResult> = [] // 扫码结果列表
public scroller: Scroller = new Scroller() // 垂直滚动器实例
// 页面显示前,将参数中的扫码结果保存到局部变量
aboutToAppear() {
this.result = this.params.result as Array<scanBarcode.ScanResult>
}
// 定义调试使用的 mock 数据
@MockSetup
mock() {
this.params = new ParamsType()
let mockScanResult: scanBarcode.ScanResult = {
scanType: scanCore.ScanType.QR_CODE,
originalValue: 'mock',
scanCodeRect: {
left: 10,
right: 100,
top: 10,
bottom: 100
}
}
this.params.result = [mockScanResult]
this.result = this.params.result as Array<scanBarcode.ScanResult>
}
// 自定义文本展示区域 Builder,用于展示每条扫码结果
@Builder
CustomTextBox(scanType: string, inputValue: string, left: number, top: number, right: number, bottom: number) {
Column() {
Column() {
Text($r('app.string.code_format')).textName() // “码类型”标题
Text(scanType).textValue() // 实际码类型名称
}
.align(Alignment.Start)
.margin({ left: 10, top: 20, bottom: 20 })
Column() {
Text($r('app.string.result_content')).textName() // “码内容”标题
.fontWeight(FontWeight.Medium)
Text(inputValue).textValue() // 实际扫码内容
}
.align(Alignment.Start)
.margin({ left: 10, bottom: 20 })
Column() {
Text($r('app.string.code_react')).textName() // “扫码区域”标题
Text('left: ' + left + ' top: ' + top + ' right: ' + right + ' bottom: ' + bottom).textValue()
}
.align(Alignment.Start)
.margin({ left: 10, bottom: 20 })
}
.margin({ bottom: 5 })
.backgroundColor('#fffaf8f8') // 背景色
.borderRadius(8) // 圆角边框
}
// 页面构建函数
build() {
Column() {
// 顶部返回栏(图标 + 标题)
Row() {
Image($rawfile('scan_back.svg')) // 返回按钮图标
.fillColor(Color.Black)
.width(30)
.height(30)
.objectFit(ImageFit.Contain)
Text($r('app.string.title_result')) // 页面标题:扫码结果
.fontSize(20)
.fontColor($r('sys.color.black'))
.margin({ left: 15 })
}
.margin({ top: 20 })
.zIndex(10)
.position({ x: 15, y: 0 })
.onClick(async () => {
// 点击返回跳转首页并清除页面栈
router.pushUrl({
url: 'pages/Index'
}).then(() => {
router.clear()
})
})
// 内容区域,使用滚动视图展示所有扫码结果
Scroll(this.scroller) {
Column() {
Column() {
// 遍历每条扫码结果,显示对应文本信息
ForEach(this.result, (item: scanBarcode.ScanResult) => {
if (item['scanCodeRect']) {
this.CustomTextBox(
this.getScanTypeKey(item['scanType']), // 类型名称
item['originalValue'], // 内容
item['scanCodeRect']['left'],
item['scanCodeRect'].top,
item['scanCodeRect'].right,
item['scanCodeRect'].bottom
)
}
})
}
}
.width(330) // 内容区域宽度
}
.scrollable(ScrollDirection.Vertical)
.scrollBar(BarState.On)
.scrollBarColor(Color.Gray)
.scrollBarWidth(5)
.margin({ top: 120 }) // 内容距离顶部 120px
}
.width('100%') // 页面宽度占满
.padding({ top: 40 }) // 页面顶部内边距
}
// 将扫码类型编号转换为对应字符串
public getScanTypeKey(type: number): string {
return SCAN_TYPE[type] || ''
}
}// entry/src/main/ets/utils/Common.ets
// Common.ets
import { display } from '@kit.ArkUI'
const TAG: string = 'ScanKit common'
// 相机预览流常用的宽高比。可根据实际需要自定义。
// 常见比例为 1(正方形)、4:3、16:9。
let ratios: Array<number> = [1, 4 / 3, 16 / 9]
// 定义返回的 xComponent 显示区域结构体
export interface xComDisplay {
width: number, // 显示区域宽度(vp单位)
height: number, // 显示区域高度(vp单位)
offsetX: number, // 水平偏移,用于居中
offsetY: number // 垂直偏移,用于居中
}
// 获取最接近目标比例的标准比例值
// 例如:目标是 1.7,返回最接近的标准比例(如 16/9)
function getRatio(ratio: number): number {
// 若输入小于 1,先取倒数(如 3/4 → 4/3)
let setRatio: number = ratio < 1 ? (1 / ratio) : ratio
let result: number = ratios[0] // 初始值设为第一个标准比例
let minNo: number = Math.abs(setRatio - ratios[0]) // 当前差值
for (let i = 1; i < ratios.length; i++) {
// 找出与输入比例最接近的标准比例
if (Math.abs(setRatio - ratios[i]) < minNo) {
minNo = Math.abs(setRatio - ratios[i])
result = ratios[i]
}
}
return result
}
// 获取 xComponent 全屏显示所需的大小及偏移信息
export function getXComDisplay(): xComDisplay {
// 获取当前设备的默认显示屏信息(像素单位)
let displayClass = display.getDefaultDisplaySync()
let width: number = px2vp(displayClass.width) // 转换为 vp 单位
let height: number = px2vp(displayClass.height)
// 初始化默认返回值(默认尺寸为 360x640,无偏移)
let result: xComDisplay = {
width: 360,
height: 640,
offsetX: 0,
offsetY: 0
}
// 获取当前屏幕宽高比对应的标准比例
let defaultRatio: number = getRatio(height / width)
console.info(TAG, `defaultRatio: ${defaultRatio}`)
// 计算显示区域的实际宽高及偏移量
if (height / width >= defaultRatio) {
// 高度优先,按高度等比例放缩,宽度适配
result.height = height
result.width = height / defaultRatio
result.offsetX = (width - result.width) / 2 // 水平居中偏移
result.offsetY = 0
} else {
// 宽度优先,按宽度等比例放缩,高度适配
result.width = width
result.height = width * defaultRatio
result.offsetX = 0
result.offsetY = (height - result.height) / 2 // 垂直居中偏移
}
return result
}// entry/src/main/ets/utils/PermissionsUtil.ets
// PermissionsUtil.ets
import { bundleManager, common, abilityAccessCtrl, PermissionRequestResult, Permissions } from '@kit.AbilityKit'
import { hilog } from '@kit.PerformanceAnalysisKit'
const TAG: string = 'ScanKit Permission' // 日志标识符
let context = getContext(this) as common.UIAbilityContext // 获取当前UIAbility的上下文对象
// 权限工具类,用于检测与申请所需权限
export class PermissionsUtil {
// 检查应用是否拥有某项权限(基于 accessToken)
public static async checkAccessToken(permission: Permissions): Promise<abilityAccessCtrl.GrantStatus> {
let atManager = abilityAccessCtrl.createAtManager() // 创建 access token 管理器实例
let grantStatus: abilityAccessCtrl.GrantStatus = -1 // 初始化权限状态,默认未授权
let tokenId: number = 0 // 应用 accessToken ID 初始化
try {
// 获取当前应用的 bundle 信息,包括 appInfo(accessTokenId 存在于此)
let bundleInfo: bundleManager.BundleInfo =
await bundleManager.getBundleInfoForSelf(bundleManager.BundleFlag.GET_BUNDLE_INFO_WITH_APPLICATION)
let appInfo: bundleManager.ApplicationInfo = bundleInfo.appInfo
tokenId = appInfo.accessTokenId // 取出 accessTokenId
} catch (error) {
// 获取 accessToken 失败时输出错误日志
hilog.error(0x0001, TAG, `Failed to get bundle info for self. Code: ${error.code}, message: ${error.message}`)
}
// 若成功获取了 tokenId,继续检查权限状态
if (tokenId) {
try {
grantStatus = await atManager.checkAccessToken(tokenId, permission)
} catch (error) {
// 检查 accessToken 权限失败时输出日志
hilog.error(0x0001, TAG, `Failed to check access token. Code: ${error.code}, message: ${error.message}`)
}
}
return grantStatus // 返回权限检查结果(0 为已授权)
}
// 向用户请求权限(如 CAMERA),返回授权结果数组
public static async reqPermissionsFromUser(): Promise<number[]> {
hilog.info(0x0001, TAG, 'reqPermissionsFromUser start') // 输出请求开始日志
let atManager = abilityAccessCtrl.createAtManager() // 创建 access token 管理器
let grantStatus: PermissionRequestResult = { permissions: [], authResults: [] } // 初始化返回结果结构体
try {
// 调用系统权限申请接口,请求相机权限
grantStatus = await atManager.requestPermissionsFromUser(context, ['ohos.permission.CAMERA'])
} catch (error) {
// 申请失败时输出错误日志
hilog.error(0x0001, TAG,
`Failed to request permissions from user. Code: ${error.code}, message: ${error.message}`)
}
return grantStatus.authResults // 返回权限请求结果数组(每项为 0 表示已授权,1 表示拒绝)
}
}
步骤3. 运行后,手动点击“允许”获取相机权限。
步骤4. 根据当前扫码环境光线强弱,选择是否打开闪光灯按钮。
步骤5. 扫描二维码,成功后显示扫码结果页。
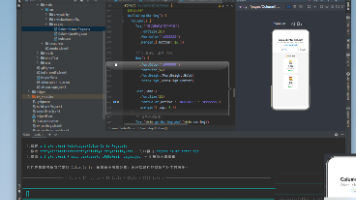
- 界面效果
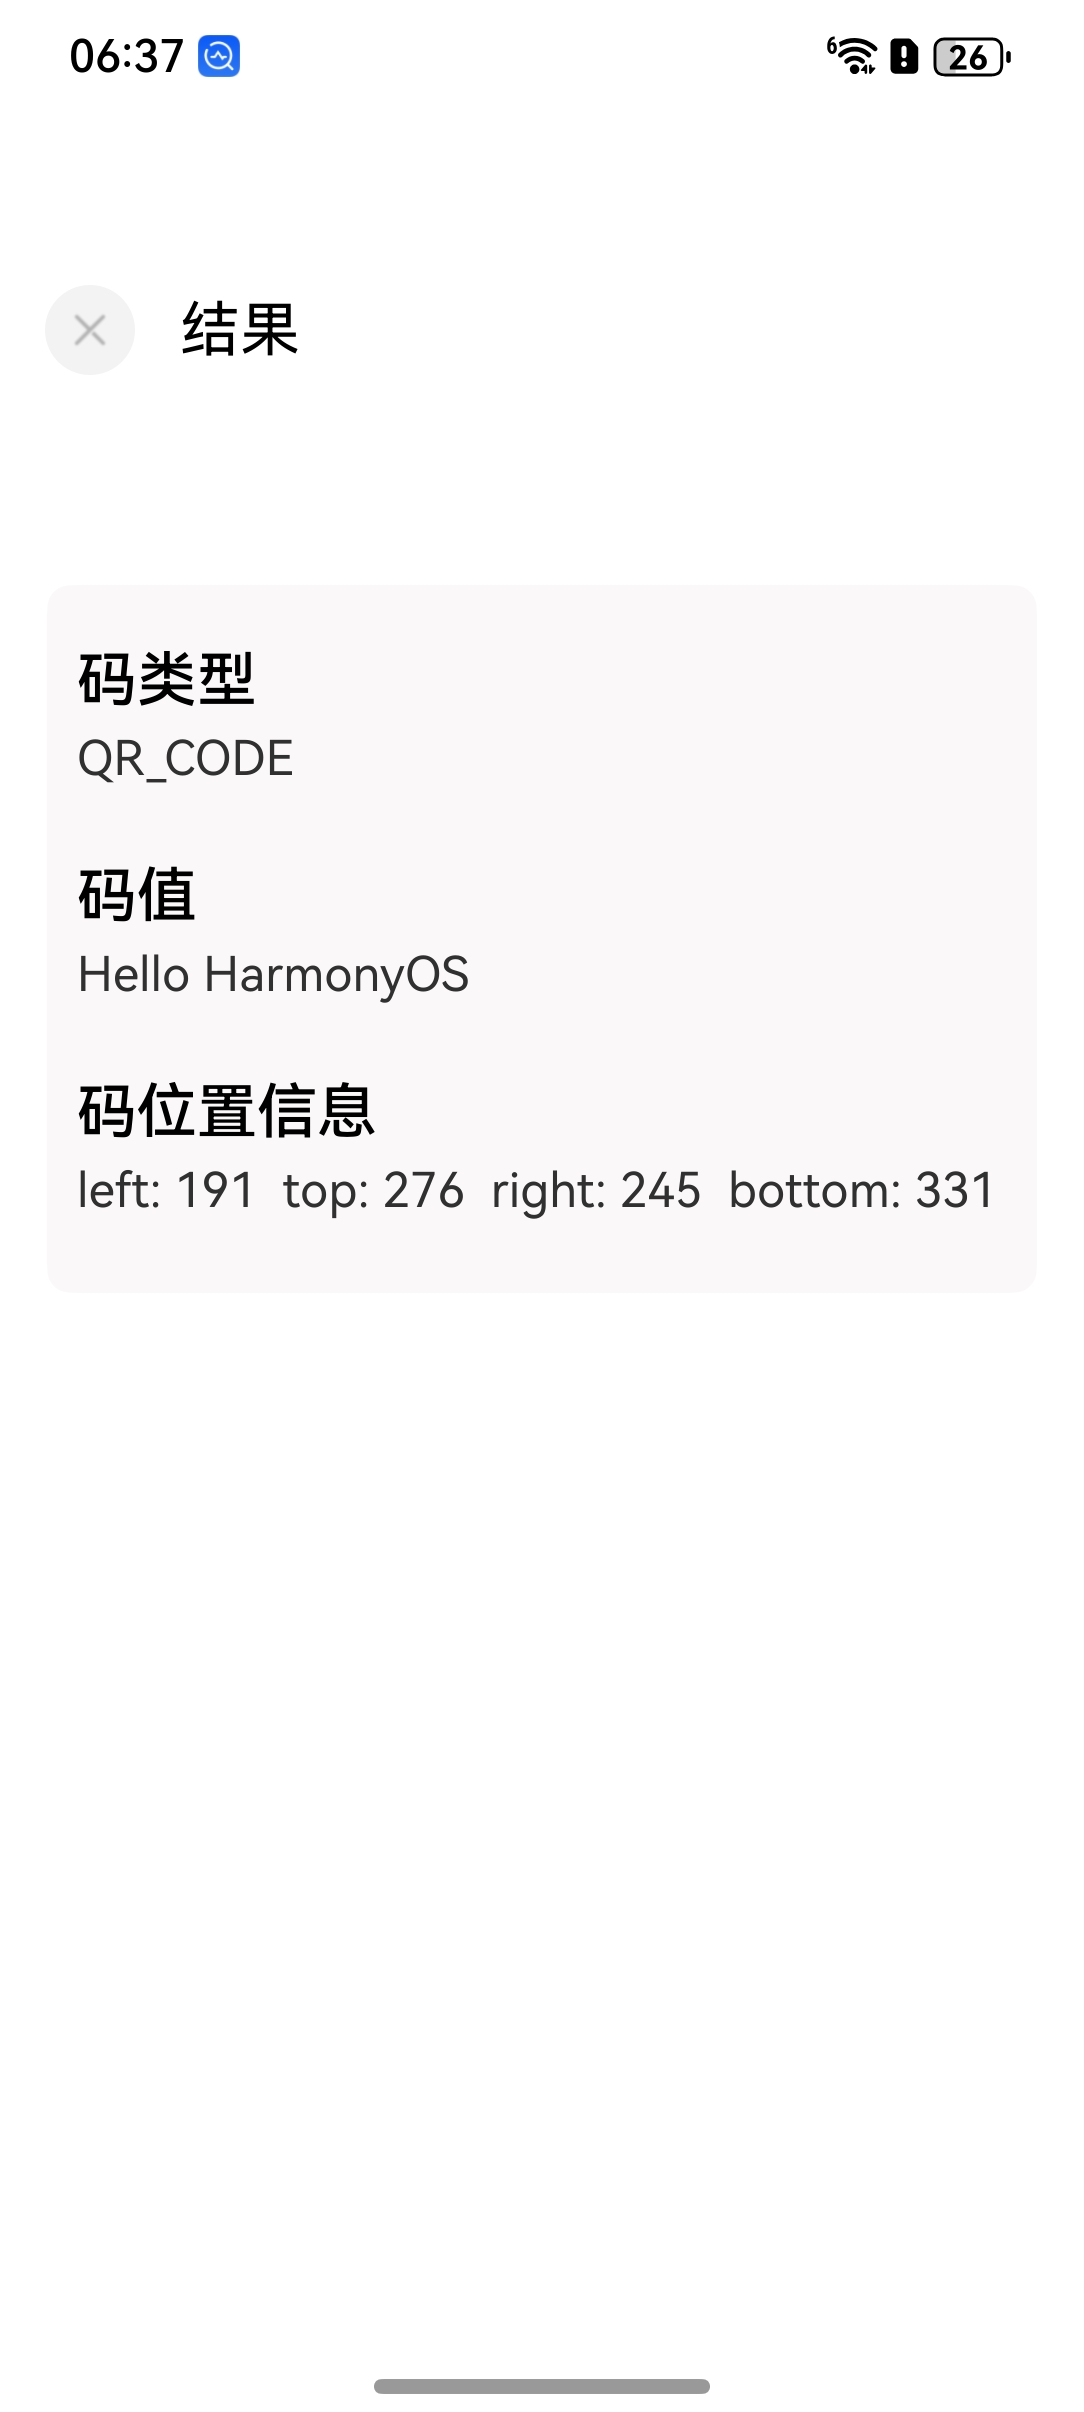
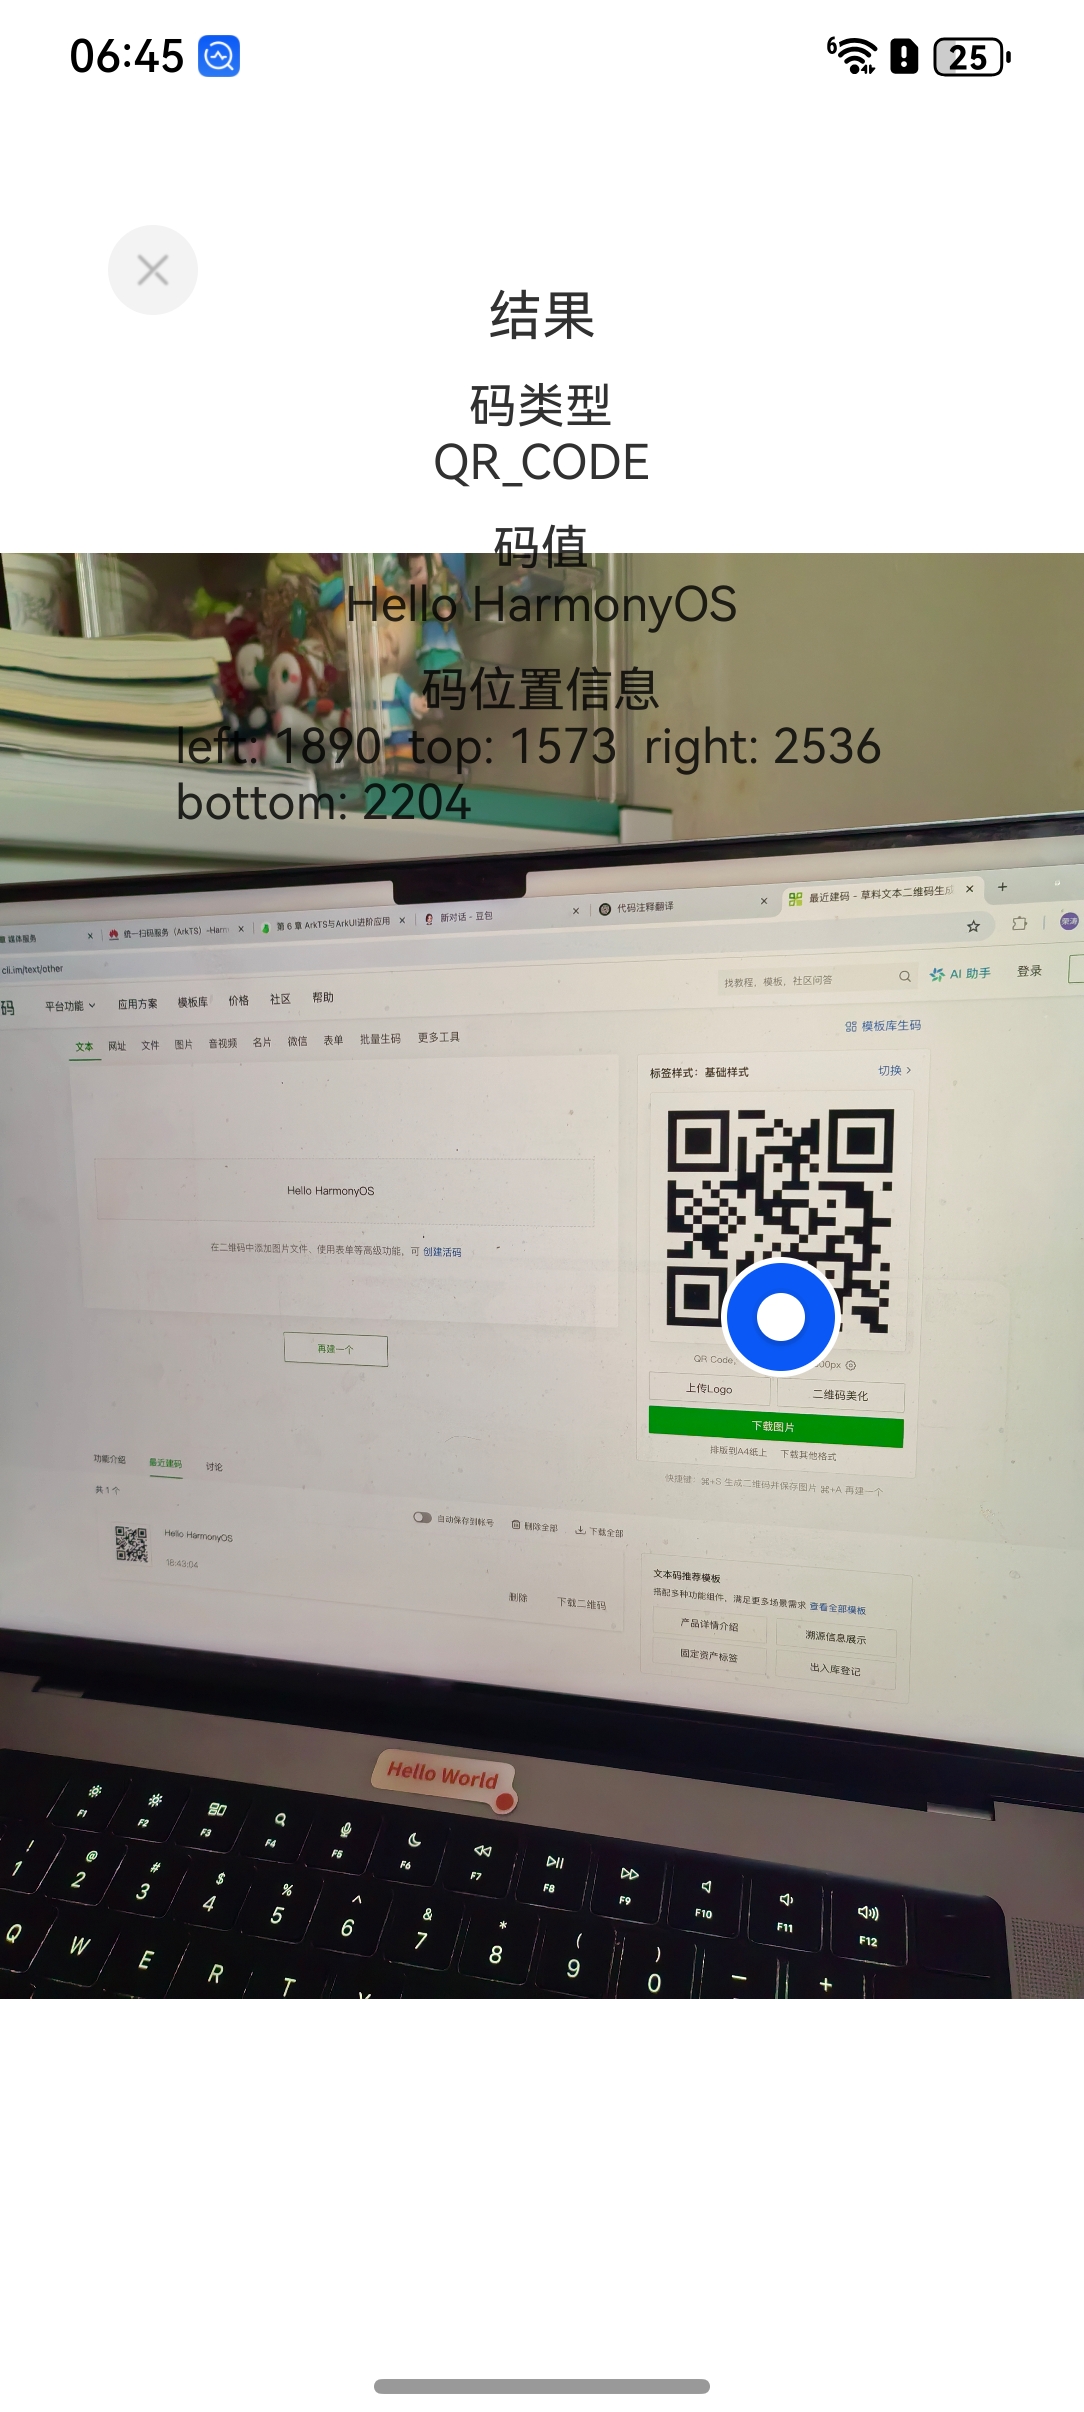
十、图像识码
图片识码能力支持对图片中的条形码、二维码、MULTIFUNCTIONAL CODE进行识别,并获得码类型、码值、码位置信息。该能力可用于一图单码和一图多码的识别,比如条形码、付款码等。
- 开发示例:
- 开发者需要将通过码图生成功能生成的QR码作为码源,进行扫码识别。
- 识别结果与码图生成功能中的字符串信息('huawei')以及码值类型(scanCore.ScanType.QR_CODE)一致,返回当前图片中码图的位置信息。
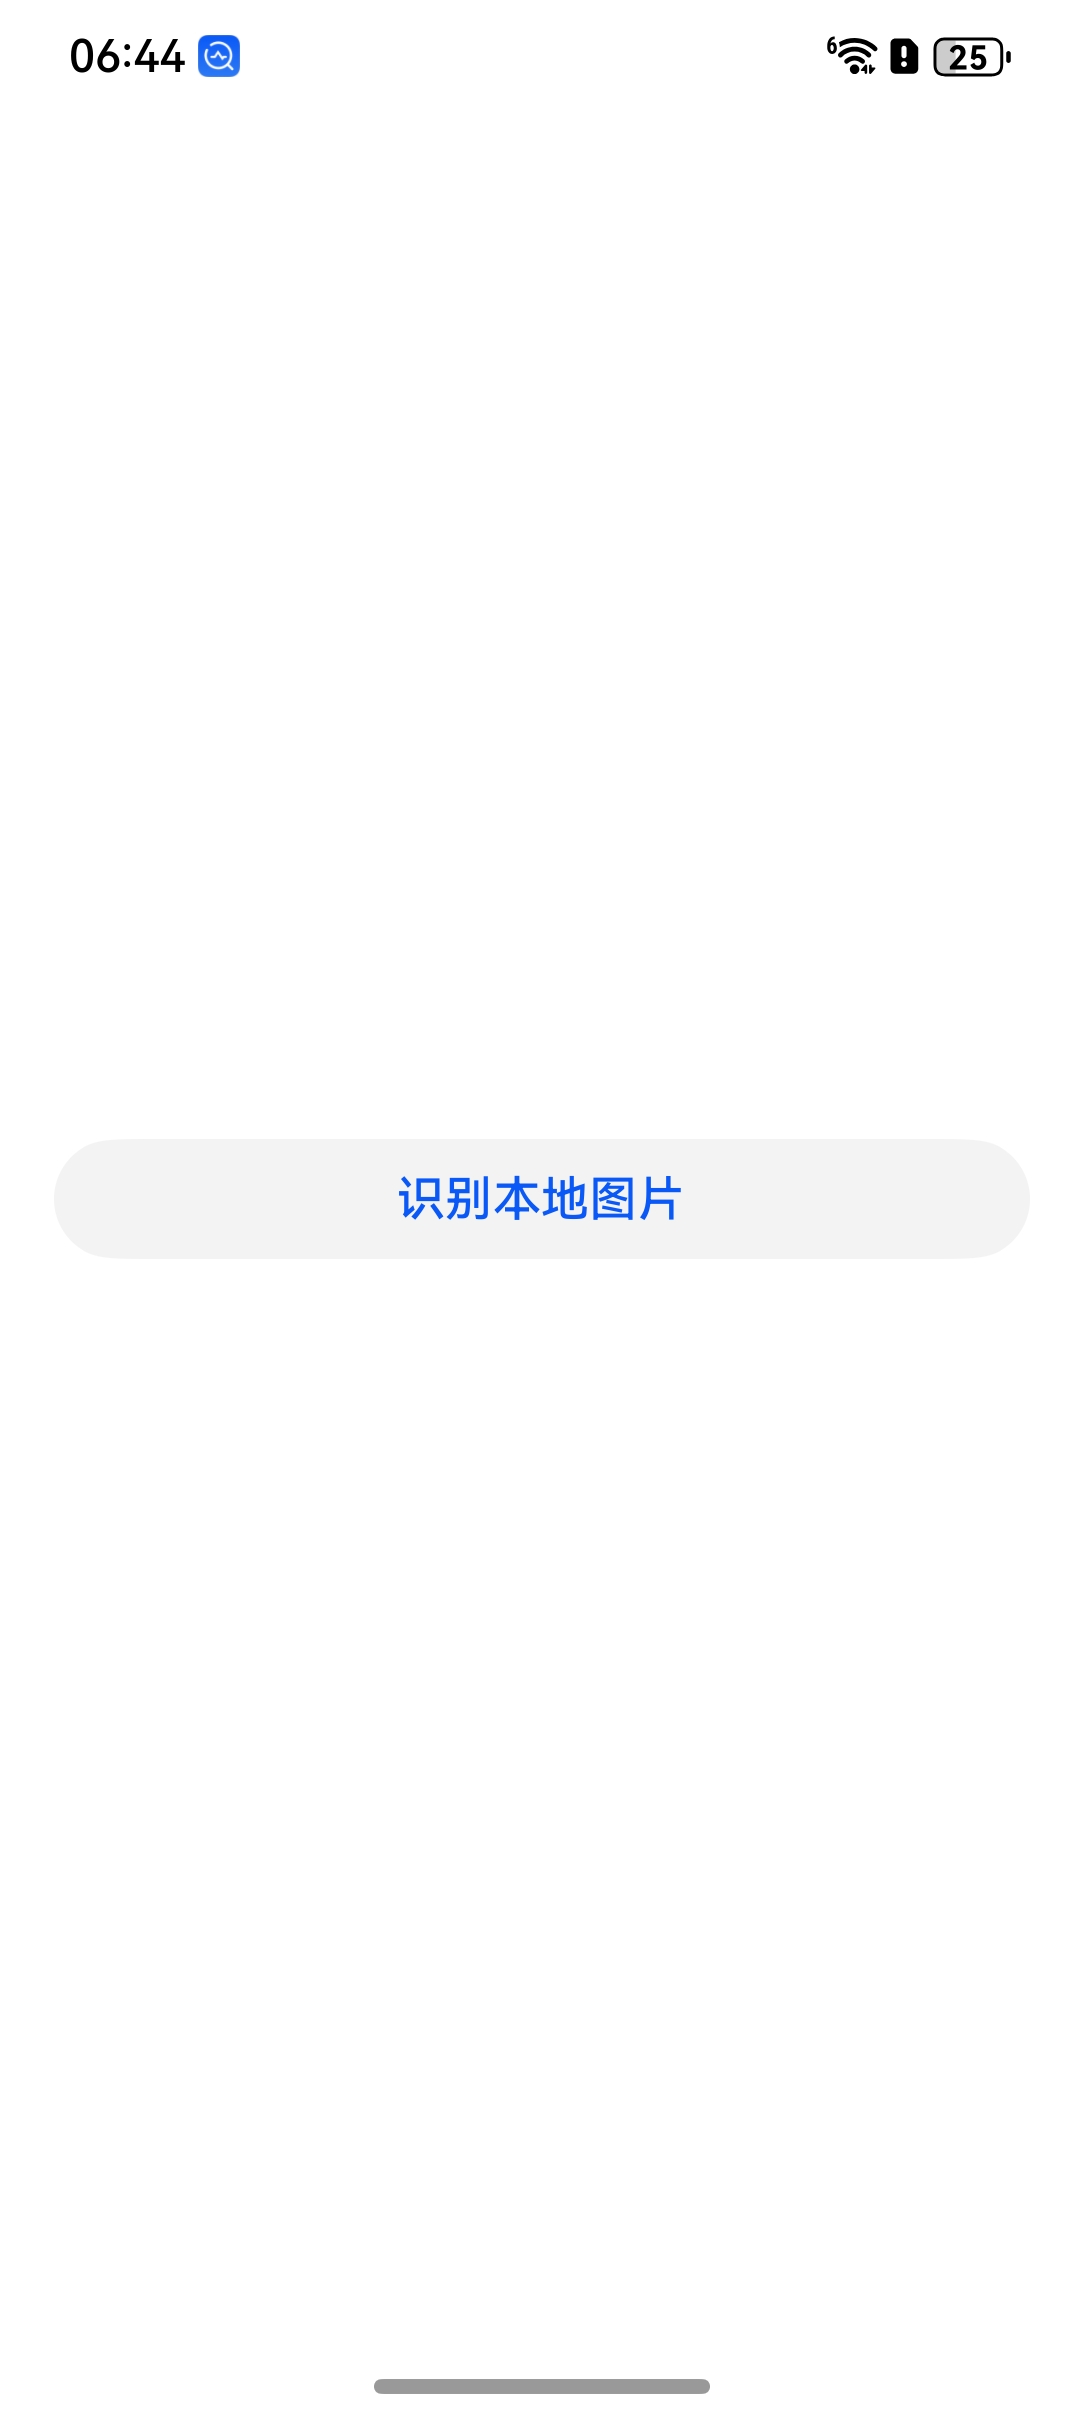
- 开发步骤:
步骤1. 将示例代码放入需要的项目中并编译,请注意将两段示例放入不同文件中。
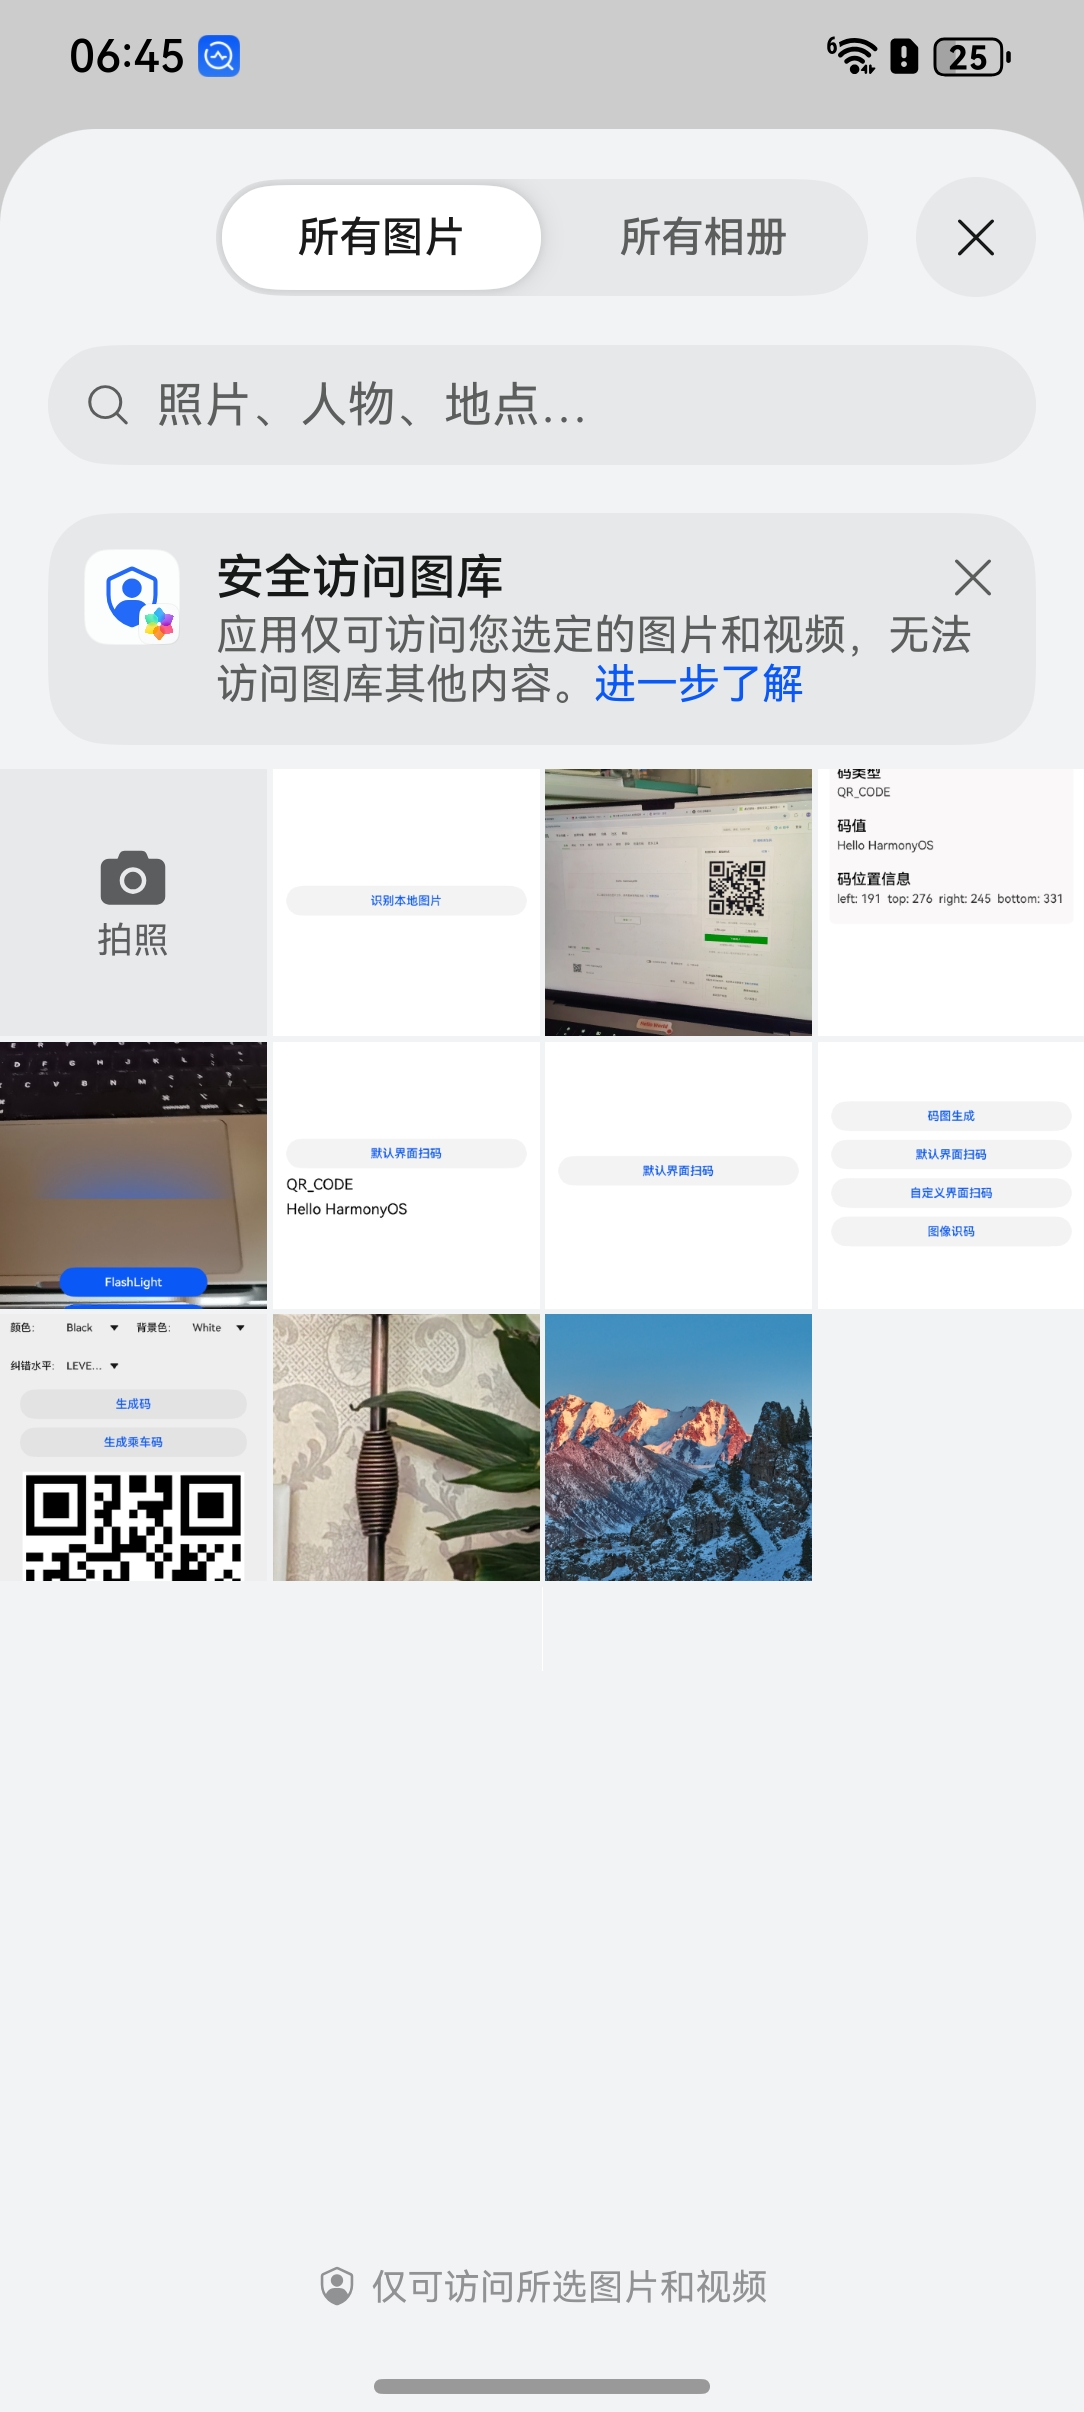
步骤2. 点击“图像识码 > 识别本地图片”按钮,通过picker拉起图库。
步骤3. 从图库中选择QR码图片。
步骤4. 通过Promise方式回调进行码图识别,并返回识别结果。
// entry/src/main/ets/pages/DetectBarcode.ets

// DetectBarcode.ets 使用图库选择图片后识别图中的条形码/二维码
import { image } from '@kit.ImageKit'
import { hilog } from '@kit.PerformanceAnalysisKit'
import { fileIo } from '@kit.CoreFileKit'
import { photoAccessHelper } from '@kit.MediaLibraryKit'
import { router, promptAction } from '@kit.ArkUI'
import { BusinessError } from '@kit.BasicServicesKit'
import { scanCore, detectBarcode, scanBarcode } from '@kit.ScanKit'

const TAG: string = 'ScanKit DetectBarcode'

@Entry
@ComponentV2
struct DetectBarcodePage {
  build() {
    Column() {
      // 创建一个按钮,点击后从图库中选择图片进行条码识别
      Button($r('app.string.bitmap_api_decode'))
        .backgroundColor($r('sys.color.ohos_id_color_button_normal'))
        .fontColor($r('sys.color.ohos_id_color_text_primary_activated'))
        .align(Alignment.Center)
        .type(ButtonType.Capsule)
        .margin({ bottom: 12 })
        .width('90%')
        .height(40)
        .onClick(() => {
          // 设置识别参数:识别所有类型,且只识别一个条码
          let options: scanBarcode.ScanOptions = {
            scanTypes: [scanCore.ScanType.ALL],
            enableMultiMode: false
          }

          try {
            // 配置图库选择参数
            let photoOption = new photoAccessHelper.PhotoSelectOptions()
            photoOption.MIMEType = photoAccessHelper.PhotoViewMIMETypes.IMAGE_TYPE
            photoOption.maxSelectNumber = 1
            let photoPicker = new photoAccessHelper.PhotoViewPicker()

            // 打开图库选择图片
            photoPicker.select(photoOption).then((photoResult) => {
              let infoW: number = 0
              let infoH: number = 0

              try {
                // 打开所选图片的文件句柄
                let file = fileIo.openSync(photoResult.photoUris[0], fileIo.OpenMode.READ_ONLY)
                const imageSourceApi = image.createImageSource(file.fd)

                // 关闭文件
                try {
                  fileIo.closeSync(file)
                } catch (error) {
                  hilog.error(0x0001, TAG, `Failed to closeSync. Code: ${error.code}.`)
                }

                // 获取图片信息(如宽高)
                imageSourceApi.getImageInfo(0, (error: BusinessError, imageInfo) => {
                  try {
                    imageSourceApi.release()
                  } catch (error) {
                    hilog.error(0x0001, TAG,
                      `Failed to release imageSourceApi. Code: ${error.code}, message: ${error.message}`)
                    return
                  }

                  // 如果获取失败,记录错误日志
                  if (imageInfo == undefined) {
                    hilog.error(0x0001, TAG,
                      `Failed to get imageInfo by callback. Code: ${error.code}, message: ${error.message}`)
                    return
                  }

                  // 成功获取宽高
                  infoW = imageInfo.size.width
                  infoH = imageInfo.size.height
                })
              } catch (error) {
                hilog.error(0x0001, TAG, `Failed to get imageInfo. Code: ${error.code}, message: ${error.message}`)
                return
              }

              try {
                // 构造识别输入对象
                let inputImage: detectBarcode.InputImage = { uri: photoResult.photoUris[0] }

                // 调用条码识别接口
                detectBarcode.decode(inputImage, options).then((result: Array<scanBarcode.ScanResult>) => {
                  hilog.info(0x0001, TAG, `Succeeded in getting ScanResult by promise with options.`)

                  // 如果识别到结果则跳转到结果页面
                  if (result && result.length > 0) {
                    router.pushUrl({
                      url: 'pages/ResultPage', // 可以改成 pages/CustomResultPage
                      params: {
                        result: result,
                        uri: photoResult.photoUris[0],
                        infoW: infoW,
                        infoH: infoH
                      }
                    })
                  } else {
                    // 未识别到条码,提示用户
                    promptAction.showToast({
                      message: $r('app.string.Scan_diaLog_not_found'),
                      duration: 2000
                    })
                  }
                }).catch((error: BusinessError) => {
                  // 识别失败,记录错误并提示
                  if (photoResult.photoUris[0]) {
                    promptAction.showToast({
                      message: $r('app.string.Scan_diaLog_not_found'),
                      duration: 2000
                    })
                    hilog.error(0x0001, TAG,
                      `Failed to get ScanResult by promise with options. Code: ${error.code}, message: ${error.message}`)
                  }
                })
              } catch (error) {
                hilog.error(0x0001, TAG, `Failed to decode. Code: ${error.code}, message: ${error.message}`)
              }
            })
          } catch (error) {
            hilog.error(0x0001, TAG, `Failed to select photo. Code: ${error.code}, message: ${error.message}`)
          }
        })
    }
    // 页面布局设置
    .width('100%')
    .height('100%')
    .alignItems(HorizontalAlign.Center)
    .justifyContent(FlexAlign.Center)
  }
}
// entry/src/main/ets/pages/ResultPage.ets

// ResultPage.ets 显示识别结果及二维码在图像中的位置
import { hilog } from '@kit.PerformanceAnalysisKit'
import { scanBarcode, scanCore } from '@kit.ScanKit'
import { display, router } from '@kit.ArkUI'
import { MockSetup } from '@ohos/hamock'

// 日志标签
const TAG: string = 'ScanKit ResultPage'

// 扫码类型对应表,用于显示格式名
const SCAN_TYPE: Record<number, string> = {
  0: 'FORMAT_UNKNOWN',
  1: 'AZTEC_CODE',
  2: 'CODABAR_CODE',
  3: 'CODE39_CODE',
  4: 'CODE93_CODE',
  5: 'CODE128_CODE',
  6: 'DATAMATRIX_CODE',
  7: 'EAN8_CODE',
  8: 'EAN13_CODE',
  9: 'ITF14_CODE',
  10: 'PDF417_CODE',
  11: 'QR_CODE',
  12: 'UPC_A_CODE',
  13: 'UPC_E_CODE',
  14: 'MULTIFUNCTIONAL_CODE',
  100: 'ONE_D_CODE',
  101: 'TWO_D_CODE'
}

// 参数类型定义:识别结果、图片路径、原图宽高
class ParamsType {
  public result: scanBarcode.ScanResult[] = []
  public uri: string = ''
  public infoW: number = 0
  public infoH: number = 0
}

@Entry
@ComponentV2
struct ScanResultPage {
  // 页面状态参数
  @Local params: ParamsType = router.getParams() as ParamsType
  @Local cameraHeight: number = 1412
  @Local cameraWidth: number = 720
  @Local layTop: number = 226
  @Local layLeft: number = 0
  @Local screen: number = 1
  @Local rx: number = 0
  @Local ry: number = 0
  @Local rw: number = 0
  @Local rh: number = 0

  public scroller: Scroller = new Scroller()
  private statusHeight: number = 39 // 状态栏高度
  private result: Array<scanBarcode.ScanResult> = [] // 条码识别结果
  private uri: string = '' // 图片路径
  private infoW: number = 0 // 原图宽度
  private infoH: number = 0 // 原图高度

  // 模拟数据(用于调试)
  @MockSetup
  mock() {
    this.params = new ParamsType()
    let mockScanResult: scanBarcode.ScanResult = {
      scanType: scanCore.ScanType.QR_CODE,
      originalValue: 'mock',
      scanCodeRect: {
        left: 200,
        right: 300,
        top: 200,
        bottom: 300
      }
    }
    this.params.result = [mockScanResult]
    this.result = [mockScanResult]
  }

  // 页面即将显示时初始化
  aboutToAppear() {
    let isFold: boolean = display.isFoldable()
    this.setDisplay() // 设置显示设备参数
    hilog.info(0x0001, TAG, 'aboutToAppear ResultPage')
    let getParams = this.params as ParamsType
    this.result = getParams.result
    this.uri = getParams.uri
    this.infoW = getParams.infoW
    this.infoH = getParams.infoH
    hilog.info(0x0001, TAG, `Succeeded in getting Params.`)
    hilog.info(0x0001, TAG, `uri: ${this.uri}, infoW: ${this.infoW}, infoH: ${this.infoH}`)
    this.calculate() // 计算图片缩放比例与偏移

    // 可折叠设备监听折叠状态变化,重新计算位置
    if (isFold) {
      display.on('foldStatusChange', async (foldStatus: display.FoldStatus) => {
        if (foldStatus === 1 || foldStatus === 2) {
          setTimeout(() => {
            this.setDisplay()
            this.calculate()
          }, 300)
        }
      })
    }
  }

  // 设置当前屏幕宽高(考虑状态栏)
  public setDisplay(): void {
    hilog.info(0x0001, TAG, 'setDisplay start')
    let displayClass: display.Display | null = null
    try {
      displayClass = display.getDefaultDisplaySync()
      hilog.info(0x0001, TAG, 'get displayClass success')
    } catch (error) {
      hilog.error(0x0001, TAG, `get displayClass failed: ${error.code}, ${error.message}`)
    }

    if (displayClass !== null) {
      displayClass.height = displayClass.height - vp2px(this.statusHeight)
      this.cameraHeight = Math.round(px2lpx(displayClass.height))
      this.cameraWidth = Math.round(px2lpx(displayClass.width))
      hilog.info(0x0001, TAG, `cameraHeight: ${this.cameraHeight}, cameraWidth: ${this.cameraWidth}`)
    }
  }

  // 根据原图尺寸和屏幕尺寸计算缩放比例及位置偏移
  public calculate() {
    if (this.infoW && this.infoH && this.cameraHeight && this.cameraWidth) {
      if (this.infoW / this.infoH > this.cameraWidth / this.cameraHeight) {
        // 图片更宽,按宽度缩放
        this.screen = 720 / this.infoW
        this.layTop = (this.cameraHeight - this.cameraWidth * this.infoH / this.infoW) / 2
        this.layLeft = 0
      } else {
        // 图片更高,按高度缩放
        this.layTop = 0
        this.layLeft = (this.cameraWidth - this.cameraHeight * this.infoW / this.infoH) / 2
        this.screen = this.cameraHeight / this.infoH
      }
    }
  }

  // 自定义结果展示框
  @Builder
  CustomTextBox(scanType: string, inputValue: string, left: number, top: number, right: number, bottom: number) {
    Column() {
      Column() {
        Text($r('app.string.code_format'))
        Text(scanType).align(Alignment.Start)
      }.margin({ top: 10 }).width('100%')

      Column() {
        Text($r('app.string.result_content'))
        Text(inputValue)
      }.margin({ top: 10 }).width('100%')

      Column() {
        Text($r('app.string.code_react'))
        Text('left: ' + left + '  top: ' + top + '  right: ' + right + '  bottom: ' + bottom)
      }.margin({ top: 10 }).width('100%')
    }.margin({ bottom: 5 })
  }

  // 页面 UI 构建
  build() {
    Stack() {
      // 显示识别图片
      if (this.uri) {
        Image(this.uri)
          .objectFit(ImageFit.Contain)
          .width('100%').height('100%')
      }

      // 显示条码坐标图标(例如在二维码中心加图标)
      ForEach(this.result, (item: scanBarcode.ScanResult, index: number) => {
        Column() {
          if (item.scanCodeRect && index >= 0) {
            Image($rawfile('scan_selected.svg'))
              .width(40).height(40)
              .markAnchor({ x: 20, y: 20 })
              .position({
                x: Math.round(item.scanCodeRect.left * this.screen + this.layLeft) +
                  Math.round((item.scanCodeRect.right - item.scanCodeRect.left) * this.screen) / 2 + 'lpx',
                y: Math.round(item.scanCodeRect.top * this.screen + this.layTop) +
                  Math.round((item.scanCodeRect.bottom - item.scanCodeRect.top) * this.screen) / 2 + 'lpx',
              })
          }
        }.width('100%').height('100%')
      })

      // 滚动展示结果信息
      Scroll(this.scroller) {
        Column() {
          // 返回按钮
          Image($rawfile('scan_back.svg'))
            .fillColor(Color.Black)
            .width(30).height(30)
            .objectFit(ImageFit.Contain)
            .position({ x: 0, y: 0 })
            .zIndex(10)
            .onClick(async () => {
              router.back()
            })

          // 结果文字展示
          Column() {
            Text($r('app.string.title_result')).fontSize(18).margin({ top: 20 })

            ForEach(this.result, (item: scanBarcode.ScanResult) => {
              if (item['scanCodeRect']) {
                this.CustomTextBox(this.getScanTypeKey(item['scanType']), item['originalValue'],
                  item['scanCodeRect']['left'], item['scanCodeRect'].top,
                  item['scanCodeRect'].right, item['scanCodeRect'].bottom)
              }
            })
          }.width('80%').height('100%')
        }
      }
      .scrollable(ScrollDirection.Vertical)
      .scrollBar(BarState.On)
      .scrollBarColor(Color.Gray)
      .scrollBarWidth(5)
      .height('100%')
    }
    .width('100%')
    .height('100%')
    .padding({ top: 40 })
  }

  // 获取扫码类型对应字符串
  public getScanTypeKey(type: number): string {
    return SCAN_TYPE[type] || ''
  }
}
- 页面效果

需要参加鸿蒙认证的请点击 鸿蒙认证链接

讨论HarmonyOS开发技术,专注于API与组件、DevEco Studio、测试、元服务和应用上架分发等。
更多推荐
 12
12 0
0- 0


 已为社区贡献30条内容

所有评论(0)