Flutter框架跨平台鸿蒙开发 —— Image Widget 基础:图片加载方式
在 Flutter 跨平台鸿蒙开发中,Image Widget 是用于显示图片的核心组件。相比 Text Widget,Image 的使用看似简单,但涉及图片加载、缓存、内存管理等复杂机制。掌握 Image Widget 的基础使用,是打造优秀视觉体验的第一步。本文将从 Image Widget 的核心概念出发,通过实际应用场景的示例,带你深入理解图片的加载方式和原理。Image Widget 是
·
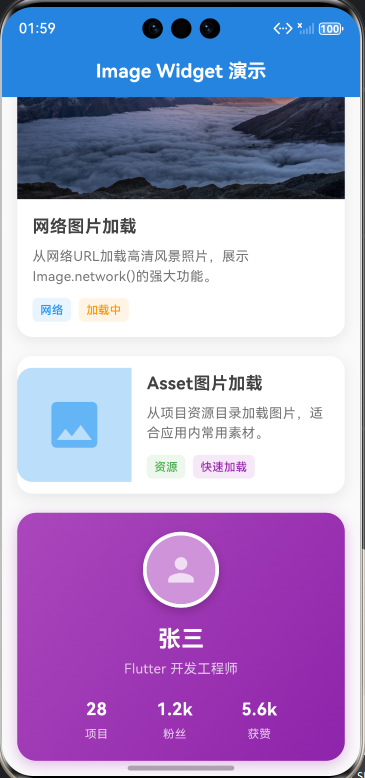
示例+效果图
下面是一个完整的可运行示例,展示 Image Widget 的实际应用:
import 'package:flutter/material.dart';
void main() => runApp(const ImageDemoApp());
/// Image Widget 演示应用
class ImageDemoApp extends StatelessWidget {
const ImageDemoApp({Key? key}) : super(key: key);
Widget build(BuildContext context) {
return MaterialApp(
debugShowCheckedModeBanner: false,
title: 'Image Widget 演示',
theme: ThemeData(
primarySwatch: Colors.blue,
useMaterial3: true,
),
home: const HomePage(),
);
}
}
/// 主页面
class HomePage extends StatelessWidget {
const HomePage({Key? key}) : super(key: key);
Widget build(BuildContext context) {
return Scaffold(
backgroundColor: Colors.grey[50],
appBar: AppBar(
title: const Text(
'Image Widget 演示',
style: TextStyle(
fontSize: 20,
fontWeight: FontWeight.bold,
color: Colors.white,
),
),
centerTitle: true,
elevation: 0,
backgroundColor: Colors.blue[600],
),
body: const SingleChildScrollView(
padding: EdgeInsets.all(16),
child: Column(
children: [
NetworkImageCard(),
SizedBox(height: 20),
AssetImageCard(),
SizedBox(height: 20),
UserProfileCard(),
],
),
),
);
}
}
/// 网络图片卡片
class NetworkImageCard extends StatelessWidget {
const NetworkImageCard({Key? key}) : super(key: key);
Widget build(BuildContext context) {
return Container(
decoration: BoxDecoration(
color: Colors.white,
borderRadius: BorderRadius.circular(16),
boxShadow: [
BoxShadow(
color: Colors.black.withOpacity(0.08),
blurRadius: 12,
offset: const Offset(0, 4),
),
],
),
child: Column(
crossAxisAlignment: CrossAxisAlignment.start,
children: [
// 网络图片
ClipRRect(
borderRadius: const BorderRadius.vertical(top: Radius.circular(16)),
child: Image.network(
'https://images.unsplash.com/photo-1506905925346-21bda4d32df4?w=800',
width: double.infinity,
height: 200,
fit: BoxFit.cover,
loadingBuilder: (context, child, loadingProgress) {
if (loadingProgress == null) return child;
return Container(
width: double.infinity,
height: 200,
color: Colors.grey[200],
child: Center(
child: CircularProgressIndicator(
value: loadingProgress.expectedTotalBytes != null
? loadingProgress.cumulativeBytesLoaded /
loadingProgress.expectedTotalBytes!
: null,
),
),
);
},
errorBuilder: (context, error, stackTrace) {
return Container(
width: double.infinity,
height: 200,
color: Colors.grey[300],
child: const Center(
child: Icon(Icons.error, color: Colors.grey, size: 48),
),
);
},
),
),
// 内容
Padding(
padding: const EdgeInsets.all(16),
child: Column(
crossAxisAlignment: CrossAxisAlignment.start,
children: [
Text(
'网络图片加载',
style: TextStyle(
fontSize: 18,
fontWeight: FontWeight.bold,
color: Colors.grey[800],
),
),
const SizedBox(height: 8),
Text(
'从网络URL加载高清风景照片,展示Image.network()的强大功能。',
style: TextStyle(
fontSize: 14,
color: Colors.grey[600],
height: 1.5,
),
),
const SizedBox(height: 12),
Row(
children: [
_buildTag('网络', Colors.blue),
const SizedBox(width: 8),
_buildTag('加载中', Colors.orange),
],
),
],
),
),
],
),
);
}
Widget _buildTag(String text, Color color) {
return Container(
padding: const EdgeInsets.symmetric(horizontal: 8, vertical: 4),
decoration: BoxDecoration(
color: color.withOpacity(0.1),
borderRadius: BorderRadius.circular(6),
),
child: Text(
text,
style: TextStyle(
fontSize: 12,
color: color,
fontWeight: FontWeight.w500,
),
),
);
}
}
/// Asset图片卡片
class AssetImageCard extends StatelessWidget {
const AssetImageCard({Key? key}) : super(key: key);
Widget build(BuildContext context) {
return Container(
decoration: BoxDecoration(
color: Colors.white,
borderRadius: BorderRadius.circular(16),
boxShadow: [
BoxShadow(
color: Colors.black.withOpacity(0.08),
blurRadius: 12,
offset: const Offset(0, 4),
),
],
),
child: Row(
children: [
// Asset图片(使用占位图)
ClipRRect(
borderRadius: const BorderRadius.horizontal(
left: Radius.circular(16),
),
child: Container(
width: 120,
height: 120,
color: Colors.blue[100],
child: Icon(
Icons.image,
size: 64,
color: Colors.blue[300],
),
),
),
// 内容
Expanded(
child: Padding(
padding: const EdgeInsets.all(16),
child: Column(
crossAxisAlignment: CrossAxisAlignment.start,
children: [
Text(
'Asset图片加载',
style: TextStyle(
fontSize: 18,
fontWeight: FontWeight.bold,
color: Colors.grey[800],
),
),
const SizedBox(height: 8),
Text(
'从项目资源目录加载图片,适合应用内常用素材。',
style: TextStyle(
fontSize: 14,
color: Colors.grey[600],
height: 1.5,
),
maxLines: 2,
overflow: TextOverflow.ellipsis,
),
const SizedBox(height: 12),
Row(
children: [
_buildTag('资源', Colors.green),
const SizedBox(width: 8),
_buildTag('快速加载', Colors.purple),
],
),
],
),
),
),
],
),
);
}
Widget _buildTag(String text, Color color) {
return Container(
padding: const EdgeInsets.symmetric(horizontal: 8, vertical: 4),
decoration: BoxDecoration(
color: color.withOpacity(0.1),
borderRadius: BorderRadius.circular(6),
),
child: Text(
text,
style: TextStyle(
fontSize: 12,
color: color,
fontWeight: FontWeight.w500,
),
),
);
}
}
/// 用户资料卡片(实际应用)
class UserProfileCard extends StatelessWidget {
const UserProfileCard({Key? key}) : super(key: key);
Widget build(BuildContext context) {
return Container(
padding: const EdgeInsets.all(20),
decoration: BoxDecoration(
gradient: LinearGradient(
begin: Alignment.topLeft,
end: Alignment.bottomRight,
colors: [
Colors.purple[400]!,
Colors.purple[600]!,
],
),
borderRadius: BorderRadius.circular(20),
boxShadow: [
BoxShadow(
color: Colors.purple.withOpacity(0.3),
blurRadius: 12,
offset: const Offset(0, 4),
),
],
),
child: Column(
children: [
// 头像(网络图片)
Container(
width: 80,
height: 80,
decoration: BoxDecoration(
shape: BoxShape.circle,
border: Border.all(color: Colors.white, width: 4),
boxShadow: [
BoxShadow(
color: Colors.black.withOpacity(0.2),
blurRadius: 8,
offset: const Offset(0, 4),
),
],
),
child: ClipOval(
child: Image.network(
'https://api.dicebear.com/7.x/avataaars/svg?seed=Felix',
fit: BoxFit.cover,
errorBuilder: (context, error, stackTrace) {
return Container(
color: Colors.purple[200],
child: const Icon(Icons.person, size: 40, color: Colors.white70),
);
},
),
),
),
const SizedBox(height: 16),
Text(
'张三',
style: TextStyle(
fontSize: 24,
fontWeight: FontWeight.bold,
color: Colors.white,
),
),
const SizedBox(height: 4),
Text(
'Flutter 开发工程师',
style: TextStyle(
fontSize: 14,
color: Colors.white70,
),
),
const SizedBox(height: 20),
Row(
mainAxisAlignment: MainAxisAlignment.spaceEvenly,
children: [
_buildStat('项目', '28'),
_buildStat('粉丝', '1.2k'),
_buildStat('获赞', '5.6k'),
],
),
],
),
);
}
Widget _buildStat(String label, String value) {
return Column(
children: [
Text(
value,
style: TextStyle(
fontSize: 18,
fontWeight: FontWeight.bold,
color: Colors.white,
),
),
const SizedBox(height: 4),
Text(
label,
style: TextStyle(
fontSize: 12,
color: Colors.white70,
),
),
],
);
}
}
关键知识点说明
1. 图片加载状态处理
Image.network(
  url,
  loadingBuilder: (context, child, loadingProgress) {
    // 处理加载中状态
    if (loadingProgress == null) return child;
    return CircularProgressIndicator();
  },
  errorBuilder: (context, error, stackTrace) {
    // 处理加载失败状态
    return Icon(Icons.error);
  },
)
2. BoxFit 图片适应方式对比
| BoxFit | 效果 | 适用场景 |
|---|---|---|
fill |
填充容器,可能变形 | 需要完全填充的场景 |
cover |
裁剪填充,保持比例 | 背景图、封面图 |
contain |
完整显示,保持比例 | 商品详情图、头像 |
fitWidth |
宽度填充 | 横向滚动图片列表 |
fitHeight |
高度填充 | 纵向滚动图片列表 |
none |
原始尺寸 | 需要原图的场景 |
scaleDown |
缩小至包含 | 响应式图片 |
// BoxFit.cover示例(推荐用于封面图)
Image.network(
  url,
  fit: BoxFit.cover,  // 裁剪填充,保持比例
)
一、 前言
在 Flutter 跨平台鸿蒙开发中,Image Widget 是用于显示图片的核心组件。相比 Text Widget,Image 的使用看似简单,但涉及图片加载、缓存、内存管理等复杂机制。掌握 Image Widget 的基础使用,是打造优秀视觉体验的第一步。
本文将从 Image Widget 的核心概念出发,通过实际应用场景的示例,带你深入理解图片的加载方式和原理。
二、 图片加载方式流程图
2.1 Image Widget 整体加载流程
2.2 网络图片加载详细流程
三、 Image Widget 核心属性对比表
| 属性 | 类型 | 作用 | 鸿蒙适配建议 | 常用值 |
|---|---|---|---|---|
image |
ImageProvider | 图片数据源 | 根据场景选择合适的Provider | NetworkImage, AssetImage |
width |
double? | 图片宽度 | 根据UI设计设置 | null(自适应) |
height |
double? | 图片高度 | 根据UI设计设置 | null(自适应) |
fit |
BoxFit? | 图片适应方式 | 保持图片比例 | BoxFit.cover, BoxFit.contain |
alignment |
AlignmentGeometry? | 对齐方式 | 鸿蒙默认居中 | Alignment.center |
color |
Color? | 混合颜色 | 用于图标着色 | null |
colorBlendMode |
BlendMode? | 混合模式 | 配合color使用 | BlendMode.srcIn |
repeat |
ImageRepeat? | 重复方式 | 平铺场景 | ImageRepeat.noRepeat |
四、 图片加载方式详解
4.1 ImageProvider 架构
4.2 三种主要加载方式
方式1:网络图片加载
Image.network(
  'https://example.com/image.jpg',
  width: 200,
  height: 200,
  fit: BoxFit.cover,
)
方式2:Asset图片加载
// pubspec.yaml中配置
// assets:
//   - assets/images/

Image.asset(
  'assets/images/logo.png',
  width: 100,
  height: 100,
)
方式3:文件图片加载
Image.file(
  File('/path/to/local/image.jpg'),
  width: 200,
  height: 200,
)
五、 最佳实践
5.1 图片加载建议
| 场景 | 推荐方式 | 原因 |
|---|---|---|
| 应用Logo、图标 | Asset | 打包进应用,快速加载 |
| 用户头像 | Network | 动态内容,需要更新 |
| 临时图片 | Memory | 内存缓存,快速访问 |
| 相册图片 | File | 本地文件,权限可控 |
5.2 性能优化技巧
-
使用缓存
// Flutter默认启用图片缓存 // 可自定义缓存策略 Image.network( url, cacheWidth: 400, // 限制缓存尺寸 cacheHeight: 400, ) -
预加载图片
// 预加载图片,提前进入缓存 precacheImage(NetwordImage(url), context); -
合理使用BoxFit
// 封面图使用cover
// 详情图使用contain
// 背景图使用fill
5.3 避免的坑点
| 坑点 | 解决方案 |
|---|---|
| 图片变形 | 使用BoxFit.cover或contain |
| 内存溢出 | 限制cacheWidth和cacheHeight |
| 加载慢 | 添加loadingBuilder |
| 错误无提示 | 添加errorBuilder |
| 图片模糊 | 使用高分辨率源图 |
六、 总结
Image Widget 是 Flutter UI 开发中不可或缺的组件。掌握 Image 的使用技巧,需要理解:
- 选择合适的加载方式: 网络、Asset、文件各有适用场景
- 处理加载状态: loadingBuilder和errorBuilder提升用户体验
- 理解BoxFit: 选择正确的图片适应方式
- 性能优化: 合理使用缓存和预加载
- 错误处理: 做好异常处理,避免应用崩溃
记住,好的图片设计不仅仅是显示图片,而是恰到好处的加载、展示和管理。当你能够熟练运用 Image Widget 时,你就已经在通往高级工程师的道路上迈出了坚实的一步。
附录
A. pubspec.yaml配置
# 添加Asset图片资源
flutter:
  assets:
    - assets/images/
    - assets/icons/
B. 常用网络图片API
- Unsplash: https://source.unsplash.com/random
- Lorem Picsum: https://picsum.photos/800/600
- DiceBear Avatars: https://api.dicebear.com/7.x/avataaars/svg
C. 图片调试技巧
// 开启图片缓存调试
MaterialApp(
  debugShowMaterialGrid: false,
  checkerboardRasterCacheImages: true,  // 显示图片缓存
  checkerboardOffscreenLayers: true,    // 显示离屏图层
)
欢迎加入开源鸿蒙跨平台社区: https://openharmonycrossplatform.csdn.net

讨论HarmonyOS开发技术,专注于API与组件、DevEco Studio、测试、元服务和应用上架分发等。
更多推荐

 4
4 0
0- 0


 已为社区贡献2条内容

所有评论(0)