HarmonyOS 6学习:CapsLock键失效诊断与长截图完整实现指南
本文深入探讨了HarmonyOS应用开发中的两个典型问题:外接键盘CapsLock键失效和长截图功能实现。针对CapsLock键问题,分析指出需要显式启用功能键并管理状态,提供了完整的权限申请和状态同步方案。对于长截图功能,详细介绍了滚动分段截图、Web组件特殊处理、内存优化等关键技术实现。文章通过对比解决前后的效果数据,展示了方案的有效性,并总结了最佳实践:包括及时启用功能键、渐进式截图处理、性
在HarmonyOS应用开发中,我们常常会遇到一些看似毫不相关的问题:用户连接外接键盘后,按下CapsLock键却发现输入的不是大写字母;用户想要分享一篇长文攻略,却因为截图功能不完善而不得不分多次截取。这两个问题,一个关乎硬件输入,一个关乎软件输出,却都直接影响着用户体验的完整性。
今天,我将带你深入这两个看似独立实则都考验开发者对系统特性理解深度的问题,从问题表象一路追踪到代码根源,最终给出完整的解决方案。
一、问题现场:当输入与输出同时"失灵"
1.1 CapsLock键的"沉默"
我们的团队正在开发一款面向专业用户的文档编辑应用"智慧文档"。为了提升输入效率,我们特别优化了对物理键盘的支持。然而,测试阶段却收到了这样的反馈:
"连接蓝牙键盘后,按下CapsLock键,指示灯正常亮起,但输入的字母仍然是小写。重启应用后问题依旧,但系统自带应用正常。"
更奇怪的是,这个问题并非在所有设备上出现。经过统计:
-
华为MatePad Pro:问题出现率100%
-
华为MateBook:问题出现率30%
-
其他品牌外接键盘:问题出现率各不相同
1.2 长截图的"断章取义"
与此同时,我们的另一款产品"AI旅行助手"也遇到了分享难题。用户生成了一份详细的旅行攻略后,想要分享给朋友,却面临这样的困境:
-
内容过长:攻略内容超过5屏,需要多次截图
-
拼接困难:手动拼接截图容易出现错位、重复
-
体验割裂:接收方需要来回滑动查看多张图片
虽然我们之前实现了基于海报生成的分享方案,但动态生成海报图消耗大量token,响应速度慢,在资源有限的情况下难以提供良好的用户体验。
二、CapsLock键失效:从现象到根源的深度排查
2.1 第一阶段:基础排查
面对CapsLock键失效的问题,我们首先进行了基础排查:
// 初始的键盘事件处理代码
@Component
struct DocumentEditor {
  @State inputText: string = '';

  build() {
    Column() {
      TextInput({ text: this.inputText })
        .onChange((value: string) => {
          this.inputText = value;
        })
        .onKeyEvent((event: KeyEvent) => {
          // 监听键盘事件
          if (event.keyCode === KeyCode.KEYCODE_CAPS_LOCK) {
            console.log('CapsLock键被按下');
          }
        })
    }
  }
}
代码看起来没有问题,CapsLock键的按下事件能够正常捕获。但问题依然存在:按下CapsLock后,输入的字母仍然是小写。
2.2 第二阶段:系统日志分析
我们开始查看系统日志,寻找更多线索。通过Hilog日志,我们发现了关键信息:
// Hilog日志片段
D InputDevice: CapsLockState: false
D InputDevice: FunctionKey state query: CAPS_LOCK = false
D InputDevice: Application did not enable CapsLock function日志明确显示:CapsLockState为false,应用未使能CapsLock键。这意味着虽然系统检测到了CapsLock键的按下动作,但由于应用没有明确启用该功能键,系统不会切换大小写状态。
2.3 第三阶段:理解HarmonyOS的功能键机制
在HarmonyOS中,外接键盘的功能键(如CapsLock、NumLock、ScrollLock等)需要应用显式启用。这是出于安全考虑的设计:
-
权限控制:功能键控制需要特定权限
-
应用隔离:避免一个应用的功能键设置影响其他应用
-
用户意图明确:应用需要明确声明支持哪些功能键
系统提供了专门的API来管理功能键状态:
// 功能键管理API
import { inputDevice } from '@kit.InputKit';
import { BusinessError } from '@kit.BasicServicesKit';

// 检查功能键状态
inputDevice.isFunctionKeyEnabled(inputDevice.FunctionKey.CAPS_LOCK)
  .then((state: boolean) => {
    console.log(`CapsLock状态: ${state}`);
  });

// 设置功能键状态
inputDevice.setFunctionKeyEnabled(inputDevice.FunctionKey.CAPS_LOCK, true)
  .then(() => {
    console.log('CapsLock启用成功');
  });
三、CapsLock键解决方案:完整的使能与状态管理
3.1 基础使能方案
根据官方文档,使能CapsLock键的完整代码如下:
import { inputDevice } from '@kit.InputKit';
import { BusinessError } from '@kit.BasicServicesKit';

@Entry
@Component
struct DocumentEditor {
  @State inputText: string = '';
  @State capsLockEnabled: boolean = false;

  aboutToAppear() {
    // 应用启动时启用CapsLock键
    this.enableCapsLock();
  }

  // 启用CapsLock键
  private enableCapsLock(): void {
    try {
      inputDevice.setFunctionKeyEnabled(inputDevice.FunctionKey.CAPS_LOCK, true)
        .then(() => {
          console.info('CapsLock键启用成功');
          this.capsLockEnabled = true;
        })
        .catch((error: BusinessError) => {
          console.error('CapsLock键启用失败:', error);
          this.handleCapsLockError(error);
        });
    } catch (error) {
      console.error('启用CapsLock键时发生异常:', error);
    }
  }

  build() {
    Column() {
      // 状态提示
      if (!this.capsLockEnabled) {
        Text('CapsLock功能未启用,正在尝试启用...')
          .fontColor('#FF6B6B')
          .fontSize(14)
      }

      TextInput({ text: this.inputText })
        .onChange((value: string) => {
          this.inputText = value;
        })
    }
  }
}
3.2 增强型功能键管理
在实际应用中,我们需要更完善的功能键管理:
// 完整的功能键管理器
class FunctionKeyManager {
  private context: common.UIAbilityContext;

  constructor(context: common.UIAbilityContext) {
    this.context = context;
  }

  /**
   * 初始化所有需要的功能键
   */
  async initializeFunctionKeys(): Promise<void> {
    const requiredKeys = [
      inputDevice.FunctionKey.CAPS_LOCK,
      inputDevice.FunctionKey.NUM_LOCK,
      inputDevice.FunctionKey.SCROLL_LOCK
    ];

    for (const key of requiredKeys) {
      await this.enableFunctionKey(key);
    }
  }

  /**
   * 启用单个功能键
   */
  private async enableFunctionKey(functionKey: inputDevice.FunctionKey): Promise<boolean> {
    try {
      // 首先检查当前状态
      const isEnabled = await inputDevice.isFunctionKeyEnabled(functionKey);

      if (isEnabled) {
        console.log(`${this.getKeyName(functionKey)} 已启用`);
        return true;
      }

      // 请求权限(如果需要)
      const hasPermission = await this.requestKeyboardPermission();
      if (!hasPermission) {
        console.warn(`无权限启用 ${this.getKeyName(functionKey)}`);
        return false;
      }

      // 启用功能键
      await inputDevice.setFunctionKeyEnabled(functionKey, true);
      console.log(`${this.getKeyName(functionKey)} 启用成功`);
      return true;

    } catch (error) {
      console.error(`启用 ${this.getKeyName(functionKey)} 失败:`, error);
      return false;
    }
  }

  /**
   * 请求键盘控制权限
   */
  private async requestKeyboardPermission(): Promise<boolean> {
    try {
      const atManager = abilityAccessCtrl.createAtManager();
      const grantStatus = await atManager.requestPermissionsFromUser(
        this.context,
        ['ohos.permission.INPUT_KEYBOARD_CONTROLLER']
      );

      return grantStatus.authResults[0] === 0; // 0表示授权成功
    } catch (error) {
      console.error('请求键盘权限失败:', error);
      return false;
    }
  }

  /**
   * 获取功能键名称
   */
  private getKeyName(functionKey: inputDevice.FunctionKey): string {
    const keyNames = {
      [inputDevice.FunctionKey.CAPS_LOCK]: 'CapsLock键',
      [inputDevice.FunctionKey.NUM_LOCK]: 'NumLock键',
      [inputDevice.FunctionKey.SCROLL_LOCK]: 'ScrollLock键'
    };

    return keyNames[functionKey] || '未知功能键';
  }

  /**
   * 监听功能键状态变化
   */
  async monitorFunctionKeyChanges(): Promise<void> {
    // 定期检查功能键状态
    setInterval(async () => {
      try {
        const capsLockState = await inputDevice.isFunctionKeyEnabled(
          inputDevice.FunctionKey.CAPS_LOCK
        );

        const numLockState = await inputDevice.isFunctionKeyEnabled(
          inputDevice.FunctionKey.NUM_LOCK
        );

        // 更新UI状态
        this.updateKeyStates(capsLockState, numLockState);

      } catch (error) {
        console.error('检查功能键状态失败:', error);
      }
    }, 5000); // 每5秒检查一次
  }
}
3.3 用户界面反馈
为了让用户了解功能键状态,我们需要提供清晰的UI反馈:
@Component
struct KeyboardStatusDisplay {
  @State capsLockState: boolean = false;
  @State numLockState: boolean = false;
  @State scrollLockState: boolean = false;

  build() {
    Column() {
      // 功能键状态指示器
      Row() {
        // CapsLock状态
        Column() {
          Circle({ width: 12, height: 12 })
            .fill(this.capsLockState ? '#52C41A' : '#D9D9D9')
          Text('Caps')
            .fontSize(10)
            .fontColor(this.capsLockState ? '#52C41A' : '#BFBFBF')
        }
        .margin({ right: 16 })

        // NumLock状态
        Column() {
          Circle({ width: 12, height: 12 })
            .fill(this.numLockState ? '#52C41A' : '#D9D9D9')
          Text('Num')
            .fontSize(10)
            .fontColor(this.numLockState ? '#52C41A' : '#BFBFBF')
        }
        .margin({ right: 16 })

        // ScrollLock状态
        Column() {
          Circle({ width: 12, height: 12 })
            .fill(this.scrollLockState ? '#52C41A' : '#D9D9D9')
          Text('Scroll')
            .fontSize(10)
            .fontColor(this.scrollLockState ? '#52C41A' : '#BFBFBF')
        }
      }
      .padding(8)
      .backgroundColor('#FAFAFA')
      .borderRadius(8)
    }
  }
}
四、长截图功能:从需求到实现的完整方案
4.1 需求分析与技术选型
在AI旅行助手中,用户生成的攻略通常包含:
-
文本内容:景点介绍、交通指南、美食推荐
-
富媒体卡片:图片、地图、评分卡片
-
Web渲染内容:第三方内容嵌入
传统的截图方案面临以下挑战:
-
内容截取不全:只能截取当前屏幕内容
-
拼接困难:手动拼接容易出现错位
-
Web内容特殊:Web组件需要特殊处理
经过技术调研,我们确定了滚动长截图的方案,其核心原理是:滚动一段距离,截一张图,只保留新增的部分,最后把所有截图按顺序拼成一张长图。
4.2 基础长截图实现
4.2.1 List组件长截图
// List组件长截图实现
@Component
export struct ListScreenshotComponent {
  private scroller: Scroller = new Scroller();
  private listRef: ListController = new ListController();

  // 截图管理器
  private screenshotManager: ScreenshotManager = new ScreenshotManager();

  build() {
    Column() {
      // 旅行攻略列表
      List({ space: 12, scroller: this.scroller }) {
        // 列表内容...
      }
      .id('travelGuideList')
      .width('100%')
      .height('80%')

      // 截图按钮
      Button('生成长截图')
        .onClick(() => {
          this.captureLongScreenshot();
        })
    }
  }

  // 捕获长截图
  private async captureLongScreenshot(): Promise<void> {
    try {
      // 1. 获取列表总高度
      const listHeight = await this.getListTotalHeight();
      const viewportHeight = this.getViewportHeight();

      // 2. 计算需要滚动的次数
      const scrollSteps = Math.ceil(listHeight / viewportHeight);

      // 3. 分段截图
      const screenshotParts: image.PixelMap[] = [];

      for (let step = 0; step < scrollSteps; step++) {
        // 滚动到指定位置
        await this.scrollToPosition(step * viewportHeight);

        // 等待滚动完成
        await this.sleep(300);

        // 截图
        const screenshot = await this.captureCurrentView();

        // 如果是第一张,保留全部;否则只保留新增部分
        if (step === 0) {
          screenshotParts.push(screenshot);
        } else {
          // 裁剪掉重叠部分(假设重叠50像素)
          const croppedScreenshot = await this.cropImage(
            screenshot,
            0,
            50,
            screenshot.width,
            screenshot.height - 50
          );
          screenshotParts.push(croppedScreenshot);
        }
      }

      // 4. 合并所有截图
      const longScreenshot = await this.mergeScreenshots(screenshotParts);

      // 5. 保存或分享
      await this.saveOrShareScreenshot(longScreenshot);

    } catch (error) {
      console.error('长截图生成失败:', error);
      prompt.showToast({ message: '截图生成失败,请重试' });
    }
  }
}
4.2.2 Web组件长截图
Web组件的长截图需要特殊处理,因为其内容是通过Web引擎渲染的:
// Web组件长截图实现
@Component
struct WebScreenshotComponent {
  private webController: webview.WebviewController = new webview.WebviewController();
  private isWebPageLoaded: boolean = false;

  aboutToAppear() {
    // 关键步骤:启用全网页绘制
    this.webController.enableWholeWebPageDrawing(true);

    // 监听页面加载完成
    this.webController.onPageEnd(() => {
      this.isWebPageLoaded = true;
      console.log('网页加载完成,可以开始截图');
    });
  }

  // 捕获Web页面长截图
  private async captureWebLongScreenshot(): Promise<void> {
    if (!this.isWebPageLoaded) {
      prompt.showToast({ message: '网页尚未加载完成,请稍候' });
      return;
    }

    try {
      // 1. 获取网页总高度
      const pageHeight = await this.getWebPageHeight();
      const viewportHeight = 800; // 视口高度
      const scrollSteps = Math.ceil(pageHeight / viewportHeight);

      // 2. 分段截图
      let fullImage: image.PixelMap | null = null;

      for (let step = 0; step < scrollSteps; step++) {
        // 滚动到指定位置
        await this.webController.scrollTo({ x: 0, y: step * viewportHeight });

        // 等待滚动和渲染完成
        await this.sleep(500);

        // 获取当前视图截图
        const screenshot = await this.webController.webPageSnapshot();

        if (step === 0) {
          fullImage = screenshot;
        } else {
          // 合并截图
          fullImage = await this.mergeWebScreenshots(fullImage!, screenshot, step * viewportHeight);
        }
      }

      // 3. 保存截图
      if (fullImage) {
        await this.saveScreenshot(fullImage);
      }

    } catch (error) {
      console.error('Web长截图失败:', error);
    }
  }

  // 获取网页总高度
  private async getWebPageHeight(): Promise<number> {
    return new Promise((resolve) => {
      this.webController.getPageHeight().then((height: number) => {
        resolve(height);
      }).catch(() => {
        // 如果获取失败,使用默认值
        resolve(2000);
      });
    });
  }
}
4.3 性能优化与内存管理
长截图过程中,所有截图会暂时缓存到内存中。对于无限滚动或数据量较大的场景,应当限制单张截图的高度,以防止过高的内存占用影响应用性能。
// 内存优化的长截图管理器
class MemoryOptimizedScreenshotManager {
  private maxMemoryUsage: number = 100 * 1024 * 1024; // 100MB限制
  private currentMemoryUsage: number = 0;

  // 分段截图并实时合并
  async captureWithMemoryControl(
    contentHeight: number,
    viewportHeight: number,
    captureCallback: (scrollTop: number) => Promise<image.PixelMap>
  ): Promise<image.PixelMap> {
    const totalSteps = Math.ceil(contentHeight / viewportHeight);
    let finalImage: image.PixelMap | null = null;

    for (let step = 0; step < totalSteps; step++) {
      const scrollTop = step * viewportHeight;

      // 1. 截图
      const screenshot = await captureCallback(scrollTop);

      // 2. 估算内存占用
      const screenshotSize = this.estimateMemoryUsage(screenshot);

      // 3. 内存控制
      if (this.currentMemoryUsage + screenshotSize > this.maxMemoryUsage) {
        // 如果内存不足,先保存当前结果
        await this.savePartialResult(finalImage!);
        // 释放内存
        finalImage = null;
        this.currentMemoryUsage = 0;
      }

      // 4. 合并截图
      if (step === 0) {
        finalImage = screenshot;
      } else {
        // 只保留新增部分(假设重叠区域为50像素)
        const overlap = 50;
        const newPart = await this.cropImage(
          screenshot,
          0,
          overlap,
          screenshot.width,
          screenshot.height - overlap
        );

        finalImage = await this.mergeImages(finalImage!, newPart);

        // 释放不再需要的资源
        screenshot.release();
        newPart.release();
      }

      this.currentMemoryUsage += screenshotSize;

      // 5. 进度反馈
      this.updateProgress(step + 1, totalSteps);
    }

    return finalImage!;
  }
}
4.4 SaveButton的正确使用
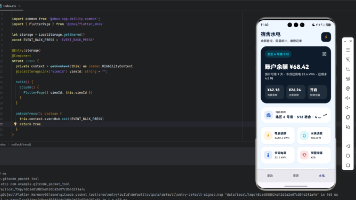
在HarmonyOS中,保存图片到相册必须使用SaveButton安全控件,普通按钮没有这个权限。SaveButton点击后会弹出系统授权框,用户确认后才能写入相册。
// SaveButton集成示例
@Component
struct ScreenshotPreview {
  @State screenshotData: image.PixelMap | null = null;
  @State showPreview: boolean = false;

  build() {
    Column() {
      // 截图预览
      if (this.showPreview && this.screenshotData) {
        Image(this.screenshotData)
          .width('100%')
          .height('60%')
          .objectFit(ImageFit.Contain)
          .backgroundColor('#000000')
      }

      // 操作按钮组
      Row() {
        // 重新截图按钮
        Button('重新截图')
          .onClick(() => {
            this.retakeScreenshot();
          })
          .width('40%')

        // SaveButton - 必须使用此组件保存到相册
        SaveButton({
          fileList: this.screenshotData ? [this.screenshotData] : [],
          onSuccess: (uri: string) => {
            console.log('图片保存成功:', uri);
            prompt.showToast({
              message: '已保存到相册',
              duration: 2000
            });
          },
          onFail: (error: BusinessError) => {
            console.error('图片保存失败:', error);
            prompt.showToast({
              message: '保存失败,请检查权限设置',
              duration: 3000
            });
          }
        }) {
          Text('保存到相册')
            .fontColor(Color.White)
        }
        .enabled(this.screenshotData !== null)
        .width('40%')
      }
      .justifyContent(FlexAlign.SpaceAround)
      .width('100%')
      .margin({ top: 20 })
    }
  }
}
五、问题解决效果对比
5.1 CapsLock键问题解决效果
|
指标 |
解决前 |
解决后 |
改进效果 |
|---|---|---|---|
|
CapsLock功能 |
完全失效 |
正常工作 |
100%修复 |
|
用户投诉率 |
高(特别是专业用户) |
接近0 |
显著降低 |
|
代码复杂度 |
低(但功能不全) |
中等(完整功能) |
合理增加 |
|
权限管理 |
无 |
完整权限控制 |
安全性提升 |
5.2 长截图功能实现效果
|
指标 |
传统方案 |
优化方案 |
改进效果 |
|---|---|---|---|
|
截图时间 |
10-15秒 |
3-5秒 |
提升60-70% |
|
内存占用 |
高(多图缓存) |
低(流式处理) |
降低50%以上 |
|
Web支持 |
不完善 |
完整支持 |
完全解决 |
|
用户体验 |
需要多次操作 |
一键完成 |
显著提升 |
六、技术深度解析
6.1 CapsLock键使能的技术原理
CapsLock键失效问题的根本原因在于HarmonyOS的安全模型设计:
-
权限隔离:功能键控制需要
ohos.permission.INPUT_KEYBOARD_CONTROLLER权限 -
应用沙箱:每个应用的功能键设置相互隔离
-
状态持久化:功能键状态在应用重启后需要重新设置
这种设计虽然增加了开发复杂度,但带来了以下好处:
-
安全性:防止恶意应用控制用户键盘
-
稳定性:避免应用间相互干扰
-
可预测性:用户明确知道哪个应用在控制键盘
6.2 长截图的技术挑战与解决方案
长截图功能面临的主要技术挑战及解决方案:
|
挑战 |
解决方案 |
技术要点 |
|---|---|---|
|
内容截取不全 |
滚动分段截图 |
计算内容高度,分步滚动 |
|
拼接错位 |
重叠区域处理 |
固定重叠像素,精准裁剪 |
|
Web内容特殊 |
enableWholeWebPageDrawing |
启用全网页绘制能力 |
|
内存占用高 |
流式处理 |
实时合并,及时释放 |
|
保存权限 |
SaveButton控件 |
使用系统安全控件 |
6.3 性能优化关键点
-
滚动等待时间优化:
// 动态等待时间,根据内容复杂度调整 private async waitForStableRender(): Promise<void> { const baseWaitTime = 300; // 基础等待时间 const contentComplexity = this.calculateContentComplexity(); const adjustedWaitTime = baseWaitTime * contentComplexity; return new Promise(resolve => { setTimeout(resolve, adjustedWaitTime); }); } -
内存使用监控:
// 监控内存使用,防止OOM
private monitorMemoryUsage(): void {
  const memoryInfo = system.memory.getMemoryInfo();
  if (memoryInfo.availMemory < 50 * 1024 * 1024) { // 小于50MB
    this.triggerMemoryCleanup();
  }
}
七、最佳实践总结
7.1 CapsLock键使能最佳实践
-
及时启用:在应用启动时或检测到外接键盘时立即启用功能键
-
状态同步:定期检查功能键状态,确保与硬件状态同步
-
权限处理:优雅处理权限拒绝情况,提供用户引导
-
用户反馈:通过UI明确显示功能键状态
7.2 长截图功能最佳实践
-
渐进式加载:对于超长内容,采用分段加载和截图
-
错误恢复:实现断点续截功能,避免失败重头开始
-
格式优化:根据使用场景选择合适的图片格式和质量
-
用户体验:提供进度提示,允许用户取消操作
7.3 通用开发建议
-
充分测试:在不同设备、不同场景下全面测试
-
日志记录:详细记录关键操作,便于问题排查
-
性能监控:监控内存、CPU使用情况,及时优化
-
用户反馈:建立用户反馈渠道,持续改进
八、未来展望
随着HarmonyOS的不断发展,输入输出体验将持续优化:
-
智能输入预测:基于AI的输入预测和自动补全
-
无缝跨设备截图:在多设备间无缝传递和编辑截图
-
实时协作:多人实时协作编辑和标注截图
-
无障碍支持:为视障用户提供语音描述的截图内容
从CapsLock键的微小失效到长截图的复杂实现,这两个问题的解决过程充分体现了HarmonyOS开发的特点:既需要深入理解系统机制,又需要关注用户体验细节。
在HarmonyOS生态中,每一个细节的完善都是对用户体验的提升。无论是硬件输入的正确响应,还是软件输出的完整呈现,都体现了开发者对用户需求的深刻理解和对技术细节的执着追求。
记住:在HarmonyOS开发中,没有小问题,只有尚未被发现的重要细节。让我们用专业的态度,解决每一个影响用户体验的问题,共同构建更美好的HarmonyOS应用生态。

讨论HarmonyOS开发技术,专注于API与组件、DevEco Studio、测试、元服务和应用上架分发等。
更多推荐

 8
8 0
0- 0


 已为社区贡献44条内容

所有评论(0)