鸿蒙PC Electron框架开发实战:CMS构建智能文章管理系统
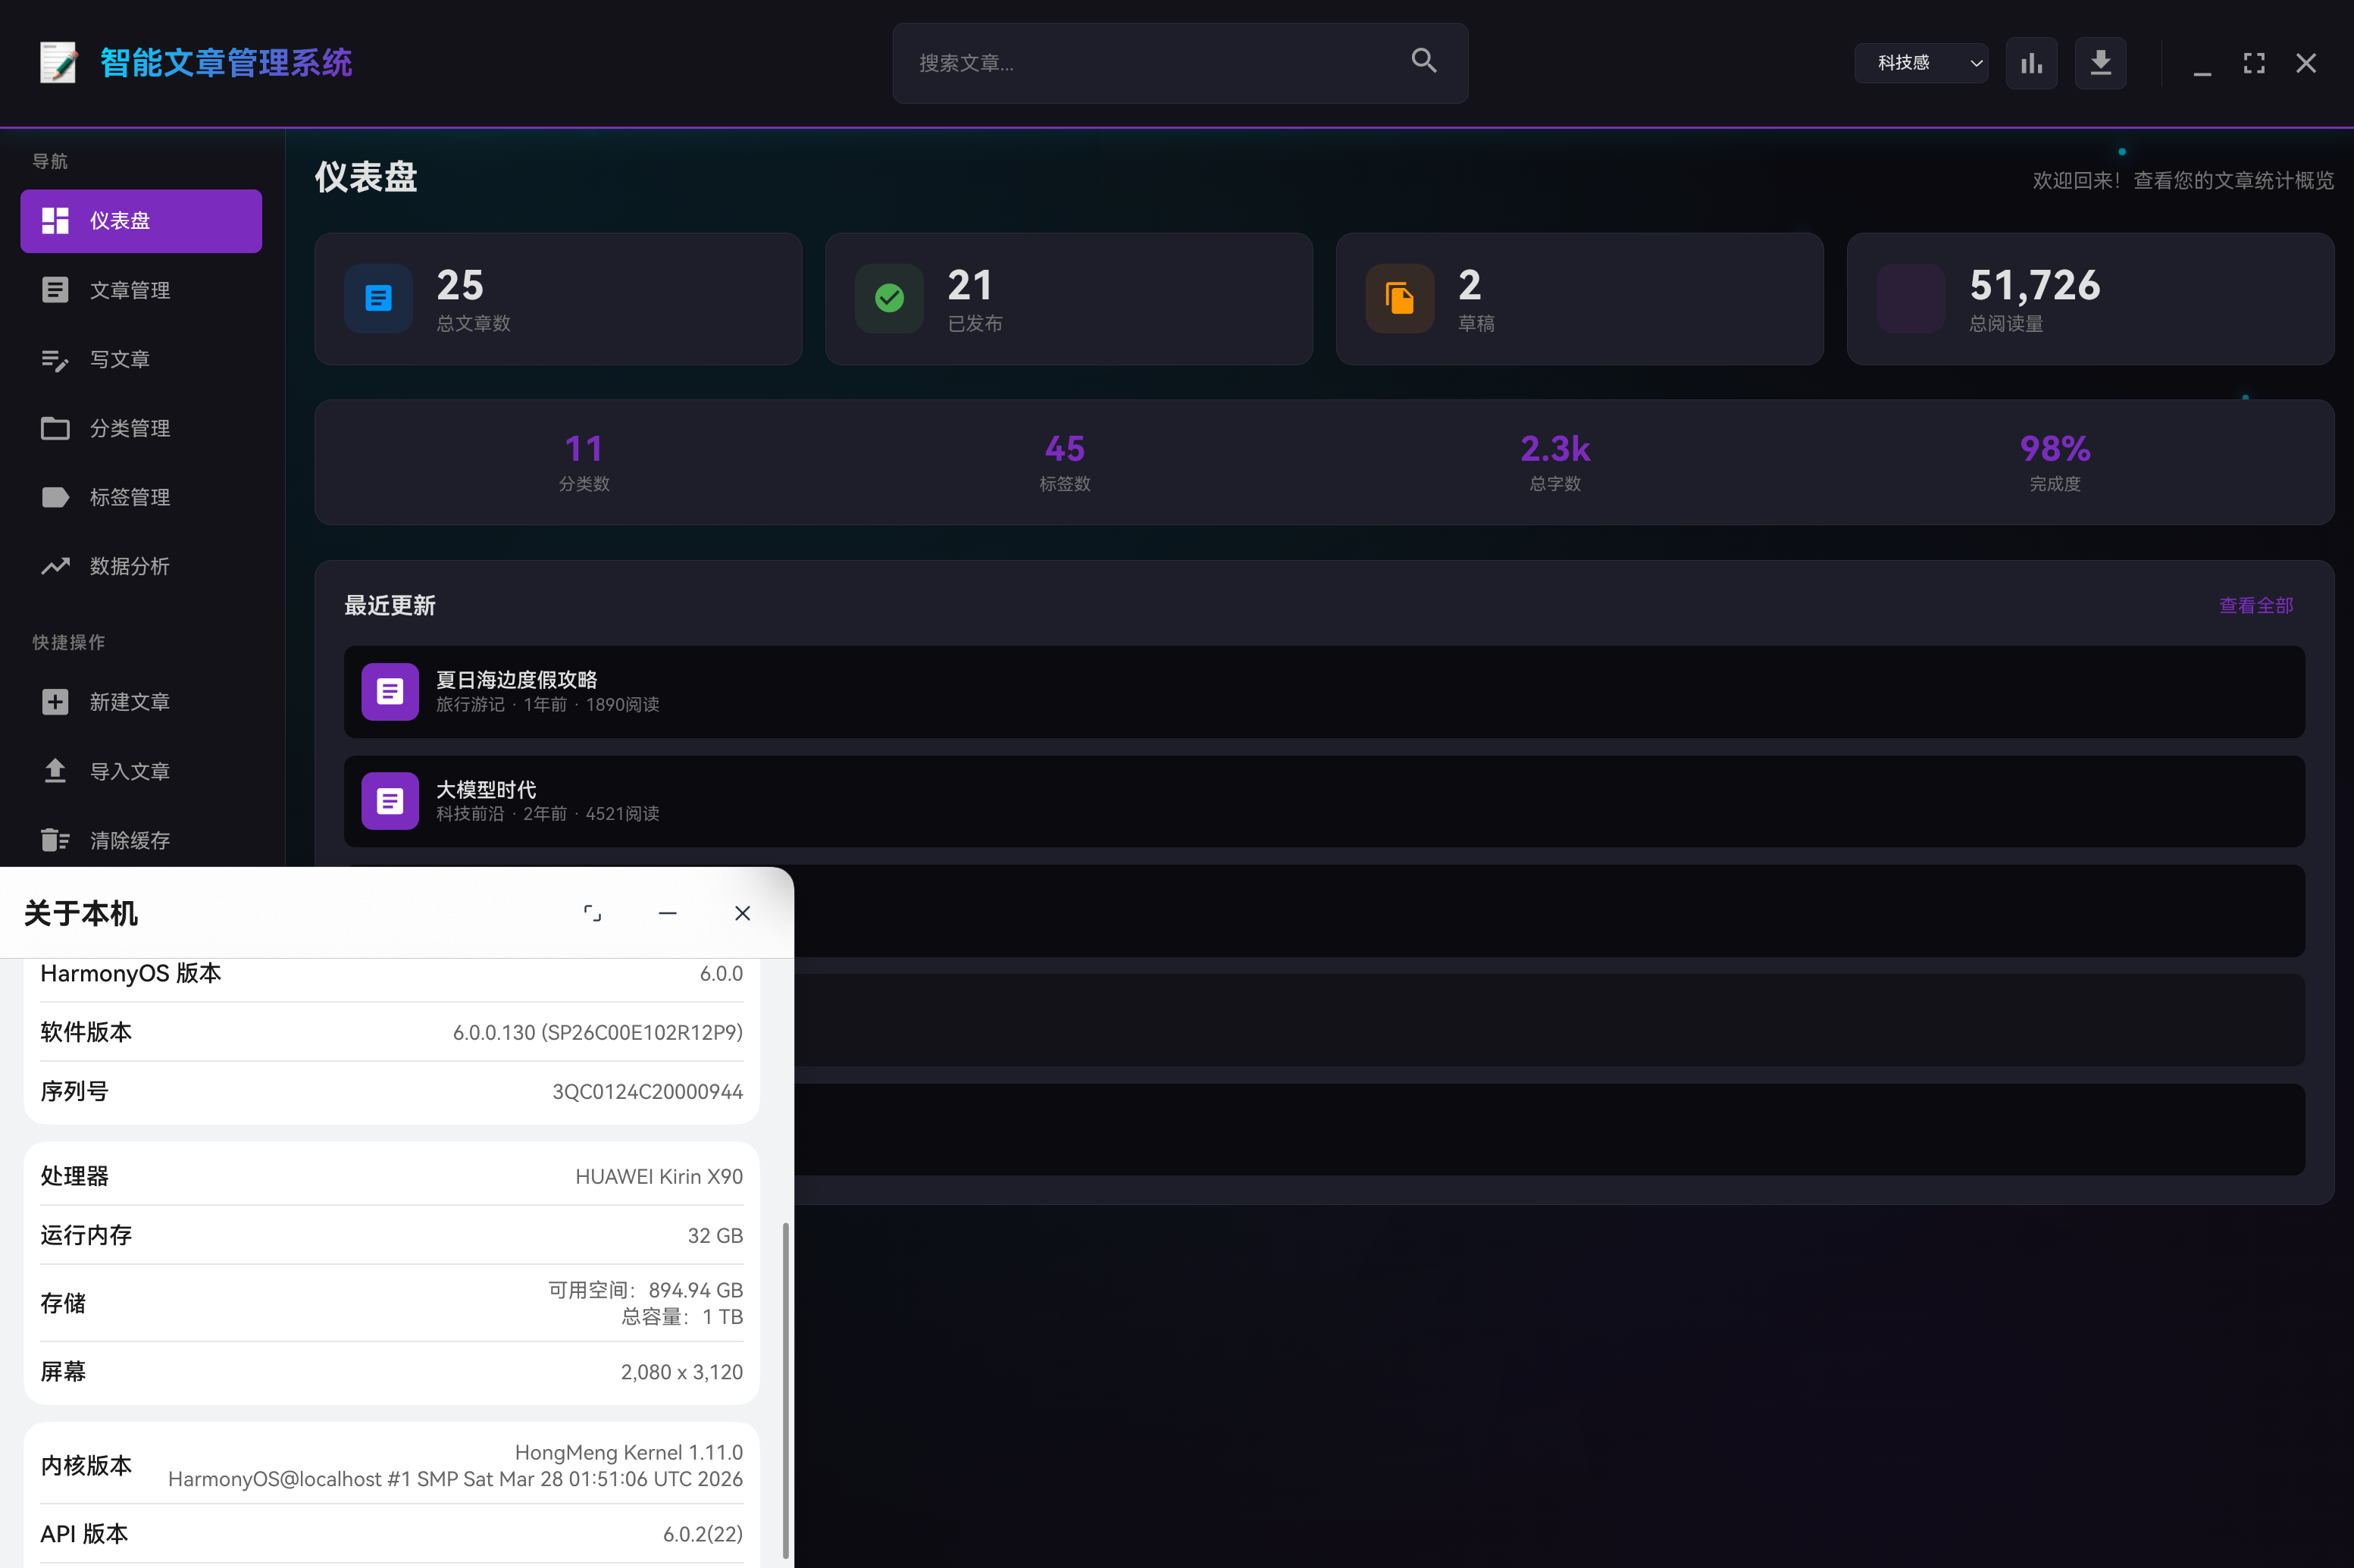
开源鸿蒙PC智能文章管理系统开发指南 本文介绍了基于Electron框架在开源鸿蒙PC平台上开发智能文章管理系统的完整流程。系统包含仪表盘、文章管理、富文本编辑、分类标签管理等模块,采用主进程/渲染进程架构实现。开发环境搭建包括Node.js和Electron的安装配置,项目结构采用标准Electron应用布局。主进程负责窗口管理、菜单创建和IPC通信,渲染进程处理UI交互。系统支持文章CRUD操
欢迎加入开源鸿蒙PC社区:https://harmonypc.csdn.net/
atomgit仓库地址: https://atomgit.com/feng8403000/cms
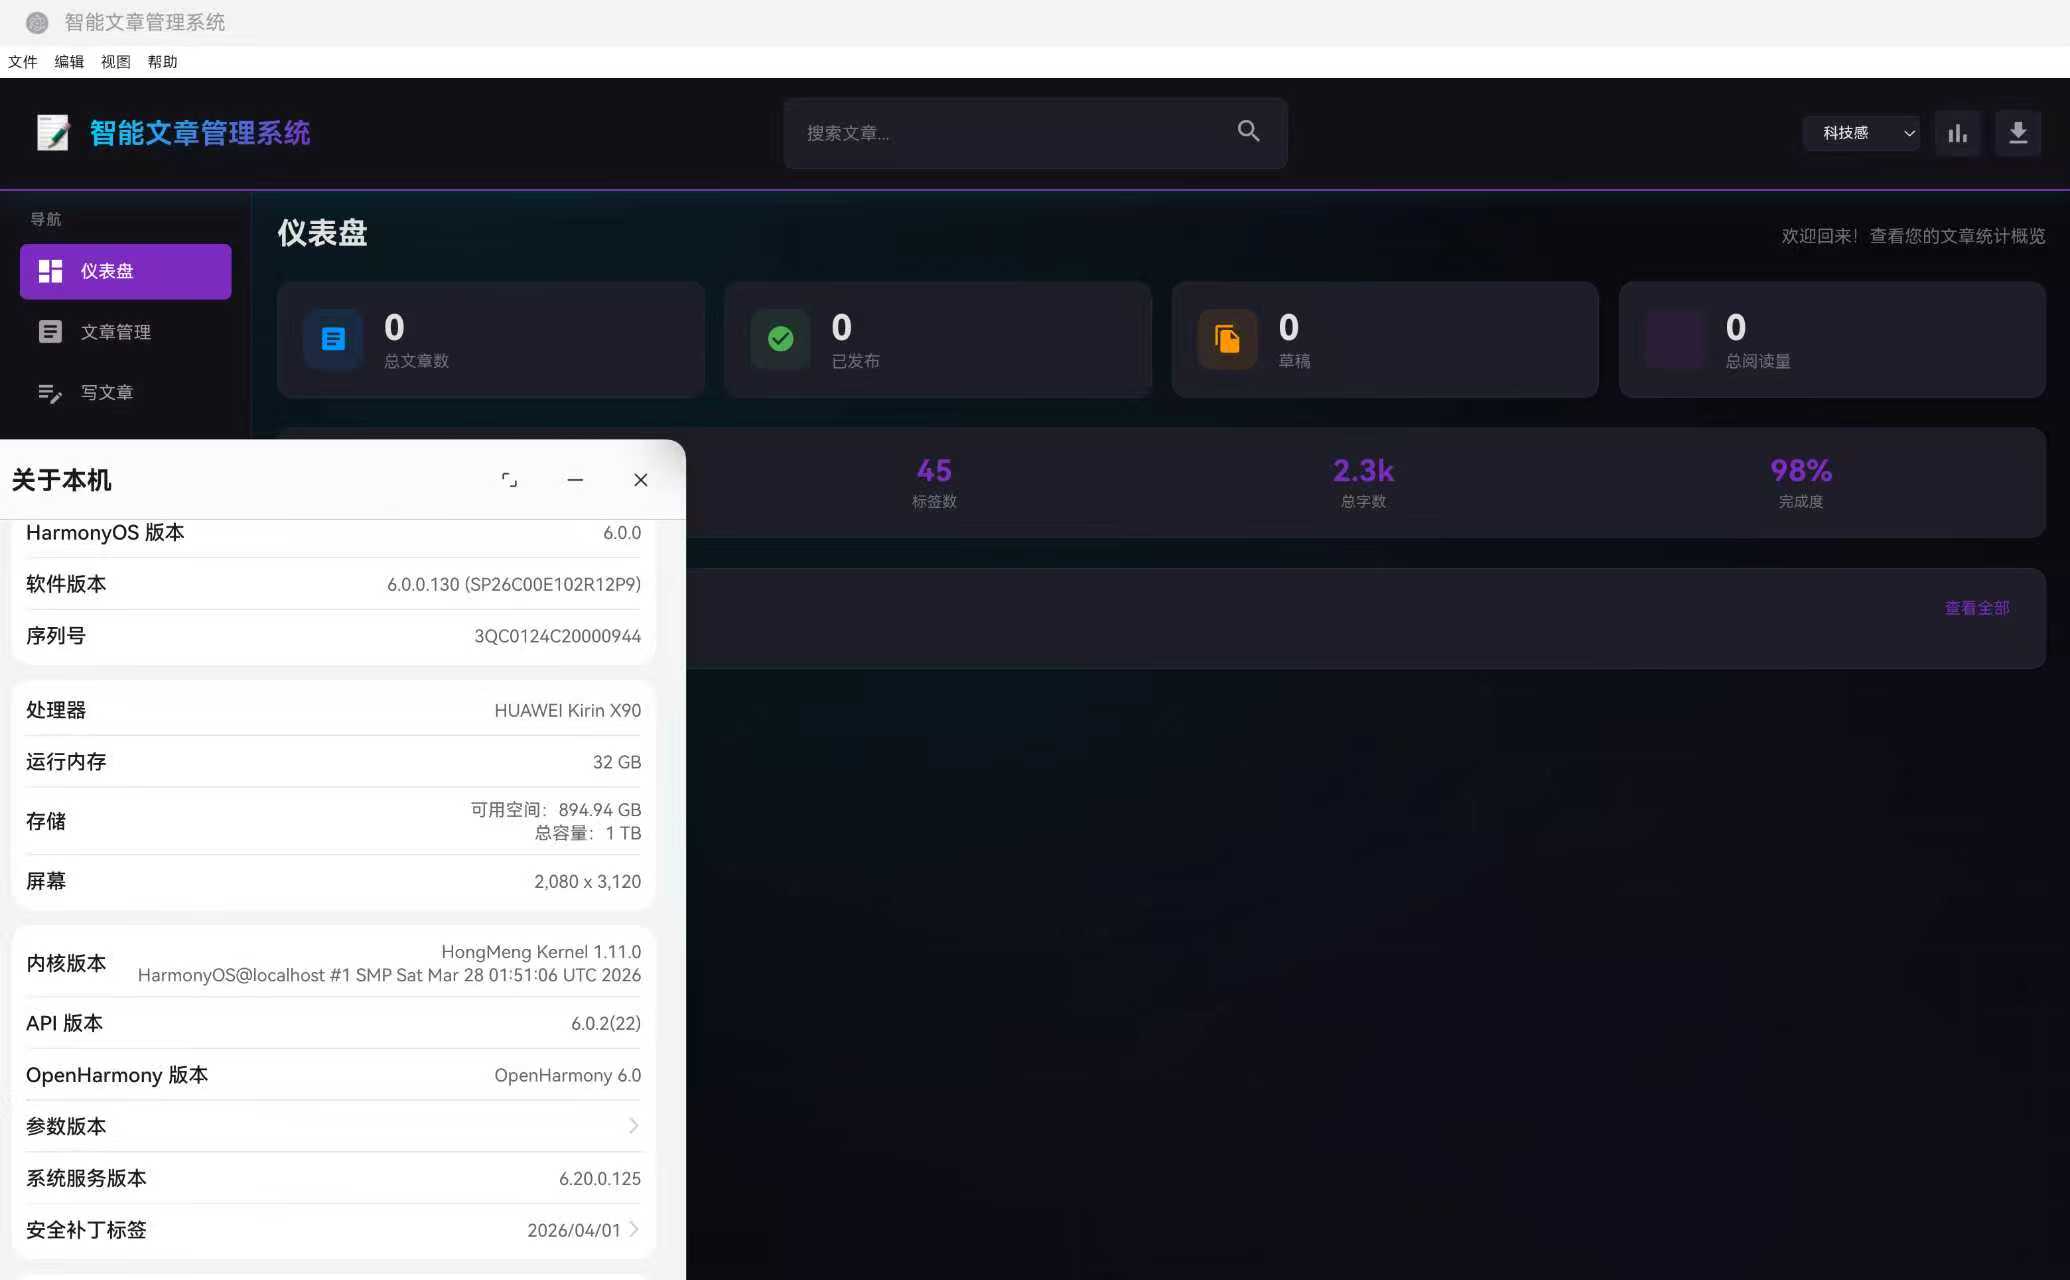
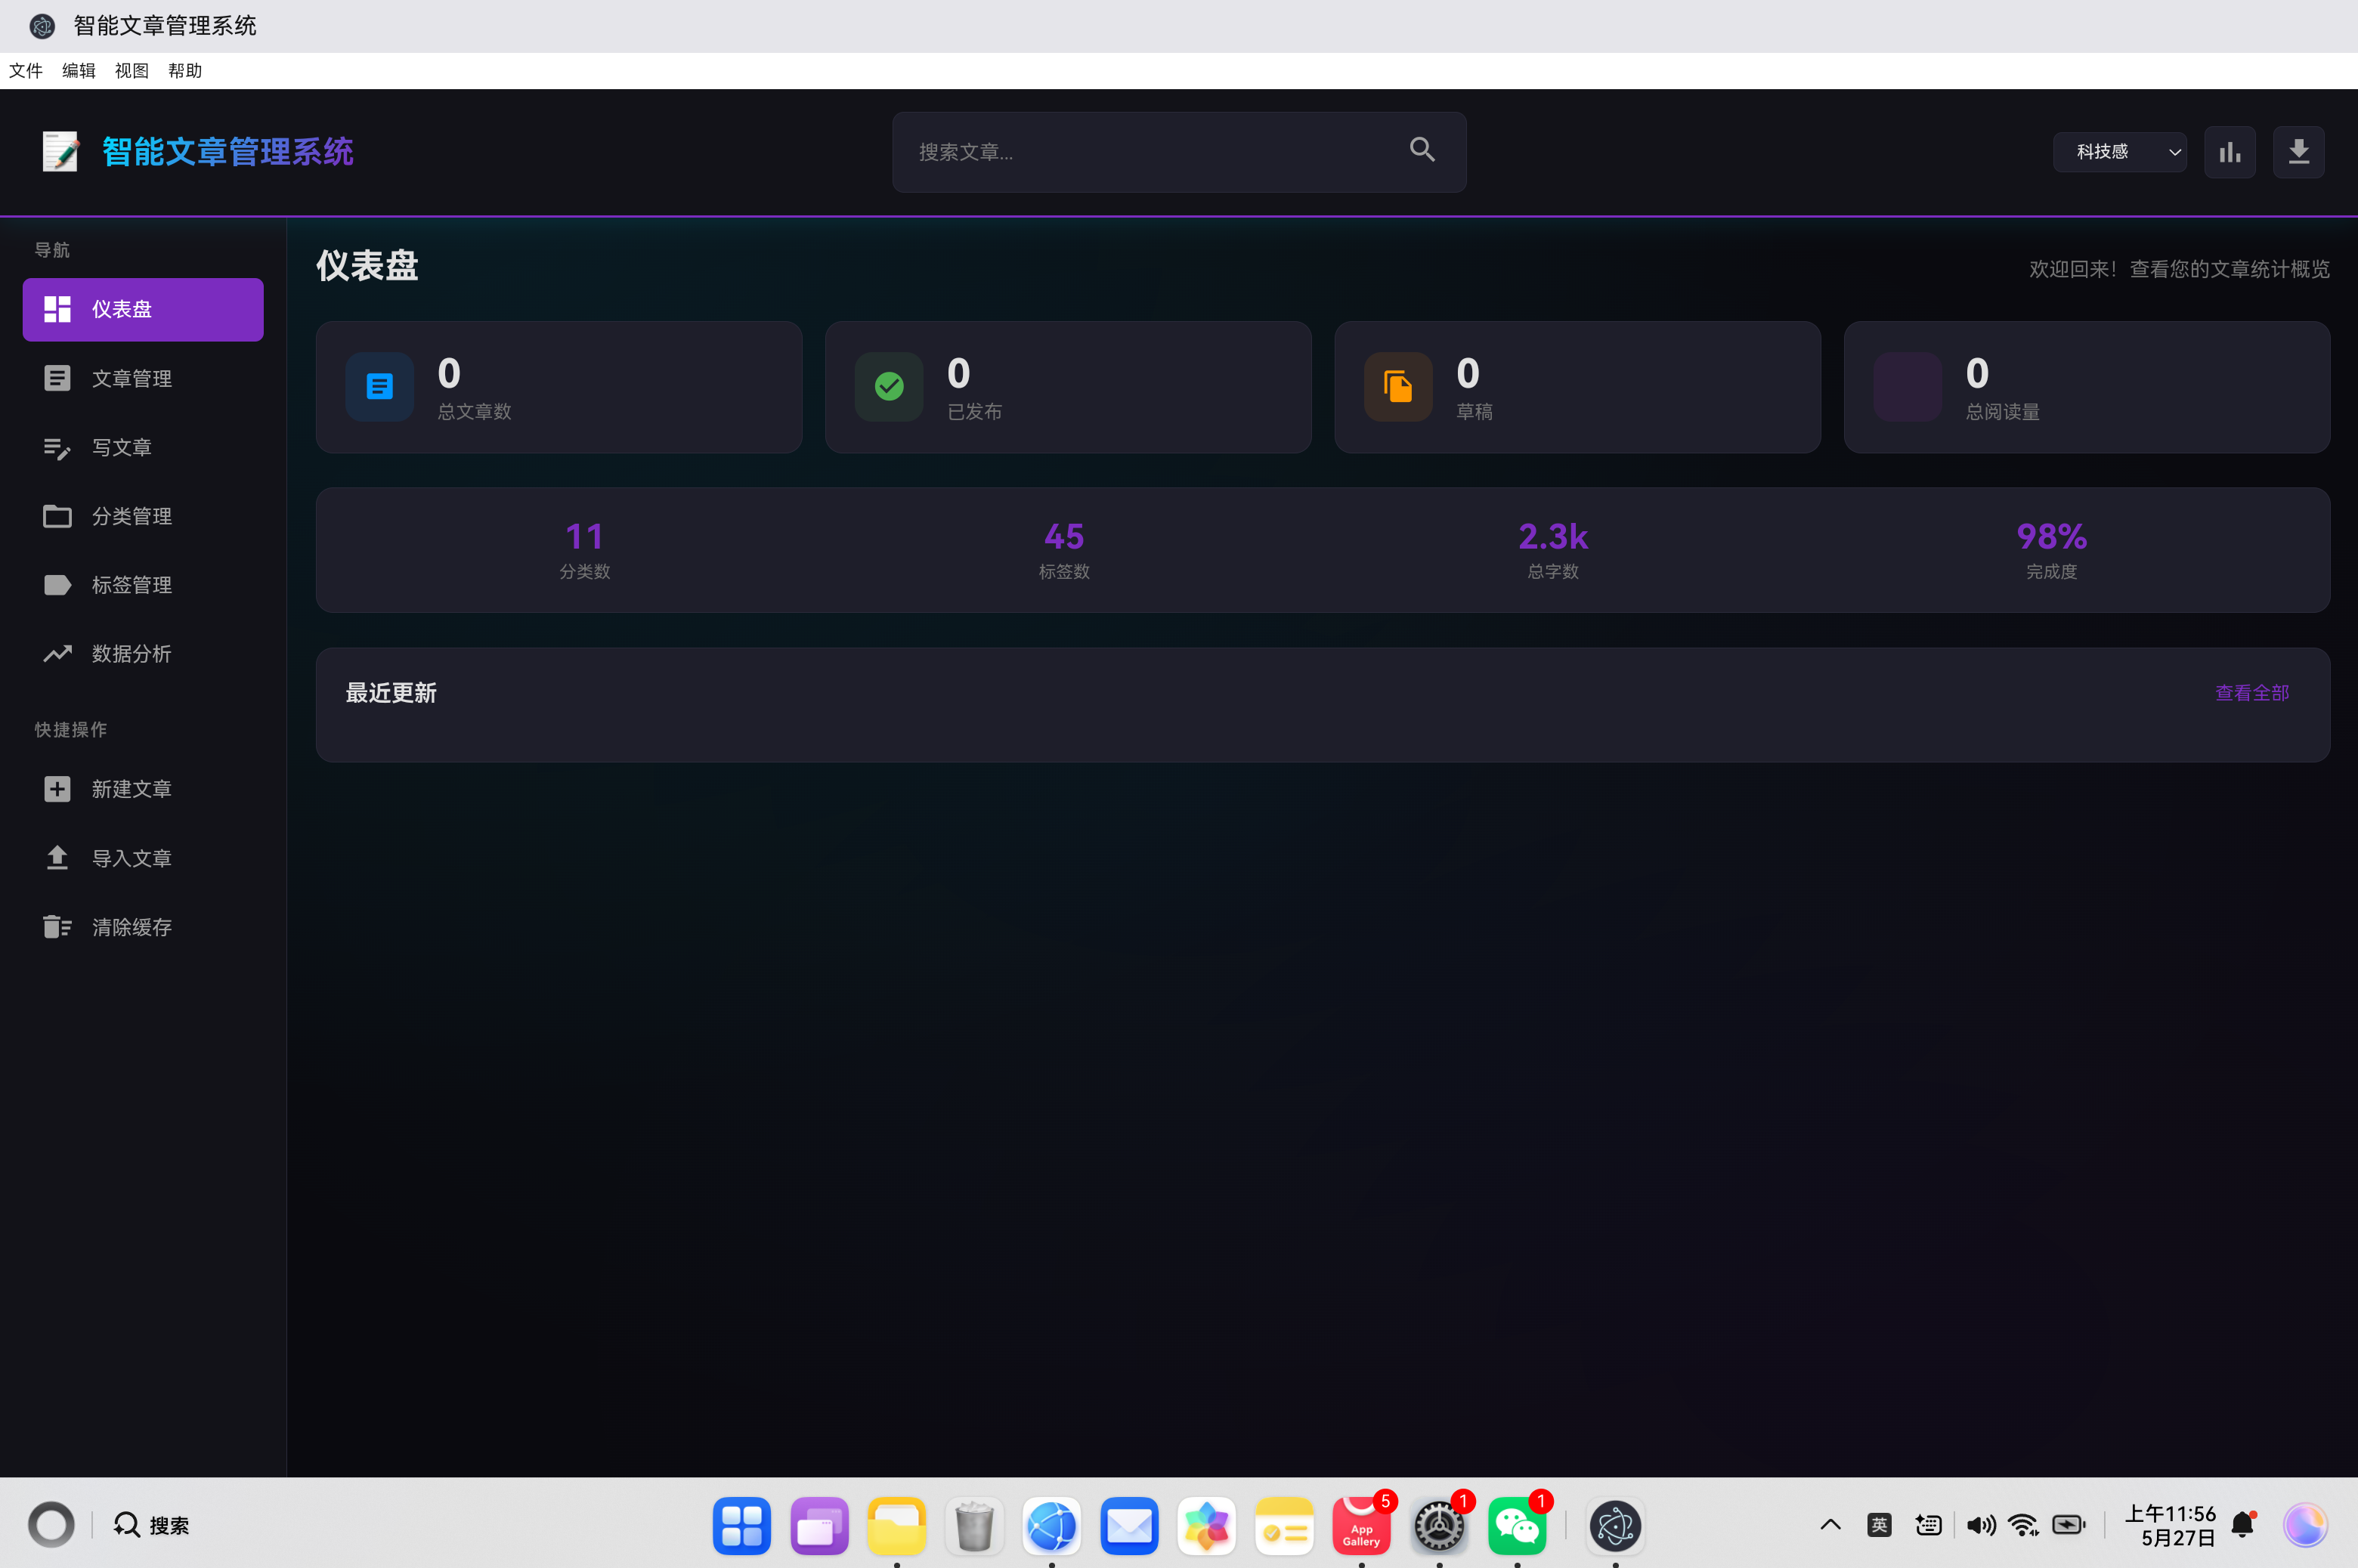
一、引言
1.1 鸿蒙PC与Electron框架
随着开源鸿蒙PC生态的不断发展,越来越多的开发者开始关注如何在鸿蒙操作系统上构建桌面应用。Electron作为一种成熟的跨平台桌面应用开发框架,为开发者提供了使用Web技术栈构建原生桌面应用的能力。
鸿蒙PC平台特点:
- 基于OpenHarmony开源项目
- 支持多设备协同
- 提供丰富的系统API
- 良好的性能表现
Electron框架优势:
- 使用HTML/CSS/JavaScript进行开发
- 一次开发,多平台部署
- 丰富的社区资源和插件生态
- 良好的开发者体验
1.2 项目背景
本文将详细介绍如何在鸿蒙PC平台上使用Electron框架构建一个功能完整的智能文章管理系统。通过实际项目实践,展示Electron在鸿蒙PC上的开发流程、技术选型和最佳实践。
1.3 项目概述
智能文章管理系统是一个功能丰富的桌面应用,主要包含以下模块:
| 模块 | 功能描述 | 技术要点 |
|---|---|---|
| 仪表盘 | 数据统计与概览 | 实时数据展示、图表渲染 |
| 文章管理 | 文章列表与操作 | CRUD操作、搜索过滤 |
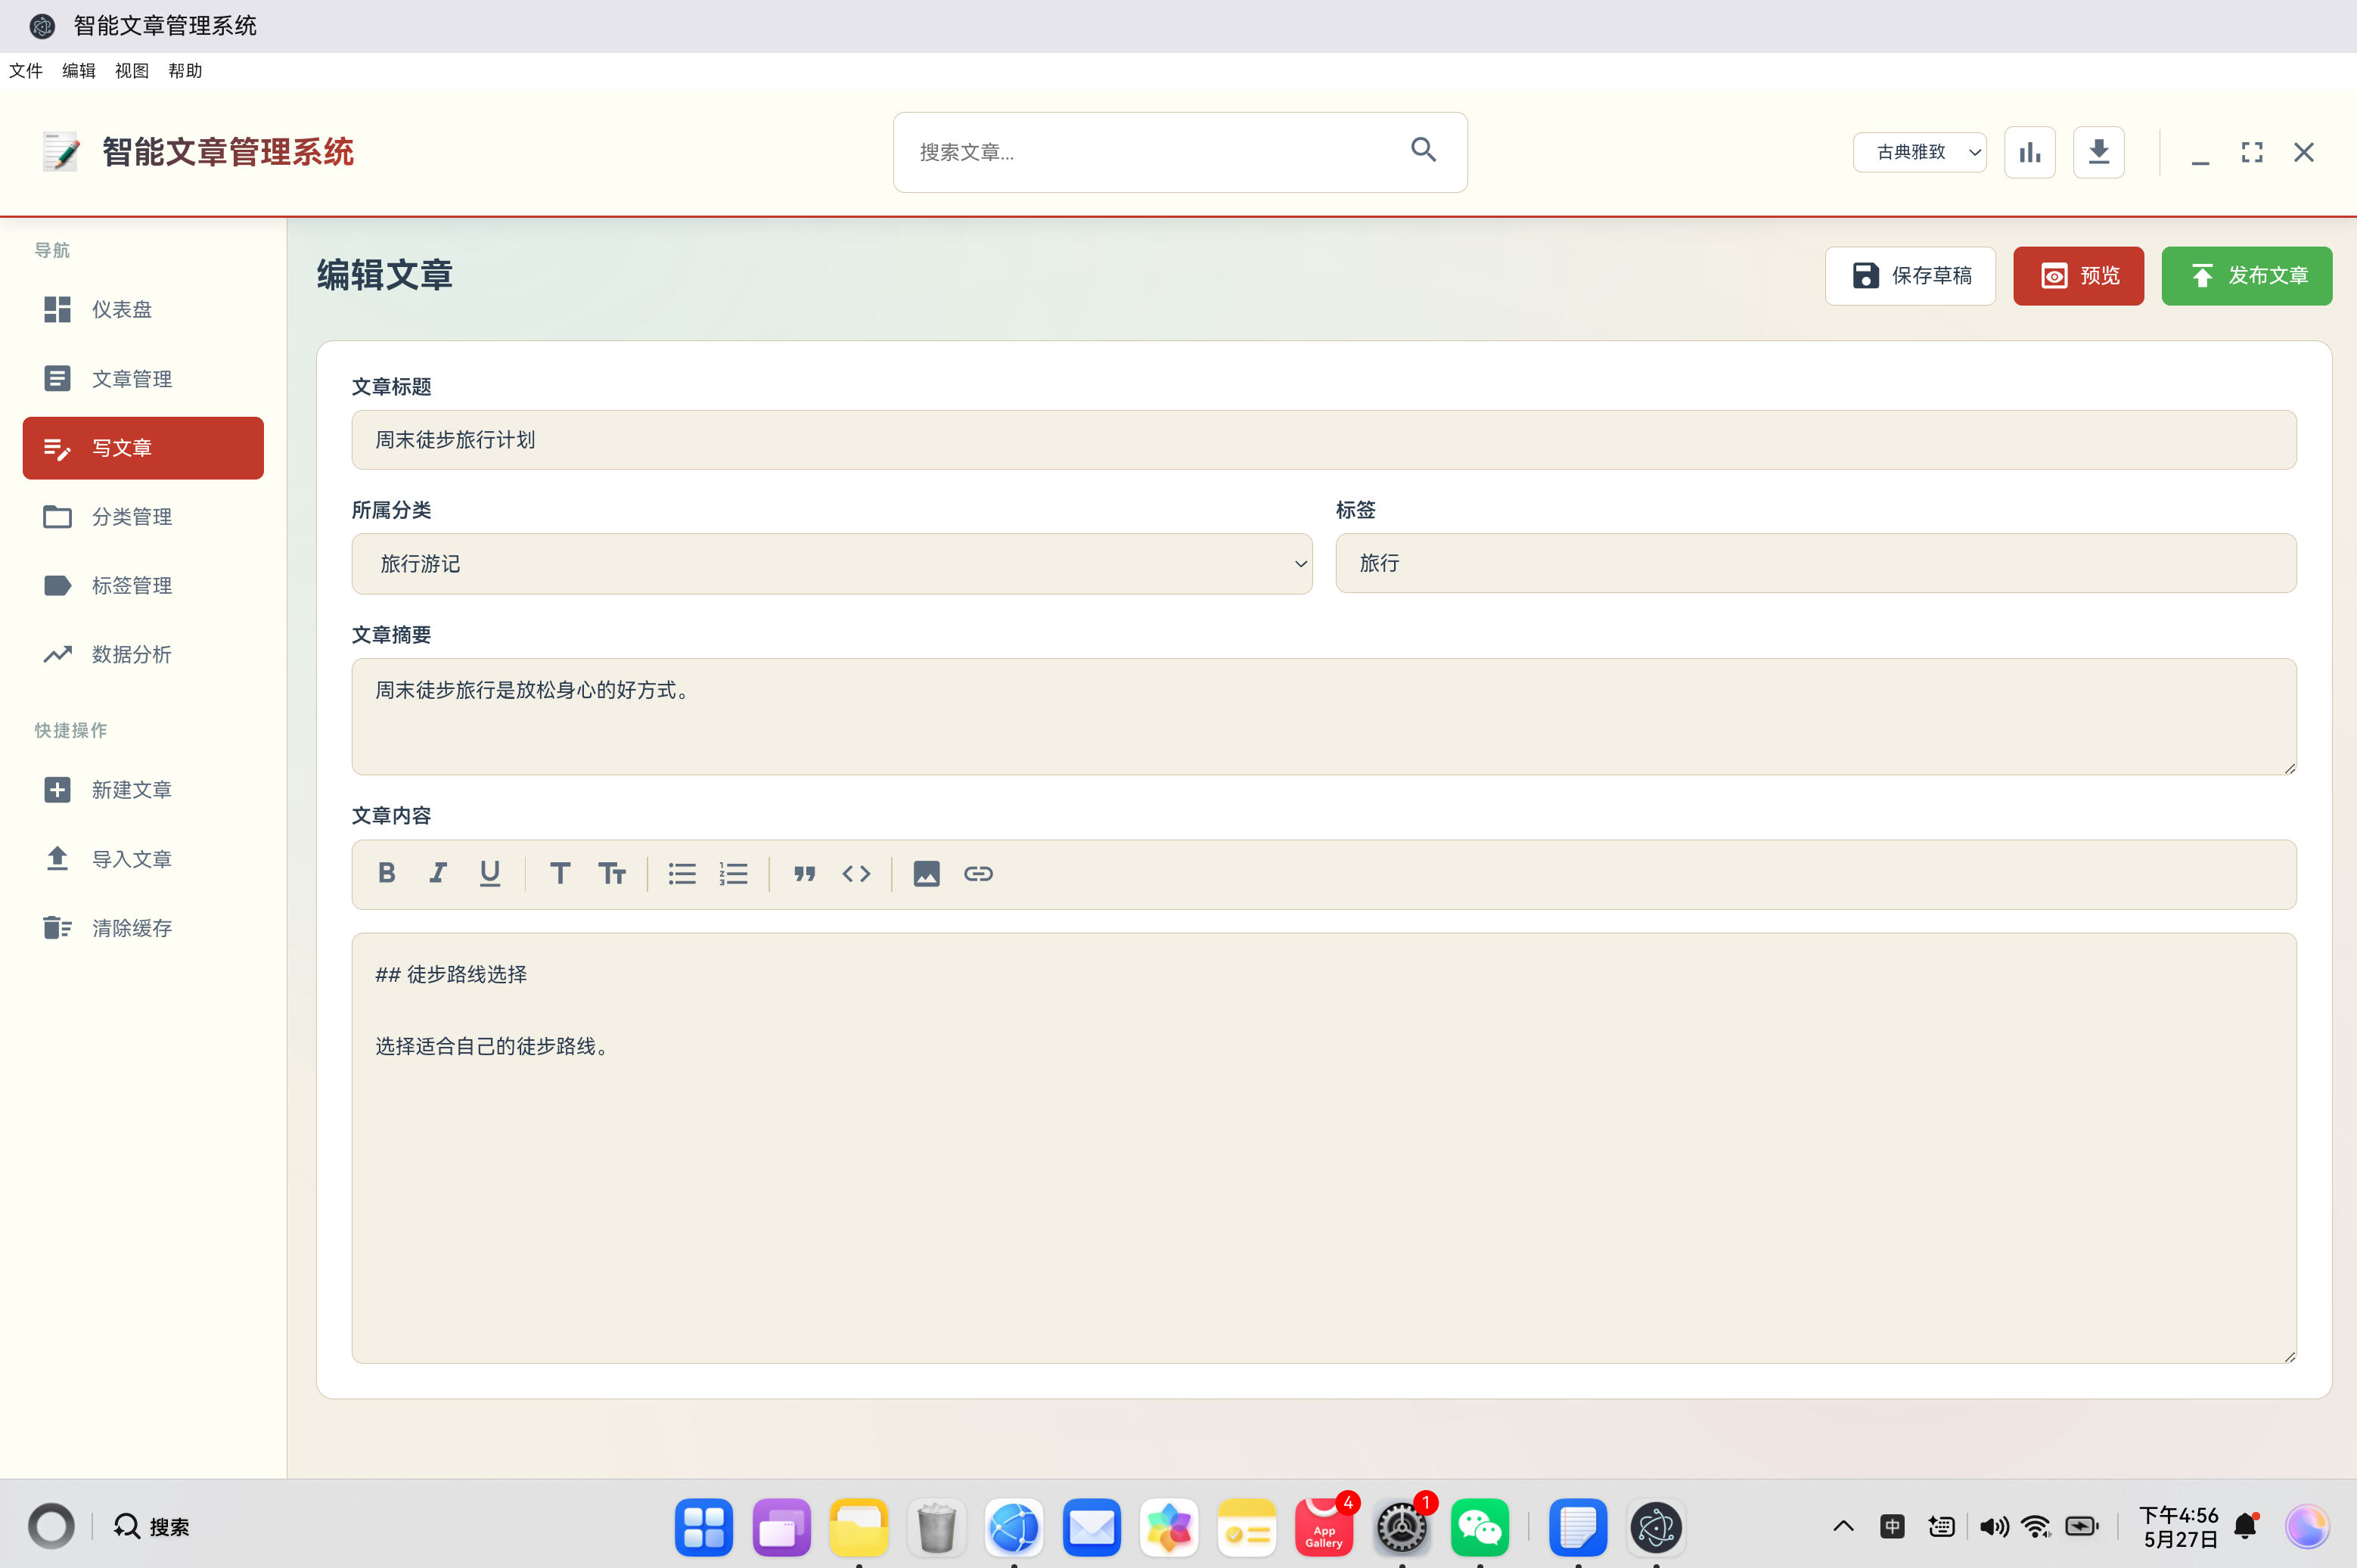
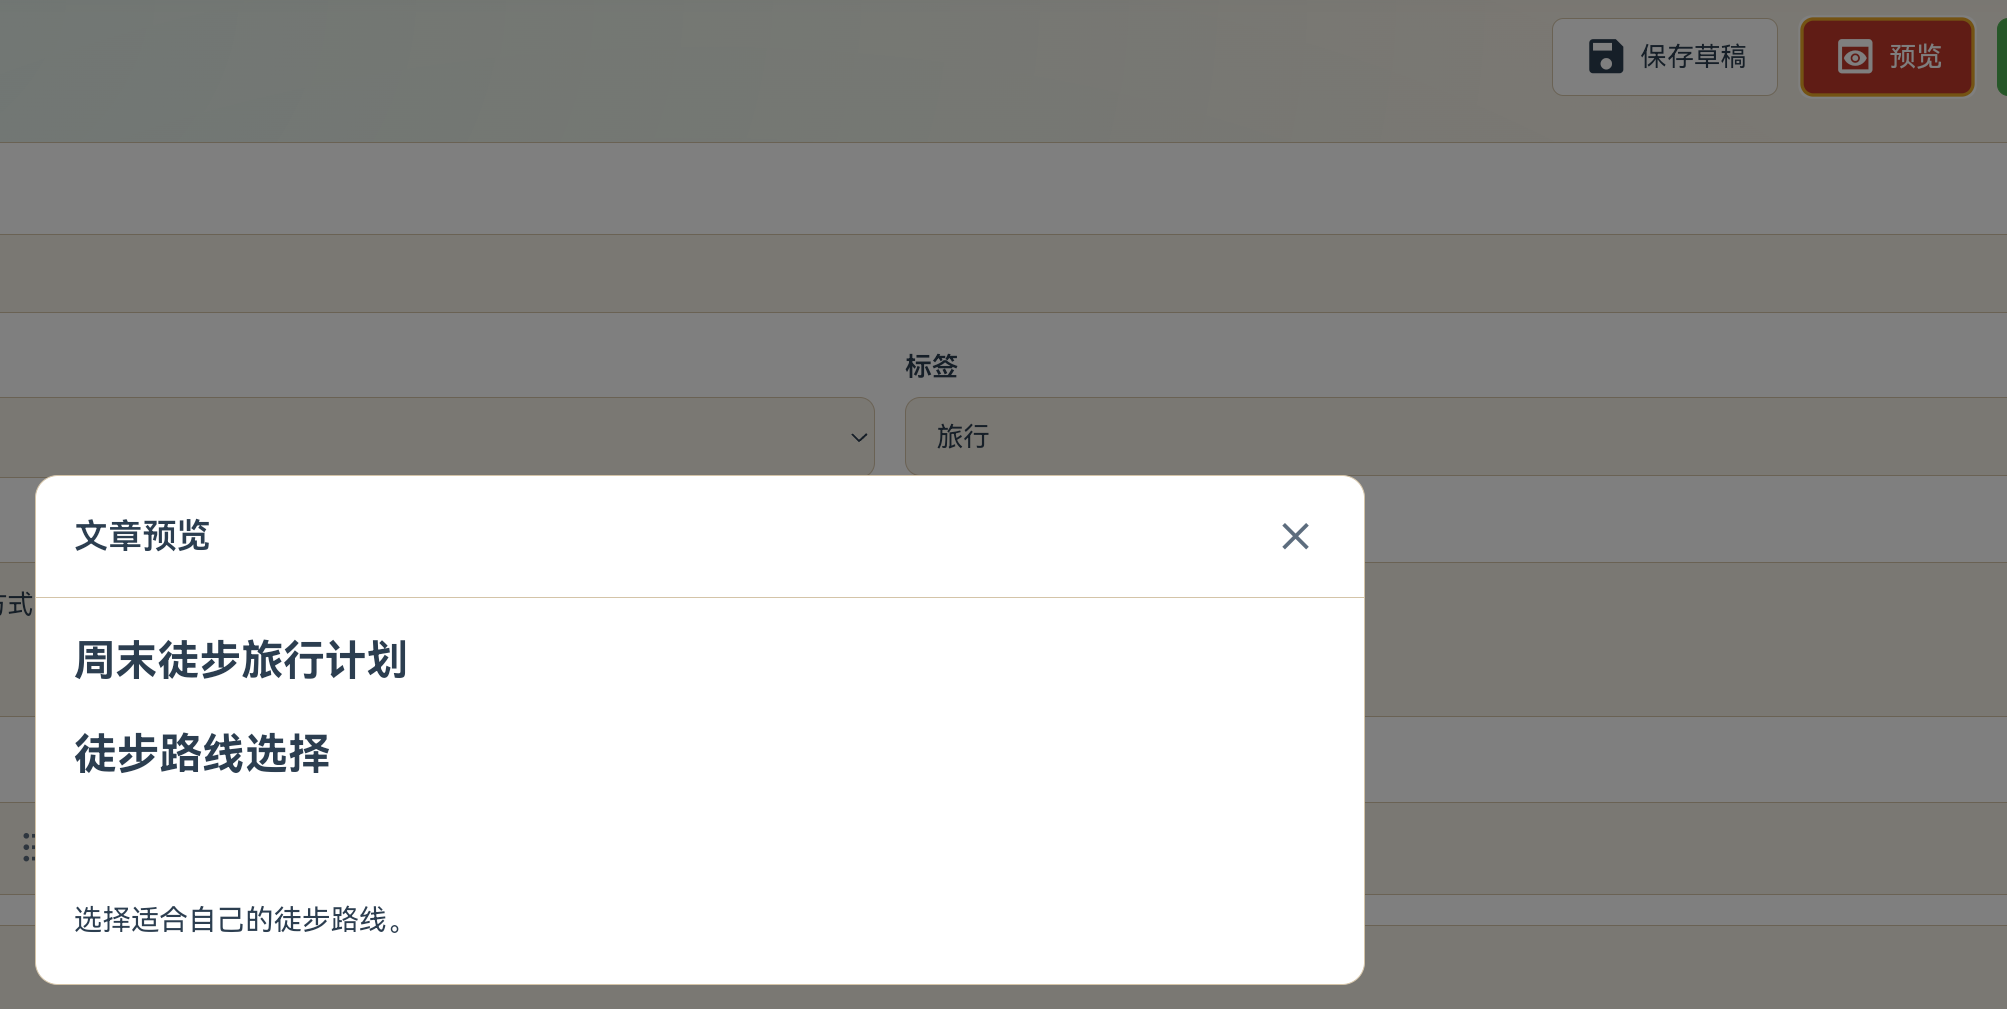
| 文章编辑器 | 富文本编辑 | Markdown支持、内容预览 |
| 分类管理 | 分类创建与管理 | 数据关联、层级结构 |
| 标签管理 | 标签系统 | 颜色标识、关联统计 |
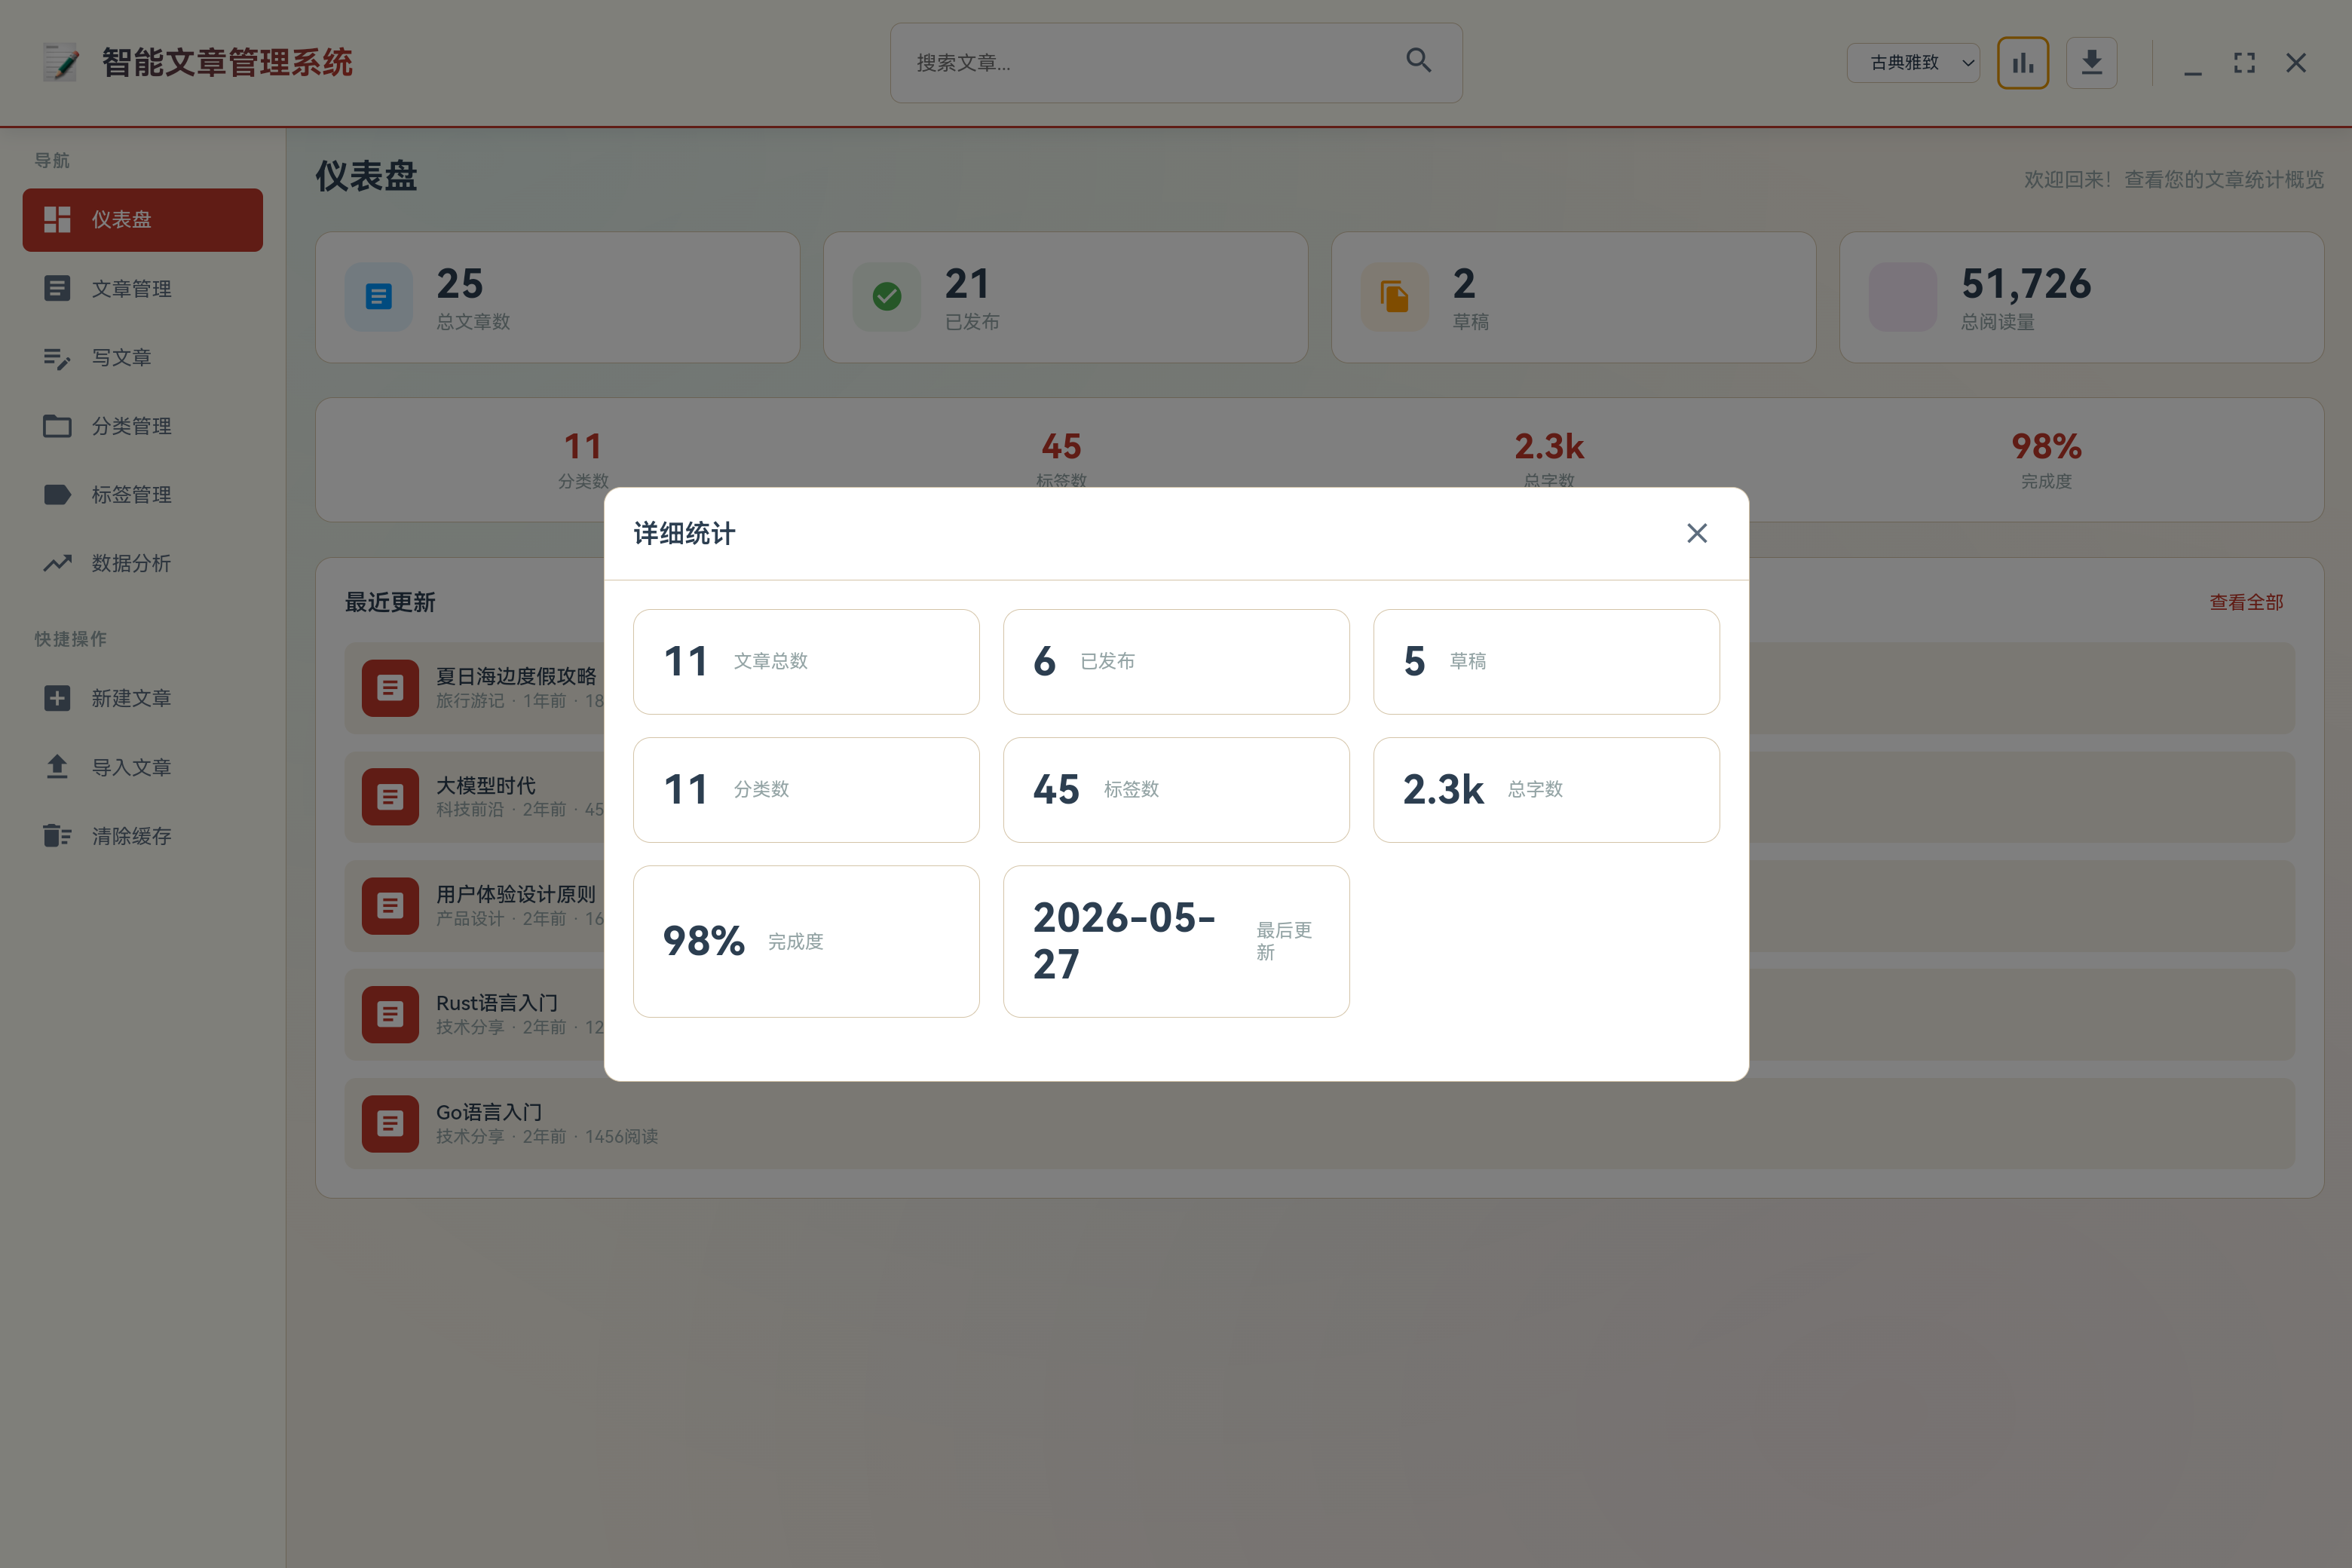
| 数据分析 | 数据可视化 | 图表展示、趋势分析 |
二、开发环境搭建
2.1 鸿蒙PC开发环境
在开始开发之前,需要准备好鸿蒙PC的开发环境:
2.1.1 操作系统要求
- 支持Windows 10/11 (64位)
- 支持Ubuntu 20.04 LTS及以上版本
2.1.2 安装依赖
# 安装Node.js (建议v16+)
sudo apt-get update
sudo apt-get install nodejs npm

# 安装Electron依赖
npm install -g electron
2.1.3 验证环境
node --version
npm --version
electron --version
2.2 项目初始化
使用Electron官方脚手架初始化项目:
# 创建项目目录
mkdir article-manager && cd article-manager

# 初始化npm项目
npm init -y

# 安装Electron依赖
npm install electron --save-dev
npm install electron-builder --save-dev
2.3 项目结构
article-manager/
├── package.json          # 项目配置
├── main.js              # 主进程入口
├── index.html           # 渲染进程入口
├── style.css            # 全局样式
└── js/                  # JavaScript模块
    ├── config.js        # 数据配置与管理
    └── battle.js        # 应用控制器
三、主进程开发
3.1 主进程架构
Electron应用分为主进程和渲染进程。主进程负责管理应用生命周期、窗口管理和系统级操作。
// main.js - 主进程入口
const { app, BrowserWindow, Menu, ipcMain } = require('electron');
const path = require('path');

let mainWindow;

function createWindow() {
    // 创建主窗口
    mainWindow = new BrowserWindow({
        width: 1200,
        height: 800,
        minWidth: 800,
        minHeight: 600,
        title: '智能文章管理系统',
        icon: path.join(__dirname, 'icon.png'),
        webPreferences: {
            nodeIntegration: true,
            contextIsolation: false,
            enableRemoteModule: true,
        },
    });

    // 加载HTML文件
    mainWindow.loadFile('index.html');

    // 窗口关闭事件
    mainWindow.on('closed', function () {
        mainWindow = null;
    });

    // 创建菜单
    createMenu();
}

function createMenu() {
    const menu = Menu.buildFromTemplate([
        {
            label: '文件',
            submenu: [
                {
                    label: '新建文章',
                    accelerator: 'Ctrl+N',
                    click: () => {
                        mainWindow.webContents.executeJavaScript('AppController.openEditor()');
                    },
                },
                { type: 'separator' },
                {
                    label: '退出',
                    accelerator: 'Ctrl+Q',
                    click: () => {
                        app.quit();
                    },
                },
            ],
        },
        // 更多菜单...
    ]);

    Menu.setApplicationMenu(menu);
}

// 应用就绪事件
app.on('ready', createWindow);

// 所有窗口关闭事件
app.on('window-all-closed', function () {
    if (process.platform !== 'darwin') app.quit();
});

// 应用激活事件
app.on('activate', function () {
    if (mainWindow === null) createWindow();
});
3.2 IPC通信机制
主进程与渲染进程之间通过IPC(Inter-Process Communication)进行通信。
// 主进程 - 接收渲染进程消息
ipcMain.on('save-article', (event, article) => {
    console.log('Saving article:', article.title);
    // 可以在这里添加文件保存或数据库操作
    event.reply('article-saved', true);
});

ipcMain.on('delete-article', (event, articleId) => {
    console.log('Deleting article:', articleId);
    event.reply('article-deleted', true);
});
在渲染进程中发送消息:
// 渲染进程 - 发送消息到主进程
const { ipcRenderer } = require('electron');

function saveArticle(article) {
    ipcRenderer.send('save-article', article);
}

ipcRenderer.on('article-saved', (event, success) => {
    if (success) {
        console.log('Article saved successfully');
    }
});
3.3 窗口管理
主进程负责管理应用的所有窗口:
// 创建关于窗口
function createAboutWindow() {
    const aboutWindow = new BrowserWindow({
        width: 400,
        height: 280,
        title: '关于智能文章管理系统',
        icon: path.join(__dirname, 'icon.png'),
        resizable: false,
        webPreferences: {
            nodeIntegration: true,
            contextIsolation: false,
        },
    });

    aboutWindow.loadFile('about.html');
    aboutWindow.setMenu(null);
}
四、渲染进程开发
4.1 界面布局设计
渲染进程负责应用的UI展示和用户交互。
<!-- index.html - 主界面布局 -->
<!DOCTYPE html>
<html lang="zh-CN">
<head>
    <meta charset="UTF-8">
    <meta name="viewport" content="width=device-width, initial-scale=1.0">
    <title>智能文章管理系统</title>
    <link href="https://fonts.googleapis.com/icon?family=Material+Icons" rel="stylesheet">
    <link rel="stylesheet" href="style.css">
</head>
<body>
    <!-- 背景效果 -->
    <div class="bg-effects">
        <div class="ink-bg"></div>
        <div class="particles"></div>
    </div>

    <!-- 顶部导航栏 -->
    <header class="top-header">
        <div class="header-left">
            <div class="logo">
                <span class="material-icons logo-icon">article</span>
                <span class="app-title">智能文章管理系统</span>
            </div>
        </div>
        <div class="header-center">
            <div class="search-bar">
                <input type="text" id="search-input" placeholder="搜索文章...">
                <button id="search-btn" class="search-btn">
                    <span class="material-icons">search</span>
                </button>
            </div>
        </div>
        <div class="header-right">
            <div class="theme-switcher">
                <select id="theme-select">
                    <option value="tech">科技感</option>
                    <option value="classical">古典雅致</option>
                    <option value="modern">简约现代</option>
                    <option value="elegant">优雅墨色</option>
                    <option value="warm">温暖秋色</option>
                    <option value="night">夜间模式</option>
                </select>
            </div>
            <button class="header-btn" title="新建文章" id="add-article-btn">
                <span class="material-icons">add</span>
            </button>
        </div>
    </header>

    <!-- 主内容区 -->
    <main class="main-container">
        <!-- 左侧导航 -->
        <aside class="sidebar">
            <div class="nav-section">
                <h3 class="nav-title">导航</h3>
                <nav class="nav-menu">
                    <button class="nav-item active" data-view="dashboard" onclick="switchView('dashboard')">
                        <span class="material-icons">dashboard</span>
                        <span class="nav-text">仪表盘</span>
                    </button>
                    <button class="nav-item" data-view="articles" onclick="switchView('articles')">
                        <span class="material-icons">article</span>
                        <span class="nav-text">文章管理</span>
                    </button>
                    <button class="nav-item" data-view="categories" onclick="switchView('categories')">
                        <span class="material-icons">folder</span>
                        <span class="nav-text">分类管理</span>
                    </button>
                    <button class="nav-item" data-view="tags" onclick="switchView('tags')">
                        <span class="material-icons">label</span>
                        <span class="nav-text">标签管理</span>
                    </button>
                    <button class="nav-item" data-view="analytics" onclick="switchView('analytics')">
                        <span class="material-icons">bar_chart</span>
                        <span class="nav-text">数据分析</span>
                    </button>
                </nav>
            </div>
        </aside>

        <!-- 内容区域 -->
        <section class="content-area">
            <!-- 仪表盘视图 -->
            <div id="dashboardView" class="view active">
                <!-- 统计卡片 -->
                <div class="stats-grid">
                    <div class="stat-card">
                        <div class="stat-icon blue">
                            <span class="material-icons">article</span>
                        </div>
                        <div class="stat-info">
                            <span class="stat-value" id="stat-articles">0</span>
                            <span class="stat-label">总文章数</span>
                        </div>
                    </div>
                    <!-- 更多统计卡片... -->
                </div>

                <!-- 快速统计 -->
                <div class="quick-stats">
                    <!-- 统计内容 -->
                </div>

                <!-- 最近文章 -->
                <div class="recent-section">
                    <div class="section-header">
                        <h3>最近文章</h3>
                        <button class="view-all-btn" onclick="switchView('articles')">查看全部</button>
                    </div>
                    <div id="recent-list" class="recent-list">
                        <!-- 文章列表 -->
                    </div>
                </div>
            </div>

            <!-- 文章管理视图 -->
            <div id="articlesView" class="view">
                <!-- 文章列表 -->
                <div id="article-list" class="article-list">
                    <!-- 文章卡片 -->
                </div>
            </div>

            <!-- 编辑器视图 -->
            <div id="editorView" class="view">
                <!-- 文章编辑器 -->
                <form id="article-form" class="editor-form">
                    <!-- 表单内容 -->
                </form>
            </div>

            <!-- 分类管理视图 -->
            <div id="categoriesView" class="view">
                <!-- 分类列表 -->
                <div id="categories-list" class="categories-list">
                    <!-- 分类卡片 -->
                </div>
            </div>

            <!-- 标签管理视图 -->
            <div id="tagsView" class="view">
                <!-- 标签云 -->
                <div id="tags-cloud" class="tags-cloud">
                    <!-- 标签项 -->
                </div>
            </div>

            <!-- 数据分析视图 -->
            <div id="analyticsView" class="view">
                <!-- 分析图表 -->
                <div class="analytics-grid">
                    <!-- 图表卡片 -->
                </div>
            </div>
        </section>
    </main>

    <!-- 模态框 -->
    <div id="articleDetailModal" class="modal-overlay" style="display: none;">
        <!-- 文章详情模态框 -->
    </div>

    <!-- JavaScript模块 -->
    <script src="js/config.js"></script>
    <script src="js/battle.js"></script>
</body>
</html>
4.2 样式系统设计
使用CSS变量实现多主题切换:
/* 科技感主题(默认) */
[data-theme="tech"] {
    --primary: #00d9ff;
    --primary-light: #66e5ff;
    --accent: #7b2cbf;
    --bg-paper: #0a0a0f;
    --bg-panel: #121218;
    --bg-card: #1e1e2a;
    --border: #2a2a3a;
    --text-primary: #e0e0e0;
    --text-secondary: #a0a0a0;
    --shadow: 0 0 20px rgba(0, 217, 255, 0.15);
}

/* 古典雅致主题 */
[data-theme="classical"] {
    --primary: #2c3e50;
    --accent: #c0392b;
    --bg-paper: #f5f0e6;
    --bg-panel: #fffef5;
    --bg-card: #ffffff;
    --border: #d4c4a8;
    --text-primary: #2c3e50;
    --text-secondary: #5d6d7e;
}

/* 主题切换逻辑 */
function changeTheme(theme) {
    document.documentElement.setAttribute('data-theme', theme);
    localStorage.setItem('article-theme', theme);
}
4.3 应用控制器
应用控制器负责管理应用状态和用户交互:
// battle.js - 应用控制器
const AppController = {
    currentView: 'dashboard',
    currentArticleId: null,
    selectedCategory: null,
    selectedTag: null,
    searchKeyword: '',

    init() {
        this.setupEventListeners();
        this.loadTheme();
        this.renderDashboard();
        this.initParticles();
    },

    setupEventListeners() {
        // 设置所有事件监听器
        document.querySelectorAll('.nav-item').forEach(btn => {
            btn.addEventListener('click', (e) => {
                const viewId = e.currentTarget.dataset.view;
                this.switchView(viewId);
            });
        });

        document.getElementById('theme-select').addEventListener('change', (e) => {
            this.changeTheme(e.target.value);
        });

        // 更多事件监听...
    },

    switchView(viewId) {
        this.currentView = viewId;

        // 更新导航状态
        document.querySelectorAll('.nav-item').forEach(item => {
            item.classList.remove('active');
        });
        document.querySelector(`[data-view="${viewId}"]`).classList.add('active');

        // 切换视图显示
        document.querySelectorAll('.view').forEach(view => {
            view.classList.remove('active');
        });
        document.getElementById(`${viewId}View`).classList.add('active');

        // 根据视图类型渲染内容
        switch(viewId) {
            case 'dashboard':
                this.renderDashboard();
                break;
            case 'articles':
                this.renderArticles();
                break;
            case 'editor':
                this.openEditor();
                break;
            // 其他视图...
        }
    },

    renderDashboard() {
        const stats = ArticleManager.getStats();
        const recentArticles = ArticleManager.getRecentArticles(5);

        // 更新统计数据
        document.getElementById('stat-articles').textContent = stats.totalArticles;
        document.getElementById('stat-published').textContent = stats.published;
        document.getElementById('stat-reads').textContent = this.formatNumber(stats.totalReads);
        document.getElementById('stat-likes').textContent = stats.totalLikes;

        // 渲染最近文章列表
        const recentList = document.getElementById('recent-list');
        recentList.innerHTML = recentArticles.map(article => {
            const category = ArticleManager.getCategoryById(article.categoryId);
            return `
                <div class="recent-item" onclick="AppController.openArticleDetail('${article.id}')">
                    <div class="recent-icon">
                        <span class="material-icons">article</span>
                    </div>
                    <div class="recent-info">
                        <div class="recent-title">${article.title}</div>
                        <div class="recent-meta">${category?.name || '未分类'} - ${this.formatDate(article.createdAt)}</div>
                    </div>
                </div>
            `;
        }).join('');
    },

    // 更多方法...
};

// DOM加载完成后初始化
document.addEventListener('DOMContentLoaded', () => {
    AppController.init();
});
五、数据管理模块
5.1 数据结构设计
设计合理的数据结构是应用的基础:
// config.js - 数据管理模块
const ArticleManager = {
    // 分类数据
    categories: [
        { id: 'cat-1', name: '技术分享', icon: 'code', description: '技术文章、开发经验分享' },
        { id: 'cat-2', name: '生活随笔', icon: 'coffee', description: '生活感悟、日常记录' },
        { id: 'cat-3', name: '读书心得', icon: 'book', description: '阅读感悟、书评' },
        { id: 'cat-4', name: '旅行游记', icon: 'plane', description: '旅行故事、风景分享' },
        { id: 'cat-5', name: '美食探索', icon: 'restaurant', description: '美食推荐、烹饪分享' },
        { id: 'cat-6', name: '摄影艺术', icon: 'camera', description: '摄影作品、技巧分享' },
    ],

    // 标签数据
    tags: [
        { id: 'tag-1', name: 'JavaScript', color: '#f7df1e' },
        { id: 'tag-2', name: '前端开发', color: '#61dafb' },
        { id: 'tag-3', name: '生活', color: '#4caf50' },
        // 更多标签...
    ],

    // 文章数据
    articles: [
        {
            id: 'art-1',
            title: '深入理解JavaScript闭包原理与实战应用',
            excerpt: '闭包是JavaScript中最重要的概念之一...',
            content: '## 什么是闭包\n\n闭包(Closure)是指有权访问另一个函数作用域中变量的函数...',
            categoryId: 'cat-1',
            tagIds: ['tag-1', 'tag-2'],
            status: 'published',
            createdAt: '2024-01-15T10:30:00Z',
            updatedAt: '2024-01-15T14:20:00Z',
            readCount: 1256,
            likeCount: 89,
        },
        // 更多文章...
    ],

    // 数据操作方法
    getCategoryById(id) {
        return this.categories.find(cat => cat.id === id);
    },

    getArticleById(id) {
        return this.articles.find(art => art.id === id);
    },

    getArticlesByCategory(categoryId) {
        if (!categoryId) return this.articles;
        return this.articles.filter(art => art.categoryId === categoryId);
    },

    addArticle(article) {
        const newArticle = {
            id: `art-${Date.now()}`,
            ...article,
            createdAt: new Date().toISOString(),
            updatedAt: new Date().toISOString(),
            readCount: 0,
            likeCount: 0
        };
        this.articles.unshift(newArticle);
        return newArticle;
    },

    updateArticle(id, updates) {
        const index = this.articles.findIndex(art => art.id === id);
        if (index !== -1) {
            this.articles[index] = {
                ...this.articles[index],
                ...updates,
                updatedAt: new Date().toISOString()
            };
            return this.articles[index];
        }
        return null;
    },

    deleteArticle(id) {
        const index = this.articles.findIndex(art => art.id === id);
        if (index !== -1) {
            return this.articles.splice(index, 1)[0];
        }
        return null;
    },

    getStats() {
        const published = this.articles.filter(a => a.status === 'published').length;
        const drafts = this.articles.filter(a => a.status === 'draft').length;
        const totalReads = this.articles.reduce((sum, a) => sum + a.readCount, 0);
        const totalLikes = this.articles.reduce((sum, a) => sum + a.likeCount, 0);

        return {
            totalArticles: this.articles.length,
            published,
            drafts,
            totalReads,
            totalLikes,
            categories: this.categories.length,
            tags: this.tags.length
        };
    },

    getRecentArticles(count = 5) {
        return [...this.articles]
            .sort((a, b) => new Date(b.createdAt) - new Date(a.createdAt))
            .slice(0, count);
    }
};

// 导出模块
if (typeof module !== 'undefined' && module.exports) {
    module.exports = ArticleManager;
}
5.2 数据持久化方案
虽然当前使用内存数据,但在实际应用中需要考虑数据持久化:
// 数据持久化方案
const StorageManager = {
    saveData(key, data) {
        try {
            localStorage.setItem(key, JSON.stringify(data));
            return true;
        } catch (error) {
            console.error('保存数据失败:', error);
            return false;
        }
    },

    loadData(key) {
        try {
            const data = localStorage.getItem(key);
            return data ? JSON.parse(data) : null;
        } catch (error) {
            console.error('加载数据失败:', error);
            return null;
        }
    },

    saveArticles() {
        return this.saveData('articles', ArticleManager.articles);
    },

    loadArticles() {
        const saved = this.loadData('articles');
        if (saved) {
            ArticleManager.articles = saved;
        }
    },

    // 自动保存
    setupAutoSave() {
        setInterval(() => {
            this.saveArticles();
        }, 30000); // 每30秒自动保存
    }
};
六、核心功能实现
6.1 文章管理功能
文章管理是系统的核心功能,包括创建、编辑、删除和查看文章。
// 打开文章编辑器
openEditor(articleId = null) {
    this.currentArticleId = articleId;

    if (articleId) {
        const article = ArticleManager.getArticleById(articleId);
        if (article) {
            document.getElementById('article-title-input').value = article.title;
            document.getElementById('article-excerpt-input').value = article.excerpt;
            document.getElementById('article-content-input').value = article.content;
            document.getElementById('article-category-select').value = article.categoryId;
            document.getElementById('article-status-select').value = article.status;

            // 设置标签选择
            const tagCheckboxes = document.querySelectorAll('.tag-checkbox');
            tagCheckboxes.forEach(checkbox => {
                checkbox.checked = article.tagIds.includes(checkbox.value);
            });
        }
    } else {
        document.getElementById('article-form').reset();
    }

    this.switchView('editor');
},

// 保存文章
saveArticle() {
    const title = document.getElementById('article-title-input').value.trim();
    const excerpt = document.getElementById('article-excerpt-input').value.trim();
    const content = document.getElementById('article-content-input').value.trim();
    const categoryId = document.getElementById('article-category-select').value;
    const status = document.getElementById('article-status-select').value;

    const selectedTags = Array.from(document.querySelectorAll('.tag-checkbox:checked'))
        .map(checkbox => checkbox.value);

    if (!title || !content) {
        alert('请填写标题和内容');
        return;
    }

    if (this.currentArticleId) {
        ArticleManager.updateArticle(this.currentArticleId, {
            title,
            excerpt,
            content,
            categoryId,
            status,
            tagIds: selectedTags
        });
    } else {
        ArticleManager.addArticle({
            title,
            excerpt,
            content,
            categoryId,
            status,
            tagIds: selectedTags
        });
    }

    this.closeEditor();
},

// 删除文章确认
deleteArticleConfirm(articleId) {
    if (confirm('确定要删除这篇文章吗?')) {
        ArticleManager.deleteArticle(articleId);
        this.renderArticles();
    }
},

// 打开文章详情
openArticleDetail(articleId) {
    const article = ArticleManager.getArticleById(articleId);
    if (!article) return;

    const category = ArticleManager.getCategoryById(article.categoryId);

    document.getElementById('modal-article-title').textContent = article.title;
    document.getElementById('modal-article-meta').innerHTML = `
        <span>${category?.name || '未分类'}</span>
        <span>${this.formatDate(article.createdAt)}</span>
        <span>阅读 ${article.readCount}</span>
        <span>点赞 ${article.likeCount}</span>
    `;
    document.getElementById('modal-article-content').innerHTML = this.renderMarkdown(article.content);

    document.getElementById('articleDetailModal').style.display = 'flex';

    // 更新阅读计数
    ArticleManager.updateArticle(articleId, {
        readCount: article.readCount + 1
    });
}
6.2 分类管理功能
分类管理允许用户创建和管理文章分类:
// 打开添加分类模态框
openAddCategoryModal() {
    document.getElementById('category-form').reset();
    document.getElementById('addCategoryModal').style.display = 'flex';
},

// 保存分类
saveCategory() {
    const name = document.getElementById('category-name-input').value.trim();
    const description = document.getElementById('category-desc-input').value.trim();
    const icon = document.getElementById('category-icon-select').value;

    if (!name) {
        alert('请输入分类名称');
        return;
    }

    ArticleManager.addCategory({ name, description, icon });
    document.getElementById('addCategoryModal').style.display = 'none';
    this.renderCategories();
},

// 渲染分类列表
renderCategories() {
    const categories = ArticleManager.categories;

    const categoriesList = document.getElementById('categories-list');
    categoriesList.innerHTML = categories.map(category => {
        const count = ArticleManager.getArticlesByCategory(category.id).length;
        return `
            <div class="category-card" onclick="AppController.selectCategory('${category.id}')">
                <div class="category-icon">
                    <span class="material-icons">${category.icon}</span>
                </div>
                <div class="category-info">
                    <div class="category-name">${category.name}</div>
                    <div class="category-desc">${category.description}</div>
                </div>
                <span class="category-count">${count} 篇</span>
            </div>
        `;
    }).join('');
}
6.3 标签管理功能
标签管理提供灵活的标签系统:
// 打开添加标签模态框
openAddTagModal() {
    document.getElementById('tag-form').reset();
    document.getElementById('addTagModal').style.display = 'flex';
},

// 保存标签
saveTag() {
    const name = document.getElementById('tag-name-input').value.trim();
    const color = document.getElementById('tag-color-input').value;

    if (!name) {
        alert('请输入标签名称');
        return;
    }

    ArticleManager.addTag({ name, color });
    document.getElementById('addTagModal').style.display = 'none';
    this.renderTags();
},

// 渲染标签云
renderTags() {
    const tags = ArticleManager.tags;

    const tagsCloud = document.getElementById('tags-cloud');
    tagsCloud.innerHTML = tags.map(tag => {
        const count = ArticleManager.getArticlesByTag(tag.id).length;
        return `
            <div class="tag-item" onclick="AppController.selectTag('${tag.id}')">
                <span class="tag-color" style="background: ${tag.color}"></span>
                <span class="tag-name">${tag.name}</span>
                <span class="tag-count">${count}</span>
            </div>
        `;
    }).join('');
}
6.4 数据分析功能
数据分析模块展示文章统计信息:
// 渲染数据分析
renderAnalytics() {
    const stats = ArticleManager.getStats();
    const articles = ArticleManager.articles;

    // 分类统计
    const categoryStats = ArticleManager.categories.map(cat => ({
        name: cat.name,
        count: ArticleManager.getArticlesByCategory(cat.id).length
    }));

    // 月度数据
    const monthlyData = [0, 0, 0, 0, 0, 0, 0, 0, 0, 0, 0, 0];
    articles.forEach(article => {
        const month = new Date(article.createdAt).getMonth();
        monthlyData[month]++;
    });

    // 更新统计数据
    document.getElementById('analytics-total').textContent = stats.totalArticles;
    document.getElementById('analytics-published').textContent = stats.published;
    document.getElementById('analytics-drafts').textContent = stats.drafts;
    document.getElementById('analytics-views').textContent = this.formatNumber(stats.totalReads);

    // 绘制图表
    this.drawCategoryChart(categoryStats);
    this.drawMonthlyChart(monthlyData);
},

// 绘制分类图表
drawCategoryChart(data) {
    const container = document.getElementById('category-chart');
    const maxCount = Math.max(...data.map(d => d.count), 1);

    container.innerHTML = `
        <div style="display: flex; flex-direction: column; gap: 8px; width: 100%;">
            ${data.map(item => `
                <div style="display: flex; align-items: center; gap: 8px;">
                    <span style="width: 80px; font-size: 12px;">${item.name}</span>
                    <div style="flex: 1; height: 20px; background: var(--bg-paper); border-radius: 4px; overflow: hidden;">
                        <div style="height: 100%; background: var(--accent); width: ${(item.count / maxCount) * 100}%; transition: width 0.5s;"></div>
                    </div>
                    <span style="width: 30px; text-align: right; font-size: 12px;">${item.count}</span>
                </div>
            `).join('')}
        </div>
    `;
},

// 绘制月度图表
drawMonthlyChart(data) {
    const container = document.getElementById('monthly-chart');
    const months = ['1月', '2月', '3月', '4月', '5月', '6月', '7月', '8月', '9月', '10月', '11月', '12月'];
    const maxCount = Math.max(...data, 1);

    container.innerHTML = `
        <div style="display: flex; align-items: flex-end; justify-content: space-between; height: 100%; padding: 10px;">
            ${data.map((count, index) => `
                <div style="display: flex; flex-direction: column; align-items: center; gap: 4px; flex: 1;">
                    <div style="width: 20px; background: var(--primary); border-radius: 4px 4px 0 0; height: ${(count / maxCount) * 150}px; min-height: 4px;"></div>
                    <span style="font-size: 10px;">${months[index]}</span>
                </div>
            `).join('')}
        </div>
    `;
}
七、主题系统实现
7.1 多主题设计
系统支持6种主题风格:
/* 科技感主题(默认) */
[data-theme="tech"] {
    --primary: #00d9ff;
    --accent: #7b2cbf;
    --bg-paper: #0a0a0f;
    --bg-panel: #121218;
    --bg-card: #1e1e2a;
    --border: #2a2a3a;
    --text-primary: #e0e0e0;
    --text-secondary: #a0a0a0;
}

/* 古典雅致主题 */
[data-theme="classical"] {
    --primary: #2c3e50;
    --accent: #c0392b;
    --bg-paper: #f5f0e6;
    --bg-panel: #fffef5;
    --bg-card: #ffffff;
    --border: #d4c4a8;
    --text-primary: #2c3e50;
    --text-secondary: #5d6d7e;
}

/* 简约现代主题 */
[data-theme="modern"] {
    --primary: #1a1a2e;
    --accent: #4361ee;
    --bg-paper: #f8f9fa;
    --bg-panel: #ffffff;
    --bg-card: #ffffff;
    --border: #e9ecef;
    --text-primary: #1a1a2e;
    --text-secondary: #495057;
}

/* 优雅墨色主题 */
[data-theme="elegant"] {
    --primary: #1a1a1a;
    --accent: #8b5a2b;
    --bg-paper: #faf8f5;
    --bg-panel: #ffffff;
    --bg-card: #ffffff;
    --border: #e8e4e0;
    --text-primary: #1a1a1a;
    --text-secondary: #4a4a4a;
}

/* 温暖秋色主题 */
[data-theme="warm"] {
    --primary: #5d4037;
    --accent: #d84315;
    --bg-paper: #fff8e1;
    --bg-panel: #fffde7;
    --bg-card: #ffffff;
    --border: #ffe0b2;
    --text-primary: #5d4037;
    --text-secondary: #795548;
}

/* 夜间模式主题 */
[data-theme="night"] {
    --primary: #e0e0e0;
    --accent: #ffb74d;
    --bg-paper: #121212;
    --bg-panel: #1e1e1e;
    --bg-card: #2d2d2d;
    --border: #424242;
    --text-primary: #e0e0e0;
    --text-secondary: #bdbdbd;
}
7.2 主题切换逻辑
// 加载保存的主题
loadTheme() {
    const savedTheme = localStorage.getItem('article-theme') || 'tech';
    document.documentElement.setAttribute('data-theme', savedTheme);
    document.getElementById('theme-select').value = savedTheme;
},

// 切换主题
changeTheme(theme) {
    document.documentElement.setAttribute('data-theme', theme);
    localStorage.setItem('article-theme', theme);
}
八、性能优化策略
8.1 渲染优化
使用虚拟列表优化长列表渲染:
// 虚拟列表优化
function renderArticlesWithVirtualScroll() {
    const container = document.getElementById('article-list');
    const articles = ArticleManager.articles;

    // 只渲染可见区域的文章
    const visibleCount = 10;
    const startIndex = Math.max(0, scrollPosition - 2);
    const endIndex = Math.min(articles.length, startIndex + visibleCount);

    container.innerHTML = articles.slice(startIndex, endIndex).map(article => {
        // 渲染文章卡片
    }).join('');
}
8.2 事件节流与防抖
// 节流函数
function throttle(fn, delay) {
    let lastTime = 0;

    return function(...args) {
        const now = Date.now();
        if (now - lastTime >= delay) {
            lastTime = now;
            fn.apply(this, args);
        }
    };
}

// 防抖函数
function debounce(fn, delay) {
    let timer = null;

    return function(...args) {
        if (timer) clearTimeout(timer);
        timer = setTimeout(() => {
            fn.apply(this, args);
        }, delay);
    };
}

// 应用节流和防抖
const throttledScroll = throttle(function() {
    updateVisibleArticles();
}, 100);

const debouncedSearch = debounce(function(keyword) {
    performSearch(keyword);
}, 300);
8.3 资源优化
// 图片懒加载
function setupImageLazyLoad() {
    const images = document.querySelectorAll('img[data-src]');

    const observer = new IntersectionObserver((entries) => {
        entries.forEach(entry => {
            if (entry.isIntersecting) {
                const img = entry.target;
                img.src = img.dataset.src;
                observer.unobserve(img);
            }
        });
    });

    images.forEach(img => observer.observe(img));
}
九、构建与部署
9.1 项目构建
配置package.json中的构建脚本:
{
    "scripts": {
        "start": "electron .",
        "build": "electron-builder",
        "build:win": "electron-builder --win",
        "build:linux": "electron-builder --linux",
        "build:mac": "electron-builder --mac"
    },
    "build": {
        "appId": "com.example.article-manager",
        "productName": "智能文章管理系统",
        "directories": {
            "output": "dist"
        },
        "files": [
            "**/*",
            "!node_modules/**/*"
        ],
        "win": {
            "target": "nsis",
            "icon": "icon.ico"
        },
        "linux": {
            "target": "deb",
            "icon": "icon.png"
        }
    }
}
9.2 构建命令
# 开发模式
npm start

# 构建Windows版本
npm run build:win

# 构建Linux版本
npm run build:linux

# 构建所有平台
npm run build
9.3 鸿蒙PC平台部署
在鸿蒙PC平台上部署Electron应用需要注意:
- 权限配置:确保应用具有必要的系统权限
- 依赖检查:确保所有native依赖在鸿蒙PC上可用
- 兼容性测试:在实际鸿蒙PC设备上测试应用
- 性能优化:针对鸿蒙PC平台进行性能调优
十、总结与展望
10.1 项目总结
通过本文的实践,我们成功构建了一个基于Electron框架的智能文章管理系统,主要完成了以下工作:
- 环境搭建:配置了鸿蒙PC上的Electron开发环境
- 架构设计:设计了主进程与渲染进程的架构
- 功能实现:实现了文章管理、分类管理、标签管理和数据分析等核心功能
- 主题系统:实现了6种主题风格的切换
- 性能优化:应用了节流、防抖、虚拟列表等优化策略
10.2 技术亮点
- 模块化架构:代码组织清晰,便于维护和扩展
- 响应式设计:支持不同屏幕尺寸
- 多主题支持:满足不同用户的视觉偏好
- 数据持久化:支持本地存储
10.3 未来展望
未来可以进一步扩展的功能:
- 云端同步:支持文章数据的云端备份和同步
- 团队协作:支持多人协作编辑
- 富文本编辑器:增强编辑功能
- 移动端适配:开发移动端版本
- 插件系统:支持第三方插件扩展

讨论HarmonyOS开发技术,专注于API与组件、DevEco Studio、测试、元服务和应用上架分发等。
更多推荐


 3
3 0
0- 0


 已为社区贡献267条内容

所有评论(0)