Android 测试工程师的鸿蒙迁移指南:零成本上手 HMNextAuto
Android 测试工程师的鸿蒙迁移指南:零成本上手 HMNextAuto
导读:鸿蒙 NEXT 不再兼容 Android,你熟悉的 uiautomator2 全部失效?别慌,HMNextAuto 让你用几乎一模一样的 API 继续写鸿蒙自动化测试,迁移成本趋近于零。本文从 API 对比、迁移步骤、实战案例到常见问题,手把手带你完成从 uiautomator2 到 HMNextAuto 的完整迁移。
一、引言:Android 测试工程师的转型阵痛
1.1 鸿蒙 NEXT 带来的冲击
2024 年华为正式发布 HarmonyOS NEXT(纯血鸿蒙),彻底抛弃了 Android AOSP 代码,不再兼容 Android 应用。这对测试工程师来说是一个巨大的冲击:
- uiautomator2 失效:基于 Android UiAutomation 框架的 uiautomator2,在鸿蒙 NEXT 上完全无法运行
- Appium 方案中断:依赖 Android WebDriver 的 Appium 方案同样面临底层缺失的问题
- 测试资产归零:团队积累的数百个自动化测试脚本,一夜之间变成了"废代码"
- 工期压力剧增:产品线要求同步上线鸿蒙版本,测试人力却需要重新学习
这不是一个假设性场景,而是大量 Android 测试团队在 2024-2025 年真实面临的困境。
1.2 鸿蒙自动化测试的现状
面对鸿蒙 NEXT 的测试需求,目前可选的方案屈指可数:
| 方案 | 类型 | 优点 | 缺点 |
|---|---|---|---|
| Hypium(官方) | 侵入式 | 官方支持 | 需集成 SDK、API 风格独特、学习成本高 |
| hmdriver2 | 非侵入式 | API 类似 u2 | 已停止维护 2 年,Bug 无人修复 |
| HMNextAuto | 非侵入式 | API 对齐 u2、持续维护 | 需替换 import 路径 |
其中,HMNextAuto 是目前最贴近 uiautomator2 使用体验的方案。它基于原 hmdriver2 的核心架构,修复了大量 Bug,新增了性能监控、OCR、视觉定位等高级功能,并且保持了与 uiautomator2 高度一致的 API 设计。
1.3 HMNextAuto 的兼容性优势
HMNextAuto 的核心设计理念就是**“让 uiautomator2 用户零学习成本上手鸿蒙测试”**。具体体现在:
- API 命名一致:
click()、set_text()、swipe()、wait()等核心方法完全一致 - 选择器语法一致:
d(text="登录")、d(description="提交")与 u2 写法相同 - Watcher 机制一致:
d.watcher("name").when(text="跳过").click()原样可用 - 手势操作一致:
swipe_ext("up")、swipe()参数高度相似
这意味着你只需要修改 import 路径和初始化方式,大部分测试脚本可以直接复用。
二、API 对比:uiautomator2 vs HMNextAuto
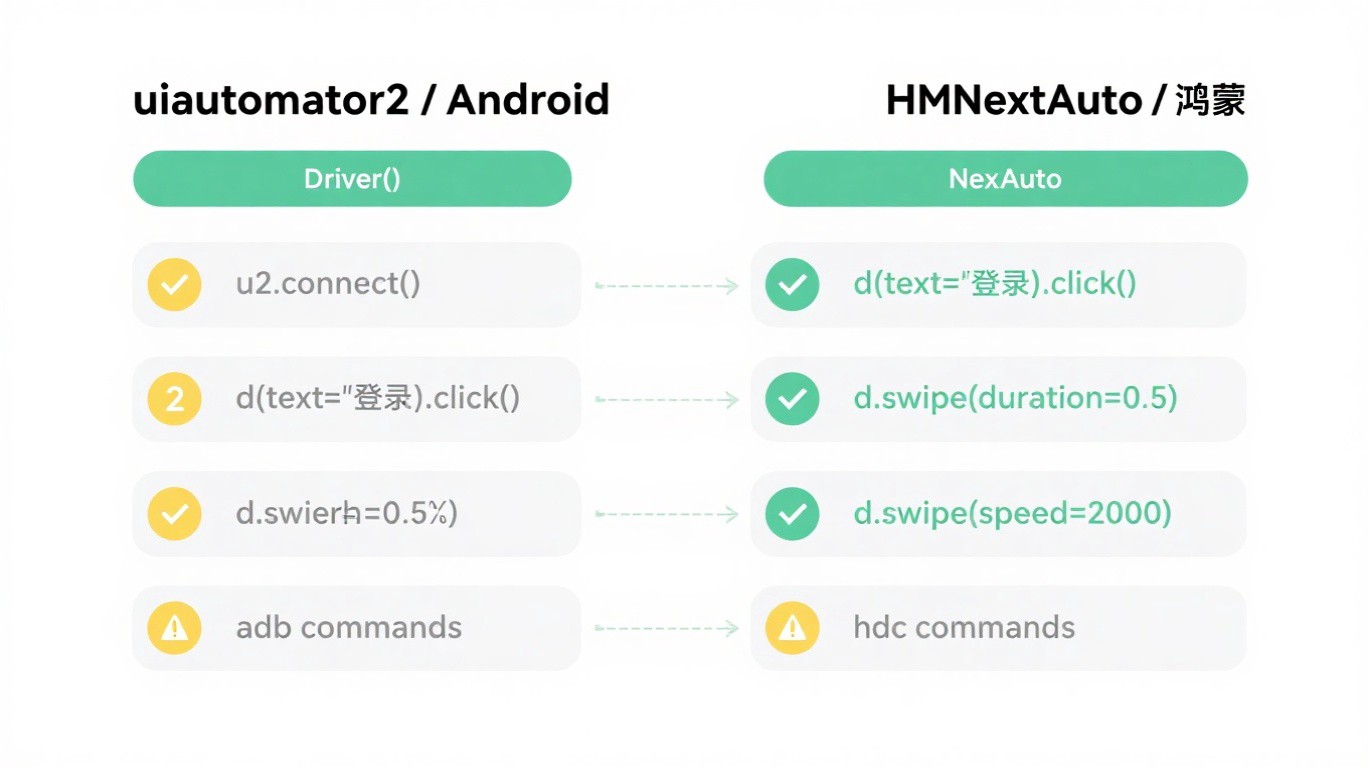
下面我们从初始化、控件操作、手势操作、等待机制四个核心维度进行详细对比。
2.1 初始化对比
| 对比项 | uiautomator2 | HMNextAuto | 差异说明 |
|---|---|---|---|
| 导入方式 | import uiautomator2 as u2 | from hmnextauto.driver import Driver | 包名不同 |
| 连接设备 | u2.connect() | Driver() | 函数调用 vs 类实例化 |
| 指定设备 | u2.connect("serial") | Driver("serial") | 参数传递方式一致 |
| 设备命令 | adb | hdc | 鸿蒙使用 hdc 而非 adb |
# ========== uiautomator2 ==========
import uiautomator2 as u2

# 连接默认设备(USB 连接的第一台设备)
d = u2.connect()

# 连接指定设备
d = u2.connect("ABC123456")

# ========== HMNextAuto ==========
from hmnextauto.driver import Driver

# 连接默认设备(hdc list targets 中的第一台设备)
d = Driver()

# 连接指定设备
d = Driver("ABC123456")
注意:鸿蒙 NEXT 使用
hdc(HarmonyOS Device Connector)替代了 Android 的adb。连接设备前请确保已安装 hdc 工具并正确配置环境变量。
2.2 控件操作对比
控件操作是自动化测试的核心,HMNextAuto 在这方面做到了几乎 100% 兼容:
| 操作 | uiautomator2 | HMNextAuto | 兼容性 |
|---|---|---|---|
| 文本匹配点击 | d(text="登录").click() | d(text="登录").click() | 完全一致 |
| 描述匹配点击 | d(description="提交").click() | d(description="提交").click() | 完全一致 |
| 输入文本 | d(resourceId="id/username").set_text("admin") | d(text="用户名").set_text("admin") | 需调整选择器 |
| 获取文本 | d(text="标题").info["text"] | d(text="标题").info["text"] | 完全一致 |
| 判断存在 | d(text="首页").exists() | d(text="首页").exists() | 完全一致 |
| 长按 | d(text="设置").long_click() | d(text="设置").long_click() | 完全一致 |
# ========== uiautomator2 ==========
# 通过文本查找并点击
d(text="登录").click()

# 通过 resourceId 查找并输入
d(resourceId="com.app:id/username").set_text("admin")
d(resourceId="com.app:id/password").set_text("123456")

# 通过 description 查找并点击
d(description="提交").click()

# 获取控件信息
element = d(text="欢迎")
print(element.info["text"])
print(element.info["bounds"])

# ========== HMNextAuto ==========
# 通过文本查找并点击(完全一致)
d(text="登录").click()

# 鸿蒙控件属性命名不同,通常用 text 替代 resourceId
d(text="用户名").set_text("admin")
d(text="密码").set_text("123456")

# 通过 description 查找并点击(完全一致)
d(description="提交").click()

# 获取控件信息(完全一致)
element = d(text="欢迎")
print(element.info["text"])
print(element.info["bounds"])
关键差异:鸿蒙 NEXT 的控件树结构与 Android 不同,没有
resourceId属性。鸿蒙控件通常使用text、description、type等属性进行定位。迁移时需要将resourceId选择器替换为text或其他可用属性。
2.3 手势操作对比
| 操作 | uiautomator2 | HMNextAuto | 差异说明 |
|---|---|---|---|
| 基础滑动 | d.swipe(sx, sy, ex, ey, duration=0.5) | d.swipe(sx, sy, ex, ey, speed=2000) | duration(秒) -> speed(像素/秒) |
| 方向滑动 | d.swipe_ext("up", scale=0.9) | d.swipe_ext("up") | 参数更简洁 |
| 截图 | d.screenshot("a.png") | d.screenshot("a.png") | 完全一致 |
# ========== uiautomator2 ==========
# 基础滑动:从 (0.5, 0.8) 滑到 (0.5, 0.2),持续 0.5 秒
d.swipe(0.5, 0.8, 0.5, 0.2, duration=0.5)

# 方向滑动:向上滑动,滑动距离为屏幕高度的 90%
d.swipe_ext("up", scale=0.9)

# 向左滑动
d.swipe_ext("left", scale=0.8)

# ========== HMNextAuto ==========
# 基础滑动:参数为比例坐标,speed 单位为像素/秒
d.swipe(0.5, 0.8, 0.5, 0.2, speed=2000)

# 方向滑动:向上滑动(默认 scale=0.8)
d.swipe_ext("up")

# 向左滑动,指定滑动比例
d.swipe_ext("left", scale=0.8)
参数转换技巧:uiautomator2 的
duration(秒)可以粗略转换为 HMNextAuto 的speed(像素/秒)。假设滑动距离为屏幕高度的 60%(约 1200px),duration=0.5s对应speed=2400。
2.4 等待机制对比
等待机制是自动化测试稳定性的关键,HMNextAuto 完全保留了 uiautomator2 的等待 API:
| 操作 | uiautomator2 | HMNextAuto | 兼容性 |
|---|---|---|---|
| 等待出现 | d(text="首页").wait(timeout=10) | d(text="首页").wait(timeout=10) | 完全一致 |
| 等待消失 | d(text="加载中").wait_gone(timeout=5) | d(text="加载中").wait_gone(timeout=5) | 完全一致 |
| 判断存在 | d(text="首页").exists(timeout=10) | d(text="首页").exists(timeout=10) | 完全一致 |
# ========== uiautomator2 ==========
# 等待"首页"文本出现,最多等 10 秒
d(text="首页").wait(timeout=10)

# 等待"加载中"文本消失,最多等 5 秒
d(text="加载中").wait_gone(timeout=5)

# 判断元素是否存在(带超时)
if d(text="设置").exists(timeout=3):
    d(text="设置").click()

# ========== HMNextAuto ==========
# 等待"首页"文本出现,最多等 10 秒(完全一致)
d(text="首页").wait(timeout=10)

# 等待"加载中"文本消失,最多等 5 秒(完全一致)
d(text="加载中").wait_gone(timeout=5)

# 判断元素是否存在(完全一致)
if d(text="设置").exists(timeout=3):
    d(text="设置").click()
2.5 Watcher 机制对比
Watcher 是 uiautomator2 最受欢迎的特性之一,HMNextAuto 完美复刻了这一机制:
# ========== uiautomator2 ==========
d.watcher("skip").when(text="跳过").click()
d.watcher("allow").when(text="允许").click()
d.watcher.start()

# ========== HMNextAuto(完全一致)==========
d.watcher("skip").when(text="跳过").click()
d.watcher("allow").when(text="允许").click()
d.watcher.start(interval=0.3)  # 支持自定义轮询间隔
2.6 HMNextAuto 独有功能
除了兼容 uiautomator2 的全部核心 API,HMNextAuto 还提供了一系列独有功能:
# ========== 性能监控 ==========
# 在测试过程中持续采集 FPS、CPU、内存等指标
with d.performance_watcher.start("perf.jsonl", interval=0.5):
    d(text="首页").click()
    d.swipe_ext("up")
    d(text="商品详情").click()

# ========== 通知栏操作 ==========
d.notification.open()                              # 打开通知栏
d.notification.click_quick_setting("wifi")         # 点击快捷设置中的 WiFi
d.notification.close()                             # 关闭通知栏

# ========== OCR 文字识别 ==========
# 当控件树无法定位时,使用 OCR 识别屏幕文字并点击
d.ocr.click_text("确定")
text = d.ocr.read(region=(100, 200, 500, 400))     # 区域识别

# ========== 视觉定位 ==========
# 通过模板图片匹配并点击(支持多尺度匹配)
d.click_image("target.png", threshold=0.85)
三、迁移步骤:四步完成从 u2 到 HMNextAuto

# 从华为开发者官网下载 DevEco Studio,hdc 位于 SDK 目录下
# 将 hdc 添加到 PATH 环境变量
# 3. 验证设备连接
hdc list targets
# 输出示例:ABC123456789
# 4. 验证 HMNextAuto 安装
python -c "from hmnextauto.driver import Driver; d = Driver(); print('连接成功')"
环境准备检查清单:
- Python 3.8+ 已安装
- HMNextAuto 已通过 pip 安装
- hdc 工具已安装并配置 PATH
- 鸿蒙设备已通过 USB 连接并开启调试模式
-
hdc list targets能正确列出设备序列号 - HMNextAuto 能成功连接设备
Step 2:代码替换
代码替换是迁移的核心步骤,主要涉及以下几类修改:
2.1 替换 import 语句
# 修改前(uiautomator2)
import uiautomator2 as u2

# 修改后(HMNextAuto)
from hmnextauto.driver import Driver
2.2 替换初始化代码
# 修改前
d = u2.connect()
# 或
d = u2.connect("serial")

# 修改后
d = Driver()
# 或
d = Driver("serial")
2.3 替换控件选择器
# 修改前:使用 resourceId 定位
d(resourceId="com.app:id/btn_login").click()
d(resourceId="com.app:id/et_username").set_text("admin")

# 修改后:使用 text 或其他属性定位
d(text="登录").click()
d(text="用户名").set_text("admin")
2.4 替换手势参数
# 修改前:duration 单位为秒
d.swipe(0.5, 0.8, 0.5, 0.2, duration=0.5)

# 修改后:speed 单位为像素/秒
d.swipe(0.5, 0.8, 0.5, 0.2, speed=2000)
Step 3:调试优化
代码替换完成后,需要逐个调试测试用例:
"""
迁移调试模板:逐步验证每个操作是否正常
"""
from hmnextauto.driver import Driver
import time

d = Driver()

# 1. 验证设备连接
print(f"设备信息: {d.info}")

# 2. 验证控件定位
print(f"当前页面控件: {d.dump_hierarchy()}")

# 3. 逐步验证操作
try:
    d(text="首页").wait(timeout=10)
    print("[PASS] 首页加载成功")

    d(text="搜索").click()
    print("[PASS] 搜索按钮点击成功")

    d.swipe_ext("up")
    print("[PASS] 上滑操作成功")

except Exception as e:
    print(f"[FAIL] 操作失败: {e}")
    # 保存截图用于分析
    d.screenshot("debug_fail.png")
Step 4:持续集成
将迁移后的测试脚本集成到 CI/CD 流水线中:
# GitHub Actions 示例配置
name: HarmonyOS UI Test

on:
  push:
    branches: [main]
  pull_request:
    branches: [main]

jobs:
  ui-test:
    runs-on: self-hosted  # 需要在连接了鸿蒙设备的机器上运行
    steps:
      - uses: actions/checkout@v4

      - name: 安装依赖
        run: pip install -U hmnextauto pytest

      - name: 检查设备连接
        run: hdc list targets

      - name: 运行测试
        run: pytest tests/ -v --tb=short

      - name: 上传测试报告
        if: always()
        uses: actions/upload-artifact@v4
        with:
          name: test-report
          path: reports/
四、实战迁移案例
案例一:登录流程测试脚本迁移
登录流程是最基础的测试场景,也是迁移的起点。
迁移前(uiautomator2):
"""
登录流程测试 - uiautomator2 版本
"""
import uiautomator2 as u2
import time

def test_login():
    d = u2.connect("emulator-5554")

    # 启动应用
    d.app_start("com.example.app")
    time.sleep(3)

    # 输入用户名
    d(resourceId="com.example.app:id/et_username").set_text("admin")

    # 输入密码
    d(resourceId="com.example.app:id/et_password").set_text("123456")

    # 点击登录按钮
    d(resourceId="com.example.app:id/btn_login").click()

    # 等待登录成功
    assert d(text="首页").wait(timeout=10), "登录失败,未跳转到首页"

    print("登录测试通过")

if __name__ == "__main__":
    test_login()
迁移后(HMNextAuto):
"""
登录流程测试 - HMNextAuto 版本
迁移说明:
1. import 路径从 uiautomator2 改为 hmnextauto.driver
2. 初始化从 u2.connect() 改为 Driver()
3. resourceId 选择器改为 text 选择器(鸿蒙控件属性差异)
4. 其余 API 完全一致,无需修改
"""
from hmnextauto.driver import Driver
import time

def test_login():
    d = Driver("ABC123456789")  # 替换为鸿蒙设备序列号

    # 启动应用(鸿蒙使用 bundleName)
    d.app_start("com.example.app")
    time.sleep(3)

    # 输入用户名(resourceId -> text)
    d(text="用户名").set_text("admin")

    # 输入密码(resourceId -> text)
    d(text="密码").set_text("123456")

    # 点击登录按钮(resourceId -> text)
    d(text="登录").click()

    # 等待登录成功(完全一致)
    assert d(text="首页").wait(timeout=10), "登录失败,未跳转到首页"

    print("登录测试通过")

if __name__ == "__main__":
    test_login()
迁移差异汇总:
| 修改项 | 修改前 | 修改后 | 修改原因 |
|---|---|---|---|
| import | import uiautomator2 as u2 | from hmnextauto.driver import Driver | 包名变更 |
| 初始化 | u2.connect("serial") | Driver("serial") | API 风格差异 |
| 用户名定位 | resourceId=".../et_username" | text="用户名" | 鸿蒙无 resourceId |
| 密码定位 | resourceId=".../et_password" | text="密码" | 鸿蒙无 resourceId |
| 登录按钮 | resourceId=".../btn_login" | text="登录" | 鸿蒙无 resourceId |
案例二:列表滑动测试脚本迁移
列表滑动是移动端测试的高频场景,涉及手势操作和滚动查找。
迁移前(uiautomator2):
"""
商品列表滑动测试 - uiautomator2 版本
"""
import uiautomator2 as u2

def test_scroll_list():
    d = u2.connect()

    # 等待列表加载
    d(resourceId="com.app:id/recycler_view").wait(timeout=10)

    # 连续向上滑动 5 次
    for i in range(5):
        d.swipe_ext("up", scale=0.9)
        import time
        time.sleep(1)

    # 查找目标商品
    if d(text="华为 Mate 70").exists(timeout=5):
        d(text="华为 Mate 70").click()
        print("找到并点击了目标商品")
    else:
        print("未找到目标商品")

    # 滑动到底部
    while True:
        if d(text="已经到底了").exists(timeout=2):
            break
        d.swipe(0.5, 0.8, 0.5, 0.2, duration=0.3)

if __name__ == "__main__":
    test_scroll_list()
迁移后(HMNextAuto):
"""
商品列表滑动测试 - HMNextAuto 版本
迁移说明:
1. swipe_ext 参数简化,scale 使用默认值即可
2. swipe 的 duration 参数改为 speed 参数
3. 控件定位从 resourceId 改为 text
4. 其余逻辑完全不变
"""
from hmnextauto.driver import Driver
import time

def test_scroll_list():
    d = Driver()

    # 等待列表加载
    d(text="推荐").wait(timeout=10)  # 用页面标志性文本替代 resourceId

    # 连续向上滑动 5 次
    for i in range(5):
        d.swipe_ext("up")  # 默认 scale=0.8,通常够用
        time.sleep(1)

    # 查找目标商品(完全一致)
    if d(text="华为 Mate 70").exists(timeout=5):
        d(text="华为 Mate 70").click()
        print("找到并点击了目标商品")
    else:
        print("未找到目标商品")

    # 滑动到底部(duration -> speed)
    while True:
        if d(text="已经到底了").exists(timeout=2):
            break
        d.swipe(0.5, 0.8, 0.5, 0.2, speed=3000)  # speed=3000 对应较快的滑动

if __name__ == "__main__":
    test_scroll_list()
案例三:复杂场景测试脚本迁移
复杂场景涉及 Watcher、弹窗处理、多页面跳转等组合操作。
迁移前(uiautomator2):
"""
复杂场景测试 - uiautomator2 版本
包含:弹窗处理、Watcher、页面跳转、断言验证
"""
import uiautomator2 as u2
import time

def test_complex_flow():
    d = u2.connect()

    # 设置 Watcher 自动处理弹窗
    d.watcher("update").when(text="立即更新").click()
    d.watcher("ad").when(text="跳过广告").click()
    d.watcher("rating").when(text="以后再说").click()
    d.watcher.start()

    # 启动应用
    d.app_start("com.example.app")
    time.sleep(5)

    # 登录
    d(resourceId="com.app:id/et_username").set_text("admin")
    d(resourceId="com.app:id/et_password").set_text("123456")
    d(resourceId="com.app:id/btn_login").click()

    # 等待首页加载
    d(text="首页").wait(timeout=10)

    # 进入搜索页面
    d(description="搜索").click()
    d(resourceId="com.app:id/search_input").set_text("手机")

    # 等待搜索结果
    d(text="搜索结果").wait(timeout=10)

    # 点击第一个搜索结果
    d(className="android.widget.RecyclerView").child(text="华为").click()

    # 返回首页
    d.press_back()
    d.press_back()

    # 停止 Watcher
    d.watcher.stop()

    print("复杂场景测试通过")

if __name__ == "__main__":
    test_complex_flow()
迁移后(HMNextAuto):
"""
复杂场景测试 - HMNextAuto 版本
迁移说明:
1. Watcher 机制完全一致,代码无需修改
2. resourceId 选择器全部改为 text/description
3. className 改为鸿蒙对应的 type 属性
4. 新增性能监控能力(HMNextAuto 独有)
"""
from hmnextauto.driver import Driver
import time

def test_complex_flow():
    d = Driver()

    # 设置 Watcher 自动处理弹窗(完全一致!)
    d.watcher("update").when(text="立即更新").click()
    d.watcher("ad").when(text="跳过广告").click()
    d.watcher("rating").when(text="以后再说").click()
    d.watcher.start(interval=0.3)  # 支持自定义轮询间隔

    # 启动应用
    d.app_start("com.example.app")

    # 使用性能监控包裹核心操作(HMNextAuto 独有功能)
    with d.performance_watcher.start("complex_flow_perf.jsonl", interval=1.0):
        time.sleep(5)

        # 登录(resourceId -> text)
        d(text="用户名").set_text("admin")
        d(text="密码").set_text("123456")
        d(text="登录").click()

        # 等待首页加载
        d(text="首页").wait(timeout=10)

        # 进入搜索页面(description 一致)
        d(description="搜索").click()
        d(text="请输入搜索内容").set_text("手机")

        # 等待搜索结果
        d(text="搜索结果").wait(timeout=10)

        # 点击第一个搜索结果(className -> type)
        d(type="List").child(text="华为").click()

        # 返回首页
        d.press_back()
        d.press_back()

    # 停止 Watcher
    d.watcher.stop()

    print("复杂场景测试通过")
    print("性能数据已保存到 complex_flow_perf.jsonl")

if __name__ == "__main__":
    test_complex_flow()
亮点:迁移后的代码不仅保持了原有的全部功能,还额外获得了性能监控能力,可以在测试过程中同步采集 FPS、CPU、内存等指标,一举两得。
五、常见问题与解决方案
5.1 控件属性差异
问题:鸿蒙控件没有 resourceId,如何定位元素?
解决方案:
# 方案一:使用 text 属性(最常用)
d(text="登录").click()

# 方案二:使用 description 属性
d(description="返回").click()

# 方案三:使用 type 属性(对应 Android 的 className)
d(type="Button").click()

# 方案四:组合定位(提高精确度)
d(text="登录", type="Button").click()

# 方案五:使用 XPath(复杂场景)
d.xpath('//Button[@text="登录"]').click()

# 方案六:使用 OCR(控件树无法定位时)
d.ocr.click_text("登录")

# 方案七:使用视觉定位(图片匹配)
d.click_image("login_button.png", threshold=0.85)
建议:优先使用
text属性定位,这是鸿蒙控件最稳定、最通用的定位方式。对于动态文本,可以结合textContains或textMatches使用。
5.2 等待时间调整
问题:迁移后部分用例出现等待超时,鸿蒙应用的加载速度与 Android 不同。
解决方案:
# 方案一:增加全局等待超时(推荐)
from hmnextauto.driver import Driver
d = Driver()
d.settings["wait_timeout"] = 30  # 全局等待超时设为 30 秒

# 方案二:针对特定操作设置超时
d(text="首页").wait(timeout=30)  # 单次等待 30 秒

# 方案三:使用 wait_until 智能等待(HMNextAuto 独有)
d.wait_until(lambda: d(text="首页").exists, timeout=30, interval=1.0)

# 方案四:轮询检查 + 截图保存(调试阶段推荐)
def wait_for_element(selector, timeout=30):
    """等待元素出现,超时则截图"""
    import time
    start = time.time()
    while time.time() - start < timeout:
        if d(**selector).exists(timeout=1):
            return True
    d.screenshot(f"timeout_{selector}.png")
    raise TimeoutError(f"等待 {selector} 超时 {timeout}s")
5.3 特殊场景处理
问题一:鸿蒙应用启动速度与 Android 不同
# 解决方案:增加启动等待 + 使用 app_wait 参数
d.app_start("com.example.app", wait=True)  # 等待应用启动完成
# 或手动等待
d.app_start("com.example.app")
d(text="首页").wait(timeout=15)  # 给更长的启动时间
问题二:鸿蒙的弹窗/对话框层级不同
# 解决方案:使用 Watcher 自动处理 + 手动兜底
d.watcher("dialog").when(text="确定").click()
d.watcher("permission").when(text="允许").click()
d.watcher.start(interval=0.3)

# 如果 Watcher 未触发,手动处理
if d(text="权限申请").exists(timeout=3):
    d(text="允许").click()
问题三:鸿蒙特有的权限弹窗
# 解决方案:使用通知栏操作权限(HMNextAuto 独有)
d.notification.open()
d.notification.click_quick_setting("wifi")  # 快捷操作
d.notification.close()
问题四:控件树结构变化导致 XPath 失效
# 解决方案:使用更灵活的 XPath + OCR 兜底
try:
    # 先尝试 XPath
    d.xpath('//List/ListItem[1]//Button[@text="购买"]').click()
except Exception:
    # XPath 失败,使用 OCR 兜底
    d.ocr.click_text("购买")
六、迁移工具与技巧
6.1 批量替换脚本
对于拥有大量测试脚本的项目,手动逐个替换效率太低。这里提供一个实用的批量替换脚本:
"""
uiautomator2 -> HMNextAuto 批量迁移脚本
使用方法:python migrate.py /path/to/your/tests/
"""
import os
import re
import sys
from pathlib import Path


def migrate_file(file_path: str, dry_run: bool = False):
    """
    对单个 Python 文件执行迁移替换

    Args:
        file_path: Python 文件路径
        dry_run: 仅打印修改内容,不实际写入
    """
    with open(file_path, "r", encoding="utf-8") as f:
        content = f.read()

    original = content
    changes = []

    # 1. 替换 import 语句
    # "import uiautomator2 as u2" -> "from hmnextauto.driver import Driver"
    new_content = re.sub(
        r'import\s+uiautomator2\s+as\s+u2',
        'from hmnextauto.driver import Driver',
        content
    )
    if new_content != content:
        changes.append("替换 import 语句")
        content = new_content

    # 2. 替换初始化:u2.connect() -> Driver()
    # 匹配 u2.connect() 和 u2.connect("serial")
    new_content = re.sub(
        r'u2\.connect\(\)',
        'Driver()',
        content
    )
    new_content = re.sub(
        r'u2\.connect\("([^"]+)"\)',
        r'Driver("\1")',
        new_content
    )
    if new_content != content:
        changes.append("替换初始化代码")
        content = new_content

    # 3. 替换 resourceId 选择器(需要根据项目自定义映射)
    # 示例:将 resourceId 替换为对应的 text
    resource_id_map = {
        "com.app:id/btn_login": 'text="登录"',
        "com.app:id/btn_submit": 'text="提交"',
        "com.app:id/et_username": 'text="用户名"',
        "com.app:id/et_password": 'text="密码"',
        # 在此添加更多映射...
    }

    for rid, replacement in resource_id_map.items():
        new_content = content.replace(f'resourceId="{rid}"', replacement)
        if new_content != content:
            changes.append(f"替换 resourceId: {rid} -> {replacement}")
            content = new_content

    # 4. 替换 duration 参数为 speed(粗略转换)
    # d.swipe(..., duration=0.5) -> d.swipe(..., speed=2000)
    def duration_to_speed(match):
        duration = float(match.group(1))
        # 粗略转换:假设滑动距离约 1000px
        speed = int(1000 / duration) if duration > 0 else 2000
        return f'speed={speed}'

    new_content = re.sub(
        r'duration=([\d.]+)',
        duration_to_speed,
        content
    )
    if new_content != content:
        changes.append("替换 duration -> speed 参数")
        content = new_content

    # 5. 替换 className 为 type
    new_content = re.sub(
        r'className=',
        'type=',
        content
    )
    if new_content != content:
        changes.append("替换 className -> type")
        content = new_content

    # 输出结果
    if changes:
        print(f"\n{'[DRY RUN] ' if dry_run else ''}文件: {file_path}")
        for change in changes:
            print(f"  - {change}")

        if not dry_run:
            with open(file_path, "w", encoding="utf-8") as f:
                f.write(content)
            print(f"  [已保存]")
    else:
        print(f"\n{'[DRY RUN] ' if dry_run else ''}文件: {file_path} (无需修改)")


def migrate_directory(dir_path: str, dry_run: bool = False):
    """
    批量迁移目录下所有 Python 文件

    Args:
        dir_path: 目录路径
        dry_run: 仅预览修改,不实际写入
    """
    total = 0
    modified = 0

    for root, dirs, files in os.walk(dir_path):
        for file in files:
            if file.endswith(".py"):
                total += 1
                file_path = os.path.join(root, file)
                with open(file_path, "r", encoding="utf-8") as f:
                    content = f.read()
                # 只处理包含 uiautomator2 的文件
                if "uiautomator2" in content:
                    modified += 1
                    migrate_file(file_path, dry_run=dry_run)

    print(f"\n{'='*50}")
    print(f"扫描文件: {total} 个")
    print(f"需要迁移: {modified} 个")
    print(f"模式: {'预览' if dry_run else '已执行'}")


if __name__ == "__main__":
    if len(sys.argv) < 2:
        print("使用方法: python migrate.py <目录路径> [--dry-run]")
        sys.exit(1)

    target_dir = sys.argv[1]
    dry_run = "--dry-run" in sys.argv

    if not os.path.isdir(target_dir):
        print(f"错误: {target_dir} 不是有效目录")
        sys.exit(1)

    migrate_directory(target_dir, dry_run=dry_run)
使用方法:
# 预览模式:查看哪些文件会被修改(不实际修改)
python migrate.py ./tests/ --dry-run

# 执行迁移
python migrate.py ./tests/
6.2 兼容性检查清单
迁移完成后,使用以下清单逐项验证:
| 序号 | 检查项 | 验证方法 | 通过标准 |
|---|---|---|---|
| 1 | import 替换 | 搜索 import uiautomator2 | 无匹配结果 |
| 2 | 初始化替换 | 搜索 u2.connect | 无匹配结果 |
| 3 | resourceId 替换 | 搜索 resourceId= | 无匹配结果(或已确认替换) |
| 4 | duration 替换 | 搜索 duration= | 无匹配结果(swipe 场景) |
| 5 | className 替换 | 搜索 className= | 无匹配结果 |
| 6 | 设备连接 | 运行 hdc list targets | 设备在线 |
| 7 | 基础操作 | 运行 d(text="xxx").click() | 操作成功 |
| 8 | 等待机制 | 运行 d(text="xxx").wait() | 等待正常 |
| 9 | Watcher | 运行 d.watcher.start() | 弹窗处理正常 |
| 10 | 截图功能 | 运行 d.screenshot() | 截图正常保存 |
6.3 回归测试策略
迁移后的回归测试建议分三个阶段进行:
阶段一:冒烟测试(Day 1)
"""
冒烟测试套件 - 验证迁移后的核心功能
优先级:P0(必须全部通过)
"""
from hmnextauto.driver import Driver

def test_smoke():
    d = Driver()

    # 1. 应用启动
    d.app_start("com.example.app")
    assert d(text="首页").wait(timeout=15), "应用启动失败"

    # 2. 基础点击
    d(text="搜索").click()
    assert d(text="搜索").exists(), "点击操作失败"

    # 3. 基础输入
    d(text="请输入").set_text("test")
    assert d(text="请输入").info["text"] == "test", "输入操作失败"

    # 4. 基础滑动
    d.swipe_ext("up")
    time.sleep(1)

    # 5. 返回操作
    d.press_back()
    assert d(text="首页").wait(timeout=5), "返回操作失败"

    print("冒烟测试全部通过")
阶段二:核心用例回归(Day 2-3)
运行所有 P0 和 P1 级别的测试用例,重点关注:
- 登录/注册流程
- 核心业务操作流程
- 列表滑动和加载
- 弹窗和权限处理
阶段三:全量回归(Day 4-5)
运行全部测试用例,收集以下数据:
- 用例通过率(目标:>= 95%)
- 失效用例清单及原因分析
- 性能对比数据(与 Android 版本对比)
七、总结与预告
本文回顾
本文从 Android 测试工程师的实际痛点出发,详细介绍了从 uiautomator2 迁移到 HMNextAuto 的完整流程。核心要点总结如下:
- 迁移成本低:只需修改 import 路径和初始化代码,核心 API 完全一致
- 控件定位需调整:鸿蒙没有
resourceId,需改用text、description、type等属性 - 手势参数有变化:
duration(秒)改为speed(像素/秒),但语义一致 - Watcher 原样可用:弹窗处理逻辑无需任何修改
- 额外获得新能力:性能监控、OCR、视觉定位等 HMNextAuto 独有功能
迁移收益评估
| 维度 | 评估 |
|---|---|
| 代码修改量 | 通常只需修改 10-20% 的代码行 |
| 学习成本 | 几乎为零(API 高度一致) |
| 迁移周期 | 中小型项目 1-2 天,大型项目 3-5 天 |
| 功能增强 | 获得性能监控、OCR、视觉定位等新能力 |
| 长期收益 | 统一鸿蒙测试框架,持续获得更新支持 |
下周预告
在 Week 7 中,我们将深入探讨 HMNextAuto 的自定义手势与复杂交互,包括:
- 多指手势的实现(双指缩放、双指旋转)
- 复杂拖拽操作(排序、拖放)
- 手势链编排(连续操作的组合)
- 自定义手势录制与回放
- 游戏场景的手势自动化
敬请期待!
相关文章:
项目地址:https://github.com/ziguiway/HMNextAuto
安装命令:
pip install -U hmnextauto

讨论HarmonyOS开发技术,专注于API与组件、DevEco Studio、测试、元服务和应用上架分发等。
更多推荐



 9
9 0
0- 0


 已为社区贡献4条内容

所有评论(0)