HarmonyOS4+NEXT星河版入门与项目实战(25)------UIAbility启动模式(文档编辑案例)
·
1、启动模式
- Singleton启动模式: 每个
UIAbility 只存在一个实例,是默认的启动模式,任务列表中只会存在一个相同的 UIAbility - Standard启动模式: 每次启动
UIAbility 都会创建一个新的实例,在任务列表中可能存在一个或多个相同的 UIAbility - Multiton启动模式: 每次都会创建一个新的
UIAbility,但是只存在一个实例,就的实例会被移除,任务列表中只会存在一个 UIAbility - Specified启动模式: 每个
UIAbility 实例可以设置Key标识,启动UIAbility 时,需要指定key,存在key 相同实例时直接拉起展示,不存在则创建,任务列表中同一个Key的 UIAbility只有一个
2、Specified启动模式实现步骤
实现 Specified启动模式需要实现三个步骤。
第一步:
- 获取上下文
- 指定跳转信息
- 调用目标
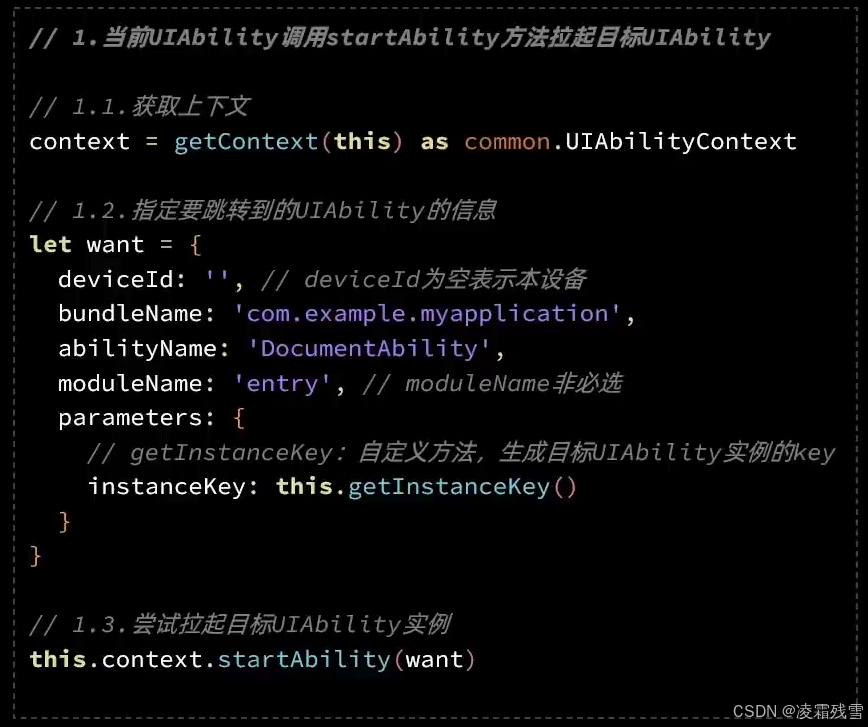
第二步:
- 生成页面Key
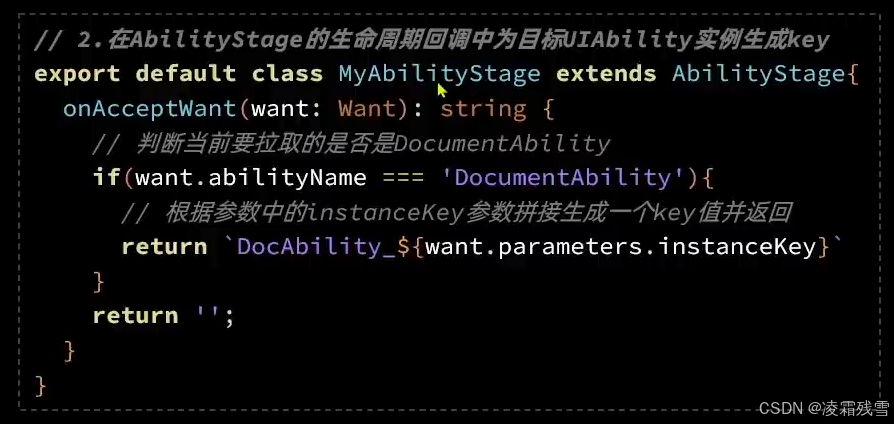
第三步:
- 配置模块
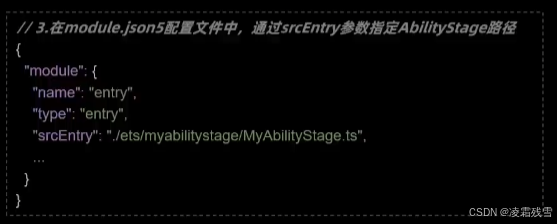
3、文档编辑案例
1、文件创建
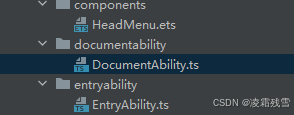
在 ets 目录下新建DocumentAbility 文件,自动生成对应文件目录和配置。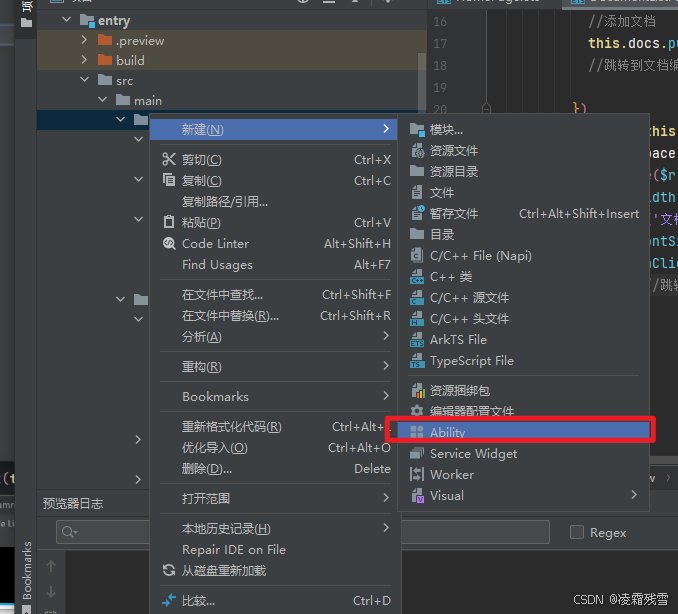
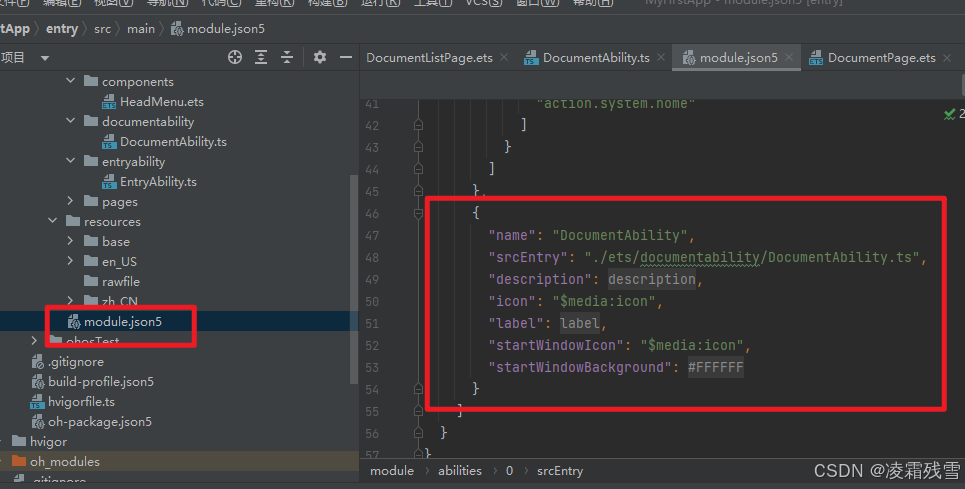
修改启动模式为 Specified 。
 {
        "name": "DocumentAbility",
        "srcEntry": "./ets/documentability/DocumentAbility.ts",
        "description": "$string:DocumentAbility_desc",
        "icon": "$media:icon",
        "label": "$string:DocumentAbility_label",
        "startWindowIcon": "$media:icon",
        "startWindowBackground": "$color:start_window_background",
        "launchType": "specified"
      }
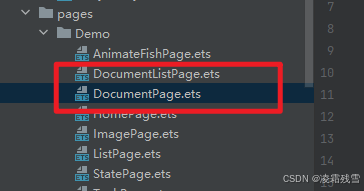
创建 DocumentListPage页面和 DocumentPage 页面。
2代码实现
DocumentListPage 代码如下:
import {HeaderMenu} from '../../components/HeadMenu'
import common from '@ohos.app.ability.common'
import Want from '@ohos.app.ability.Want'
@Entry
@Component
struct DocumentListPage {
  private index:number=1
  @State docs: number[] = []
  private context=getContext(this) as common.UIAbilityContext


  build() {
    Row() {
      Column({space:10}) {
        HeaderMenu({title:'文档列表'})
        Divider()
        Button('新建文档')
          .onClick(()=>{
            //添加文档
            this.docs.push(this.index++)
            //跳转到文档编辑的 UIAbility
            //跳转到目标 want
            let want:Want={
              deviceId:'',
              bundleName:'com.example.myfirstapp',
              moduleName:'entry',
              abilityName:'DocumentAbility',
              parameters:{
                instanceKey:'idx_'+this.index++
              }
            }

            //跳转
            this.context.startAbility(want)


          })
           ForEach(this.docs,id=>{
             Row({space:10}){
               Image($r('app.media.icon'))
                 .width(20)
               Text('文档'+id)
                 .fontSize(18)
                 .onClick(()=>{
                   //跳转到文档编辑的 UIAbility

                   let want:Want={
                     deviceId:'',
                     bundleName:'com.example.myfirstapp',
                     moduleName:'entry',
                     abilityName:'DocumentAbility',
                     parameters:{
                       instanceKey:'idx_'+this.id
                     }
                   }
                   //跳转
                   this.context.startAbility(want)
                 })
             }
           })
      }
      .width('100%')
      .height('100%')
      .padding(20)
    }
    .justifyContent(FlexAlign.Start)
    .width('100%')
  }
}
DocumentPage 页面代码如下
import common from '@ohos.app.ability.common'
import colorSpaceManager from '@ohos.graphics.colorSpaceManager'
import Want from '@ohos.app.ability.Want'

@Entry
@Component
struct DocumentPage {
  private context = getContext(this) as common.UIAbilityContext
  @State editTitle: boolean = true
  @State title: string = '标题'
  @State content: string = ''

  build() {
    Row() {
      Column({ space: 10 }) {
        Row({ space: 10 }) {
          Image($r('app.media.back'))
            .width(30)
            .onClick(() => {
              //跳转到文档列表的 UIAbility
              let want: Want = {
                deviceId: '',
                bundleName: 'com.example.myfirstapp',
                moduleName: 'entry',
                abilityName: 'EntryAbility'
              }
              //跳转
              this.context.startAbility(want)
            })
          if (!this.editTitle) {
            Text(this.title)
              .fontSize(30)
              .fontWeight(FontWeight.Bold)
            Button('确认')
              .fontSize(30)
              .fontWeight(FontWeight.Bold)
              .onClick(()=>{
                this.editTitle=false
                this.content='258'
              })
          }
          else{
            Text(this.content)
              .fontSize(20)
              .fontWeight(FontWeight.Bold)
          }
        }
      }
      .width('100%')
      .height(35)

    }
    .height('100%')
  }
}
3、Statge 创建
Statge 创建没有自动创建目录的功能,手动创建目录 myabilitystage 和对应的 TypeScript File 文件,如下所示: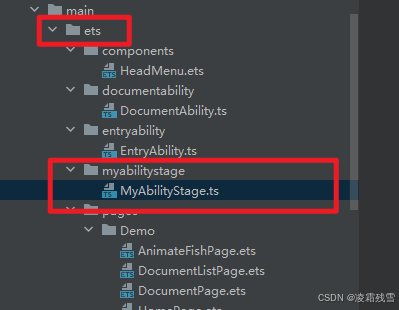
DocumentAbility 页面代码如下:
import UIAbility from '@ohos.app.ability.UIAbility';
import hilog from '@ohos.hilog';
import window from '@ohos.window';

export default class DocumentAbility extends UIAbility {
  onCreate(want, launchParam) {
    hilog.info(0x0000, 'testTag', '%{public}s', 'Ability onCreate');
  }

  onDestroy() {
    hilog.info(0x0000, 'testTag', '%{public}s', 'Ability onDestroy');
  }

  onWindowStageCreate(windowStage: window.WindowStage) {
    // Main window is created, set main page for this ability
    hilog.info(0x0000, 'testTag', '%{public}s', 'Ability onWindowStageCreate');

    windowStage.loadContent('pages/Demo/DocumentPage', (err, data) => {
      if (err.code) {
        hilog.error(0x0000, 'testTag', 'Failed to load the content. Cause: %{public}s', JSON.stringify(err) ?? '');
        return;
      }
      hilog.info(0x0000, 'testTag', 'Succeeded in loading the content. Data: %{public}s', JSON.stringify(data) ?? '');
    });
  }

  onWindowStageDestroy() {
    // Main window is destroyed, release UI related resources
    hilog.info(0x0000, 'testTag', '%{public}s', 'Ability onWindowStageDestroy');
  }

  onForeground() {
    // Ability has brought to foreground
    hilog.info(0x0000, 'testTag', '%{public}s', 'Ability onForeground');
  }

  onBackground() {
    // Ability has back to background
    hilog.info(0x0000, 'testTag', '%{public}s', 'Ability onBackground');
  }
}
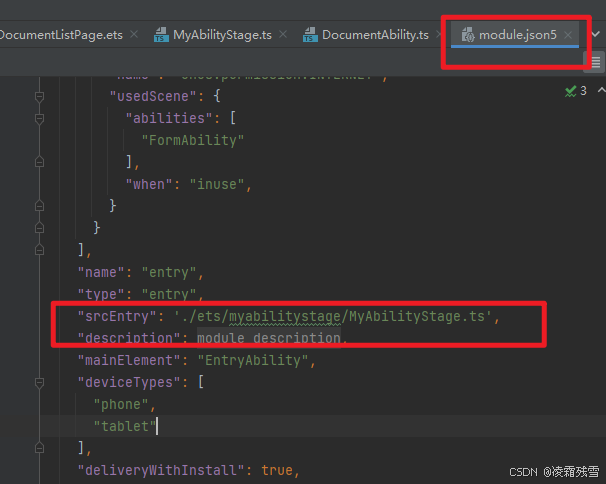
4、添加配置

讨论HarmonyOS开发技术,专注于API与组件、DevEco Studio、测试、元服务和应用上架分发等。
更多推荐

 1
1 0
0- 0


 已为社区贡献27条内容

所有评论(0)