【HarmonyOS 6.1实战】从0打造沉浸式天气APP(一):项目搭建与ArkUI架构设计
【HarmonyOS 6.1实战】从0打造沉浸式天气APP(一):项目搭建与ArkUI架构设计
本文基于 HarmonyOS 6.1 + ArkTS + ArkUI,从零开始实现一个沉浸式天气 APP。
本系列将完整实践 HarmonyOS 6.1 新能力:
- 沉浸式光感(Immersive Light Sense)
- HDS Material Design
- Live Form 交互式卡片
- Scene Animation 场景动画
- Widget 自适应
最终实现一个从手机 APP 到桌面卡片的完整鸿蒙原生应用。
一、为什么要做这个项目?
最近在学习 HarmonyOS NEXT 应用开发时,我发现一个明显变化:
传统移动应用开发更多关注:
接口请求 → 数据处理 → 页面展示 → 功能完成
但是 HarmonyOS 6.1 开始,应用体验设计被提升到了新的高度。
一个页面不仅需要“能用”,还需要:
- 是否有空间层次?
- 是否有自然交互?
- 是否符合鸿蒙设计语言?
- 是否能融入系统生态?
比如一个天气 APP。
传统实现:
天气接口 → Text显示温度 → 图片展示天气
而 HarmonyOS 6.1 的设计思路:
天气状态 → 视觉变化 → 光感反馈 → 动态交互 → 沉浸体验
所以本系列准备从零实现:
HarmonyWeather 沉浸式天气应用
最终效果:
手机端:
天气数据 → 沉浸式背景 → 动态天气卡片 → 状态动画
桌面端:
Live Form → 桌面天气卡片 → 点击进入应用
二、最终项目效果预览
完成后的 APP:
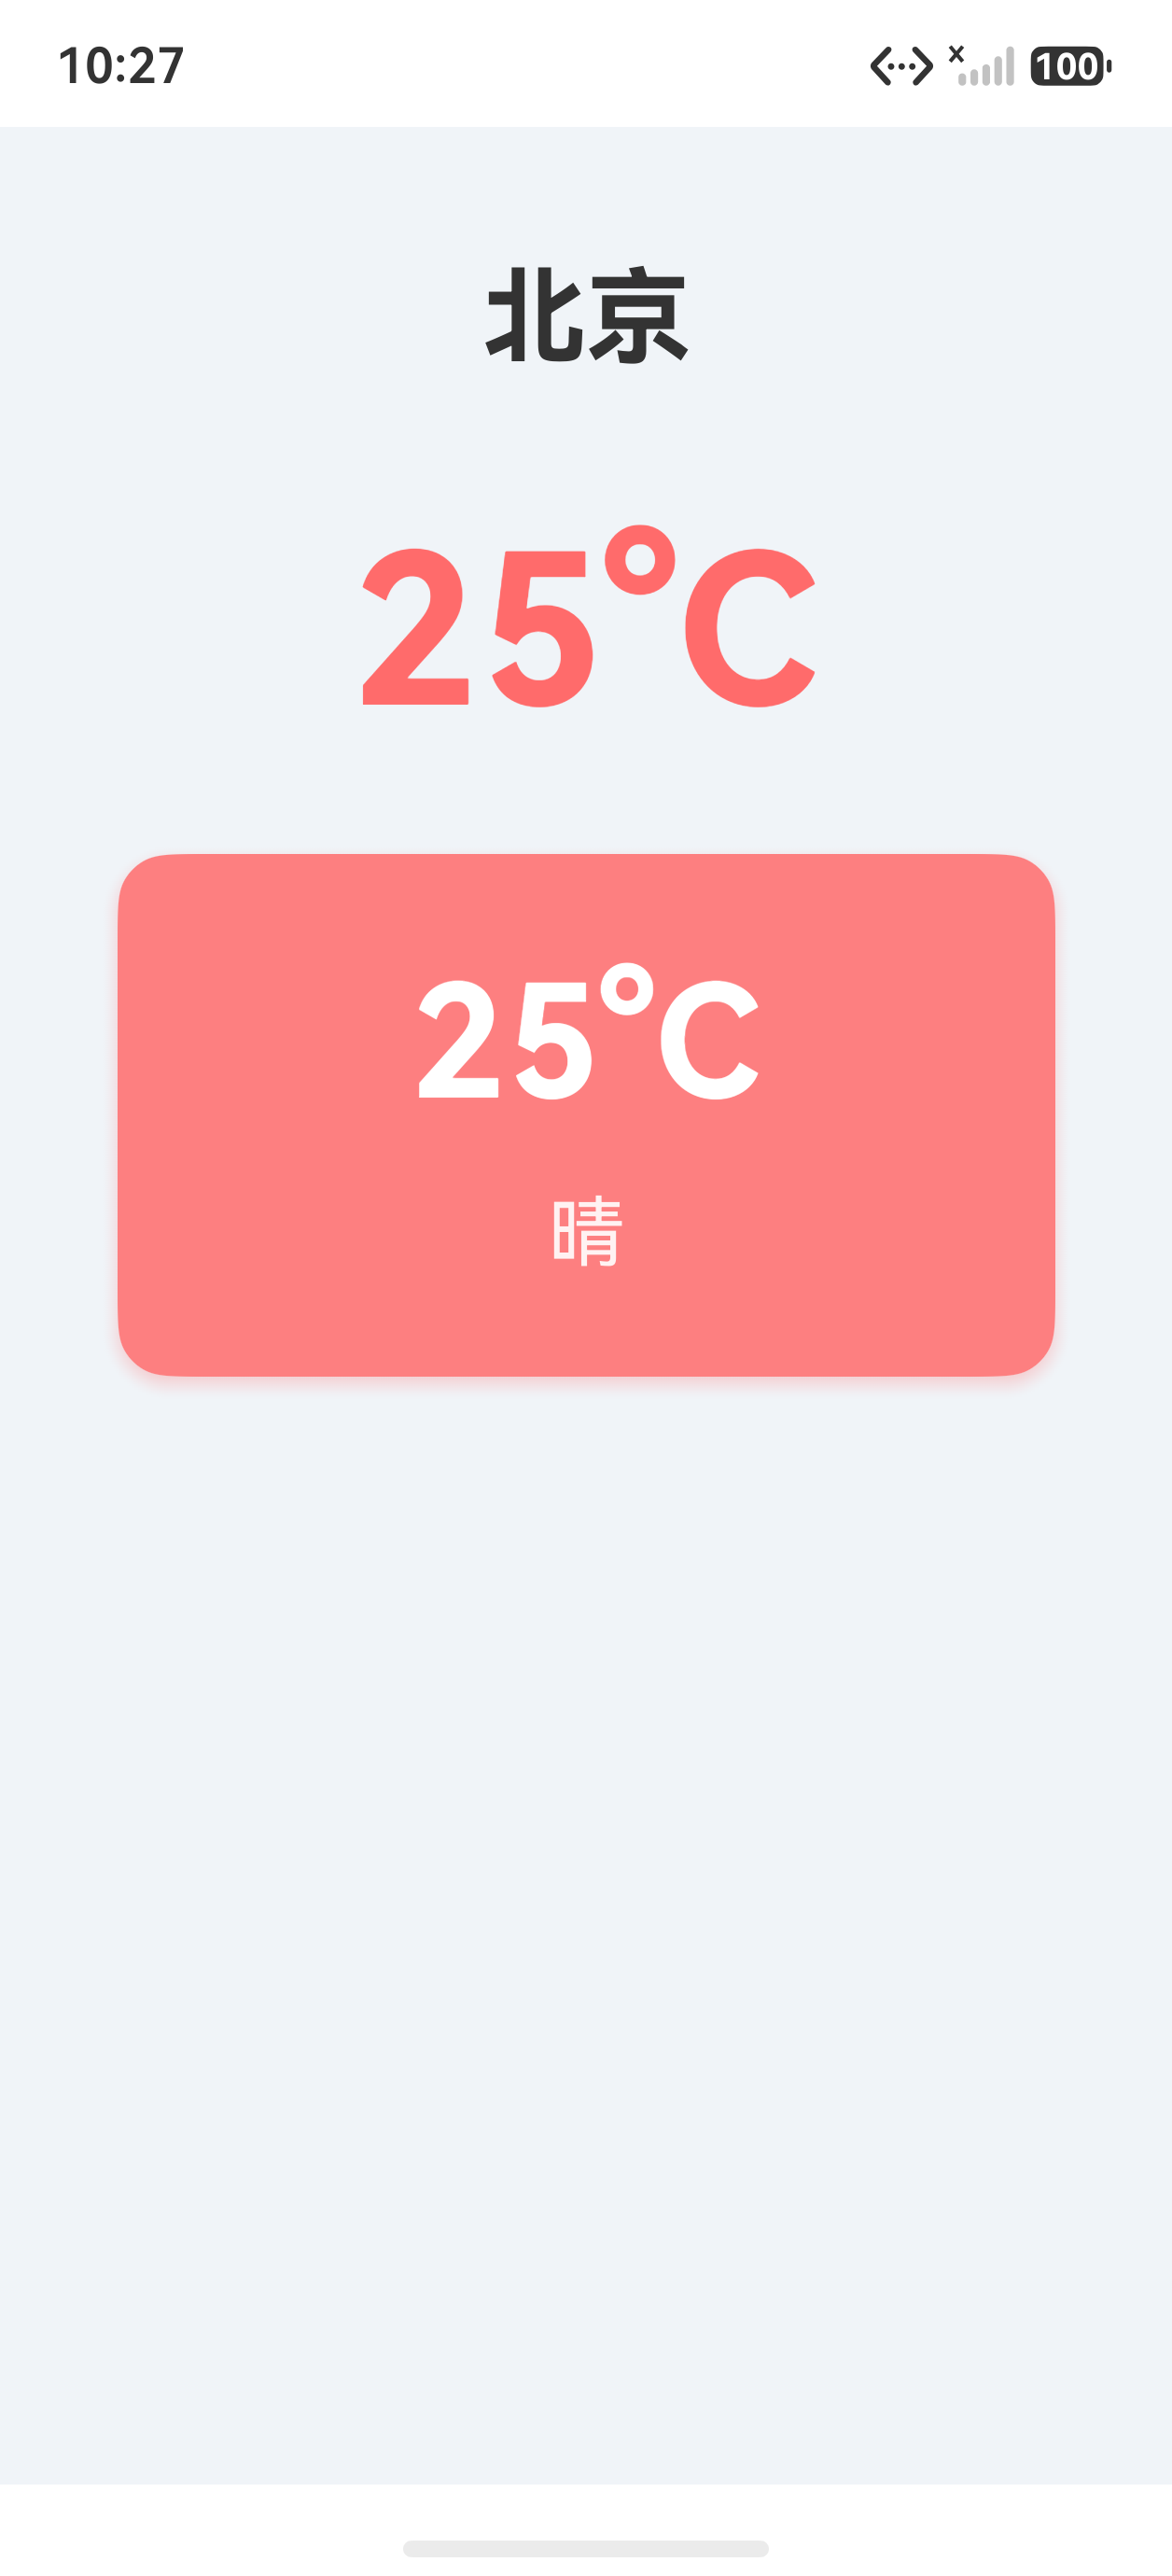
首页:
HarmonyWeather

北京
28℃
晴
天气信息卡片
后续版本会加入:
- 天气变化背景
- 光影渐变
- 桌面卡片
- 卡片动画
最终项目架构:
三、项目技术选型
本项目:
开发工具:
DevEco Studio 6.1+
SDK:
HarmonyOS SDK 6.1.0+
语言:
ArkTS
UI:
ArkUI
应用模型:
Stage模型
为什么选择 Stage 模型?
因为后续桌面卡片需要:
Ability → ExtensionAbility → Form
Stage 模型正好提供完整生命周期管理。
四、创建 HarmonyOS 项目
打开 DevEco Studio:
File → New → Create Project → Application
选择:
Empty Ability

ArkTS

Stage模型
项目结构:
HarmonyWeather

├── entry
│   └── src/main
│       ├── ets
│       │
│       ├── pages
│       │   └── WeatherPage.ets
│       │
│       ├── components
│       │   └── WeatherCard.ets
│       │
│       └── entryability
│           └── EntryAbility.ets
五、设计页面架构
开始编码前,先确定职责。
页面:
负责整体组合:
WeatherPage
组件:
负责 UI 展示:
WeatherCard
数据:
负责模型:
WeatherModel
整体关系:
WeatherModel

↓

WeatherPage

↓

WeatherCard
这样设计的原因:
如果全部写在页面:
WeatherPage.ets

500行+
后期增加:
- 湿度
- 风速
- 空气质量
- 日出时间
代码会快速膨胀。
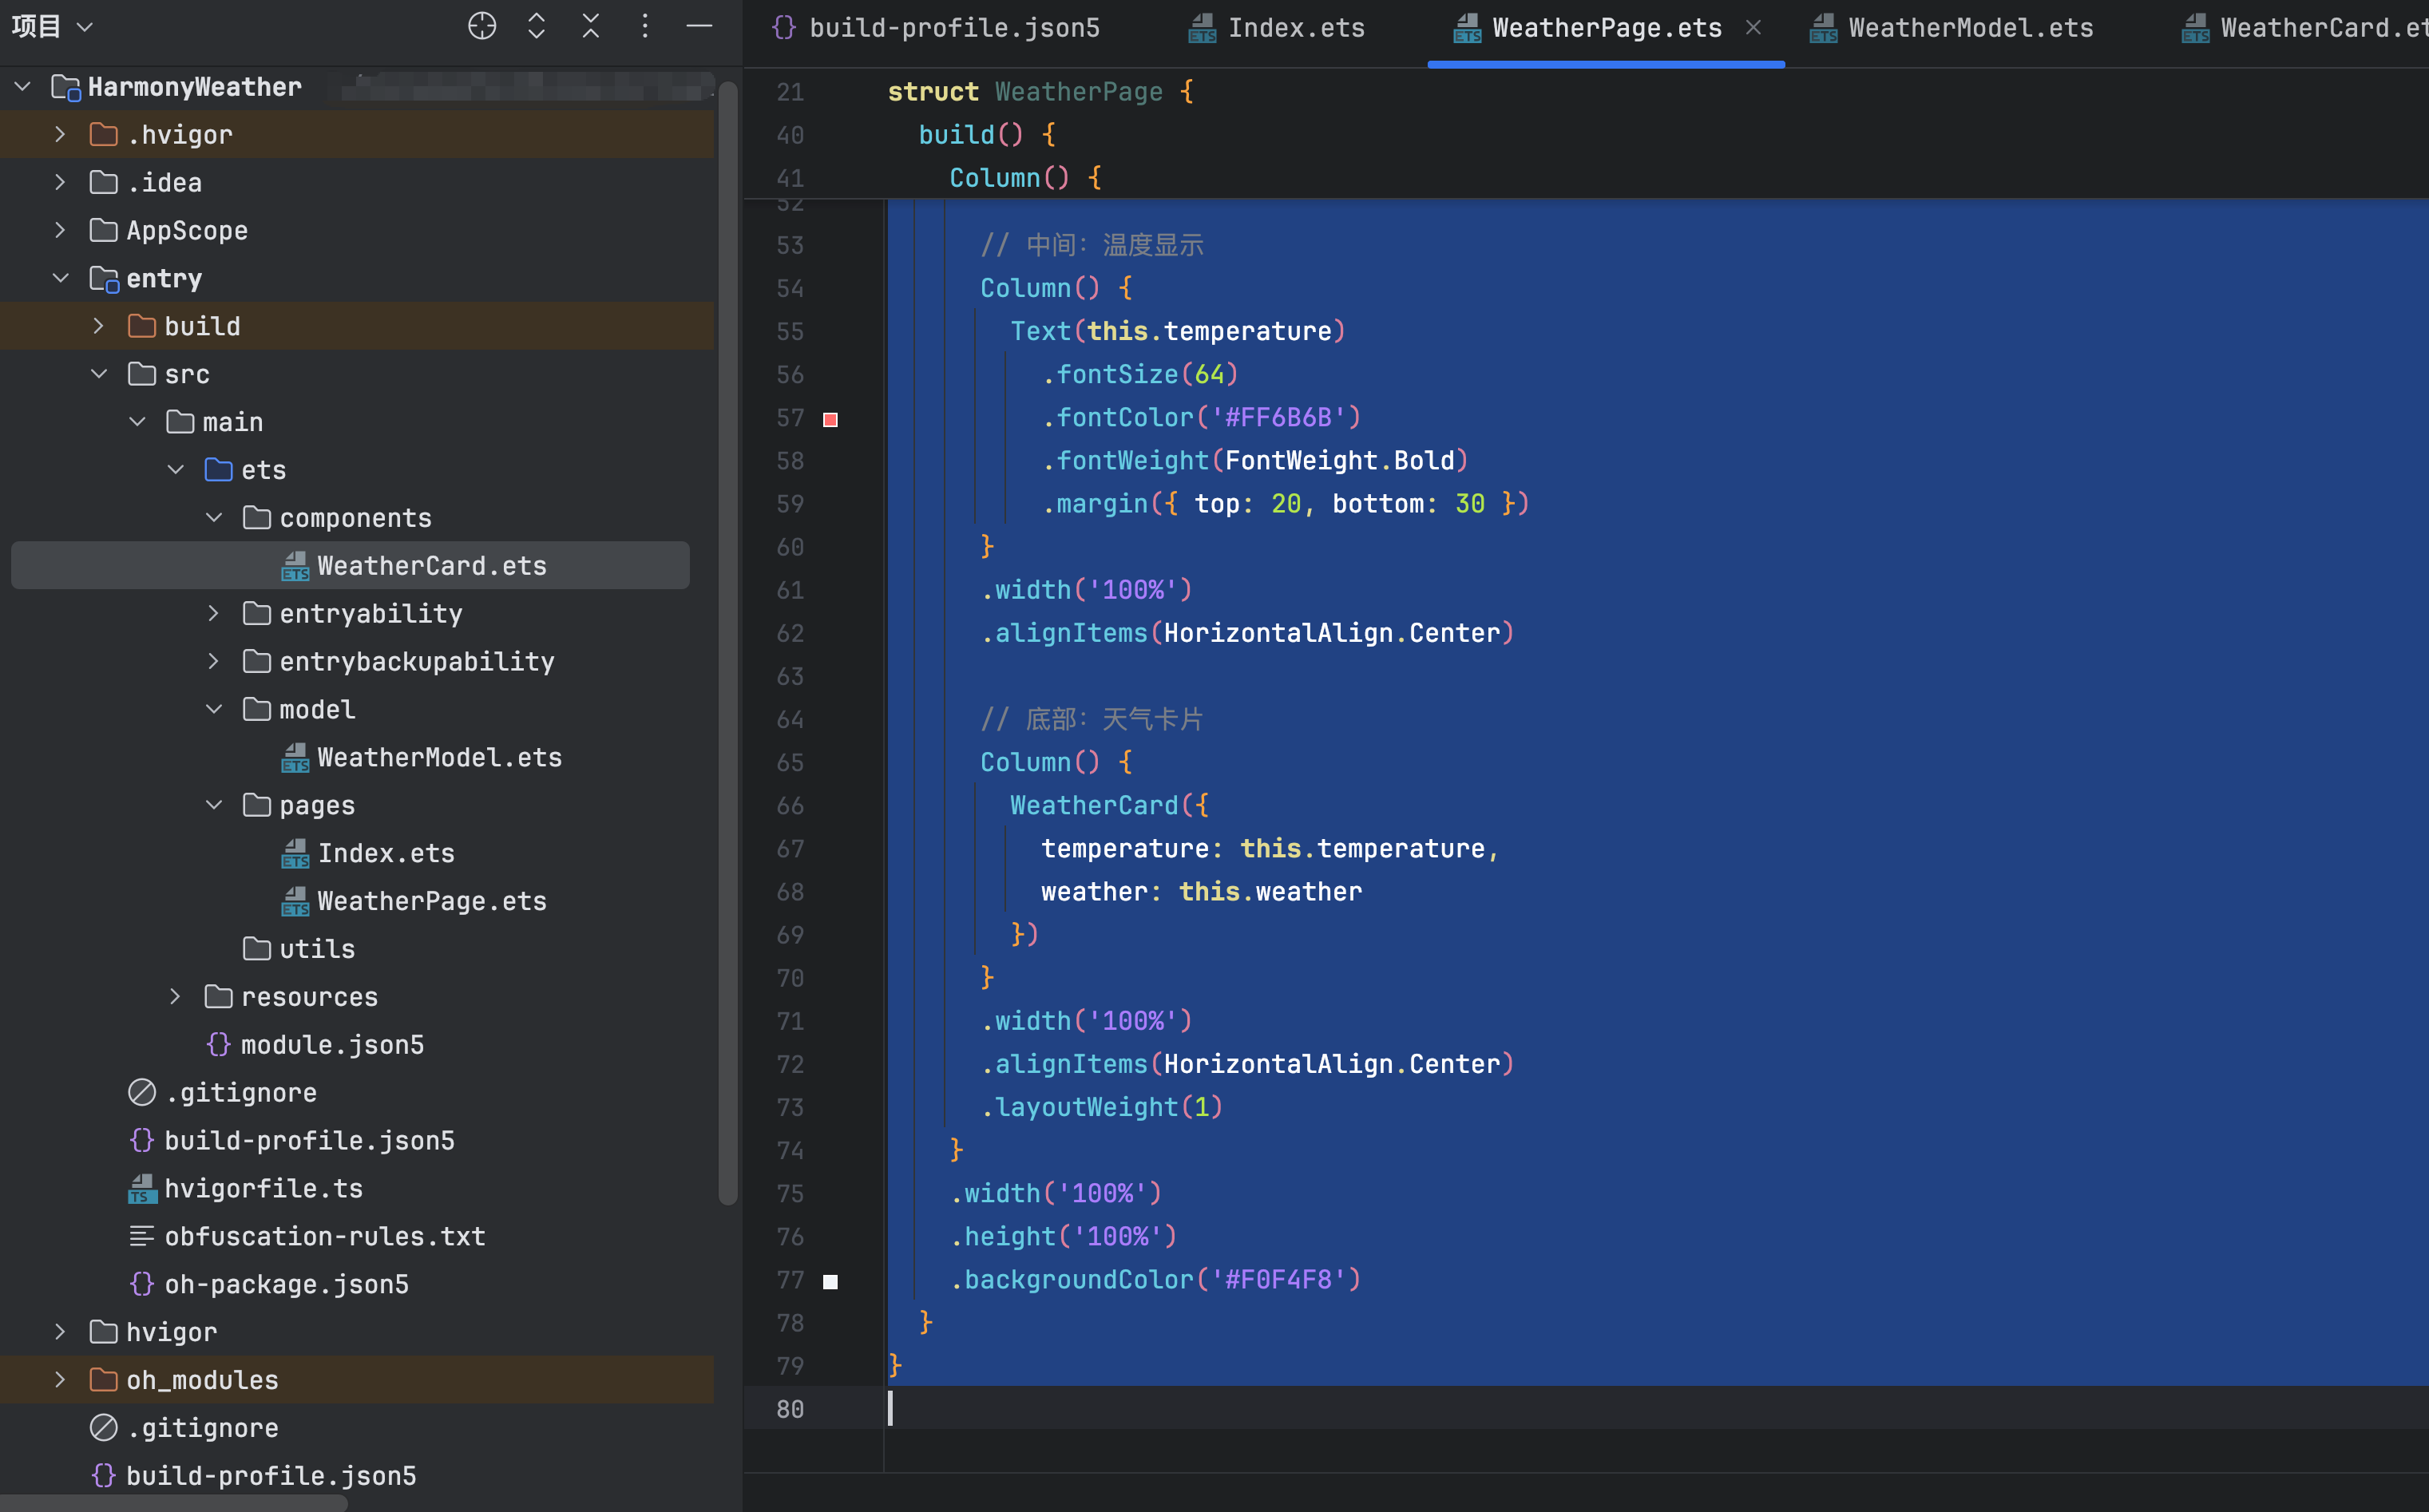
六、创建首页页面
创建:
pages/WeatherPage.ets
代码:
import { WeatherCard } from '../components/WeatherCard';
import { WeatherModel } from '../model/WeatherModel';

@Entry
@Component
struct WeatherPage {
  // 状态变量:城市名称
  @State city: string = '北京';
  // 状态变量:温度
  @State temperature: string = '25°C';
  // 状态变量:天气状态
  @State weather: string = '晴';

  // 天气数据模型
  private weatherModel: WeatherModel | null = null;

  aboutToAppear(): void {
    // 初始化天气数据
    this.weatherModel = new WeatherModel('北京', '25°C', '晴');
    this.city = this.weatherModel.city;
    this.temperature = this.weatherModel.temperature;
    this.weather = this.weatherModel.weather;
  }

  build() {
    Column() {
      // 顶部:城市名称
      Column() {
        Text(this.city)
          .fontSize(32)
          .fontColor('#333333')
          .fontWeight(FontWeight.Bold)
          .margin({ top: 40, bottom: 20 })
      }
      .width('100%')
      .alignItems(HorizontalAlign.Center)

      // 中间:温度显示
      Column() {
        Text(this.temperature)
          .fontSize(64)
          .fontColor('#FF6B6B')
          .fontWeight(FontWeight.Bold)
          .margin({ top: 20, bottom: 30 })
      }
      .width('100%')
      .alignItems(HorizontalAlign.Center)

      // 底部:天气卡片
      Column() {
        WeatherCard({
          temperature: this.temperature,
          weather: this.weather
        })
      }
      .width('100%')
      .alignItems(HorizontalAlign.Center)
      .layoutWeight(1)
    }
    .width('100%')
    .height('100%')
    .backgroundColor('#F0F4F8')
  }
}
七、理解 ArkUI 状态驱动
第一次接触 ArkUI 时,很多 Android 开发者容易产生一个误区:
以前:
textView.setText("30℃")
需要主动修改 UI。
但是 ArkUI:
temperature = "30℃"
页面自动刷新。
流程:
状态变化 → ArkUI检测 → 组件重新构建 → 页面刷新
核心:
@State
八、创建天气卡片组件
创建:
components/WeatherCard.ets
代码:
@Component
export struct WeatherCard {
  // 从父组件接收的温度数据
  @Prop temperature: string = '25°C';
  // 从父组件接收的天气状态数据
  @Prop weather: string = '晴';

  build() {
    Column() {
      // 温度显示
      Text(this.temperature)
        .fontSize(48)
        .fontColor('#FFFFFF')
        .fontWeight(FontWeight.Bold)
        .margin({ bottom: 16 })

      // 天气状态显示
      Text(this.weather)
        .fontSize(24)
        .fontColor('#FFFFFF')
        .opacity(0.9)
    }
    .width('80%')
    .height(160)
    .borderRadius(16)
    .backgroundColor('rgba(255, 107, 107, 0.85)')
    .justifyContent(FlexAlign.Center)
    .alignItems(HorizontalAlign.Center)
    .padding({ top: 20, bottom: 20, left: 24, right: 24 })
    .shadow({
      radius: 20,
      color: 'rgba(255, 107, 107, 0.3)',
      offsetX: 0,
      offsetY: 8
    })
  }
}
九、为什么使用组件化?
组件化以后:
页面:
负责:
布局
组件:
负责:
展示
数据:
负责:
状态
未来扩展:
增加空气质量:
只需要:
WeatherInfo组件
不会污染首页代码。
十、创建天气数据模型
创建:
model/WeatherModel.ets
代码:
/**
 * 天气数据模型
 * 用于封装和管理天气信息
 */
export class WeatherModel {
  // 城市名称
  city: string;
  // 温度值
  temperature: string;
  // 天气状态
  weather: string;

  /**
   * 构造函数
   * @param city 城市名称
   * @param temperature 温度值
   * @param weather 天气状态
   */
  constructor(city: string, temperature: string, weather: string) {
    this.city = city;
    this.temperature = temperature;
    this.weather = weather;
  }
}
十一、运行效果
运行:
hvigorw assembleHap
或者:
Run
当前版本效果:
十二、开发踩坑记录
1. build中不要创建对象
错误:
build(){

let model=new WeatherModel()

}
原因:
build可能重复执行。
正确:
@State

weatherData
2. 不要把所有逻辑放页面
错误:
WeatherPage
1000行
推荐:
pages

components

model
十三、本篇总结
本篇完成:
✅ HarmonyOS 6.1项目创建
✅ Stage模型工程
✅ ArkUI页面
✅ 状态管理
✅ 组件拆分
✅ 数据模型设计
当前进度:
[████░░░░░░]

20%
下一篇:
【HarmonyOS 6.1实战】从0打造沉浸式天气APP(二):ArkUI组件化与高级页面设计
下一篇将继续实现:
- 天气信息区域
- HDS设计基础
- 卡片材质优化
- 为沉浸光感做准备

讨论HarmonyOS开发技术,专注于API与组件、DevEco Studio、测试、元服务和应用上架分发等。
更多推荐

 1
1 0
0- 0


 已为社区贡献46条内容

所有评论(0)