《基于手势控制的卡片翻转与动态交互实现》:HarmonyOS 3D 金融级 UI 动效全解析

文章目录
前言
在当今的数字金融(Fintech)与电子钱包应用中,单纯的信息展示早已无法满足挑剔的用户体验需求。各大顶级应用(如 Apple Wallet、各类数字银行 App)纷纷引入了高度拟物化、带有空间感的三维(3D)交互视觉。一张能在屏幕上随着手指拖拽而倾斜、带有物理惯性、并且支持点击 3D 翻转的虚拟信用卡,能够极大提升应用的高级感与用户的信任度。
在以往的移动端开发中,想要实现带有光影变化和空间翻转的 3D 卡片,开发者往往需要借助复杂的底层图形库(如 OpenGL/WebGL),或者编写令人头疼的矩阵变换代码。然而,在 HarmonyOS 的 ArkUI 声明式框架下,这一切被极致简化了。通过原生内置的手势引擎(Gesture Engine)和强大的属性动画系统,我们仅需几百行代码,就能徒手打造一个丝滑的 3D 银行卡交互模块。
本文将基于一段完整的 ArkUI 高阶卡片交互实战代码,为您像素级拆解其中的技术奥秘。从数据驱动模型、手势拦截机制、2D 到 3D 的数学映射,再到正反面翻转的视觉欺骗原理,进行全方位深度的硬核解析。
一、 架构之始:强类型数据模型与交互状态机
在声明式 UI 中,界面的长相和行为是由状态(State)决定的。构建一个具有多维交互的 3D 卡片,首先需要建立稳固的数据基座和极度敏感的交互状态机。
1. 业务数据模型定义
interface CardType {
  bank: string;    // 发卡行名称
  type: string;    // 卡片等级(如 PLATINUM, GOLD)
  holder: string;  // 持卡人姓名
  num: string;     // 脱敏后的卡号
  color: string;   // 卡片主色调(渐变起点)
  color2: string;  // 卡片辅色调(渐变终点)
  cvv: string;     // 安全码
  exp: string;     // 有效期
  icon: string;    // 银行/组织标志
}
数据结构解析:CardType 接口定义了银行卡所需的全部物理与业务属性。特别值得注意的是 color 和 color2 两个字段。在拟物化设计中,卡片极少使用单色背景,通过这两个颜色字段构建 LinearGradient(线性渐变),是模拟卡片金属质感或高分子材料光泽的视觉基础。
2. 全局交互状态机(The State Machine)
@Entry
@Component
struct Index {
  // 空间平移状态(X/Y轴滑动距离)
  @State panX: number = 0
  @State panY: number = 0

  // 空间旋转状态(控制 3D 倾斜角度)
  @State rotateY: number = 0
  @State rotateX: number = 0

  // 卡片正反面翻转标识
  @State flip: boolean = false

  // 当前展示的卡片索引
  @State cardIdx: number = 0

  // 动画互斥锁:防止连划导致的动画冲突与状态崩溃
  @State animating: boolean = false

  private cards: CardType[] = [
    // ... 卡片数据初始化,省略具体内容
  ]
  // ...
}
状态机深度剖析:
这段代码是整个组件的神经中枢。
panX与panY:直接绑定手指在屏幕上的滑动偏移量,用于控制卡片的平移跟随。rotateX与rotateY:这是 3D 效果的核心。手指在 2D 屏幕上的滑动,将被特定的数学公式转换为 X 轴和 Y 轴的欧拉角(Euler Angles),从而产生“按压倾斜”的视觉错觉。animating状态锁:在极其复杂的动画交响乐中,用户的胡乱滑动极易导致状态紊乱。当进行自动切卡动画时,animating会被置为true,此时所有的底层手势事件将被无情拦截,保证动画生命周期的完整性。
二、 手势捕捉引擎:PanGesture 的物理学与数学映射
要让卡片“活”起来,我们需要精准捕捉用户的拖拽意图。ArkUI 提供的 PanGesture 是处理持续滑动事件的利器。
  // 手势开始前的拦截
  private onPanStart(): void {
    if (this.animating) return
  }

  // 手势持续滑动过程中的实时数学映射
  private onPanUpdate(x: number, y: number): void {
    if (this.animating) return
    this.panX = x
    this.panY = y
    // 【核心高能:滑动距离到 3D 倾斜角的映射算法】
    this.rotateY = Math.max(-25, Math.min(25, x * 0.12))
    this.rotateX = Math.max(-15, Math.min(15, -y * 0.08))
  }
2D 到 3D 的魔法算法拆解:
在 onPanUpdate 函数中,我们见到了极具智慧的代码设计:
- 比例衰减因子 (
* 0.12与* 0.08):
如果我们直接把滑动的像素值赋给旋转角度,卡片会像风扇一样疯狂旋转。通过乘以0.12,我们降低了旋转的灵敏度。这意味着手指在 X 轴滑动 100 像素,卡片在 Y 轴上仅倾斜 12 度,营造出一种卡片带有质量、难以轻易翻转的物理阻尼感。 - 极性反转 (
-y):
仔细观察rotateX的计算,为什么 Y 轴的位移前加了负号?因为在 UI 坐标系中,向下拖拽 Y 值为正。但根据右手螺旋定则,想要让卡片顶部向后倒(符合人类拖拽底部的直觉),X 轴的旋转角度必须是负值。 - 安全阈值钳制 (
Math.max与Math.min):
卡片不能无限倾斜,否则会变成一条线。这里利用Math.max和Math.min形成了一个“钳位器”(Clamp)。强制将左右倾斜角限制在 ±25 度内,上下倾斜限制在 ±15 度内。这完美模拟了卡片被固定在具有弹性极限的机械摇杆上的手感。
三、 翻转与切卡:复杂的动画编排艺术
当用户松开手指时,我们需要根据滑动的距离,决定是让卡片回弹复位,还是切换到下一张。这就是手势结束时的决断逻辑。
  private onPanEnd(): void {
    if (this.animating) return

    // 阈值判断:X轴滑动超过120px,判定为意图切换卡片
    if (this.panX > 120) {
      this.swipeCard(-1) // 向右滑动,切换到上一张
    } else if (this.panX < -120) {
      this.swipeCard(1)  // 向左滑动,切换到下一张
    } else {
      this.animateReset() // 未达阈值,弹性回位
    }
  }
1. 深度拆解 swipeCard (切卡动画序列)
飞出屏幕再从另一侧进入的视觉效果,需要极其精密的异步控制。
  private swipeCard(dir: number): void {
    this.animating = true // 上锁

    // 1. 飞出动画前奏:极大增加旋转角和位移量,把卡片甩出屏幕
    this.rotateY = dir * 45
    this.panX = dir * 400

    // 2. 第一阶段动画耗时等待
    setTimeout(() => {
      // 核心业务:数据索引切换(利用模运算实现首尾循环)
      this.cardIdx = (this.cardIdx + dir + this.cards.length) % this.cards.length

      // 3. 瞬间瞬移机制(无动画):把卡片瞬移到屏幕另一侧的反向位置
      this.panX = -dir * 400
      this.rotateY = -dir * 45

      // 4. 第二阶段:让 UI 渲染引擎有时间响应瞬移后,再执行归位动画
      setTimeout(() => {
        this.animateReset()
      }, 20)
    }, 220) // 220ms 匹配了外部 UI 组件上挂载的动画 duration
  }
动画序列的奥义:
这是一个经典的“移花接木”动画技巧。卡片飞出屏幕后,其实并没有销毁。我们在 setTimeout 的黑暗时刻里,瞬间更改了卡片的数据索引(cardIdx),并把它的物理坐标瞬间移动到屏幕的另一侧。等待 20 毫秒(确保底层绘制树刷新)后,再调用复位函数,卡片就会以全新的面貌从另一边飞入屏幕中央。整个过程对用户而言,就像是真的丢弃了一张卡,又抽出了新的一张。
2. 复位动画与解锁
  private animateReset(): void {
    // 全部物理状态归零
    this.panX = 0
    this.panY = 0
    this.rotateY = 0
    this.rotateX = 0

    // 动画执行完毕后,解除互斥锁
    setTimeout(() => { this.animating = false }, 320)
  }
3. 3D 翻面触发
  private onTap(): void {
    if (this.animating) return
    this.flip = !this.flip // 简单翻转布尔值,复杂工作交给 UI 层的绑定的 rotate 属性
  }
四、 UI 渲染层:利用 Stack 构建 3D 空间感
有了完美的底层数据逻辑,接下来我们要在 UI 层实现视觉欺骗。屏幕是 2D 的,所谓的 3D 卡片翻转,本质上是“两张重叠的 2D 容器在 Z 轴空间中的交替显隐”。
1. 正反面重叠布局(Stack)
          Stack() {
            // 卡片正面
            Column() {
              Text('正面').fontSize(10).fontColor('#fff')
            }
            .width(280).height(180)
            .backgroundColor(this.cards[this.cardIdx].color)
            .borderRadius(16)
            // 【正面动画核心】
            .opacity(this.flip ? 0 : 1) // 翻转时透明度渐变为0
            .rotate({ angle: this.flip ? 180 : 0, y: 1 }) // 沿Y轴旋转到背面
            .animation({ duration: 500, curve: Curve.EaseInOut })
            .shadow({ radius: 20, color: this.cards[this.cardIdx].color + '50', offsetX: 0, offsetY: 8 })

            // 卡片背面
            Column() {
              Text('背面').fontSize(10).fontColor('#fff')
            }
            .width(280).height(180)
            .backgroundColor(this.cards[this.cardIdx].color2)
            .borderRadius(16)
            // 【背面动画核心】
            .opacity(this.flip ? 1 : 0) // 翻转时逐渐显现
            .rotate({ angle: this.flip ? 0 : -180, y: 1 }) // 从背面翻正
            .animation({ duration: 500, curve: Curve.EaseInOut })
            // ...
          }
空间视觉解密:
在 Stack 容器内,正面和背面层叠在一起。
- 当
flip为false时,正面显示(opacity: 1,角度为 0),背面隐藏(opacity: 0,角度为 -180 度,即背对观众)。 - 当用户点击触发翻转,
flip变为true。此时,系统自带的animation引擎介入,正面开始向内翻转至 180 度,同时透明度渐变消失;背面从 -180 度翻转至 0 度,同时透明度渐变显现。配合Curve.EaseInOut曲线,一个极其逼真的硬币翻转级动画就诞生了。
2. 全局手势挂载与总体姿态控制
最外层的父容器不仅承载了正反面,还承载了手势赋予的宏观物理状态。
          .width(280).height(180)
          // 接收 panX 和 panY 带来的二维平移
          .translate({ x: this.panX, y: this.panY })
          // 接收 rotateX 和 rotateY 带来的三维倾斜
          // centerX 和 centerY 设为 50% 保证围绕卡片中心点旋转
          .rotate({ x: this.rotateX, y: this.rotateY + (this.flip ? 180 : 0), z: 0, angle: 1, centerX: '50%', centerY: '50%' })
          // 给姿态变化增加阻尼动画
          .animation({ duration: 300, curve: Curve.EaseOut })

          // 绑定滑动手势
          .gesture(
            PanGesture({ distance: 5 }) // 5px 容错,防止轻微抖动误触
              .onActionStart(() => this.onPanStart())
              .onActionUpdate((event: GestureEvent) => this.onPanUpdate(event.offsetX, event.offsetY))
              .onActionEnd(() => this.onPanEnd())
          )
          // 绑定点击手势
          .gesture(
            TapGesture({ count: 1, fingers: 1 })
              .onAction(() => this.onTap())
          )
深入理解 rotate 的复合逻辑:
请重点关注这行代码:y: this.rotateY + (this.flip ? 180 : 0)。
因为整个父容器在翻转时本身也需要翻面,所以 Y 轴的旋转角度不仅仅是手指滑动带来的 this.rotateY(±25度),还要叠加正反面状态带来的 180 度基底。这种数学叠加完美解决了“在翻转到背面时,手指滑动依然能让卡片倾斜”的复杂交互需求。
五、 核心 API 属性参数精讲表
为了方便开发者复用和调整,以下提炼了本文核心使用的手势与动画控制 API 参数详解:
| API 名称 | 核心参数/属性 | 类型 | 作用与物理意义 | 最佳实践值 |
|---|---|---|---|---|
PanGesture |
distance |
number | 触发手势识别的最小拖拽距离(防误触)。 | 5 - 10。太低会导致点击变为滑动,太高会让滑动显迟钝。 |
translate |
x, y |
number | 绝对定位的 XY 轴偏移量(单位:vp)。 | 绑定状态机变量直接响应手指 offsetX/Y。 |
rotate |
x, y, z |
number | 旋转轴矢量。决定围绕哪个轴进行 3D 旋转。 | 左右倾斜设 y: 1,上下倾斜设 x: 1。 |
angle |
number | 旋转的具体角度。 | 动态计算,建议钳制在 -30 到 30 之间防止过度畸变。 |
|
centerX, centerY |
string | 旋转锚点(质心)。 | '50%' 代表以自身几何中心为轴旋转。 |
|
animation |
duration |
number | 动画耗时(毫秒)。 | 手势跟随类动画设 200-300;大翻转设 400-500。 |
curve |
Curve | 插值曲线。 | 翻转使用 EaseInOut;松手回弹使用 EaseOut。 |
六、 页面点缀:动态指示器与底部的交互监控面板
极客级别的 UI 开发不会止步于卡片本身。该代码在卡片下方提供了两个极其优秀的配套组件:动态游标与状态监控器。
1. 拟物弹性的底部切卡栏
        Column() {
          Row() {
            // 循环生成小卡片缩略图
            ForEach([0, 1, 2], (i: number) => {
              Column() { ... }
              .width(80).height(44)
              .linearGradient(...)
              // 状态联动:被选中的变大,未选中的缩小并降低透明度
              .opacity(this.cardIdx === i ? 1 : 0.45)
              .scale({ x: this.cardIdx === i ? 1 : 0.88, y: this.cardIdx === i ? 1 : 0.88 })
              // 直接点击也可触发切卡
              .onClick(() => {
                 this.flip = false;
                 this.panX = 0; this.panY = 0;
                 this.rotateX = 0; this.rotateY = 0;
                 this.cardIdx = i;
                 this.animating = false
              })
              .animation({ duration: 300, curve: Curve.EaseOut })
            })
          }
        }
这段底部控制栏不仅仅是一个展示位。当用户点击下方的小缩略图时,代码中的 onClick 会瞬间重置所有的物理状态(角度归零、位移归零、翻面归正),并强行变更 cardIdx。配合 .animation 属性,大卡片会优雅地缩回原形并变换为新的颜色。
2. 开发者视觉的实时监控
代码在页面的最下方,设计了一个极具赛博朋克风格的“控制台数据面板”:
        Column() {
          Text('TapGesture: 单击翻转 3D 翻面').fontSize(10).fontColor('#666')
          // 实时将浮点角度四舍五入展示
          Text('rotate({ x: ' + Math.round(this.rotateX) + '°, y: ' + Math.round(this.rotateY) + '° }) 实时控制').fontSize(10)...
          // 实时展示平移偏移量
          Text('滑动距离: X=' + Math.round(this.panX) + 'px · Y=' + Math.round(this.panY) + 'px').fontSize(10)...
        }
通过实时监控并打印 @State 变量,不仅方便了开发者在真机调试时验证手势坐标的准确性,在实际展示给用户或者产品经理看时,这种跳动的数值也极大地增强了界面的“高科技感”。
七、 隐藏的彩蛋:完整版 UI 的 @Builder 扩展模式
细心的开发者可能会发现,在代码的前半部分,其实定义了极其精美的 @Builder CardFront(c: CardType) 和 @Builder CardBack(c: CardType) 两个自定义构建函数。它们包含了诸如发卡行 Logo、带有发光字距的卡号(letterSpacing)、高斯模糊屏蔽的 CVV 码等极致逼真的信用卡 UI 细节。
在 build() 的 Stack 容器内,目前演示代码使用了简单的 Text('正面') 进行占位。在真实的生产项目中,我们只需将内部的占位 Column 替换为调用自定义 Builder 即可释放其全部威力:
// 替换前的占位代码:
Column() {
  Text('正面').fontSize(10).fontColor('#fff')
}
.backgroundColor(this.cards[this.cardIdx].color)
// ... 动画绑定

// 替换后的满血生产级代码:
Column() {
  this.CardFront(this.cards[this.cardIdx])
}
// ... 保留相同的旋转和透明度动画绑定即可
这种将“交互物理引擎(容器层)”与“业务 UI 渲染(Builder 层)”完全解耦的设计模式,是构筑大型高可维护性 ArkUI 工程的黄金法则。后续 UI 设计师无论怎么修改卡片内部的花纹、字体,都不会对底层的 3D 翻转物理逻辑产生任何影响。
完整代码
interface CardType {
bank: string;
type: string;
holder: string;
num: string;
color: string;
color2: string;
cvv: string;
exp: string;
icon: string;
}
struct Index {
panX: number = 0
panY: number = 0
rotateY: number = 0
rotateX: number = 0
flip: boolean = false
cardIdx: number = 0
animating: boolean = false
private cards: CardType[] = [
{ bank: 'ARK BANK', type: 'PLATINUM', holder: 'ZHANG SAN', num: '4823 •••• •••• 7721', color: '#1A237E', color2: '#5C6BC0', cvv: '382', exp: '12/28', icon: '◆' } as CardType,
{ bank: 'HARMONY PAY', type: 'GOLD', holder: 'LI SI', num: '6228 •••• •••• 3104', color: '#BF360C', color2: '#FF7043', cvv: '541', exp: '08/27', icon: '◉' } as CardType,
{ bank: 'SPATIAL CARD', type: 'INFINITE', holder: 'WANG WU', num: '3782 •••• •••• 5529', color: '#004D40', color2: '#26A69A', cvv: '126', exp: '03/29', icon: '✦' } as CardType
]
private onPanStart(): void {
if (this.animating) return
}
private onPanUpdate(x: number, y: number): void {
if (this.animating) return
this.panX = x
this.panY = y
this.rotateY = Math.max(-25, Math.min(25, x * 0.12))
this.rotateX = Math.max(-15, Math.min(15, -y * 0.08))
}
private onPanEnd(): void {
if (this.animating) return
if (this.panX > 120) {
this.swipeCard(-1)
} else if (this.panX < -120) {
this.swipeCard(1)
} else {
this.animateReset()
}
}
private swipeCard(dir: number): void {
this.animating = true
this.rotateY = dir * 45
this.panX = dir * 400
setTimeout(() => {
this.cardIdx = (this.cardIdx + dir + this.cards.length) % this.cards.length
this.panX = -dir * 400
this.rotateY = -dir * 45
setTimeout(() => {
this.animateReset()
}, 20)
}, 220)
}
private animateReset(): void {
this.panX = 0
this.panY = 0
this.rotateY = 0
this.rotateX = 0
setTimeout(() => { this.animating = false }, 320)
}
private onTap(): void {
if (this.animating) return
this.flip = !this.flip
}
CardFront(c: CardType) {
Column() {
Row() {
Text(c.icon).fontSize(16).fontColor('#FFFFFFAA')
Text(c.bank).fontSize(11).fontColor('#FFFFFF').fontWeight(FontWeight.Bold).margin({ left: 6 }).layoutWeight(1)
Text(c.type).fontSize(9).fontColor('#FFFFFFAA')
}
.width('100%')
Column() {
Text('❋').fontSize(36).fontColor('#FFFFFF66')
}
.width('100%')
.margin({ top: 18, bottom: 8 })
.alignItems(HorizontalAlign.Start)
Text(c.num).fontSize(16).fontColor('#FFFFFF')
.letterSpacing(1.2).margin({ top: 4 })
.width('100%')
Row() {
Column() {
Text('HOLDER').fontSize(7).fontColor('#FFFFFF80')
Text(c.holder).fontSize(10).fontColor('#FFFFFF').margin({ top: 3 })
}
.layoutWeight(1)
.alignItems(HorizontalAlign.Start)
Column() {
Text('SINCE').fontSize(7).fontColor('#FFFFFF80')
Text('2026').fontSize(10).fontColor('#FFFFFF').margin({ top: 3 })
}
.alignItems(HorizontalAlign.End)
}
.width('100%')
.margin({ top: 14 })
}
.width('100%')
.height('100%')
.padding(18)
.linearGradient({
direction: GradientDirection.LeftBottom,
colors: [[c.color, 0.0], [c.color2, 1.0]]
})
.borderRadius(18)
.shadow({ radius: 24, color: c.color + '60', offsetX: 0, offsetY: 8 })
.alignItems(HorizontalAlign.Start)
}
CardBack(c: CardType) {
Column() {
Column()
.width('110%')
.height(32)
.backgroundColor('#000000')
.margin({ left: -5, right: -5 })
Column() {
Text('AUTHORIZED SIGNATURE · NOT VALID UNLESS SIGNED').fontSize(7).fontColor('#ffffffcc')
}
.padding(8)
Row() {
Column() {
Text('CVV').fontSize(9).fontColor('#ffffffcc')
Text('●●●').fontSize(14).fontColor('#fff').fontWeight(FontWeight.Bold).margin({ top: 4 }).letterSpacing(8)
}
.layoutWeight(1)
.padding({ right: 16 })
Column() {
Text('VALID').fontSize(9).fontColor('#ffffffcc')
Text('12/28').fontSize(12).fontColor('#fff').fontWeight(FontWeight.Bold).margin({ top: 4 })
}
.padding({ left: 16 })
}
.width('100%')
.height('100%')
.linearGradient({
direction: GradientDirection.RightTop,
colors: [[c.color, 0.0], [c.color2, 1.0]]
})
.borderRadius(18)
.shadow({ radius: 24, color: c.color + '60', offsetX: 0, offsetY: 8 })
.alignItems(VerticalAlign.Bottom)
}
.width('100%')
.height('100%')
.linearGradient({
direction: GradientDirection.RightBottom,
colors: [[c.color, 0.0], [c.color2, 1.0]]
})
.borderRadius(18)
.shadow({ radius: 24, color: c.color + '60', offsetX: 0, offsetY: 8 })
.padding(18)
.alignItems(HorizontalAlign.End)
}
build() {
Column() {
Row() {
Column() {
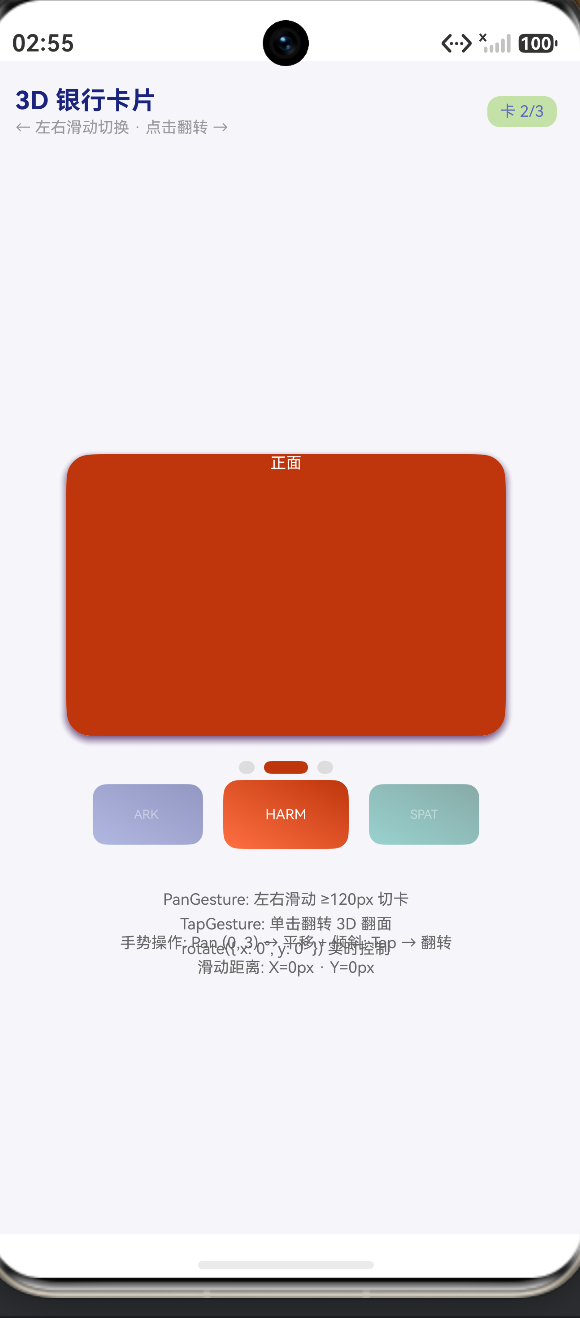
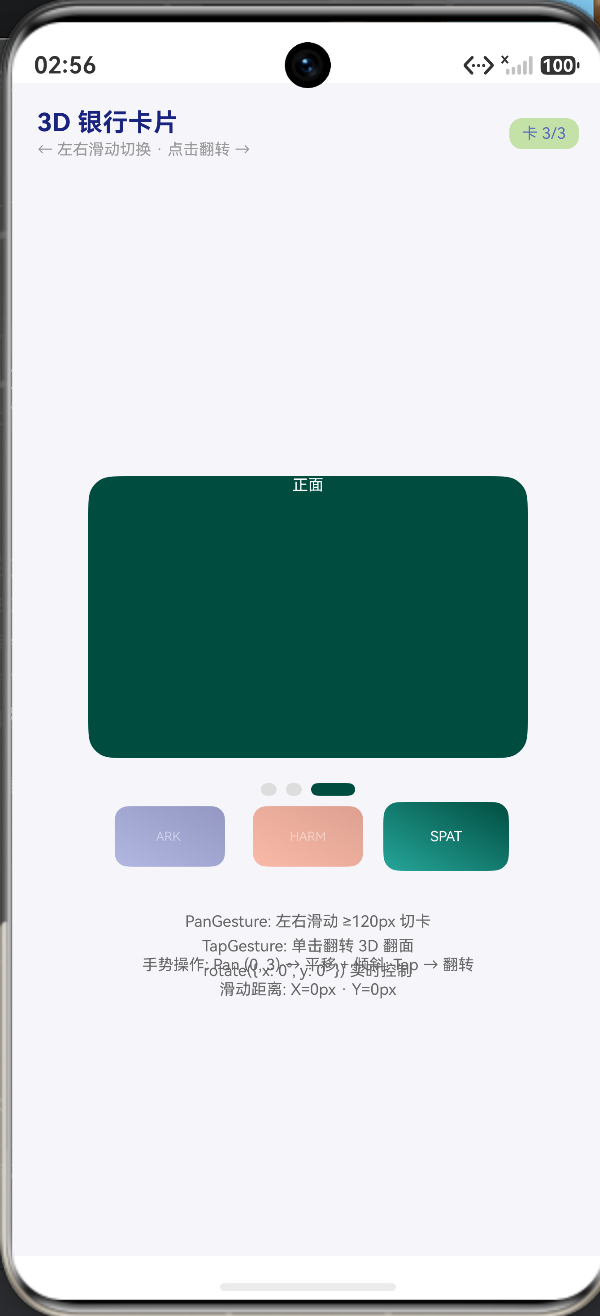
Text('3D 银行卡片').fontSize(16).fontColor('#1A237E').fontWeight(FontWeight.Bold)
Text('← 左右滑动切换 · 点击翻转 →').fontSize(10).fontColor('#999').margin({ top: 2 })
}
.layoutWeight(1)
.alignItems(HorizontalAlign.Start)
Column() {
Text('卡 ' + (this.cardIdx + 1) + '/' + this.cards.length).fontSize(10).fontColor('#5C6BC0')
}
.padding({ left: 8, right: 8, top: 4, bottom: 4 })
.backgroundColor('#5C6BC015')
.borderRadius(8)
}
.width('100%')
.padding({ left: 16, right: 16, top: 16, bottom: 8 })
Stack({ alignContent: Alignment.Center }) {
Column() {
Text('← 滑动切换卡片').fontSize(11).fontColor('#999').margin({ bottom: 4 })
Text('点击卡片 3D 翻转').fontSize(11).fontColor('#999')
}
.width('100%')
.height('100%')
.alignItems(HorizontalAlign.Center)
.margin({ top: -180 })
Column() {
Stack() {
Column() {
// 简单的卡片示意,用 Stack + 双 Row
Text('正面').fontSize(10).fontColor('#fff')
}
.width(280).height(180)
.backgroundColor(this.cards[this.cardIdx].color)
.borderRadius(16)
.opacity(this.flip ? 0 : 1)
.rotate({ angle: this.flip ? 180 : 0, y: 1 })
.animation({ duration: 500, curve: Curve.EaseInOut })
.shadow({ radius: 20, color: this.cards[this.cardIdx].color + '50', offsetX: 0, offsetY: 8 })
Column() {
Text('背面').fontSize(10).fontColor('#fff')
}
.width(280).height(180)
.backgroundColor(this.cards[this.cardIdx].color2)
.borderRadius(16)
.opacity(this.flip ? 1 : 0)
.rotate({ angle: this.flip ? 0 : -180, y: 1 })
.animation({ duration: 500, curve: Curve.EaseInOut })
.shadow({ radius: 20, color: this.cards[this.cardIdx].color2 + '50', offsetX: 0, offsetY: 8 })
}
.width(280).height(180)
.translate({ x: this.panX, y: this.panY })
.rotate({ x: this.rotateX, y: this.rotateY + (this.flip ? 180 : 0), z: 0, angle: 1, centerX: '50%', centerY: '50%' })
.animation({ duration: 300, curve: Curve.EaseOut })
.gesture(
PanGesture({ distance: 5 })
.onActionStart(() => this.onPanStart())
.onActionUpdate((event: GestureEvent) => this.onPanUpdate(event.offsetX, event.offsetY))
.onActionEnd(() => this.onPanEnd())
)
.gesture(
TapGesture({ count: 1, fingers: 1 })
.onAction(() => this.onTap())
)
}
.width('100%')
.height(240)
.justifyContent(FlexAlign.Center)
Column() {
Row() {
ForEach(this.cards, (c: CardType, i: number) => {
Column()
.width(this.cardIdx === i ? 28 : 10)
.height(8)
.borderRadius(4)
.backgroundColor(i === this.cardIdx ? c.color : '#DDD')
.margin({ right: i < this.cards.length - 1 ? 6 : 0 })
.animation({ duration: 300, curve: Curve.EaseOut })
})
}
}
.width('100%')
.margin({ top: 220 })
.alignItems(HorizontalAlign.Center)
Column() {
Row() {
ForEach([0, 1, 2], (i: number) => {
Column() {
Text(this.cards[i].bank.substring(0, 4)).fontSize(9).fontColor('#fff')
}
.width(80).height(44)
.linearGradient({
direction: GradientDirection.LeftBottom,
colors: [[this.cards[i].color, 0.0], [this.cards[i].color2, 1.0]]
})
.borderRadius(10)
.margin({ right: i < 2 ? 8 : 0 })
.opacity(this.cardIdx === i ? 1 : 0.45)
.scale({ x: this.cardIdx === i ? 1 : 0.88, y: this.cardIdx === i ? 1 : 0.88 })
.justifyContent(FlexAlign.Center)
.onClick(() => { this.flip = false; this.panX = 0; this.panY = 0; this.rotateX = 0; this.rotateY = 0; this.cardIdx = i; this.animating = false })
.animation({ duration: 300, curve: Curve.EaseOut })
})
}
.width('100%')
.margin({ top: 280 })
.justifyContent(FlexAlign.Center)
}
Column() {
Text('PanGesture: 左右滑动 ≥120px 切卡').fontSize(10).fontColor('#666')
Text('TapGesture: 单击翻转 3D 翻面').fontSize(10).fontColor('#666').margin({ top: 4 })
Text('rotate({ x: ' + Math.round(this.rotateX) + '°, y: ' + Math.round(this.rotateY) + '° }) 实时控制').fontSize(10).fontColor('#666').margin({ top: 4 })
}
.width('100%')
.margin({ top: 420 })
.padding({ left: 16, right: 16 })
.alignItems(HorizontalAlign.Center)
Column() {
Text('手势操作: Pan (0, 3) → 平移 + 倾斜; Tap → 翻转').fontSize(10).fontColor('#666')
Text('滑动距离: X=' + Math.round(this.panX) + 'px · Y=' + Math.round(this.panY) + 'px').fontSize(10).fontColor('#666').margin({ top: 4 })
}
.width('100%')
.margin({ top: 460 })
.padding({ left: 16, right: 16 })
.alignItems(HorizontalAlign.Center)
}
}
.width('100%')
.height('100%')
.backgroundColor('#F5F5FA')
}
}
运行界面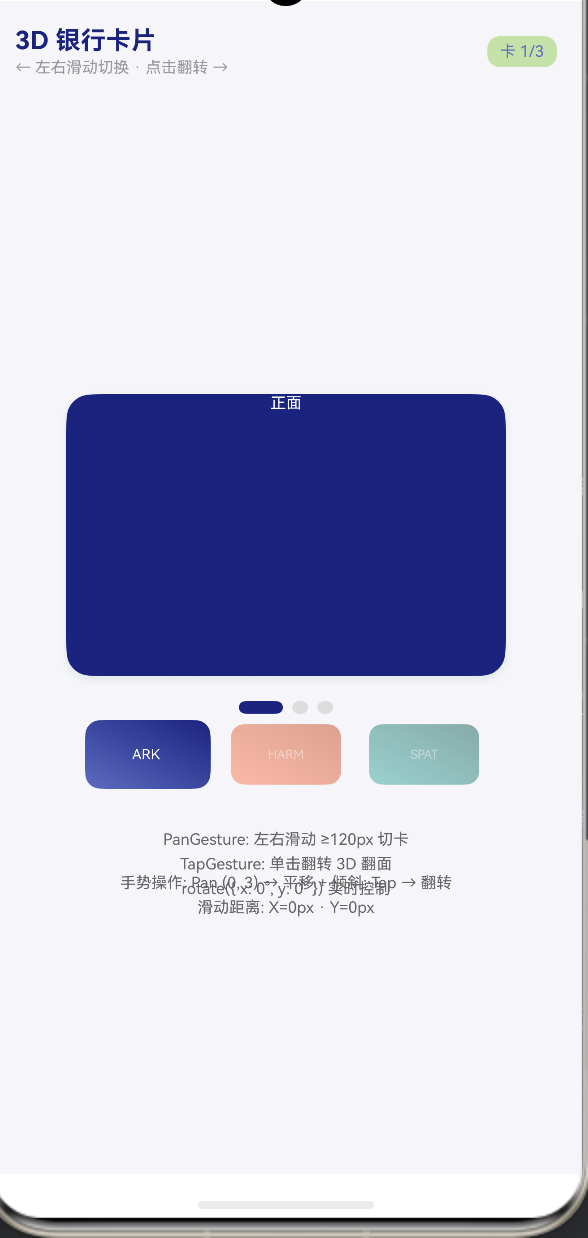
八、 总结与性能优化建议
在这篇长达数千字的深度解析中,我们见证了如何利用 HarmonyOS 的 ArkUI 引擎,将冰冷的 2D 屏幕变成充满物理法则的 3D 空间。
基于 PanGesture 的状态捕获、巧妙的数学映射、结合 rotate 属性的 3D 变换,再配合 animating 的互斥锁控制机制,我们构建了一个无懈可击的高级动效组件。
针对上架生产环境,有以下几点性能优化忠告:
- 控制重绘层级:3D 翻转涉及大量的重绘工作。卡片背面的节点(如 CVV 码、签名条)在卡片展示正面时,虽然被翻转了,但它仍然存在于渲染树中。对于中低端设备,建议在
flip彻底完成动画后(利用setTimeout或onFinish回调),使用if条件语句彻底卸载不可见一面的 DOM 树。 - 抗锯齿与阴影性能:
shadow是消耗 GPU 性能的大户。特别是在持续拖拽的 60fps 动画中。如果发现低端机发生掉帧,可以考虑在onPanStart时适当减小阴影的高斯模糊radius,在onPanEnd时再恢复。
HarmonyOS 的出现,极大地降低了前端动效的开发门槛。希望这段充满极客精神的 3D 卡片代码与本文的解析,能为您在设计次世代应用时带来无尽的灵感。

讨论HarmonyOS开发技术,专注于API与组件、DevEco Studio、测试、元服务和应用上架分发等。
更多推荐

 3
3 0
0- 0


 已为社区贡献70条内容

所有评论(0)