# 老奶奶记账 —— 从零构建 HarmonyOS 原生记账应用(基于 ArkTS + SQLite)
项目名称:ProjectToSQLite
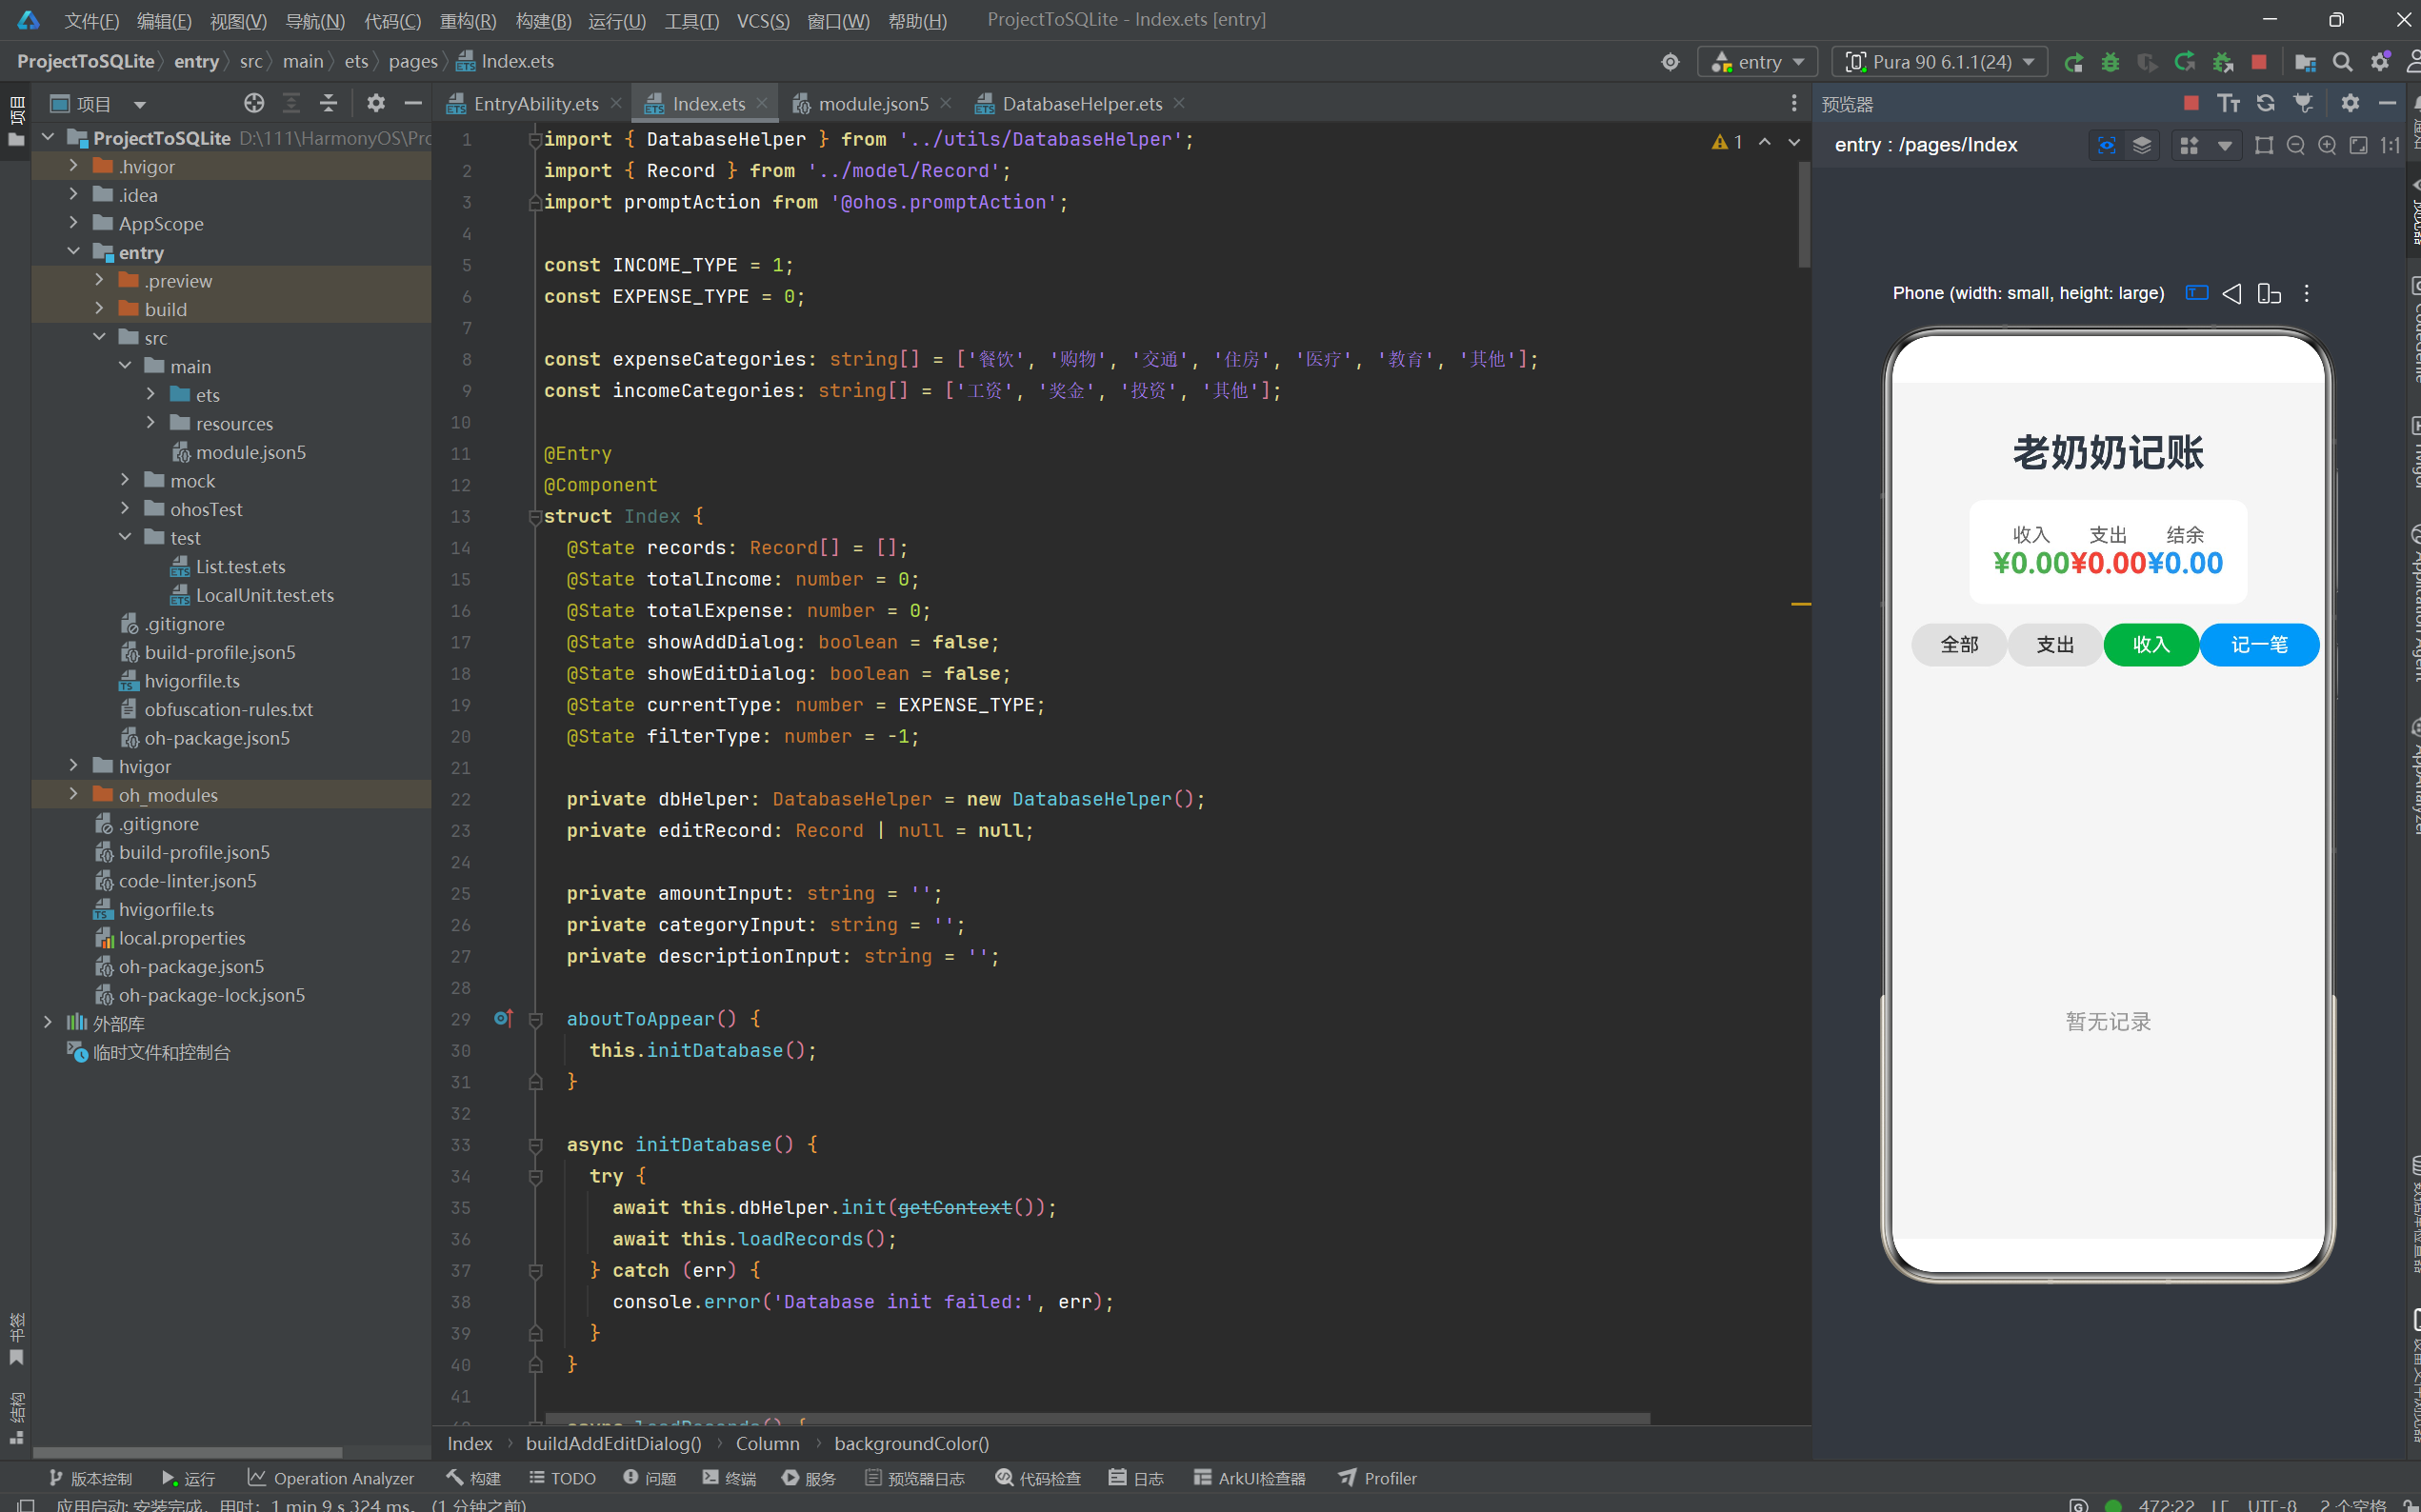
开发框架:HarmonyOS API 11(ArkTS + ArkUI)
数据存储:关系型数据库(RDB / SQLite)
作者:ProjectToSQLite Dev Team
版本:1.0.0
目录
- 项目背景与需求分析
- 开发环境与工程搭建
- 整体架构设计
- 数据模型层(Model)
- 数据库访问层(DatabaseHelper)
- UI 页面层(Index)
- Ability 生命周期管理
- 备份与恢复能力
- 多语言资源管理
- 核心业务流程详解
10.1 启动流程
10.2 添加账单流程
10.3 编辑账单流程
10.4 删除账单流程
10.5 过滤查询流程
10.6 统计汇总流程 - 关键技术点解析
- 项目总结与展望
1. 项目背景与需求分析
1.1 为什么需要这样一款应用?
在日常生活中,记账是每个人都会遇到的需求。无论是学生管理生活费、上班族控制开支,还是家庭主妇记录日常花销,一款轻量、易用、数据安全的记账应用都非常重要。本项目正是为了满足这一需求而诞生的。
1.2 功能需求清单
| 需求编号 | 功能名称 | 描述 | 优先级 |
|---|---|---|---|
| R01 | 添加账单 | 选择收入/支出类型、填写金额、选择分类、添加备注 | P0 |
| R02 | 编辑账单 | 长按或点击编辑按钮修改已有账单 | P0 |
| R03 | 删除账单 | 不再需要的账单可以一键删除 | P0 |
| R04 | 分类过滤 | 支持"全部"、“支出”、"收入"三种视图 | P1 |
| R05 | 统计总览 | 顶部卡片显示总收入、总支出、结余 | P1 |
| R06 | 数据持久化 | 所有账单数据保存到本地数据库,重启不丢失 | P0 |
| R07 | 应用备份 | 支持 HarmonyOS 系统备份能力 | P2 |
1.3 非功能性需求
- 启动速度:应用冷启动时间 < 2 秒
- 数据安全:数据库安全级别 S1(基本信息安全保护)
- 离线运行:完全本地运行,无需网络权限
- 包体积:安装包小于 5MB
2. 开发环境与工程搭建
2.1 环境准备
在正式开始之前,需要确保本地安装了如下开发环境:
# 开发工具
DevEco Studio 5.0.1+
# HarmonyOS SDK
API Version 11 (HarmonyOS NEXT)
# 运行环境
HarmonyOS 模拟器或真机(API 11 / API 24)
2.2 创建项目
打开 DevEco Studio,选择 Create Project → Empty Ability 模板,填写项目信息:
| 配置项 | 值 |
|---|---|
| Project Name | ProjectToSQLite |
| Bundle Name | com.example.projecttosqlite |
| Save Location | 本地目录 |
| Compile SDK | API 11 (HarmonyOS NEXT) |
| Compatible SDK | API 11 |
| Device Type | Phone |
创建完成后,项目的主目录结构如下:
ProjectToSQLite/
├── AppScope/                      # 应用级资源配置
│   ├── app.json5                  # 应用全局配置
│   └── resources/                 # 应用级资源
├── entry/                         # 主模块
│   ├── src/main/
│   │   ├── ets/                   # ArkTS 源文件
│   │   │   ├── entryability/      # Ability 入口
│   │   │   ├── entrybackupability/ # 备份扩展
│   │   │   ├── model/             # 数据模型
│   │   │   ├── pages/             # 页面
│   │   │   └── utils/             # 工具类
│   │   ├── module.json5           # 模块配置
│   │   └── resources/             # 模块级资源
│   └── oh-package.json5
├── oh-package.json5               # 工程级包配置
└── hvigor/                        # 构建配置
2.3 配置文件导读
module.json5 — 模块配置
{
  "module": {
    "name": "entry",
    "type": "entry",
    "mainElement": "EntryAbility",
    "deviceTypes": ["phone"],
    "pages": "$profile:main_pages",
    "abilities": [
      {
        "name": "EntryAbility",
        "srcEntry": "./ets/entryability/EntryAbility.ets",
        "label": "$string:EntryAbility_label",
        "exported": true,
        "skills": [
          {
            "entities": ["entity.system.home"],
            "actions": ["ohos.want.action.home"]
          }
        ]
      }
    ],
    "extensionAbilities": [
      {
        "name": "EntryBackupAbility",
        "srcEntry": "./ets/entrybackupability/EntryBackupAbility.ets",
        "type": "backup",
        "exported": false,
        "metadata": [
          {
            "name": "ohos.extension.backup",
            "resource": "$profile:backup_config"
          }
        ]
      }
    ]
  }
}
这里我们注册了一个主 Ability(EntryAbility)和一个备份扩展 Ability(EntryBackupAbility)。skills 中的配置说明该应用是一个桌面级的可启动应用(entity.system.home + ohos.want.action.home)。
app.json5 — 应用全局配置
{
  "app": {
    "bundleName": "com.example.projecttosqlite",
    "vendor": "example",
    "versionCode": 1000000,
    "versionName": "1.0.0",
    "buildVersion": "1",
    "icon": "$media:layered_image",
    "label": "$string:app_name"
  }
}
3. 整体架构设计
3.1 架构分层
本应用采用经典的三层架构,架构清晰,职责明确:
┌─────────────────────────────────────────┐
│           UI 表现层 (Pages)              │
│        Index.ets(主页面 + 对话框)        │
├─────────────────────────────────────────┤
│           业务逻辑层 (Model)              │
│        Record.ets(数据模型)              │
├─────────────────────────────────────────┤
│        数据访问层 (DatabaseHelper)        │
│    CRUD 操作 · 统计分析 · 参数化查询       │
├─────────────────────────────────────────┤
│         HarmonyOS 基础服务层              │
│   relationalStore · promptAction · hilog │
└─────────────────────────────────────────┘
3.2 数据流图
用户操作(点击/输入)
      │
      ▼
┌─────────────┐      ┌──────────────────┐
│  Index 组件   │──────▶ DatabaseHelper   │
│  (@Component) │      │  (CRUD 方法)      │
└──────┬───────┘      └────────┬─────────┘
       │                       │
       │ @State 响应式更新      │ relationalStore API
       ▼                       ▼
┌─────────────┐      ┌──────────────────┐
│  UI 重新渲染  │      │   SQLite 数据库   │
│  显示账单列表  │      │  grandma_book.db  │
└─────────────┘      └──────────────────┘
4. 数据模型层(Model)
4.1 Record 数据模型
// model/Record.ets

export class Record {
  id: number;          // 主键 ID(数据库自增)
  type: number;        // 类型:1=收入,0=支出
  amount: number;      // 金额(浮点数)
  category: string;    // 分类名称(如"餐饮"、"工资")
  description: string; // 备注描述
  date: string;        // 日期(格式:YYYY-MM-DD)

  constructor(id: number, type: number, amount: number,
              category: string, description: string, date: string) {
    this.id = id;
    this.type = type;
    this.amount = amount;
    this.category = category;
    this.description = description;
    this.date = date;
  }
}
4.2 字段设计说明
| 字段名 | 类型 | 说明 | 约束 |
|---|---|---|---|
id |
number | 唯一标识,数据库自增主键 | AUTOINCREMENT |
type |
number | 0=支出,1=收入 | NOT NULL |
amount |
number | 金额,精确到两位小数 | NOT NULL,REAL 类型 |
category |
string | 分类中文名 | NOT NULL |
description |
string | 备注,可为空 | 可选 |
date |
string | 账单日期,YYYY-MM-DD 格式 |
NOT NULL |
设计思考:
- 使用
number而非bigint是因为金额在合理范围内(通常不超过 10^10),number 的双精度浮点足够 type用 0/1 而非布尔是因为后续可扩展(如 2=转账,3=退款)date存字符串而非时间戳,方便 SQL 查询和展示,也提升了可读性
5. 数据库访问层(DatabaseHelper)
5.1 数据库初始化
// utils/DatabaseHelper.ets

import relationalStore from '@ohos.data.relationalStore';
import { Record } from '../model/Record';

const DB_NAME = 'grandma_book.db';   // 数据库文件名
const TABLE_NAME = 'records';         // 表名

export class DatabaseHelper {
  private rdbStore: relationalStore.RdbStore | null = null;

  async init(context: Context): Promise<void> {
    const config: relationalStore.StoreConfig = {
      name: DB_NAME,
      securityLevel: relationalStore.SecurityLevel.S1
    };

    this.rdbStore = await relationalStore.getRdbStore(context, config);
    await this.createTable();
  }
  // ...
}
关键点:
relationalStore.getRdbStore()是 HarmonyOS 提供的 RDB 仓库获取接口,参数是Context和StoreConfigSecurityLevel.S1表示安全等级 1,适合一般的个人信息数据RdbStore实例是单例的,后续所有数据库操作都通过它进行
5.2 建表语句
private async createTable(): Promise<void> {
  if (!this.rdbStore) {
    return;
  }

  const createTableSql: string = `
    CREATE TABLE IF NOT EXISTS ${TABLE_NAME} (
      id INTEGER PRIMARY KEY AUTOINCREMENT,
      type INTEGER NOT NULL,
      amount REAL NOT NULL,
      category TEXT NOT NULL,
      description TEXT,
      date TEXT NOT NULL
    )
  `;

  await this.rdbStore.executeSql(createTableSql, []);
}
SQL 建表语句的关键设计点:
| 字段 | SQL 类型 | 说明 |
|---|---|---|
| id | INTEGER PK AI | 自增主键 |
| type | INTEGER | NOT NULL,0/1 枚举 |
| amount | REAL | SQLite 的 REAL = IEEE 双精度浮点 |
| category | TEXT | NOT NULL |
| description | TEXT | 可为 NULL |
| date | TEXT | NOT NULL,存储 ISO 8601 日期字符串 |
注意:这里使用了
CREATE TABLE IF NOT EXISTS,确保应用在重复启动时不会因表已存在而报错。
5.3 插入记录(C - Create)
async insertRecord(record: Record): Promise<number> {
  if (!this.rdbStore) {
    throw new Error('Database not initialized');
  }

  const values: relationalStore.ValuesBucket = {
    type: record.type,
    amount: record.amount,
    category: record.category,
    description: record.description,
    date: record.date
  };

  return await this.rdbStore.insert(TABLE_NAME, values);
}
ValuesBucket 是 HarmonyOS RDB 的数据容器,类似键值对。rdbStore.insert() 返回新插入行的 rowId。
5.4 查询所有记录(R - Read All)
async queryAllRecords(): Promise<Record[]> {
  if (!this.rdbStore) {
    throw new Error('Database not initialized');
  }

  const columns: string[] = ['id', 'type', 'amount', 'category', 'description', 'date'];
  const orderBy: string = 'date DESC';

  const resultSet: relationalStore.ResultSet = await this.rdbStore.querySql(
    `SELECT ${columns.join(', ')} FROM ${TABLE_NAME} ORDER BY ${orderBy}`,
    []
  );

  const records: Record[] = [];
  try {
    while (resultSet.goToNextRow()) {
      const id: number = resultSet.getLong(resultSet.getColumnIndex('id'));
      const type: number = resultSet.getLong(resultSet.getColumnIndex('type'));
      const amount: number = resultSet.getDouble(resultSet.getColumnIndex('amount'));
      const category: string = resultSet.getString(resultSet.getColumnIndex('category'));
      const description: string = resultSet.getString(resultSet.getColumnIndex('description'));
      const date: string = resultSet.getString(resultSet.getColumnIndex('date'));

      records.push(new Record(id, type, amount, category, description, date));
    }
  } finally {
    resultSet.close();  // 必须在 finally 中关闭 ResultSet
  }

  return records;
}
重要最佳实践:
ResultSet使用后必须关闭,否则会导致资源泄漏- 使用
try { ... } finally { resultSet.close(); }确保即使在读取过程中抛出异常也能释放资源 getColumnIndex()根据列名获得列索引,避免硬编码数字
5.5 按类型查询(R - Read By Type)
async queryRecordsByType(type: number): Promise<Record[]> {
  if (!this.rdbStore) {
    throw new Error('Database not initialized');
  }

  const columns: string[] = ['id', 'type', 'amount', 'category', 'description', 'date'];

  const resultSet: relationalStore.ResultSet = await this.rdbStore.querySql(
    `SELECT ${columns.join(', ')} FROM ${TABLE_NAME} WHERE type = ? ORDER BY date DESC`,
    [type]  // 参数化查询,防止 SQL 注入
  );

  const records: Record[] = [];
  try {
    while (resultSet.goToNextRow()) {
      // 读取逻辑与 queryAllRecords 相同
      // ...
      records.push(new Record(id, recordType, amount, category, description, date));
    }
  } finally {
    resultSet.close();
  }

  return records;
}
这里使用了 参数化查询(WHERE type = ? + 参数数组 [type]),这是防止 SQL 注入的标准做法。HarmonyOS RDB 框架底层会对参数进行安全转义。
5.6 更新记录(U - Update)
async updateRecord(record: Record): Promise<number> {
  if (!this.rdbStore) {
    throw new Error('Database not initialized');
  }

  const values: relationalStore.ValuesBucket = {
    type: record.type,
    amount: record.amount,
    category: record.category,
    description: record.description,
    date: record.date
  };

  const predicates: relationalStore.RdbPredicates =
    new relationalStore.RdbPredicates(TABLE_NAME);
  predicates.equalTo('id', record.id);

  return await this.rdbStore.update(values, predicates);
}
更新操作的要点:
- 使用
RdbPredicates构建 WHERE 条件,equalTo('id', record.id)精确定位 update()方法返回受影响的行数,可用于验证更新是否成功- 不更新
id字段(主键不变)
5.7 删除记录(D - Delete)
async deleteRecord(id: number): Promise<number> {
  if (!this.rdbStore) {
    throw new Error('Database not initialized');
  }

  const predicates: relationalStore.RdbPredicates =
    new relationalStore.RdbPredicates(TABLE_NAME);
  predicates.equalTo('id', id);

  return await this.rdbStore.delete(predicates);
}
同样使用 RdbPredicates 构建条件。delete() 方法也是返回受影响行数。
5.8 统计汇总(Aggregation)
async getTotalAmount(type: number): Promise<number> {
  if (!this.rdbStore) {
    throw new Error('Database not initialized');
  }

  const resultSet: relationalStore.ResultSet = await this.rdbStore.querySql(
    `SELECT SUM(amount) as total FROM ${TABLE_NAME} WHERE type = ?`,
    [type]
  );

  let total: number = 0;
  try {
    if (resultSet.goToNextRow()) {
      const value: number = resultSet.getDouble(resultSet.getColumnIndex('total'));
      total = value || 0;  // 处理 NULL(没有记录时 SUM 返回 NULL)
    }
  } finally {
    resultSet.close();
  }

  return total;
}
统计查询的关键:
- 使用 SQL 聚合函数
SUM(amount)进行求和 - 当表中没有任何记录时,
SUM()返回NULL,所以用value || 0做防御性处理 - 该查询被调用了两次(
INCOME_TYPE和EXPENSE_TYPE),可以优化为一次查询两个结果,但为了代码清晰性保持分开
5.9 DatabaseHelper 完整源码
import relationalStore from '@ohos.data.relationalStore';
import { Record } from '../model/Record';

const DB_NAME = 'grandma_book.db';
const TABLE_NAME = 'records';

export class DatabaseHelper {
  private rdbStore: relationalStore.RdbStore | null = null;

  async init(context: Context): Promise<void> {
    const config: relationalStore.StoreConfig = {
      name: DB_NAME,
      securityLevel: relationalStore.SecurityLevel.S1
    };
    this.rdbStore = await relationalStore.getRdbStore(context, config);
    await this.createTable();
  }

  private async createTable(): Promise<void> {
    if (!this.rdbStore) return;
    const sql = `CREATE TABLE IF NOT EXISTS ${TABLE_NAME} (
      id INTEGER PRIMARY KEY AUTOINCREMENT,
      type INTEGER NOT NULL,
      amount REAL NOT NULL,
      category TEXT NOT NULL,
      description TEXT,
      date TEXT NOT NULL
    )`;
    await this.rdbStore.executeSql(sql, []);
  }

  async insertRecord(record: Record): Promise<number> { /* 如上 */ }
  async queryAllRecords(): Promise<Record[]> { /* 如上 */ }
  async queryRecordsByType(type: number): Promise<Record[]> { /* 如上 */ }
  async updateRecord(record: Record): Promise<number> { /* 如上 */ }
  async deleteRecord(id: number): Promise<number> { /* 如上 */ }
  async getTotalAmount(type: number): Promise<number> { /* 如上 */ }
}
6. UI 页面层(Index)
6.1 整体布局结构
主页面 Index.ets 采用自顶向下的纵向布局(Column),包含四个主要区域:
┌─────────────────────────────────┐
│        标题:老奶奶记账            │  ← Text 组件
├─────────────────────────────────┤
│  ┌──────┐  ┌──────┐  ┌──────┐  │
│  │ 收入  │  │ 支出  │  │ 结余  │  │  ← 统计卡片 Row
│  │ ¥xxx  │  │ ¥xxx  │  │ ¥xxx  │  │
│  └──────┘  └──────┘  └──────┘  │
├─────────────────────────────────┤
│ [全部] [支出] [收入]    [+记一笔] │  ← 操作栏 Row
├─────────────────────────────────┤
│  ┌──────────────────────────┐  │
│  │ 餐饮  2026-06-22   -¥45 │  │  ← 记录列表(可滚动)
│  │               [编辑][删除]│  │
│  ├──────────────────────────┤  │
│  │ 工资  2026-06-21  +¥8K  │  │
│  │               [编辑][删除]│  │
│  └──────────────────────────┘  │
├─────────────────────────────────┤
│     底部弹出:添加/编辑对话框      │  ← @Builder 构建
└─────────────────────────────────┘
6.2 状态变量设计
@Entry
@Component
struct Index {
  @State records: Record[] = [];        // 当前显示的记录列表
  @State totalIncome: number = 0;       // 总收入
  @State totalExpense: number = 0;      // 总支出
  @State showAddDialog: boolean = false;  // 控制添加对话框
  @State showEditDialog: boolean = false; // 控制编辑对话框
  @State currentType: number = EXPENSE_TYPE;  // 当前选中类型
  @State filterType: number = -1;       // 过滤类型(-1=全部)

  private dbHelper: DatabaseHelper = new DatabaseHelper();
  private editRecord: Record | null = null;  // 正在编辑的记录

  // 表单输入
  private amountInput: string = '';
  private categoryInput: string = '';
  private descriptionInput: string = '';
}
ArkUI 的 @State 装饰器是响应式系统的核心。当 @State 变量变化时,框架会自动重新渲染关联的 UI 组件。
6.3 生命周期与数据初始化
aboutToAppear() {
  this.initDatabase();
}

async initDatabase() {
  try {
    await this.dbHelper.init(getContext());
    await this.loadRecords();
  } catch (err) {
    console.error('Database init failed:', err);
  }
}

async loadRecords() {
  try {
    let data: Record[] = [];
    if (this.filterType === -1) {
      data = await this.dbHelper.queryAllRecords();
    } else {
      data = await this.dbHelper.queryRecordsByType(this.filterType);
    }
    this.records = data;
    await this.calculateTotals();
  } catch (err) {
    console.error('Load records failed:', err);
  }
}
aboutToAppear() 是 ArkUI 组件生命周期方法,在组件即将出现在屏幕上时触发,适合做初始化工作。这里我们在此时初始化数据库并加载记录。
6.4 统计卡片区域
Row() {
  // 收入卡片
  Column() {
    Text($r('app.string.income'))
      .fontSize(16)
      .fontColor('#666666');
    Text(`¥${this.totalIncome.toFixed(2)}`)
      .fontSize(24)
      .fontWeight(FontWeight.Bold)
      .fontColor('#4CAF50');  // 绿色
  }
  .flexGrow(1)
  .alignItems(HorizontalAlign.Center);

  // 支出卡片
  Column() {
    Text($r('app.string.expense'))
      .fontSize(16)
      .fontColor('#666666');
    Text(`¥${this.totalExpense.toFixed(2)}`)
      .fontSize(24)
      .fontWeight(FontWeight.Bold)
      .fontColor('#F44336');  // 红色
  }
  .flexGrow(1)
  .alignItems(HorizontalAlign.Center);

  // 结余卡片
  Column() {
    Text('结余')
      .fontSize(16)
      .fontColor('#666666');
    Text(`¥${(this.totalIncome - this.totalExpense).toFixed(2)}`)
      .fontSize(24)
      .fontWeight(FontWeight.Bold)
      .fontColor('#2196F3');  // 蓝色
  }
  .flexGrow(1)
  .alignItems(HorizontalAlign.Center);
}
设计亮点:
- 使用
flexGrow(1)让三个卡片等宽分布 - 三种颜色语义化:绿色代表收入、红色代表支出、蓝色代表结余
.toFixed(2)确保金额始终显示两位小数,如¥100.00$r('app.string.income')引用国际化字符串
6.5 过滤按钮栏
Row() {
  Button($r('app.string.all'))
    .width(80).height(36)
    .backgroundColor(this.filterType === -1 ? '#2196F3' : '#E0E0E0')
    .fontColor(this.filterType === -1 ? '#FFFFFF' : '#333333')
    .borderRadius(18)
    .onClick(() => {
      this.filterType = -1;
      this.loadRecords();
    });

  Button($r('app.string.expense'))
    .width(80).height(36)
    .backgroundColor(this.filterType === EXPENSE_TYPE ? '#F44336' : '#E0E0E0')
    .fontColor(this.filterType === EXPENSE_TYPE ? '#FFFFFF' : '#333333')
    .borderRadius(18)
    .onClick(() => {
      this.filterType = EXPENSE_TYPE;
      this.loadRecords();
    });

  Button($r('app.string.income'))
    .width(80).height(36)
    .backgroundColor(this.filterType === INCOME_TYPE ? '#4CAF50' : '#E0E0E0')
    .fontColor(this.filterType === INCOME_TYPE ? '#FFFFFF' : '#333333')
    .borderRadius(18)
    .onClick(() => {
      this.filterType = INCOME_TYPE;
      this.loadRecords();
    });

  Blank();

  Button($r('app.string.add_record'))
    .width(100).height(36)
    .backgroundColor('#2196F3')
    .fontColor('#FFFFFF')
    .borderRadius(18)
    .onClick(() => {
      this.currentType = EXPENSE_TYPE;
      this.resetForm();
      this.showAddDialog = true;
    });
}
视觉反馈设计:
- 当前选中的过滤按钮高亮为主色(全部=蓝、支出=红、收入=绿),其余为灰色
- 使用
borderRadius(18)制作胶囊按钮样式 Blank()组件占据剩余空间,将"记一笔"按钮推到右侧
6.6 记录列表
Scroll() {
  Column() {
    if (this.records.length === 0) {
      Text($r('app.string.no_records'))
        .fontSize(18)
        .fontColor('#999999')
        .margin({ top: 100 });
    } else {
      ForEach(this.records, (record: Record) => {
        Row() {
          // 左侧:分类名 + 日期描述
          Column() {
            Text(record.category).fontSize(18).fontWeight(FontWeight.Bold);
            Text(record.date + ' ' + (record.description || ''))
              .fontSize(14).fontColor('#999999');
          }.flexGrow(1);

          // 右侧:金额 + 操作按钮
          Column() {
            Text(record.type === INCOME_TYPE
              ? `+¥${record.amount.toFixed(2)}`
              : `-¥${record.amount.toFixed(2)}`)
              .fontSize(18)
              .fontWeight(FontWeight.Bold)
              .fontColor(record.type === INCOME_TYPE ? '#4CAF50' : '#F44336');

            Row() {
              Button($r('app.string.edit'))
                .width(50).height(28).backgroundColor('#FFC107')
                .fontColor('#FFFFFF').fontSize(12).borderRadius(14)
                .onClick(() => { this.showEditDialogHandler(record); });

              Button($r('app.string.delete'))
                .width(50).height(28).backgroundColor('#F44336')
                .fontColor('#FFFFFF').fontSize(12).borderRadius(14)
                .onClick(() => { this.deleteRecord(record.id); });
            }.margin({ top: 8 });
          }
        }
        .padding({ top: 16, bottom: 16, left: 16, right: 16 })
        .backgroundColor('#FFFFFF')
        .margin({ bottom: 12, left: 16, right: 16 })
        .borderRadius(12);
      });
    }
  }
}
.flexGrow(1);
UI 技巧:
- 使用
Scroll包裹列表,保证内容溢出时可以滚动 - 空列表时显示友好提示"暂无记录"
- 每条记录是一个带圆角的白色卡片,与背景形成层次感
- 金额前缀使用
+¥/-¥符号直观表达收支方向 - 编辑按钮使用 琥珀色
#FFC107,删除按钮使用红色,区分操作属性
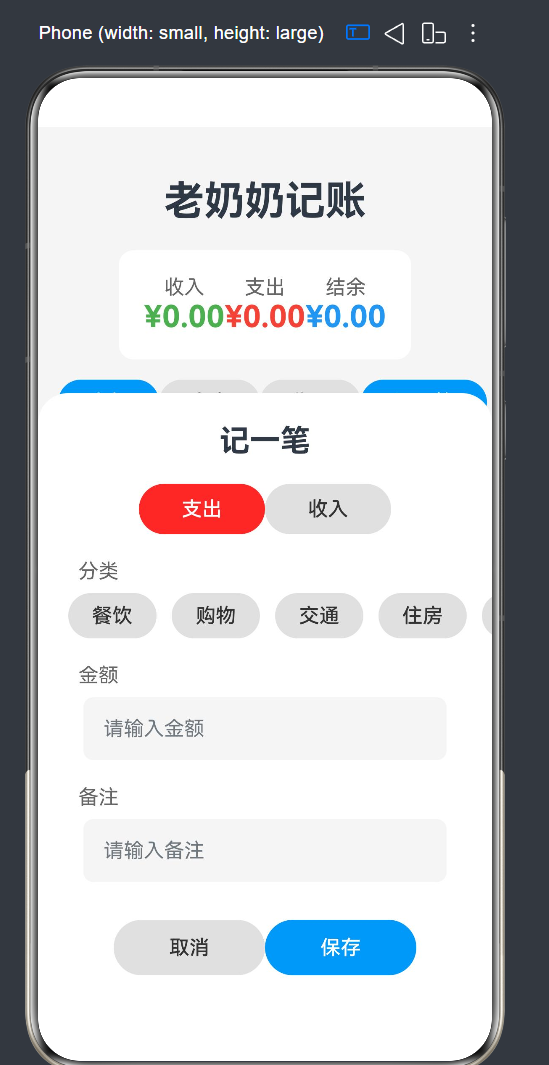
6.7 添加/编辑对话框
@Builder
buildAddEditDialog(isAdd: boolean) {
  Column() {
    Text(isAdd ? '记一笔' : '编辑记录')
      .fontSize(24).fontWeight(FontWeight.Bold)
      .margin({ top: 24, bottom: 20 });

    // 类型切换:支出 / 收入
    Row() {
      Button($r('app.string.expense'))
        .width(100).height(40)
        .backgroundColor(this.currentType === EXPENSE_TYPE ? '#F44336' : '#E0E0E0')
        .onClick(() => { this.currentType = EXPENSE_TYPE; this.categoryInput = ''; });
      Button($r('app.string.income'))
        .width(100).height(40)
        .backgroundColor(this.currentType === INCOME_TYPE ? '#4CAF50' : '#E0E0E0')
        .onClick(() => { this.currentType = INCOME_TYPE; this.categoryInput = ''; });
    }
    .margin({ bottom: 20 });

    // 分类选择(横向滚动标签)
    Text($r('app.string.category'))
      .fontSize(16).fontColor('#666666')
      .alignSelf(ItemAlign.Start).margin({ left: 32, bottom: 8 });
    Row() {
      Scroll() {
        Row() {
          ForEach(this.getCategories(), (category: string) => {
            Button(category)
              .width(70).height(36)
              .backgroundColor(this.categoryInput === category ? '#2196F3' : '#E0E0E0')
              .fontColor(this.categoryInput === category ? '#FFFFFF' : '#333333')
              .borderRadius(18).margin({ right: 12 })
              .onClick(() => { this.categoryInput = category; });
          });
        }
      }.width('100%').padding({ left: 24, right: 24 })
    }.margin({ bottom: 20 });

    // 金额输入
    Text($r('app.string.amount'))
      .fontSize(16).fontColor('#666666')
      .alignSelf(ItemAlign.Start).margin({ left: 32, bottom: 8 });
    TextInput({ placeholder: '请输入金额', text: this.amountInput })
      .width('80%').height(50).backgroundColor('#F5F5F5')
      .borderRadius(8).type(InputType.Number)
      .onChange((value: string) => { this.amountInput = value; })
      .margin({ bottom: 20 });

    // 备注输入
    Text($r('app.string.description'))
      .fontSize(16).fontColor('#666666')
      .alignSelf(ItemAlign.Start).margin({ left: 32, bottom: 8 });
    TextInput({ placeholder: '请输入备注', text: this.descriptionInput })
      .width('80%').height(50).backgroundColor('#F5F5F5')
      .borderRadius(8)
      .onChange((value: string) => { this.descriptionInput = value; })
      .margin({ bottom: 30 });

    // 操作按钮
    Row() {
      Button($r('app.string.cancel'))
        .width(120).height(44).backgroundColor('#E0E0E0')
        .fontColor('#333333').borderRadius(22)
        .onClick(() => {
          this.resetForm();
          this.showAddDialog = false;
          this.showEditDialog = false;
        });
      Button($r('app.string.save'))
        .width(120).height(44).backgroundColor('#2196F3')
        .fontColor('#FFFFFF').borderRadius(22)
        .onClick(() => {
          if (isAdd) { this.addRecord(); }
          else { this.updateRecord(); }
        });
    }
  }
  .width('100%')
  .backgroundColor('#FFFFFF')
  .borderRadius({ topLeft: 24, topRight: 24 })
  .padding({ bottom: 40 })
  .position({ bottom: 0 });
}
对话框设计要点:
- 使用
@Builder装饰器创建可复用的 UI 构建函数 - 通过
isAdd参数区分添加/编辑模式,复用同一套布局 - 分类标签使用横向
Scroll包裹,支持左右滑动查看更多分类 - 金额输入框设置
type(InputType.Number)调起数字键盘 - 底部圆角
borderRadius({ topLeft: 24, topRight: 24 })+position({ bottom: 0 })实现底部弹出效果 - 取消和保存按钮宽度足够大(120),易于点击
6.8 分类数据
const INCOME_TYPE = 1;
const EXPENSE_TYPE = 0;

const expenseCategories: string[] = ['餐饮', '购物', '交通', '住房', '医疗', '教育', '其他'];
const incomeCategories: string[] = ['工资', '奖金', '投资', '其他'];

getCategories(): string[] {
  return this.currentType === INCOME_TYPE ? incomeCategories : expenseCategories;
}
分类设计原则:
- 支出分类覆盖了日常生活的主要内容(餐饮、购物、交通、住房、医疗、教育),外加"其他"作为兜底
- 收入分类包含工资、奖金、投资三大来源,同样以"其他"兜底
- 通过
getCategories()方法根据当前类型动态返回对应的分类列表
7. Ability 生命周期管理
7.1 EntryAbility 源码分析
import { AbilityConstant, ConfigurationConstant, UIAbility, Want } from '@kit.AbilityKit';
import { hilog } from '@kit.PerformanceAnalysisKit';
import { window } from '@kit.ArkUI';

const DOMAIN = 0x0000;

export default class EntryAbility extends UIAbility {
  onCreate(want: Want, launchParam: AbilityConstant.LaunchParam): void {
    try {
      this.context.getApplicationContext()
        .setColorMode(ConfigurationConstant.ColorMode.COLOR_MODE_NOT_SET);
    } catch (err) {
      hilog.error(DOMAIN, 'testTag', 'Failed to set colorMode. Cause: %{public}s',
        JSON.stringify(err));
    }
    hilog.info(DOMAIN, 'testTag', '%{public}s', 'Ability onCreate');
  }

  onWindowStageCreate(windowStage: window.WindowStage): void {
    hilog.info(DOMAIN, 'testTag', '%{public}s', 'Ability onWindowStageCreate');
    windowStage.loadContent('pages/Index', (err) => {
      if (err.code) {
        hilog.error(DOMAIN, 'testTag', 'Failed to load the content. Cause: %{public}s',
          JSON.stringify(err));
        return;
      }
      hilog.info(DOMAIN, 'testTag', 'Succeeded in loading the content.');
    });
  }

  onDestroy(): void {
    hilog.info(DOMAIN, 'testTag', '%{public}s', 'Ability onDestroy');
  }

  onWindowStageDestroy(): void {
    hilog.info(DOMAIN, 'testTag', '%{public}s', 'Ability onWindowStageDestroy');
  }

  onForeground(): void {
    hilog.info(DOMAIN, 'testTag', '%{public}s', 'Ability onForeground');
  }

  onBackground(): void {
    hilog.info(DOMAIN, 'testTag', '%{public}s', 'Ability onBackground');
  }
}
7.2 Ability 生命周期图
用户启动应用
    │
    ▼
onCreate()          ← 应用创建,设置颜色模式
    │
    ▼
onWindowStageCreate() ← 创建窗口,加载首页
    │
    ▼
onForeground()      ← 应用进入前台
    │
    ▼
   [应用运行中]
    │
    ├─ 按 Home 键 → onBackground() → [后台]
    │    └─ 返回前台 → onForeground()
    │
    ├─ 按 返回键
    │    │
    │    ▼
    │ onBackground()
    │    │
    │    ▼
    │ onWindowStageDestroy()
    │    │
    │    ▼
    │ onDestroy()   ← 应用销毁
    │
    └─ 系统杀进程 → onBackground() → onWindowStageDestroy() → onDestroy()
应用启动关键路径:
- 系统在
onWindowStageCreate()中调用windowStage.loadContent('pages/Index', callback) - 这会触发
Index组件的aboutToAppear()生命周期 aboutToAppear()中初始化数据库并加载记录列表- 页面渲染完成后回调告知窗口加载成功
8. 备份与恢复能力
8.1 备份扩展 Ability
import { hilog } from '@kit.PerformanceAnalysisKit';
import { BackupExtensionAbility, BundleVersion } from '@kit.CoreFileKit';

const DOMAIN = 0x0000;

export default class EntryBackupAbility extends BackupExtensionAbility {
  async onBackup() {
    hilog.info(DOMAIN, 'testTag', 'onBackup ok');
    await Promise.resolve();
  }

  async onRestore(bundleVersion: BundleVersion) {
    hilog.info(DOMAIN, 'testTag', 'onRestore ok %{public}s',
      JSON.stringify(bundleVersion));
    await Promise.resolve();
  }
}
8.2 备份配置
// backup_config.json
{
  "allowToBackup": true,
  "includesExcludes": {
    "includes": [],
    "excludes": []
  }
}
备份能力允许系统在用户授权的情况下自动备份应用的 SQLite 数据库文件,当用户换机或重装系统时可以从云端恢复数据。
注意:当前实现中
onBackup和onRestore为简单实现。实际生产环境中,可在onBackup前关闭数据库连接以确保数据一致性,在onRestore后重新连接数据库。
9. 多语言资源管理
9.1 字符串资源文件
// resources/base/element/string.json
{
  "string": [
    { "name": "app_title",      "value": "老奶奶记账" },
    { "name": "income",         "value": "收入" },
    { "name": "expense",        "value": "支出" },
    { "name": "add_record",     "value": "记一笔" },
    { "name": "category",       "value": "分类" },
    { "name": "amount",         "value": "金额" },
    { "name": "description",    "value": "备注" },
    { "name": "save",           "value": "保存" },
    { "name": "cancel",         "value": "取消" },
    { "name": "delete",         "value": "删除" },
    { "name": "edit",           "value": "编辑" },
    { "name": "no_records",     "value": "暂无记录" },
    { "name": "all",            "value": "全部" },
    { "name": "food",           "value": "餐饮" },
    { "name": "shopping",       "value": "购物" },
    { "name": "transport",      "value": "交通" },
    { "name": "housing",        "value": "住房" },
    { "name": "medical",        "value": "医疗" },
    { "name": "education",      "value": "教育" },
    { "name": "salary",         "value": "工资" },
    { "name": "bonus",          "value": "奖金" },
    { "name": "investment",     "value": "投资" },
    { "name": "other",          "value": "其他" },
    { "name": "module_desc",    "value": "老奶奶记账 - 简单易用的记账应用" },
    { "name": "EntryAbility_desc", "value": "老奶奶记账应用" },
    { "name": "EntryAbility_label","value": "老奶奶记账" }
  ]
}
9.2 在代码中引用
ArkUI 中使用 $r() 语法引用资源:
// 引用字符串资源
Text($r('app.string.app_title'))

// 引用图片资源
icon: "$media:layered_image"

// 引用颜色资源
startWindowBackground: "$color:start_window_background"
资源引用的好处:
- 支持 多语言:添加
resources/en_US/element/string.json即可支持英文 - 支持 多设备:添加
resources/tablet/即可适配平板 - 支持 多主题:添加
resources/dark/资源即可适配深色模式
例如,要支持英文,只需创建 resources/en_US/element/string.json:
// resources/en_US/element/string.json
{
  "string": [
    { "name": "app_title",      "value": "Grandma's Ledger" },
    { "name": "income",         "value": "Income" },
    { "name": "expense",        "value": "Expense" },
    { "name": "add_record",     "value": "Add" },
    { "name": "category",       "value": "Category" },
    // ...
  ]
}
系统会根据用户的语言设置自动选择对应的资源文件,无需修改任何代码。
10. 核心业务流程详解
10.1 启动流程
用户点击桌面图标
       │
       ▼
系统创建 EntryAbility
  ├─ onCreate():设置颜色模式
  ├─ onWindowStageCreate():加载 Index 页面
  │    └─ aboutToAppear() 触发
  │         ├─ DatabaseHelper.init()
  │         │    ├─ getRdbStore() 打开/创建数据库
  │         │    └─ createTable() 创建 records 表
  │         └─ loadRecords()
  │              ├─ queryAllRecords() 查询全部
  │              └─ calculateTotals() 统计汇总
  └─ onForeground():应用可见
关键代码:
// Index.ets
aboutToAppear() {
  this.initDatabase();
}

async initDatabase() {
  try {
    await this.dbHelper.init(getContext());  // 初始化数据库
    await this.loadRecords();                // 加载已有数据
  } catch (err) {
    console.error('Database init failed:', err);
  }
}
10.2 添加账单流程
用户点击 [记一笔] 按钮
       │
       ▼
showAddDialog = true  →  底部弹出对话框
       │
       ▼
用户选择 支出/收入 类型(currentType)
       │
       ▼
用户选择分类 → categoryInput = '餐饮'
       │
       ▼
用户输入金额 → amountInput = '45.00'
       │
       ▼
用户输入备注 → descriptionInput = '午餐'
       │
       ▼
用户点击 [保存]
       │
       ▼
addRecord() 方法执行
  ├─ 校验:金额 > 0 且 已选分类
  ├─ 构造 Record 对象(自动填入当前日期)
  ├─ dbHelper.insertRecord(record)
  ├─ 提示"添加成功"
  ├─ 关闭对话框、重置表单
  └─ loadRecords() 刷新列表
校验逻辑:
async addRecord() {
  // 金额校验
  if (!this.amountInput || parseFloat(this.amountInput) <= 0) {
    this.showToast('请输入有效的金额');
    return;
  }
  // 分类校验
  if (!this.categoryInput) {
    this.showToast('请选择分类');
    return;
  }

  // 生成当前日期
  const now: Date = new Date();
  const dateStr: string = `${now.getFullYear()}-${
    this.padZero(now.getMonth() + 1)}-${
    this.padZero(now.getDate())}`;

  // 构造记录对象
  const record: Record = new Record(
    0,                    // id=0,数据库自动生成
    this.currentType,
    parseFloat(this.amountInput),
    this.categoryInput,
    this.descriptionInput,
    dateStr
  );

  // 插入数据库
  try {
    await this.dbHelper.insertRecord(record);
    this.showToast('添加成功');
    this.resetForm();      // 清空输入
    this.showAddDialog = false;
    await this.loadRecords();  // 刷新列表
  } catch (err) {
    console.error('Add record failed:', err);
    this.showToast('添加失败');
  }
}
10.3 编辑账单流程
用户在列表中点击某条记录的 [编辑] 按钮
       │
       ▼
showEditDialogHandler(record) 方法执行
  ├─ editRecord = record        ← 保存要编辑的记录引用
  ├─ currentType = record.type  ← 回填类型
  ├─ amountInput = record.amount.toString()  ← 回填金额
  ├─ categoryInput = record.category         ← 回填分类
  ├─ descriptionInput = record.description   ← 回填备注
  └─ showEditDialog = true      ← 显示编辑对话框
       │
       ▼
用户修改内容后点击 [保存]
       │
       ▼
updateRecord() 方法执行
  ├─ 校验:editRecord 不空、金额有效
  ├─ 构造新的 Record 对象(保留原 id,更新日期为当天)
  ├─ dbHelper.updateRecord(record)
  ├─ 提示"修改成功"
  ├─ 关闭对话框、重置表单
  └─ loadRecords() 刷新列表
代码实现:
async updateRecord() {
  if (!this.editRecord || !this.amountInput || parseFloat(this.amountInput) <= 0) {
    this.showToast('请输入有效的金额');
    return;
  }
  if (!this.categoryInput) {
    this.showToast('请选择分类');
    return;
  }

  const now: Date = new Date();
  const dateStr: string = `${now.getFullYear()}-${
    this.padZero(now.getMonth() + 1)}-${
    this.padZero(now.getDate())}`;

  const record: Record = new Record(
    this.editRecord.id,          // 保持原 ID 不变
    this.currentType,
    parseFloat(this.amountInput),
    this.categoryInput,
    this.descriptionInput,
    dateStr                      // 日期更新为当天
  );

  try {
    await this.dbHelper.updateRecord(record);
    this.showToast('修改成功');
    this.resetForm();
    this.showEditDialog = false;
    await this.loadRecords();
  } catch (err) {
    console.error('Update record failed:', err);
    this.showToast('修改失败');
  }
}
10.4 删除账单流程
用户点击某条记录的 [删除] 按钮
       │
       ▼
deleteRecord(record.id) 方法执行
  └─ dbHelper.deleteRecord(id)
       ├─ 构建 RdbPredicates:WHERE id = ?
       └─ rdbStore.delete(predicates)
       │
       ▼
提示"删除成功",刷新列表
代码实现:
async deleteRecord(id: number) {
  try {
    await this.dbHelper.deleteRecord(id);
    this.showToast('删除成功');
    await this.loadRecords();  // 立即刷新
  } catch (err) {
    console.error('Delete record failed:', err);
    this.showToast('删除失败');
  }
}
10.5 过滤查询流程
用户点击 [全部] / [支出] / [收入] 按钮
       │
       ▼
更新 filterType 变量
  ├─ 点击 [全部] → filterType = -1
  ├─ 点击 [支出] → filterType = 0 (EXPENSE_TYPE)
  └─ 点击 [收入] → filterType = 1 (INCOME_TYPE)
       │
       ▼
调用 loadRecords()
  ├─ filterType === -1 → queryAllRecords()
  └─ filterType !== -1 → queryRecordsByType(filterType)
       │
       ▼
同时调用 calculateTotals() 刷新顶部统计
SQL 查询示例(按类型过滤):
-- 查询所有支出记录(filterType = 0)
SELECT id, type, amount, category, description, date
FROM records
WHERE type = 0
ORDER BY date DESC;

-- 查询所有收入记录(filterType = 1)
SELECT id, type, amount, category, description, date
FROM records
WHERE type = 1
ORDER BY date DESC;

-- 查询全部记录(filterType = -1)
SELECT id, type, amount, category, description, date
FROM records
ORDER BY date DESC;
10.6 统计汇总流程
loadRecords() 执行完成后
       │
       ▼
calculateTotals() 方法执行
  ├─ totalIncome  = dbHelper.getTotalAmount(INCOME_TYPE)
  │    └─ SQL: SELECT SUM(amount) FROM records WHERE type = 1
  ├─ totalExpense = dbHelper.getTotalAmount(EXPENSE_TYPE)
  │    └─ SQL: SELECT SUM(amount) FROM records WHERE type = 0
       │
       ▼
@State 变量更新 → UI 自动重新渲染
  ├─ 收入卡片显示 totalIncome
  ├─ 支出卡片显示 totalExpense
  └─ 结余卡片显示 (totalIncome - totalExpense)
11. 关键技术点解析
11.1 HarmonyOS RDB(关系型数据库)API 详解
HarmonyOS 的关系型数据库(RDB)基于 SQLite 引擎,提供了完整的本地数据存储解决方案。本项目中用到的核心 API:
| API 方法 | 功能 | 对应 SQL |
|---|---|---|
getRdbStore(context, config) |
获取/创建数据库 | - |
executeSql(sql, bindArgs) |
执行任意 SQL | DDL / DML |
insert(table, values) |
插入记录 | INSERT INTO |
querySql(sql, bindArgs) |
SQL 查询 | SELECT |
update(values, predicates) |
更新记录 | UPDATE … WHERE |
delete(predicates) |
删除记录 | DELETE FROM WHERE |
11.2 ArkUI 响应式编程
ArkUI 的响应式系统基于以下三个核心机制:
| 装饰器 | 作用 | 使用场景 |
|---|---|---|
@State |
标记组件内部状态,变化时触发重渲染 | 记录列表、金额显示 |
@Prop |
从父组件传递的响应式数据 | 子组件参数 |
@Builder |
自定义构建函数,可复用 UI 片段 | 添加/编辑对话框 |
@Entry |
标记页面入口组件 | 主页面 Index |
@Component |
标记一个自定义组件 | 所有组件 |
11.3 ResultSet 的正确使用
ResultSet 是查询结果的游标,使用不当容易造成资源泄漏:
// ✅ 正确用法
const resultSet = await this.rdbStore.querySql(sql, []);
try {
  while (resultSet.goToNextRow()) {
    // 读取数据
  }
} finally {
  resultSet.close();  // 确保释放
}

// ❌ 错误用法
const resultSet = await this.rdbStore.querySql(sql, []);
while (resultSet.goToNextRow()) {
  // 如果此处抛出异常,resultSet 永远不会被关闭
}
resultSet.close(); // 异常时这行不会执行
11.4 参数化查询与 SQL 注入防护
// ✅ 安全:参数化查询
const sql = `SELECT * FROM records WHERE type = ? AND amount > ?`;
const args = [type, minAmount];
const resultSet = await this.rdbStore.querySql(sql, args);

// ❌ 危险:字符串拼接 SQL(可能被注入)
const sql = `SELECT * FROM records WHERE type = ${type}`;
const resultSet = await this.rdbStore.querySql(sql, []);
11.5 异步编程模式
本项目大量使用了 async/await 模式进行异步数据库操作:
// 初始化流程
async initDatabase() {
  await this.dbHelper.init(getContext());  // 等待数据库打开
  await this.loadRecords();                // 等待数据加载
}

// 错误处理
async loadRecords() {
  try {
    this.records = await this.dbHelper.queryAllRecords();
    await this.calculateTotals();
  } catch (err) {
    console.error('Failed:', err);
  }
}
所有可能抛出异常的地方都使用了 try/catch,确保应用不会因数据库异常而崩溃。
11.6 UI 状态与业务逻辑分离
本项目遵循了良好的关注点分离设计:
┌─────────────────────┐
│  UI 层 (Index.ets)   │  ← 仅负责展示和用户交互
│  @State 响应式数据    │
├─────────────────────┤
│  逻辑层 (Index.ets)  │  ← 负责业务流程编排
│  addRecord / delete  │
├─────────────────────┤
│  数据层 (DatabaseHelper) │  ← 仅负责数据库操作
│  CRUD / 聚合查询        │
└─────────────────────────┘
这样设计的好处是:
- 当切换数据库方案(如换为分布式数据库)时,只需修改
DatabaseHelper - UI 层不需要知道底层存的是 SQLite 还是文件
- 业务逻辑可单独测试
12. 项目总结与展望
12.1 项目成果
通过本项目的开发,我们完成了一个功能完整的 HarmonyOS 原生记账应用,实现了:
| 功能模块 | 状态 | 说明 |
|---|---|---|
| 添加账单 | ✅ | 支持收入/支出分类选择、金额输入、备注 |
| 编辑账单 | ✅ | 回填原数据、修改后保存 |
| 删除账单 | ✅ | 一键删除,即时刷新 |
| 分类过滤 | ✅ | 全部/支出/收入三种视图 |
| 统计总览 | ✅ | 顶部卡片实时显示收入、支出、结余 |
| 数据持久化 | ✅ | 基于 SQLite 的本地存储,数据不丢失 |
| 备份能力 | ✅ | HarmonyOS 系统备份框架集成 |
| 国际化支持 | ✅ | 基于 $r() 资源引用,可扩展多语言 |
12.2 代码统计
| 文件 | 行数 | 职责 |
|---|---|---|
model/Record.ets |
17 | 数据模型 |
utils/DatabaseHelper.ets |
171 | 数据库访问层 |
pages/Index.ets |
477 | UI 页面 + 业务逻辑 |
entryability/EntryAbility.ets |
48 | Ability 生命周期 |
entrybackupability/EntryBackupAbility.ets |
16 | 备份扩展 |
| 总计 | 729 |
12.3 后续优化方向
从 MVP 到生产级应用,可以考虑以下增强方向:
功能增强:
- 图表统计:接入
@ohos.components.chart或基于 Canvas 绘制月度趋势图、分类占比饼图 - 预算管理:设置月度预算上限,超额时提醒
- 多账本:支持家庭账本、个人账本切换
- 数据导出:导出为 CSV/Excel 文件,方便分析
- 搜索功能:按关键字搜索备注和分类
- 标签系统:为账单添加多标签
- 定时记账:设置周期性账单(如每月房租)
技术优化:
- 数据库升级:实现
onUpgrade回调,支持版本迁移 - 数据加密:使用
relationalStore.SecurityLevel.S3+或逐字段加密 - 状态管理:引入更复杂的状态管理方案(如
@ObservedV2/@Trace) - 分页加载:大量数据时分页查询,避免一次性加载过多
- 动画过渡:增加列表动画、对话框过渡动画
- 单元测试:补充
ohosTest测试用例 - 性能监控:使用
hitrace或@ohos.hidebug监控数据库操作耗时
用户体验:
- 深色模式:完善
resources/dark/资源 - 无障碍:为组件添加无障碍描述
- 手势操作:左滑删除、下拉刷新
- 桌面卡片:通过 FormAbility 展示月度统计
12.4 开发心得
通过本项目,我们深入实践了 HarmonyOS NEXT 应用开发的核心技术栈:
- ArkTS 语言:TypeScript 的超集,提供了静态类型检查和装饰器能力,让 UI 开发更加声明式
- ArkUI 框架:基于组件的声明式 UI 框架,
@State+@Builder的组合极大地提升了 UI 开发效率 - relationalStore:HarmonyOS 的 RDB API 封装良好,接口设计现代化,使用
async/await无缝集成 - 资源管理:
$r()的资源引用机制让国际化与多主题成为一等公民 - Ability 框架:生命周期清晰,扩展机制完善(扩展 Ability)
12.5 写在最后
"老奶奶记账"虽然只是一款小巧的个人项目,但它完整地展示了如何在 HarmonyOS NEXT 上构建一款具备数据持久化能力的原生应用。从数据库设计到 UI 渲染,从 CRUD 操作到统计汇总,每一行代码都遵循了 HarmonyOS 的最佳实践。
如果你正在学习 HarmonyOS 应用开发,希望这个项目能为你提供一个清晰、可复用的参考模板。完整的源代码已在项目中开源,欢迎 fork 和贡献!
项目地址:[ProjectToSQLite]
开发环境:DevEco Studio 5.0.1+ | HarmonyOS SDK API 11
运行时兼容:HarmonyOS API 11+ (包括 API 24)
许可证:MIT

讨论HarmonyOS开发技术,专注于API与组件、DevEco Studio、测试、元服务和应用上架分发等。
更多推荐


 5
5 0
0- 0


 已为社区贡献7条内容

所有评论(0)