OpenHarmony 进阶 UI 组件、自定义组件实战与交互开发
一、引言
在上一篇文章中,我们学习了 OpenHarmony ArkUI 基础组件与基础布局,能够完成常规页面搭建。在实际项目开发中,还会用到选择器、弹窗、进度条、开关等进阶交互组件;同时页面中大量重复的 UI 模块,需要通过自定义组件实现代码复用、降低维护成本。
本文聚焦进阶交互组件、常用拓展组件、自定义组件封装三大板块,结合落地案例讲解用法、属性与开发规范,帮助开发者实现更丰富的界面交互与工程化开发。
二、常用进阶交互组件详解及案例
2.1 Toggle 开关组件
多用于设置页面、功能启停(蓝牙、消息通知、夜间模式等),支持状态监听与样式自定义。 核心属性:isOn(开关状态)、onChange(状态切换回调)、selectedColor(开启颜色)
@Entry
@Component
struct ToggleDemo {
  // 绑定开关状态
  @State isOpen: boolean = false

  build() {
    Column({ space: 20 }) {
      Row() {
        Text("开启消息通知").fontSize(18).layoutWeight(1)
        Toggle({ isOn: this.isOpen })
          .selectedColor("#007DFF")
          .onChange((isOn: boolean) => {
            this.isOpen = isOn
            console.log("开关状态:", isOn ? "已开启" : "已关闭")
          })
      }
      .width("100%")
      .padding(15)
      .backgroundColor("#F5F5F5")
      .borderRadius(8)
    }
    .padding(20)
  }
}
2.2 Slider 滑动条组件
适用于音量调节、亮度调节、进度选择等场景,支持滑动取值、样式定制。 核心属性:min/max(取值范围)、value(当前值)、onChange(滑动回调)
@Entry
@Component
struct SliderDemo {
  @State currentValue: number = 50

  build() {
    Column({ space: 15 }) {
      Text(`当前数值:${this.currentValue}`).fontSize(18)
      Slider({
        min: 0,
        max: 100,
        value: this.currentValue
      })
      .trackColor("#E5E5E5")
      .selectedColor("#2ECC71")
      .blockColor("#FFFFFF")
      .onChange((value: number) => {
        this.currentValue = value
      })
    }
    .padding(20)
  }
}
2.3 Progress 进度条组件
展示任务加载、文件下载、页面加载进度,分为线性进度条、环形进度条。 核心属性:value(当前进度)、total(总进度)、type(进度条类型)
@Entry
@Component
struct ProgressDemo {
  @State progress: number = 60

  build() {
    Column({ space: 30 }) {
      Text("线性进度条").fontSize(18)
      Progress({ value: this.progress, total: 100 })
        .width("100%")
        .color("#007DFF")

      Text("环形进度条").fontSize(18)
      Progress({ value: this.progress, total: 100, type: ProgressType.Ring })
        .width(100)
        .height(100)
        .color("#FF6734")
    }
    .padding(20)
  }
}
2.4 Select 下拉选择器
替代传统下拉菜单,用于选项选择、分类筛选、地区选择等场景。 核心属性:options(选项数组)、selected(默认选中项)、onSelect(选择回调)
@Entry
@Component
struct SelectDemo {
  @State selectText: string = "请选择分类"
  // 下拉选项
  private options: ResourceStr[] = ["数码产品", "生活用品", "服饰穿搭", "美食生鲜"]

  build() {
    Column({ space: 20 }) {
      Select(this.options)
        .width(200)
        .height(40)
        .onSelect((index: number, text: string) => {
          this.selectText = text
        })
      Text(`已选择:${this.selectText}`).fontSize(18)
    }
    .padding(20)
  }
}
2.5 AlertDialog 弹窗组件
全局弹窗,用于消息提示、二次确认、操作提醒,是应用高频交互组件。 使用说明:通过show()方法唤起弹窗,支持标题、内容、多按钮配置。
@Entry
@Component
struct DialogDemo {
  build() {
    Column() {
      Button("点击弹出确认弹窗")
        .width(200)
        .onClick(() => {
          AlertDialog.show({
            title: "温馨提示",
            message: "确定要执行该操作吗?",
            primaryButton: {
              value: "确定",
              action: () => console.log("点击确定")
            },
            secondaryButton: {
              value: "取消",
              action: () => console.log("点击取消")
            }
          })
        })
    }
    .width("100%")
    .height("100%")
    .justifyContent(FlexAlign.Center)
  }
}
三、自定义组件开发实战
ArkUI 支持将重复使用的 UI 模块封装为自定义组件,遵循@Component装饰器定义,可传入参数、绑定状态,大幅简化代码。
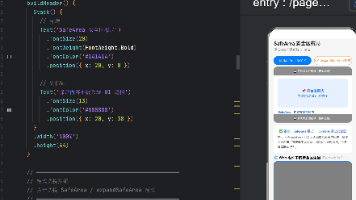
3.1 基础自定义组件(纯展示卡片)
封装通用信息卡片,可在列表、首页、个人中心重复调用。
// 自定义卡片组件
@Component
struct CardItem {
  // 外部传入参数
  @Prop title: string
  @Prop desc: string

  build() {
    Column({ space: 8 }) {
      Text(this.title)
        .fontSize(20)
        .fontWeight(FontWeight.Bold)
      Text(this.desc)
        .fontSize(16)
        .fontColor("#666666")
    }
    .width("100%")
    .padding(15)
    .backgroundColor("#FFFFFF")
    .borderRadius(10)
    .shadow({ radius: 5, color: "#E0E0E0" })
  }
}

// 页面入口,调用自定义组件
@Entry
@Component
struct CustomCardPage {
  build() {
    Column({ space: 15 }) {
      // 多次复用自定义卡片
      CardItem({ title: "功能一", desc: "OpenHarmony 分布式能力介绍" })
      CardItem({ title: "功能二", desc: "ArkUI 组件实战开发教程" })
      CardItem({ title: "功能三", desc: "应用性能优化技巧分享" })
    }
    .width("100%")
    .padding(20)
    .backgroundColor("#F5F5F5")
  }
}
3.2 带交互的自定义组件(自定义按钮)
封装带点击事件的交互组件,支持样式、文字、事件外部传参。
// 自定义交互按钮组件
@Component
struct MyButton {
  @Prop btnText: string
  @Prop btnColor: ResourceColor
  // 点击事件回调
  @BuilderParam clickFunc: () => void

  build() {
    Button(this.btnText)
      .width(160)
      .height(45)
      .backgroundColor(this.btnColor)
      .borderRadius(22)
      .onClick(this.clickFunc)
  }
}

@Entry
@Component
struct CustomBtnPage {
  build() {
    Column({ space: 20 }) {
      MyButton({
        btnText: "提交表单",
        btnColor: "#007DFF",
        clickFunc: () => console.log("点击提交按钮")
      })

      MyButton({
        btnText: "重置内容",
        btnColor: "#999999",
        clickFunc: () => console.log("点击重置按钮")
      })
    }
    .width("100%")
    .height("100%")
    .justifyContent(FlexAlign.Center)
  }
}
四、综合实战:设置页面(组件组合 + 自定义组件)
整合上文所有进阶组件与自定义组件,搭建一套完整的应用设置页面,可直接用于项目开发。
// 自定义设置项组件
@Component
struct SettingItem {
  @Prop title: string
  @BuilderParam content: () => void

  build() {
    Row() {
      Text(this.title)
        .fontSize(18)
        .layoutWeight(1)
      this.content()
    }
    .width("100%")
    .height(60)
    .padding({ left: 15, right: 15 })
    .backgroundColor("#FFFFFF")
  }
}

@Entry
@Component
struct SettingPage {
  @State noticeOpen: boolean = true
  @State brightness: number = 70

  build() {
    Column() {
      // 页面标题
      Text("应用设置")
        .fontSize(24)
        .fontWeight(FontWeight.Bold)
        .margin({ bottom: 20 })

      // 复用自定义设置项 + 开关
      SettingItem({ title: "消息通知" }) {
        Toggle({ isOn: this.noticeOpen })
          .onChange((val) => this.noticeOpen = val)
      }

      // 复用自定义设置项 + 滑动条
      SettingItem({ title: "屏幕亮度" }) {
        Slider({ min: 0, max: 100, value: this.brightness })
          .width(120)
          .onChange((val) => this.brightness = val)
      }

      // 下拉选择
      SettingItem({ title: "默认分类" }) {
        Select(["推荐", "热门", "最新"])
          .width(100)
      }

      Blank().layoutWeight(1)

      // 底部退出按钮
      Button("退出登录")
        .width("100%")
        .height(50)
        .backgroundColor("#FF4444")
        .margin({ top: 30 })
        .onClick(() => {
          AlertDialog.show({
            title: "退出提醒",
            message: "确定要退出当前账号吗?",
            primaryButton: { value: "确定" },
            secondaryButton: { value: "取消" }
          })
        })
    }
    .width("100%")
    .height("100%")
    .padding(20)
    .backgroundColor("#F5F5F5")
  }
}
五、开发总结与最佳实践
5.1 进阶组件使用要点
- 弹窗
AlertDialog属于全局弹窗,避免在循环内频繁调用,防止层级错乱; - 滑动条、开关、选择器必须绑定状态变量,保证 UI 与数据双向同步;
- 进度条优先用于异步任务场景,提升用户体验。
5.2 自定义组件开发规范
- 通用 UI 模块(卡片、列表项、按钮、设置栏)优先封装为自定义组件;
- 组件传参使用
@Prop,交互事件使用@BuilderParam,保证组件解耦; - 单一自定义组件只负责单一功能,遵循单一职责原则。
5.3 性能优化建议
- 大量重复组件使用
ForEach遍历渲染,减少重复代码; - 非高频更新的状态,合理划分组件层级,减少全局刷新;
- 统一组件样式(圆角、间距、颜色),维护全局风格。
六、拓展学习方向
- 封装全局公共组件库,统一项目 UI 风格;
- 结合动画组件,为开关、弹窗添加过渡动效;
- 学习
@CustomDialog自定义弹窗,实现个性化弹窗样式。

讨论HarmonyOS开发技术,专注于API与组件、DevEco Studio、测试、元服务和应用上架分发等。
更多推荐

 3
3 0
0- 0


 已为社区贡献15条内容

所有评论(0)