【鸿蒙实战】20分钟手把手教你开发骰子模拟器
·
【鸿蒙实战】20分钟手把手教你开发骰子模拟器
保姆级教程!从零开始,带你用 HarmonyOS NEXT 和 ArkTS 实现一个功能完整的骰子模拟器应用。
一、项目预览
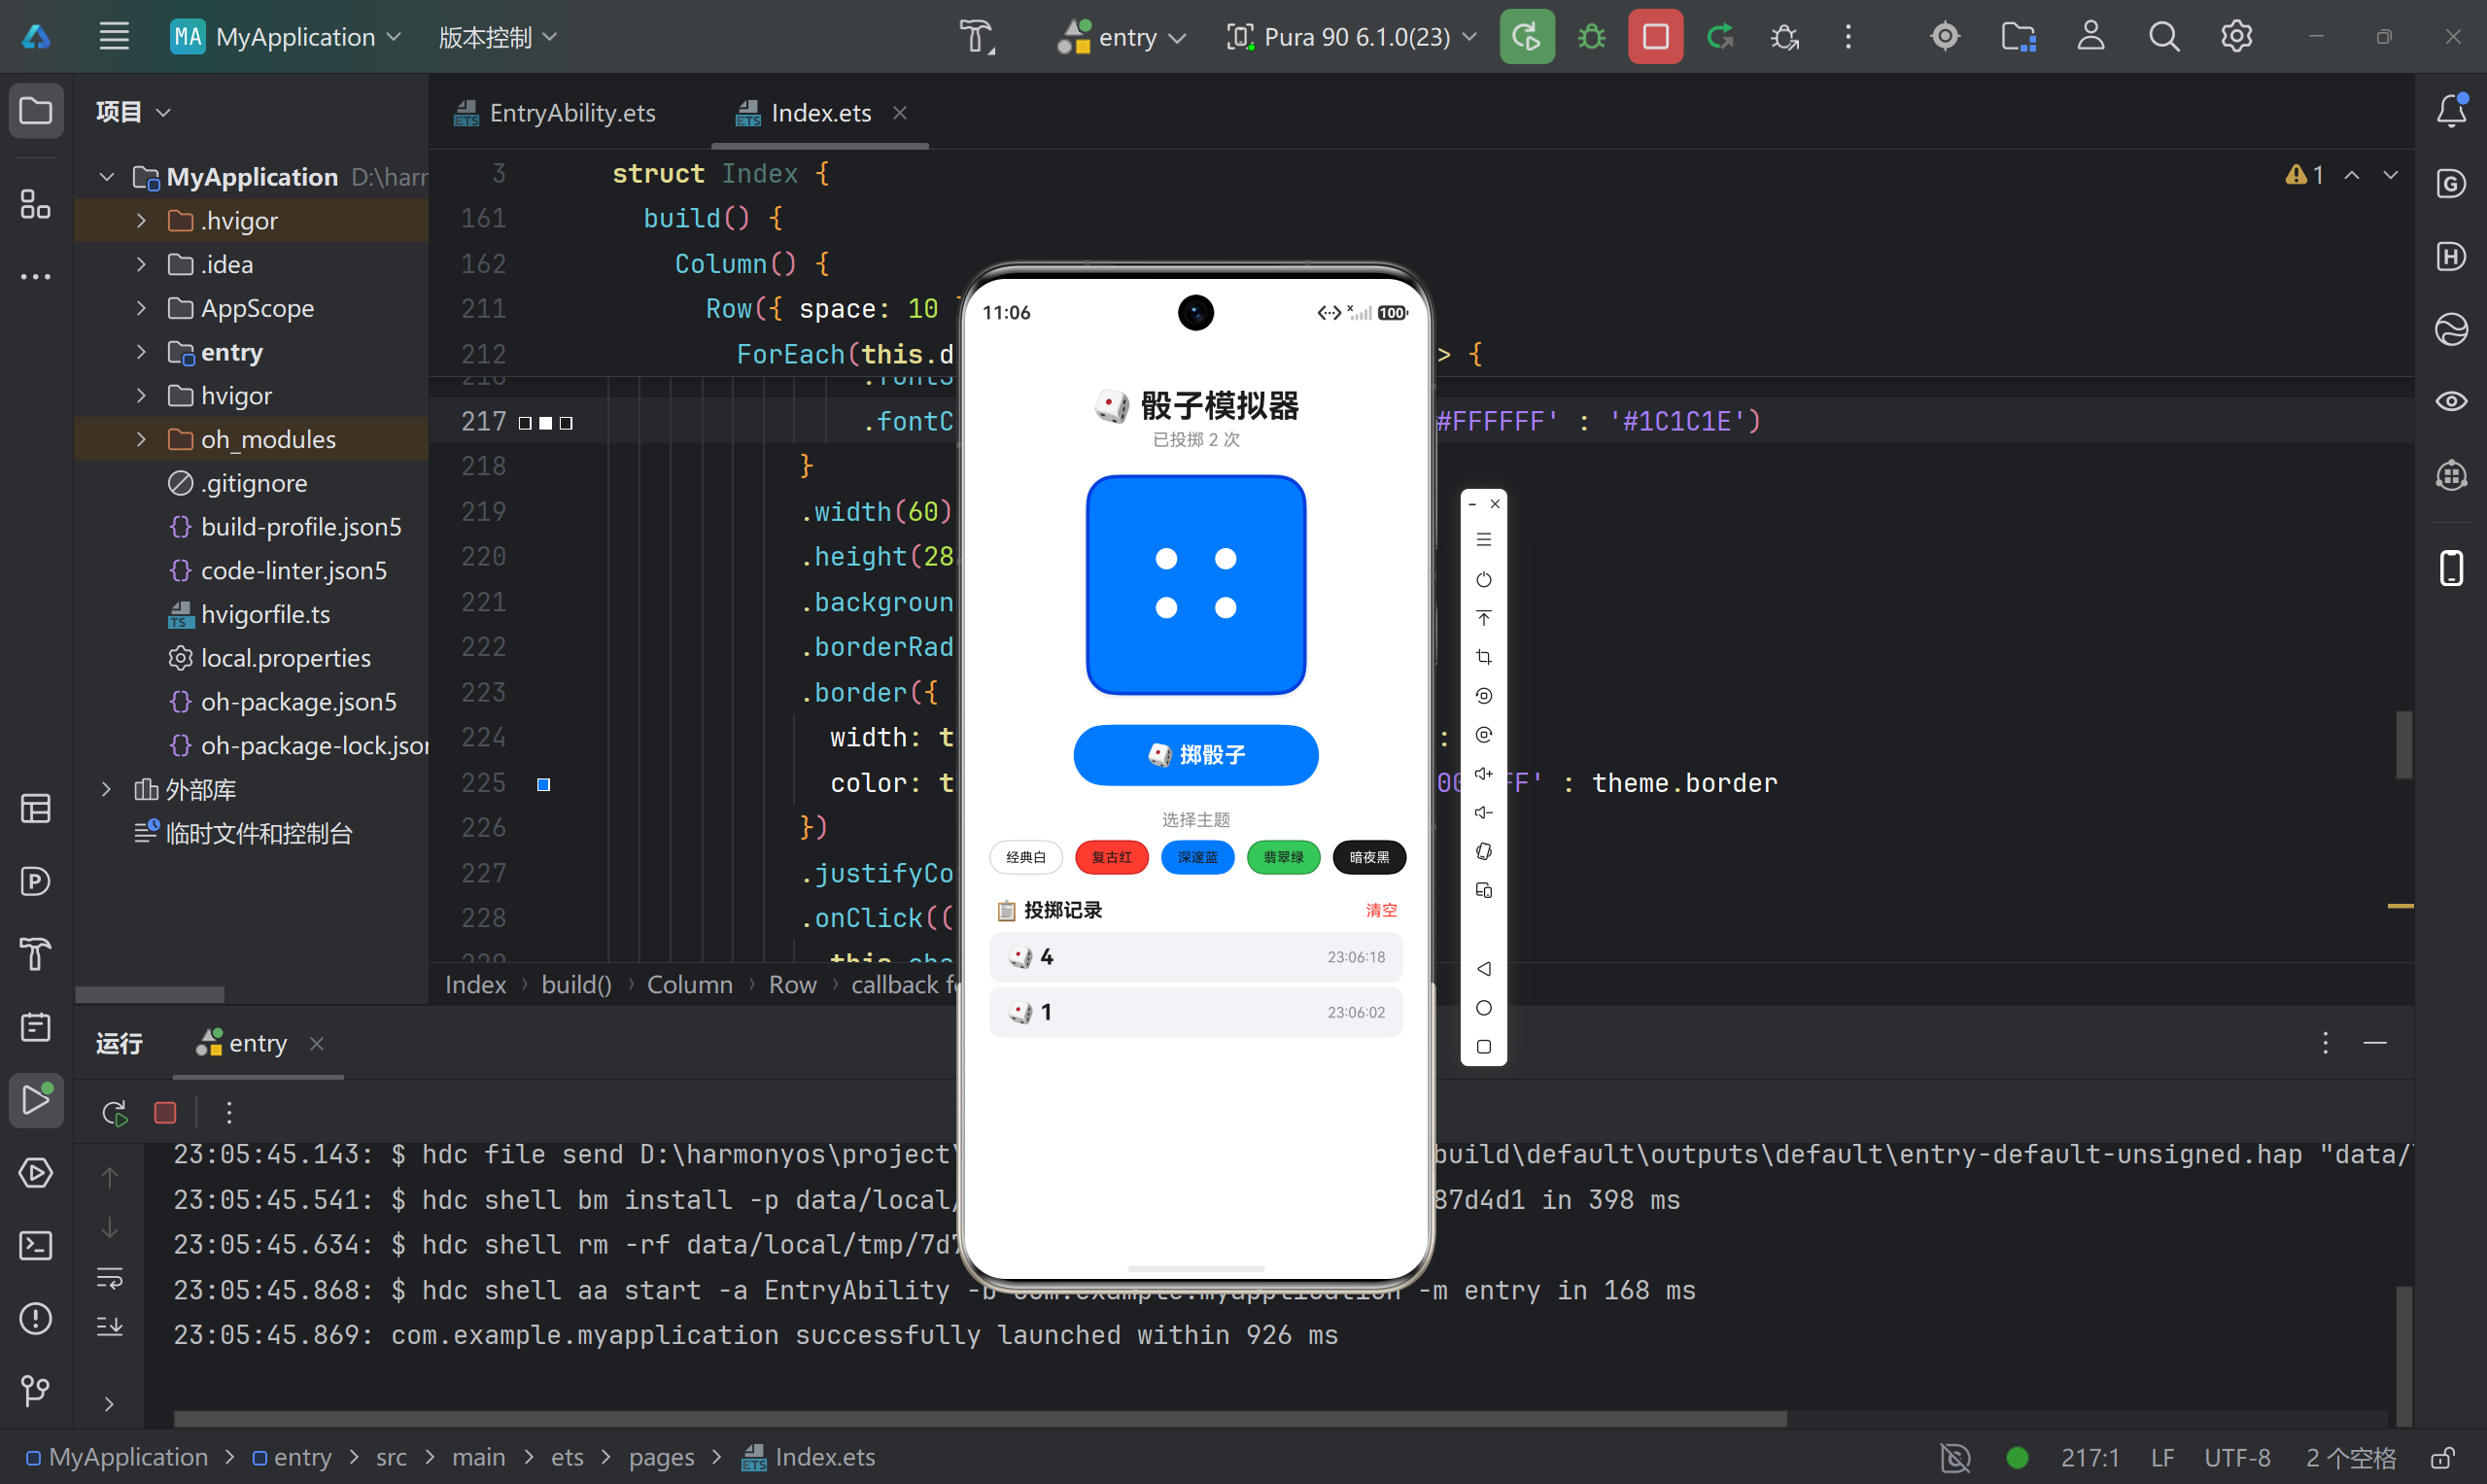
先看看我们要做什么:
- 🎲 点击投掷骰子,显示 1-6 点
- ⚡ 流畅的翻滚动画效果
- 🎨 5 种主题配色可选
- 📊 自动记录投掷历史
- 💡 支持点击骰子或按钮两种操作
二、准备工作
2.1 环境要求
| 工具 | 版本 |
|---|---|
| DevEco Studio | 5.0+ |
| HarmonyOS SDK | API 23+ |
| Node.js | 14.19.1+ |
2.2 创建项目
步骤 1: 打开 DevEco Studio,点击 File → New → Create Project
步骤 2: 选择 Empty Ability 模板
步骤 3: 填写项目信息:
- Bundle name:
com.example.myapplication - Save location:
D:\harmonyos\project\project11\MyApplication
步骤 4: 点击 Finish,等待项目初始化
2.3 项目结构
MyApplication/
├── entry/
│   └── src/main/
│       ├── ets/
│       │   ├── entryability/
│       │   │   └── EntryAbility.ets
│       │   └── pages/
│       │       └── Index.ets        ⭐ 主页面
│       └── resources/
└── build-profile.json5
我们主要编辑 Index.ets 文件。
三、代码实现
3.1 定义数据模型
步骤 1: 打开 Index.ets,定义两个接口:
// 投掷记录
interface DiceRecord {
  value: number;   // 点数:1-6
  time: string;    // 时间:HH:MM:SS
}

// 主题配置
interface DiceTheme {
  name: string;    // 主题名称
  bg: string;      // 背景色
  dot: string;     // 点数色
  border: string;  // 边框色
}
3.2 创建组件和状态
步骤 2: 定义组件和状态变量:
@Entry
@Component
struct Index {
  // ========== 状态变量 ==========
  @State currentValue: number = 1;      // 当前点数
  @State isRolling: boolean = false;    // 是否在滚动
  @State totalRolls: number = 0;        // 总投掷次数
  @State history: DiceRecord[] = [];    // 历史记录
  @State diceColor: string = '#FFFFFF'; // 骰子背景色
  @State dotColor: string = '#1C1C1E';  // 点数颜色

  // ========== 主题数据 ==========
  readonly diceColors: DiceTheme[] = [
    { name: '经典白', bg: '#FFFFFF', dot: '#1C1C1E', border: '#D1D1D6' },
    { name: '复古红', bg: '#FF3B30', dot: '#FFFFFF', border: '#C41A1A' },
    { name: '深邃蓝', bg: '#007AFF', dot: '#FFFFFF', border: '#0040DD' },
    { name: '翡翠绿', bg: '#34C759', dot: '#FFFFFF', border: '#248A3D' },
    { name: '暗夜黑', bg: '#1C1C1E', dot: '#FFFFFF', border: '#000000' },
  ];
}
说明:
@State:状态变量,变化时 UI 自动更新readonly:常量数组,不需要响应式
3.3 实现投掷逻辑
步骤 3: 添加投掷方法:
rollDice(): void {
  // 1. 防止重复触发
  if (this.isRolling) return;
  this.isRolling = true;

  // 2. 快速切换数字产生动画
  let frame = 0;
  const interval = setInterval(() => {
    this.currentValue = Math.floor(Math.random() * 6) + 1;
    frame++;

    // 3. 8 帧后停止
    if (frame >= 8) {
      clearInterval(interval);
      const finalValue = Math.floor(Math.random() * 6) + 1;
      this.currentValue = finalValue;
      this.isRolling = false;
      this.totalRolls++;

      // 4. 记录历史
      this.addToHistory(finalValue);
    }
  }, 60);
}
步骤 4: 添加记录历史的方法:
addToHistory(value: number): void {
  const now = new Date();
  const timeStr =
    `${now.getHours().toString().padStart(2, '0')}:` +
    `${now.getMinutes().toString().padStart(2, '0')}:` +
    `${now.getSeconds().toString().padStart(2, '0')}`;

  const newRecord: DiceRecord = { value: value, time: timeStr };

  // 插入到数组开头
  const temp = [newRecord];
  for (let i = 0; i < this.history.length; i++) {
    temp.push(this.history[i]);
  }
  this.history = temp;

  // 限制 10 条
  if (this.history.length > 10) {
    const temp2 = [];
    for (let i = 0; i < 10; i++) {
      temp2.push(this.history[i]);
    }
    this.history = temp2;
  }
}
3.4 绘制骰子点数
步骤 5: 使用 @Builder 定义可复用的 UI:
@Builder
buildDiceFace() {
  Column() {
    if (this.currentValue === 1) {
      Text('●').fontSize(48).fontColor(this.dotColor)
    } else if (this.currentValue === 2) {
      Row() {
        Column() { Text('●').fontSize(24).fontColor(this.dotColor) }.width('50%')
        Column() { Text('●').fontSize(24).fontColor(this.dotColor) }.width('50%')
      }.width(120).justifyContent(FlexAlign.SpaceAround)
    } else if (this.currentValue === 3) {
      Row() {
        Column() { Text('●').fontSize(20).fontColor(this.dotColor) }.width('33%')
        Column() { Text('●').fontSize(24).fontColor(this.dotColor) }.width('33%')
        Column() { Text('●').fontSize(20).fontColor(this.dotColor) }.width('33%')
      }.width(140).justifyContent(FlexAlign.SpaceAround)
    } else if (this.currentValue === 4) {
      Column({ space: 12 }) {
        Row({ space: 24}) {
          Text('●').fontSize(24).fontColor(this.dotColor)
          Text('●').fontSize(24).fontColor(this.dotColor)
        }
        Row({ space: 24}) {
          Text('●').fontSize(24).fontColor(this.dotColor)
          Text('●').fontSize(24).fontColor(this.dotColor)
        }
      }
    } else if (this.currentValue === 5) {
      Column({ space: 10 }) {
        Row({ space: 18 }) {
          Text('●').fontSize(20).fontColor(this.dotColor)
          Text('●').fontSize(20).fontColor(this.dotColor)
          Text('●').fontSize(20).fontColor(this.dotColor)
        }
        Row({ space: 18 }) {
          Text('').fontSize(20)
          Text('●').fontSize(24).fontColor(this.dotColor)
          Text('').fontSize(20)
        }
        Row({ space: 18 }) {
          Text('●').fontSize(20).fontColor(this.dotColor)
          Text('●').fontSize(20).fontColor(this.dotColor)
          Text('●').fontSize(20).fontColor(this.dotColor)
        }
      }
    } else {
      Column({ space: 8 }) {
        Row({ space: 14 }) {
          Text('●').fontSize(20).fontColor(this.dotColor)
          Text('●').fontSize(20).fontColor(this.dotColor)
          Text('●').fontSize(20).fontColor(this.dotColor)
        }
        Row({ space: 14 }) {
          Text('●').fontSize(20).fontColor(this.dotColor)
          Text('●').fontSize(20).fontColor(this.dotColor)
          Text('●').fontSize(20).fontColor(this.dotColor)
        }
        Row({ space: 14 }) {
          Text('●').fontSize(20).fontColor(this.dotColor)
          Text('●').fontSize(20).fontColor(this.dotColor)
          Text('●').fontSize(20).fontColor(this.dotColor)
        }
      }
    }
  }
  .width(160)
  .height(160)
  .justifyContent(FlexAlign.Center)
}
3.5 构建界面
步骤 6: 在 build() 方法中组装 UI:
build() {
  Column() {
    // 标题
    Text('🎲 骰子模拟器')
      .fontSize(26)
      .fontWeight(FontWeight.Bold)
      .margin({ top: 30, bottom: 4 })

    Text(`已投掷 ${this.totalRolls} 次`)
      .fontSize(14)
      .fontColor('#8E8E93')
      .margin({ bottom: 20 })

    // 骰子
    Column() {
      this.buildDiceFace()
    }
    .width(180)
    .height(180)
    .backgroundColor(this.diceColor)
    .borderRadius(24)
    .border({ width: 3, color: '#D1D1D6' })
    .shadow({ radius: 12, color: '#20000000', offsetY: 4 })
    .opacity(this.isRolling ? 0.7 : 1.0)
    .onClick(() => {
      this.rollDice();
    })

    // 按钮
    Button(this.isRolling ? '🎲 投掷中...' : '🎲 掷骰子')
      .type(ButtonType.Capsule)
      .width(200)
      .height(50)
      .backgroundColor('#007AFF')
      .margin({ top: 24 })
      .enabled(!this.isRolling)
      .onClick(() => {
        this.rollDice();
      })

    // 主题
    Text('选择主题')
      .fontSize(14)
      .fontColor('#8E8E93')
      .margin({ top: 20, bottom: 8 })

    Row({ space: 10 }) {
      ForEach(this.diceColors, (theme: DiceTheme) => {
        Row() {
          Text(theme.name)
            .fontSize(11)
            .fontColor(theme.bg === '#1C1C1E' ? '#FFFFFF' : '#1C1C1E')
        }
        .width(60)
        .height(28)
        .backgroundColor(theme.bg)
        .borderRadius(14)
        .border({
          width: this.diceColor === theme.bg ? 2 : 1,
          color: this.diceColor === theme.bg ? '#007AFF' : theme.border
        })
        .justifyContent(FlexAlign.Center)
        .onClick(() => {
          this.diceColor = theme.bg;
          this.dotColor = theme.dot;
        })
      })
    }

    // 历史
    if (this.history.length > 0) {
      Row() {
        Text('📋 投掷记录')
          .fontSize(16)
          .fontWeight(FontWeight.Bold)
        Blank()
        Text('清空')
          .fontSize(13)
          .fontColor('#FF3B30')
          .onClick(() => {
            this.history = [];
            this.totalRolls = 0;
          })
      }
      .width('100%')
      .margin({ top: 20, bottom: 8 })

      Column({ space: 4 }) {
        ForEach(this.history, (record: DiceRecord) => {
          Row() {
            Text(`🎲 ${record.value}`)
              .fontSize(18)
              .fontWeight(FontWeight.Bold)
            Blank()
            Text(record.time)
              .fontSize(12)
              .fontColor('#8E8E93')
          }
          .width('100%')
          .padding(10)
          .backgroundColor('#F2F2F7')
          .borderRadius(10)
        })
      }
      .width('100%')
    }
  }
  .width('100%')
  .height('100%')
  .backgroundColor('#FFFFFF')
  .padding(20)
}
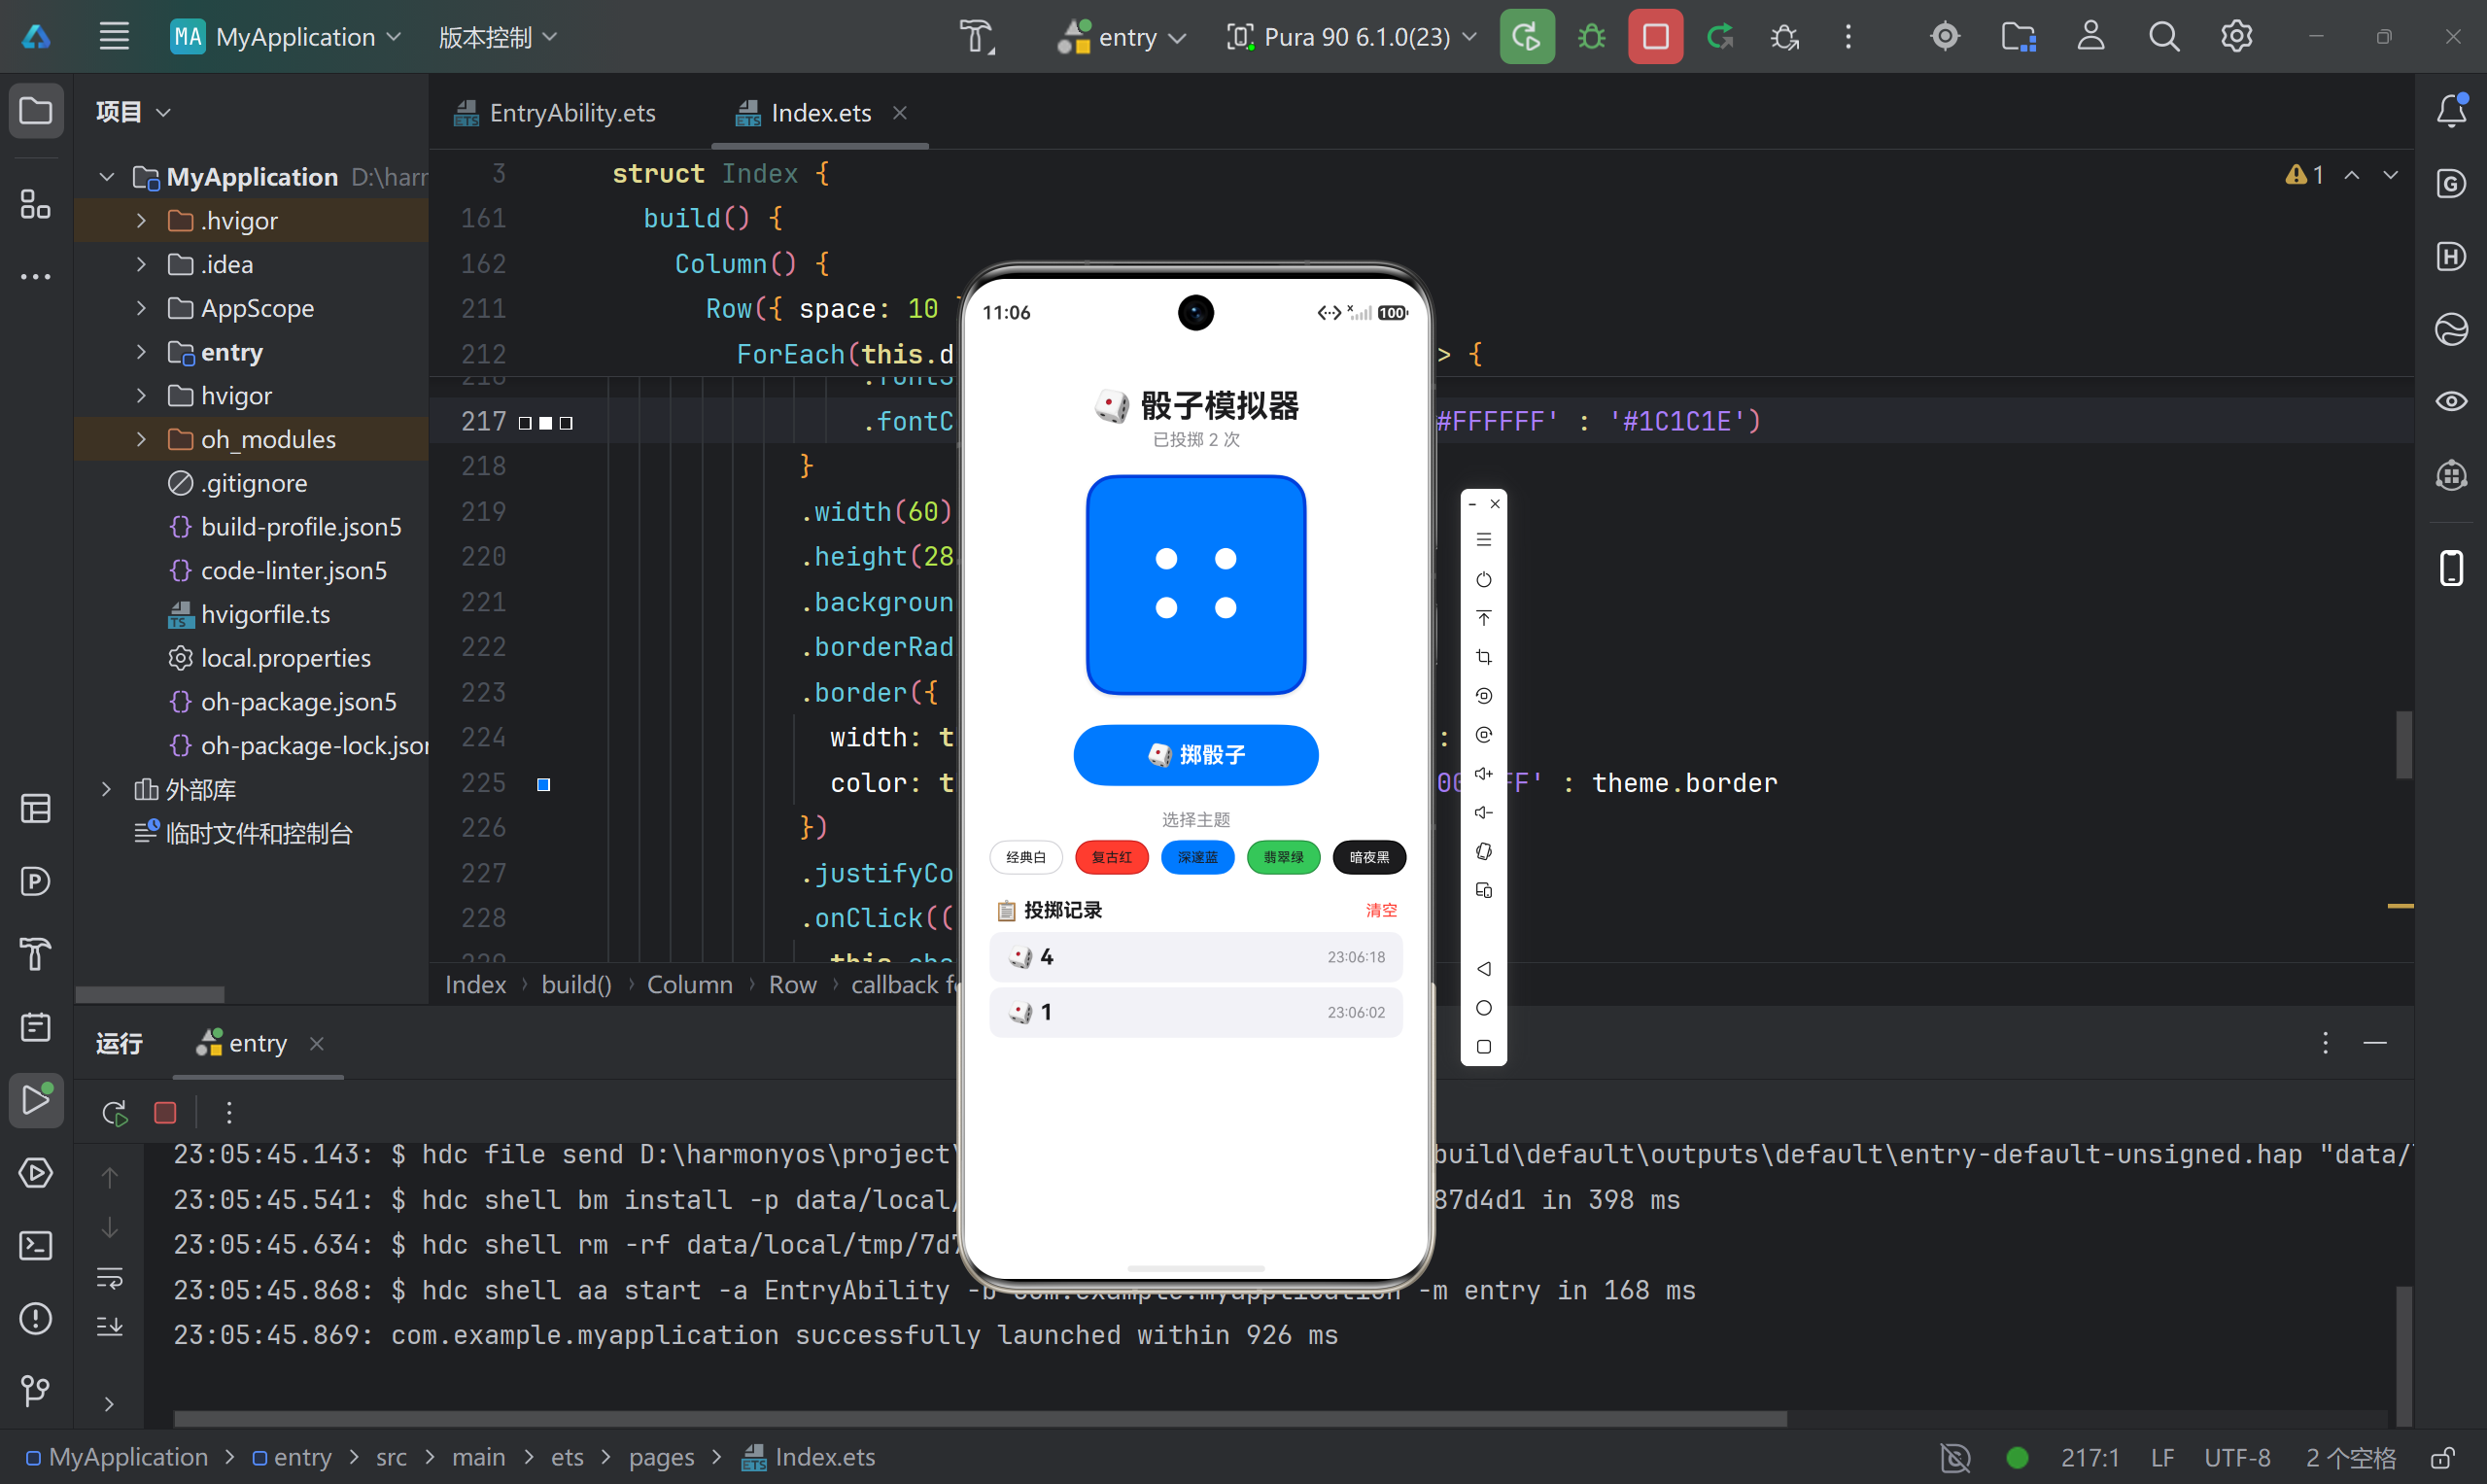
四、运行测试
五、功能演示
5.1 投掷骰子
点击骰子或按钮,骰子快速翻滚 8 次后停下。
5.2 切换主题
点击主题按钮,骰子颜色立即切换。
| 主题 | 颜色 |
|---|---|
| 经典白 | 白底黑点 |
| 复古红 | 红底白点 |
| 深邃蓝 | 蓝底白点 |
| 翡翠绿 | 绿底白点 |
| 暗夜黑 | 黑底白点 |
5.3 查看历史
自动记录最近 10 次投掷,显示点数和时间。
六、常见问题
Q1: 点击没反应?
A: 检查 isRolling 状态,确保动画结束后才能再次点击。
Q2: 历史记录不显示?
A: 检查 history.length > 0 条件,确保有数据。
Q3: 主题切换不生效?
A: 检查 diceColor 和 dotColor 是否都更新了。
Q4: 如何修改动画速度?
A: 调整 setInterval 的间隔时间:
- 更快:改小间隔(如 40ms)
- 更慢:改大间隔(如 100ms)
Q5: 如何添加更多主题?
A: 在 diceColors 数组中添加:
{ name: '紫罗兰', bg: '#AF52DE', dot: '#FFFFFF', border: '#8B3AA8' }
七、项目总结
核心知识点
| 知识点 | 说明 |
|---|---|
| @State | 状态管理 |
| @Builder | UI 复用 |
| setInterval | 动画实现 |
| ForEach | 列表渲染 |
| if | 条件渲染 |
项目信息:
- SDK:API 23
- 开发工具:DevEco Studio 5.0+

讨论HarmonyOS开发技术,专注于API与组件、DevEco Studio、测试、元服务和应用上架分发等。
更多推荐


 4
4 0
0- 0


 已为社区贡献52条内容

所有评论(0)