HarmonyOS NEXT实现文字和图片的方式和AI对话
作品效果:
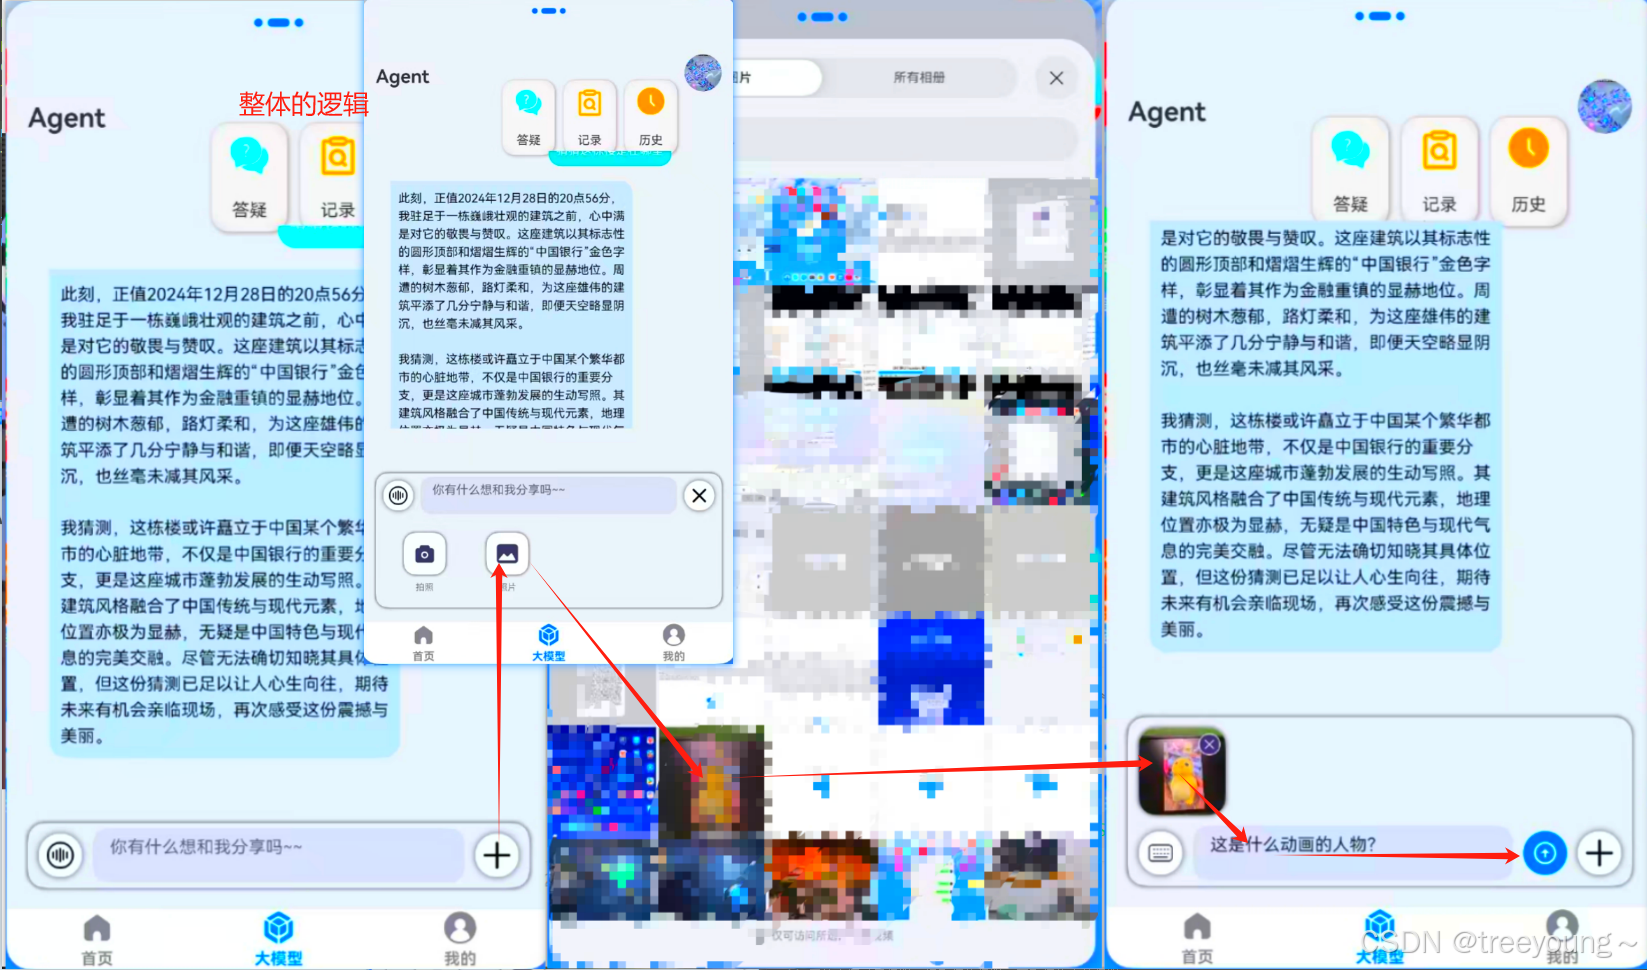
大模型的回答:
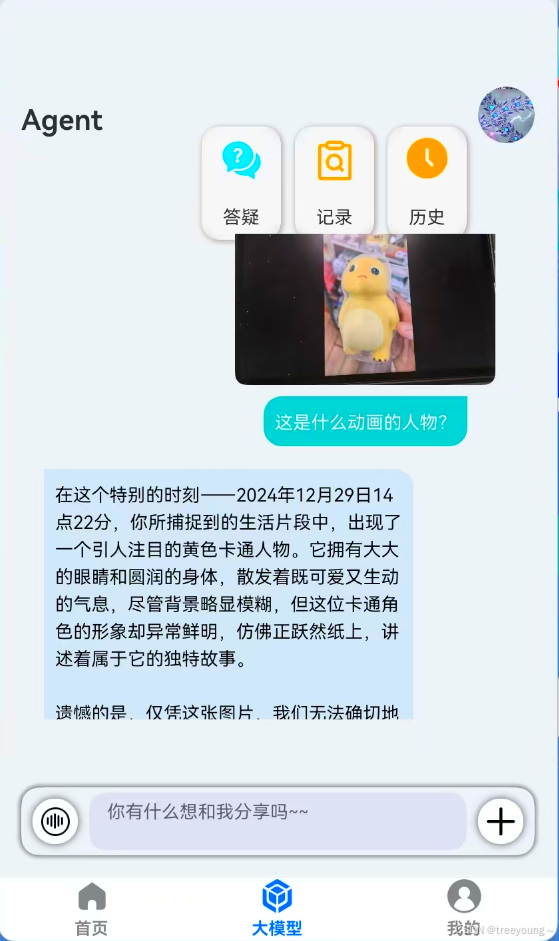
大家根据上面的图片就大概知道了这是一个怎么样的业务逻辑
总的来说:首先设计好数据结构
这里是两个人在对话,一个是用户User另外一个是机器人Agent
设计好ViewModel
现在分析如何实现上述效果:
STEP1:点击右边的十字,显示更多工具
 这里描述的是右边的十字按钮,点击时改变ViewModel isMoreFunction
// 这里描述的是右边的十字按钮,点击时改变ViewModel isMoreFunction
          Row() {
            Image($r("app.media.ic_public_agent_more_plus_mark"))
              .width(25)
              .height(25)
              .borderRadius(25)
              .fillColor(Color.Black)
              .rotate({ angle: this.rotateAngle })
          }
          .width(40)
          .height(40)
          .borderRadius(40)
          .justifyContent(FlexAlign.Center)
          .backgroundColor(Color.White)
          .shadow({
            radius: 10,
            color: $r("app.color.agent_btm_func_item_icon_gray"),
            offsetX: 0,
            offsetY: 0
          })
          .onClick(() => {
            // 设置属性动画
            this.getUIContext()?.animateTo({ curve: curves.springMotion() }, async () => {
              // 打开任务栏
              this.isMoreFunction = !this.isMoreFunction
              this.rotateAngle = this.isMoreFunction ? 45 : 0
              if (this.isMoreFunction) {
                // 关闭键盘
                await inputMethod.getController().stopInputSession()
              }
            })
          })
这里使用if条件渲染下面的结构:
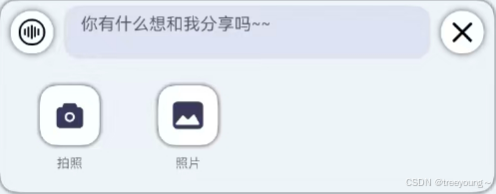
代码如下:
 @State isMoreFunction: boolean = false // 是否展现底部的多功能栏

......

// 底部结构
      if (this.isMoreFunction) {
        Row() {
          GridRow({ columns: 4 }) {
            ForEach(this.bottomFunctionList, (item: PopupComp) => {
              GridCol() {
                this.getBottomCard(item)
              }.height(100)
            })
          }
          .width('100%')
        }
        .margin({ top: 20 })
        .width($r("app.string.full_percent"))
        .padding({ left: 10, right: 10 })
      }
点击图片按钮的时候就会弹出弹窗,这里我使用的是我之前封装好的工具类MediaOperate的getImageUrisFromAlbum方法,打开系统相册,获取照片
  /**
   * 选择照片
   * @param photoNum
   * @returns
   */
  static async getImageUrisFromAlbum(photoNum: number = 1): Promise<string> {
    try {
      const photo = new picker.PhotoViewPicker()
      const result = await photo.select({
        maxSelectNumber: photoNum,
        MIMEType: picker.PhotoViewMIMETypes.IMAGE_TYPE
      })
      return result.photoUris[0]
    } catch (error) {
      AlertDialog.show({
        message: '选取相册图片uris失败:\n' + JSON.stringify(error, null, 2)
      })
      return ''
    }
  }
并且将照片存储到状态变量中去
@State @Watch('getPlaceHolder') selectedUri: string = '' // 当前选中的图片的地址

//......
this.selectedUri = await MediaOperate.getImageUrisFromAlbum(1)
然后我们就拿到了请求大模型的照片了
如图: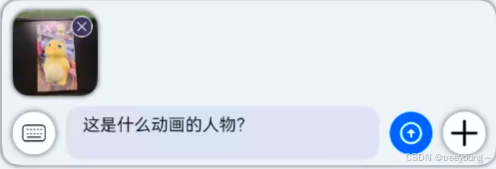
然后就是老生常谈的输入文字了,这里我不过多赘述了
可以参考官网文档:文本与输入-ArkTS组件-ArkUI(方舟UI框架)-应用框架 - 华为HarmonyOS开发者 (huawei.com)
只需要将输入的文字也存储到状态变量里面去即可:下面的代码仅供参考
  // 输入文字的系统组件
            TextArea({
              placeholder: this.placeHolder,
              text: this.inputTextContent
            })
              .height(50)
              .textOverflow(TextOverflow.Ellipsis)
              .layoutWeight(1)
              .borderRadius(14)
              .backgroundColor($r("app.color.agent_textarea_background_color"))
              .id('input')
              .focusable(true)
              .defaultFocus(true)
              .onFocus(() => {
                // 聚焦键盘的时候,隐藏底部功能栏
                this.isMoreFunction = false
                this.rotateAngle = 0
                // 消息列表滚动到底部
                this.scroller.scrollEdge(Edge.Bottom)
              })
              .onChange((value) => {
                this.inputTextContent = value
              })
              .onSubmit(() => {
                this.sendTextMessage(this.inputTextContent)
                this.inputTextContent = ''
})就这样我们拿到了图片和用户输入的文字了
STEP2:发送请求:
这里我使用的是原生的http请求(参考官方文档:@ohos.net.http (数据请求)-ArkTS API-Network Kit(网络服务)-网络-系统 - 华为HarmonyOS开发者 (huawei.com))
这里呢,我封装了一个请求工具类:
贴给大家参考一下:(涉及我的保密信息,部分不显示)代码太长了:仅供参考!!!
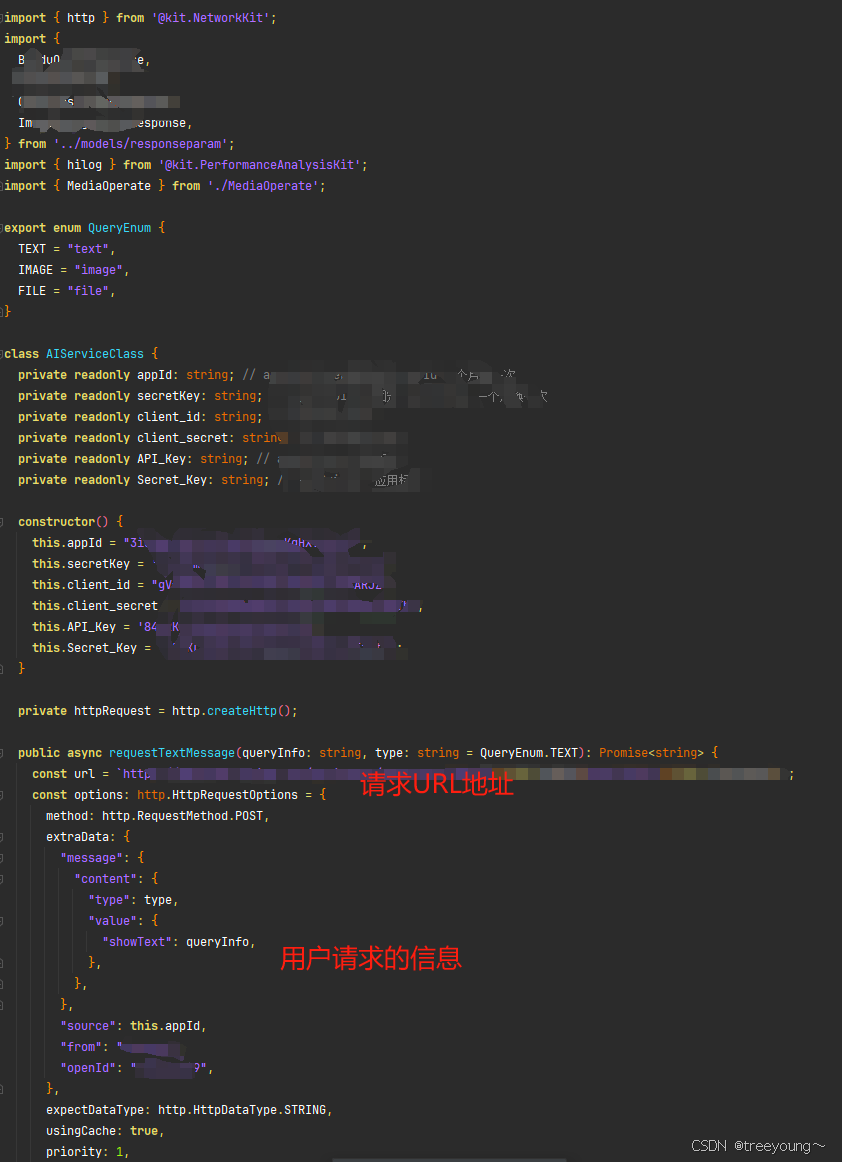
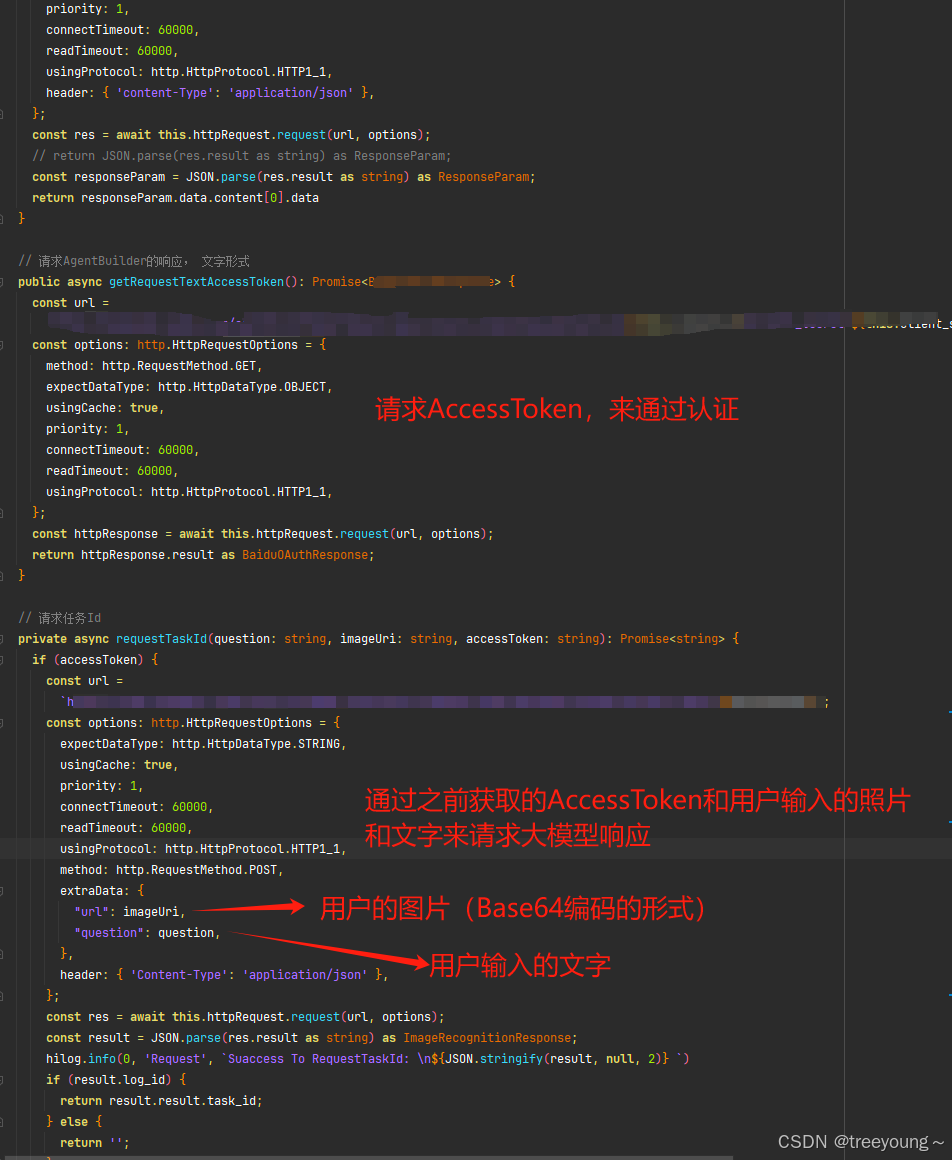
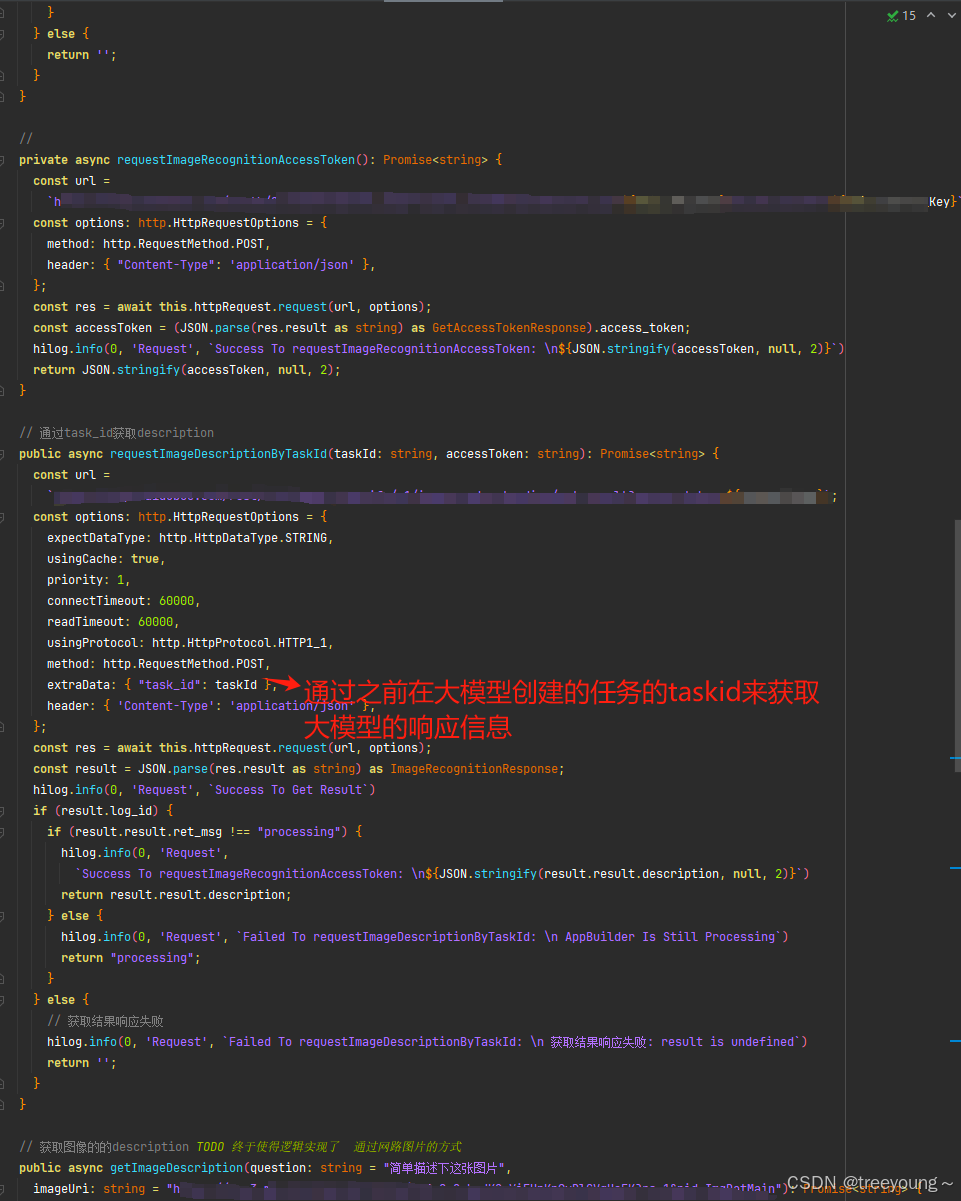
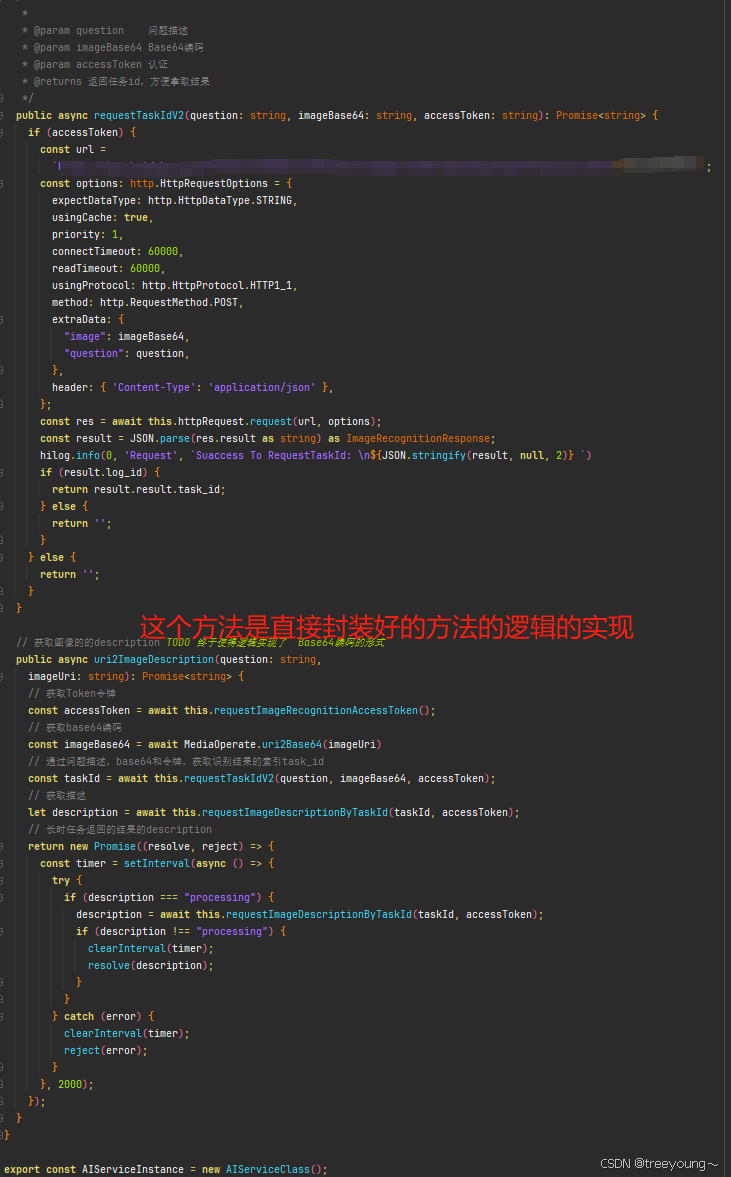
然后我们就能拿到用户发送的信息和大模型的响应信息了:
最后我们渲染一下就可以了:
效果: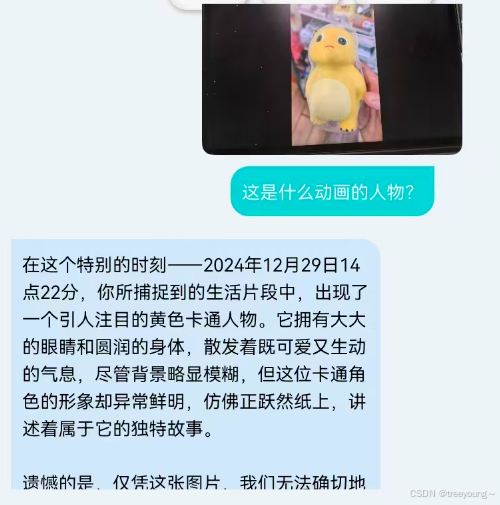
首先是将用户的的大模型的信息更新到状态变量里面去,这里怎么更新前面讲了,也不做过多描述。
  @State rcdMsgList: MessageInfoModel[] = [] // 记录生活信息数据
  @State qstMsgList: MessageInfoModel[] = [] // 问题模式信息数据
  @State showMsgList: MessageInfoModel[] = [] // 需要展示的数据信息
// 发送信息给大模型
async sendTextMessage(inputContent: string) {
if (this.agentMode === AgentModeEnum.Record) {
const tempUri = this.selectedUri
// 删除选中的图片
this.selectedUri = ''
// 分享生活
const msgStored = new MessageInfoModel({
sender: currentUser,
receiver: currentAgent,
content: inputContent,
sendTimeStamp: Date.now(),
sourceFilePath: tempUri, // 照片的地址
type: tempUri === '' ? MessageTypeEnum.TEXT : MessageTypeEnum.IMAGE // 照片
} as MessageInfo)
hilog.info(0, 'AgentMessage', `AgentMessage Info: ${JSON.stringify(msgStored, null, 2)}`)
// 更新到记录生活的列表里面去,展示UI界面
this.rcdMsgList.push(msgStored)
// 添加信息到数据库里面去
await relationalDatabase.addMessage(msgStored, TABLE_RECORD_MESSAGE)
this.scroller.scrollEdge(Edge.Bottom)
let requestContent = inputContent
// 辅助记录生活的语句
requestContent =
'帮我记录我的生活:\n' + `现在是` + getCurrentTimeStringFormat(Date.now()) + ',\n' + inputContent
// 用于辅助询问信息的对象
const msgAsked = new MessageInfoModel({
sender: currentUser,
receiver: currentAgent,
content: requestContent,
sendTimeStamp: Date.now(),
sourceFilePath: tempUri, // 照片的地址
type: tempUri === '' ? MessageTypeEnum.TEXT : MessageTypeEnum.IMAGE // 照片
} as MessageInfo)
// 更新UI
this.showMsgList = this.rcdMsgList
this.getResponseMessage(msgAsked)
} else {
const tempUri = this.selectedUri
// 删除选中的图片
this.selectedUri = ''
// 解答疑惑
const msg = new MessageInfoModel({
sender: currentUser,
receiver: currentAgent,
content: inputContent,
sendTimeStamp: Date.now(),
sourceFilePath: tempUri, // 照片的地址
type: tempUri === '' ? MessageTypeEnum.TEXT : MessageTypeEnum.IMAGE // 照片
} as MessageInfo)
// 更新到解答疑问的列表里面去,展示UI界面
this.qstMsgList.push(msg)
// 添加信息到数据库里面去
await relationalDatabase.addMessage(msg, TABLE_QUESTION_MESSAGE)
// 滑动到最低端
this.scroller.scrollEdge(Edge.Bottom)
// 构建问题语句,这个是根据用户输入的信息进行优化的prompt
// 用户原始的输入的信息将通过inputContent存储到数据库中去
// 问题语句
let requestContent = inputContent
requestContent = '我有一个问题想问你:\n' + inputContent
// 用于辅助询问信息的对象
const msgAsked = new MessageInfoModel({
sender: currentUser,
receiver: currentAgent,
content: requestContent,
sendTimeStamp: Date.now(),
sourceFilePath: tempUri, // 照片的地址
type: tempUri === '' ? MessageTypeEnum.TEXT : MessageTypeEnum.IMAGE // 照片
} as MessageInfo)
// 更新UI
this.showMsgList = this.qstMsgList
// 获取Agent响应
await this.getResponseMessage(msgAsked)
}
}在这里主要讲讲封装信息的组件:
信息列表:这里就是通过showMsgList里面的信息渲染出来的
//聊天内容
      List({ space: 20, scroller: this.scroller }) {
        ForEach(this.showMsgList, (item: MessageInfoModel) => {
          ListItem() {
            // 单个消息UI                                        解决this丢失问题
            MessageComp({ item, popupBuilder: this.popupBuilder.bind(this), showPopup: this.showPopup })
          }
        })
      }
      .layoutWeight(1)
      .width('100%')
      .scrollBar(BarState.Off)
      .padding({ top: 20, bottom: 60 })
      .onClick(async () => {
        // 关闭键盘
        await inputMethod.getController().stopInputSession()
      })
最后就是自定义封装的Message了:
@Component
struct MessageComp {
  @State item: MessageInfoModel = new MessageInfoModel({} as MessageInfo)
  @State showPopup: boolean = false
  @State popupCompList: PopupComp[] = []
  // 使用自定义组件的自定义构建函数初始化@BuilderParam
  @BuilderParam popupBuilder: () => void = this.doNothingBuilder; // list: PopupComp[]

  @Builder
  doNothingBuilder() {
  };

  build() {
    Row() {
      Row() {
        Column({ space: 10 }) {
          if (this.item.sourceFilePath && this.item.sender.username === currentUser.username) {
            Image(this.item.sourceFilePath)
              .width(230)
              .borderRadius(10)
              .margin({ left: 25, right: 25 })

          }
          // 消息类型渲染
          Text(this.item.content)
            .backgroundColor(this.item.sender.user_id === currentUser.user_id ? $r('app.color.user_massage_color') :
            $r('app.color.agent_message_color'))
            .fontColor(this.item.sender.user_id === currentUser.user_id ? Color.White : Color.Black)
            .margin({ left: 10, right: 10 })
            .borderRadius({
              topLeft: this.item.sender.user_id === currentUser.user_id ? 16 : 0,
              topRight: this.item.sender.user_id === currentUser.user_id ? 0 : 16,
              bottomLeft: 16,
              bottomRight: 16
            })
            .lineHeight(24)
            .padding(10)
            .bindPopup(this.showPopup, {
              builder: this.popupBuilder,
              popupColor: Color.White,
              backgroundBlurStyle: BlurStyle.NONE,
              onStateChange: (event) => {
                // 当手指点了其他位置 关闭状态
                this.showPopup = event.isVisible
              }
            })
        }
      }
      .layoutWeight(4)
      .justifyContent(this.item.sender.user_id === currentUser.user_id ? FlexAlign.End : FlexAlign.Start)

      // 站位
      Text().layoutWeight(1)
    }
    .width('100%')
    .padding({ left: 10, right: 10 })
    .direction(this.item.sender.user_id === currentUser.user_id ? Direction.Rtl : Direction.Ltr)
    .gesture(
      // 长按显示弹层,操作信息
      LongPressGesture()
        .onAction(() => {
          this.showPopup = true
        }))
  }
}

export { MessageComp }
讨论HarmonyOS开发技术,专注于API与组件、DevEco Studio、测试、元服务和应用上架分发等。
更多推荐



 11
11 0
0- 0


 已为社区贡献6条内容

所有评论(0)