HarmonyOS 6.1 网络请求实战:从 createHttp 到数据驱动的完整链路
基于 NetworkDemo 实战验证,覆盖 HTTP 请求全流程、错误处理、请求日志,附带完整可运行代码
写在前面
做网络请求这事儿,在 HarmonyOS 上比在 Android 上蛋疼不少。Android 有 Retrofit、OkHttp 一堆成熟的库,HarmonyOS 就一个 @kit.NetworkKit 的 http 模块,用法偏底层,没有自动 JSON 解析,没有拦截器,连请求日志都得自己打。
但好消息是,底层意味着可控。你知道每一步在干什么,出了问题能直接定位。这篇文章就把我用 http.createHttp() 做网络请求踩过的坑全列出来。
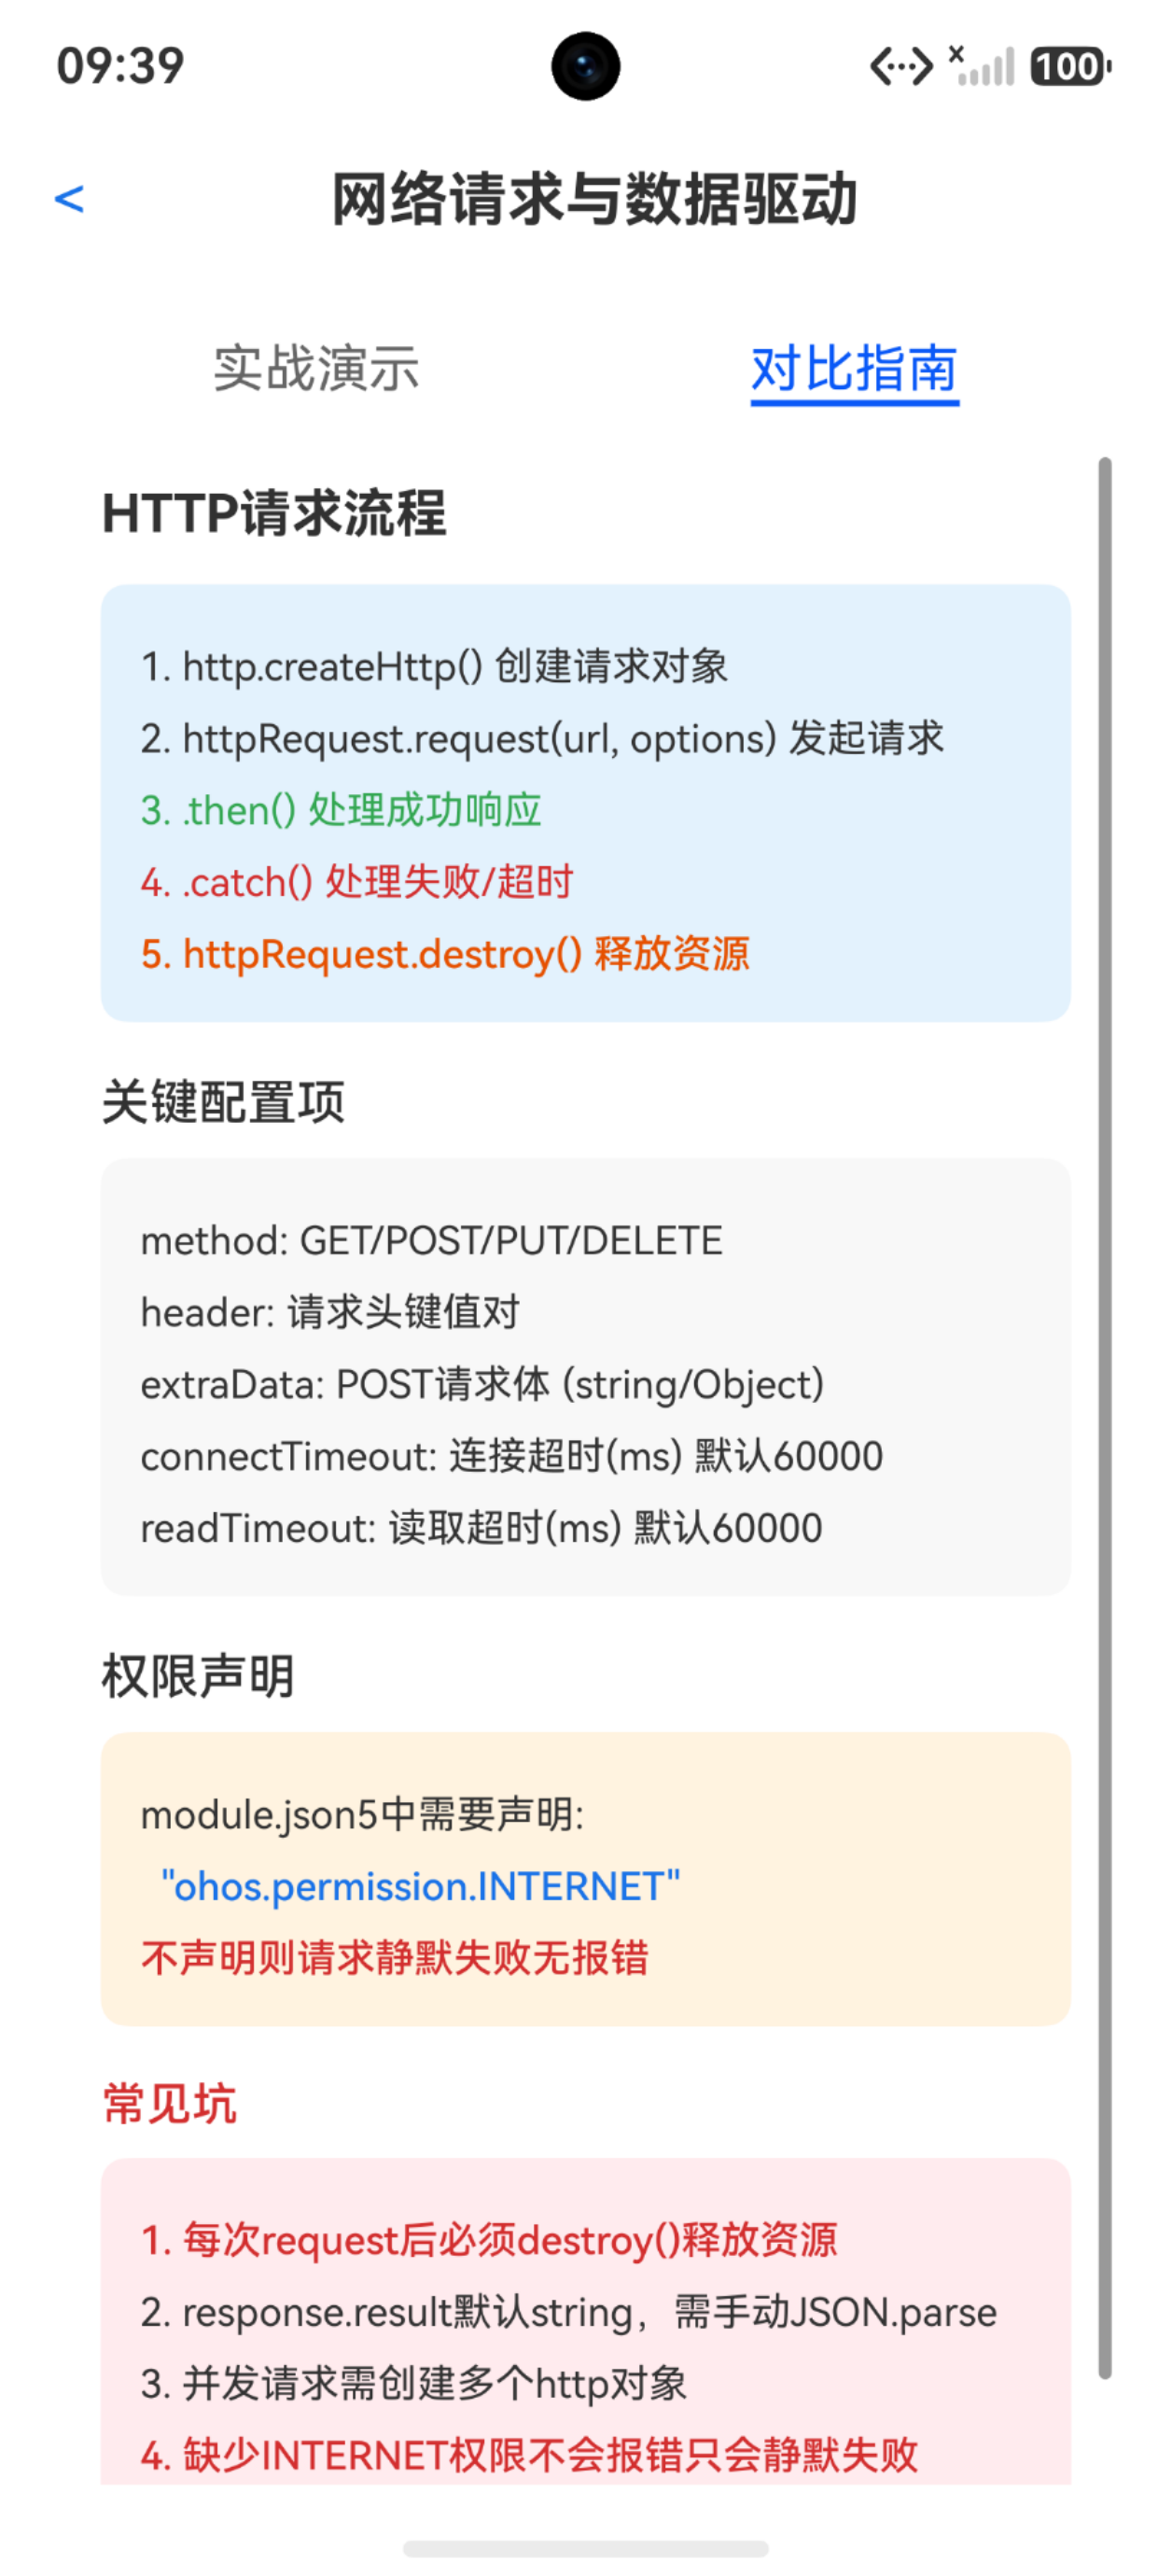
一、HTTP 请求五步流程
先说清楚完整流程,后面再逐个展开:
import { http } from '@kit.NetworkKit'

// 1. 创建请求对象
const httpRequest = http.createHttp()

// 2. 发起请求
httpRequest.request(url, {
  method: http.RequestMethod.GET,
  header: { 'Content-Type': 'application/json' },
  connectTimeout: 10000,
  readTimeout: 10000
}).then((response: http.HttpResponse) => {
  // 3. 处理成功响应
  const result: string = response.result as string
  const data = JSON.parse(result)
  // ...
}).catch((err: Error) => {
  // 4. 处理失败
  console.error(err.message)
}).finally(() => {
  // 5. 释放资源(必须!)
  httpRequest.destroy()
})
看起来不复杂对吧?但每一步都有坑。
二、踩坑一:不 destroy() 就内存泄漏
http.createHttp() 创建的请求对象是有限资源。如果你不发 destroy(),这个对象就一直占着内存和连接。连续发几十个请求不 destroy,内存直接飙上去。
必须在请求结束后调用 destroy(),不管是 then 还是 catch:
httpRequest.request(url, options)
  .then((response) => {
    // 处理响应
    httpRequest.destroy()  // then 里也要 destroy
  })
  .catch((err) => {
    // 处理错误
    httpRequest.destroy()  // catch 里也要 destroy
  })
更安全的写法是用 finally,但 ArkTS 的 Promise 没有 finally……那就 then 和 catch 里都写一遍。麻烦但必须。
三、踩坑二:缺少 INTERNET 权限 = 静默失败
这个坑坑了我一整个下午。请求发出去,then 不进,catch 也不进,就好像从来没发过请求一样。最后发现是 module.json5 里忘了声明 ohos.permission.INTERNET。
关键点:缺少权限不会报错,不会抛异常,就是静默失败。 连 hilog 都看不到错误信息。
// module.json5
{
  "module": {
    "requestPermissions": [
      { "name": "ohos.permission.INTERNET" }
    ]
  }
}
如果你发现网络请求"发了没反应",第一件事检查权限声明。
四、踩坑三:response.result 默认是 string
Android 的 Retrofit 能自动把 JSON 反序列化成对象,HarmonyOS 的 http 模块不行。response.result 默认返回 string,你得自己 JSON.parse:
.then((response: http.HttpResponse) => {
  if (response.responseCode === 200) {
    const result: string = response.result as string
    const parsed: Object = JSON.parse(result)
    this.posts = parsed as PostItem[]
  }
})
注意 as string 这个类型转换。ArkTS strict 模式下不允许随意用 as,但 response.result 的类型是 string | Object,转成 string 是合理的。不过如果服务器返回的不是 JSON 字符串,这里会崩。更安全的做法是先判断类型。
五、踩坑四:并发请求需要多个 http 对象
一个 httpRequest 对象同时只能发一个请求。如果你需要并发(比如同时请求列表和详情),必须创建多个对象:
// 错误:同一个对象发两个请求,第二个会覆盖第一个
const httpRequest = http.createHttp()
httpRequest.request(url1, options1).then(...)
httpRequest.request(url2, options2).then(...)

// 正确:每个请求创建独立对象
const req1 = http.createHttp()
req1.request(url1, options1).then(() => { req1.destroy() })

const req2 = http.createHttp()
req2.request(url2, options2).then(() => { req2.destroy() })
六、请求配置项详解
httpRequest.request(url, {
  method: http.RequestMethod.GET,     // GET/POST/PUT/DELETE
  header: {                            // 请求头
    'Content-Type': 'application/json',
    'Authorization': 'Bearer ' + token
  },
  extraData: {                         // POST 请求体(string 或 Object)
    name: 'test',
    value: 123
  },
  connectTimeout: 10000,               // 连接超时 10秒
  readTimeout: 10000                   // 读取超时 10秒
})
extraData 的坑
GET 请求不能传 extraData,传了会被忽略。POST 请求的 extraData 如果是 Object,会自动 JSON.stringify。如果是 string,就原样发送。这个行为文档写得不清楚,实测出来的。
七、请求日志模式
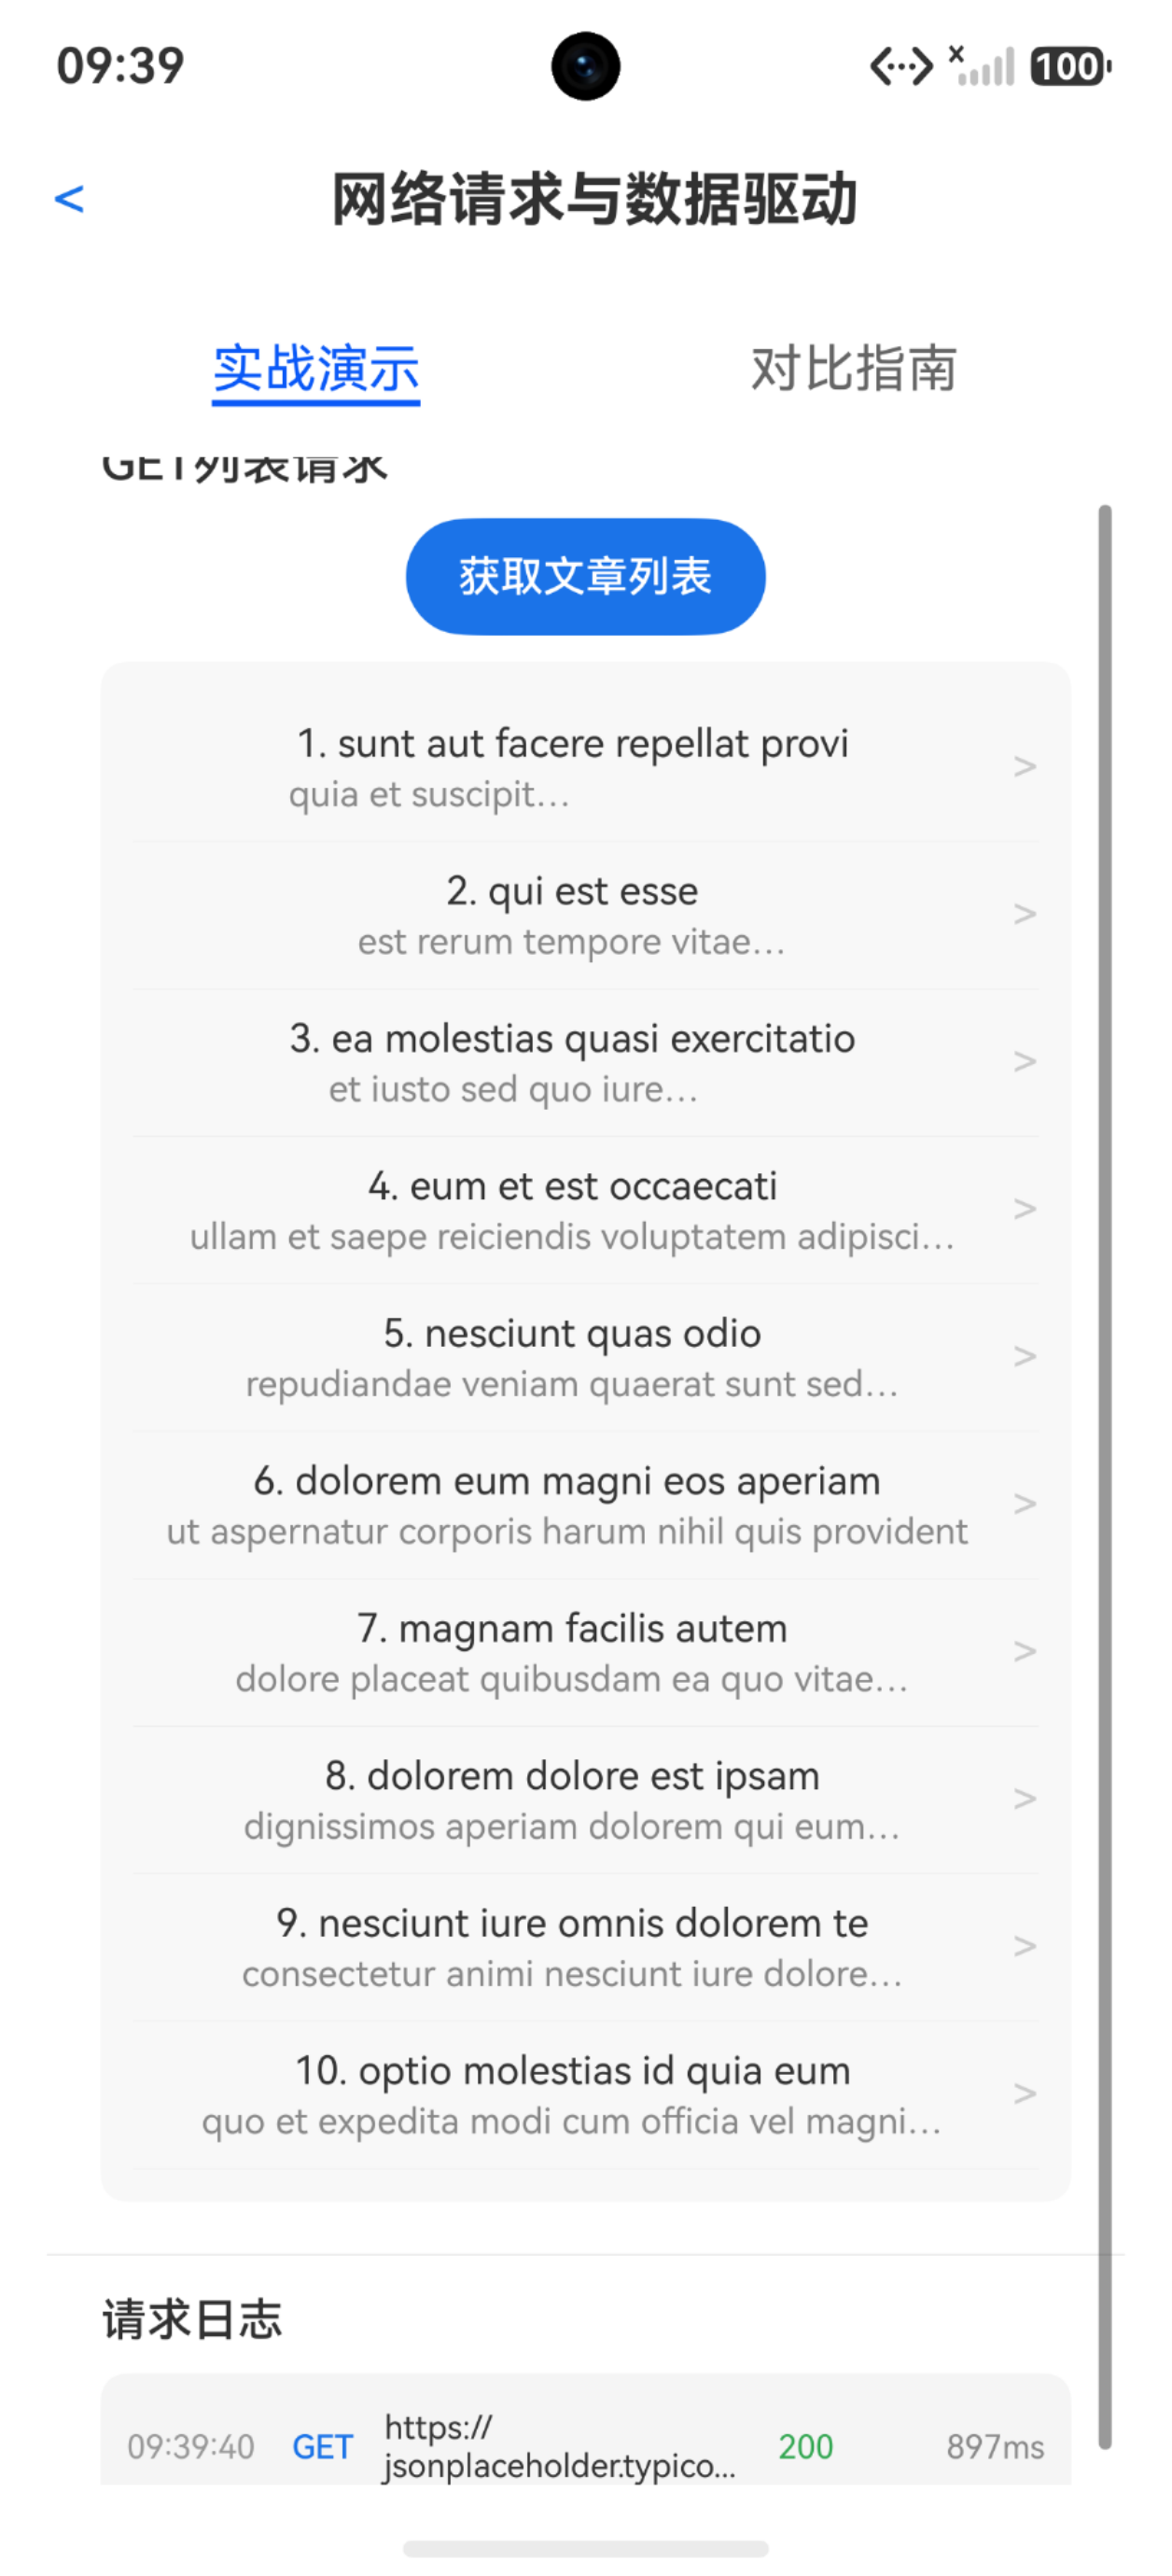
线上排查问题,请求日志是命根子。Demo 里实现了完整的日志记录:
private requestLogs: RequestLog[] = []

private addLog(url: string, method: string, status: number, duration: number): void {
  const now: Date = new Date()
  const time: string = now.getHours().toString().padStart(2, '0') + ':' +
    now.getMinutes().toString().padStart(2, '0') + ':' +
    now.getSeconds().toString().padStart(2, '0')
  const log: RequestLog = { url: url, method: method, status: status, duration: duration, time: time }
  this.requestLogs = [log].concat(this.requestLogs)
}
每次请求记录 URL、方法、状态码、耗时。这个模式建议所有项目都做,哪怕只是开发阶段用。
耗时计算
const startTime: number = Date.now()
httpRequest.request(url, options).then((response) => {
  const duration: number = Date.now() - startTime
  this.addLog(url, 'GET', response.responseCode, duration)
})
注意 Date.now() 要在 request() 调用之前获取,不是在 then 回调里。then 回调是异步的,那时已经开始计算耗时了。
八、数据驱动:从网络数据到 UI
网络请求的最终目的是驱动 UI 更新。基本模式:
- 声明 @State 数据数组
- 请求成功后赋值
- ForEach 渲染列表
@State posts: PostItem[] = []

// 请求成功后
this.posts = parsed as PostItem[]

// UI 渲染
ForEach(this.posts, (post: PostItem) => {
  Row() {
    Column() {
      Text(post.id.toString() + '. ' + post.title.substring(0, 30))
        .fontSize(12).fontColor('#333333')
      Text(post.body.substring(0, 50))
        .fontSize(11).fontColor('#888888')
    }
  }
  .onClick(() => { this.fetchSinglePost(post.id) })
}, (post: PostItem) => post.id.toString())
注意 ForEach 的 key:用 post.id.toString() 作为唯一标识,不要省略。省略 key 会导致列表更新时全部重渲染,性能问题严重。
九、错误处理最佳实践
网络请求的错误分两类:
- HTTP 错误:服务器返回 4xx/5xx,在 then 里通过
response.responseCode判断 - 网络错误:超时、断网、DNS 解析失败,在 catch 里处理
.then((response: http.HttpResponse) => {
  if (response.responseCode === 200) {
    // 成功
  } else if (response.responseCode === 401) {
    // token 过期,跳转登录
  } else {
    // 其他 HTTP 错误
    this.errorMsg = 'HTTP ' + response.responseCode.toString()
  }
})
.catch((err: Error) => {
  // 网络层错误
  if (err.message.indexOf('timeout') >= 0) {
    this.errorMsg = '请求超时,请检查网络'
  } else {
    this.errorMsg = '网络错误: ' + err.message
  }
})
十、网络请求不会阻塞 UI
一个常见疑问:主线程发网络请求会不会卡 UI?不会。 httpRequest.request() 是异步的,底层用 native 线程执行网络 IO,不会阻塞 JS 主线程。所以短请求不需要放 TaskPool。
但如果请求后要做大量 JSON 解析(比如 5000 条记录的列表),解析本身可能卡 UI。这种情况应该用 TaskPool 做解析,参考第 09 篇 TaskPool 的内容。
写在最后
HarmonyOS 的网络模块虽然不如 Retrofit 好用,但胜在透明。每一行代码你都知道在干什么,出了问题能直接定位。不像 Retrofit 好多魔法的背后行为,出错的时候一脸懵。
建议所有网络请求都封装一层,至少把 destroy()、错误处理、日志记录统一起来。裸写 http.createHttp() 在大项目里维护成本太高。

讨论HarmonyOS开发技术,专注于API与组件、DevEco Studio、测试、元服务和应用上架分发等。
更多推荐

 0
0 0
0- 0


 已为社区贡献70条内容

所有评论(0)