HarmonyOS APP实战-基于Image Kit的图像处理APP - 第2篇:图片选择与显示
HarmonyOS APP实战-基于Image Kit的图像处理APP - 第2篇:图片选择与预览
1. 开篇
在上一篇中,我们完成了环境搭建与项目创建,配置了DevEco Studio开发环境,创建了名为ImageProcessor的HarmonyOS工程,并在module.json5中预留了文件读写所需的权限声明。项目骨架已经搭好,源代码中包含了基础的EntryAbility入口和空白的首页页面。
从本篇开始,我们将进入真正的功能开发。本篇要实现的是整个APP的入口操作——让用户从系统相册中选择图片,并将选中的图片以缩略图网格的形式呈现在屏幕上。这不仅是视觉交互的第一步,更是后续所有图片处理操作的数据来源基础。我们将封装三个核心模块:PhotoPickerService(选择图片服务)、ImageSourceUtils(图片解码工具)和ImageGridPage(图片网格页面),它们将协同完成从选择到展示的完整闭环。
2. 核心实现
2.1 基础配置:导入模块与权限声明
在开始编码前,我们需要确认项目已经添加了必要的依赖。在module.json5的requestPermissions中新增相册访问权限(PhotoViewPicker在API 11+无需单独权限,但为了兼容旧设备和数据访问,建议声明读取媒体文件权限)。同时,在代码中导入所需的系统模块。
src/main/module.json5 权限配置片段:
{
  "module": {
    "name": "entry",
    "type": "entry",
    "requestPermissions": [
      {
        "name": "ohos.permission.READ_MEDIA"
      }
    ]
  }
}
关键点说明:
- 尽管
PhotoViewPicker自带用户授权弹窗,但声明ohos.permission.READ_MEDIA可以确保后续需要直接读取文件时权限就绪。 ohos.permission.READ_MEDIA属于user_grant类型,需要动态弹窗申请。本APP仅在选择图片时触发,我们会在选择前动态请求。
导入依赖模块(在需要使用的地方添加):
import { photoAccessHelper } from '@kit.MediaLibraryKit'; // 仅作参考,实际使用PhotoViewPicker
import { photoViewPicker } from '@kit.MediaLibraryKit'; // PhotoViewPicker 所在模块
import { image } from '@kit.ImageKit'; // Image Kit 核心模块
import { fileIo } from '@kit.CoreFileKit'; // 文件操作
import { common } from '@kit.AbilityKit';
实际使用的API路径(基于官方文档):
PhotoViewPicker来自@ohos.multimedia.picker(API10+)或@kit.MediaLibraryKit(API11+)。image.createImageSource来自@ohos.multimedia.image或@kit.ImageKit。fileIo.openSync来自@ohos.file.fs。
2.2 核心逻辑:PhotoPickerService 与 ImageSourceUtils
我们首先封装一个服务类,负责调用系统选择器并返回选中文件的URI列表;然后编写一个工具类,将URI解码为像素图(PixelMap)缩略图。
src/main/ets/services/PhotoPickerService.ets:
import { photoViewPicker } from '@kit.MediaLibraryKit';
import { common } from '@kit.AbilityKit';
import { BusinessError } from '@kit.BasicServicesKit';

/**
 * 图片选择服务,封装 PhotoViewPicker 调用
 */
export class PhotoPickerService {
  private picker: photoViewPicker.PhotoViewPicker;

  constructor() {
    this.picker = new photoViewPicker.PhotoViewPicker();
  }

  /**
   * 打开系统相册选择图片,返回选中文件的URI数组
   * @param context UIAbility上下文,用于申请权限
   * @returns 返回选中的图片URI列表,如果用户取消则返回空数组
   */
  async pickPhotos(context: common.UIAbilityContext): Promise<string[]> {
    try {
      // 构建选择选项:限制最多选择50张,只显示图片类型
      const options: photoViewPicker.PhotoSelectOptions = {
        MIMEType: photoViewPicker.PhotoViewMIMETypes.IMAGE_TYPE, // 只选择图片
        maxSelectNumber: 50, // 最大50张
        isOriginal: false // 不选择原始图,提升速度
      };
      // 调用选择器,返回结果
      const result: photoViewPicker.PhotoSelectResult =
        await this.picker.select(options, context);
      // 取出选中的URI列表
      const uris: string[] = result.photoUris;
      console.info('PhotoPickerService: selected uris count = ' + uris.length);
      return uris;
    } catch (error) {
      const err: BusinessError = error as BusinessError;
      console.error('PhotoPickerService: pick failed, code = ' + err.code + ', msg = ' + err.message);
      return [];
    }
  }
}
关键点说明:
photoViewPicker.PhotoViewPicker是系统提供的图片选择器API,无需额外权限,系统会弹出用户授权界面。PhotoSelectOptions中的MIMEType设置为PhotoViewMIMETypes.IMAGE_TYPE只显示图片文件。isOriginal: false表示返回的是压缩后的缩略图URI,选择速度快,适合预览场景。如需原始大图,可设为true,但后续解码时需注意内存。
src/main/ets/utils/ImageSourceUtils.ets:
import { image } from '@kit.ImageKit';
import { fileIo } from '@kit.CoreFileKit';

/**
 * 图片解码工具类,提供URI转像素图(缩略图)功能
 */
export class ImageSourceUtils {
  /**
   * 根据文件URI创建解码后的缩略图 PixelMap
   * @param fileUri 文件URI,例如从 PhotoPickerService 得到
   * @param width 期望的缩略图宽度(px)
   * @param height 期望的缩略图高度(px)
   * @returns 解码后的 PixelMap,失败返回 undefined
   */
  static async decodeThumbnail(
    fileUri: string,
    width: number = 256,
    height: number = 256
  ): Promise<image.PixelMap | undefined> {
    let file: fileIo.File | undefined;
    try {
      // 打开文件获取文件描述符
      file = fileIo.openSync(fileUri, fileIo.OpenMode.READ_ONLY);
      const fd: number = file.fd;
      // 创建图片源对象
      const imageSource: image.ImageSource = image.createImageSource(fd);
      // 设置解码参数:输出缩略图尺寸
      const decodingOptions: image.DecodingOptions = {
        desiredSize: { width: width, height: height }, // 指定期望的宽高
        editable: true // 允许后续编辑(如裁剪)
      };
      // 同步解码得到 PixelMap
      const pixelMap: image.PixelMap = imageSource.createPixelMapSync(decodingOptions);
      // 释放图片源资源
      imageSource.release();
      return pixelMap;
    } catch (error) {
      console.error('ImageSourceUtils decode failed: ' + JSON.stringify(error));
      return undefined;
    } finally {
      // 关闭文件描述符
      if (file) {
        fileIo.closeSync(file);
      }
    }
  }
}
关键点说明:
- 使用
fileIo.openSync将URI转换为文件描述符,因为image.createImageSource接受文件描述符(fd)。fileIo.openSync的OpenMode.READ_ONLY表示只读打开。 image.createImageSource返回ImageSource对象,它是解码图片的入口。DecodingOptions中的desiredSize属性可以指定输出像素图的尺寸,这相当于“缩略图采样”,比解码再缩放更高效,且节省内存。createPixelMapSync是同步接口,不会阻塞主线程太久(小图)。也可以使用异步接口createPixelMap,但示例采用同步更简洁。
2.3 完整模块:ImageGridPage 页面
现在我们将选择服务与解码工具组合到页面中,实现点击按钮选择图片,并显示在Grid布局中。
src/main/ets/pages/ImageGridPage.ets:
import { PhotoPickerService } from '../services/PhotoPickerService';
import { ImageSourceUtils } from '../utils/ImageSourceUtils';
import { image } from '@kit.ImageKit';
import { common } from '@kit.AbilityKit';

@Component
export struct ImageGridPage {
  // 声明图片列表状态,每次选择后追加新图的PixelMap
  @State imageList: image.PixelMap[] = [];
  // 页面标题
  private title: string = '图片预览';

  // 常量:网格列数
  private readonly GRID_COLUMNS: number = 3;

  build() {
    Column() {
      // 顶部操作栏
      Row() {
        Text(this.title)
          .fontSize(24)
          .fontWeight(FontWeight.Bold)
          .padding({ left: 16 });
        Blank();
        Button('选择图片')
          .onClick(() => this.pickAndAddImages())
          .margin({ right: 16 })
      }
      .height(60)
      .width('100%')
      .backgroundColor('#F5F5F5')

      // 图片网格区域
      if (this.imageList.length === 0) {
        // 没有图片时显示提示
        Column() {
          Text('点击上方按钮从相册选择图片')
            .fontSize(16)
            .fontColor('#999999')
        }
        .layoutWeight(1)
        .justifyContent(FlexAlign.Center)
        .alignItems(HorizontalAlign.Center)
        .width('100%')
      } else {
        Grid() {
          ForEach(this.imageList, (item: image.PixelMap, index: number) => {
            GridItem() {
              Image(item)
                .width('100%')
                .aspectRatio(1) // 正方形显示
                .objectFit(ImageFit.Cover)
                .borderRadius(8)
            }
            .margin(4)
          }, (item: image.PixelMap, index: number) => index.toString())
        }
        .columnsTemplate('1fr '.repeat(this.GRID_COLUMNS))
        .rowsTemplate('1fr '.repeat(this.GRID_COLUMNS))
        .columnsGap(4)
        .rowsGap(4)
        .padding(4)
        .layoutWeight(1)
        .width('100%')
      }
    }
    .width('100%')
    .height('100%')
  }

  /**
   * 选择图片并添加到列表
   */
  private async pickAndAddImages() {
    // 获取UIAbility上下文(在页面中通过getContext获取)
    const context: common.UIAbilityContext = getContext(this) as common.UIAbilityContext;
    const service = new PhotoPickerService();
    const uris: string[] = await service.pickPhotos(context);
    if (uris.length === 0) {
      // 用户取消或选择失败
      return;
    }
    // 遍历URI,解码缩略图并添加到列表
    for (const uri of uris) {
      const thumb: image.PixelMap | undefined = await ImageSourceUtils.decodeThumbnail(uri, 256, 256);
      if (thumb) {
        // 追加到状态数组,触发UI刷新
        this.imageList = [...this.imageList, thumb];
      }
    }
  }
}
关键点说明:
- 网格使用
Grid容器,columnsTemplate设置为'1fr 1fr 1fr'(3列),用字符串重复生成。 ForEach遍历imageList,每个GridItem内使用Image(pixelMap)显示像素图。objectFit(ImageFit.Cover)确保图片填满正方形区域,可能会被裁剪。- 每次选择后,
pickAndAddImages方法异步解码所有选定图片,新生成的PixelMap追加到imageList中。为了简单,这里使用...展开运算符创建新数组触发刷新。如果图片数量较多,建议使用@Observed配合LazyForEach实现懒加载。 getContext(this)获取当前组件的上下文,传递给PhotoPickerService。
首页引用该页面:
修改 EntryAbility.ets 或 Index.ets 中的 build() 直接加载 ImageGridPage 组件,例如:
@Entry
@Component
struct Index {
  build() {
    ImageGridPage()
  }
}
3. 运行验证
完成上述代码后,运行项目(通过模拟器或真机)。预期表现如下:
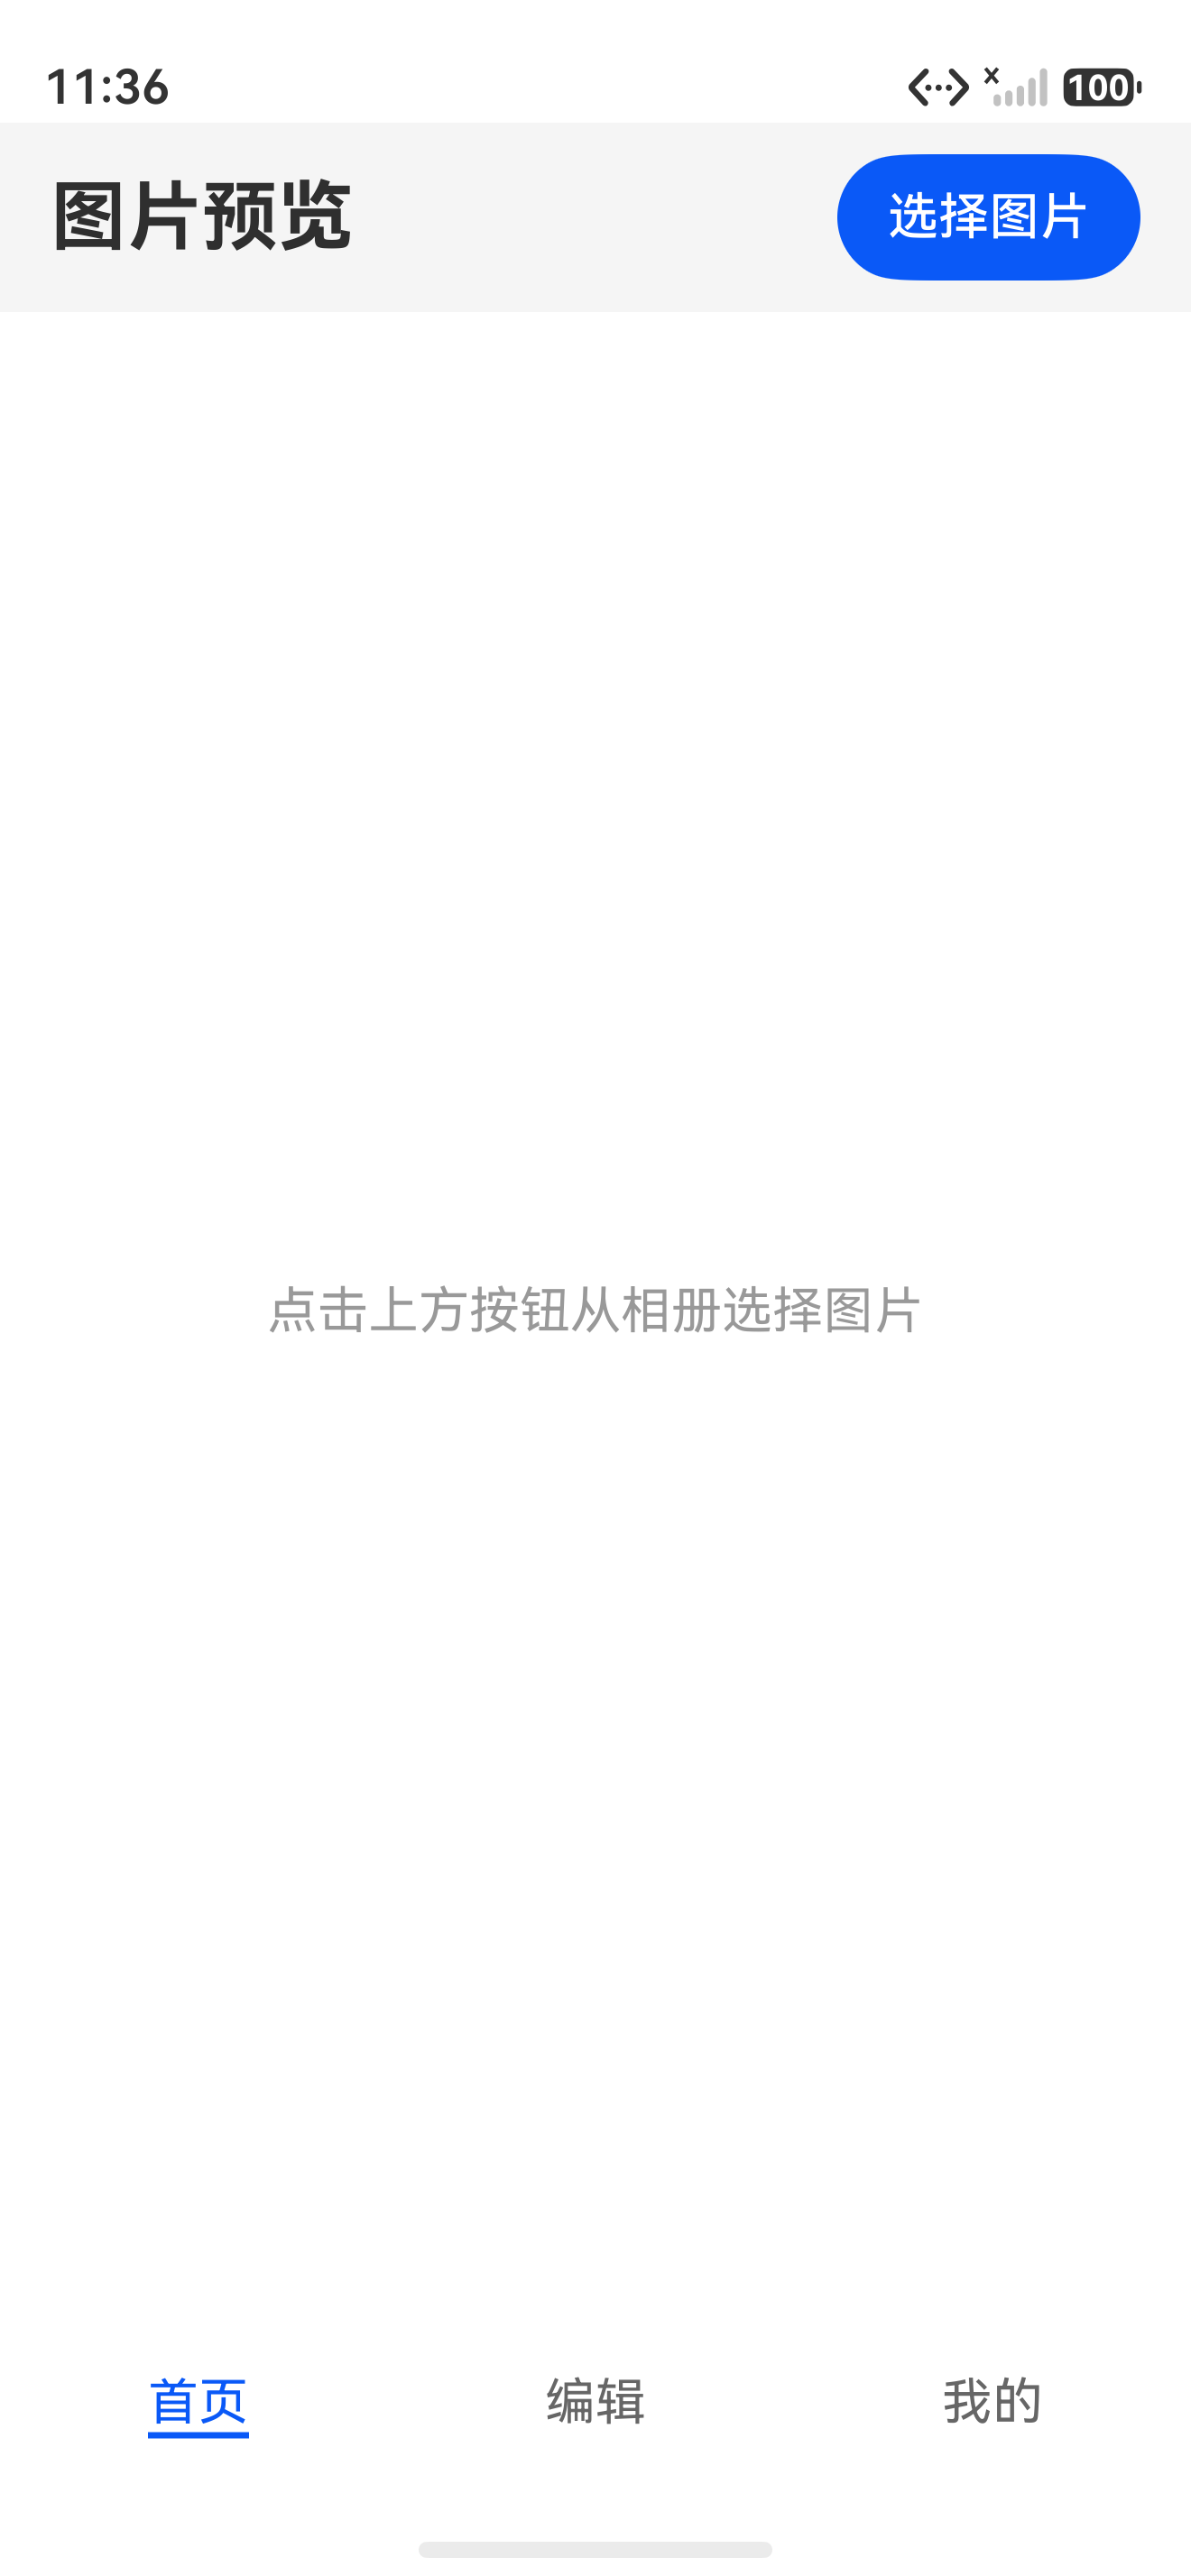
- 应用启动后,显示一个空白页面,顶部标题“图片预览”,右侧有“选择图片”按钮。
- 点击“选择图片”按钮,系统弹出相册选择界面,用户可以单选或多选图片。
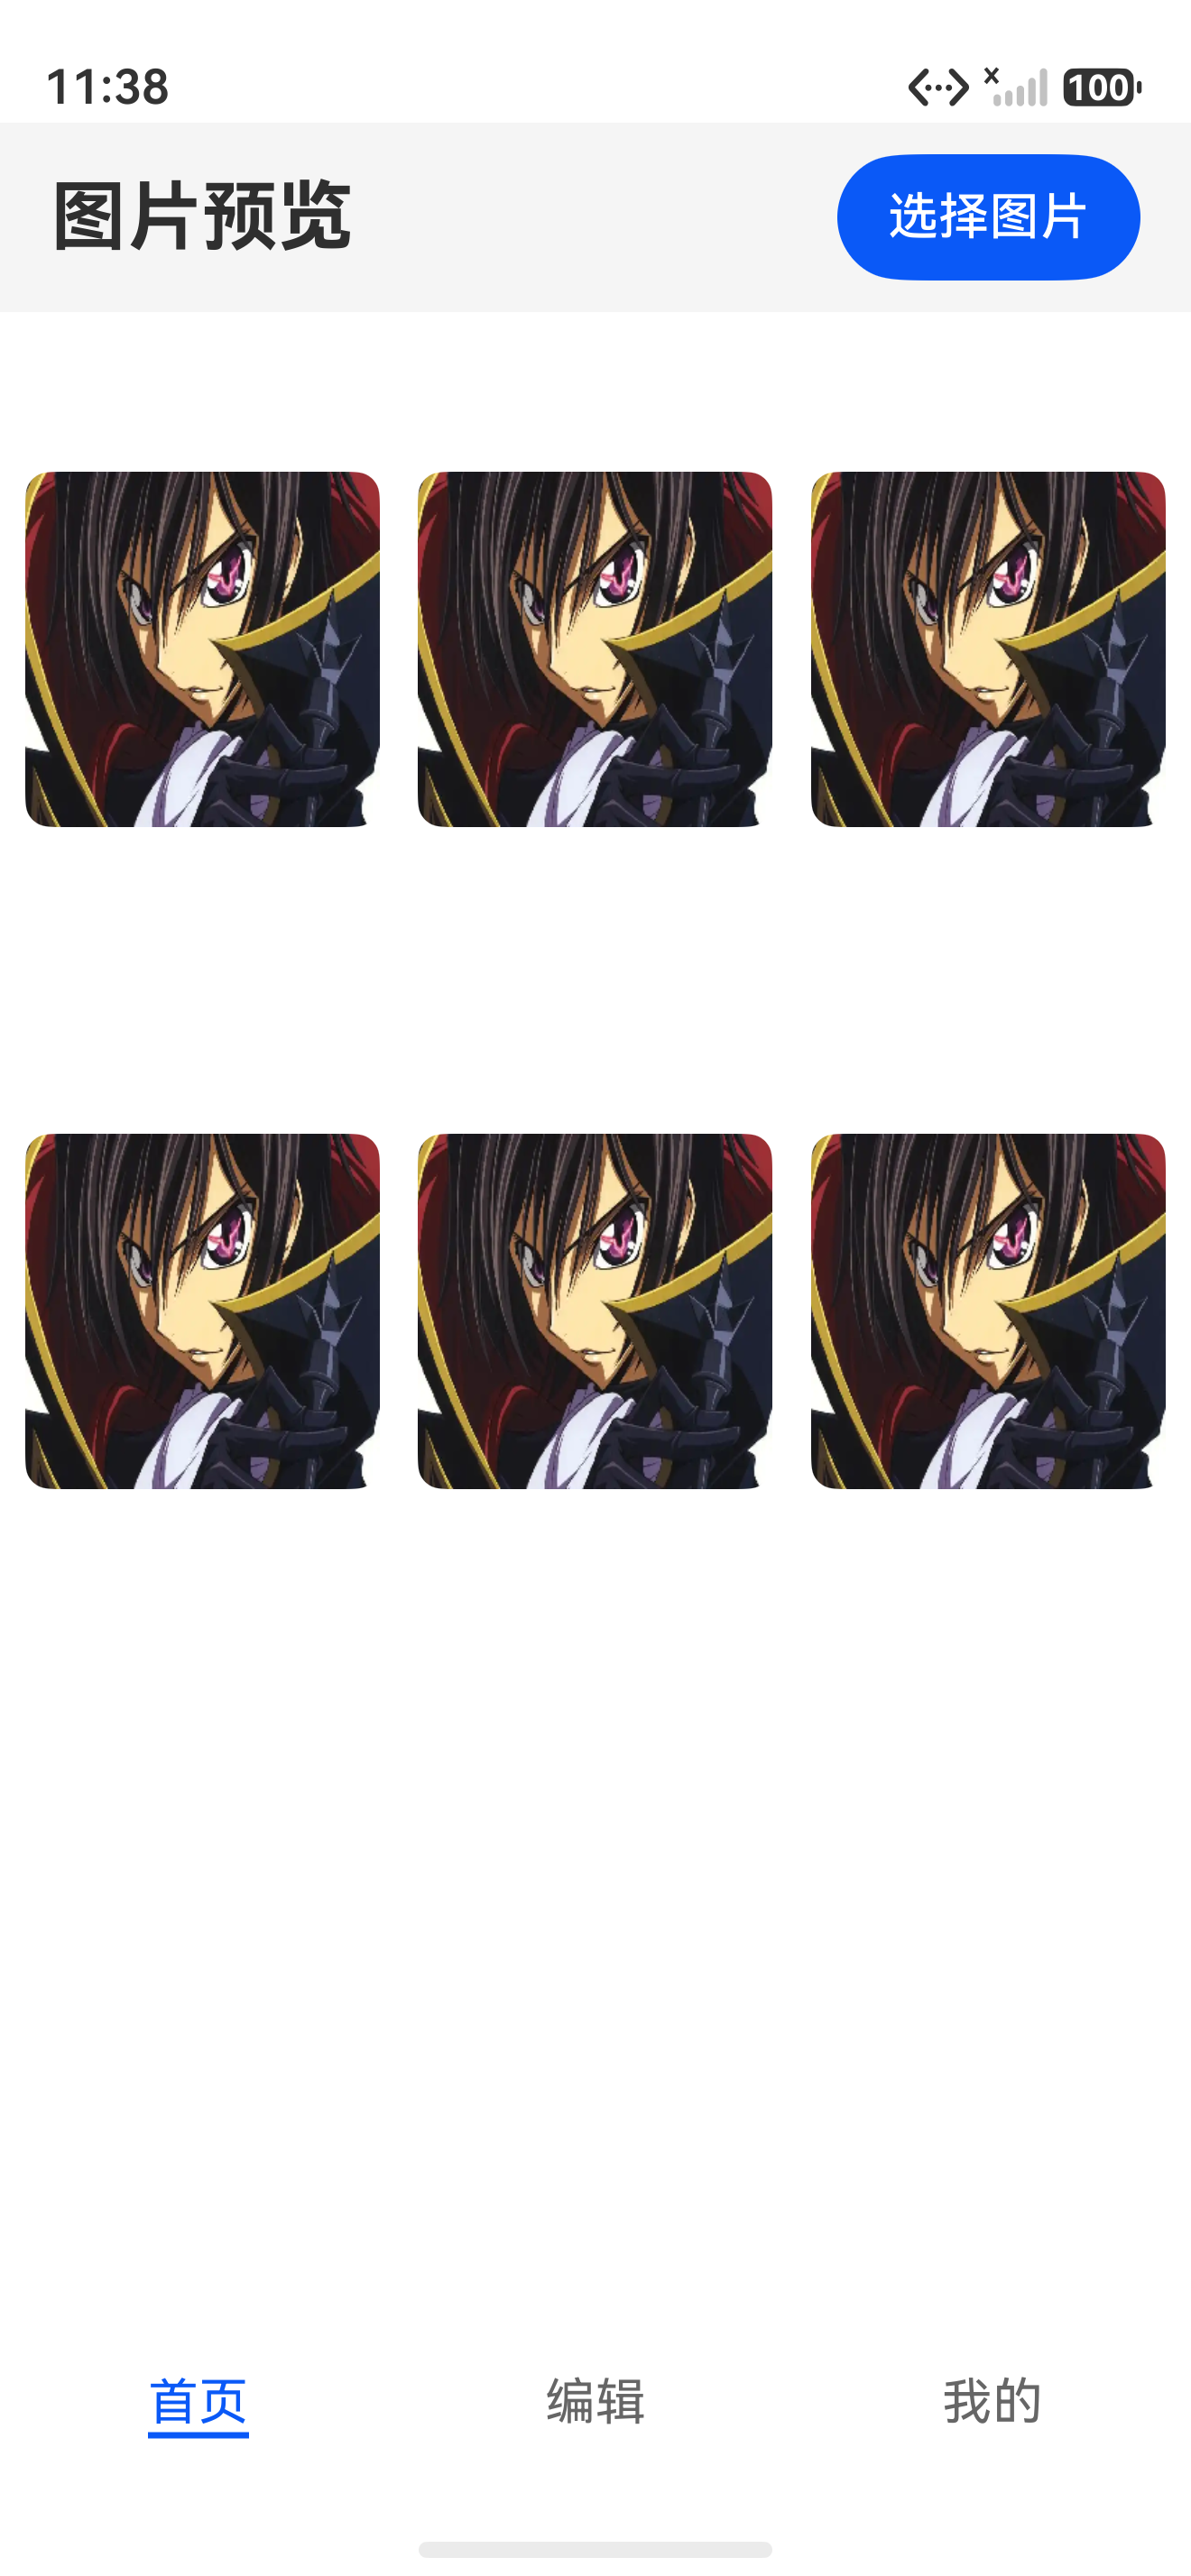
- 选择后返回APP,选中的图片以3列网格的形式显示为小方块(256x256像素缩略图)。
- 连续多次选择,新图片会被追加到网格末尾,之前的图片保留。
如果出现图片无法显示,请检查:
- 真机/模拟器是否已登录华为账号并授予相册权限?
- 测试图片是否损坏或格式不被支持(建议使用JPEG、PNG格式)?
- 控制台是否有文件打开或解码失败的日志?
4. 小结与预告
本篇我们完成了APP的第一个核心功能模块:通过PhotoViewPicker选择多张图片,使用image.createImageSource配合DecodingOptions高效解码出缩略图,并以Grid网格形式预览。我们封装的PhotoPickerService和ImageSourceUtils将成为后续所有编辑操作的基石——所有图片处理都将基于PixelMap进行。
下一篇,我们将深入图片解码环节,学习如何获取图片的原始信息(宽度、高度、方向、EXIF元数据等),并在此基础上实现图片的基本信息展示面板。届时,你的图片处理APP将拥有“看懂图片”的能力。

讨论HarmonyOS开发技术,专注于API与组件、DevEco Studio、测试、元服务和应用上架分发等。
更多推荐



 0
0 0
0- 0


 已为社区贡献194条内容

所有评论(0)