鸿蒙开发 Navigation 路由教程:从入门到实战
文章目录
一、引言
在 HarmonyOS 应用开发中,页面路由是构建多页面应用的核心能力。Navigation 组件作为官方推荐的路由容器,不仅提供了强大的页面栈管理能力,还支持单栏、分栏和自适应三种显示模式,能够轻松适配手机、平板、折叠屏等多种设备形态。
本文将从一个完整的登录跳转个人中心示例出发,带你掌握 Navigation 的核心概念、配置步骤和实战技巧。
二、Navigation 核心概念
Navigation 是 HarmonyOS 提供的路由容器组件,支持 单栏(Stack)、分栏(Split) 和 自适应(Auto) 三种显示模式,适用于模块内和跨模块的页面路由切换。与传统的 Router 路由相比,Navigation 支持更丰富的转场动效、多端部署能力和更灵活的栈操作,推荐将 Navigation 作为应用的顶层根容器。
2.1 核心组成
- NavPathStack:管理页面栈的控制器,提供
push、pop、replace、clear等操作方法。 - NavDestination:子页面的根容器,每个跳转的目标页面必须包裹在
NavDestination中。 .navDestination()属性:用于设置页面路由映射表,将页面名称(字符串)与@Builder构建函数关联。
三、实战:登录页 → 个人中心
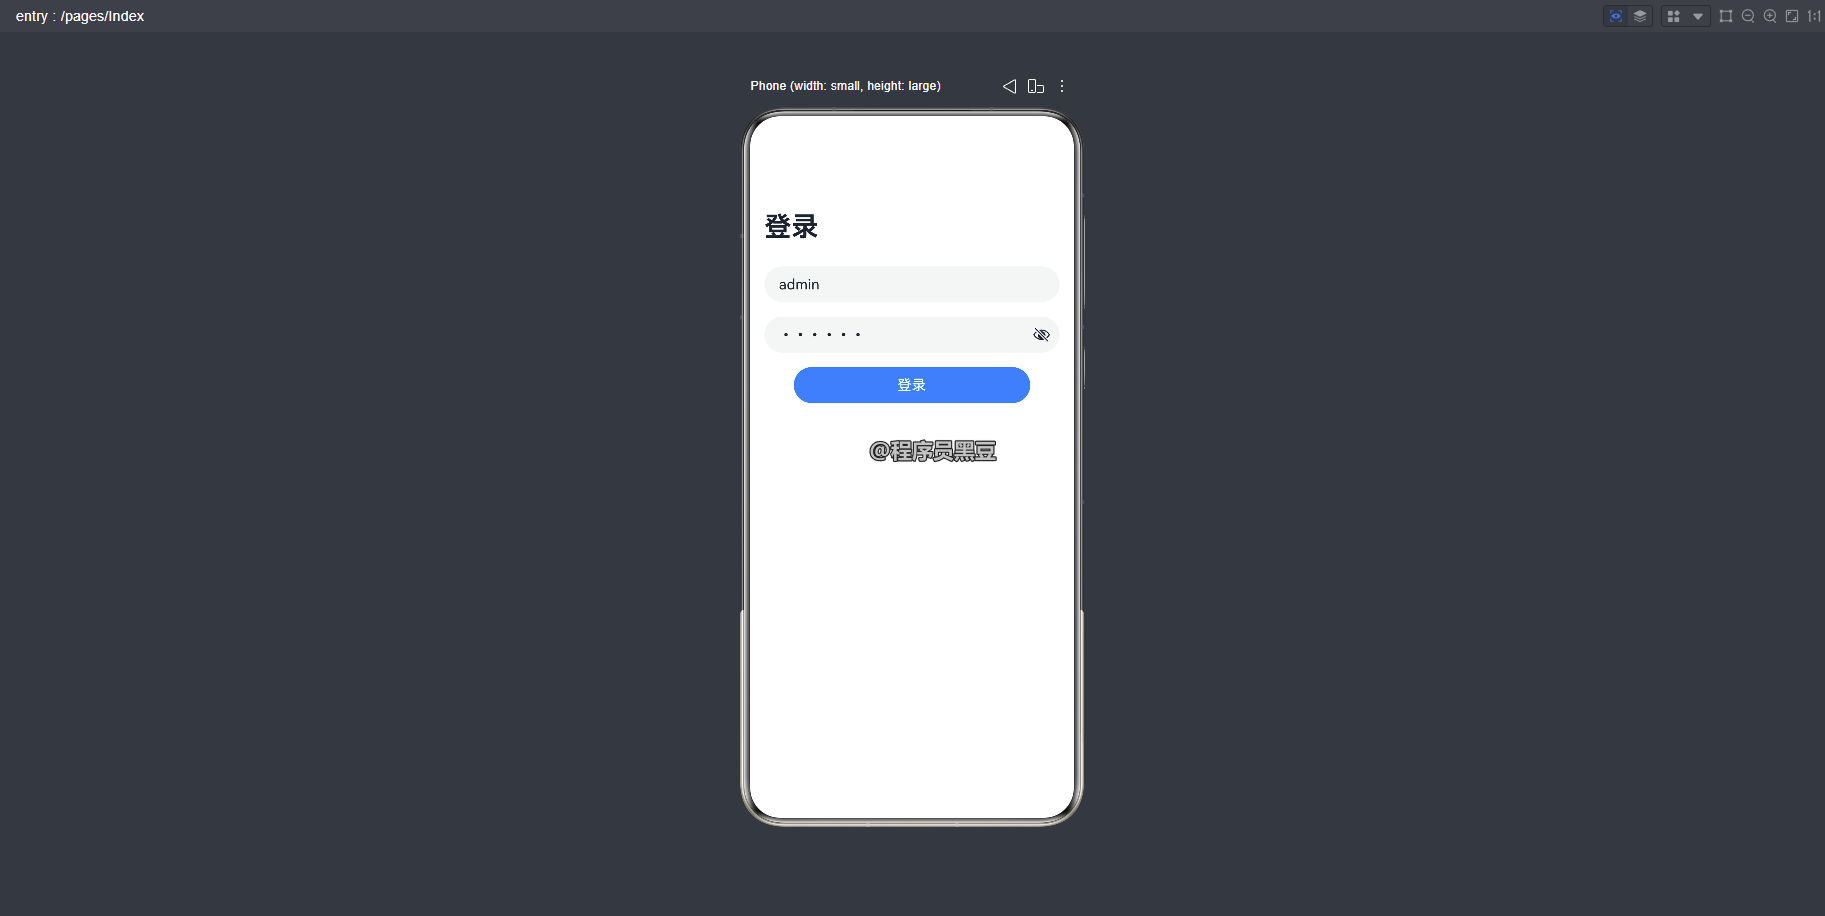
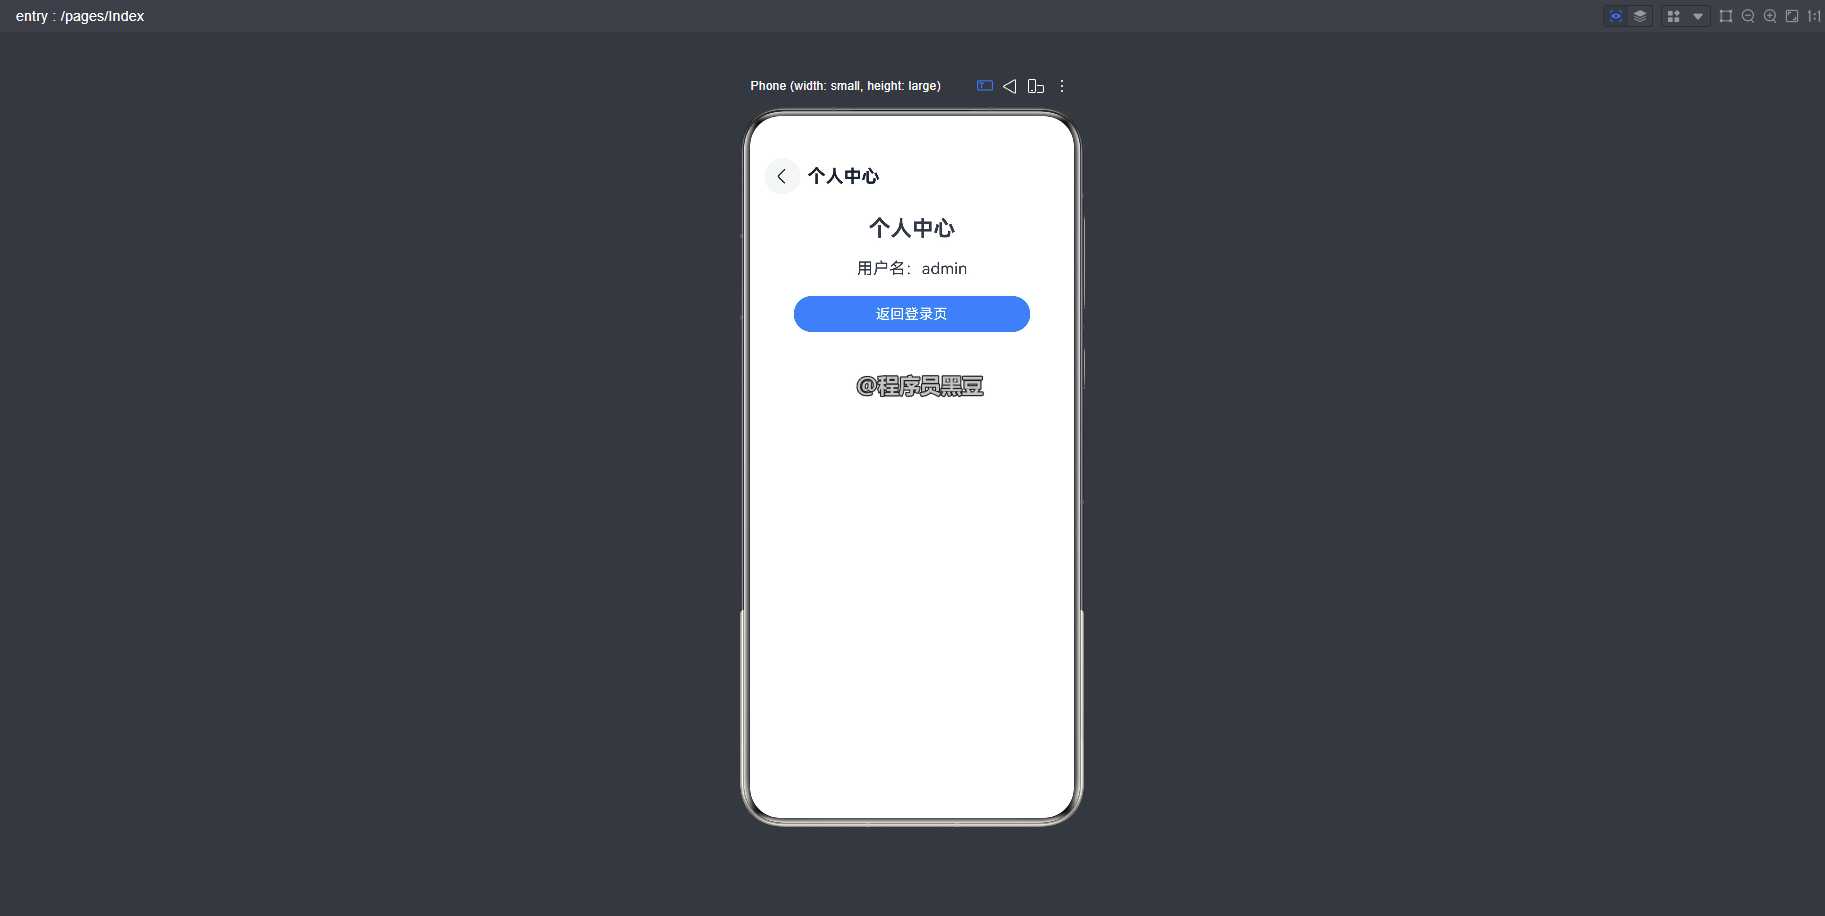
以下示例演示了从登录页跳转到个人中心页面的完整流程。登录页使用 Navigation 作为根容器,点击登录按钮后通过 pushPathByName 跳转到个人中心,并将用户名作为参数传递。
3.1 创建项目文件结构
src/main/ets/
├── pages/
│   ├── Index.ets          // 登录页(@Entry 入口)
│   └── ProfilePage.ets    // 个人中心页(目标页面)
└── resources/base/profile/
    └── router_map.json    // 路由映射表
3.2 配置路由映射表(router_map.json)
在 resources/base/profile/ 目录下创建 router_map.json 文件,注册所有需要跳转的页面:
{
  "routerMap": [
    {
      "name": "profile",
      "pageSourceFile": "src/main/ets/pages/ProfilePage.ets",
      "buildFunction": "buildProfilePage"
    }
  ]
}
3.3 在 module.json5 中添加 routerMap 配置
打开 src/main/module.json5 文件,在对应模块的配置中添加 routerMap 字段:
{
  "pages": "$profile:main_pages",
  "routerMap": "$profile:router_map",
  "requestPermissions": []
}
3.4 登录页(Index.ets)
登录页作为应用入口,使用 Navigation 作为根容器,包含账号、密码输入框和登录按钮。
import { buildProfilePage } from './ProfilePage2';

interface IUserInfo {
  userName: string
}

@Entry
@Component
struct Index {
  private pageStack: NavPathStack = new NavPathStack();

  @State username: string = 'admin';
  @State password: string = '123456';

  build() {
    Navigation(this.pageStack) {
      Column({ space: 16 }) {
        TextInput({ text: this.username!!, placeholder: '账号' })
          .type(InputType.USER_NAME)

        TextInput({ text: this.password, placeholder: '密码' })
          .type(InputType.Password)
          .showPasswordIcon(true)

        Button('登录')
          .width('80%')
          .enabled(this.username.length > 0 && this.password.length > 0)
          .onClick(() => {
            // 跳转到个人中心,并传递用户名
            const param: IUserInfo = { userName: this.username }
            this.pageStack.pushPathByName('profile', param);
          })
      }
      .padding(16)
    }
    .title('登录') // 设置页面标题
    .titleMode(NavigationTitleMode.Full) // 设置页面标题栏显示模式
    .navDestination(this.pageMap)
  }

  @Builder
  pageMap(name: string, param: object) {
    if (name === 'profile') {
      buildProfilePage(param as Record<string, Object>);
    }
  }
}
运行效果:
3.5 个人中心页(ProfilePage.ets)
目标页面根组件必须是 NavDestination,并通过 @Builder 导出一个构建函数,函数名与 router_map.json 中配置的 buildFunction 完全一致。
interface IParams {
  userName: string
}

// 注意:页面根组件必须是 NavDestination
@Component
struct ProfilePage {
  private pageInfos: NavPathStack = {} as NavPathStack;
  private userName: string = '默认用户';

  build() {
    NavDestination() {
      Column({ space: 20 }) {
        Text('个人中心')
          .fontSize(24)
          .fontWeight(FontWeight.Bold)

        Text('用户名:' + this.userName)
          .fontSize(18)

        Button('返回登录页')
          .width('80%')
          .onClick(() => {
            // 返回上一页
            this.pageInfos.pop();
          })
      }
      .padding(16)
      .width('100%')
      .height('100%')
    }
    .title('个人中心') // 设置页面标题
    .hideTitleBar(false) // 设置是否隐藏标题栏
    .onReady((context: NavDestinationContext) => { // 当NavDestination即将构建子组件之前会触发此回调 参数context中包含 NavDestination 上下文信息
      this.pageInfos = context.pathStack // 当前 NavDestination 所处的导航控制器
      const params = context.pathInfo.param as IParams; // context.pathInfo 路由页面信息
      this.userName = params.userName
    })
  }
}

// 必须导出 @Builder 函数,名称与 router_map.json 中的 buildFunction 一致
@Builder
export function buildProfilePage(param: Record<string, Object>): void {
  ProfilePage()
}
运行效果:
四、拦截器
Navigation 组件提供的 setInterception 方法是 HarmonyOS 实现页面跳转拦截的核心能力。它可以拦截页面跳转过程中的关键节点,让开发者能够在页面路由时执行统一的逻辑,例如登录鉴权、权限校验、埋点统计等。
该方法接收一个 NavigationInterception 对象,包含以下三个回调:
willShow:页面跳转前的回调,允许操作栈,在当前跳转中生效。拦截的页面会被创建。didShow:页面跳转后回调。modeChange:Navigation单双栏显示状态发生变更时触发该回调。interception:页面跳转前的回调,允许操作栈,在当前跳转中生效。拦截的页面不会被创建。
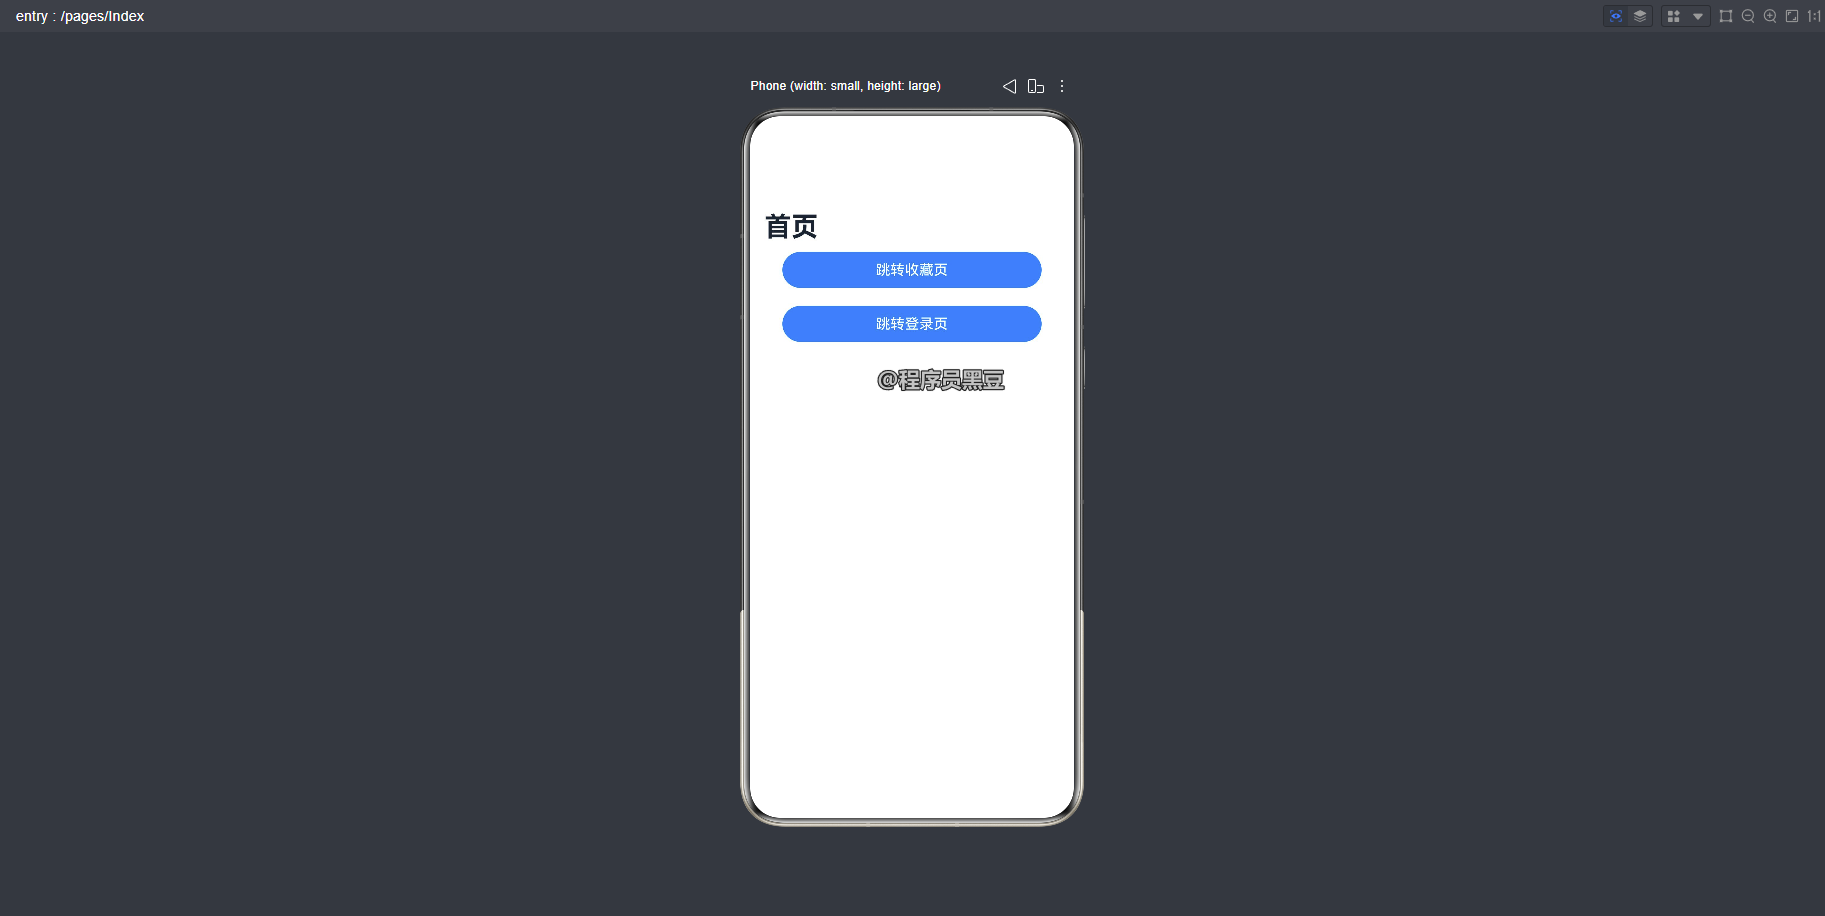
以下代码演示如何在跳转到“收藏页面”前检查用户是否已登录,若未登录则拦截并重定向到登录页面。
@Entry
@Component
struct Index {
  // 使用 AppStorage 管理登录状态,方便跨页面共享
  @StorageLink('isLogged') isLogged: boolean = false;
  // 创建导航栈
  private navPathStack: NavPathStack = new NavPathStack();

  aboutToAppear(): void {
    // 注册路由拦截
    this.navPathStack.setInterception({
      willShow: (from: NavDestinationContext | 'navBar',
        to: NavDestinationContext | 'navBar',
        operation: NavigationOperation,
        animated: boolean) => {
        // 只拦截 push 操作(operation === 1)
        if (operation === NavigationOperation.PUSH) {
          const target = to as NavDestinationContext;
          // 判断目标页面名是否为需要登录的页面
          if (target.pathInfo?.name === 'CollectionPage' && !this.isLogged) {
            // 移除当前 push 的页面(取消跳转)
            target.pathStack.pop();
            // 替换路径到登录页
            this.navPathStack.replacePathByName('LoginPage', { redirect: 'CollectionPage' });
          }
        }
      }
    });
  }

  build() {
    Navigation(this.navPathStack) {
      Column({space: 20}) {
        Button('跳转收藏页')
          .width('80%')
          .onClick(() => {
            this.navPathStack.pushPathByName('CollectionPage', null);
          });
        Button('跳转登录页')
          .width('80%')
          .onClick(() => {
            this.navPathStack.pushPathByName('LoginPage', null);
          });
      }
      .width('100%')
      .height('100%')
    }
    .title('首页')
    .navBarWidth('100%')
    .navDestination(this.buildDestinations)
  }

  // 路由表构建
  @Builder
  buildDestinations(name: string, param: object) {
    if (name === 'CollectionPage') {
      CollectionPage();
    } else if (name === 'LoginPage') {
      LoginPage({ param });
    }
  }
}

// 收藏页面(需要登录)
@Component
struct CollectionPage {
  build() {
    NavDestination() {
      Text('收藏页面 - 已登录')
        .fontSize(20)
    }
  }
}

// 登录页面
@Component
struct LoginPage {
  @StorageLink('isLogged') isLogged: boolean = false;
  private param?: object;
  private navPathStack = {} as NavPathStack;

  build() {
    NavDestination() {
      Column({space: 20}) {
        Text('登录页面')
          .fontSize(20)
        Button('登录')
          .width('80%')
          .onClick(() => {
            // 登录成功后更新状态
            this.isLogged = true;
            // 跳转回原来想去的页面
            if ((this.param as Record<string, string>)?.redirect === 'CollectionPage') {
              this.navPathStack.replacePathByName('CollectionPage', null);
            } else {
              this.navPathStack.pop();
            }
          });
      }
      .width('100%')
      .height('100%')
    }
    .onReady((context: NavDestinationContext) => {
      this.navPathStack = context.pathStack
    })
  }
}
运行效果:
代码要点说明:
- 状态管理:使用
@StorageLink('isLogged')将登录状态存入AppStorage,确保各页面可共享且同步变化。 - 拦截判断:在
willShow回调中,通过operation === NavigationOperation.PUSH只拦截新页面的压栈(避免影响返回操作),再根据目标页面名称CollectionPage和登录状态决定是否放行。 - 拦截动作:未登录时先调用
pop()移除当前跳转目标,再通过replacePathByName跳转到登录页,并携带redirect参数告知登录后返回原目标。 - 登录后跳转:登录页点击登录按钮后更新
isLogged状态,并根据redirect参数决定恢复跳转到收藏页或直接返回。
注意事项:
- 拦截器需要在
aboutToAppear中尽早注册,确保所有跳转均能被拦截。 - 避免在拦截逻辑中再次触发拦截,防止死循环(例如拦截到登录页时,登录页自身不应再触发相同拦截)。
- 如果使用多个
NavPathStack,需为每个栈独立设置拦截器。
五、注意事项与最佳实践
5.1 前置条件
必须在项目中创建 router_map.json 并注册所有跳转页面,同时在 module.json5 中添加 routerMap 配置,否则页面无法正常跳转。
5.2 页面结构规范
目标页面的根组件必须是 NavDestination,且需使用 @Builder 导出一个构建函数,函数名与 router_map.json 中配置的 buildFunction 完全一致。
5.3 显示模式
推荐使用 Auto 模式(默认),系统会根据组件宽度自动切换单栏/分栏,便于多端适配。分栏模式在宽度 ≥ 600vp 时生效(平板、折叠屏等场景)。
5.4 标题栏与菜单
titleMode支持Mini(滚动时折叠)和Full(始终显示完整标题栏)。- 菜单栏使用数组方式时,竖屏最多显示 3 个图标,横屏最多显示 5 个,超出需使用
CustomBuilder自定义。
5.6 页面生命周期
NavDestination 支持 onPageShow、onPageHide、onBackPress 等页面事件,可在其中处理数据刷新或状态保存。
5.7 返回处理
推荐使用 NavPathStack 的 pop() 方法返回上一页,也可通过 popToName、popToIndex 实现精准返回。如需在返回时传递数据,可使用 pushPath 的回调函数。
5.8 拦截器
通过 setInterception 可实现在跳转前进行登录鉴权、数据保护等拦截逻辑,提升应用安全性。
六、总结
本文从 Navigation 的核心概念出发,通过一个完整的登录跳转个人中心示例,详细讲解了路由映射表配置、页面创建、参数传递和页面返回等关键步骤。掌握这些内容后,你就能在鸿蒙应用中灵活运用 Navigation 构建复杂的多页面交互了。

讨论HarmonyOS开发技术,专注于API与组件、DevEco Studio、测试、元服务和应用上架分发等。
更多推荐



 3
3 0
0- 0


 已为社区贡献39条内容

所有评论(0)