【共创季稿事节】HarmonyOS 7.0 网络编程实战:构建高可用RESTful客户端与缓存策略
文章目录

每日一句正能量
凡事靠自己,然后风生又水起。
不是否认合作,而是强调底层心态上不寄生、不等靠。风生水起不是运气的结果,是自己成为源头后的自然展开。
导读
在指导学生开发需要网络通信的鸿蒙应用时,我发现一个共性问题——学生们往往直接调用
@ohos.net.http的request方法,把 URL 和参数往里一塞,拿到数据就完事。这种"裸调"方式在 demo 阶段看似简洁,但一旦遇到弱网、Token 过期、大文件下载、重复请求等真实场景,代码就会迅速膨胀成一团乱麻。HarmonyOS 6.x 提供了基础的网络 API,但缺乏系统级的拦截器、缓存管理和流量优化机制。HarmonyOS 7.0 极有可能在网络层引入更完善的中间件架构。本文将基于 6.1 现状与行业网络库(如 OkHttp、Axios)的成熟设计,推演并实战一套高可用的 RESTful 客户端方案。
一、HarmonyOS 6.x 网络编程现状:基础 API,工程缺位
6.1 的 @ohos.net.http 模块提供了标准的 HTTP/HTTPS 请求能力:
| 能力 | 6.x API | 工程化痛点 |
|---|---|---|
| HTTP 请求 | http.createHttp().request() |
每次请求需重复配置 header、超时、证书 |
| WebSocket | webSocket.createWebSocket() |
无自动重连、心跳、消息队列 |
| 数据解析 | 手动 JSON.parse() |
无统一的响应体封装和错误码映射 |
| 请求拦截 | 无原生支持 | 需在每个请求前手动拼接 Token |
| 响应缓存 | 无原生支持 | 需自行实现内存/磁盘缓存层 |
| 断点续传 | 无原生支持 | 大文件下载失败需从头再来 |
| 流量统计 | 无原生支持 | 无法精准监控应用耗流情况 |
课堂场景中的典型反模式:
// ❌ 6.x 反模式:裸调网络,到处复制粘贴
async function getUserInfo(userId: string): Promise<UserInfo> {
  const httpRequest = http.createHttp();
  const response = await httpRequest.request(
    `https://api.example.com/users/${userId}`,
    {
      method: http.RequestMethod.GET,
      header: { 'Authorization': 'Bearer ' + getToken() }  // 每个请求都写
    }
  );
  const json = JSON.parse(response.result as string);  // 到处 JSON.parse
  httpRequest.destroy();  // 经常忘记
  return json.data;
}
这种代码的维护成本极高——Token 刷新逻辑改了要改 20 处,缓存策略加了要改 20 处,超时时间调整了要改 20 处。
二、HarmonyOS 7.0 网络层架构推演:从"裸 API"到"中间件管道"
2.1 统一网络中间件(NetMiddleware)
7.0 最可能的演进方向,是在系统层或框架层引入网络中间件管道,将请求生命周期拆分为可插拔的拦截器:
请求构建 → 拦截器链(请求侧)→ 网络传输 → 拦截器链(响应侧)→ 结果分发
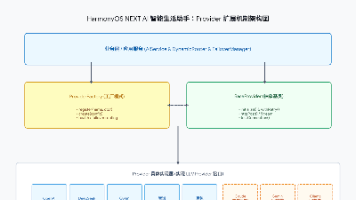
图1:HarmonyOS 7.0 RESTful 客户端网络架构图
图片内容说明(中文):纵向流程图,从上到下。①应用层(UI/ViewModel)发起请求→②Repository层组装业务参数→③NetMiddleware统一入口→④请求拦截器链:AuthInterceptor(Token附加)→SignInterceptor(请求签名)→RetryInterceptor(失败重试)→⑤网络传输层(HTTP/HTTPS/WebSocket)→⑥响应拦截器链:CacheInterceptor(缓存写入)→ErrorInterceptor(错误统一处理)→LogInterceptor(日志记录)→⑦返回解析后的数据到应用层。各拦截器用不同颜色矩形,链条用箭头连接,中间网络传输层用橙色高亮。
2.2 7.0 推演:拦截器接口定义
// 7.0 推演:网络拦截器接口
export interface NetInterceptor {
  // 请求拦截
  interceptRequest?(config: RequestConfig): Promise<RequestConfig>;

  // 响应拦截
  interceptResponse?<T>(response: NetResponse<T>): Promise<NetResponse<T>>;

  // 错误拦截
  interceptError?(error: NetError): Promise<NetResponse<any> | void>;
}
三、实战:高可用 RESTful 客户端封装
3.1 核心客户端类
// net/NetClient.ets
import { http } from '@ohos.net.http';

export interface RequestConfig {
  url: string;
  method?: 'GET' | 'POST' | 'PUT' | 'DELETE' | 'PATCH';
  headers?: Record<string, string>;
  body?: object | ArrayBuffer;
  timeout?: number;
  cachePolicy?: CachePolicy;
  retryCount?: number;
  tag?: string;  // 请求标识,用于取消
}

export interface NetResponse<T> {
  data: T;
  statusCode: number;
  headers: Record<string, string>;
  fromCache: boolean;
}

export class NetClient {
  private interceptors: NetInterceptor[] = [];
  private cacheManager: CacheManager = new CacheManager();
  private pendingRequests: Map<string, Promise<any>> = new Map();

  // 注册拦截器
  addInterceptor(interceptor: NetInterceptor): void {
    this.interceptors.push(interceptor);
  }

  // 核心请求方法
  async request<T>(config: RequestConfig): Promise<NetResponse<T>> {
    // 1. 执行请求拦截器
    let processedConfig = { ...config };
    for (const interceptor of this.interceptors) {
      if (interceptor.interceptRequest) {
        processedConfig = await interceptor.interceptRequest(processedConfig);
      }
    }

    // 2. 请求合并去重(相同 GET 请求在 100ms 内合并)
    if (processedConfig.method === 'GET' && processedConfig.tag) {
      const pending = this.pendingRequests.get(processedConfig.tag);
      if (pending) return pending;
    }

    const requestPromise = this.executeRequest<T>(processedConfig);
    if (processedConfig.tag) {
      this.pendingRequests.set(processedConfig.tag, requestPromise);
      requestPromise.finally(() => this.pendingRequests.delete(processedConfig.tag));
    }

    return requestPromise;
  }

  private async executeRequest<T>(config: RequestConfig): Promise<NetResponse<T>> {
    // 3. 检查缓存
    if (config.cachePolicy === CachePolicy.CACHE_FIRST) {
      const cached = await this.cacheManager.get(config.url);
      if (cached) {
        return { data: cached as T, statusCode: 200, headers: {}, fromCache: true };
      }
    }

    // 4. 执行网络请求
    const httpRequest = http.createHttp();
    try {
      const response = await httpRequest.request(config.url, {
        method: config.method as http.RequestMethod,
        header: config.headers,
        extraData: config.body,
        connectTimeout: config.timeout || 10000,
        readTimeout: config.timeout || 10000
      });

      // 7.0:response.body 为 ArrayBuffer
      const decoder = new util.TextDecoder();
      const json = JSON.parse(decoder.decodeToString(response.body));

      let netResponse: NetResponse<T> = {
        data: json,
        statusCode: response.responseCode,
        headers: response.header,
        fromCache: false
      };

      // 5. 执行响应拦截器
      for (const interceptor of this.interceptors) {
        if (interceptor.interceptResponse) {
          netResponse = await interceptor.interceptResponse(netResponse);
        }
      }

      // 6. 写入缓存
      if (config.cachePolicy === CachePolicy.CACHE_FIRST ||
          config.cachePolicy === CachePolicy.CACHE_AFTER_SUCCESS) {
        await this.cacheManager.set(config.url, json, 300); // 缓存 5 分钟
      }

      return netResponse;
    } catch (error) {
      // 7. 执行错误拦截器
      for (const interceptor of this.interceptors) {
        if (interceptor.interceptError) {
          const recovered = await interceptor.interceptError(error as NetError);
          if (recovered) return recovered as NetResponse<T>;
        }
      }
      throw error;
    } finally {
      httpRequest.destroy();
    }
  }
}

export enum CachePolicy {
  NO_CACHE = 'no_cache',
  CACHE_FIRST = 'cache_first',       // 先读缓存,无缓存再请求
  CACHE_AFTER_SUCCESS = 'cache_after' // 请求成功后写缓存
}
3.2 认证拦截器(Token 自动刷新)
// interceptors/AuthInterceptor.ets
export class AuthInterceptor implements NetInterceptor {
  private token: string = '';
  private refreshPromise: Promise<string> | null = null;

  async interceptRequest(config: RequestConfig): Promise<RequestConfig> {
    if (!this.token) {
      this.token = await AppStorage.get('access_token') || '';
    }

    config.headers = {
      ...config.headers,
      'Authorization': `Bearer ${this.token}`,
      'X-Request-ID': this.generateRequestId()
    };
    return config;
  }

  async interceptError(error: NetError): Promise<NetResponse<any> | void> {
    if (error.statusCode === 401) {
      // Token 过期,自动刷新
      if (!this.refreshPromise) {
        this.refreshPromise = this.refreshToken();
      }

      try {
        const newToken = await this.refreshPromise;
        this.token = newToken;
        AppStorage.setOrCreate('access_token', newToken);

        // 重试原请求
        const client = new NetClient();
        return await client.request(error.originalConfig);
      } finally {
        this.refreshPromise = null;
      }
    }
  }

  private async refreshToken(): Promise<string> {
    const response = await new NetClient().request<{ token: string }>({
      url: 'https://api.example.com/auth/refresh',
      method: 'POST',
      body: { refreshToken: AppStorage.get('refresh_token') }
    });
    return response.data.token;
  }

  private generateRequestId(): string {
    return `${Date.now()}-${Math.random().toString(36).substr(2, 9)}`;
  }
}
3.3 重试拦截器(指数退避)
// interceptors/RetryInterceptor.ets
export class RetryInterceptor implements NetInterceptor {
  async interceptError(error: NetError): Promise<NetResponse<any> | void> {
    const config = error.originalConfig;
    const maxRetry = config.retryCount || 3;

    if (!error.retryCount) error.retryCount = 0;

    if (error.retryCount < maxRetry && this.isRetryable(error)) {
      error.retryCount++;
      // 指数退避:1s, 2s, 4s
      const delay = Math.pow(2, error.retryCount - 1) * 1000;
      await new Promise(resolve => setTimeout(resolve, delay));

      const client = new NetClient();
      return await client.request(config);
    }
  }

  private isRetryable(error: NetError): boolean {
    // 超时、网络断开、5xx 服务器错误可重试
    return error.statusCode >= 500 ||
           error.code === 'ECONNRESET' ||
           error.code === 'ETIMEDOUT';
  }
}
四、离线缓存策略:内存 + 磁盘双层架构
4.1 缓存管理器实现
// cache/CacheManager.ets
import { distributedKVStore } from '@ohos.data.distributedKVStore';

export class CacheManager {
  private memoryCache: Map<string, CacheEntry> = new Map();
  private diskCache: distributedKVStore.SingleKVStore | null = null;

  async init(): Promise<void> {
    // 初始化磁盘缓存(基于 KV-Manager)
    const kvManager = distributedKVStore.createKVManager({
      bundleName: 'com.example.app',
      context: getContext()
    });
    this.diskCache = await kvManager.getKVStore('net_cache', {
      createIfMissing: true,
      encrypt: true  // 7.0:加密存储缓存数据
    });
  }

  async get(key: string): Promise<any | null> {
    // 1. 先查内存
    const memEntry = this.memoryCache.get(key);
    if (memEntry && !this.isExpired(memEntry)) {
      return memEntry.data;
    }

    // 2. 再查磁盘
    if (this.diskCache) {
      const diskValue = await this.diskCache.get(key);
      if (diskValue) {
        const entry = JSON.parse(diskValue as string) as CacheEntry;
        if (!this.isExpired(entry)) {
          // 回填内存
          this.memoryCache.set(key, entry);
          return entry.data;
        }
      }
    }

    return null;
  }

  async set(key: string, data: any, ttlSeconds: number): Promise<void> {
    const entry: CacheEntry = {
      data,
      expireAt: Date.now() + ttlSeconds * 1000,
      etag: ''  // 可配合 HTTP ETag 做协商缓存
    };

    // 写入内存
    this.memoryCache.set(key, entry);

    // 写入磁盘
    if (this.diskCache) {
      await this.diskCache.put(key, JSON.stringify(entry));
    }
  }

  private isExpired(entry: CacheEntry): boolean {
    return Date.now() > entry.expireAt;
  }
}

interface CacheEntry {
  data: any;
  expireAt: number;
  etag: string;
}
图2:离线缓存策略流程图
图片内容说明(中文):流程图,从上到下。①发起请求→②检查缓存策略→③CACHE_FIRST?→是→查内存缓存→命中且未过期?→是→直接返回。④未命中→查磁盘缓存→命中且未过期?→是→回填内存并返回。⑤磁盘未命中→发起网络请求→成功→写入内存+磁盘缓存→返回数据。⑥CACHE_FIRST为否→直接网络请求→成功→根据策略决定是否写缓存→返回。各判断节点用菱形,缓存命中路径用绿色,网络请求路径用蓝色。
五、断点续传:大文件下载的可靠方案
5.1 断点续传下载器
// net/ResumableDownloader.ets
import { request } from '@ohos.request';

export class ResumableDownloader {
  private downloadTask: request.DownloadTask | null = null;
  private progressCallback: ((current: number, total: number) => void) | null = null;

  async download(
    url: string,
    filePath: string,
    onProgress?: (current: number, total: number) => void
  ): Promise<void> {
    this.progressCallback = onProgress || null;

    // 检查已下载部分
    const existingSize = await this.getFileSize(filePath);

    const config: request.DownloadConfig = {
      url: url,
      filePath: filePath,
      header: existingSize > 0 ? {
        'Range': `bytes=${existingSize}-`  // 断点续传
      } : {}
    };

    this.downloadTask = await request.downloadFile(getContext(), config);

    this.downloadTask.on('progress', (received, total) => {
      if (this.progressCallback) {
        this.progressCallback(received + existingSize, total + existingSize);
      }
    });

    this.downloadTask.on('complete', () => {
      console.log('下载完成');
    });

    this.downloadTask.on('fail', (err) => {
      console.error('下载失败:', err);
      // 可自动重试
    });
  }

  pause(): void {
    if (this.downloadTask) {
      this.downloadTask.remove();  // 暂停并保存进度
    }
  }

  private async getFileSize(path: string): Promise<number> {
    try {
      const stat = await fs.stat(path);
      return stat.size;
    } catch {
      return 0;
    }
  }
}
六、流量优化策略
6.1 请求合并与防抖
// utils/RequestBatcher.ets
export class RequestBatcher {
  private batchQueue: Map<string, Array<() => void>> = new Map();
  private timer: number | null = null;

  // 将多个相似请求合并为一次批量请求
  add<T>(key: string, requestFn: () => Promise<T>): Promise<T> {
    return new Promise((resolve, reject) => {
      if (!this.batchQueue.has(key)) {
        this.batchQueue.set(key, []);
      }
      this.batchQueue.get(key)!.push(() => {
        requestFn().then(resolve).catch(reject);
      });

      // 50ms 内收集请求,然后批量执行
      if (!this.timer) {
        this.timer = setTimeout(() => this.flush(), 50);
      }
    });
  }

  private flush(): void {
    this.batchQueue.forEach((callbacks, key) => {
      if (callbacks.length === 1) {
        callbacks[0]();
      } else {
        // 批量请求
        this.executeBatch(key, callbacks);
      }
    });
    this.batchQueue.clear();
    this.timer = null;
  }

  private executeBatch(key: string, callbacks: Array<() => void>): void {
    // 实际项目中此处合并为一次 API 调用
    callbacks.forEach(cb => cb());
  }
}
6.2 图片自适应加载
// utils/AdaptiveImageLoader.ets
export class AdaptiveImageLoader {
  static getOptimizedUrl(originalUrl: string, targetWidth: number): string {
    const networkType = this.getNetworkType();

    if (networkType === '2G' || networkType === 'slow-2g') {
      // 弱网:加载缩略图
      return `${originalUrl}?w=${Math.min(targetWidth, 200)}&q=60&format=webp`;
    } else if (networkType === '4g') {
      // 4G:中等质量
      return `${originalUrl}?w=${targetWidth}&q=80&format=webp`;
    } else {
      // WiFi/5G:原图
      return `${originalUrl}?w=${targetWidth}&q=90&format=webp`;
    }
  }

  private static getNetworkType(): string {
    // 7.0 推演:网络质量感知 API
    // return networkQuality.getCurrent().connectionType;
    return '4g';  // 占位
  }
}
七、结语
网络编程是移动应用开发中最容易"踩坑"的领域之一。裸调 HTTP API 在 demo 阶段看似高效,但在生产环境中,弱网适配、Token 刷新、缓存策略、断点续传、流量优化等问题会像滚雪球一样累积成技术债务。
HarmonyOS 7.0 若能在网络层引入拦截器管道和缓存框架,将极大提升开发者的工程效率。但在官方框架成熟之前,我们完全可以基于 6.x 的 http 模块,自行封装一套高可用的网络客户端——本文提供的 NetClient、CacheManager、ResumableDownloader 就是一套可落地的参考实现。
对高校学生开发者而言,理解网络层的工程化设计,是区分"写代码"和"做工程"的重要标志。当你在毕业设计中展示"离线缓存优先、弱网自动降级、Token 过期自动刷新、大文件断点续传"等特性时,你展现的不仅是技术深度,更是对用户体验的系统性思考。
转载自:https://blog.csdn.net/u014727709/article/details/162933487
欢迎 👍点赞✍评论⭐收藏,欢迎指正

讨论HarmonyOS开发技术,专注于API与组件、DevEco Studio、测试、元服务和应用上架分发等。
更多推荐


 3
3 0
0- 0


 已为社区贡献390条内容

所有评论(0)