鸿蒙Flutter 拖拽与滑动手势:Flutter高级交互实现
作者:高红帆(Math_teacher_fan)
仓库地址:https://gitcode.com/feng8403000/FlutterfromBeginnertoAdvancedForHarmonyOS.git
联系邮箱:372699828@qq.com
引言
在移动端应用开发中,拖拽和滑动手势是实现丰富交互体验的核心手段。滑动删除、拖拽排序、拖拽移动等交互模式已经成为现代移动应用的标配。Flutter提供了强大的手势识别系统,支持各种复杂的拖拽和滑动操作。本文将深入探讨Flutter中拖拽与滑动手势的实现方式,并提供完整的代码示例和最佳实践。
一、拖拽与滑动概述
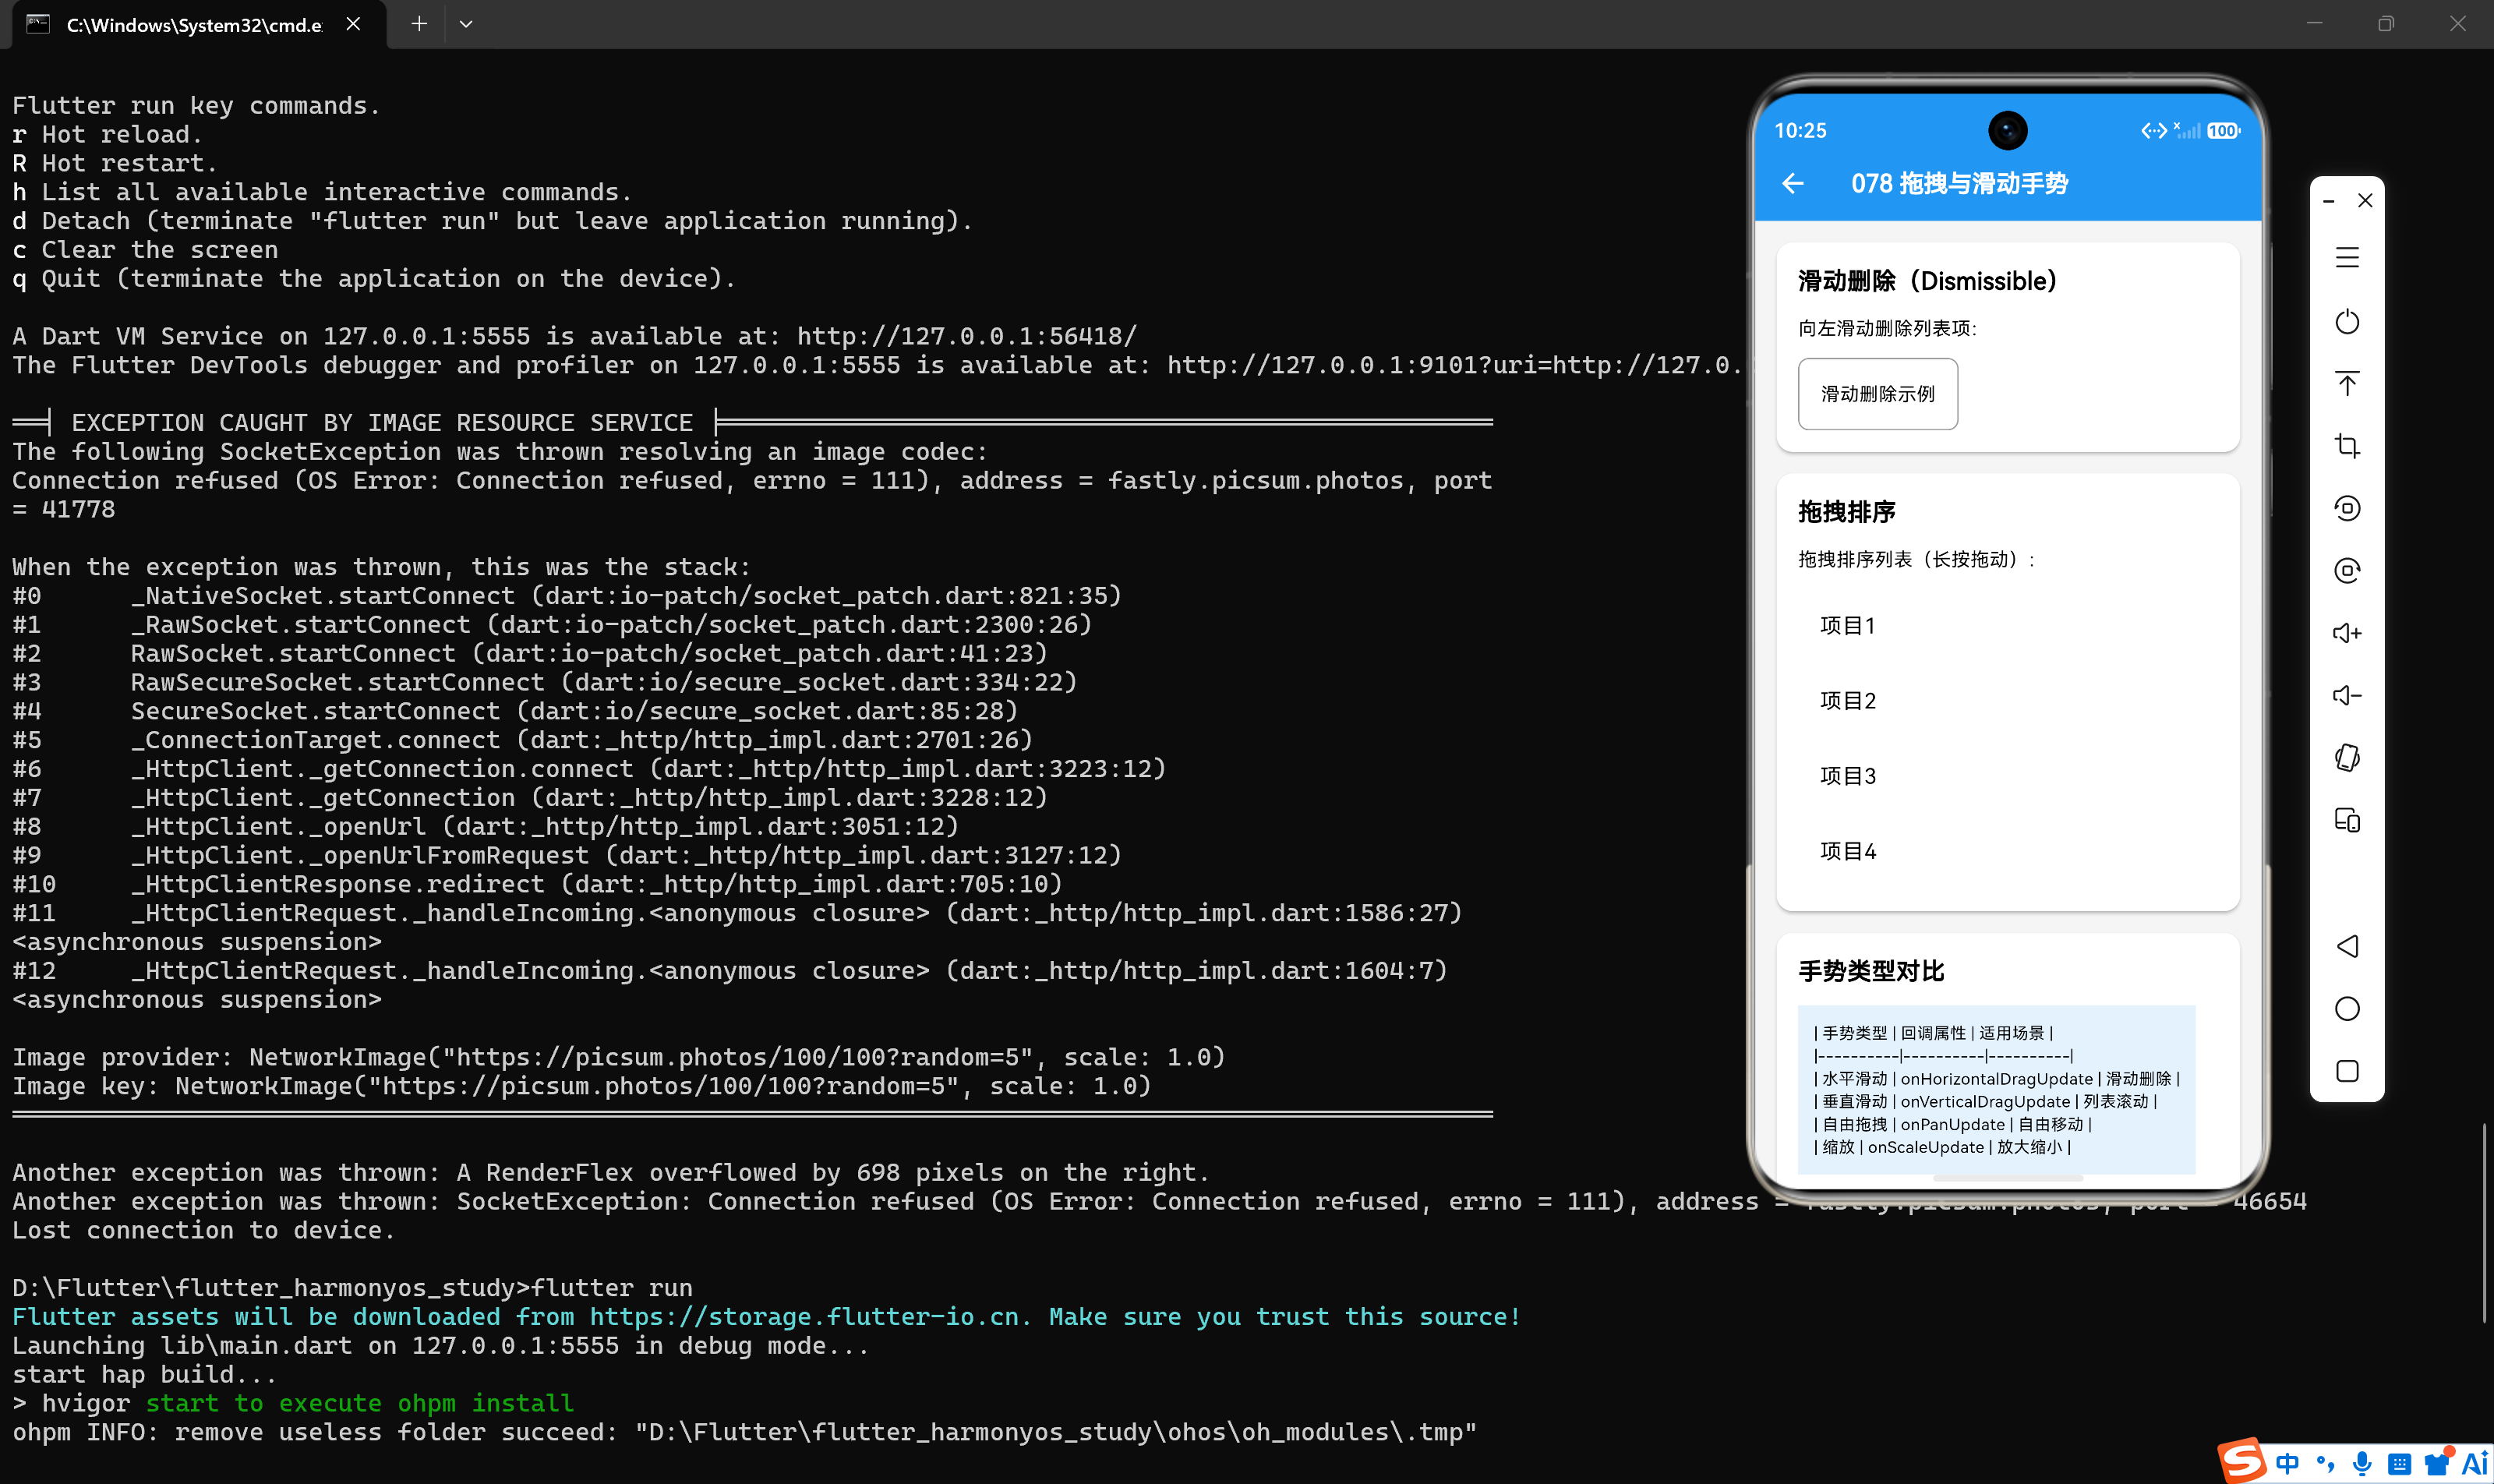
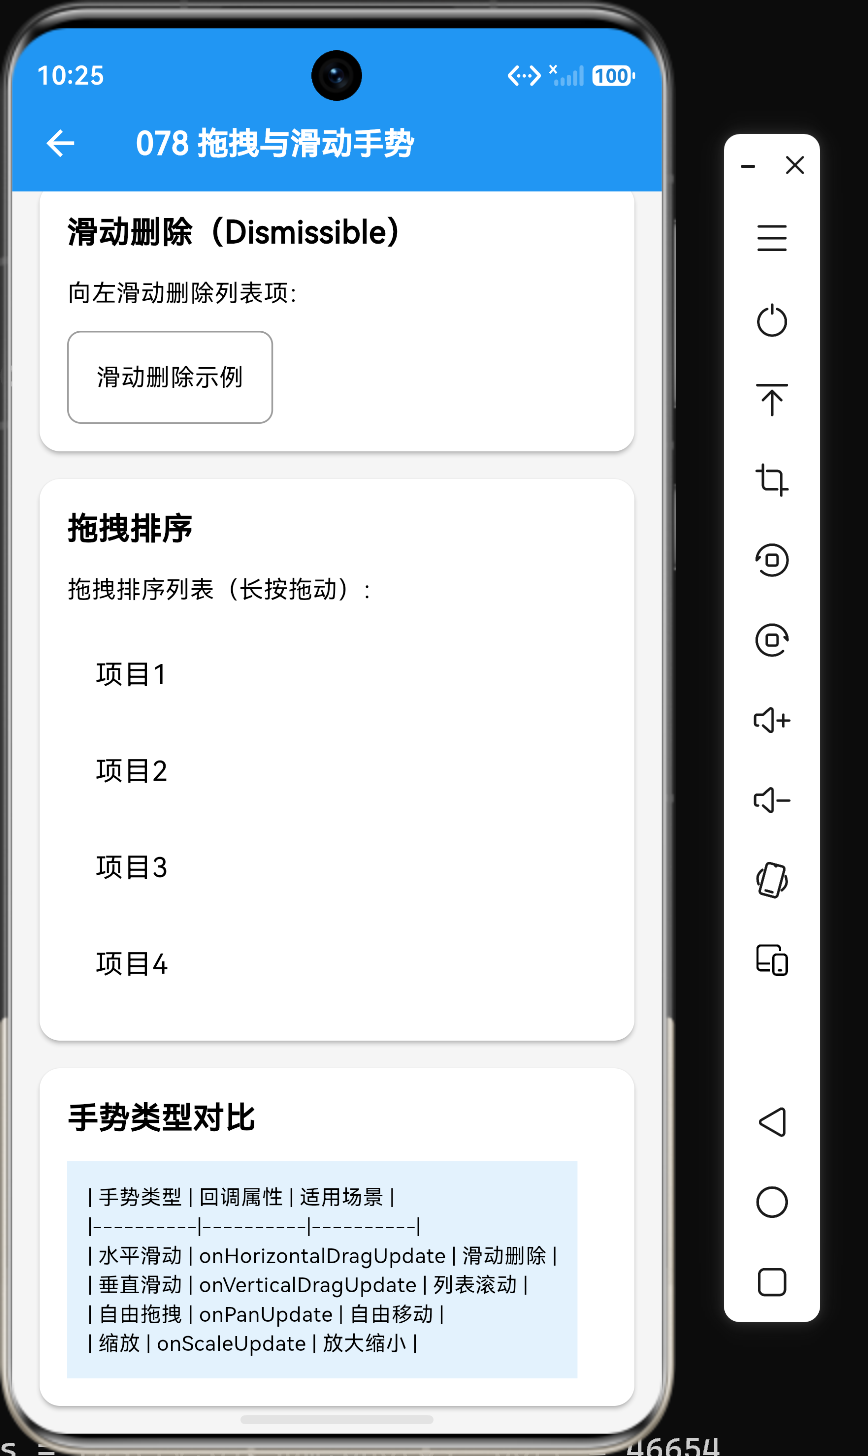
1.1 手势类型对比
| 手势类型 | 回调属性 | 适用场景 |
|---|---|---|
| 水平滑动 | onHorizontalDragUpdate | 滑动删除、滑动切换 |
| 垂直滑动 | onVerticalDragUpdate | 列表滚动、下拉刷新 |
| 自由拖拽 | onPanUpdate | 自由移动、拖拽排序 |
| 缩放 | onScaleUpdate | 放大缩小、捏合操作 |
1.2 核心组件
Flutter提供了多个用于实现拖拽和滑动的核心组件:
| 组件 | 功能 | 适用场景 |
|---|---|---|
| Dismissible | 滑动删除 | 列表项滑动删除 |
| Draggable | 拖拽源 | 拖拽操作的起点 |
| DragTarget | 拖拽目标 | 接收拖拽数据 |
| ReorderableListView | 拖拽排序 | 列表项重新排序 |
| NotificationListener | 滚动监听 | 自定义滚动行为 |
1.3 手势处理流程
用户触摸屏幕
    ↓
GestureDetector接收手势
    ↓
识别手势类型(水平/垂直/自由拖拽)
    ↓
触发对应回调(onDragStart/onDragUpdate/onDragEnd)
    ↓
更新UI状态(位置、缩放等)
    ↓
动画过渡到新状态
二、滑动删除实现
2.1 滑动删除概述
滑动删除是移动端最常见的交互模式之一,用户可以通过向左或向右滑动列表项来显示操作按钮。Flutter提供了两种实现方式:
- 自定义实现:使用
GestureDetector监听水平拖拽事件 - Dismissible组件:Flutter提供的官方组件,简化滑动删除实现
2.2 自定义滑动删除
class SwipeToDelete extends StatefulWidget {
final Todo todo;
final VoidCallback onDelete;
const SwipeToDelete({
super.key,
required this.todo,
required this.onDelete,
});
State<SwipeToDelete> createState() => _SwipeToDeleteState();
}
class _SwipeToDeleteState extends State<SwipeToDelete> {
double _offset = 0.0;
static const double _maxOffset = -100;
Widget build(BuildContext context) {
return Stack(
children: [
Positioned.fill(
child: Row(
mainAxisAlignment: MainAxisAlignment.end,
children: [
Container(
width: -_maxOffset,
color: Colors.red,
child: const Center(child: Text('删除', style: TextStyle(color: Colors.white))),
),
],
),
),
GestureDetector(
onHorizontalDragUpdate: (details) {
setState(() {
_offset += details.delta.dx;
if (_offset > 0) _offset = 0;
if (_offset < _maxOffset) _offset = _maxOffset;
});
},
onHorizontalDragEnd: (details) {
setState(() {
if (_offset < _maxOffset / 2) {
_offset = _maxOffset;
} else {
_offset = 0;
}
});
},
child: AnimatedContainer(
duration: const Duration(milliseconds: 200),
transform: Matrix4.translationValues(_offset, 0, 0),
child: TodoItem(todo: widget.todo),
),
),
],
);
}
}
2.3 使用Dismissible组件
Flutter提供了Dismissible组件,大大简化了滑动删除的实现:
Dismissible(
  key: Key(todo.id.toString()),
  direction: DismissDirection.endToStart,
  background: Container(
    color: Colors.red,
    alignment: Alignment.centerRight,
    padding: const EdgeInsets.only(right: 16),
    child: const Icon(Icons.delete, color: Colors.white),
  ),
  confirmDismiss: (direction) async {
    return await showDialog(
      context: context,
      builder: (context) => AlertDialog(
        title: const Text('确认删除'),
        content: const Text('确定要删除这个待办事项吗?'),
        actions: [
          TextButton(
            onPressed: () => Navigator.pop(context, false),
            child: const Text('取消'),
          ),
          TextButton(
            onPressed: () => Navigator.pop(context, true),
            child: const Text('删除'),
          ),
        ],
      ),
    );
  },
  onDismissed: (direction) {
    setState(() {
      todos.removeWhere((t) => t.id == todo.id);
    });
    ScaffoldMessenger.of(context).showSnackBar(
      const SnackBar(content: Text('已删除')),
    );
  },
  child: TodoItem(todo: todo),
)
2.4 Dismissible属性说明
| 属性 | 类型 | 说明 |
|---|---|---|
| key | Key | 唯一标识,必须提供 |
| direction | DismissDirection | 滑动方向(startToEnd/endToStart/horizontal/vertical/all) |
| background | Widget | 滑动时显示的背景 |
| secondaryBackground | Widget | 另一个方向滑动时的背景 |
| confirmDismiss | Future Function(DismissDirection) | 确认删除回调 |
| onDismissed | void Function(DismissDirection) | 删除完成回调 |
| resizeDuration | Duration | 调整大小的动画时长 |
| dismissThresholds | Map<DismissDirection, double> | 滑动阈值 |
2.5 双向滑动删除
Dismissible(
  key: Key(todo.id.toString()),
  direction: DismissDirection.horizontal,
  background: Container(
    color: Colors.green,
    alignment: Alignment.centerLeft,
    padding: const EdgeInsets.only(left: 16),
    child: const Icon(Icons.check, color: Colors.white),
  ),
  secondaryBackground: Container(
    color: Colors.red,
    alignment: Alignment.centerRight,
    padding: const EdgeInsets.only(right: 16),
    child: const Icon(Icons.delete, color: Colors.white),
  ),
  onDismissed: (direction) {
    if (direction == DismissDirection.startToEnd) {
      setState(() => todo.isCompleted = true);
    } else {
      setState(() => todos.removeWhere((t) => t.id == todo.id));
    }
  },
  child: TodoItem(todo: todo),
)
三、拖拽操作
3.1 Draggable组件
Draggable组件用于实现拖拽操作的起点:
Draggable<Todo>(
  data: todo,
  feedback: Container(
    width: 200,
    padding: const EdgeInsets.all(8),
    color: Colors.blue,
    child: Text(todo.title, style: const TextStyle(color: Colors.white)),
  ),
  childWhenDragging: Opacity(
    opacity: 0.5,
    child: TodoItem(todo: todo),
  ),
  child: TodoItem(todo: todo),
)
3.2 Draggable属性说明
| 属性 | 类型 | 说明 |
|---|---|---|
| data | T | 拖拽携带的数据 |
| feedback | Widget | 拖拽时显示的预览 |
| childWhenDragging | Widget | 拖拽时原位置显示的组件 |
| child | Widget | 正常状态显示的组件 |
| axis | Axis | 拖拽方向限制 |
| affinity | DragAffinity | 拖拽优先级 |
| maxSimultaneousDrags | int | 最大同时拖拽数量 |
| onDragStarted | void Function() | 拖拽开始回调 |
| onDragEnd | void Function(DraggableDetails) | 拖拽结束回调 |
3.3 DragTarget组件
DragTarget用于接收拖拽的数据:
DragTarget<Todo>(
  builder: (context, candidateData, rejectedData) {
    return Container(
      height: 100,
      color: candidateData.isNotEmpty ? Colors.green[200] : Colors.grey[200],
      child: const Center(child: Text('拖放到这里删除')),
    );
  },
  onWillAccept: (todo) => true,
  onAccept: (todo) {
    setState(() {
      todos.removeWhere((t) => t.id == todo.id);
    });
  },
)
3.4 DragTarget属性说明
| 属性 | 类型 | 说明 |
|---|---|---|
| builder | Widget Function(BuildContext, List<T?>, List<Object?>) | 构建回调 |
| onWillAccept | bool Function(T?) | 是否接受拖拽数据 |
| onAccept | void Function(T) | 接受数据回调 |
| onLeave | void Function(T?) | 离开目标回调 |
| onAcceptWithDetails | void Function(DragTargetDetails) | 带详情的接受回调 |
3.5 拖拽删除实战
class DragDeleteArea extends StatefulWidget {
final List<Todo> todos;
const DragDeleteArea({super.key, required this.todos});
State<DragDeleteArea> createState() => _DragDeleteAreaState();
}
class _DragDeleteAreaState extends State<DragDeleteArea> {
bool _isDragOver = false;
Widget build(BuildContext context) {
return Column(
children: [
Expanded(
child: ListView.builder(
itemCount: widget.todos.length,
itemBuilder: (context, index) {
final todo = widget.todos[index];
return Draggable<Todo>(
key: Key(todo.id.toString()),
data: todo,
feedback: Container(
width: MediaQuery.of(context).size.width - 32,
padding: const EdgeInsets.all(16),
color: Colors.blue,
child: Text(todo.title, style: const TextStyle(color: Colors.white)),
),
childWhenDragging: Opacity(
opacity: 0.5,
child: TodoItem(todo: todo),
),
child: TodoItem(todo: todo),
);
},
),
),
DragTarget<Todo>(
builder: (context, candidateData, rejectedData) {
return AnimatedContainer(
duration: const Duration(milliseconds: 200),
height: _isDragOver ? 80 : 60,
color: _isDragOver ? Colors.red[200] : Colors.red[100],
child: const Center(child: Text('拖放到这里删除')),
);
},
onWillAccept: (todo) {
setState(() => _isDragOver = true);
return true;
},
onAccept: (todo) {
setState(() {
_isDragOver = false;
widget.todos.removeWhere((t) => t.id == todo.id);
});
},
onLeave: (_) {
setState(() => _isDragOver = false);
},
),
],
);
}
}
四、拖拽排序
4.1 ReorderableListView组件
Flutter提供了ReorderableListView组件,简化了列表项拖拽排序的实现:
class DragSortList extends StatefulWidget {
final List<Todo> todos;
const DragSortList({super.key, required this.todos});
State<DragSortList> createState() => _DragSortListState();
}
class _DragSortListState extends State<DragSortList> {
Widget build(BuildContext context) {
return ReorderableListView(
onReorder: (oldIndex, newIndex) {
setState(() {
if (oldIndex < newIndex) {
newIndex -= 1;
}
final item = widget.todos.removeAt(oldIndex);
widget.todos.insert(newIndex, item);
});
},
children: widget.todos
.map((todo) => ListTile(key: Key(todo.id.toString()), title: Text(todo.title)))
.toList(),
);
}
}
4.2 ReorderableListView属性说明
| 属性 | 类型 | 说明 |
|---|---|---|
| onReorder | void Function(int, int) | 排序回调 |
| children | List | 列表项,每个需要key |
| padding | EdgeInsets | 内边距 |
| scrollDirection | Axis | 滚动方向 |
| reverse | bool | 是否反向 |
| shrinkWrap | bool | 是否自适应高度 |
| physics | ScrollPhysics | 滚动物理效果 |
4.3 自定义拖拽排序
class CustomDragSortList extends StatefulWidget {
final List<Todo> todos;
const CustomDragSortList({super.key, required this.todos});
State<CustomDragSortList> createState() => _CustomDragSortListState();
}
class _CustomDragSortListState extends State<CustomDragSortList> {
int? _draggedIndex;
Offset _dragOffset = Offset.zero;
void _handleDragStart(int index) {
setState(() {
_draggedIndex = index;
_dragOffset = Offset.zero;
});
}
void _handleDragUpdate(DragUpdateDetails details) {
setState(() {
_dragOffset += details.delta;
});
}
void _handleDragEnd(int index) {
setState(() {
_draggedIndex = null;
_dragOffset = Offset.zero;
});
}
Widget build(BuildContext context) {
return ListView.builder(
itemCount: widget.todos.length,
itemBuilder: (context, index) {
final todo = widget.todos[index];
final isDragging = _draggedIndex == index;
return GestureDetector(
key: Key(todo.id.toString()),
onVerticalDragStart: (_) => _handleDragStart(index),
onVerticalDragUpdate: _handleDragUpdate,
onVerticalDragEnd: (_) => _handleDragEnd(index),
child: AnimatedContainer(
duration: const Duration(milliseconds: 100),
transform: isDragging ? Matrix4.translationValues(0, _dragOffset.dy, 0) : Matrix4.identity(),
child: TodoItem(todo: todo),
),
);
},
);
}
}
五、自由拖拽
5.1 自由拖拽实现
自由拖拽允许用户在屏幕上自由移动组件:
class FreeDraggableWidget extends StatefulWidget {
final Widget child;
const FreeDraggableWidget({super.key, required this.child});
State<FreeDraggableWidget> createState() => _FreeDraggableWidgetState();
}
class _FreeDraggableWidgetState extends State<FreeDraggableWidget> {
Offset _position = Offset.zero;
Offset _startOffset = Offset.zero;
void _handlePanStart(DragStartDetails details) {
_startOffset = details.globalPosition - _position;
}
void _handlePanUpdate(DragUpdateDetails details) {
setState(() {
_position = details.globalPosition - _startOffset;
});
}
Widget build(BuildContext context) {
return Positioned(
left: _position.dx,
top: _position.dy,
child: GestureDetector(
onPanStart: _handlePanStart,
onPanUpdate: _handlePanUpdate,
child: widget.child,
),
);
}
}
5.2 带边界限制的自由拖拽
class BoundedDraggableWidget extends StatefulWidget {
final Widget child;
final Size boundarySize;
const BoundedDraggableWidget({
super.key,
required this.child,
required this.boundarySize,
});
State<BoundedDraggableWidget> createState() => _BoundedDraggableWidgetState();
}
class _BoundedDraggableWidgetState extends State<BoundedDraggableWidget> {
Offset _position = Offset.zero;
Offset _startOffset = Offset.zero;
Size? _childSize;
void _handlePanStart(DragStartDetails details) {
_startOffset = details.globalPosition - _position;
}
void _handlePanUpdate(DragUpdateDetails details) {
final newPosition = details.globalPosition - _startOffset;
final childSize = _childSize ?? const Size(100, 100);
final maxX = widget.boundarySize.width - childSize.width;
final maxY = widget.boundarySize.height - childSize.height;
setState(() {
_position = Offset(
newPosition.dx.clamp(0, maxX),
newPosition.dy.clamp(0, maxY),
);
});
}
Widget build(BuildContext context) {
return Positioned(
left: _position.dx,
top: _position.dy,
child: SizeChangedLayoutNotifier(
child: NotificationListener<SizeChangedLayoutNotification>(
onNotification: (notification) {
_childSize = notification.newSize;
return true;
},
child: GestureDetector(
onPanStart: _handlePanStart,
onPanUpdate: _handlePanUpdate,
child: widget.child,
),
),
),
);
}
}
5.3 吸附效果拖拽
class SnapDraggableWidget extends StatefulWidget {
final Widget child;
final List<Offset> snapPoints;
const SnapDraggableWidget({
super.key,
required this.child,
required this.snapPoints,
});
State<SnapDraggableWidget> createState() => _SnapDraggableWidgetState();
}
class _SnapDraggableWidgetState extends State<SnapDraggableWidget> {
Offset _position = Offset.zero;
Offset _startOffset = Offset.zero;
void _handlePanStart(DragStartDetails details) {
_startOffset = details.globalPosition - _position;
}
void _handlePanUpdate(DragUpdateDetails details) {
setState(() {
_position = details.globalPosition - _startOffset;
});
}
void _handlePanEnd(DragEndDetails details) {
Offset nearestPoint = widget.snapPoints[0];
double minDistance = double.infinity;
for (final point in widget.snapPoints) {
final distance = (_position - point).distance;
if (distance < minDistance) {
minDistance = distance;
nearestPoint = point;
}
}
setState(() {
_position = nearestPoint;
});
}
Widget build(BuildContext context) {
return Positioned(
left: _position.dx,
top: _position.dy,
child: GestureDetector(
onPanStart: _handlePanStart,
onPanUpdate: _handlePanUpdate,
onPanEnd: _handlePanEnd,
child: widget.child,
),
);
}
}
六、缩放手势
6.1 缩放实现
class ScaleGestureWidget extends StatefulWidget {
final Widget child;
const ScaleGestureWidget({super.key, required this.child});
State<ScaleGestureWidget> createState() => _ScaleGestureWidgetState();
}
class _ScaleGestureWidgetState extends State<ScaleGestureWidget> {
double _scale = 1.0;
double _previousScale = 1.0;
void _handleScaleStart(ScaleStartDetails details) {
_previousScale = _scale;
}
void _handleScaleUpdate(ScaleUpdateDetails details) {
setState(() {
_scale = _previousScale * details.scale;
_scale = _scale.clamp(0.5, 2.0);
});
}
Widget build(BuildContext context) {
return GestureDetector(
onScaleStart: _handleScaleStart,
onScaleUpdate: _handleScaleUpdate,
child: Transform.scale(
scale: _scale,
child: widget.child,
),
);
}
}
6.2 缩放与拖拽结合
class ScaleAndDragWidget extends StatefulWidget {
final Widget child;
const ScaleAndDragWidget({super.key, required this.child});
State<ScaleAndDragWidget> createState() => _ScaleAndDragWidgetState();
}
class _ScaleAndDragWidgetState extends State<ScaleAndDragWidget> {
double _scale = 1.0;
double _previousScale = 1.0;
Offset _offset = Offset.zero;
Offset _previousOffset = Offset.zero;
void _handleScaleStart(ScaleStartDetails details) {
_previousScale = _scale;
_previousOffset = _offset;
}
void _handleScaleUpdate(ScaleUpdateDetails details) {
setState(() {
_scale = _previousScale * details.scale;
_scale = _scale.clamp(0.5, 2.0);
_offset = _previousOffset + details.focalPointDelta;
});
}
Widget build(BuildContext context) {
return GestureDetector(
onScaleStart: _handleScaleStart,
onScaleUpdate: _handleScaleUpdate,
child: Transform(
transform: Matrix4.identity()
..translate(_offset.dx, _offset.dy)
..scale(_scale),
child: widget.child,
),
);
}
}
七、实战示例:待办事项列表
7.1 完整代码示例
import 'package:flutter/material.dart';
class Todo {
final int id;
final String title;
final bool isCompleted;
Todo({
required this.id,
required this.title,
this.isCompleted = false,
});
}
class TodoItem extends StatelessWidget {
final Todo todo;
const TodoItem({super.key, required this.todo});
Widget build(BuildContext context) {
return Container(
padding: const EdgeInsets.all(16),
margin: const EdgeInsets.symmetric(horizontal: 16, vertical: 8),
decoration: BoxDecoration(
color: Colors.white,
border: Border.all(color: Colors.grey),
borderRadius: BorderRadius.circular(8),
),
child: Row(
children: [
Icon(
todo.isCompleted ? Icons.check_circle : Icons.circle_outlined,
color: todo.isCompleted ? Colors.green : Colors.grey,
),
const SizedBox(width: 12),
Expanded(child: Text(todo.title)),
],
),
);
}
}
class TodoListPage extends StatefulWidget {
const TodoListPage({super.key});
State<TodoListPage> createState() => _TodoListPageState();
}
class _TodoListPageState extends State<TodoListPage> {
final List<Todo> _todos = [
Todo(id: 1, title: '完成项目文档'),
Todo(id: 2, title: '代码审查'),
Todo(id: 3, title: '团队会议'),
Todo(id: 4, title: '编写测试用例'),
Todo(id: 5, title: '更新文档'),
];
void _toggleTodo(int id) {
setState(() {
final todo = _todos.firstWhere((t) => t.id == id);
todo.isCompleted = !todo.isCompleted;
});
}
void _deleteTodo(int id) {
setState(() {
_todos.removeWhere((t) => t.id == id);
});
}
void _reorderTodos(int oldIndex, int newIndex) {
setState(() {
if (oldIndex < newIndex) {
newIndex -= 1;
}
final item = _todos.removeAt(oldIndex);
_todos.insert(newIndex, item);
});
}
Widget build(BuildContext context) {
return Scaffold(
appBar: AppBar(title: const Text('待办事项')),
body: ReorderableListView(
onReorder: _reorderTodos,
children: _todos.map((todo) {
return Dismissible(
key: Key(todo.id.toString()),
direction: DismissDirection.horizontal,
background: Container(
color: Colors.green,
alignment: Alignment.centerLeft,
padding: const EdgeInsets.only(left: 16),
child: const Icon(Icons.check, color: Colors.white),
),
secondaryBackground: Container(
color: Colors.red,
alignment: Alignment.centerRight,
padding: const EdgeInsets.only(right: 16),
child: const Icon(Icons.delete, color: Colors.white),
),
onDismissed: (direction) {
if (direction == DismissDirection.startToEnd) {
_toggleTodo(todo.id);
} else {
_deleteTodo(todo.id);
}
},
child: GestureDetector(
onTap: () => _toggleTodo(todo.id),
child: TodoItem(todo: todo),
),
);
}).toList(),
),
);
}
}
7.2 交互说明
| 操作 | 效果 | 实现方式 |
|---|---|---|
| 单击 | 切换完成状态 | GestureDetector.onTap |
| 向左滑动 | 显示删除按钮 | Dismissible |
| 向右滑动 | 显示完成按钮 | Dismissible |
| 拖拽排序 | 重新排列顺序 | ReorderableListView |
八、性能优化与最佳实践
8.1 使用AnimatedContainer优化动画
// 推荐
AnimatedContainer(
  duration: const Duration(milliseconds: 200),
  transform: Matrix4.translationValues(_offset, 0, 0),
  child: TodoItem(todo: todo),
)

// 不推荐
Transform.translate(
  offset: Offset(_offset, 0),
  child: TodoItem(todo: todo),
)
8.2 避免频繁setState
// 推荐:使用ValueNotifier
final _offsetNotifier = ValueNotifier<Offset>(Offset.zero);

void _handleDragUpdate(DragUpdateDetails details) {
  _offsetNotifier.value += details.delta;
}

// 使用ValueListenableBuilder
ValueListenableBuilder<Offset>(
  valueListenable: _offsetNotifier,
  builder: (context, offset, child) {
    return Transform.translate(offset: offset, child: child);
  },
  child: TodoItem(todo: todo),
)
8.3 使用RepaintBoundary
RepaintBoundary(
  child: Draggable(
    feedback: Container(
      child: RepaintBoundary(
        child: TodoItem(todo: todo),
      ),
    ),
    child: TodoItem(todo: todo),
  ),
)
8.4 合理设置拖拽阈值
Dismissible(
  dismissThresholds: const {
    DismissDirection.endToStart: 0.4,
    DismissDirection.startToEnd: 0.4,
  },
  child: TodoItem(todo: todo),
)
8.5 考虑拖拽性能
// 推荐:使用轻量级的feedback
Draggable(
  feedback: Container(
    width: 200,
    child: Text(todo.title),
  ),
  child: TodoItem(todo: todo),
)

// 不推荐:使用复杂组件作为feedback
Draggable(
  feedback: TodoItem(todo: todo), // 会复制整个组件
  child: TodoItem(todo: todo),
)
九、常见问题与解决方案
9.1 问题1:滑动删除与列表滚动冲突
问题描述:列表项的滑动删除与列表滚动发生冲突。
解决方案:使用Dismissible组件,它会自动处理与滚动的冲突。
Dismissible(
  key: Key(todo.id.toString()),
  child: TodoItem(todo: todo),
)
9.2 问题2:拖拽时组件闪烁
问题描述:拖拽时组件出现闪烁。
解决方案:使用RepaintBoundary或优化组件结构。
RepaintBoundary(
  child: Draggable(
    feedback: const Material(
      child: Text('拖拽'),
    ),
    child: TodoItem(todo: todo),
  ),
)
9.3 问题3:拖拽后位置错乱
问题描述:拖拽结束后组件位置错乱。
解决方案:在onDragEnd中正确更新状态。
void _handleDragEnd(DragEndDetails details) {
  setState(() {
    _isDragging = false;
    _offset = Offset.zero;
  });
}
9.4 问题4:缩放时中心点偏移
问题描述:缩放时组件中心点发生偏移。
解决方案:使用Transform.scale并设置alignment。
Transform.scale(
  scale: _scale,
  alignment: Alignment.center,
  child: widget.child,
)
9.5 问题5:嵌套拖拽冲突
问题描述:嵌套组件的拖拽发生冲突。
解决方案:使用AbsorbPointer或IgnorePointer控制手势传递。
GestureDetector(
  onPanUpdate: _handleParentDrag,
  child: AbsorbPointer(
    absorbing: _isParentDragging,
    child: child,
  ),
)
十、总结
通过本文的学习,我们掌握了以下核心知识点:
- 滑动删除使用
Dismissible组件或自定义GestureDetector实现 - 拖拽操作使用
Draggable和DragTarget组件实现 - 拖拽排序使用
ReorderableListView组件实现 - 自由拖拽使用
GestureDetector.onPanUpdate实现 - 缩放手势使用
GestureDetector.onScaleUpdate实现 - 性能优化包括使用
AnimatedContainer、RepaintBoundary、避免频繁setState等 - 手势冲突处理使用
AbsorbPointer、IgnorePointer等组件
在实际开发中,合理使用拖拽和滑动手势能够显著提升用户体验。理解各种手势组件的使用方式和性能优化策略,能够帮助我们创建出交互流畅、响应及时的应用。
参考资料
- Flutter官方文档:https://docs.flutter.dev/development/ui/advanced/gestures
- Dismissible组件:https://api.flutter.dev/flutter/widgets/Dismissible-class.html
- Draggable组件:https://api.flutter.dev/flutter/widgets/Draggable-class.html
- ReorderableListView组件:https://api.flutter.dev/flutter/material/ReorderableListView-class.html

讨论HarmonyOS开发技术,专注于API与组件、DevEco Studio、测试、元服务和应用上架分发等。
更多推荐
 3
3 0
0- 0


 已为社区贡献97条内容

所有评论(0)