React Native鸿蒙跨平台React Native 的useEffect生命周期,在鸿蒙中对应 `onInit`/`onReady`/`onShow` 等生命周期钩子
欢迎大家加入开源鸿蒙跨平台开发者社区,一起共建开源鸿蒙跨平台生态。
在康复医学领域,术后或受伤后的康复训练是恢复功能的关键环节。今天我们来深入分析一个基于 React Native 开发的术后康复运动应用,该应用为用户提供定制化的运动方案,支持视频跟练及进度追踪,帮助用户科学、系统地进行康复训练。
通过类型定义确保数据结构的一致性和代码的可维护性
该应用采用了 React Native 现代开发技术栈,主要包括:
- React Hooks:使用
useState管理应用状态,包括用户数据、运动方案、运动列表和进度追踪等 - TypeScript:通过类型定义确保数据结构的一致性和代码的可维护性
- 跨平台组件:使用
SafeAreaView、TouchableOpacity、ScrollView、Modal、Image等实现跨平台兼容的用户界面 - 响应式布局:利用
Dimensions API获取屏幕尺寸,确保在不同设备上的良好显示效果 - 基础组件:使用
View、Text、TextInput等构建用户界面
表示用户信息,包含 ID、姓名、损伤类型和康复阶段
应用通过 TypeScript 定义了四个核心数据类型,构建了完整的术后康复运动数据模型:
User:表示用户信息,包含 ID、姓名、损伤类型和康复阶段ExercisePlan:表示运动方案,包含 ID、用户 ID、标题、描述、持续时间和运动列表Exercise:表示运动类型,包含 ID、名称、描述、视频链接和持续时间ProgressTracking:表示进度追踪,包含 ID、用户 ID、运动 ID、日期、完成状态和备注
这种强类型定义不仅提高了代码的可读性和可维护性,也为鸿蒙跨端适配提供了清晰的数据结构映射基础。
状态管理
应用采用了基于 useState 的轻量级状态管理方案,为不同功能模块分别管理状态:
- 静态数据(用户列表)通过初始化的
useState直接存储 - 动态数据(运动方案、进度追踪)通过
useState管理,并支持添加和更新 - 表单数据(新运动信息)通过独立的
useState管理 - 交互状态(选中的用户、选中的方案、模态框可见性)通过独立的
useState管理
这种模式在中小型应用中非常高效,既避免了过度设计,又保证了状态管理的清晰性。
用户管理
用户管理是应用的基础功能,通过列表展示用户的基本信息,包括姓名、损伤类型和康复阶段。用户可以点击选择用户进行康复训练,为运动方案的制定和进度追踪提供明确的目标对象。
运动方案管理是应用的核心功能,主要包括:
- 为不同用户制定个性化的运动方案
- 展示运动方案的详细信息,包括标题、描述和持续时间
- 向运动方案中添加新的运动
- 选择运动方案进行训练
应用通过嵌套的数据结构,将运动方案与具体运动关联起来,实现了结构化的康复训练管理。
运动视频指导是应用的特色功能,主要包括:
- 为每个运动提供详细的视频指导
- 展示运动的名称、描述和持续时间
- 通过视频链接访问标准的运动示范
应用使用了示例视频链接(https://example.com/exercise1.mp4 和 https://example.com/exercise2.mp4)来模拟运动视频的展示,实际应用中可以通过集成视频播放器实现直接播放。
进度追踪功能帮助用户和医护人员了解康复训练的执行情况:
- 记录用户的运动完成状态
- 允许添加运动备注
- 标记运动为已完成
- 查看历史进度记录
通过进度追踪,用户可以清晰地了解自己的康复进展,医护人员也可以根据进度调整康复方案。
应用通过卡片式布局展示用户信息、运动方案和进度追踪,使用 TouchableOpacity 组件实现交互功能,点击卡片后可以查看详细信息或执行相关操作。此外,应用使用 Modal 组件展示详细信息,提升了用户体验。
组件映射
在鸿蒙 OS 适配过程中,需要注意以下组件映射:
SafeAreaView:在鸿蒙上需要使用SafeArea组件或自定义适配TouchableOpacity:对应鸿蒙的Button或Text组件配合点击事件ScrollView:对应鸿蒙的ListContainer或Scroll组件Modal:对应鸿蒙的Dialog组件Alert:对应鸿蒙的ToastDialog或AlertDialog组件TextInput:对应鸿蒙的TextField组件Image:对应鸿蒙的Image组件
鸿蒙 OS 对 Flexbox 布局的支持与 React Native 基本一致,但在细节上仍需注意:
- 确保样式命名符合鸿蒙规范
- 调整间距和尺寸以适应鸿蒙设备的显示特性
- 注意字体大小和行高的适配
- 对于表单输入控件,需要适配鸿蒙的输入框样式和交互方式
在鸿蒙跨端开发中,性能优化是一个重要考虑因素:
- 使用
memo优化组件渲染,特别是对于用户列表、运动方案列表等重复渲染的场景 - 合理使用
useCallback和useMemo减少不必要的计算 - 优化图片资源,考虑使用鸿蒙的资源加载机制
- 对于视频链接的处理,考虑使用鸿蒙的视频播放组件
- 对于列表数据的渲染,考虑使用虚拟化技术减少内存占用
应用实现了个性化的康复方案制定:
- 基于用户的损伤类型和康复阶段制定运动方案
- 为每个运动方案提供详细的运动列表
- 支持向运动方案中添加新的运动
- 为每个运动提供视频指导
这种个性化的康复方案比通用的康复建议更具针对性,能够更好地满足不同用户的康复需求。
视频指导系统
应用集成了视频指导系统:
- 为每个运动提供标准的视频示范
- 通过视频链接访问详细的运动指导
- 展示运动的名称、描述和持续时间
- 支持用户按照视频示范进行训练
这种视频指导系统比传统的文字说明更直观,能够帮助用户更准确地掌握运动要领。
应用实现了完整的进度追踪系统:
- 记录用户的运动完成情况
- 允许添加运动备注
- 标记运动为已完成
- 查看历史进度记录
通过进度追踪,用户可以清晰地了解自己的康复进展,医护人员也可以根据进度调整康复方案。
应用采用了清晰的模块化设计:
- 功能按模块划分(用户管理、运动方案管理、运动指导、进度追踪)
- 组件职责单一,便于维护和扩展
- 状态管理逻辑与 UI 渲染分离
Base64 图标库
应用使用 Base64 编码的图标,这种方式有几个优点:
- 减少网络请求,提高加载速度
- 避免图标资源的跨平台适配问题
- 减小应用包体积
虽然示例中使用的是占位 Base64 编码,但实际应用中可以使用真实的图标编码。
文件结构
示例代码集中在 App.tsx 文件中,适合小型应用。对于大型应用,建议按功能模块拆分文件:
-
/components:存放可复用组件,如用户卡片、运动方案卡片、运动卡片等 -
/types:存放类型定义,如 User、ExercisePlan、Exercise、ProgressTracking 等 -
/hooks:存放自定义 hooks,如运动方案管理逻辑、进度追踪逻辑等 -
/services:存放 API 调用和业务逻辑,如数据存储、视频服务等 -
/utils:存放工具函数,如日期处理、数据格式化等 -
命名规范:变量和函数命名清晰,符合语义化要求
-
类型安全:使用 TypeScript 确保类型安全
-
错误处理:通过条件判断处理可能的异常情况,如表单验证
-
注释:代码结构清晰,关键部分有适当注释
-
性能考虑:合理使用 React Hooks,避免不必要的渲染和计算
应用架构具有良好的扩展性:
- 可以轻松添加新的用户类型和损伤类型
- 可以扩展支持更多的运动类型和视频指导
- 可以集成传感器数据,实现运动姿态的实时监测
- 可以添加社交功能,让用户分享康复进展
- 可以开发配套的医护端应用,实现远程康复指导
这个术后康复运动应用展示了如何使用 React Native 构建功能完备的康复训练管理工具,特别是在个性化康复方案制定和视频指导方面的实践具有重要参考价值。通过跨端开发技术,可以在不同平台为用户提供一致的服务体验。
随着人们对康复医学重视程度的提高,这类术后康复运动应用的需求将不断增长。未来可以考虑:
- 集成更先进的运动姿态识别技术,实时纠正用户的运动姿势
- 与可穿戴设备对接,监测用户的生理指标和运动强度
- 利用 AI 技术根据用户的康复进展自动调整运动方案
- 支持远程康复指导,让医护人员实时监测和指导用户的训练
- 开发社区功能,让用户分享康复经验和进展
React Native 鸿蒙跨端开发代表了移动应用开发的未来趋势,通过一套代码库覆盖多个平台,不仅可以降低开发成本,还可以确保用户体验的一致性。在医疗康复应用领域,这种开发模式尤为重要,因为它可以让开发者更专注于核心功能的实现,而不是平台差异的处理。
在医疗健康领域,术后康复运动应用需要兼顾专业性、易用性与多端覆盖能力,React Native 凭借其跨端开发特性成为这类应用的理想技术选型,而鸿蒙(HarmonyOS)的分布式能力则为康复应用的跨设备协同提供了全新可能。本文以术后康复运动应用为例,深度拆解 React Native 应用的核心技术架构,并系统分析其向鸿蒙生态跨端适配的关键技术要点与最佳实践。
本次案例中的术后康复运动应用,是一套面向受伤/术后用户的康复管理系统,涵盖用户管理、运动方案定制、视频跟练、进度追踪等核心功能,其技术架构充分体现了 React Native 函数式组件开发的最佳实践:
1. TypeScript 驱动
应用基于 TypeScript 定义了完整的业务数据模型,构建了从用户到康复计划的全链路数据体系,这不仅提升了代码的可维护性,也为跨端适配奠定了结构化数据基础:
// 用户模型:核心标识康复人群的基础属性
type User = {
  id: string;
  name: string;
  injuryType: string; // 受伤类型(如膝关节损伤)
  recoveryStage: string; // 恢复阶段(如初期/中期恢复)
};

// 运动方案模型:关联用户的定制化康复计划
type ExercisePlan = {
  id: string;
  userId: string; // 关联用户ID,实现计划与用户的绑定
  title: string;
  description: string;
  duration: string;
  exercises: Exercise[]; // 嵌套运动项,体现1:N的业务关联
};

// 运动项模型:康复动作的精细化定义
type Exercise = {
  id: string;
  name: string;
  description: string; // 动作说明,保障康复专业性
  videoUrl: string; // 视频链接,支撑视频跟练核心功能
  duration: string;
};

// 进度追踪模型:康复过程的量化管理
type ProgressTracking = {
  id: string;
  userId: string;
  exerciseId: string;
  date: string;
  completed: boolean; // 完成状态,核心追踪指标
  notes: string; // 备注信息,记录康复体感
};
这套数据模型遵循“用户-计划-运动-进度”的业务逻辑链路,通过 ID 关联实现数据的精准映射,所有字段均采用基础数据类型(string/boolean),无平台相关依赖,为跨端数据复用提供了纯净的数据源。
2. React Hooks 的轻量化实践
应用采用 React 核心的 useState Hook 实现组件内状态管理,摒弃了复杂的第三方状态管理库,以轻量化方式实现康复业务的状态流转:
- 基础数据状态:
users(用户列表)、exercisePlans(运动方案)、progressTrackings(进度记录)作为核心业务数据,采用不可变数据模式更新,通过扩展运算符([...prev])保证状态更新的可追溯性; - 交互状态:
selectedUser/selectedPlan标记当前选中的用户/计划,实现 UI 交互的可视化反馈;newExercise管理新增运动的表单状态,支持康复计划的动态扩展; - 弹窗状态:
isModalVisible/modalContent封装通用弹窗逻辑,统一处理计划详情、运动说明、进度信息的弹窗展示,避免重复代码。
核心业务逻辑的封装体现了“纯函数+不可变数据”的设计思想,以运动添加功能为例:
const handleAddExercise = () => {
  if (newExercise.name && newExercise.description && newExercise.videoUrl && newExercise.duration) {
    const newExerciseItem: Exercise = {
      id: (exercisePlans.flatMap(p => p.exercises).length + 1).toString(),
      name: newExercise.name,
      description: newExercise.description,
      videoUrl: newExercise.videoUrl,
      duration: newExercise.duration
    };
    // 不可变更新:仅修改选中计划的运动列表,其余计划保持不变
    setExercisePlans(prevPlans =>
      prevPlans.map(plan =>
        plan.id === selectedPlan
          ? { ...plan, exercises: [...plan.exercises, newExerciseItem] }
          : plan
      )
    );
    setNewExercise({ name: '', description: '', videoUrl: '', duration: '' });
    Alert.alert('添加成功', '新运动已添加到康复计划中');
  } else {
    Alert.alert('提示', '请填写完整的运动信息');
  }
};
这里的关键技术点在于不可变数据更新:通过 prevPlans 回调获取最新状态,使用 map + 扩展运算符实现仅目标计划的局部更新,既保证了 React 状态的单向数据流特性,又避免了全量数据重渲染,提升了应用性能,同时这种纯 JS 逻辑可直接复用于鸿蒙端。
3. 医疗场景
应用基于 React Native 基础组件构建了符合医疗场景的 UI 体系,核心交互设计兼顾了康复用户的操作便捷性:
- 分层布局体系:采用
SafeAreaView保障不同设备的安全区域适配,ScrollView承载长列表内容,View实现模块化分区,形成“头部-内容区-弹窗”的三层布局结构; - 康复场景化交互:
- 运动方案与用户的关联选择:通过
selectedUser/selectedPlan状态实现卡片高亮,直观反馈选中状态; - 视频跟练功能:封装
TouchableOpacity实现播放按钮,通过 Alert 模拟视频播放交互,预留原生视频组件接入接口; - 进度追踪交互:针对未完成的康复动作,提供“标记完成”按钮,通过
handleMarkAsCompleted实现状态的即时更新,满足康复进度的实时管理需求;
- 运动方案与用户的关联选择:通过
- 样式系统设计:通过
StyleSheet.create封装统一的样式规范,采用 Flex 布局实现卡片的自适应排列,elevation/shadow属性增强视觉层级,borderRadius等属性提升医疗应用的柔和视觉体验,所有样式属性均为 React Native 跨平台通用属性,无平台硬编码。
4. 嵌套数据处理
应用的核心技术难点在于处理“运动方案-运动项”的嵌套数据结构,通过 flatMap + find 实现嵌套数据的精准查询:
// 查找指定ID的运动项:跨计划检索所有运动
const exercise = exercisePlans.flatMap(p => p.exercises).find(e => e.id === exerciseId);
这种数据处理方式完全基于 ES6+ 标准语法,无平台相关 API 依赖,是跨端适配中“业务逻辑复用”的核心体现——无论运行在 iOS、Android 还是鸿蒙系统,数据检索逻辑保持完全一致。
鸿蒙系统作为分布式操作系统,其“一次开发,多端部署”的特性与 React Native 的跨端理念高度契合,将康复运动应用适配到鸿蒙生态,核心在于“复用业务逻辑,适配底层组件与分布式能力”:
1. 适配方案选型:
针对本应用的轻量级特性,优先选择“React Native 业务逻辑复用 + 鸿蒙 JS/TS 组件替换”的适配方案,核心思路是:
- 100% 复用业务逻辑:用户管理、运动方案更新、进度追踪、数据校验等纯 JS/TS 逻辑代码无需修改,直接迁移到鸿蒙工程中;
- 组件层适配:将 React Native 组件映射为鸿蒙 ArkUI 组件,保持布局结构与交互逻辑一致:
| React Native 组件 | 鸿蒙 ArkUI 组件 | 适配要点 |
|---|---|---|
SafeAreaView | SafeArea + Column | 鸿蒙通过 SafeArea 组件实现安全区域适配,外层嵌套 Column 保持布局结构 |
View | Stack/Column/Row | 鸿蒙的容器组件语义更明确,根据布局方向选择对应容器 |
Text | Text | 属性基本一致,仅需调整样式属性命名(如 fontWeight: 'bold' → fontWeight: FontWeight.Bold) |
TouchableOpacity | Button/Text(绑定 onClick) | 鸿蒙无 TouchableOpacity 组件,通过 Button 或 Text 绑定点击事件实现交互 |
ScrollView | Scroll | 滚动容器属性完全兼容,仅需调整样式写法 |
Modal | Dialog | 鸿蒙通过 Dialog 组件实现弹窗,需适配显隐控制逻辑 |
TextInput | Input | 输入框属性基本兼容,onChangeText → onChange 事件回调 |
以康复计划卡片为例,鸿蒙适配后的代码示例:
// 鸿蒙 TS/JS 适配代码
@Entry
@Component
struct ExercisePlanCard {
  @State selectedPlan: string = '1';
  @State exercisePlans: ExercisePlan[] = [...]; // 复用原数据

  build() {
    Column() {
      ForEach(this.exercisePlans, (plan) => {
        Stack({ direction: Direction.Horizontal }) {
          Text('📋').fontSize(28).marginRight(12);
          Column() {
            Text(plan.title).fontSize(16).fontWeight(FontWeight.Medium);
            Text(plan.description).fontSize(14);
            Text(`持续时间: ${plan.duration}`).fontSize(14);
          }.flexGrow(1);
          Button('查看详情')
            .backgroundColor('#0284c7')
            .borderRadius(8)
            .onClick(() => this.handleViewPlan(plan.id));
        }
        .backgroundColor(this.selectedPlan === plan.id ? '#e0f7fa' : '#f0f9ff')
        .borderWidth(this.selectedPlan === plan.id ? 2 : 0)
        .borderColor('#0284c7')
        .borderRadius(12)
        .padding(16)
        .marginBottom(12)
        .onClick(() => this.handleSelectPlan(plan.id));
      })
    }
  }

  // 完全复用原 handleViewPlan 逻辑
  handleViewPlan(planId: string) {
    const plan = this.exercisePlans.find(p => p.id === planId);
    if (plan) {
      // 鸿蒙 Dialog 弹窗逻辑
      this.modalContent = `计划名称: ${plan.title}\n描述: ${plan.description}\n持续时间: ${plan.duration}`;
      this.isModalVisible = true;
    }
  }
}
2. 核心差异点
React Native 基于 React Hooks 实现状态管理,而鸿蒙 JS/TS 框架采用装饰器模式的状态管理,核心适配要点:
- 状态映射:React 的
useState→ 鸿蒙的@State/@Link装饰器,例如:// React Native 状态 const [selectedPlan, setSelectedPlan] = useState<string | null>(null); // 鸿蒙适配后 @State selectedPlan: string | null = null; - 不可变更新适配:React Native 中通过
setExercisePlans(prev => prev.map(...))的不可变更新方式,在鸿蒙中可直接通过数组操作实现,因为鸿蒙的@State装饰器会监听数组的变更:// 鸿蒙中更新运动计划 handleAddExercise(newExercise: Exercise) { this.exercisePlans = this.exercisePlans.map(plan => plan.id === this.selectedPlan ? { ...plan, exercises: [...plan.exercises, newExercise] } : plan ); } - 生命周期适配:React Native 的
useEffect生命周期,在鸿蒙中对应onInit/onReady/onShow等生命周期钩子,例如组件挂载完成后的初始化逻辑:// React Native useEffect(() => { // 初始化逻辑 }, []); // 鸿蒙 onReady() { // 复用相同的初始化逻辑 }
适配鸿蒙的核心价值不仅是“多端运行”,更是利用其分布式能力提升康复应用的体验:
- 分布式数据同步:将
progressTrackings进度数据存储到鸿蒙分布式数据中心,实现手机端记录康复进度、平板端查看康复报告、智慧屏端播放康复视频的跨设备数据同步; - 分布式任务调度:将康复视频解码、运动数据统计等耗性能任务,分发到性能更强的鸿蒙设备(如平板/PC)执行,提升低配置设备的运行流畅度;
- 跨设备交互:支持在手机上选择康复计划,一键流转到智慧屏进行视频跟练,利用智慧屏的大屏优势提升康复动作的可视性,适配代码示例:
// 鸿蒙分布式流转能力
import router from '@ohos.router';
import distributedDeviceManager from '@ohos.distributedDeviceManager';

// 视频跨设备播放
const playVideoOnSmartScreen = (videoUrl: string) => {
  // 获取可用的鸿蒙设备列表
  const devices = distributedDeviceManager.getAvailableDevices();
  // 选择智慧屏设备
  const smartScreen = devices.find(device => device.deviceType === 'tv');
  if (smartScreen) {
    // 跳转视频播放页面到智慧屏
    router.pushUrl({
      url: 'pages/VideoPlayer',
      params: { videoUrl, deviceId: smartScreen.deviceId }
    }, router.RouterMode.CROSS_DEVICE);
  }
};
4. 样式
React Native 的 Flex 布局与鸿蒙的 Flex 布局语法高度兼容,仅需少量样式属性适配:
- 样式属性命名适配:React Native 的
flexDirection: 'row'→ 鸿蒙的flexDirection: FlexDirection.Row,alignItems: 'center'→alignItems: ItemAlign.Center; - 尺寸单位适配:React Native 的
padding: 16(逻辑像素),在鸿蒙中保持一致,鸿蒙会自动适配不同设备的像素密度; - 阴影效果适配:React Native 的
elevation/shadow属性,在鸿蒙中通过shadow组件实现,保持视觉效果一致:// React Native 阴影样式 shadowColor: '#000', shadowOffset: { width: 0, height: 2 }, shadowOpacity: 0.1, shadowRadius: 4, // 鸿蒙适配后 .shadow({ color: '#000', offsetX: 0, offsetY: 2, opacity: 0.1, radius: 4 })
针对术后康复运动这类医疗应用,跨端开发需兼顾专业性与性能,核心最佳实践:
- 数据模型的标准化:采用 TypeScript 强类型定义所有业务数据,确保跨端数据解析的一致性,避免因数据类型错误导致的康复计划展示异常;
- 业务逻辑与UI解耦:将康复进度计算、运动方案匹配等核心逻辑封装为纯函数,与 UI 组件解耦,保证跨端复用性;
- 列表性能优化:在鸿蒙端将
map渲染的长列表(如运动列表、进度列表)替换为鸿蒙的LazyForEach组件,实现列表项的懒加载,降低内存占用; - 原生能力适配:视频播放、本地存储等原生能力,在鸿蒙端替换为鸿蒙系统 API(如
@ohos.multimedia.media播放视频),保证功能的原生体验。
本文以术后康复运动应用为例,系统解析了 React Native 应用的核心技术架构,包括强类型数据模型、轻量化状态管理、嵌套数据处理、场景化 UI 设计等,并深入探讨了向鸿蒙系统跨端适配的完整技术路径。React Native 应用的“纯 JS 业务逻辑 + 标准化数据模型”为鸿蒙适配提供了低成本复用基础,而鸿蒙的分布式能力则为康复应用赋予了跨设备协同的全新体验。对于医疗健康类跨端应用开发而言,这种“React Native 跨端开发 + 鸿蒙分布式能力扩展”的模式,既保证了多端开发效率,又能充分利用鸿蒙生态的技术优势,是医疗应用跨端落地的最优路径之一。
真实演示案例代码:
// App.tsx
import React, { useState } from 'react';
import { SafeAreaView, View, Text, StyleSheet, TouchableOpacity, ScrollView, Dimensions, Alert, TextInput, Modal, Image } from 'react-native';

// Base64 图标库
const ICONS_BASE64 = {
  exercise: 'data:image/png;base64,iVBORw0KGgoAAAANSUhEUgAAAAEAAAABCAYAAAAfFcSJAAAADUlEQVR42mNkYPhfDwAChwGA60e6kgAAAABJRU5ErkJggg==',
  video: 'data:image/png;base64,iVBORw0KGgoAAAANSUhEUgAAAAEAAAABCAYAAAAfFcSJAAAADUlEQVR42mNkYPhfDwAChwGA60e6kgAAAABJRU5ErkJggg==',
  progress: 'data:image/png;base64,iVBORw0KGgoAAAANSUhEUgAAAAEAAAABCAYAAAAfFcSJAAAADUlEQVR42mNkYPhfDwAChwGA60e6kgAAAABJRU5ErkJggg==',
  plan: 'data:image/png;base64,iVBORw0KGgoAAAANSUhEUgAAAAEAAAABCAYAAAAfFcSJAAAADUlEQVR42mNkYPhfDwAChwGA60e6kgAAAABJRU5ErkJggg==',
};

const { width, height } = Dimensions.get('window');

// 用户类型
type User = {
  id: string;
  name: string;
  injuryType: string;
  recoveryStage: string;
};

// 运动方案类型
type ExercisePlan = {
  id: string;
  userId: string;
  title: string;
  description: string;
  duration: string;
  exercises: Exercise[];
};

// 运动类型
type Exercise = {
  id: string;
  name: string;
  description: string;
  videoUrl: string;
  duration: string;
};

// 进度追踪类型
type ProgressTracking = {
  id: string;
  userId: string;
  exerciseId: string;
  date: string;
  completed: boolean;
  notes: string;
};

// 术后康复运动应用组件
const PostInjuryRehabilitationApp: React.FC = () => {
  const [users] = useState<User[]>([
    {
      id: '1',
      name: '李先生',
      injuryType: '膝关节损伤',
      recoveryStage: '初期恢复'
    },
    {
      id: '2',
      name: '王女士',
      injuryType: '肩袖撕裂',
      recoveryStage: '中期恢复'
    }
  ]);

  const [exercisePlans, setExercisePlans] = useState<ExercisePlan[]>([
    {
      id: '1',
      userId: '1',
      title: '膝关节康复计划',
      description: '针对膝关节损伤的康复训练',
      duration: '4周',
      exercises: [
        {
          id: '1',
          name: '直腿抬高',
          description: '平躺,抬起患腿至45度,保持5秒',
          videoUrl: 'https://example.com/exercise1.mp4',
          duration: '10分钟'
        },
        {
          id: '2',
          name: '膝关节屈伸',
          description: '坐姿,缓慢屈伸膝关节',
          videoUrl: 'https://example.com/exercise2.mp4',
          duration: '15分钟'
        }
      ]
    }
  ]);

  const [progressTrackings, setProgressTrackings] = useState<ProgressTracking[]>([
    {
      id: '1',
      userId: '1',
      exerciseId: '1',
      date: '2023-12-01',
      completed: true,
      notes: '感觉良好,无不适'
    },
    {
      id: '2',
      userId: '1',
      exerciseId: '2',
      date: '2023-12-02',
      completed: false,
      notes: '膝盖略有疼痛'
    }
  ]);

  const [selectedUser, setSelectedUser] = useState<string | null>(null);
  const [selectedPlan, setSelectedPlan] = useState<string | null>(null);
  const [newExercise, setNewExercise] = useState({
    name: '',
    description: '',
    videoUrl: '',
    duration: ''
  });
  const [isModalVisible, setIsModalVisible] = useState(false);
  const [modalContent, setModalContent] = useState('');

  const handleSelectUser = (userId: string) => {
    setSelectedUser(userId);
    Alert.alert('选择用户', '您已选择该用户进行康复训练');
  };

  const handleSelectPlan = (planId: string) => {
    setSelectedPlan(planId);
    Alert.alert('选择计划', '您已选择该康复计划');
  };

  const handleAddExercise = () => {
    if (newExercise.name && newExercise.description && newExercise.videoUrl && newExercise.duration) {
      const newExerciseItem: Exercise = {
        id: (exercisePlans.flatMap(p => p.exercises).length + 1).toString(),
        name: newExercise.name,
        description: newExercise.description,
        videoUrl: newExercise.videoUrl,
        duration: newExercise.duration
      };
      setExercisePlans(prevPlans =>
        prevPlans.map(plan =>
          plan.id === selectedPlan
            ? { ...plan, exercises: [...plan.exercises, newExerciseItem] }
            : plan
        )
      );
      setNewExercise({ name: '', description: '', videoUrl: '', duration: '' });
      Alert.alert('添加成功', '新运动已添加到康复计划中');
    } else {
      Alert.alert('提示', '请填写完整的运动信息');
    }
  };

  const handleMarkAsCompleted = (trackingId: string) => {
    setProgressTrackings(prevTrackings =>
      prevTrackings.map(tracking =>
        tracking.id === trackingId
          ? { ...tracking, completed: true }
          : tracking
      )
    );
    Alert.alert('标记完成', '运动已标记为完成');
  };

  const handleViewPlan = (planId: string) => {
    const plan = exercisePlans.find(p => p.id === planId);
    if (plan) {
      setModalContent(`计划名称: ${plan.title}\n描述: ${plan.description}\n持续时间: ${plan.duration}`);
      setIsModalVisible(true);
    }
  };

  const handleViewExercise = (exerciseId: string) => {
    const exercise = exercisePlans.flatMap(p => p.exercises).find(e => e.id === exerciseId);
    if (exercise) {
      setModalContent(`运动名称: ${exercise.name}\n描述: ${exercise.description}\n持续时间: ${exercise.duration}\n视频链接: ${exercise.videoUrl}`);
      setIsModalVisible(true);
    }
  };

  const handleViewProgress = (trackingId: string) => {
    const tracking = progressTrackings.find(t => t.id === trackingId);
    if (tracking) {
      const exercise = exercisePlans.flatMap(p => p.exercises).find(e => e.id === tracking.exerciseId);
      setModalContent(`运动: ${exercise?.name}\n日期: ${tracking.date}\n完成状态: ${tracking.completed ? '已完成' : '未完成'}\n备注: ${tracking.notes}`);
      setIsModalVisible(true);
    }
  };

  const openModal = (content: string) => {
    setModalContent(content);
    setIsModalVisible(true);
  };

  const closeModal = () => {
    setIsModalVisible(false);
  };

  return (
    <SafeAreaView style={styles.container}>
      {/* 头部 */}
      <View style={styles.header}>
        <Text style={styles.title}>术后康复运动</Text>
        <Text style={styles.subtitle}>术后或受伤用户可获取定制化运动方案,支持视频跟练及进度追踪</Text>
      </View>

      <ScrollView style={styles.content}>
        {/* 用户列表 */}
        <View style={styles.section}>
          <Text style={styles.sectionTitle}>用户列表</Text>
          {users.map(user => (
            <TouchableOpacity
              key={user.id}
              style={[
                styles.card,
                selectedUser === user.id && styles.selectedCard
              ]}
              onPress={() => handleSelectUser(user.id)}
            >
              <Text style={styles.icon}>👤</Text>
              <View style={styles.cardInfo}>
                <Text style={styles.cardTitle}>{user.name}</Text>
                <Text style={styles.cardDescription}>受伤类型: {user.injuryType}</Text>
                <Text style={styles.cardDescription}>恢复阶段: {user.recoveryStage}</Text>
              </View>
            </TouchableOpacity>
          ))}
        </View>

        {/* 运动方案 */}
        <View style={styles.section}>
          <Text style={styles.sectionTitle}>运动方案</Text>
          {exercisePlans.map(plan => (
            <TouchableOpacity
              key={plan.id}
              style={[
                styles.card,
                selectedPlan === plan.id && styles.selectedCard
              ]}
              onPress={() => handleSelectPlan(plan.id)}
            >
              <Text style={styles.icon}>📋</Text>
              <View style={styles.cardInfo}>
                <Text style={styles.cardTitle}>{plan.title}</Text>
                <Text style={styles.cardDescription}>{plan.description}</Text>
                <Text style={styles.cardDescription}>持续时间: {plan.duration}</Text>
              </View>
              <TouchableOpacity
                style={styles.viewButton}
                onPress={() => handleViewPlan(plan.id)}
              >
                <Text style={styles.viewText}>查看详情</Text>
              </TouchableOpacity>
            </TouchableOpacity>
          ))}
        </View>

        {/* 添加运动 */}
        <View style={styles.section}>
          <Text style={styles.sectionTitle}>添加运动</Text>
          <View style={styles.inputRow}>
            <TextInput
              style={styles.input}
              placeholder="运动名称"
              value={newExercise.name}
              onChangeText={(text) => setNewExercise({ ...newExercise, name: text })}
            />
            <TextInput
              style={styles.input}
              placeholder="运动描述"
              value={newExercise.description}
              onChangeText={(text) => setNewExercise({ ...newExercise, description: text })}
            />
          </View>
          <View style={styles.inputRow}>
            <TextInput
              style={styles.input}
              placeholder="视频链接"
              value={newExercise.videoUrl}
              onChangeText={(text) => setNewExercise({ ...newExercise, videoUrl: text })}
            />
            <TextInput
              style={styles.input}
              placeholder="持续时间"
              value={newExercise.duration}
              onChangeText={(text) => setNewExercise({ ...newExercise, duration: text })}
            />
          </View>
          <TouchableOpacity
            style={styles.addButton}
            onPress={handleAddExercise}
          >
            <Text style={styles.addText}>添加运动</Text>
          </TouchableOpacity>
        </View>

        {/* 运动列表 */}
        <View style={styles.section}>
          <Text style={styles.sectionTitle}>运动列表</Text>
          {selectedPlan && exercisePlans.find(p => p.id === selectedPlan)?.exercises.map(exercise => (
            <TouchableOpacity
              key={exercise.id}
              style={styles.exerciseCard}
              onPress={() => handleViewExercise(exercise.id)}
            >
              <Text style={styles.icon}>🎥</Text>
              <View style={styles.cardInfo}>
                <Text style={styles.cardTitle}>{exercise.name}</Text>
                <Text style={styles.cardDescription}>{exercise.description}</Text>
                <Text style={styles.cardDescription}>持续时间: {exercise.duration}</Text>
              </View>
              <TouchableOpacity
                style={styles.videoButton}
                onPress={() => Alert.alert('播放视频', `正在播放 ${exercise.name} 的教学视频`)}
              >
                <Text style={styles.videoText}>播放视频</Text>
              </TouchableOpacity>
            </TouchableOpacity>
          ))}
        </View>

        {/* 进度追踪 */}
        <View style={styles.section}>
          <Text style={styles.sectionTitle}>进度追踪</Text>
          {progressTrackings.map(tracking => (
            <View key={tracking.id} style={styles.trackingCard}>
              <Text style={styles.icon}>📊</Text>
              <View style={styles.cardInfo}>
                <Text style={styles.cardTitle}>记录ID: {tracking.id}</Text>
                <Text style={styles.cardDescription}>日期: {tracking.date}</Text>
                <Text style={styles.cardDescription}>完成状态: {tracking.completed ? '已完成' : '未完成'}</Text>
                <Text style={styles.cardDescription}>备注: {tracking.notes}</Text>
              </View>
              {!tracking.completed && (
                <TouchableOpacity
                  style={styles.completeButton}
                  onPress={() => handleMarkAsCompleted(tracking.id)}
                >
                  <Text style={styles.completeText}>标记完成</Text>
                </TouchableOpacity>
              )}
            </View>
          ))}
        </View>

        {/* 使用说明 */}
        <View style={styles.infoCard}>
          <Text style={styles.sectionTitle}>📘 使用说明</Text>
          <Text style={styles.infoText}>• 选择用户进行康复训练</Text>
          <Text style={styles.infoText}>• 查看并选择合适的康复计划</Text>
          <Text style={styles.infoText}>• 添加个性化运动到计划中</Text>
          <Text style={styles.infoText}>• 跟练视频并追踪训练进度</Text>
        </View>

        {/* 弹框内容 */}
        <Modal
          animationType="slide"
          transparent={true}
          visible={isModalVisible}
          onRequestClose={closeModal}
        >
          <View style={styles.modalContainer}>
            <View style={styles.modalContent}>
              <Text style={styles.modalTitle}>详细信息</Text>
              <Text style={styles.modalText}>{modalContent}</Text>
              <TouchableOpacity
                style={styles.closeButton}
                onPress={closeModal}
              >
                <Text style={styles.closeButtonText}>关闭</Text>
              </TouchableOpacity>
            </View>
          </View>
        </Modal>
      </ScrollView>
    </SafeAreaView>
  );
};

const styles = StyleSheet.create({
  container: {
    flex: 1,
    backgroundColor: '#f0f9ff',
  },
  header: {
    flexDirection: 'column',
    padding: 16,
    backgroundColor: '#ffffff',
    borderBottomWidth: 1,
    borderBottomColor: '#bae6fd',
  },
  title: {
    fontSize: 20,
    fontWeight: 'bold',
    color: '#0c4a6e',
    marginBottom: 4,
  },
  subtitle: {
    fontSize: 14,
    color: '#0284c7',
  },
  content: {
    flex: 1,
    marginTop: 12,
  },
  section: {
    backgroundColor: '#ffffff',
    marginHorizontal: 16,
    marginBottom: 12,
    borderRadius: 12,
    padding: 16,
    elevation: 2,
    shadowColor: '#000',
    shadowOffset: { width: 0, height: 2 },
    shadowOpacity: 0.1,
    shadowRadius: 4,
  },
  sectionTitle: {
    fontSize: 16,
    fontWeight: '600',
    color: '#0c4a6e',
    marginBottom: 12,
  },
  card: {
    flexDirection: 'row',
    alignItems: 'center',
    backgroundColor: '#f0f9ff',
    borderRadius: 12,
    padding: 16,
    marginBottom: 12,
  },
  selectedCard: {
    borderWidth: 2,
    borderColor: '#0284c7',
  },
  exerciseCard: {
    flexDirection: 'row',
    alignItems: 'center',
    backgroundColor: '#f0f9ff',
    borderRadius: 12,
    padding: 16,
    marginBottom: 12,
  },
  trackingCard: {
    flexDirection: 'row',
    alignItems: 'center',
    backgroundColor: '#f0f9ff',
    borderRadius: 12,
    padding: 16,
    marginBottom: 12,
  },
  icon: {
    fontSize: 28,
    marginRight: 12,
  },
  cardInfo: {
    flex: 1,
  },
  cardTitle: {
    fontSize: 16,
    fontWeight: '500',
    color: '#0c4a6e',
    marginBottom: 4,
  },
  cardDescription: {
    fontSize: 14,
    color: '#0284c7',
    marginBottom: 2,
  },
  viewButton: {
    backgroundColor: '#0284c7',
    paddingHorizontal: 12,
    paddingVertical: 6,
    borderRadius: 8,
  },
  viewText: {
    color: '#ffffff',
    fontSize: 12,
    fontWeight: '500',
  },
  videoButton: {
    backgroundColor: '#10b981',
    paddingHorizontal: 12,
    paddingVertical: 6,
    borderRadius: 8,
  },
  videoText: {
    color: '#ffffff',
    fontSize: 12,
    fontWeight: '500',
  },
  completeButton: {
    backgroundColor: '#ef4444',
    paddingHorizontal: 12,
    paddingVertical: 6,
    borderRadius: 8,
  },
  completeText: {
    color: '#ffffff',
    fontSize: 12,
    fontWeight: '500',
  },
  inputRow: {
    flexDirection: 'row',
    justifyContent: 'space-between',
    marginBottom: 12,
  },
  input: {
    flex: 1,
    backgroundColor: '#f0f9ff',
    borderRadius: 8,
    paddingHorizontal: 12,
    paddingVertical: 8,
    fontSize: 14,
    color: '#0c4a6e',
    marginRight: 8,
  },
  addButton: {
    backgroundColor: '#0284c7',
    padding: 12,
    borderRadius: 8,
    alignItems: 'center',
  },
  addText: {
    color: '#ffffff',
    fontSize: 14,
    fontWeight: '500',
  },
  infoCard: {
    backgroundColor: '#ffffff',
    marginHorizontal: 16,
    marginBottom: 80,
    borderRadius: 12,
    padding: 16,
    elevation: 2,
    shadowColor: '#000',
    shadowOffset: { width: 0, height: 2 },
    shadowOpacity: 0.1,
    shadowRadius: 4,
  },
  infoText: {
    fontSize: 14,
    color: '#64748b',
    lineHeight: 20,
    marginBottom: 4,
  },
  modalContainer: {
    flex: 1,
    justifyContent: 'center',
    alignItems: 'center',
    backgroundColor: 'rgba(0, 0, 0, 0.5)',
  },
  modalContent: {
    width: '80%',
    backgroundColor: '#ffffff',
    borderRadius: 12,
    padding: 20,
    elevation: 5,
  },
  modalTitle: {
    fontSize: 18,
    fontWeight: 'bold',
    color: '#0c4a6e',
    marginBottom: 12,
    textAlign: 'center',
  },
  modalText: {
    fontSize: 14,
    color: '#0c4a6e',
    lineHeight: 20,
    marginBottom: 20,
  },
  closeButton: {
    backgroundColor: '#0284c7',
    padding: 10,
    borderRadius: 8,
    alignItems: 'center',
  },
  closeButtonText: {
    color: '#ffffff',
    fontSize: 14,
    fontWeight: '500',
  },
});

export default PostInjuryRehabilitationApp;
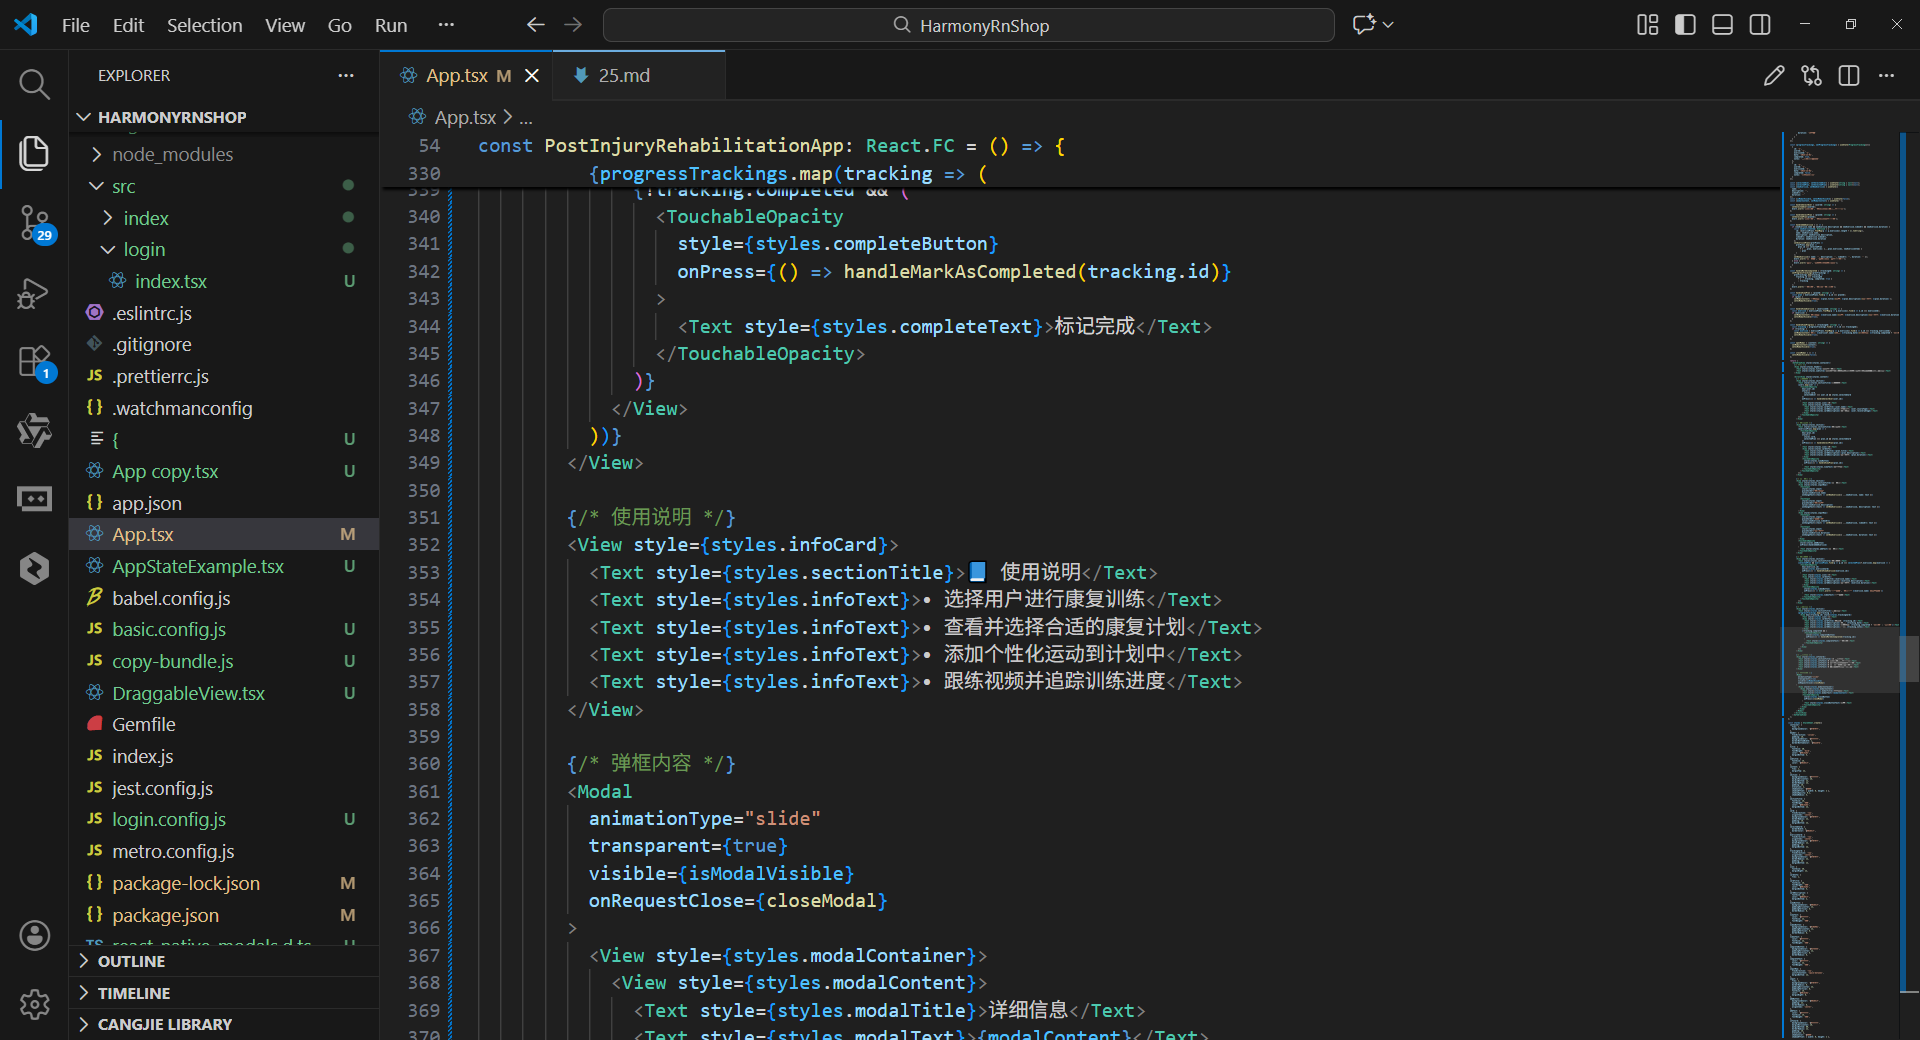
打包
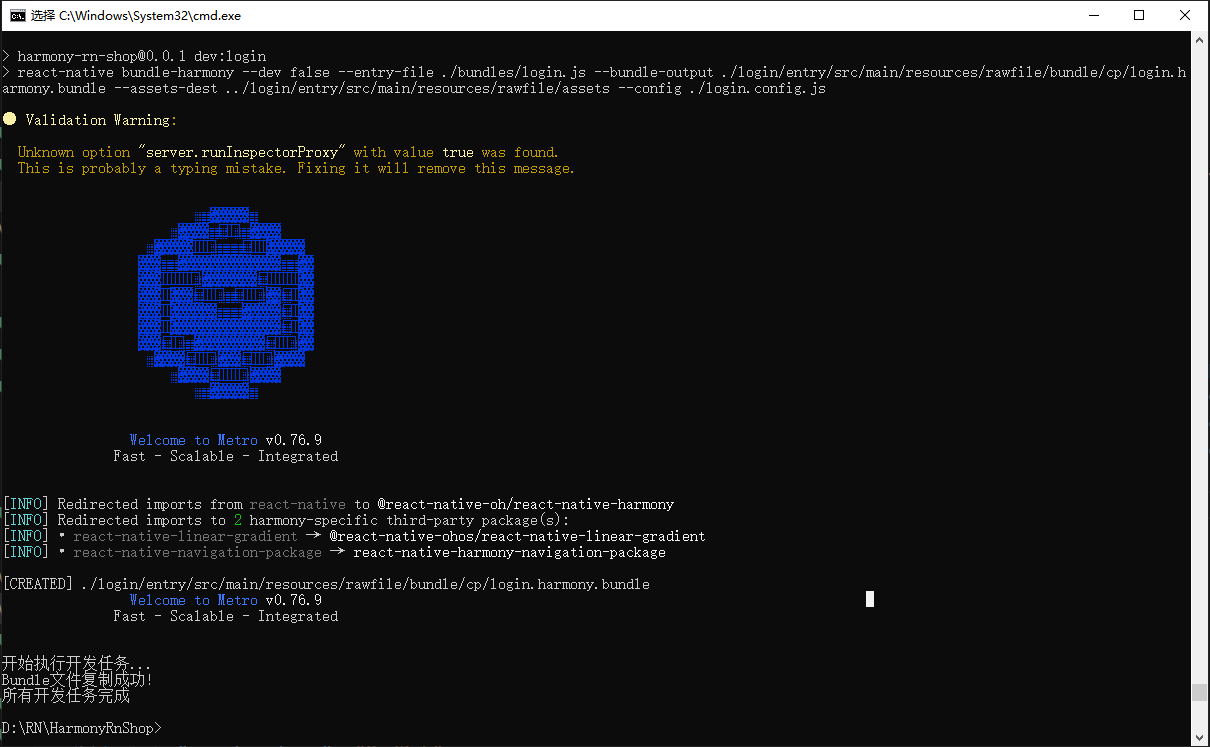
接下来通过打包命令npn run harmony将reactNative的代码打包成为bundle,这样可以进行在开源鸿蒙OpenHarmony中进行使用。
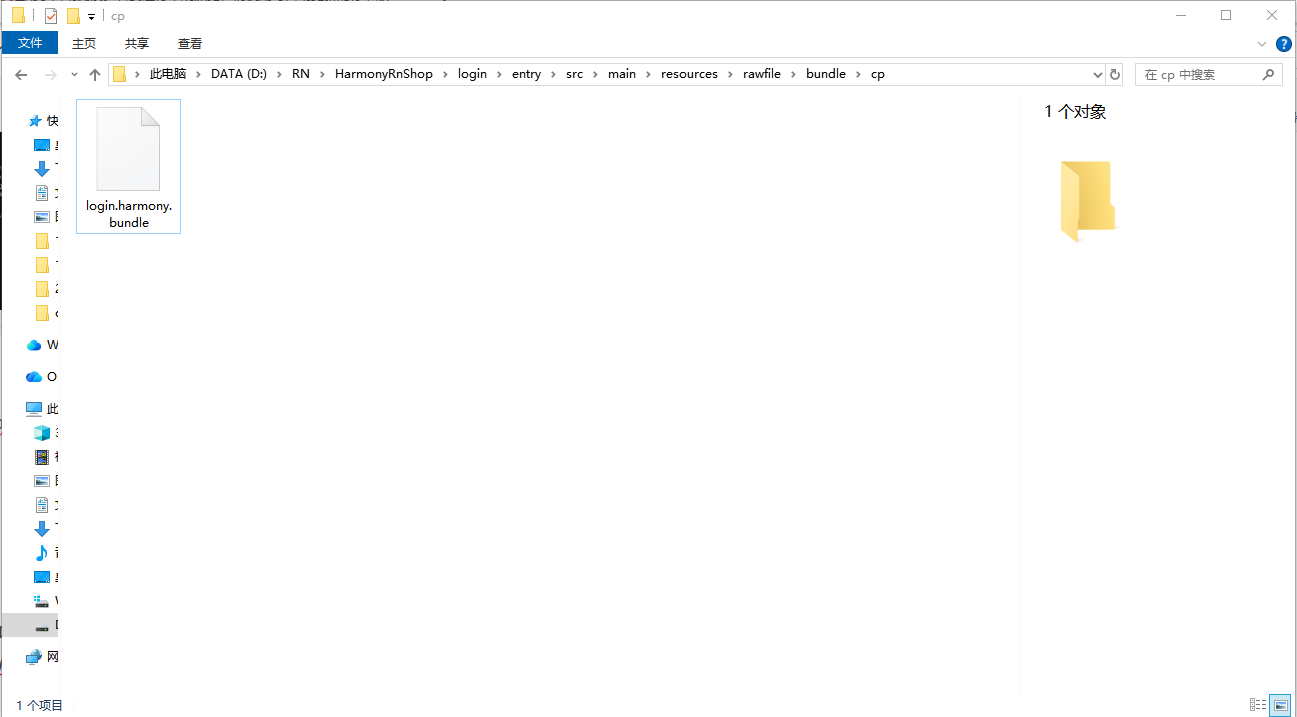
打包之后再将打包后的鸿蒙OpenHarmony文件拷贝到鸿蒙的DevEco-Studio工程目录去:
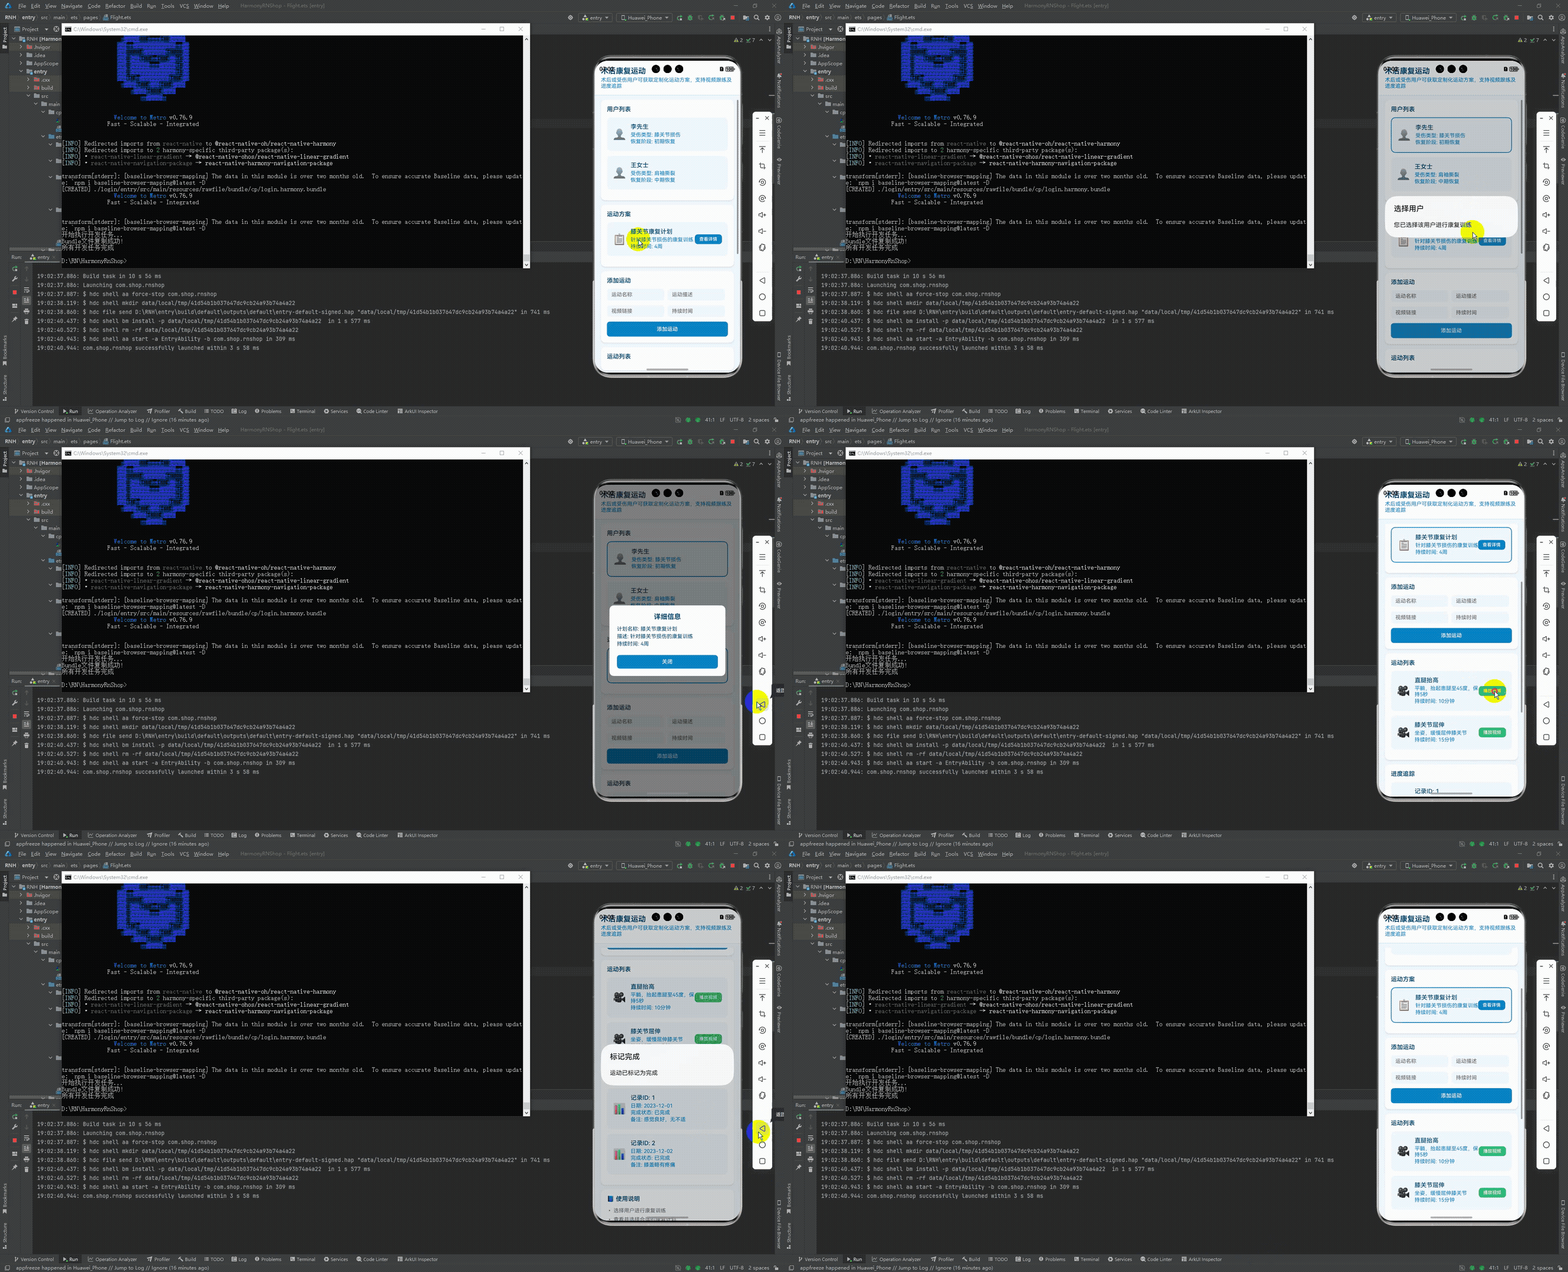
最后运行效果图如下显示:
本文介绍了一个基于React Native开发的术后康复运动应用,该应用通过TypeScript定义核心数据模型,包括用户信息、运动方案、运动类型和进度追踪,确保数据结构一致性。应用采用React Hooks进行状态管理,使用跨平台组件实现响应式界面,支持个性化康复方案制定、视频跟练指导和进度追踪功能。文章重点分析了React Native向鸿蒙OS的跨端适配方案,包括组件映射、布局适配和性能优化策略,展示了如何通过一套代码实现多平台覆盖,为医疗康复类应用开发提供了技术参考。
欢迎大家加入开源鸿蒙跨平台开发者社区,一起共建开源鸿蒙跨平台生态。

讨论HarmonyOS开发技术,专注于API与组件、DevEco Studio、测试、元服务和应用上架分发等。
更多推荐

 8
8 0
0- 0


 已为社区贡献29条内容

所有评论(0)