第14章_HarmonyOs开发图解 图像
第14章 HarmonyOs开发图解 图像
HarmonyOS 学习系统 | 阶段三:高级深耕期
学习目标
| 序号 | 能力 |
|---|---|
| 1 | 掌握图像解码(ImageSource)与编码(ImagePacker)的完整流程 |
| 2 | 能够使用 PixelMap 进行像素级操作 |
| 3 | 掌握图像缩放、裁剪、EXIF 信息读取等常用功能 |
核心图解
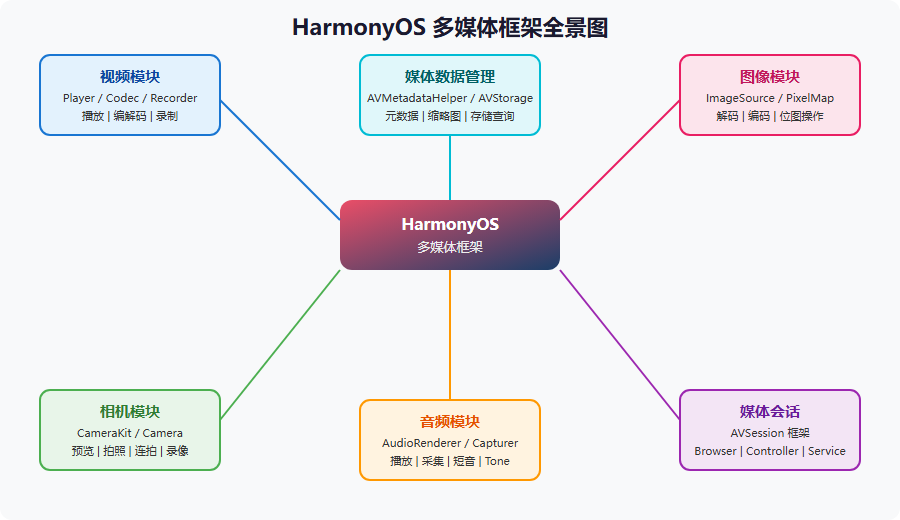
内容讲解
14.1 图像处理概述
HarmonyOS 的图像处理模块围绕三个核心类展开:ImageSource(图像源/解码器)、PixelMap(位图/像素容器)、ImagePacker(图像编码器)。这三个类组成了"读取 -> 处理 -> 保存"的完整图像处理管线。
生活化类比:PixelMap 就像"乐高底板"
图像解码就像拆快递包装:JPEG/PNG 图片就像被打包好的快递,里面是像素数据但被压缩了。解码(Decode)就是拆开包装,把像素数据整齐地摆放在一块"乐高底板"上——这块底板就是
PixelMap,每个格子就是一个像素点的颜色值。编码(Encode)则反过来,把底板上的像素重新打包压缩成图片格式。
14.2 图像解码
ImageSource 负责从各种来源(文件流、资源文件、字节数组)读取图片并解码为 PixelMap。
// 从资源文件解码图片
InputStream is = getResourceManager().getResource(MediaTable.INPUT);
ImageSource imageSource = ImageSource.create(is, new SourceOptions());
PixelMap pixelMap = imageSource.createPixelmap(new DecodingOptions());
imageDecode.setPixelMap(pixelMap);

// 带缩放的解码(避免 OOM)
DecodingOptions opts = new DecodingOptions();
opts.desiredSize = new Size(400, 300); // 缩放到 400x300
PixelMap scaledMap = imageSource.createPixelmap(opts);
14.3 图像编码与保存
ImagePacker 负责将 PixelMap 编码为指定格式的图片文件并保存。
// 编码图片保存为 JPEG
ImagePacker imagePacker = ImagePacker.create();
imagePacker.initializePacking(
    new File("path/to/output.jpg"),
    new ImagePacker.PackingOptions("image/jpeg", 90) // JPEG格式,质量90
);
imagePacker.addImage(pixelMap);
imagePacker.finalizePacking();

// 释放资源
pixelMap.release();
imageSource.release();
14.4 像素级操作
PixelMap 支持对单个像素的读写操作,可以用于图像特效处理。
// 读取指定位置像素
int color = pixelMap.readPixel(new Position(100, 200));

// 写入指定位置像素
pixelMap.writePixel(new Position(100, 200), 0xFFFF0000); // 红色

// 从颜色数组创建 PixelMap
int[] colors = new int[width * height];
// ... 填充颜色数据
PixelMap createdMap = PixelMap.create(colors, width, height, PixelFormat.ARGB_8888);
14.5 EXIF 信息读取
通过 ExifUtils 可以读取照片中嵌入的 GPS 坐标、拍摄时间等元数据。
// 获取照片 GPS 坐标
double[] latLong = ExifUtils.getLatLong(imageSource);
if (latLong != null) {
    HiLog.info(TAG, "纬度: " + latLong[0] + ", 经度: " + latLong[1]);
}
代码速查卡
| API | 功能 | 示例 |
|---|---|---|
ImageSource.create(stream, opts) | 从输入流创建图像源 | ImageSource.create(is, new SourceOptions()) |
createPixelmap(opts) | 解码为 PixelMap | imageSource.createPixelmap(opts) |
PixelMap.create(colors, w, h, fmt) | 从颜色数组创建位图 | PixelMap.create(colors, w, h, ARGB_8888) |
readPixel(position) | 读取指定位置像素 | pixelMap.readPixel(new Position(100,200)) |
writePixel(position, color) | 写入指定位置像素 | pixelMap.writePixel(pos, 0xFFFF0000) |
ImagePacker.create() | 创建图像编码器 | ImagePacker.create() |
ExifUtils.getLatLong() | 获取照片 GPS 坐标 | ExifUtils.getLatLong(imageSource) |
pixelMap.release() | 释放 Native 资源 | pixelMap.release() |
与 Android/iOS 对比
| 特性 | HarmonyOS | Android | iOS |
|---|---|---|---|
| 位图类 | PixelMap | Bitmap | CGImage / UIImage |
| 解码 | ImageSource | BitmapFactory | ImageIO |
| 编码 | ImagePacker | Bitmap.compress() | UIImageJPEGRepresentation() |
| 像素操作 | readPixel / writePixel | getPixel() / setPixel() | CGContext 绘制 |
| EXIF 读取 | ExifUtils | ExifInterface | CGImageDestination |
| 缩放解码 | DecodingOptions.desiredSize | BitmapFactory.Options.inSampleSize | ImageIO 缩略图 |
⚠️ 踩坑回忆录
OOM!为什么图片一加载就崩溃?
一张 4000x3000 的图片解码后 PixelMap 占用约 48MB 内存(4000 x 3000 x 4 字节/像素)。我曾在列表页同时加载了 20 张大图,直接 OOM 崩溃。解决办法:缩放解码!在 DecodingOptions 中设置 desiredSize,按显示尺寸缩放后再加载。列表页缩略图 200x200 就够了,详情页才加载原图。
还有一个坑:PixelMap 和 ImageSource 用完必须调 release(),它们持有 Native 资源(C/C++ 层内存),Java 的 GC 管不了。我曾在循环里创建了几十个 PixelMap 不释放,最后系统直接杀掉了我的进程。
必做实操任务
| 序号 | 任务 | 难度 |
|---|---|---|
| 1 | 实现图片解码并在 Image 组件上显示 | 低 |
| 2 | 实现图片缩放裁剪(设置 DecodingOptions 的 desiredSize 和 desiredRegion) | 中 |
| 3 | 读取照片的 EXIF 信息(经纬度、海拔)并在界面上展示 | 中 |
| 4 | 实现图片格式转换(PNG -> JPEG) | 中 |
| 5 | 实现一个简单的图片浏览器,支持缩放和滑动浏览 | 高 |
学习检查清单
- 能说出 ImageSource、PixelMap、ImagePacker 三者的关系
- 能实现图片解码并在 UI 上显示
- 能使用 DecodingOptions 实现缩放解码避免 OOM
- 能使用 ImagePacker 将 PixelMap 保存为 JPEG/PNG
- 能使用 readPixel/writePixel 进行像素级操作
- 能读取照片的 EXIF GPS 信息
- 知道为什么 PixelMap 和 ImageSource 必须手动 release
- 理解图片分辨率与内存占用的关系
进阶方向
- 学习图像变换(旋转、翻转、裁剪)API 的使用
- 探索 PixelMap 的图像特效处理(灰度、模糊、亮度调节)
- 结合第 21 章 OCR 能力,实现拍照识别文字的完整流程
和 ImageSource 必须手动 release - 理解图片分辨率与内存占用的关系
进阶方向
- 学习图像变换(旋转、翻转、裁剪)API 的使用
- 探索 PixelMap 的图像特效处理(灰度、模糊、亮度调节)
- 结合第 21 章 OCR 能力,实现拍照识别文字的完整流程

讨论HarmonyOS开发技术,专注于API与组件、DevEco Studio、测试、元服务和应用上架分发等。
更多推荐



 4
4 0
0- 0


 已为社区贡献21条内容

所有评论(0)