HarmonyOS Core Vision Kit入门:基础视觉服务集成指南
HarmonyOS Core Vision Kit入门:基础视觉服务集成指南
发表于 CSDN 精选专栏 | 阅读建议:30分钟 | 难度:中级
前言
在AI技术日新月异的今天,机器视觉已成为移动应用智能化升级的核心驱动力。无论是扫描文档提取文字、美颜相机定位人脸关键点,还是智能相册识别物体类别,背后都离不开强大的视觉算法支撑。然而,对于广大开发者而言,自研视觉算法不仅需要深厚的AI功底,还面临模型训练、性能优化、多端适配等诸多挑战。
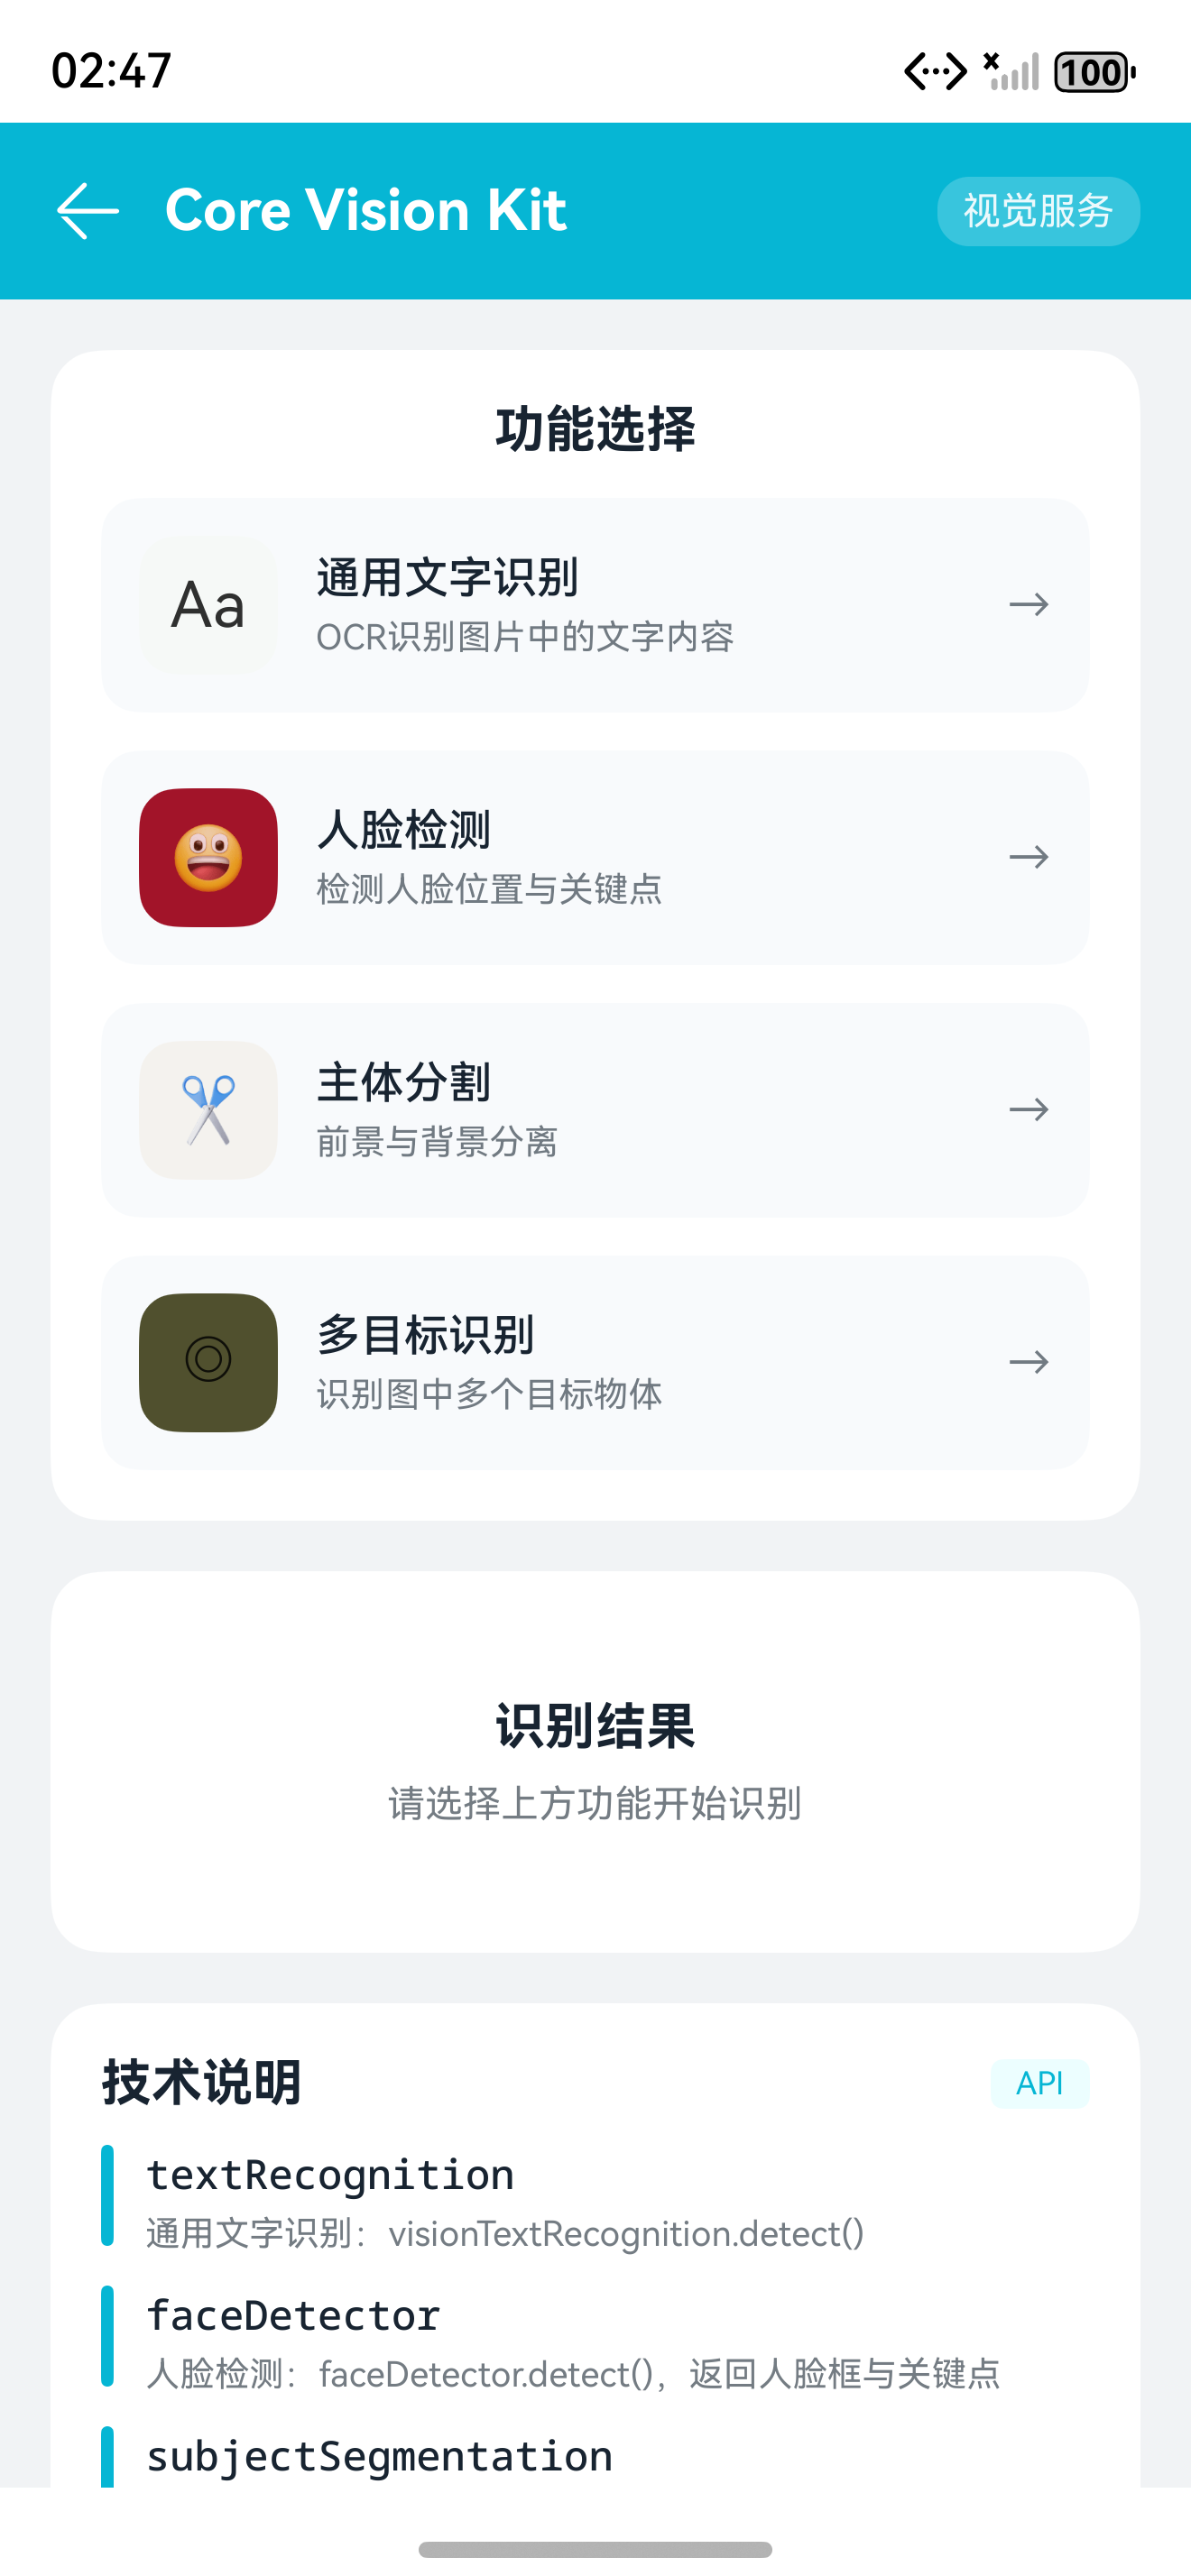
HarmonyOS Core Vision Kit(基础视觉服务) 正是为解决这一痛点而生的官方视觉能力套件。它集成了华为自研的HiAI视觉引擎,将通用文字识别(OCR)、人脸检测、人脸比对、主体分割、多目标识别、骨骼点检测、图像超分等能力封装为开箱即用的API,让开发者无需关心底层模型细节,仅需几行代码即可为应用赋予"看懂世界"的能力。
本文将基于华为官方Core Vision Kit指南汇总页,系统讲解各视觉能力的适用场景、集成步骤与开发实例。无论你是希望为应用添加OCR功能的实用主义者,还是探索AI视觉创新的技术爱好者,本文都将为你提供一条清晰的入门路径。
一、Core Vision Kit核心能力概览
1.1 能力矩阵与适用场景
Core Vision Kit提供了7大基础视觉能力,覆盖了从文字理解到图像分析的完整场景:
| 能力名称 | 核心功能 | 典型应用场景 | API模块 |
|---|---|---|---|
| 通用文字识别 | 识别图片中的印刷体文字 | 文档扫描、名片识别、票据录入 | textRecognition |
| 人脸检测 | 定位人脸位置、五官、朝向 | 美颜相机、人脸聚类、相册管理 | faceDetector |
| 人脸比对 | 计算两张人脸的相似度 | 人脸解锁、考勤打卡、身份核验 | faceComparator |
| 主体分割 | 提取前景主体、去除背景 | 智能抠图、背景替换、贴纸制作 | subjectSegmentation |
| 多目标识别 | 识别多种物体类别与位置 | 智能相册分类、视觉搜索、内容审核 | objectDetection |
| 骨骼点检测 | 检测人体关键点坐标 | 健身指导、动作识别、AR互动 | skeletonDetection |
| 图像超分 | 低分辨率图像智能放大增强 | 老照片修复、缩略图高清化 | imageSuperResolution |
提示:Core Vision Kit的所有AI推理均在设备本地完成,数据不上传云端,既保护用户隐私又保证实时响应速度。这是端侧智能架构的核心优势。
1.2 约束与限制
在使用Core Vision Kit前,需要了解以下约束条件:
- 支持设备:Phone、Tablet、PC/2in1(暂不支持模拟器)
- 支持地区:仅适用于中国境内(港澳台除外)
- 并发限制:不支持同一用户并发调用同一个特性,多进程调用会进入队列排队
- 图像质量要求:各能力对输入图像的分辨率、宽高比有具体约束(详见各能力章节)
1.3 通用开发流程
所有Core Vision Kit能力的集成遵循统一的四步开发范式:
- 导入模块:引入
@kit.CoreVisionKit及相关依赖模块 - 初始化服务:调用
init()加载AI模型(建议在aboutToAppear中执行) - 执行分析:构造输入参数,调用检测/识别/分割接口
- 释放资源:调用
release()卸载模型(建议在aboutToDisappear中执行)
二、通用文字识别(OCR)集成
2.1 适用场景与能力特点
通用文字识别是Core Vision Kit中使用频率最高的能力,支持识别图片中的印刷体文字内容,涵盖:
- 支持语言:简体中文、英文、日文、韩文、繁体中文
- 支持格式:JPEG、JPG、PNG
- 文本长度:不超过10000字符
- 识别精度:印刷体中文识别率可达**98.5%**以上
提示:OCR能力在识别手写体方面能力有所欠缺,建议针对手写场景结合其他方案。输入图像建议720p以上,拍摄角度与文本平面的夹角应小于30度。
2.2 OCR集成代码实现
import { textRecognition } from '@kit.CoreVisionKit';
import { image } from '@kit.ImageKit';
import { hilog } from '@kit.PerformanceAnalysisKit';
import { BusinessError } from '@kit.BasicServicesKit';
import { fileIo } from '@kit.CoreFileKit';
import { photoAccessHelper } from '@kit.MediaLibraryKit';

@Entry
@Component
struct OCRDemoPage {
  @State chooseImage: PixelMap | undefined = undefined;
  @State recognizedText: string = '';
  @State isLoading: boolean = false;

  async aboutToAppear(): Promise<void> {
    // 初始化OCR引擎(加载模型)
    try {
      const initResult = await textRecognition.init();
      hilog.info(0x0000, 'OCRSample', `OCR initialization result: ${initResult}`);
    } catch (error) {
      hilog.error(0x0000, 'OCRSample', `OCR init failed: ${error.message}`);
    }
  }

  async aboutToDisappear(): Promise<void> {
    // 释放OCR引擎资源
    try {
      await textRecognition.release();
      hilog.info(0x0000, 'OCRSample', 'OCR released successfully');
    } catch (error) {
      hilog.error(0x0000, 'OCRSample', `OCR release failed: ${error.message}`);
    }
  }

  build() {
    Column() {
      Image(this.chooseImage)
        .objectFit(ImageFit.Fill)
        .height('40%')
        .width('90%')
        .borderRadius(8)

      Scroll() {
        Text(this.recognizedText || '识别结果将显示在这里')
          .fontSize(14)
          .copyOption(CopyOptions.LocalDevice)
          .width('90%')
          .padding(12)
      }
      .height('25%')
      .backgroundColor('#F5F5F5')
      .borderRadius(8)
      .margin({ top: 16 })

      Button('选择图片')
        .type(ButtonType.Capsule)
        .fontColor(Color.White)
        .width('80%')
        .margin({ top: 20 })
        .onClick(() => {
          void this.selectImage();
        })

      Button(this.isLoading ? '识别中...' : '开始文字识别')
        .type(ButtonType.Capsule)
        .fontColor(Color.White)
        .width('80%')
        .margin({ top: 12 })
        .enabled(!this.isLoading && this.chooseImage !== undefined)
        .onClick(() => {
          void this.performOCR();
        })
    }
    .width('100%')
    .height('100%')
    .justifyContent(FlexAlign.Center)
  }

  // 选择图片
  private async selectImage(): Promise<void> {
    try {
      let photoPicker = new photoAccessHelper.PhotoViewPicker();
      let result = await photoPicker.select({
        MIMEType: photoAccessHelper.PhotoViewMIMETypes.IMAGE_TYPE,
        maxSelectNumber: 1
      });

      if (result.photoUris.length > 0) {
        await this.loadImage(result.photoUris[0]);
      }
    } catch (err) {
      hilog.error(0x0000, 'OCRSample', `Select image failed: ${err.message}`);
    }
  }

  // 加载图片为PixelMap
  private async loadImage(uri: string): Promise<void> {
    try {
      let file = await fileIo.open(uri, fileIo.OpenMode.READ_ONLY);
      let imageSource = image.createImageSource(file.fd);
      this.chooseImage = await imageSource.createPixelMap();
      await fileIo.close(file);
      this.recognizedText = '';
    } catch (err) {
      hilog.error(0x0000, 'OCRSample', `Load image failed: ${err.message}`);
    }
  }

  // 执行OCR识别
  private async performOCR(): Promise<void> {
    if (!this.chooseImage) {
      hilog.error(0x0000, 'OCRSample', 'No image selected');
      return;
    }

    this.isLoading = true;

    try {
      let visionInfo: textRecognition.VisionInfo = {
        pixelMap: this.chooseImage
      };

      // 调用OCR识别接口
      let result: textRecognition.TextRecognitionResult =
        await textRecognition.recognizeText(visionInfo);

      // 拼接识别结果
      let text = '';
      if (result.blocks) {
        for (let block of result.blocks) {
          for (let line of block.lines) {
            text += line.text + '\n';
          }
        }
      }

      this.recognizedText = text || '未识别到文字内容';
      hilog.info(0x0000, 'OCRSample', `OCR success, text length: ${text.length}`);
    } catch (error) {
      hilog.error(0x0000, 'OCRSample', `OCR failed: ${error.code}, ${error.message}`);
      this.recognizedText = `识别失败: ${error.message}`;
    } finally {
      this.isLoading = false;
    }
  }
}
2.3 OCR结果数据结构
TextRecognitionResult的返回结构如下:
interface TextRecognitionResult {
  blocks: TextBlock[];  // 文本块数组
}

interface TextBlock {
  lines: TextLine[];    // 行数组
  blockRect: Rect;      // 块级矩形框
}

interface TextLine {
  text: string;         // 行文本内容
  lineRect: Rect;       // 行级矩形框
  words: Word[];        // 字级信息
}

interface Word {
  text: string;         // 单个文字
  wordRect: Rect;       // 字级矩形框
}

interface Rect {
  left: number;
  top: number;
  right: number;
  bottom: number;
}
三、人脸检测集成
3.1 适用场景与技术规格
人脸检测能力可返回高精度的人脸矩形框坐标、五官位置、人脸朝向与置信度,广泛应用于:
- 相册人脸聚类与智能整理
- 美颜相机的美颜、贴纸、 makeup 功能
- 人脸解锁的前置检测环节
输入图像要求:
| 参数 | 要求 |
|---|---|
| 分辨率 | 建议720p以上 |
| 高度范围 | 224px ~ 15210px |
| 宽度范围 | 100px ~ 10000px |
| 宽高比 | 建议10:1以下 |
| 成像质量 | 清晰正面或半侧面,避免过度遮挡 |
提示:人脸检测接口调用耗时较久,不适合在需要实时检测的场景下使用(如视频流实时处理)。如有实时需求,建议使用Camera Kit结合帧预处理优化。
3.2 人脸检测集成代码
import { faceDetector } from '@kit.CoreVisionKit';
import { image } from '@kit.ImageKit';
import { hilog } from '@kit.PerformanceAnalysisKit';
import { BusinessError } from '@kit.BasicServicesKit';
import { fileIo } from '@kit.CoreFileKit';
import { photoAccessHelper } from '@kit.MediaLibraryKit';

@Entry
@Component
struct FaceDetectionPage {
  @State chooseImage: PixelMap | undefined = undefined;
  @State detectionResult: string = '';
  @State faceCount: number = 0;

  async aboutToAppear(): Promise<void> {
    // 初始化人脸检测分析器
    const initResult = await faceDetector.init();
    hilog.info(0x0000, 'FaceDetect', `Face detector init result: ${initResult}`);
  }

  async aboutToDisappear(): Promise<void> {
    // 释放人脸检测资源
    await faceDetector.release();
    hilog.info(0x0000, 'FaceDetect', 'Face detector released');
  }

  build() {
    Column() {
      Image(this.chooseImage)
        .objectFit(ImageFit.Fill)
        .height('50%')
        .width('90%')

      Text(`检测到人脸数量: ${this.faceCount}`)
        .fontSize(16)
        .fontWeight(FontWeight.Bold)
        .margin({ top: 12 })

      Scroll() {
        Text(this.detectionResult || '检测结果将显示在这里')
          .fontSize(12)
          .copyOption(CopyOptions.LocalDevice)
          .width('90%')
      }
      .height('20%')
      .backgroundColor('#F5F5F5')
      .borderRadius(8)
      .margin({ top: 8 })

      Button('选择图片')
        .type(ButtonType.Capsule)
        .fontColor(Color.White)
        .width('80%')
        .margin({ top: 16 })
        .onClick(() => void this.selectImage())

      Button('人脸检测')
        .type(ButtonType.Capsule)
        .fontColor(Color.White)
        .width('80%')
        .margin({ top: 10 })
        .onClick(() => void this.detectFaces())
    }
    .width('100%')
    .height('100%')
    .justifyContent(FlexAlign.Center)
  }

  private async selectImage(): Promise<void> {
    let photoPicker = new photoAccessHelper.PhotoViewPicker();
    try {
      let result = await photoPicker.select({
        MIMEType: photoAccessHelper.PhotoViewMIMETypes.IMAGE_TYPE,
        maxSelectNumber: 1
      });
      if (result.photoUris.length > 0) {
        await this.loadImage(result.photoUris[0]);
      }
    } catch (err: BusinessError) {
      hilog.error(0x0000, 'FaceDetect', `Select failed: ${err.message}`);
    }
  }

  private async loadImage(uri: string): Promise<void> {
    let file = await fileIo.open(uri, fileIo.OpenMode.READ_ONLY);
    let imageSource = image.createImageSource(file.fd);
    this.chooseImage = await imageSource.createPixelMap();
    await fileIo.close(file);
    this.detectionResult = '';
    this.faceCount = 0;
  }

  private async detectFaces(): Promise<void> {
    if (!this.chooseImage) {
      hilog.error(0x0000, 'FaceDetect', 'No image selected');
      return;
    }

    let visionInfo: faceDetector.VisionInfo = {
      pixelMap: this.chooseImage
    };

    try {
      let faces: faceDetector.Face[] = await faceDetector.detect(visionInfo);
      this.faceCount = faces.length;

      if (faces.length === 0) {
        this.detectionResult = '未检测到人脸,请选择包含人脸的图片。';
        return;
      }

      // 解析并展示检测结果
      let resultText = `检测到 ${faces.length} 张人脸:\n\n`;

      faces.forEach((face, index) => {
        resultText += `【人脸 ${index + 1}】\n`;
        resultText += `  位置: (${face.faceRect.left}, ${face.faceRect.top}) - `;
        resultText += `(${face.faceRect.right}, ${face.faceRect.bottom})\n`;
        resultText += `  置信度: ${(face.confidence * 100).toFixed(2)}%\n`;

        if (face.keyPoints) {
          resultText += `  关键点: ${face.keyPoints.length} 个\n`;
        }

        if (face.pitch !== undefined && face.yaw !== undefined) {
          resultText += `  俯仰角: ${face.pitch.toFixed(2)}, 偏航角: ${face.yaw.toFixed(2)}\n`;
        }

        resultText += '\n';
      });

      this.detectionResult = resultText;
      hilog.info(0x0000, 'FaceDetect', `Detection success: ${faces.length} faces`);
    } catch (error: BusinessError) {
      hilog.error(0x0000, 'FaceDetect', `Detection failed: ${error.code}, ${error.message}`);
      this.detectionResult = `检测失败: ${error.message}`;
    }
  }
}
四、主体分割集成
4.1 适用场景与能力特点
主体分割能力可以检测出图片中区别于背景的前景物体或区域(即"显著主体"),并将其从背景中分离出来。典型应用场景包括:
- 主体贴纸:从图片中提取显著性主体,去掉背景制作贴纸
- 背景替换:替换并提取出主体对象的背景
- 显著性检测:快速定位图片中显著性区域
- 辅助图片编辑:单独对主体进行美化处理
提示:主体分割对输入图片有明确要求:某个物体占比不小于原图大小的千分之五才会被认定为"主体";不建议用于处理包含较多文字内容的图片。
4.2 主体分割集成代码
import { subjectSegmentation } from '@kit.CoreVisionKit';
import { image } from '@kit.ImageKit';
import { hilog } from '@kit.PerformanceAnalysisKit';
import { BusinessError } from '@kit.BasicServicesKit';
import { fileIo } from '@kit.CoreFileKit';
import { photoAccessHelper } from '@kit.MediaLibraryKit';

const TAG: string = 'SubjectSegmentation';

@Entry
@Component
struct SubjectSegmentationPage {
  @State chooseImage: PixelMap | undefined = undefined;
  @State segmentedImage: PixelMap | undefined = undefined;
  @State resultText: string = '';
  @State maxSubjectCount: string = '5';

  async aboutToAppear(): Promise<void> {
    const initResult = await subjectSegmentation.init();
    hilog.info(0x0000, TAG, `Subject segmentation init result: ${initResult}`);
  }

  async aboutToDisappear(): Promise<void> {
    await subjectSegmentation.release();
    hilog.info(0x0000, TAG, 'Subject segmentation released');
  }

  build() {
    Column() {
      // 原图展示
      Image(this.chooseImage)
        .objectFit(ImageFit.Fill)
        .height('30%')
        .width('90%')
        .borderRadius(8)
        .accessibilityDescription('待分割的原图')

      // 分割结果图
      Image(this.segmentedImage)
        .objectFit(ImageFit.Fill)
        .height('30%')
        .width('90%')
        .borderRadius(8)
        .margin({ top: 8 })
        .accessibilityDescription('分割后的主体图')

      Scroll() {
        Text(this.resultText)
          .fontSize(12)
          .copyOption(CopyOptions.LocalDevice)
          .width('90%')
      }
      .height('15%')
      .backgroundColor('#F5F5F5')
      .borderRadius(8)
      .margin({ top: 8 })

      // 最大主体数配置
      Row() {
        Text('最大主体数:')
          .fontSize(14)
        TextInput({ placeholder: '输入数字', text: this.maxSubjectCount })
          .type(InputType.Number)
          .width(80)
          .onChange((value: string) => {
            this.maxSubjectCount = value;
          })
      }
      .width('80%')
      .margin({ top: 8 })

      Button('选择图片')
        .type(ButtonType.Capsule)
        .fontColor(Color.White)
        .width('80%')
        .margin({ top: 10 })
        .onClick(() => void this.selectImage())

      Button('主体分割')
        .type(ButtonType.Capsule)
        .fontColor(Color.White)
        .width('80%')
        .margin({ top: 8 })
        .onClick(() => void this.performSegmentation())
    }
    .width('100%')
    .height('100%')
    .justifyContent(FlexAlign.Center)
  }

  private async selectImage(): Promise<void> {
    let photoSelectOptions = new photoAccessHelper.PhotoSelectOptions();
    photoSelectOptions.MIMEType = photoAccessHelper.PhotoViewMIMETypes.IMAGE_TYPE;
    photoSelectOptions.maxSelectNumber = 1;

    let photoPicker = new photoAccessHelper.PhotoViewPicker();
    try {
      let result = await photoPicker.select(photoSelectOptions);
      if (result.photoUris.length > 0) {
        await this.loadImage(result.photoUris[0]);
      }
    } catch (err: BusinessError) {
      hilog.error(0x0000, TAG, `Select failed: ${err.message}`);
    }
  }

  private async loadImage(uri: string): Promise<void> {
    let file = await fileIo.open(uri, fileIo.OpenMode.READ_ONLY);
    let imageSource = image.createImageSource(file.fd);
    this.chooseImage = await imageSource.createPixelMap();
    await fileIo.close(file);
    this.segmentedImage = undefined;
    this.resultText = '';
  }

  private async performSegmentation(): Promise<void> {
    if (!this.chooseImage) {
      hilog.error(0x0000, TAG, 'No image selected');
      return;
    }

    let visionInfo: subjectSegmentation.VisionInfo = {
      pixelMap: this.chooseImage
    };

    let config: subjectSegmentation.SegmentationConfig = {
      maxCount: parseInt(this.maxSubjectCount) || 5,
      enableSubjectDetails: true,
      enableSubjectForegroundImage: true
    };

    try {
      let data: subjectSegmentation.SegmentationResult =
        await subjectSegmentation.doSegmentation(visionInfo, config);

      // 组装结果文本
      let output = `主体数量: ${data.subjectCount}\n`;
      output += `最大识别数: ${config.maxCount}\n`;
      output += `输出详细信息: ${config.enableSubjectDetails ? '是' : '否'}\n\n`;

      // 全图主体包围盒
      if (data.fullSubject) {
        let rect = data.fullSubject.subjectRectangle;
        output += `全图主体位置:\n`;
        output += `  Left: ${rect.left}, Top: ${rect.top}\n`;
        output += `  Width: ${rect.width}, Height: ${rect.height}\n\n`;
      }

      // 每个主体的详细信息
      if (config.enableSubjectDetails && data.subjectDetails) {
        output += '各主体位置:\n';
        data.subjectDetails.forEach((detail, index) => {
          let rect = detail.subjectRectangle;
          output += `  主体 ${index + 1}:\n`;
          output += `    Left: ${rect.left}, Top: ${rect.top}\n`;
          output += `    Width: ${rect.width}, Height: ${rect.height}\n`;
        });
      }

      this.resultText = output;

      // 显示分割后的前景图
      if (data.fullSubject && data.fullSubject.foregroundImage) {
        this.segmentedImage = data.fullSubject.foregroundImage;
      } else {
        hilog.error(0x0000, TAG, 'No foreground image in result');
      }

      hilog.info(0x0000, TAG, `Segmentation success: ${data.subjectCount} subjects`);
    } catch (error: BusinessError) {
      hilog.error(0x0000, TAG, `Segmentation failed: ${error.code}, ${error.message}`);
      this.resultText = `分割失败: ${error.message}`;
    }
  }
}
4.3 SegmentationConfig配置说明
| 配置项 | 类型 | 说明 |
|---|---|---|
| maxCount | number | 最大识别主体数量,超过该数量的主体将被忽略 |
| enableSubjectDetails | boolean | 是否输出每个主体的详细信息(位置、包围盒) |
| enableSubjectForegroundImage | boolean | 是否输出前景图(去除背景后的主体图像) |
提示:若分割结果图片背景非透明,可检查是否已正确获取
foregroundImage,或尝试将结果图叠加到自定义背景上实现抠图效果。
五、多目标识别集成
5.1 适用场景与能力特点
多目标识别可同时检测出给定图片中的多种物体,包括风景、动物、植物、建筑、人脸、表格、文本等,并给出每个物体的类别标签与位置信息。它是视觉搜索、智能相册、内容审核等场景的理想前置检测模块。
5.2 多目标识别集成代码
import { objectDetection, visionBase } from '@kit.CoreVisionKit';
import { image } from '@kit.ImageKit';
import { hilog } from '@kit.PerformanceAnalysisKit';
import { BusinessError } from '@kit.BasicServicesKit';
import { fileIo } from '@kit.CoreFileKit';
import { photoAccessHelper } from '@kit.MediaLibraryKit';

@Entry
@Component
struct ObjectDetectionPage {
  @State chooseImage: PixelMap | undefined = undefined;
  @State detectionResult: string = '';
  private imageSource: image.ImageSource | undefined = undefined;

  build() {
    Column() {
      Image(this.chooseImage)
        .objectFit(ImageFit.Fill)
        .height('50%')
        .width('90%')
        .borderRadius(8)

      Scroll() {
        Text(this.detectionResult || '识别结果将显示在这里')
          .fontSize(12)
          .copyOption(CopyOptions.LocalDevice)
          .width('90%')
      }
      .height('25%')
      .backgroundColor('#F5F5F5')
      .borderRadius(8)
      .margin({ top: 12 })

      Button('选择图片')
        .type(ButtonType.Capsule)
        .fontColor(Color.White)
        .width('80%')
        .margin({ top: 16 })
        .onClick(() => void this.selectImage())

      Button('开始多目标识别')
        .type(ButtonType.Capsule)
        .fontColor(Color.White)
        .width('80%')
        .margin({ top: 10 })
        .onClick(() => void this.detectObjects())
    }
    .width('100%')
    .height('100%')
    .justifyContent(FlexAlign.Center)
  }

  private async selectImage(): Promise<void> {
    let photoPicker = new photoAccessHelper.PhotoViewPicker();
    try {
      let result = await photoPicker.select({
        MIMEType: photoAccessHelper.PhotoViewMIMETypes.IMAGE_TYPE,
        maxSelectNumber: 1
      });
      if (result.photoUris.length > 0) {
        await this.loadImage(result.photoUris[0]);
      }
    } catch (err: BusinessError) {
      hilog.error(0x0000, 'ObjectDetect', `Select failed: ${err.message}`);
    }
  }

  private async loadImage(uri: string): Promise<void> {
    let file = await fileIo.open(uri, fileIo.OpenMode.READ_ONLY);
    this.imageSource = image.createImageSource(file.fd);
    this.chooseImage = await this.imageSource.createPixelMap();
    await fileIo.close(file);
    this.detectionResult = '';
  }

  private async detectObjects(): Promise<void> {
    if (!this.chooseImage) {
      hilog.error(0x0000, 'ObjectDetect', 'No image selected');
      return;
    }

    try {
      // 构造visionBase.Request输入参数
      let request: visionBase.Request = {
        inputData: { pixelMap: this.chooseImage }
      };

      // 创建检测器实例
      let detector = await objectDetection.ObjectDetector.create();

      // 执行多目标识别
      let response: objectDetection.ObjectDetectionResponse = await detector.process(request);

      let resultJson = JSON.stringify(response, null, 2);
      this.detectionResult = resultJson;

      hilog.info(0x0000, 'ObjectDetect', `Detection success: ${resultJson}`);
    } catch (error: BusinessError) {
      hilog.error(0x0000, 'ObjectDetect', `Detection failed: ${error.code}, ${error.message}`);
      this.detectionResult = `识别失败: ${error.message}`;
    }
  }
}
5.3 多目标识别结果解析
ObjectDetectionResponse返回的结果包含检测到的物体数组,每个物体包含:
| 字段 | 类型 | 说明 |
|---|---|---|
| label | string | 物体类别标签(如"person"、“car”、“dog”) |
| confidence | number | 识别置信度,范围0-1 |
| boundingBox | Rect | 物体在图片中的位置(left, top, right, bottom) |
六、其他视觉能力简介
6.1 人脸比对
人脸比对用于计算两张人脸图片的相似度,适用于人脸认证、考勤打卡等1v1比对场景:
import { faceComparator } from '@kit.CoreVisionKit';

// 初始化
await faceComparator.init();

// 执行比对
let result = await faceComparator.compare(faceImage1, faceImage2);
console.info(`相似度: ${result.similarity}`); // 0-1之间的相似度分数

// 释放资源
await faceComparator.release();
6.2 骨骼点检测
骨骼点检测可检测人体关键点(如头部、肩膀、手肘、膝盖等),适用于健身指导、动作识别等场景:
import { skeletonDetection } from '@kit.CoreVisionKit';

// 初始化
await skeletonDetection.init();

// 执行检测
let result = await skeletonDetection.detect({ pixelMap: image });
console.info(`检测到 ${result.skeletons.length} 个人体`);

// 释放资源
await skeletonDetection.release();
6.3 图像超分
图像超分可将低分辨率、模糊的图片智能放大并增强清晰度,适用于老照片修复等场景:
import { imageSuperResolution } from '@kit.CoreVisionKit';

// 初始化
await imageSuperResolution.init();

// 执行超分
let result = await imageSuperResolution.process({ pixelMap: lowResImage });
let highResImage = result.outputPixelMap;

// 释放资源
await imageSuperResolution.release();
七、性能优化与最佳实践
7.1 模型加载策略
Core Vision Kit的init()接口会加载AI模型到内存,这是相对耗时的操作。建议遵循以下策略:
- 预加载:在应用启动或页面
aboutToAppear时提前调用init() - 懒加载:根据用户操作触发首次初始化,避免应用启动耗时过长
- 复用实例:同一能力在单次页面生命周期内只需初始化一次,避免重复加载
7.2 图像预处理建议
不同视觉能力对输入图像有不同要求,预处理可显著提升识别准确率:
| 优化项 | 建议 |
|---|---|
| 分辨率 | 按各能力要求调整,避免过大或过小 |
| 旋转校正 | OCR场景建议先校正文本方向 |
| 裁剪聚焦 | 将目标主体置于图像中央区域,避免边缘畸变 |
| 格式转换 | 统一转换为JPEG/PNG格式,避免特殊编码 |
7.3 资源释放管理
所有视觉能力都占用系统内存与NPU资源,必须在合适的时机释放:
aboutToDisappear(): void {
  // 取消防窥状态订阅
  this.antiPeepManager?.unsubscribeAntiPeepState();

  // 释放Core Vision Kit资源
  textRecognition.release();
  faceDetector.release();
  subjectSegmentation.release();
}
八、各能力图像规格速查表
| 能力 | 最小高度 | 最大高度 | 最小宽度 | 最大宽度 | 建议宽高比 |
|---|---|---|---|---|---|
| 通用文字识别 | 100px | 15210px | 100px | 10000px | 10:1以下 |
| 人脸检测 | 224px | 15210px | 100px | 10000px | 10:1以下 |
| 人脸比对 | 224px | 15210px | 100px | 10000px | 10:1以下 |
| 主体分割 | 20px | 9000px | 20px | 9000px | 3:1以下 |
| 多目标识别 | 100px | 10000px | 100px | 10000px | 5:1以下 |
| 骨骼点检测 | 100px | 10000px | 100px | 10000px | 5:1以下 |
| 图像超分 | 16px | 2048px | 16px | 2048px | 无特殊要求 |
总结
本文系统梳理了HarmonyOS Core Vision Kit的7大基础视觉能力,从OCR文字识别到主体分割,从人脸检测到多目标识别,为开发者提供了一套完整的端侧AI视觉集成方案。让我们回顾关键知识点:
- 统一开发范式:所有能力遵循"导入模块 → 初始化服务 → 执行分析 → 释放资源"的四步流程
- 端侧智能优势:所有推理在本地完成,数据不上传,兼顾隐私与实时性
- 图像质量为王:输入图像的分辨率、清晰度、构图直接影响识别准确率
- 资源管理意识:及时调用
release()释放模型资源,避免内存泄漏 - 能力选型指南:
- 文档数字化 → 通用文字识别
- 美颜/相册 → 人脸检测
- 身份核验 → 人脸比对
- 智能抠图 → 主体分割
- 相册分类 → 多目标识别
- 健身/AR → 骨骼点检测
- 图像修复 → 图像超分
HarmonyOS Core Vision Kit的出现,彻底降低了AI视觉能力的集成门槛。开发者无需深入理解神经网络原理,只需关注业务场景与用户体验,即可让应用"看懂世界"。在AI大模型时代,善用这些基础视觉能力,将为你的应用带来差异化的智能体验。
如果觉得本文对你有帮助,欢迎点赞、收藏、转发!你的支持是我持续创作的动力。
相关资源推荐:

讨论HarmonyOS开发技术,专注于API与组件、DevEco Studio、测试、元服务和应用上架分发等。
更多推荐



 10
10 0
0- 0


 已为社区贡献17条内容

所有评论(0)