HarmonyOS Core Vision Kit实战:人脸检测与骨骼点识别
HarmonyOS Core Vision Kit实战:人脸检测与骨骼点识别
摘要:本文深入讲解HarmonyOS Core Vision Kit的人脸检测与骨骼点识别能力,从原理到实战,手把手教你如何在HarmonyOS应用中实现人脸检测、人脸关键点定位以及人体骨骼点识别。涵盖完整的工程配置、API调用、坐标映射、可视化绘制,并结合健身和游戏两大场景给出实战方案。适合有一定ArkTS基础的开发者进阶学习。
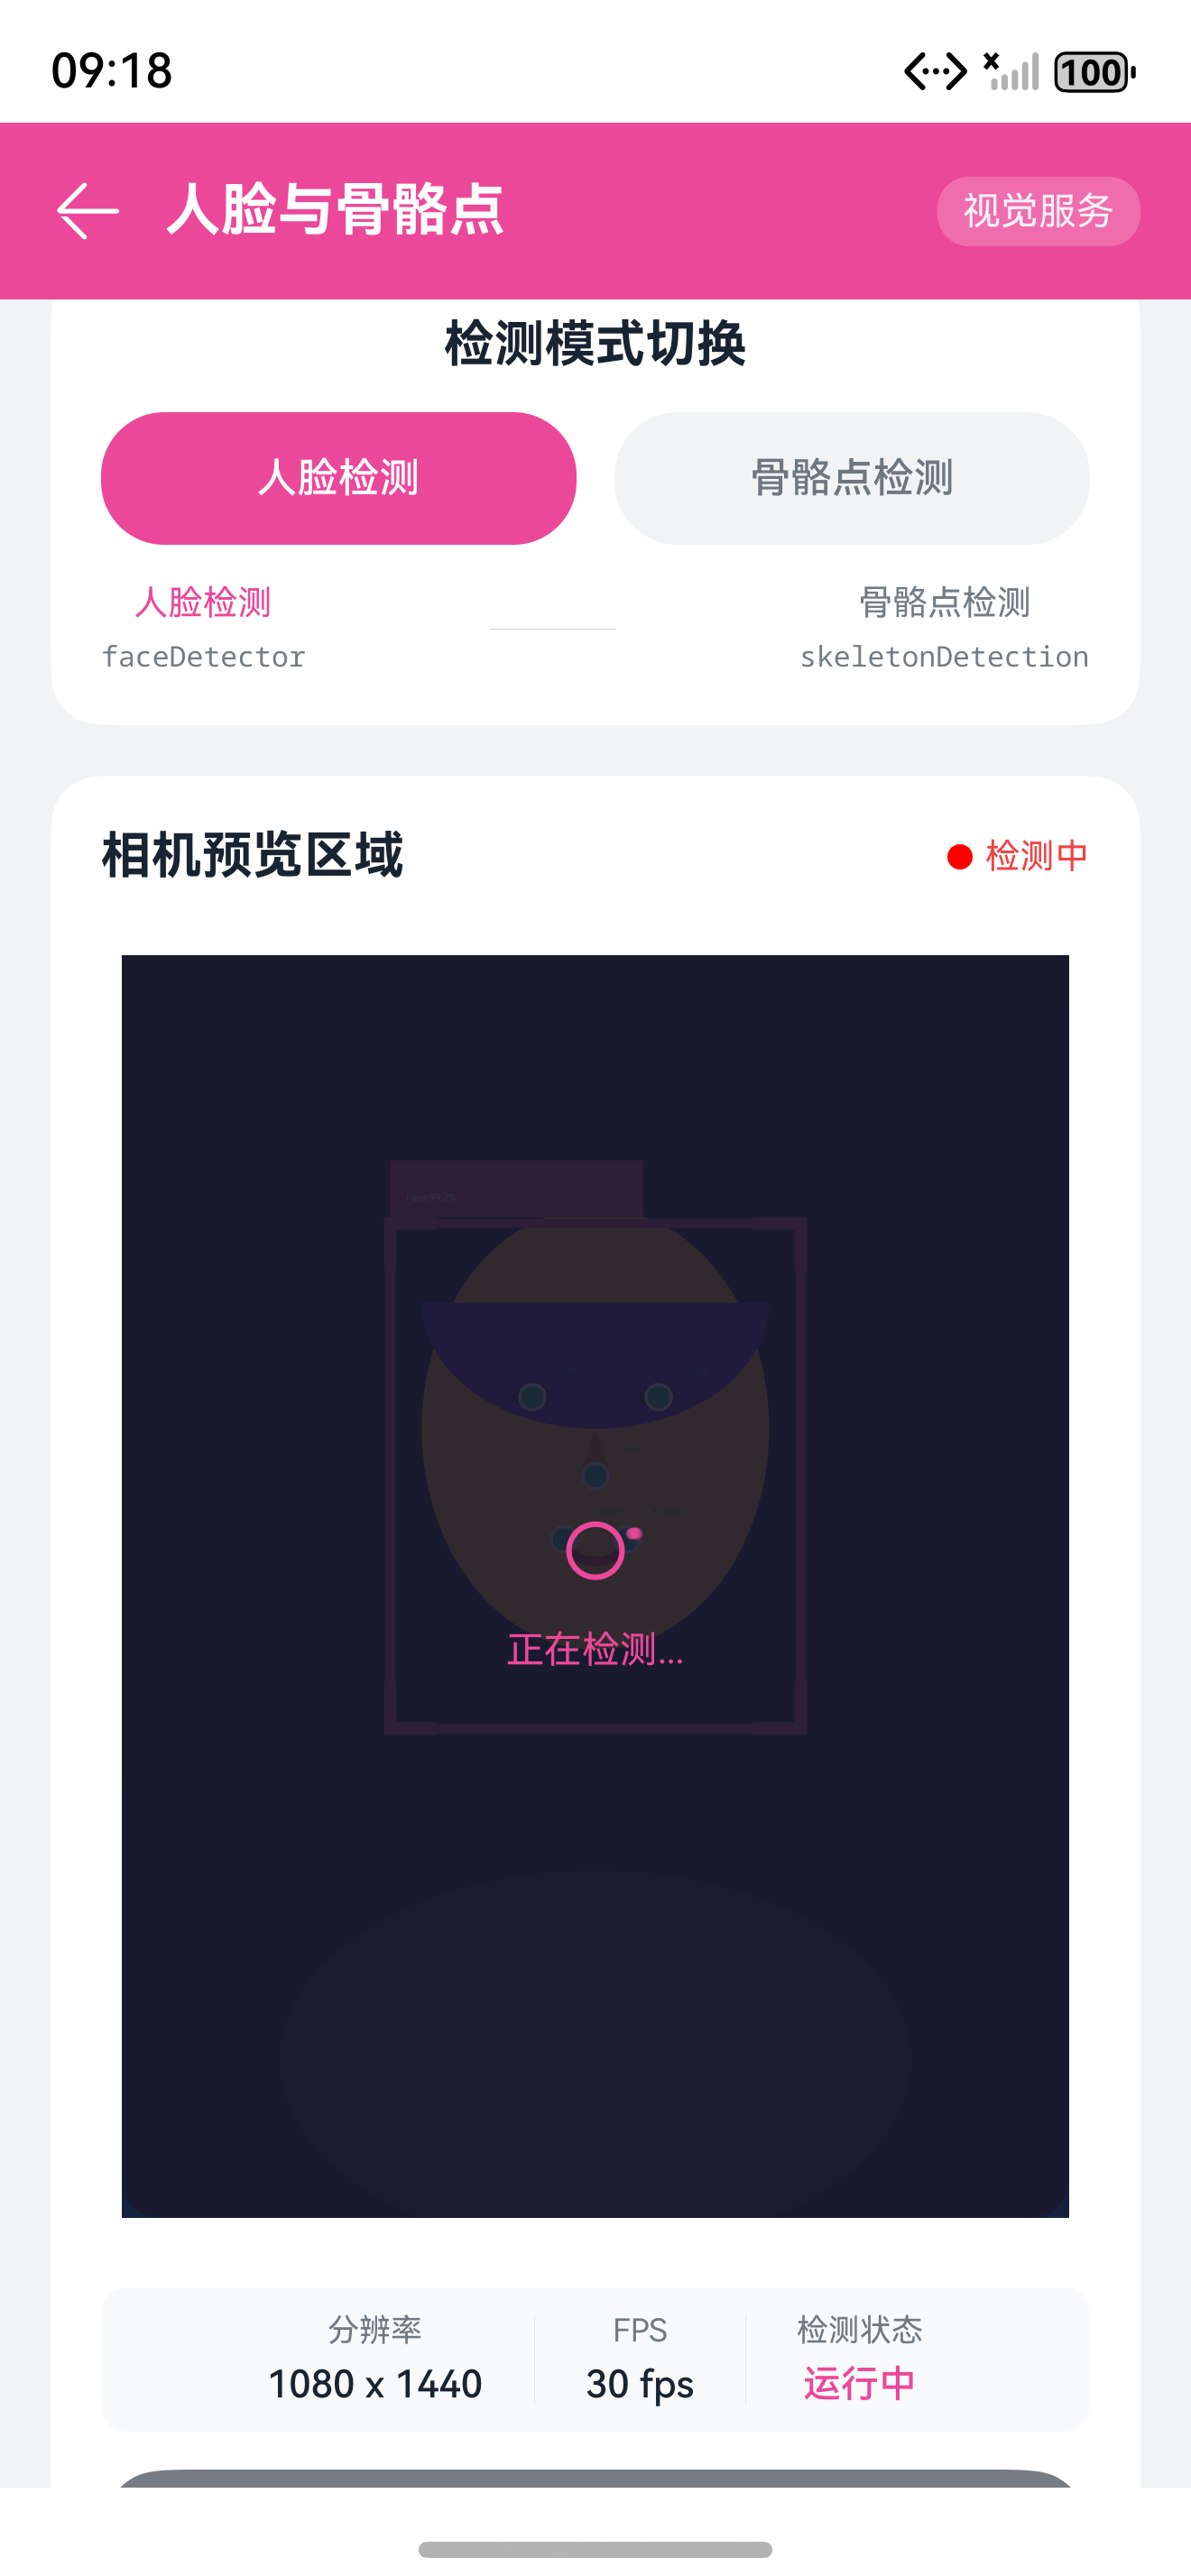
前言
在移动互联网时代,计算机视觉技术已经成为智能应用的核心能力之一。从人脸解锁到智能健身,从AR游戏到虚拟试衣,视觉AI正在重塑我们的交互方式。HarmonyOS作为新一代智能终端操作系统,其Core Vision Kit为开发者提供了开箱即用的高性能视觉能力。
Core Vision Kit是HarmonyOS提供的核心视觉服务框架,集成了人脸检测、人脸比对、骨骼点识别、图像超分、多目标检测等多种端侧AI能力。与云端方案相比,端侧推理具有低延迟、保护隐私、无需网络等显著优势。
本文将围绕以下两个核心能力展开实战讲解:
- 人脸检测:包括人脸框定位、人脸角度估计、人脸关键点检测
- 骨骼点识别:包括人体17个关键骨骼点定位、骨骼连接关系分析
提示:阅读本文前,建议先掌握ArkTS基础语法和HarmonyOS应用开发基本流程。如果你刚开始学习HarmonyOS开发,可以参考官方入门教程打好基础。
一、Core Vision Kit概述
1.1 什么是Core Vision Kit
Core Vision Kit(核心视觉服务)是HarmonyOS提供的端侧计算机视觉能力集合,基于华为自研的HiAI引擎和MindSpore Lite推理框架构建。它通过统一的API接口,将复杂的深度学习模型推理过程封装为简单的方法调用,让开发者无需关注模型训练、量化、部署等底层细节。
Core Vision Kit的主要特点包括:
- 端侧推理:所有计算在设备本地完成,数据不出端
- 高性能优化:基于NPU/GPU/DSP异构计算加速
- 低功耗设计:智能调度计算资源,延长续航时间
- 多设备适配:自动适配手机、平板、智慧屏等不同算力设备
1.2 核心能力介绍
Core Vision Kit目前提供的能力矩阵如下:
| 能力类别 | 具体功能 | 支持设备 | 性能指标 |
|---|---|---|---|
| 人脸检测 | 人脸框定位、关键点检测、角度估计 | 手机/平板/智慧屏 | 检测耗时 < 20ms |
| 人脸比对 | 1:1人脸相似度计算 | 手机/平板 | 比对耗时 < 10ms |
| 骨骼点识别 | 17点人体骨骼检测 | 手机/平板/智慧屏 | 检测耗时 < 30ms |
| 手势识别 | 手势分类与定位 | 手机/平板 | 识别耗时 < 25ms |
| 图像超分 | 2x/4x超分辨率重建 | 手机/平板 | 处理耗时 < 100ms |
| 多目标检测 | 80类目标检测与跟踪 | 手机/平板/智慧屏 | 检测耗时 < 50ms |
注意:实际性能数据会因设备型号、系统版本、并发负载等因素有所差异。上表数据基于Mate 60 Pro在实验室环境下的测试结果。
1.3 开发环境准备
在开始编码前,需要确认开发环境满足以下要求:
- DevEco Studio 3.1.1 Release或更高版本
- HarmonyOS SDK API 9及以上
- 支持NPU或GPU加速的调试设备(推荐Mate 60系列、P60系列)
你可以在华为开发者官网下载最新版本的DevEco Studio。
二、人脸检测实战
2.1 人脸检测技术原理
人脸检测是计算机视觉中最基础也最重要的任务之一。Core Vision Kit采用级联检测网络架构,结合多尺度特征融合技术,能够在复杂场景下实现高精度的人脸定位。
人脸检测流程通常包含三个阶段:
- 候选框生成:在图像不同尺度上扫描,生成可能包含人脸的候选区域
- 人脸分类:对每个候选框进行二分类,判断是否包含人脸
- 框回归与关键点定位:精细化调整人脸框位置,并输出五官关键点坐标
Core Vision Kit的人脸检测支持以下输出信息:
- 人脸矩形框(bounding box):左上角坐标(x, y)和宽高(width, height)
- 人脸置信度(confidence):该位置存在人脸的概率值(0-1)
- 人脸角度(pose):俯仰角(pitch)、偏航角(yaw)、翻滚角(roll)
- 关键点坐标(landmarks):双眼、鼻子、双嘴角共5个关键点
2.2 工程配置与权限申请
首先,在module.json5中声明视觉服务权限:
{
  "module": {
    "name": "entry",
    "type": "entry",
    "description": "$string:module_desc",
    "mainElement": "EntryAbility",
    "deviceTypes": [
      "phone",
      "tablet"
    ],
    "requestPermissions": [
      {
        "name": "ohos.permission.CAMERA",
        "reason": "$string:camera_permission_reason",
        "usedScene": {
          "abilities": ["EntryAbility"],
          "when": "always"
        }
      },
      {
        "name": "ohos.permission.READ_MEDIA",
        "reason": "$string:media_permission_reason"
      }
    ]
  }
}
然后,在oh-package.json5中添加Vision Kit依赖:
{
  "name": "face_detection_demo",
  "version": "1.0.0",
  "description": "人脸检测示例应用",
  "dependencies": {
    "@hms.ai.vision.core": "^1.0.0",
    "@hms.ai.vision.face": "^1.0.0"
  }
}
在应用启动时动态申请权限:
import { abilityAccessCtrl, Permissions } from '@kit.AbilityKit';

async function requestPermissions(): Promise<boolean> {
  const permissions: Array<Permissions> = [
    'ohos.permission.CAMERA',
    'ohos.permission.READ_MEDIA'
  ];

  const authManager = abilityAccessCtrl.createAtManager();
  const authResults = await authManager.requestPermissionsFromUser(
    getContext(),
    permissions
  );

  return authResults.authResults.every(result => result === 0);
}
2.3 人脸检测API调用
Core Vision Kit提供了同步和异步两种调用方式。推荐使用异步方式,避免阻塞UI线程。
初始化人脸检测引擎:
import { visionCore } from '@hms.ai.vision.core';
import { faceDetector } from '@hms.ai.vision.face';
import { BusinessError } from '@kit.BasicServicesKit';

class FaceDetectionEngine {
  private engine: visionCore.VisionEngine | null = null;

  async initialize(): Promise<void> {
    try {
      this.engine = await visionCore.createEngine({
        apiKey: 'your_api_key_here',
        engineType: visionCore.EngineType.FACE_DETECTION
      });
      console.info('人脸检测引擎初始化成功');
    } catch (error) {
      const err = error as BusinessError;
      console.error(`引擎初始化失败: ${err.code}, ${err.message}`);
      throw error;
    }
  }
}
执行人脸检测:
import { image } from '@kit.ImageKit';

interface FaceDetectionResult {
  faces: Array<{
    rect: { left: number; top: number; right: number; bottom: number };
    confidence: number;
    keypoints: Array<{ x: number; y: number }>;
    pose: { pitch: number; yaw: number; roll: number };
  }>;
}

async function detectFaces(
  engine: visionCore.VisionEngine,
  pixelMap: image.PixelMap
): Promise<FaceDetectionResult> {
  const options: faceDetector.DetectOptions = {
    detectMode: faceDetector.DetectMode.FAST,
    detectFaceOrient: faceDetector.FaceOrient.ANGLE_0 |
                      faceDetector.FaceOrient.ANGLE_90 |
                      faceDetector.FaceOrient.ANGLE_180 |
                      faceDetector.FaceOrient.ANGLE_270,
    detectFaceMaxNum: 10
  };

  try {
    const result = await faceDetector.detect(engine, pixelMap, options);
    return {
      faces: result.faceInfos.map(info => ({
        rect: info.faceRect,
        confidence: info.confidence,
        keypoints: info.faceLandmarks.map(lm => ({ x: lm.x, y: lm.y })),
        pose: {
          pitch: info.facePose.pitch,
          yaw: info.facePose.yaw,
          roll: info.facePose.roll
        }
      }))
    };
  } catch (error) {
    console.error('人脸检测执行失败:', error);
    throw error;
  }
}
从相机流实时检测:
import { camera } from '@kit.CameraKit';

class CameraFaceDetector {
  private cameraManager: camera.CameraManager;
  private captureSession: camera.CaptureSession | null = null;
  private faceEngine: FaceDetectionEngine;

  async startRealTimeDetection(surfaceId: string): Promise<void> {
    this.cameraManager = camera.getCameraManager(getContext());
    const cameras = this.cameraManager.getSupportedCameras();

    if (cameras.length === 0) {
      throw new Error('未找到可用摄像头');
    }

    this.captureSession = this.cameraManager.createCaptureSession();
    const previewOutput = this.cameraManager.createPreviewOutput(
      {
        surfaceId: surfaceId,
        size: { width: 1280, height: 720 }
      }
    );

    await this.captureSession.beginConfig();
    await this.captureSession.addInput(cameras[0]);
    await this.captureSession.addOutput(previewOutput);
    await this.captureSession.commitConfig();
    await this.captureSession.start();

    // 注册帧回调进行人脸检测
    previewOutput.on('frameStart', async (err, pixelMap) => {
      if (pixelMap) {
        const result = await detectFaces(this.faceEngine.engine!, pixelMap);
        this.handleDetectionResult(result);
      }
    });
  }

  private handleDetectionResult(result: FaceDetectionResult): void {
    if (result.faces.length > 0) {
      console.info(`检测到 ${result.faces.length} 张人脸`);
      // 发送UI更新事件
    }
  }
}
2.4 人脸关键点绘制
检测到人脸后,通常需要在预览画面上绘制人脸框和关键点。这需要将模型输出的归一化坐标转换为屏幕坐标。
坐标转换工具类:
class CoordinateTransformer {
  constructor(
    private imageWidth: number,
    private imageHeight: number,
    private screenWidth: number,
    private screenHeight: number
  ) {}

  normalizeToScreen(normX: number, normY: number): { x: number; y: number } {
    const scaleX = this.screenWidth / this.imageWidth;
    const scaleY = this.screenHeight / this.imageHeight;
    const scale = Math.min(scaleX, scaleY);

    const offsetX = (this.screenWidth - this.imageWidth * scale) / 2;
    const offsetY = (this.screenHeight - this.imageHeight * scale) / 2;

    return {
      x: normX * this.imageWidth * scale + offsetX,
      y: normY * this.imageHeight * scale + offsetY
    };
  }

  rectToScreen(rect: { left: number; top: number; right: number; bottom: number }) {
    const topLeft = this.normalizeToScreen(rect.left, rect.top);
    const bottomRight = this.normalizeToScreen(rect.right, rect.bottom);

    return {
      x: topLeft.x,
      y: topLeft.y,
      width: bottomRight.x - topLeft.x,
      height: bottomRight.y - topLeft.y
    };
  }
}
自定义绘制组件:
@Component
struct FaceOverlay {
  @Prop faces: FaceDetectionResult['faces'];
  @Prop imageWidth: number = 1280;
  @Prop imageHeight: number = 720;

  build() {
    Stack() {
      ForEach(this.faces, (face, index) => {
        FaceAnnotation({ face: face, index: index })
      })
    }
    .width('100%')
    .height('100%')
    .position({ x: 0, y: 0 })
  }
}

@Component
struct FaceAnnotation {
  @Prop face: FaceDetectionResult['faces'][0];
  @Prop index: number;

  build() {
    Stack() {
      // 人脸框
      Rect()
        .width(this.face.rect.right - this.face.rect.left)
        .height(this.face.rect.bottom - this.face.rect.top)
        .stroke('#00FF00')
        .strokeWidth(3)
        .fill('transparent')

      // 关键点
      ForEach(this.face.keypoints, (point, idx) => {
        Circle({ width: 8, height: 8 })
          .position({ x: point.x - 4, y: point.y - 4 })
          .fill(this.getKeypointColor(idx))
      })

      // 置信度标签
      Text(`Face ${this.index + 1}: ${(this.face.confidence * 100).toFixed(1)}%`)
        .fontSize(12)
        .fontColor('#FFFFFF')
        .backgroundColor('#00FF00')
        .padding(4)
        .position({
          x: this.face.rect.left,
          y: this.face.rect.top - 24
        })
    }
    .position({
      x: this.face.rect.left,
      y: this.face.rect.top
    })
  }

  private getKeypointColor(index: number): ResourceColor {
    const colors = ['#FF0000', '#00FF00', '#0000FF', '#FFFF00', '#FF00FF'];
    return colors[index % colors.length];
  }
}
三、骨骼点识别实战
3.1 骨骼点检测技术原理
骨骼点识别(Pose Estimation)是计算机视觉中用于定位人体关键关节位置的技术。Core Vision Kit采用自顶向下的检测策略,先通过人体检测器定位每个人体区域,再在每个区域内独立预测骨骼关键点。
模型输出的人体骨骼点遵循COCO格式,共17个关键点:
| 序号 | 关键点名称 | 说明 |
|---|---|---|
| 0 | 鼻子 | 面部中心位置 |
| 1 | 左眼 | 左眼中心 |
| 2 | 右眼 | 右眼中心 |
| 3 | 左耳 | 左耳根部 |
| 4 | 右耳 | 右耳根部 |
| 5 | 左肩 | 左肩关节 |
| 6 | 右肩 | 右肩关节 |
| 7 | 左肘 | 左肘关节 |
| 8 | 右肘 | 右肘关节 |
| 9 | 左腕 | 左手腕关节 |
| 10 | 右腕 | 右手腕关节 |
| 11 | 左髋 | 左髋关节 |
| 12 | 右髋 | 右髋关节 |
| 13 | 左膝 | 左膝关节 |
| 14 | 右膝 | 右膝关节 |
| 15 | 左踝 | 左脚踝关节 |
| 16 | 右踝 | 右脚踝关节 |
这些关键点通过预定义的骨骼连接关系构成人体骨架,常见的连接对包括:鼻子-左眼、鼻子-右眼、左肩-左肘、左肘-左腕、右肩-右髋等。
3.2 骨骼点坐标获取
与Face Detection类似,首先需要初始化骨骼点检测引擎:
import { skeletonDetector } from '@hms.ai.vision.skeleton';

class SkeletonDetectionEngine {
  private engine: visionCore.VisionEngine | null = null;

  async initialize(): Promise<void> {
    this.engine = await visionCore.createEngine({
      apiKey: 'your_api_key_here',
      engineType: visionCore.EngineType.SKELETON_DETECTION
    });
  }
}

interface SkeletonResult {
  persons: Array<{
    personId: number;
    keypoints: Array<{
      index: number;
      x: number;
      y: number;
      score: number;
    }>;
    bbox: { x: number; y: number; width: number; height: number };
    score: number;
  }>;
}

async function detectSkeleton(
  engine: visionCore.VisionEngine,
  pixelMap: image.PixelMap
): Promise<SkeletonResult> {
  const options: skeletonDetector.DetectOptions = {
    detectMode: skeletonDetector.DetectMode.ACCURATE,
    maxPersonNum: 5
  };

  const result = await skeletonDetector.detect(engine, pixelMap, options);

  return {
    persons: result.personInfos.map((info, idx) => ({
      personId: idx,
      keypoints: info.keyPoints.map(kp => ({
        index: kp.index,
        x: kp.x,
        y: kp.y,
        score: kp.score
      })),
      bbox: info.personRect,
      score: info.confidence
    }))
  };
}
关键点置信度过滤:
function filterKeypoints(
  skeleton: SkeletonResult['persons'][0],
  threshold: number = 0.3
): SkeletonResult['persons'][0]['keypoints'] {
  return skeleton.keypoints.filter(kp => kp.score >= threshold);
}

function getVisibleJoints(
  skeleton: SkeletonResult['persons'][0]
): Map<number, { x: number; y: number }> {
  const visibleJoints = new Map<number, { x: number; y: number }>();

  skeleton.keypoints.forEach(kp => {
    if (kp.score > 0.3) {
      visibleJoints.set(kp.index, { x: kp.x, y: kp.y });
    }
  });

  return visibleJoints;
}
3.3 骨骼连接线绘制
绘制骨骼需要将关键点按人体解剖结构连接起来:
const SKELETON_CONNECTIONS: Array<[number, number]> = [
  [0, 1], [0, 2],    // 鼻子到双眼
  [1, 3], [2, 4],    // 眼到耳
  [5, 6],            // 双肩
  [5, 7], [7, 9],    // 左臂
  [6, 8], [8, 10],   // 右臂
  [5, 11], [6, 12],  // 肩到髋
  [11, 12],          // 双髋
  [11, 13], [13, 15], // 左腿
  [12, 14], [14, 16]  // 右腿
];

@Component
struct SkeletonOverlay {
  @Prop persons: SkeletonResult['persons'];
  @Prop imageWidth: number = 1280;
  @Prop imageHeight: number = 720;

  private transformer: CoordinateTransformer = new CoordinateTransformer(
    this.imageWidth,
    this.imageHeight,
    1080,
    1920
  );

  build() {
    Stack() {
      ForEach(this.persons, (person) => {
        SkeletonAnnotation({
          person: person,
          transformer: this.transformer
        })
      })
    }
    .width('100%')
    .height('100%')
  }
}

@Component
struct SkeletonAnnotation {
  @Prop person: SkeletonResult['persons'][0];
  @Prop transformer: CoordinateTransformer;

  private getJointPosition(index: number): { x: number; y: number } | null {
    const kp = this.person.keypoints.find(k => k.index === index);
    if (!kp || kp.score < 0.3) return null;
    return this.transformer.normalizeToScreen(kp.x, kp.y);
  }

  build() {
    Stack() {
      // 绘制骨骼连接线
      ForEach(SKELETON_CONNECTIONS, (connection) => {
        const start = this.getJointPosition(connection[0]);
        const end = this.getJointPosition(connection[1]);

        if (start && end) {
          Line({
            start: [start.x, start.y],
            end: [end.x, end.y]
          })
          .stroke('#00FF88')
          .strokeWidth(4)
          .strokeLineCap(LineCapStyle.Round)
        }
      })

      // 绘制关节点
      ForEach(this.person.keypoints, (kp) => {
        if (kp.score >= 0.3) {
          const pos = this.transformer.normalizeToScreen(kp.x, kp.y);
          Circle({ width: 12, height: 12 })
            .position({ x: pos.x - 6, y: pos.y - 6 })
            .fill('#FF6600')
            .stroke('#FFFFFF')
            .strokeWidth(2)
        }
      })
    }
  }
}
四、应用场景实战
4.1 健身场景:动作姿态纠正
骨骼点识别在智能健身领域有广泛应用。通过实时检测用户的关节位置,可以分析运动姿态是否正确,并及时给出纠正建议。
深蹲动作分析示例:
class SquatAnalyzer {
  private readonly KNEE_ANGLE_THRESHOLD = 90;
  private readonly HIP_ANGLE_THRESHOLD = 100;

  analyzeSquat(skeleton: SkeletonResult['persons'][0]): SquatFeedback {
    const joints = this.extractJoints(skeleton);

    if (!this.hasRequiredJoints(joints)) {
      return { status: 'insufficient_joints', message: '请调整位置,确保全身可见' };
    }

    const leftKneeAngle = this.calculateAngle(
      joints.leftHip,
      joints.leftKnee,
      joints.leftAnkle
    );

    const rightKneeAngle = this.calculateAngle(
      joints.rightHip,
      joints.rightKnee,
      joints.rightAnkle
    );

    const avgKneeAngle = (leftKneeAngle + rightKneeAngle) / 2;

    if (avgKneeAngle < this.KNEE_ANGLE_THRESHOLD) {
      return {
        status: 'good_depth',
        message: '深蹲深度达标,保持背部挺直',
        metrics: { kneeAngle: avgKneeAngle }
      };
    } else {
      return {
        status: 'too_shallow',
        message: '蹲得不够深,请继续下蹲',
        metrics: { kneeAngle: avgKneeAngle }
      };
    }
  }

  private calculateAngle(
    a: { x: number; y: number },
    b: { x: number; y: number },
    c: { x: number; y: number }
  ): number {
    const ab = { x: a.x - b.x, y: a.y - b.y };
    const cb = { x: c.x - b.x, y: c.y - b.y };

    const dot = ab.x * cb.x + ab.y * cb.y;
    const magAB = Math.sqrt(ab.x * ab.x + ab.y * ab.y);
    const magCB = Math.sqrt(cb.x * cb.x + cb.y * cb.y);

    const cos = dot / (magAB * magCB);
    return Math.acos(Math.max(-1, Math.min(1, cos))) * (180 / Math.PI);
  }
}
健身提示:使用骨骼点识别进行姿态分析时,建议将设备放置在用户侧面2-3米处,高度与腰部齐平,这样可以获得最准确的关节角度计算结果。
4.2 游戏场景:体感交互
将骨骼点识别与游戏结合,可以实现无需手柄的体感交互。玩家通过身体动作控制游戏角色,带来更沉浸的游戏体验。
体感控制核心逻辑:
class MotionController {
  private lastSkeleton: SkeletonResult['persons'][0] | null = null;
  private gestureHistory: Array<string> = [];

  processSkeleton(skeleton: SkeletonResult['persons'][0]): GameInput {
    const joints = this.extractJoints(skeleton);
    const gesture = this.recognizeGesture(joints);

    this.gestureHistory.push(gesture);
    if (this.gestureHistory.length > 10) {
      this.gestureHistory.shift();
    }

    const smoothedGesture = this.smoothGestures(this.gestureHistory);

    return {
      moveDirection: this.detectMovement(joints),
      action: smoothedGesture,
      intensity: this.calculateIntensity(joints)
    };
  }

  private recognizeGesture(joints: ExtractedJoints): string {
    const leftHandY = joints.leftWrist?.y ?? 0;
    const rightHandY = joints.rightWrist?.y ?? 0;
    const shoulderY = ((joints.leftShoulder?.y ?? 0) + (joints.rightShoulder?.y ?? 0)) / 2;

    if (leftHandY < shoulderY && rightHandY < shoulderY) {
      return 'hands_up';
    } else if (leftHandY > shoulderY && rightHandY > shoulderY) {
      return 'hands_down';
    } else if (joints.leftWrist && joints.rightWrist) {
      const handDistance = Math.abs(joints.leftWrist.x - joints.rightWrist.x);
      if (handDistance < 0.1) {
        return 'clap';
      }
    }

    return 'neutral';
  }
}
游戏画面渲染:
@Entry
@Component
struct MotionGamePage {
  @State gameState: GameState = new GameState();
  @State currentSkeleton: SkeletonResult['persons'][0] | null = null;
  private motionController: MotionController = new MotionController();

  aboutToAppear() {
    this.startCameraAndDetection();
  }

  async startCameraAndDetection(): Promise<void> {
    const detector = new SkeletonDetectionEngine();
    await detector.initialize();

    // 模拟每帧回调
    setInterval(async () => {
      const pixelMap = await this.captureFrame();
      const result = await detectSkeleton(detector.engine!, pixelMap);

      if (result.persons.length > 0) {
        this.currentSkeleton = result.persons[0];
        const input = this.motionController.processSkeleton(result.persons[0]);
        this.gameState.applyInput(input);
      }
    }, 33); // 约30fps
  }

  build() {
    Stack() {
      // 游戏场景
      GameScene({ state: this.gameState })

      // 骨骼叠加层
      if (this.currentSkeleton) {
        SkeletonOverlay({
          persons: [this.currentSkeleton],
          imageWidth: 1280,
          imageHeight: 720
        })
      }

      // 操作提示
      Column() {
        Text('双手举起 = 跳跃')
          .fontSize(14)
          .fontColor('#FFFFFF')
        Text('双手放下 = 下蹲')
          .fontSize(14)
          .fontColor('#FFFFFF')
        Text('双手合十 = 释放技能')
          .fontSize(14)
          .fontColor('#FFFFFF')
      }
      .position({ x: 20, y: 20 })
      .backgroundColor('rgba(0,0,0,0.5)')
      .padding(12)
      .borderRadius(8)
    }
  }
}
五、性能优化与最佳实践
5.1 推理性能优化
在实际项目中,视觉推理的性能直接影响用户体验。以下是经过验证的优化策略:
- 分辨率控制:输入图像分辨率不需要过高,720p通常已足够,过高会增加推理耗时
- 帧率控制:人眼对视觉反馈的感知有限,15-20fps的检测频率通常足够
- ROI裁剪:如果只需要检测画面中的特定区域,可以先裁剪ROI再送入模型
- 多线程处理:将相机采集、图像预处理、模型推理、UI渲染放在不同线程
class PerformanceOptimizer {
  private lastProcessTime: number = 0;
  private readonly TARGET_INTERVAL: number = 50; // 20fps

  shouldProcess(currentTime: number): boolean {
    if (currentTime - this.lastProcessTime >= this.TARGET_INTERVAL) {
      this.lastProcessTime = currentTime;
      return true;
    }
    return false;
  }

  async preprocess(pixelMap: image.PixelMap): Promise<image.PixelMap> {
    // 缩放到模型输入尺寸
    return await pixelMap.scale(640, 480);
  }
}
5.2 常见问题排查
| 问题现象 | 可能原因 | 解决方案 |
|---|---|---|
| 检测不到人脸/人体 | 光线过暗或过曝 | 改善环境光照,避免逆光 |
| 关键点抖动严重 | 帧率过高导致置信度波动 | 启用时序滤波或降低检测频率 |
| 坐标偏移 | 预览画面与检测图像分辨率不一致 | 统一坐标系,使用transformer转换 |
| 引擎初始化失败 | API Key无效或权限未申请 | 检查配置文件和权限声明 |
| 多目标漏检 | detectFaceMaxNum设置过小 | 增大maxNum参数值 |
调试提示:开发阶段建议开启Vision Kit的日志输出功能,通过
hilog查看详细的推理耗时和错误信息,便于快速定位问题。
六、完整项目结构
一个典型的人脸检测与骨骼点识别项目结构如下:
entry/src/main/
├── ets/
│   ├── entryability/
│   │   └── EntryAbility.ets
│   ├── pages/
│   │   ├── IndexPage.ets          // 首页
│   │   ├── FaceDetectionPage.ets  // 人脸检测页面
│   │   └── SkeletonPage.ets       // 骨骼点页面
│   ├── components/
│   │   ├── FaceOverlay.ets        // 人脸绘制组件
│   │   ├── SkeletonOverlay.ets    // 骨骼绘制组件
│   │   └── CameraPreview.ets      // 相机预览组件
│   ├── engine/
│   │   ├── FaceEngine.ts          // 人脸引擎封装
│   │   ├── SkeletonEngine.ts      // 骨骼引擎封装
│   │   └── EngineFactory.ts       // 引擎工厂
│   ├── utils/
│   │   ├── CoordinateTransformer.ts
│   │   ├── PermissionHelper.ts
│   │   └── PerformanceOptimizer.ts
│   └── model/
│       ├── FaceTypes.ts
│       ├── SkeletonTypes.ts
│       └── GameTypes.ts
├── resources/
│   ├── base/
│   │   ├── element/
│   │   ├── media/
│   │   └── profile/
│   └── rawfile/
└── module.json5
总结
本文详细介绍了HarmonyOS Core Vision Kit的人脸检测与骨骼点识别两大核心能力,从原理讲解到代码实战,覆盖了完整的开发流程。
核心要点回顾:
- 人脸检测:通过
faceDetector.detect()实现人脸框定位、关键点检测和角度估计,支持多朝向、多人脸场景 - 骨骼点识别:通过
skeletonDetector.detect()获取人体17个关节点坐标,支持多人同时检测 - 坐标映射:必须将模型输出的归一化坐标转换为屏幕坐标,才能正确叠加可视化元素
- 场景应用:结合健身姿态分析和体感游戏控制,展示了视觉AI的实用价值
后续学习建议:
- 深入了解Core Vision Kit手势识别能力
- 学习图像超分与多目标检测的进阶用法
- 探索端侧AI模型量化与部署优化技术
如果你对HarmonyOS视觉开发感兴趣,欢迎关注我的专栏,后续将持续输出更多实战干货。
觉得本文有帮助?欢迎投票支持!
- 收藏本文,方便后续查阅
- 点赞支持,让更多开发者看到优质内容
- 在评论区分享你的视觉AI项目经验
相关资源链接:

讨论HarmonyOS开发技术,专注于API与组件、DevEco Studio、测试、元服务和应用上架分发等。
更多推荐



 4
4 0
0- 0


 已为社区贡献17条内容

所有评论(0)