HarmonyOS一次开发多端部署:多设备交互与功能兼容开发
HarmonyOS一次开发多端部署:多设备交互与功能兼容开发
摘要:本文深入讲解HarmonyOS一次开发,多端部署中的进阶课题:交互归一设计原则、SysCap系统能力动态管理、功能级一多实现策略以及折叠屏专属适配方案。通过完整的ArkTS代码示例和实战场景分析,帮助开发者打造在多种设备上都能提供一致且优秀用户体验的应用。
前言
在掌握了HarmonyOS多端部署的架构设计和响应式布局之后,开发者面临的下一个挑战是:如何让应用在不同设备上不仅"看起来对",还要"用起来对"?
手机上的滑动操作在智慧屏上可能完全不适用;平板支持的悬浮窗功能在车机上可能是安全隐患;折叠屏展开/收起时的状态续留更是独特挑战。这些问题都属于多设备交互与功能兼容的范畴。
本文将围绕以下核心议题展开深度探讨:
- 交互归一:统一不同设备上的交互体验
- SysCap能力管理:动态检测设备能力,实现功能级一多
- 功能级一多:让功能按需加载、按设备呈现
- 折叠屏适配:应对可折叠设备的独特场景
提示:本文内容基于HarmonyOS API 10/11版本,涉及部分高级特性。建议先完成前两篇一多系列文章的学习,再阅读本文。
一、交互归一设计
1.1 什么是交互归一
交互归一(Interaction Unification)是指在多端部署场景下,为不同设备提供符合其特性的、一致且自然的交互体验。它不是要求所有设备的交互完全一致,而是追求"相同意图,适当表达"。
HarmonyOS定义的交互归一原则包括:
- 触控设备(手机/平板):以触摸手势为主,支持滑动、捏合、长按
- 焦点设备(智慧屏/车机):以方向键/遥控器为主,需支持焦点导航
- 穿戴设备(手表):以简单点击和旋转表冠为主,减少输入
- 语音设备(音箱/部分车机):支持语音指令交互
1.2 交互抽象层设计
为了实现交互归一,推荐在工程中引入交互抽象层:
// interaction/InteractionAdapter.ets

interface InteractionHandler {
  onSelect(): void;
  onBack(): void;
  onMenu(): void;
  onNext(): void;
  onPrevious(): void;
}

class InteractionAdapter {
  private deviceType: string = 'phone';
  private handler: InteractionHandler | null = null;

  constructor() {
    this.deviceType = DeviceTypeDetector.getDeviceType();
  }

  setHandler(handler: InteractionHandler): void {
    this.handler = handler;
  }

  // 触发选择操作
  triggerSelect(): void {
    if (this.handler) {
      this.handler.onSelect();
    }
  }

  // 触发返回操作
  triggerBack(): void {
    if (this.handler) {
      this.handler.onBack();
    }
  }

  // 获取当前设备推荐的交互方式
  getPreferredInteraction(): InteractionMode {
    switch (this.deviceType) {
      case 'tv':
      case 'car':
        return InteractionMode.FOCUS;
      case 'wearable':
        return InteractionMode.SIMPLE_TAP;
      case 'phone':
      case 'tablet':
      default:
        return InteractionMode.TOUCH;
    }
  }
}

enum InteractionMode {
  TOUCH = 'touch',
  FOCUS = 'focus',
  SIMPLE_TAP = 'simple_tap',
  VOICE = 'voice'
}

export const interactionAdapter = new InteractionAdapter();
1.3 触控与焦点的统一处理
在实际组件中,需要同时支持触控和焦点两种交互模式:
@Component
struct UnifiedListItem {
  @Prop title: string;
  @Prop subtitle: string;
  @Prop icon: Resource;
  @Prop onAction: () => void;

  @State isFocused: boolean = false;
  @State isPressed: boolean = false;
  @State deviceMode: InteractionMode = interactionAdapter.getPreferredInteraction();

  private getBackgroundColor(): ResourceColor {
    if (this.isPressed) return '#E8E8E8';
    if (this.isFocused) return '#D0D0D0';
    return '#FFFFFF';
  }

  private getScaleEffect(): object {
    if (this.isFocused || this.isPressed) {
      return { x: 0.98, y: 0.98 };
    }
    return { x: 1, y: 1 };
  }

  build() {
    Row() {
      Image(this.icon)
        .width(40)
        .height(40)
        .borderRadius(8)
        .objectFit(ImageFit.Cover)

      Column() {
        Text(this.title)
          .fontSize(16)
          .fontWeight(FontWeight.Medium)
          .fontColor('#333333')

        Text(this.subtitle)
          .fontSize(13)
          .fontColor('#999999')
          .margin({ top: 4 })
          .maxLines(1)
          .textOverflow({ overflow: TextOverflow.Ellipsis })
      }
      .layoutWeight(1)
      .margin({ left: 12 })
      .alignItems(HorizontalAlign.Start)

      Image($r('app.media.ic_arrow_right'))
        .width(20)
        .height(20)
        .fillColor('#CCCCCC')
        .visibility(this.deviceMode === InteractionMode.FOCUS ? Visibility.None : Visibility.Visible)
    }
    .width('100%')
    .height(72)
    .padding(16)
    .backgroundColor(this.getBackgroundColor())
    .borderRadius(12)
    .scale(this.getScaleEffect())
    .animation({ duration: 150, curve: Curve.EaseInOut })
    .focusable(this.deviceMode === InteractionMode.FOCUS)
    .defaultFocus(false)
    .onFocus(() => this.isFocused = true)
    .onBlur(() => this.isFocused = false)
    .onTouch((event: TouchEvent) => {
      if (event.type === TouchType.Down) {
        this.isPressed = true;
      } else if (event.type === TouchType.Up) {
        this.isPressed = false;
        this.onAction();
      }
    })
    .onClick(() => {
      if (this.deviceMode !== InteractionMode.FOCUS) {
        this.onAction();
      }
    })
    .onKeyEvent((event: KeyEvent) => {
      if (this.deviceMode === InteractionMode.FOCUS && event.keyCode === KeyCode.KEYCODE_ENTER) {
        this.onAction();
        return true;
      }
      return false;
    })
  }
}
1.4 手势与遥控器的映射
对于智慧屏等设备,需要将遥控器按键映射为应用操作:
import { inputConsumer } from '@kit.InputKit';

class RemoteControlMapper {
  private callbacks: Map<number, () => void> = new Map();

  initialize(): void {
    // 注册遥控器按键监听
    inputConsumer.on('keyDown', (event) => {
      this.handleKeyEvent(event);
    });
  }

  registerMapping(keyCode: number, callback: () => void): void {
    this.callbacks.set(keyCode, callback);
  }

  private handleKeyEvent(event: inputConsumer.KeyEvent): void {
    const callback = this.callbacks.get(event.keyCode);
    if (callback) {
      callback();
    }
  }

  // 常用遥控器按键映射
  setupDefaultMappings(handlers: {
    onUp: () => void;
    onDown: () => void;
    onLeft: () => void;
    onRight: () => void;
    onOK: () => void;
    onBack: () => void;
    onMenu: () => void;
    onHome: () => void;
  }): void {
    this.registerMapping(KeyCode.KEYCODE_DPAD_UP, handlers.onUp);
    this.registerMapping(KeyCode.KEYCODE_DPAD_DOWN, handlers.onDown);
    this.registerMapping(KeyCode.KEYCODE_DPAD_LEFT, handlers.onLeft);
    this.registerMapping(KeyCode.KEYCODE_DPAD_RIGHT, handlers.onRight);
    this.registerMapping(KeyCode.KEYCODE_ENTER, handlers.onOK);
    this.registerMapping(KeyCode.KEYCODE_BACK, handlers.onBack);
    this.registerMapping(KeyCode.KEYCODE_MENU, handlers.onMenu);
    this.registerMapping(KeyCode.KEYCODE_HOME, handlers.onHome);
  }
}

export const remoteControlMapper = new RemoteControlMapper();
二、SysCap能力管理
2.1 SysCap概述
SysCap(System Capability,系统能力)是HarmonyOS用于描述设备软硬件能力的一套机制。不同设备支持的系统能力存在差异:
| 设备类型 | 支持的能力示例 | 可能缺失的能力 |
|---|---|---|
| 手机 | 相机、GPS、NFC、指纹、加速度计 | — |
| 平板 | 相机、GPS、手写笔、多窗口 | 电话、NFC |
| 智慧屏 | 高清显示、遥控器、扬声器 | 相机、GPS、触控 |
| 车机 | 定位、语音、大屏显示 | 相机、NFC |
| 手表 | 心率、步数、通知 | 相机、GPS(部分有) |
能力提示:在调用任何系统能力之前,务必先检查该能力是否在当前设备上可用。直接调用不存在的能力会导致应用崩溃。
2.2 能力查询与动态适配
HarmonyOS提供了canIUse和canIUseSync接口用于查询系统能力:
import { canIUse, canIUseSync } from '@kit.AbilityKit';

class SysCapManager {
  // 同步查询能力是否可用
  static hasCapability(capability: string): boolean {
    return canIUseSync(capability);
  }

  // 异步查询能力是否可用
  static async checkCapability(capability: string): Promise<boolean> {
    return await canIUse(capability);
  }

  // 批量查询能力
  static checkCapabilities(capabilities: Array<string>): Map<string, boolean> {
    const results = new Map<string, boolean>();
    capabilities.forEach(cap => {
      results.set(cap, canIUseSync(cap));
    });
    return results;
  }
}

// 常用系统能力定义
export const SystemCapabilities = {
  CAMERA: 'SystemCapability.Multimedia.Camera',
  LOCATION: 'SystemCapability.Location.Location',
  NFC: 'SystemCapability.Communication.NFC',
  FINGERPRINT: 'SystemCapability.UserIAM.UserAuth',
  BLUETOOTH: 'SystemCapability.Communication.Bluetooth',
  WIFI: 'SystemCapability.Communication.WiFi',
  SENSOR_ACCELEROMETER: 'SystemCapability.Sensors.Sensor',
  TELEPHONY: 'SystemCapability.Telephony.CoreService',
  MULTI_WINDOW: 'SystemCapability.Window.WindowManager',
  PEN_INPUT: 'SystemCapability.Multimedia.InputDevice',
  FOLDABLE: 'SystemCapability.Window.Foldable',
  VOICE_RECOGNITION: 'SystemCapability.AI.VoiceRecognition'
} as const;
2.3 功能级一多实现
基于SysCap,可以实现功能级一多——同样的应用在不同设备上呈现不同的功能集合:
// features/FeatureGate.ets

interface FeatureConfig {
  name: string;
  requiredCapabilities: Array<string>;
  fallbackBehavior: 'hide' | 'disable' | 'alternative';
  alternativeAction?: () => void;
}

class FeatureGate {
  private featureRegistry: Map<string, FeatureConfig> = new Map();
  private deviceCapabilities: Map<string, boolean> = new Map();

  async initialize(): Promise<void> {
    // 预检测所有相关能力
    const allCaps = Object.values(SystemCapabilities);
    this.deviceCapabilities = SysCapManager.checkCapabilities(allCaps);
  }

  registerFeature(config: FeatureConfig): void {
    this.featureRegistry.set(config.name, config);
  }

  isFeatureAvailable(featureName: string): boolean {
    const config = this.featureRegistry.get(featureName);
    if (!config) return false;

    return config.requiredCapabilities.every(cap =>
      this.deviceCapabilities.get(cap) === true
    );
  }

  getFeatureVisibility(featureName: string): Visibility {
    return this.isFeatureAvailable(featureName) ? Visibility.Visible : Visibility.None;
  }

  getAllAvailableFeatures(): Array<string> {
    return Array.from(this.featureRegistry.keys())
      .filter(name => this.isFeatureAvailable(name));
  }
}

export const featureGate = new FeatureGate();
实际应用中的功能开关:
// 在应用启动时初始化功能门控
async function initializeFeatureGate(): Promise<void> {
  await featureGate.initialize();

  // 注册各功能模块
  featureGate.registerFeature({
    name: 'camera_scan',
    requiredCapabilities: [SystemCapabilities.CAMERA],
    fallbackBehavior: 'hide'
  });

  featureGate.registerFeature({
    name: 'location_service',
    requiredCapabilities: [SystemCapabilities.LOCATION],
    fallbackBehavior: 'disable'
  });

  featureGate.registerFeature({
    name: 'nfc_payment',
    requiredCapabilities: [SystemCapabilities.NFC],
    fallbackBehavior: 'alternative',
    alternativeAction: () => {
      // 显示二维码支付作为替代
      showQRCodePayment();
    }
  });

  featureGate.registerFeature({
    name: 'fingerprint_unlock',
    requiredCapabilities: [SystemCapabilities.FINGERPRINT],
    fallbackBehavior: 'alternative',
    alternativeAction: () => {
      // 使用密码解锁作为替代
      showPasswordInput();
    }
  });

  featureGate.registerFeature({
    name: 'multi_window',
    requiredCapabilities: [SystemCapabilities.MULTI_WINDOW],
    fallbackBehavior: 'hide'
  });

  featureGate.registerFeature({
    name: 'pen_input',
    requiredCapabilities: [SystemCapabilities.PEN_INPUT],
    fallbackBehavior: 'hide'
  });
}

function showQRCodePayment(): void {
  // 实现二维码支付逻辑
}

function showPasswordInput(): void {
  // 实现密码输入逻辑
}
2.4 条件化UI渲染
结合功能门控,实现UI的条件化渲染:
@Entry
@Component
struct FeatureAdaptivePage {
  @State availableFeatures: Array<string> = [];

  aboutToAppear() {
    initializeFeatureGate().then(() => {
      this.availableFeatures = featureGate.getAllAvailableFeatures();
    });
  }

  build() {
    Column() {
      Text('功能面板')
        .fontSize(24)
        .fontWeight(FontWeight.Bold)
        .margin(16)

      // 相机扫描 - 需要相机能力
      if (featureGate.isFeatureAvailable('camera_scan')) {
        FeatureCard({
          icon: $r('app.media.ic_camera'),
          title: '扫码识别',
          description: '使用相机扫描二维码',
          onClick: () => this.startCameraScan()
        })
      }

      // 定位服务 - 需要定位能力
      if (featureGate.isFeatureAvailable('location_service')) {
        FeatureCard({
          icon: $r('app.media.ic_location'),
          title: '附近推荐',
          description: '基于位置的内容推荐',
          onClick: () => this.loadNearbyContent()
        })
      }

      // NFC支付 - 需要NFC能力,不可用显示替代方案
      if (featureGate.isFeatureAvailable('nfc_payment')) {
        FeatureCard({
          icon: $r('app.media.ic_nfc'),
          title: 'NFC支付',
          description: '一触即付',
          onClick: () => this.startNFCPayment()
        })
      } else {
        FeatureCard({
          icon: $r('app.media.ic_qrcode'),
          title: '二维码支付',
          description: '扫码完成支付',
          tintColor: '#FF9500',
          onClick: () => showQRCodePayment()
        })
      }

      // 多窗口 - 需要多窗口能力
      if (featureGate.isFeatureAvailable('multi_window')) {
        FeatureCard({
          icon: $r('app.media.ic_multitask'),
          title: '分屏浏览',
          description: '同时查看多个页面',
          onClick: () => this.enterSplitMode()
        })
      }

      // 手写输入 - 需要手写笔能力
      if (featureGate.isFeatureAvailable('pen_input')) {
        FeatureCard({
          icon: $r('app.media.ic_pen'),
          title: '手写笔记',
          description: '使用手写笔记录',
          onClick: () => this.openHandwritingPad()
        })
      }
    }
    .width('100%')
    .height('100%')
    .padding(16)
    .backgroundColor('#F5F5F5')
  }

  private startCameraScan(): void {
    // 启动相机扫描
  }

  private loadNearbyContent(): void {
    // 加载附近内容
  }

  private startNFCPayment(): void {
    // 启动NFC支付
  }

  private enterSplitMode(): void {
    // 进入分屏模式
  }

  private openHandwritingPad(): void {
    // 打开手写板
  }
}

@Component
struct FeatureCard {
  @Prop icon: Resource;
  @Prop title: string;
  @Prop description: string;
  @Prop tintColor: string = '#007AFF';
  @Prop onClick: () => void;

  build() {
    Row() {
      Stack() {
        Image(this.icon)
          .width(24)
          .height(24)
          .fillColor(this.tintColor)
      }
      .width(48)
      .height(48)
      .backgroundColor(this.tintColor + '15')
      .borderRadius(12)

      Column() {
        Text(this.title)
          .fontSize(16)
          .fontWeight(FontWeight.Medium)
          .fontColor('#333333')

        Text(this.description)
          .fontSize(13)
          .fontColor('#999999')
          .margin({ top: 4 })
      }
      .layoutWeight(1)
      .margin({ left: 12 })
      .alignItems(HorizontalAlign.Start)

      Image($r('app.media.ic_arrow_right'))
        .width(20)
        .height(20)
        .fillColor('#CCCCCC')
    }
    .width('100%')
    .height(80)
    .padding(16)
    .backgroundColor('#FFFFFF')
    .borderRadius(12)
    .margin({ bottom: 12 })
    .onClick(this.onClick)
  }
}
三、折叠屏适配
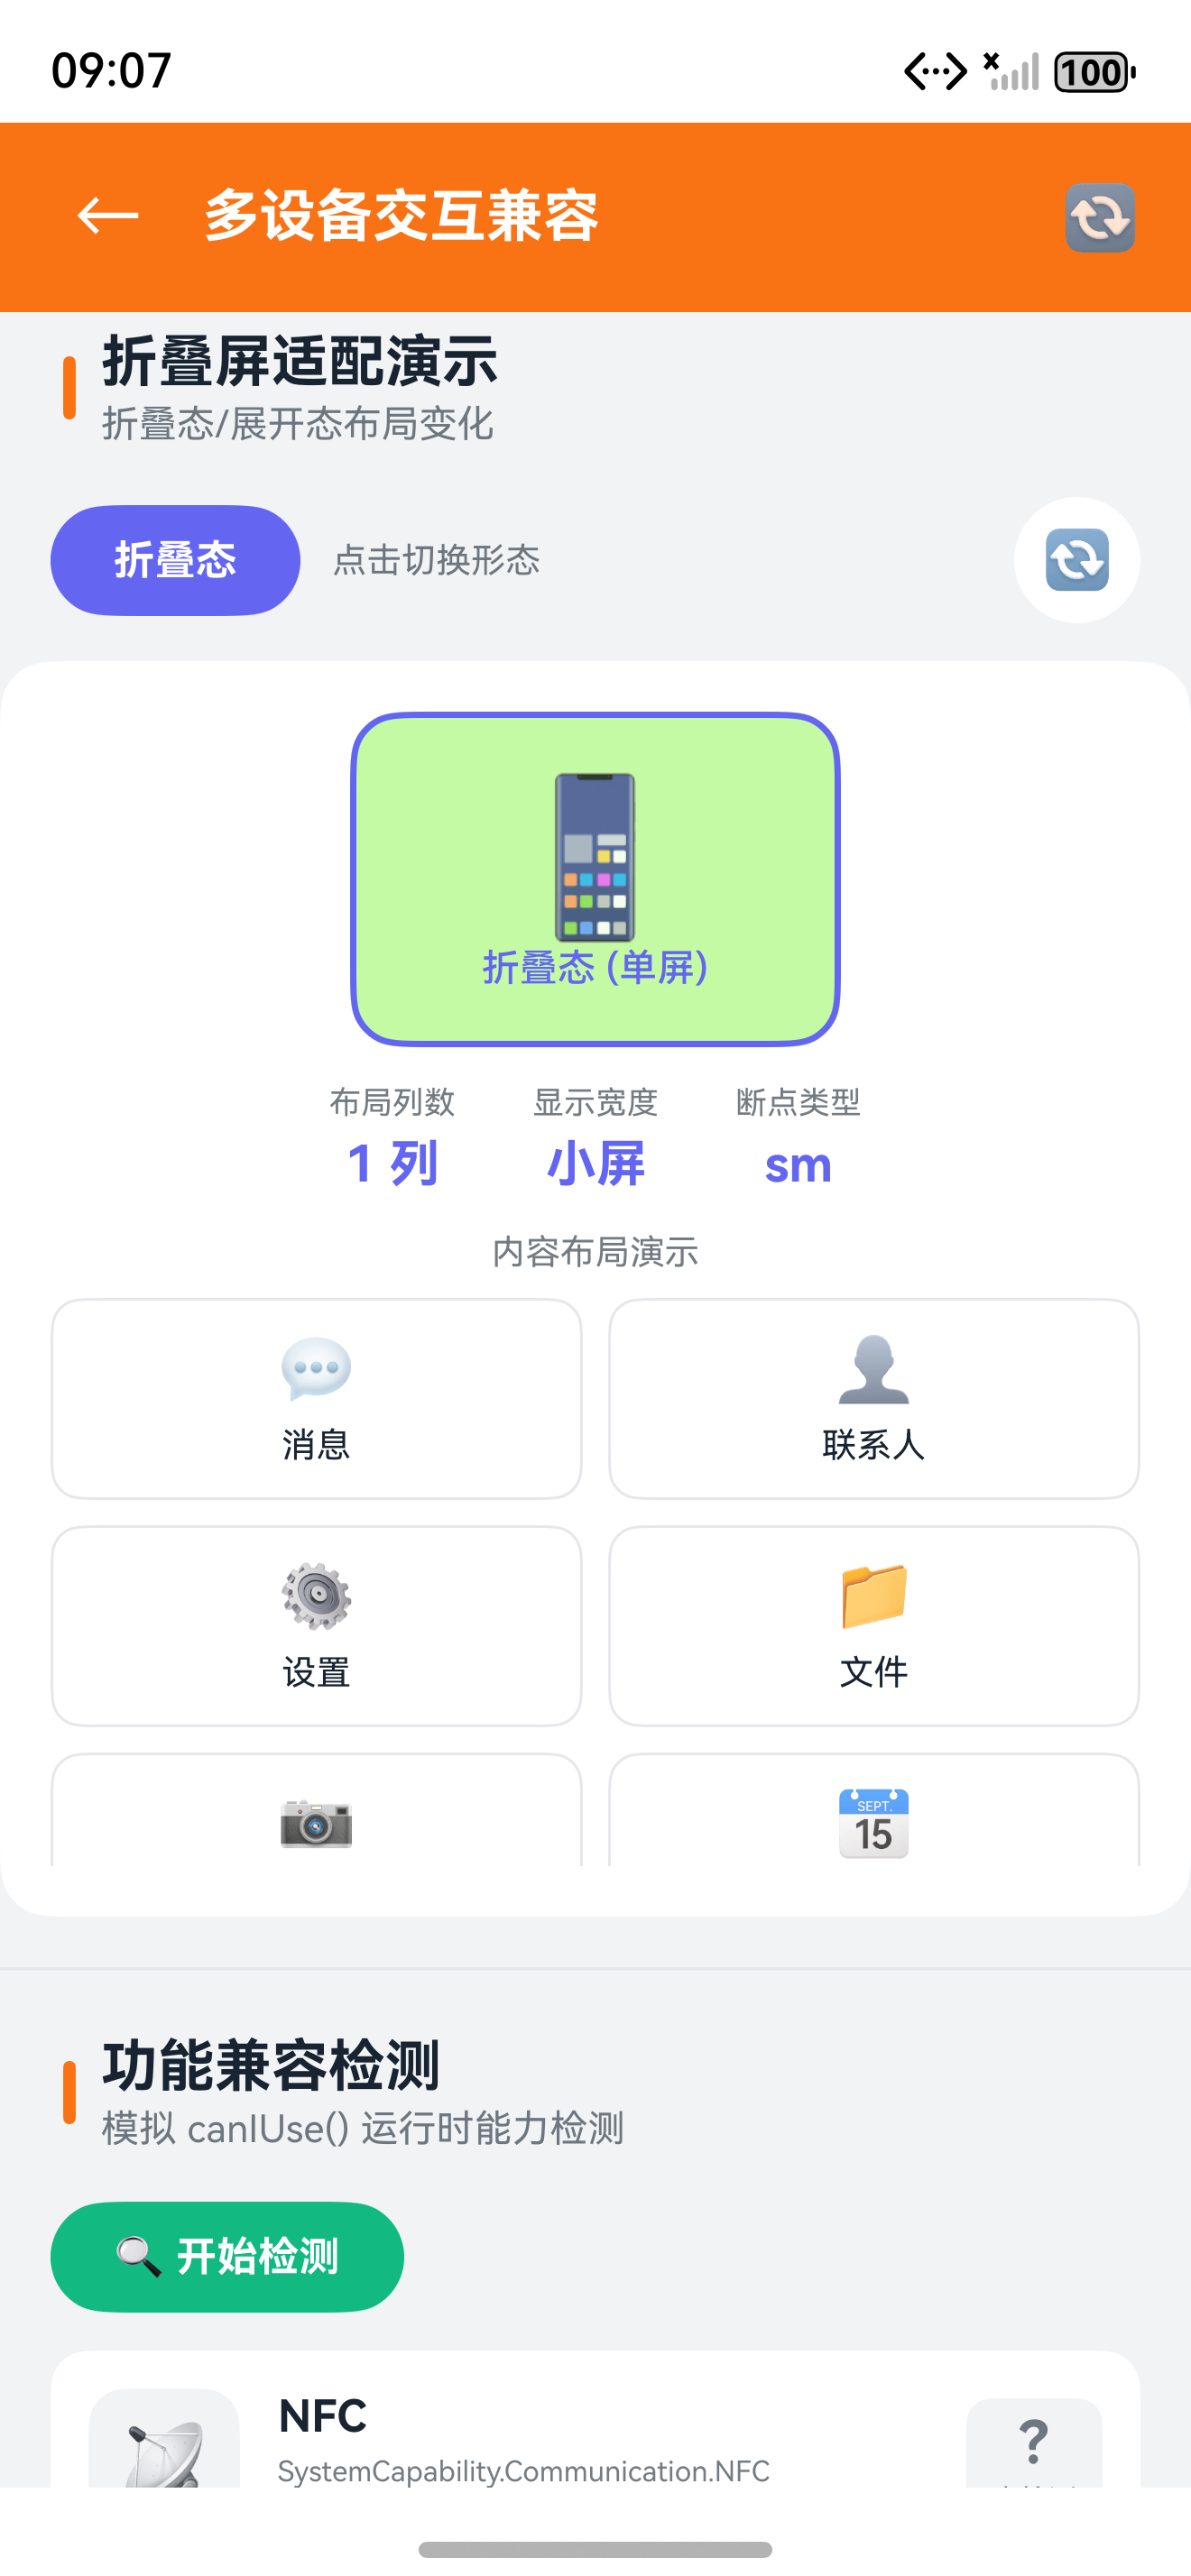
3.1 折叠屏设备特性
折叠屏设备具有独特的形态变化特性,应用需要适配以下场景:
| 状态 | 屏幕特征 | 布局策略 |
|---|---|---|
| 折叠(主屏) | 窄长条形,类似普通手机 | 标准手机布局 |
| 展开(大屏) | 接近正方形,大屏体验 | 平板/大屏布局 |
| 悬停 | 部分折叠,可自立 | 上下分栏或特殊交互 |
| 切换中 | 形态正在变化 | 保存状态,平滑过渡 |
折叠屏提示:折叠屏的展开/收起不是简单的尺寸变化,而是设备形态的切换。应用需要监听折叠状态变化,并相应调整布局和功能。
3.2 折叠状态监听
HarmonyOS提供了折叠屏状态监听API:
import { display } from '@kit.ArkUI';

enum FoldStatus {
  FOLDED = 'folded',           // 折叠状态
  EXPANDED = 'expanded',       // 展开状态
  HALF_FOLDED = 'half_folded', // 半折叠(悬停)状态
  UNKNOWN = 'unknown'
}

class FoldableDeviceManager {
  private currentStatus: FoldStatus = FoldStatus.UNKNOWN;
  private callbacks: Set<(status: FoldStatus) => void> = new Set();

  async initialize(): Promise<void> {
    try {
      // 获取当前折叠状态
      const foldInfo = display.getFoldInfo();
      this.currentStatus = this.mapFoldStatus(foldInfo.status);

      // 监听折叠状态变化
      display.on('foldStatusChange', (info: display.FoldStatusInfo) => {
        const newStatus = this.mapFoldStatus(info.status);
        if (newStatus !== this.currentStatus) {
          this.currentStatus = newStatus;
          this.callbacks.forEach(cb => cb(newStatus));
        }
      });
    } catch (error) {
      console.info('当前设备不是折叠屏或折叠屏API不可用');
      this.currentStatus = FoldStatus.UNKNOWN;
    }
  }

  private mapFoldStatus(status: display.FoldStatus): FoldStatus {
    switch (status) {
      case display.FoldStatus.FOLD_STATUS_EXPANDED:
        return FoldStatus.EXPANDED;
      case display.FoldStatus.FOLD_STATUS_FOLDED:
        return FoldStatus.FOLDED;
      case display.FoldStatus.FOLD_STATUS_HALF_FOLDED:
        return FoldStatus.HALF_FOLDED;
      default:
        return FoldStatus.UNKNOWN;
    }
  }

  onStatusChange(callback: (status: FoldStatus) => void): void {
    this.callbacks.add(callback);
    if (this.currentStatus !== FoldStatus.UNKNOWN) {
      callback(this.currentStatus);
    }
  }

  getCurrentStatus(): FoldStatus {
    return this.currentStatus;
  }

  isFoldable(): boolean {
    return this.currentStatus !== FoldStatus.UNKNOWN;
  }
}

export const foldableManager = new FoldableDeviceManager();
3.3 折叠屏响应式布局
@Entry
@Component
struct FoldableAdaptivePage {
  @State foldStatus: FoldStatus = FoldStatus.UNKNOWN;
  @State windowWidth: number = 0;
  @State windowHeight: number = 0;

  aboutToAppear() {
    foldableManager.initialize();
    foldableManager.onStatusChange((status) => {
      this.foldStatus = status;
    });

    windowSizeManager.onSizeChange((width, height) => {
      this.windowWidth = width;
      this.windowHeight = height;
    });
    windowSizeManager.initialize();
  }

  build() {
    Column() {
      if (this.foldStatus === FoldStatus.FOLDED || this.foldStatus === FoldStatus.UNKNOWN) {
        // 折叠状态:使用标准手机布局
        PhoneLayout()
      } else if (this.foldStatus === FoldStatus.EXPANDED) {
        // 展开状态:使用大屏布局
        ExpandedLayout()
      } else if (this.foldStatus === FoldStatus.HALF_FOLDED) {
        // 半折叠状态:使用悬停适配布局
        HalfFoldedLayout()
      }
    }
    .width('100%')
    .height('100%')
  }
}

@Component
struct PhoneLayout {
  build() {
    Column() {
      Text('折叠状态 - 手机布局')
        .fontSize(18)
        .fontWeight(FontWeight.Bold)
        .margin(16)

      List({ space: 12 }) {
        ForEach([1, 2, 3, 4, 5], (item) => {
          ListItem() {
            PhoneContentItem({ index: item })
          }
        })
      }
      .padding(16)
      .layoutWeight(1)
    }
    .width('100%')
    .height('100%')
    .backgroundColor('#F5F5F5')
  }
}

@Component
struct ExpandedLayout {
  build() {
    Row() {
      // 左侧导航
      Column() {
        Text('展开状态 - 大屏布局')
          .fontSize(20)
          .fontWeight(FontWeight.Bold)
          .margin(16)

        ForEach(['首页', '发现', '消息', '我的'], (item) => {
          Text(item)
            .fontSize(16)
            .fontColor('#333333')
            .width('100%')
            .height(48)
            .textAlign(TextAlign.Center)
            .backgroundColor('#FFFFFF')
            .borderRadius(8)
            .margin({ bottom: 8 })
        })
      }
      .width(200)
      .height('100%')
      .backgroundColor('#FFFFFF')
      .padding(16)

      // 右侧内容
      Grid() {
        ForEach([1, 2, 3, 4, 5, 6], (item) => {
          GridItem() {
            ExpandedContentCard({ index: item })
          }
        })
      }
      .columnsTemplate('1fr 1fr 1fr')
      .rowsGap(16)
      .columnsGap(16)
      .padding(16)
      .layoutWeight(1)
      .backgroundColor('#F5F5F5')
    }
    .width('100%')
    .height('100%')
  }
}

@Component
struct HalfFoldedLayout {
  build() {
    Column() {
      // 上半部分:内容显示
      Column() {
        Text('悬停模式 - 上屏显示内容')
          .fontSize(18)
          .fontWeight(FontWeight.Bold)

        Image($r('app.media.content_image'))
          .width('80%')
          .aspectRatio(16 / 9)
          .objectFit(ImageFit.Cover)
          .borderRadius(12)
          .margin(16)
      }
      .layoutWeight(1)
      .width('100%')
      .justifyContent(FlexAlign.Center)

      // 下半部分:操作控制
      Column() {
        Text('下屏操作控制')
          .fontSize(16)
          .fontWeight(FontWeight.Medium)
          .margin({ bottom: 16 })

        Row({ space: 16 }) {
          Button('播放')
            .width(100)
            .height(40)
          Button('暂停')
            .width(100)
            .height(40)
          Button('下一首')
            .width(100)
            .height(40)
        }
      }
      .width('100%')
      .height(200)
      .backgroundColor('#FFFFFF')
      .borderRadius({ topLeft: 20, topRight: 20 })
      .justifyContent(FlexAlign.Center)
      .shadow({ radius: 8, color: 'rgba(0,0,0,0.1)', offsetY: -4 })
    }
    .width('100%')
    .height('100%')
    .backgroundColor('#F0F0F0')
  }
}

@Component
struct PhoneContentItem {
  @Prop index: number;

  build() {
    Row() {
      Image($r('app.media.item_image'))
        .width(60)
        .height(60)
        .borderRadius(8)
        .objectFit(ImageFit.Cover)

      Column() {
        Text(`内容项 ${this.index}`)
          .fontSize(16)
          .fontWeight(FontWeight.Medium)
        Text('这是内容的简要描述')
          .fontSize(13)
          .fontColor('#999999')
          .margin({ top: 4 })
      }
      .layoutWeight(1)
      .margin({ left: 12 })
      .alignItems(HorizontalAlign.Start)
    }
    .width('100%')
    .padding(12)
    .backgroundColor('#FFFFFF')
    .borderRadius(12)
  }
}

@Component
struct ExpandedContentCard {
  @Prop index: number;

  build() {
    Column() {
      Image($r('app.media.card_image'))
        .width('100%')
        .aspectRatio(4 / 3)
        .objectFit(ImageFit.Cover)
        .borderRadius({ topLeft: 12, topRight: 12 })

      Column() {
        Text(`卡片 ${this.index}`)
          .fontSize(16)
          .fontWeight(FontWeight.Medium)
        Text('详细描述内容')
          .fontSize(13)
          .fontColor('#999999')
          .margin({ top: 4 })
      }
      .padding(12)
      .alignItems(HorizontalAlign.Start)
    }
    .width('100%')
    .backgroundColor('#FFFFFF')
    .borderRadius(12)
    .shadow({ radius: 4, color: 'rgba(0,0,0,0.06)' })
  }
}
3.4 折叠屏状态保存与恢复
折叠屏在展开/收起切换时,应用需要保存和恢复状态:
import { AppStorage } from '@kit.ArkUI';

class FoldableStateManager {
  private static readonly STATE_KEY = 'foldable_app_state';

  // 保存当前页面状态
  static saveState(state: FoldablePageState): void {
    AppStorage.setOrCreate(this.STATE_KEY, JSON.stringify(state));
  }

  // 恢复页面状态
  static restoreState(): FoldablePageState | null {
    const saved = AppStorage.get<string>(this.STATE_KEY);
    if (saved) {
      try {
        return JSON.parse(saved) as FoldablePageState;
      } catch (e) {
        return null;
      }
    }
    return null;
  }

  // 清除保存的状态
  static clearState(): void {
    AppStorage.delete(this.STATE_KEY);
  }
}

interface FoldablePageState {
  scrollPosition: number;
  selectedItemId: string;
  expandedSections: Array<string>;
  inputValues: Record<string, string>;
}

// 在页面中使用
@Entry
@Component
struct StatefulFoldablePage {
  @State scrollPosition: number = 0;
  @State selectedItemId: string = '';
  @State foldStatus: FoldStatus = FoldStatus.UNKNOWN;

  aboutToAppear() {
    // 恢复之前保存的状态
    const savedState = FoldableStateManager.restoreState();
    if (savedState) {
      this.scrollPosition = savedState.scrollPosition;
      this.selectedItemId = savedState.selectedItemId;
    }

    // 监听折叠状态变化
    foldableManager.onStatusChange((status) => {
      if (this.foldStatus !== FoldStatus.UNKNOWN && status !== this.foldStatus) {
        // 形态即将变化,保存状态
        this.saveCurrentState();
      }
      this.foldStatus = status;
    });
  }

  private saveCurrentState(): void {
    FoldableStateManager.saveState({
      scrollPosition: this.scrollPosition,
      selectedItemId: this.selectedItemId,
      expandedSections: [],
      inputValues: {}
    });
  }

  build() {
    List({ scroller: new Scroller() }) {
      // 列表内容
    }
    .onScrollIndex((start, end) => {
      this.scrollPosition = start;
    })
  }
}
四、综合实战:多端音乐播放器
4.1 需求分析
设计一个适配手机、平板、智慧屏、折叠屏和车机的音乐播放器应用,各设备功能规划如下:
| 设备 | 核心功能 | 特殊适配 |
|---|---|---|
| 手机 | 播放控制、歌单浏览、搜索 | 标准触控交互 |
| 平板 | 同手机 + 歌词大屏显示 | 分屏多任务支持 |
| 智慧屏 | 沉浸式播放、家庭共享 | 遥控器焦点导航 |
| 折叠屏 | 同手机 + 展开大屏浏览 | 折叠状态切换 |
| 车机 | 语音控制、驾驶安全模式 | 大按钮、语音优先 |
4.2 核心服务层
// services/MusicPlayerService.ets

import { avSession } from '@kit.AVSessionKit';

@ObservedV2
class MusicPlayerService {
  @Trace currentTrack: TrackInfo | null = null;
  @Trace isPlaying: boolean = false;
  @Trace currentPosition: number = 0;
  @Trace playlist: Array<TrackInfo> = [];
  @Trace playMode: PlayMode = PlayMode.SEQUENCE;

  private audioPlayer: media.AudioPlayer | null = null;
  private avSession: avSession.AVSession | null = null;

  async initialize(): Promise<void> {
    // 初始化音频播放器
    this.audioPlayer = await media.createAudioPlayer();
    this.setupAudioCallbacks();

    // 创建AVSession用于系统媒体控制
    this.avSession = await avSession.createAVSession(
      getContext(),
      'MusicPlayer',
      avSession.AVSessionType.AUDIO
    );
    this.setupAVSessionCallbacks();
  }

  private setupAudioCallbacks(): void {
    if (!this.audioPlayer) return;

    this.audioPlayer.on('timeUpdate', (time: number) => {
      this.currentPosition = time;
    });

    this.audioPlayer.on('complete', () => {
      this.playNext();
    });
  }

  private setupAVSessionCallbacks(): void {
    if (!this.avSession) return;

    this.avSession.on('play', () => this.play());
    this.avSession.on('pause', () => this.pause());
    this.avSession.on('next', () => this.playNext());
    this.avSession.on('previous', () => this.playPrevious());
  }

  async playTrack(track: TrackInfo): Promise<void> {
    this.currentTrack = track;
    await this.audioPlayer?.setSource(track.url);
    await this.play();
    this.updateAVSessionMetadata(track);
  }

  async play(): Promise<void> {
    await this.audioPlayer?.play();
    this.isPlaying = true;
  }

  async pause(): Promise<void> {
    await this.audioPlayer?.pause();
    this.isPlaying = false;
  }

  playNext(): void {
    const currentIndex = this.playlist.findIndex(t => t.id === this.currentTrack?.id);
    let nextIndex: number;

    switch (this.playMode) {
      case PlayMode.SHUFFLE:
        nextIndex = Math.floor(Math.random() * this.playlist.length);
        break;
      case PlayMode.SINGLE_LOOP:
        nextIndex = currentIndex;
        break;
      case PlayMode.SEQUENCE:
      default:
        nextIndex = (currentIndex + 1) % this.playlist.length;
    }

    this.playTrack(this.playlist[nextIndex]);
  }

  playPrevious(): void {
    const currentIndex = this.playlist.findIndex(t => t.id === this.currentTrack?.id);
    const prevIndex = currentIndex <= 0 ? this.playlist.length - 1 : currentIndex - 1;
    this.playTrack(this.playlist[prevIndex]);
  }

  private updateAVSessionMetadata(track: TrackInfo): void {
    this.avSession?.setAVMetadata({
      assetId: track.id,
      title: track.title,
      artist: track.artist,
      album: track.album,
      duration: track.duration,
      mediaImage: track.coverUrl
    });
  }
}

interface TrackInfo {
  id: string;
  title: string;
  artist: string;
  album: string;
  duration: number;
  url: string;
  coverUrl: string;
}

enum PlayMode {
  SEQUENCE = 'sequence',
  SHUFFLE = 'shuffle',
  SINGLE_LOOP = 'single_loop'
}

export const musicPlayerService = new MusicPlayerService();
4.3 设备专属播放页面
// 入口页面,根据设备类型路由
@Entry
@Component
struct MusicPlayerEntry {
  @State deviceType: string = 'phone';

  aboutToAppear() {
    this.deviceType = DeviceTypeDetector.getDeviceType();
    musicPlayerService.initialize();
  }

  build() {
    Stack() {
      if (this.deviceType === 'tv') {
        TVPlayerPage()
      } else if (this.deviceType === 'car') {
        CarPlayerPage()
      } else if (this.deviceType === 'tablet') {
        TabletPlayerPage()
      } else {
        PhonePlayerPage()
      }
    }
    .width('100%')
    .height('100%')
  }
}

// 手机版播放器
@Component
struct PhonePlayerPage {
  @State service: MusicPlayerService = musicPlayerService;

  build() {
    Column() {
      // 封面
      Image(this.service.currentTrack?.coverUrl ?? $r('app.media.default_cover'))
        .width('70%')
        .aspectRatio(1)
        .objectFit(ImageFit.Cover)
        .borderRadius(16)
        .margin(32)
        .shadow({ radius: 20, color: 'rgba(0,0,0,0.2)' })

      // 歌曲信息
      Column() {
        Text(this.service.currentTrack?.title ?? '未播放')
          .fontSize(20)
          .fontWeight(FontWeight.Bold)
          .fontColor('#333333')
          .maxLines(1)
          .textOverflow({ overflow: TextOverflow.Ellipsis })

        Text(this.service.currentTrack?.artist ?? '--')
          .fontSize(14)
          .fontColor('#999999')
          .margin({ top: 8 })
          .maxLines(1)
      }
      .width('80%')
      .margin({ top: 16 })

      // 进度条
      Slider({
        value: this.service.currentPosition,
        min: 0,
        max: this.service.currentTrack?.duration ?? 100
      })
      .width('85%')
      .margin({ top: 24 })

      Row() {
        Text(this.formatTime(this.service.currentPosition))
          .fontSize(12)
          .fontColor('#999999')
        Blank()
        Text(this.formatTime(this.service.currentTrack?.duration ?? 0))
          .fontSize(12)
          .fontColor('#999999')
      }
      .width('85%')
      .margin({ top: 4 })

      // 控制按钮
      Row({ space: 32 }) {
        Image($r('app.media.ic_prev'))
          .width(32)
          .height(32)
          .onClick(() => this.service.playPrevious())

        Image(this.service.isPlaying ? $r('app.media.ic_pause') : $r('app.media.ic_play'))
          .width(64)
          .height(64)
          .onClick(() => {
            this.service.isPlaying ? this.service.pause() : this.service.play();
          })

        Image($r('app.media.ic_next'))
          .width(32)
          .height(32)
          .onClick(() => this.service.playNext())
      }
      .margin({ top: 32 })
    }
    .width('100%')
    .height('100%')
    .backgroundColor('#F8F8F8')
  }

  private formatTime(seconds: number): string {
    const mins = Math.floor(seconds / 60);
    const secs = Math.floor(seconds % 60);
    return `${mins.toString().padStart(2, '0')}:${secs.toString().padStart(2, '0')}`;
  }
}

// 智慧屏版播放器 - 大按钮 + 焦点导航
@Component
struct TVPlayerPage {
  @State service: MusicPlayerService = musicPlayerService;
  @State focusedControl: string = 'play';

  aboutToAppear() {
    remoteControlMapper.initialize();
    remoteControlMapper.setupDefaultMappings({
      onUp: () => this.navigateFocus('up'),
      onDown: () => this.navigateFocus('down'),
      onLeft: () => this.navigateFocus('left'),
      onRight: () => this.navigateFocus('right'),
      onOK: () => this.triggerFocusedAction(),
      onBack: () => this.goBack(),
      onMenu: () => this.showPlaylist(),
      onHome: () => this.goHome()
    });
  }

  private navigateFocus(direction: string): void {
    // 焦点导航逻辑
  }

  private triggerFocusedAction(): void {
    // 触发当前焦点操作
  }

  private goBack(): void {}
  private showPlaylist(): void {}
  private goHome(): void {}

  build() {
    Column() {
      // 大封面
      Image(this.service.currentTrack?.coverUrl ?? $r('app.media.default_cover'))
        .width('50%')
        .aspectRatio(1)
        .objectFit(ImageFit.Cover)
        .borderRadius(16)
        .margin(48)

      Text(this.service.currentTrack?.title ?? '未播放')
        .fontSize(36)
        .fontWeight(FontWeight.Bold)
        .fontColor('#FFFFFF')

      Text(this.service.currentTrack?.artist ?? '--')
        .fontSize(24)
        .fontColor('#AAAAAA')
        .margin({ top: 12 })

      // 大按钮控制区
      Row({ space: 48 }) {
        this.buildTVControlButton('prev', $r('app.media.ic_prev_large'))
        this.buildTVControlButton('play',
          this.service.isPlaying ? $r('app.media.ic_pause_large') : $r('app.media.ic_play_large'))
        this.buildTVControlButton('next', $r('app.media.ic_next_large'))
      }
      .margin({ top: 48 })
    }
    .width('100%')
    .height('100%')
    .backgroundColor('#1A1A1A')
    .justifyContent(FlexAlign.Center)
  }

  @Builder
  buildTVControlButton(id: string, icon: Resource) {
    Image(icon)
      .width(id === 'play' ? 96 : 64)
      .height(id === 'play' ? 96 : 64)
      .focusable(true)
      .onFocus(() => this.focusedControl = id)
      .scale(this.focusedControl === id ? { x: 1.2, y: 1.2 } : { x: 1, y: 1 })
      .animation({ duration: 200 })
  }
}

// 车机版播放器 - 超大按钮,驾驶安全
@Component
struct CarPlayerPage {
  @State service: MusicPlayerService = musicPlayerService;

  build() {
    Column() {
      Row() {
        Image(this.service.currentTrack?.coverUrl ?? $r('app.media.default_cover'))
          .width(120)
          .height(120)
          .borderRadius(12)
          .objectFit(ImageFit.Cover)

        Column() {
          Text(this.service.currentTrack?.title ?? '未播放')
            .fontSize(28)
            .fontWeight(FontWeight.Bold)
            .fontColor('#FFFFFF')
            .maxLines(1)

          Text(this.service.currentTrack?.artist ?? '--')
            .fontSize(20)
            .fontColor('#AAAAAA')
            .margin({ top: 8 })
            .maxLines(1)
        }
        .layoutWeight(1)
        .margin({ left: 24 })
        .alignItems(HorizontalAlign.Start)
      }
      .width('100%')
      .padding(32)

      Blank()

      // 超大控制按钮
      Row({ space: 48 }) {
        Button('上一首')
          .width(160)
          .height(80)
          .fontSize(24)
          .backgroundColor('#333333')
          .onClick(() => this.service.playPrevious())

        Button(this.service.isPlaying ? '暂停' : '播放')
          .width(200)
          .height(100)
          .fontSize(28)
          .fontWeight(FontWeight.Bold)
          .backgroundColor(this.service.isPlaying ? '#FF9500' : '#34C759')
          .onClick(() => {
            this.service.isPlaying ? this.service.pause() : this.service.play();
          })

        Button('下一首')
          .width(160)
          .height(80)
          .fontSize(24)
          .backgroundColor('#333333')
          .onClick(() => this.service.playNext())
      }
      .margin({ bottom: 48 })
    }
    .width('100%')
    .height('100%')
    .backgroundColor('#000000')
  }
}
五、测试与发布策略
5.1 多端测试清单
| 测试项 | 手机 | 平板 | 智慧屏 | 折叠屏 | 车机 |
|---|---|---|---|---|---|
| 基础功能 | ✓ | ✓ | ✓ | ✓ | ✓ |
| 触控交互 | ✓ | ✓ | — | ✓ | ✓ |
| 焦点导航 | — | — | ✓ | — | ✓ |
| 语音控制 | ✓ | ✓ | ✓ | ✓ | ✓ |
| 分屏/多窗口 | — | ✓ | — | ✓ | — |
| 折叠切换 | — | — | — | ✓ | — |
| 系统媒体控制 | ✓ | ✓ | ✓ | ✓ | ✓ |
| 深色模式 | ✓ | ✓ | ✓ | ✓ | ✓ |
5.2 发布配置
// entry/src/main/module.json5
{
  "module": {
    "name": "entry",
    "type": "entry",
    "description": "$string:module_desc",
    "mainElement": "EntryAbility",
    "deviceTypes": [
      "phone",
      "tablet",
      "2in1",
      "tv",
      "car",
      "wearable"
    ],
    "deliveryWithInstall": true,
    "installationFree": false,
    "pages": "$profile:main_pages",
    "abilities": [
      {
        "name": "EntryAbility",
        "srcEntry": "./ets/entryability/EntryAbility.ets",
        "description": "$string:EntryAbility_desc",
        "icon": "$media:icon",
        "label": "$string:EntryAbility_label",
        "startWindowIcon": "$media:startIcon",
        "startWindowBackground": "$color:start_window_background",
        "exported": true,
        "skills": [
          {
            "entities": ["entity.system.home"],
            "actions": ["action.system.home"]
          }
        ]
      }
    ],
    "requestPermissions": [
      {
        "name": "ohos.permission.INTERNET"
      },
      {
        "name": "ohos.permission.READ_MEDIA"
      }
    ]
  }
}
总结
本文深入探讨了HarmonyOS一次开发,多端部署中的高级课题,从交互归一到SysCap能力管理,从功能级一多到折叠屏专属适配,为开发者提供了系统性的解决方案。
核心要点回顾:
- 交互归一:通过交互抽象层统一处理触控和焦点两种交互模式,让同一组件适配不同输入方式
- SysCap管理:使用
canIUse动态检测设备能力,实现功能的条件化加载和优雅降级 - 功能级一多:不是所有功能都要在所有设备上呈现,根据能力检测结果智能决定功能可见性
- 折叠屏适配:监听折叠状态变化,保存和恢复页面状态,为折叠、展开、悬停三种形态提供专属布局
系列文章回顾:
- 第一篇:架构设计与响应式布局(三层架构、断点系统、GridRow/GridCol)
- 第二篇:多设备交互与功能兼容(本文:交互归一、SysCap、折叠屏)
掌握这些技术后,你的HarmonyOS应用将能够真正适配全场景设备,为用户提供一致且出色的体验。
推荐阅读与资源:

讨论HarmonyOS开发技术,专注于API与组件、DevEco Studio、测试、元服务和应用上架分发等。
更多推荐



 8
8 0
0- 0


 已为社区贡献17条内容

所有评论(0)