HarmonyOS Scan Kit 默认界面扫码开发实战:一行代码实现系统级扫码体验
HarmonyOS Scan Kit 默认界面扫码开发实战:一行代码实现系统级扫码体验
前言
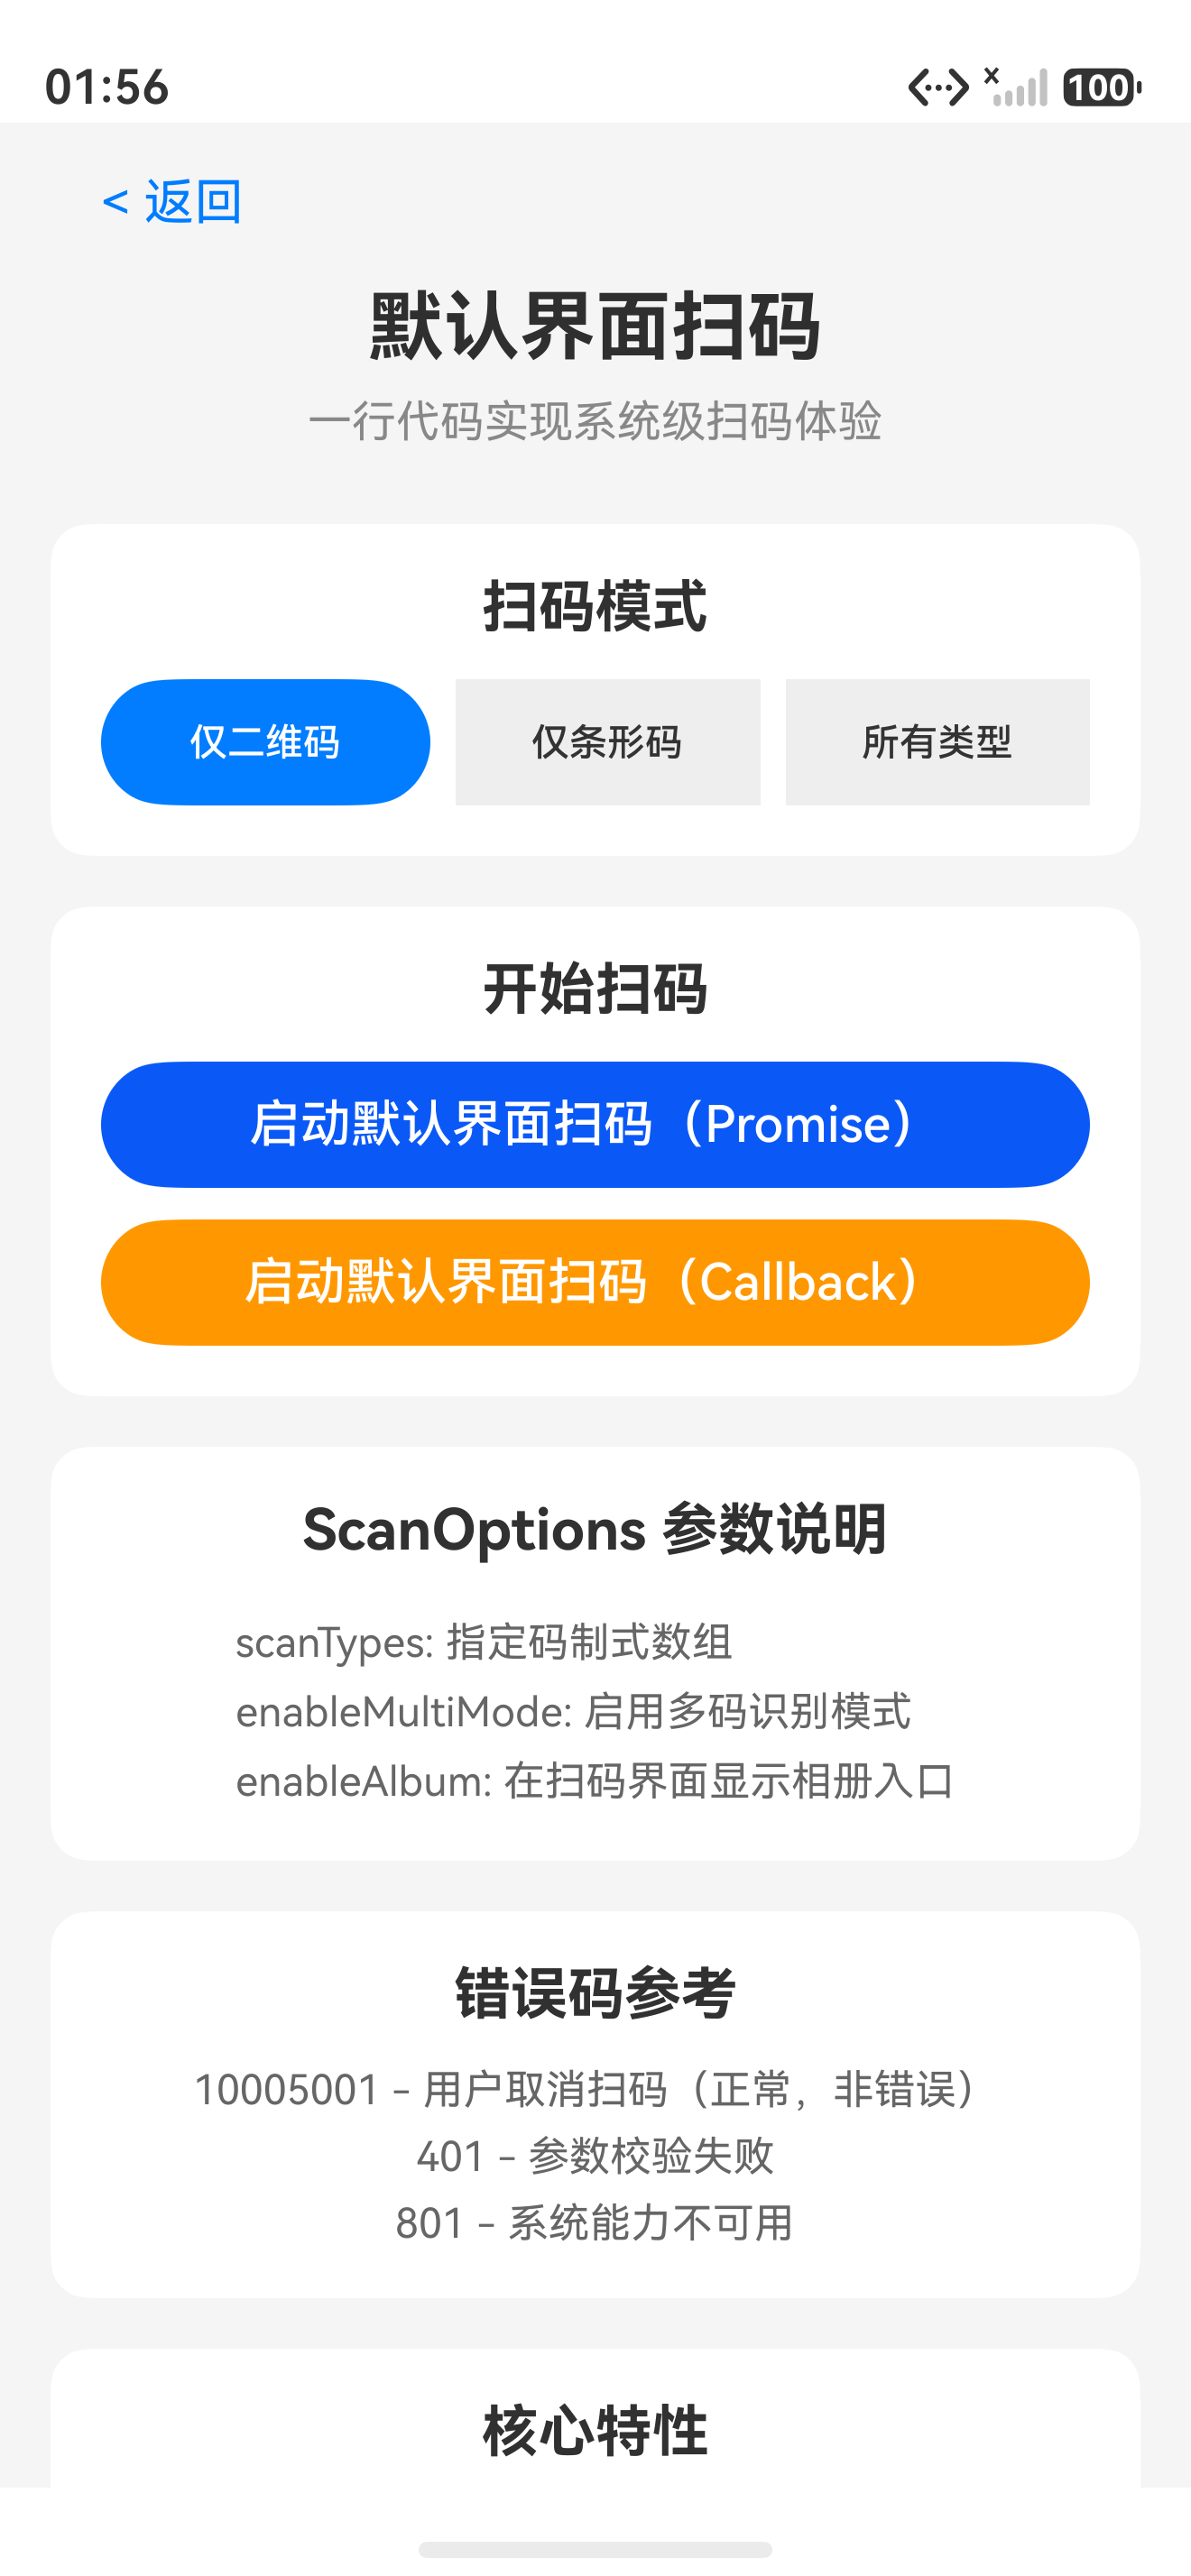
在移动应用开发中,扫码是最常见的功能需求之一。然而,传统方案需要集成第三方扫码库、申请相机权限、处理各种兼容性问题,开发成本高且体验参差不齐。HarmonyOS Scan Kit 提供的默认界面扫码能力,让开发者只需一行代码即可获得与系统体验完全一致的扫码功能,包含相机预览流、相册扫码入口、暗光环境闪光灯自动提示等完整功能。
本文将深入讲解默认界面扫码的完整开发流程,从基本概念、接口说明到代码实战,覆盖单码识别、多码识别、扫描类型配置等核心场景。
核心优势:默认界面扫码具备系统相机权限预授权,开发者无需申请相机权限,集成简单且包体 0 增加。适用于绝大多数通用扫码场景。
一、默认界面扫码概述
1.1 什么是默认界面扫码
默认界面扫码是 Scan Kit 提供的一种开箱即用的扫码能力,提供与系统体验一致的扫码界面。开发者无需实现任何 UI 代码,直接调用 startScanForResult 接口即可启动系统扫码界面,扫码完成后自动返回结果。
默认界面扫码包含以下核心功能:
- 相机预览流:实时显示相机画面,提供流畅的扫码体验
- 相册扫码入口:用户可以从相册选择图片进行扫码识别
- 暗光环境闪光灯提示:在光线不足时自动提示用户开启闪光灯
- 多码识别:支持同时识别画面中的多个码图,用户可选择目标码
- 单码识别:识别到单个码图后直接返回结果
1.2 默认界面扫码的 UX 设计
系统扫码界面提供了一致的用户体验:
- 顶部显示扫码标题,API 23+ 支持根据
scanTypes动态显示(如"扫描二维码"、“扫描条形码”) - 中央为相机预览区域,包含扫码框引导
- 底部提供相册入口按钮和闪光灯控制
- 多码场景下,识别到的码图上显示蓝点,用户点击选择目标码
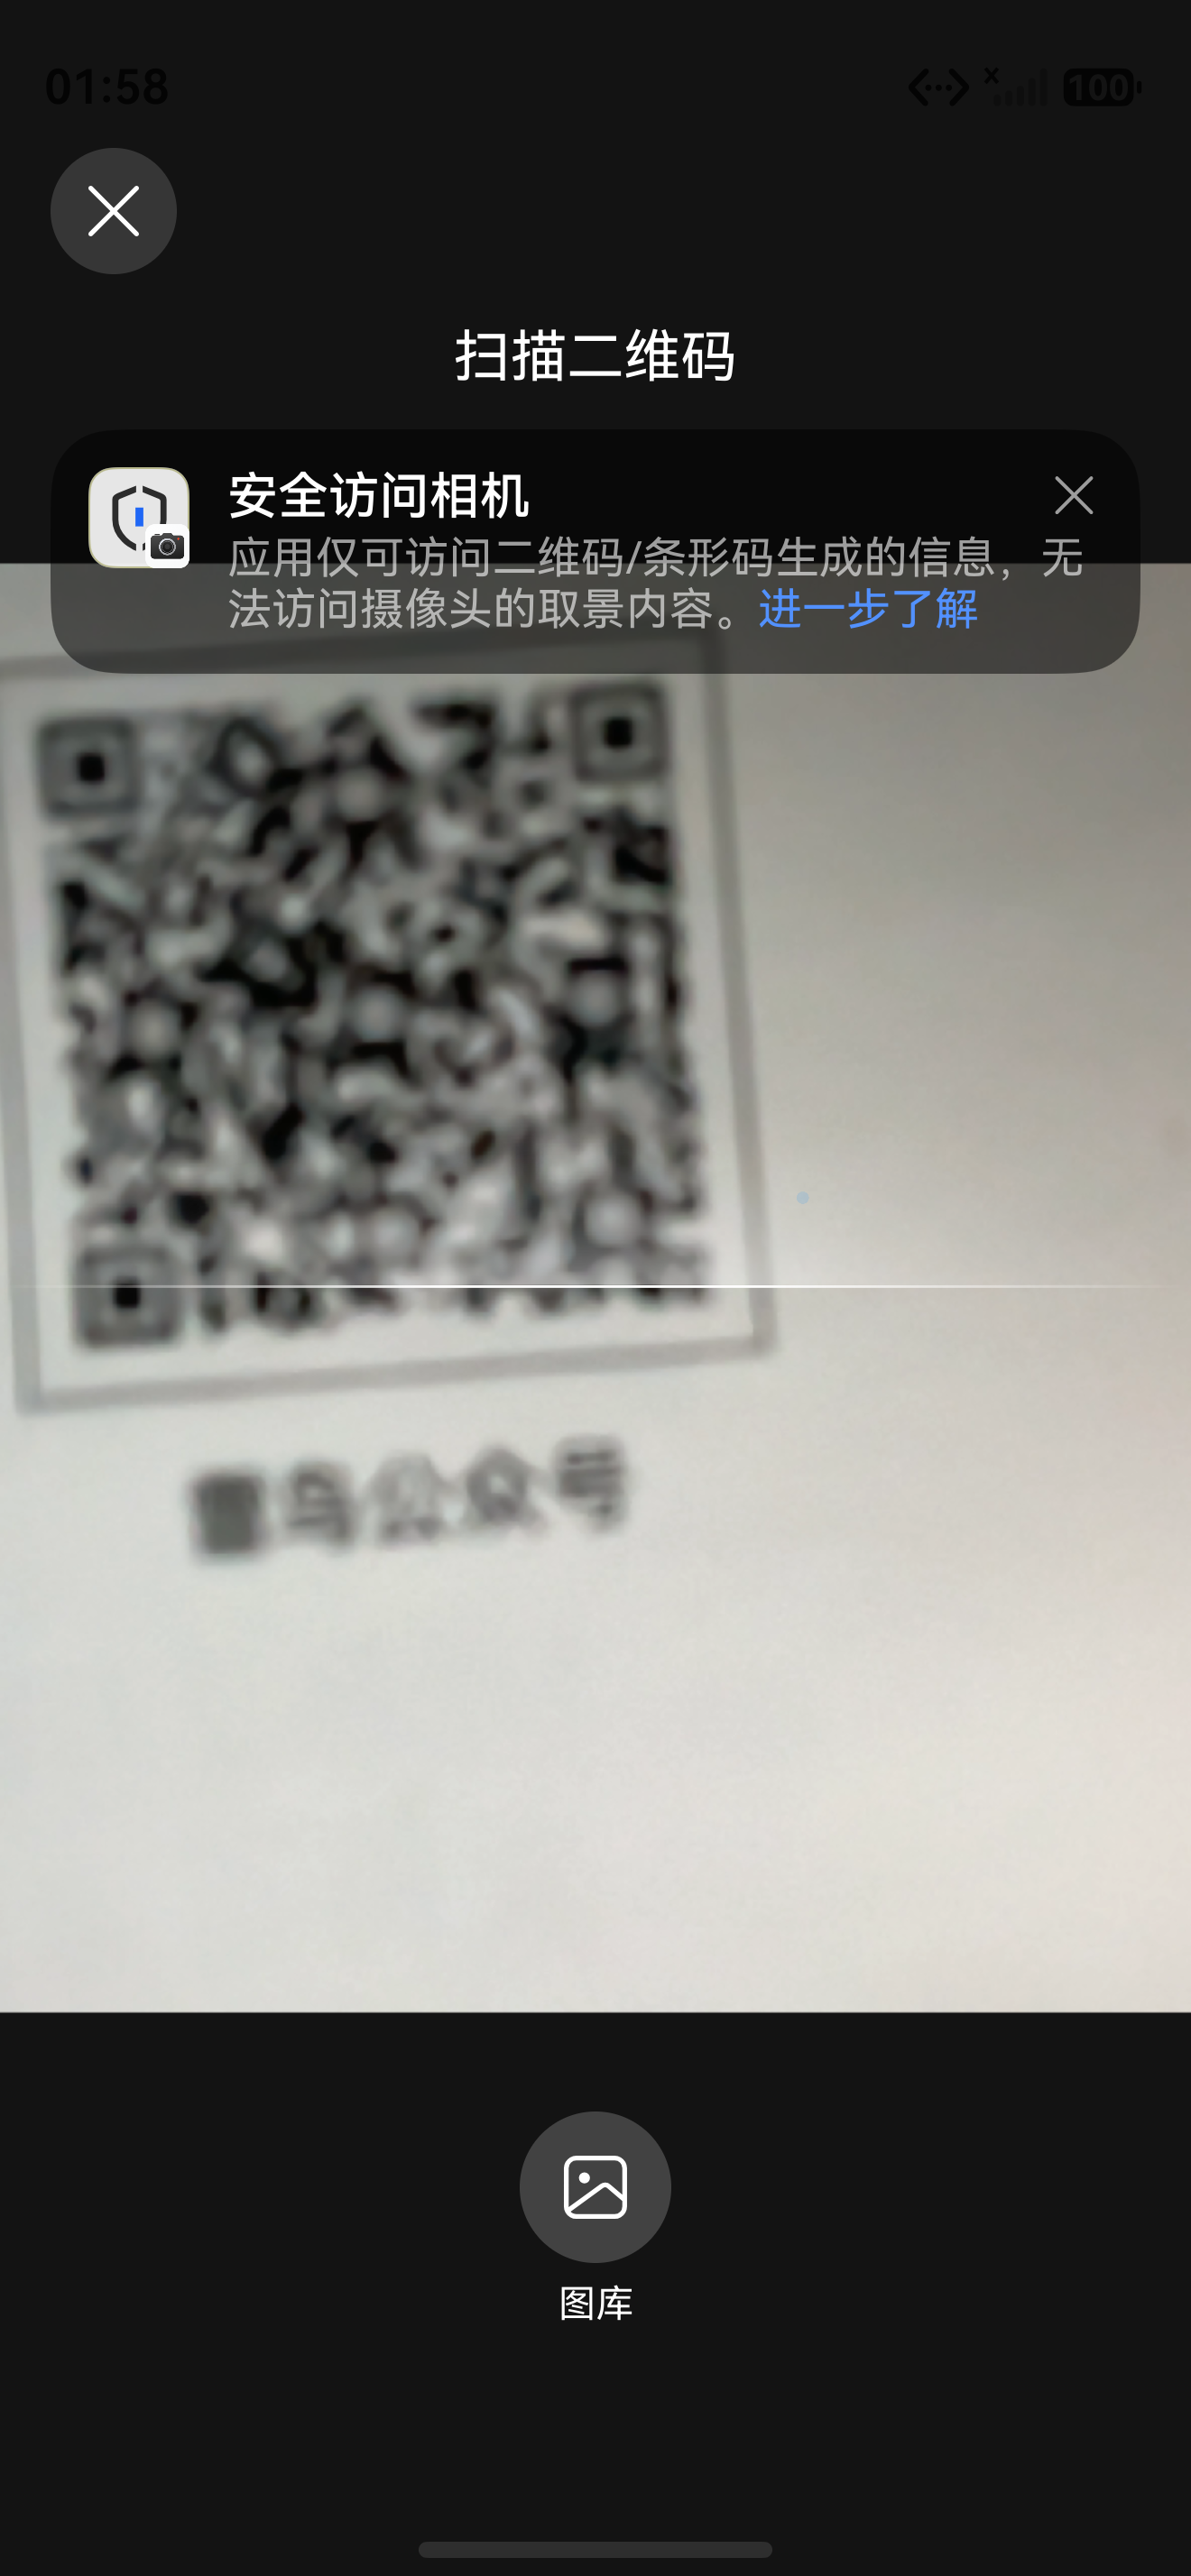
默认界面扫码提供系统级体验一致的扫码界面,包含相机预览、扫码框引导、相册入口和闪光灯控制
1.3 默认界面扫码 vs 自定义界面扫码
| 对比维度 | 默认界面扫码 | 自定义界面扫码 |
|---|---|---|
| 开发成本 | 一行代码接入 | 需要自行实现 UI 和交互 |
| UI 风格 | 系统统一风格 | 完全自定义 |
| 相机权限 | 系统预授权,无需申请 | 需要申请相机权限 |
| 相册扫码 | 内置支持 | 需要自行实现 |
| 闪光灯控制 | 系统自动管理 | 手动调用 API 控制 |
| 变焦控制 | 暂不支持 | 支持 |
| 适用场景 | 通用扫码场景 | 个性化 UI 定制场景 |
二、约束与限制
2.1 使用限制
在使用默认界面扫码时,需要注意以下限制:
| 限制项 | 说明 |
|---|---|
| 悬浮屏/分屏 | 从 API 20 开始支持悬浮屏、分屏场景 |
| 相册扫码 | 只支持单码识别,不支持多码 |
| UI 自定义 | 不支持界面 UX 添加自定义设置 |
| 设备支持 | Phone、Tablet、Wearable(API 23+,需后置相机) |
2.2 版本差异
| API 版本 | 新增特性 |
|---|---|
| API 26 | 支持 isDefaultScanSupported 接口查询设备是否支持默认界面扫码 |
| API 23 | 标题支持根据 ScanOptions 的 scanTypes 动态显示;支持带后置相机的 Wearable |
| API 20 | 支持悬浮屏、分屏场景 |
| API 11 | 默认界面扫码基础能力 |
三、业务流程
3.1 完整业务流程
使用默认界面扫码的主要业务流程如下:
- 用户发起扫码请求:用户在应用内点击扫码按钮
- 应用调用 startScanForResult:通过 Scan Kit 接口启动系统扫码界面
- 系统隐私提醒:首次使用时弹出隐私横幅提醒,用户确认后进入扫码
- 用户扫码:对准码图进行扫描
- 结果返回:
- 单码扫描:识别到码图后直接返回结果
- 多码扫描:用户点击选择其中一个码图获取结果
- 应用处理结果:解析码值结果跳转应用服务页

默认界面扫码从用户发起请求到应用处理结果的完整业务流程
3.2 隐私提醒说明
系统首次使用默认界面扫码功能时,会向用户弹出隐私横幅提醒:
- 用户可点击"进一步了解"查看安全访问相机说明
- 用户可关闭隐私横幅,关闭后重新打开应用的扫码界面将不再显示隐私横幅
- 之后显示安全访问提示,3 秒后自动消失
四、接口说明
4.1 startScanForResult 接口
默认界面扫码的核心接口是 startScanForResult,提供三种调用形式:
| 接口签名 | 描述 |
|---|---|
startScanForResult(context: Context, options?: ScanOptions): Promise<ScanResult> | Promise 异步回调,带可选参数 |
startScanForResult(context: Context, options: ScanOptions, callback: AsyncCallback<ScanResult>): void | Callback 异步回调,带参数 |
startScanForResult(context: Context, callback: AsyncCallback<ScanResult>): void | Callback 异步回调,不带参数 |
4.2 ScanOptions 参数说明
ScanOptions 用于配置扫码行为:
interface ScanOptions {
  scanTypes?: scanCore.ScanType[];  // 指定扫码类型,默认识别所有类型
  enableMultiMode?: boolean;        // 是否开启多码识别模式,默认 false
  enableAlbum?: boolean;            // 是否显示相册扫码入口,默认 false
}
4.3 ScanResult 返回值说明
ScanResult 包含扫码结果信息:
interface ScanResult {
  originalValue: string;           // 码图原始值(字符串)
  scanType: scanCore.ScanType;     // 码图类型枚举
  codeFormat?: string;             // 码图格式描述
}
4.4 错误码说明
| 错误码 | 说明 | 处理建议 |
|---|---|---|
| 10005001 | 用户取消扫码操作 | 正常业务逻辑,无需提示错误 |
| 401 | 参数校验失败 | 检查传入的 ScanOptions 参数格式 |
| 801 | 系统能力不可用 | 检查设备是否支持扫码功能 |
五、开发步骤
5.1 导入模块
首先导入默认界面扫码所需的模块:
import { scanBarcode, scanCore } from '@kit.ScanKit';
import { common } from '@kit.AbilityKit';
import { BusinessError } from '@kit.BasicServicesKit';
import { hilog } from '@kit.PerformanceAnalysisKit';
5.2 基础扫码实现(Promise 方式)
最基础的默认界面扫码实现,使用 Promise 异步回调:
const TAG: string = '[DefaultScan]';

@Entry
@Component
struct DefaultScanPage {
  @State scanResult: string = '';
  @State scanType: string = '';

  build() {
    Column() {
      // 扫码结果展示
      if (this.scanResult) {
        Column() {
          Text('扫码结果')
            .fontSize(18)
            .fontWeight(FontWeight.Bold)
            .margin({ bottom: 10 })

          Text(`码值: ${this.scanResult}`)
            .fontSize(14)
            .fontColor($r('sys.color.ohos_id_color_text_primary'))
            .margin({ bottom: 5 })

          Text(`码类型: ${this.scanType}`)
            .fontSize(14)
            .fontColor($r('sys.color.ohos_id_color_text_secondary'))
        }
        .width('90%')
        .padding(16)
        .backgroundColor($r('sys.color.ohos_id_color_sub_background'))
        .borderRadius(8)
        .margin({ bottom: 20 })
      }

      // 扫码按钮
      Button('开始扫码')
        .backgroundColor($r('sys.color.ohos_id_color_button_normal'))
        .fontColor($r('sys.color.ohos_id_color_text_primary_activated'))
        .type(ButtonType.Capsule)
        .width('90%')
        .onClick(() => {
          this.startScan();
        })
    }
    .width('100%')
    .height('100%')
    .justifyContent(FlexAlign.Center)
  }

  /**
   * 启动默认界面扫码(Promise 方式)
   */
  private startScan(): void {
    const context: common.Context = getContext(this);

    // 配置扫码参数
    const options: scanBarcode.ScanOptions = {
      scanTypes: [scanCore.ScanType.QR_CODE, scanCore.ScanType.EAN_13],
      enableMultiMode: true,
      enableAlbum: true
    };

    // 调用扫码接口
    scanBarcode.startScanForResult(context, options)
      .then((result: scanBarcode.ScanResult) => {
        hilog.info(0x0001, TAG,
          `扫码成功 - 码值: ${result.originalValue}, 码类型: ${result.scanType}`);

        this.scanResult = result.originalValue;
        this.scanType = result.scanType.toString();
      })
      .catch((err: BusinessError) => {
        if (err.code === 10005001) {
          hilog.info(0x0001, TAG, '用户取消扫码');
          this.scanResult = '用户取消扫码';
        } else {
          hilog.error(0x0001, TAG,
            `扫码失败 - 错误码: ${err.code}, 错误信息: ${err.message}`);
          this.scanResult = `扫码失败: ${err.message}`;
        }
      });
  }
}
5.3 Callback 方式实现
使用 Callback 异步回调的替代实现:
const TAG: string = '[DefaultScanCallback]';

@Entry
@Component
struct DefaultScanCallbackPage {
  @State scanResult: string = '';

  build() {
    Column() {
      Text(this.scanResult || '请点击按钮开始扫码')
        .fontSize(16)
        .margin({ bottom: 20 })

      Button('开始扫码(Callback方式)')
        .onClick(() => {
          this.startScanWithCallback();
        })
    }
    .width('100%')
    .height('100%')
    .justifyContent(FlexAlign.Center)
  }

  /**
   * 启动默认界面扫码(Callback 方式)
   */
  private startScanWithCallback(): void {
    const context: common.Context = getContext(this);

    const options: scanBarcode.ScanOptions = {
      scanTypes: [scanCore.ScanType.QR_CODE],
      enableMultiMode: false,
      enableAlbum: true
    };

    scanBarcode.startScanForResult(context, options,
      (err: BusinessError, result: scanBarcode.ScanResult) => {
        if (err) {
          if (err.code === 10005001) {
            hilog.info(0x0001, TAG, '用户取消扫码');
            this.scanResult = '用户取消扫码';
          } else {
            hilog.error(0x0001, TAG,
              `扫码失败 - 错误码: ${err.code}`);
            this.scanResult = `扫码失败: ${err.message}`;
          }
          return;
        }

        hilog.info(0x0001, TAG,
          `扫码成功 - 码值: ${result.originalValue}`);
        this.scanResult = `码值: ${result.originalValue}\n码类型: ${result.scanType}`;
      });
  }
}
六、场景化实战
6.1 仅扫描二维码
当只需要扫描二维码(如支付、登录场景)时,可以指定仅识别 QR Code:
import { scanBarcode, scanCore } from '@kit.ScanKit';
import { common } from '@kit.AbilityKit';
import { BusinessError } from '@kit.BasicServicesKit';

export class QRCodeScanner {
  /**
   * 仅扫描二维码
   * @param context 上下文
   * @returns 扫码结果字符串
   */
  static async scan(context: common.Context): Promise<string> {
    const options: scanBarcode.ScanOptions = {
      // 仅指定 QR Code,扫码标题会显示"扫描二维码"
      scanTypes: [scanCore.ScanType.QR_CODE],
      enableMultiMode: false,
      enableAlbum: true
    };

    try {
      const result = await scanBarcode.startScanForResult(context, options);
      return result.originalValue || '';
    } catch (err) {
      const error = err as BusinessError;
      if (error.code === 10005001) {
        return 'USER_CANCEL';
      }
      throw error;
    }
  }
}
6.2 仅扫描条形码
当只需扫描条形码(如商品扫码、物流追踪)时,指定条形码类型:
import { scanBarcode, scanCore } from '@kit.ScanKit';
import { common } from '@kit.AbilityKit';
import { BusinessError } from '@kit.BasicServicesKit';

export class BarcodeScanner {
  /**
   * 仅扫描条形码(一维码)
   * @param context 上下文
   * @returns 扫码结果字符串
   */
  static async scan(context: common.Context): Promise<string> {
    const options: scanBarcode.ScanOptions = {
      // 仅指定条形码类型,扫码标题会显示"扫描条形码"
      scanTypes: [
        scanCore.ScanType.EAN_8,
        scanCore.ScanType.EAN_13,
        scanCore.ScanType.UPC_A,
        scanCore.ScanType.UPC_E,
        scanCore.ScanType.CODE_39,
        scanCore.ScanType.CODE_93,
        scanCore.ScanType.CODE_128,
        scanCore.ScanType.CODABAR,
        scanCore.ScanType.ITF
      ],
      enableMultiMode: false,
      enableAlbum: false
    };

    try {
      const result = await scanBarcode.startScanForResult(context, options);
      return result.originalValue || '';
    } catch (err) {
      const error = err as BusinessError;
      if (error.code === 10005001) {
        return 'USER_CANCEL';
      }
      throw error;
    }
  }
}
6.3 多码识别场景
在需要同时识别多个码图(如物流分拣、票务核验)的场景中,启用多码模式:
import { scanBarcode, scanCore } from '@kit.ScanKit';
import { common } from '@kit.AbilityKit';
import { BusinessError } from '@kit.BasicServicesKit';
import { hilog } from '@kit.PerformanceAnalysisKit';

const TAG: string = '[MultiScan]';

@Entry
@Component
struct MultiScanPage {
  @State scanResults: string[] = [];

  build() {
    Column() {
      Text('多码识别演示')
        .fontSize(20)
        .fontWeight(FontWeight.Bold)
        .margin({ bottom: 20 })

      // 扫码结果列表
      if (this.scanResults.length > 0) {
        List() {
          ForEach(this.scanResults, (result: string, index: number) => {
            ListItem() {
              Text(`码 ${index + 1}: ${result}`)
                .fontSize(14)
                .padding(10)
            }
          })
        }
        .width('90%')
        .height('40%')
        .margin({ bottom: 20 })
      }

      Button('开始多码识别')
        .onClick(() => {
          this.startMultiScan();
        })
    }
    .width('100%')
    .height('100%')
    .justifyContent(FlexAlign.Center)
  }

  /**
   * 启动多码识别扫码
   */
  private startMultiScan(): void {
    const context: common.Context = getContext(this);

    const options: scanBarcode.ScanOptions = {
      scanTypes: [scanCore.ScanType.ALL],
      // 关键:启用多码模式
      enableMultiMode: true,
      enableAlbum: false
    };

    scanBarcode.startScanForResult(context, options)
      .then((result: scanBarcode.ScanResult) => {
        hilog.info(0x0001, TAG,
          `多码识别完成 - 用户选择了: ${result.originalValue}`);

        this.scanResults = [
          `用户选择的码值: ${result.originalValue}`,
          `码类型: ${result.scanType}`
        ];
      })
      .catch((err: BusinessError) => {
        if (err.code === 10005001) {
          hilog.info(0x0001, TAG, '用户取消扫码');
        } else {
          hilog.error(0x0001, TAG,
            `多码识别失败: ${err.message}`);
        }
      });
  }
}
6.4 支付场景实战
完整的支付扫码场景实现:
import { scanBarcode, scanCore } from '@kit.ScanKit';
import { common } from '@kit.AbilityKit';
import { BusinessError } from '@kit.BasicServicesKit';
import { hilog } from '@kit.PerformanceAnalysisKit';
import { router } from '@kit.ArkUI';

const TAG: string = '[PaymentScan]';

@Entry
@Component
struct PaymentScanPage {
  @State isScanning: boolean = false;
  @State paymentResult: string = '';

  build() {
    Column() {
      // 页面标题
      Row() {
        Text('扫码支付')
          .fontSize(20)
          .fontWeight(FontWeight.Bold)
      }
      .width('100%')
      .padding(16)

      // 支付结果展示
      if (this.paymentResult) {
        Column() {
          Text(this.paymentResult)
            .fontSize(16)
            .fontColor(
              this.paymentResult.includes('成功')
                ? '#4CAF50'
                : '#F44336'
            )
            .margin({ bottom: 20 })
        }
        .padding(20)
      }

      // 扫码支付按钮
      Button(this.isScanning ? '扫码中...' : '扫码支付')
        .enabled(!this.isScanning)
        .width('80%')
        .height(48)
        .fontSize(18)
        .onClick(() => {
          this.startPaymentScan();
        })

      Text('支持扫描微信支付码、支付宝支付码')
        .fontSize(12)
        .fontColor($r('sys.color.ohos_id_color_text_secondary'))
        .margin({ top: 12 })
    }
    .width('100%')
    .height('100%')
    .justifyContent(FlexAlign.Center)
  }

  /**
   * 启动支付扫码
   */
  private async startPaymentScan(): Promise<void> {
    this.isScanning = true;
    const context: common.Context = getContext(this);

    const options: scanBarcode.ScanOptions = {
      scanTypes: [scanCore.ScanType.QR_CODE],
      enableMultiMode: false,
      enableAlbum: false
    };

    try {
      const result = await scanBarcode.startScanForResult(context, options);
      const codeValue = result.originalValue || '';

      hilog.info(0x0001, TAG, `扫码结果: ${codeValue}`);

      // 验证支付码格式
      if (this.isValidPaymentCode(codeValue)) {
        // 跳转到支付确认页面
        router.pushUrl({
          url: 'pages/PaymentConfirm',
          params: {
            payCode: codeValue,
            scanType: result.scanType
          }
        });
      } else {
        this.paymentResult = '无效的支付码,请重试';
      }
    } catch (err) {
      const error = err as BusinessError;
      if (error.code !== 10005001) {
        this.paymentResult = `扫码失败: ${error.message}`;
      }
    } finally {
      this.isScanning = false;
    }
  }

  /**
   * 验证支付码格式
   */
  private isValidPaymentCode(code: string): boolean {
    // 支付码通常以特定前缀开头
    const validPrefixes = ['wx://', 'alipay://', 'https://qr.alipay.com/'];
    return validPrefixes.some(prefix => code.startsWith(prefix))
      || code.length >= 10;
  }
}
七、设备兼容性检查
7.1 检查设备是否支持默认界面扫码
从 API 26 开始,可以使用 isDefaultScanSupported 接口查询设备兼容性:
import { scanCore } from '@kit.ScanKit';
import { hilog } from '@kit.PerformanceAnalysisKit';

const TAG: string = '[DeviceCheck]';

@Entry
@Component
struct DeviceCheckPage {
  @State isSupported: boolean = false;
  @State checkResult: string = '';

  aboutToAppear(): void {
    this.checkDeviceSupport();
  }

  build() {
    Column() {
      Text('设备兼容性检查')
        .fontSize(20)
        .fontWeight(FontWeight.Bold)
        .margin({ bottom: 20 })

      Text(`默认界面扫码: ${this.isSupported ? '支持' : '不支持'}`)
        .fontSize(16)
        .fontColor(this.isSupported ? '#4CAF50' : '#F44336')
        .margin({ bottom: 10 })

      Text(this.checkResult)
        .fontSize(14)
        .fontColor($r('sys.color.ohos_id_color_text_secondary'))
    }
    .width('100%')
    .height('100%')
    .justifyContent(FlexAlign.Center)
  }

  /**
   * 检查设备兼容性
   */
  private checkDeviceSupport(): void {
    try {
      // 检查默认界面扫码支持
      this.isSupported = scanCore.isDefaultScanSupported();
      this.checkResult = this.isSupported
        ? '当前设备支持默认界面扫码功能'
        : '当前设备不支持默认界面扫码,请使用其他扫码方式';

      hilog.info(0x0001, TAG,
        `Default scan supported: ${this.isSupported}`);
    } catch (err) {
      hilog.error(0x0001, TAG,
        `Failed to check device support: ${JSON.stringify(err)}`);
      this.checkResult = '设备兼容性检查失败';
    }
  }
}
八、错误处理最佳实践
8.1 完整的错误处理封装
import { scanBarcode, scanCore } from '@kit.ScanKit';
import { common } from '@kit.AbilityKit';
import { BusinessError } from '@kit.BasicServicesKit';
import { hilog } from '@kit.PerformanceAnalysisKit';

const TAG: string = '[ScanErrorHandler]';

/**
 * 扫码结果枚举
 */
export enum ScanStatus {
  SUCCESS = 'SUCCESS',
  USER_CANCEL = 'USER_CANCEL',
  PARAM_ERROR = 'PARAM_ERROR',
  CAPABILITY_UNAVAILABLE = 'CAPABILITY_UNAVAILABLE',
  UNKNOWN_ERROR = 'UNKNOWN_ERROR'
}

/**
 * 扫码结果封装
 */
export interface ScanResult {
  status: ScanStatus;
  message: string;
  data?: {
    originalValue: string;
    scanType: scanCore.ScanType;
  };
}

/**
 * 带完整错误处理的默认界面扫码
 */
export class SafeScanService {
  /**
   * 安全扫码(带完整错误处理)
   */
  static async safeScan(
    context: common.Context,
    options?: scanBarcode.ScanOptions
  ): Promise<ScanResult> {
    try {
      // 参数校验
      if (!context) {
        return {
          status: ScanStatus.PARAM_ERROR,
          message: 'Context 参数不能为空'
        };
      }

      // 默认参数
      const scanOptions: scanBarcode.ScanOptions = options || {
        scanTypes: [scanCore.ScanType.ALL],
        enableMultiMode: false,
        enableAlbum: true
      };

      // 调用扫码
      const result = await scanBarcode.startScanForResult(
        context, scanOptions
      );

      hilog.info(0x0001, TAG,
        `Scan success: ${result.originalValue}`);

      return {
        status: ScanStatus.SUCCESS,
        message: '扫码成功',
        data: {
          originalValue: result.originalValue,
          scanType: result.scanType
        }
      };
    } catch (err) {
      const error = err as BusinessError;
      hilog.error(0x0001, TAG,
        `Scan error - Code: ${error.code}, Message: ${error.message}`);

      switch (error.code) {
        case 10005001:
          return {
            status: ScanStatus.USER_CANCEL,
            message: '用户取消扫码'
          };
        case 401:
          return {
            status: ScanStatus.PARAM_ERROR,
            message: '参数错误,请检查 ScanOptions 配置'
          };
        case 801:
          return {
            status: ScanStatus.CAPABILITY_UNAVAILABLE,
            message: '当前设备不支持扫码功能'
          };
        default:
          return {
            status: ScanStatus.UNKNOWN_ERROR,
            message: `扫码异常: ${error.message}`
          };
      }
    }
  }
}
8.2 在页面中使用安全扫码
import { SafeScanService, ScanStatus } from '../services/SafeScanService';
import { common } from '@kit.AbilityKit';

@Entry
@Component
struct SafeScanPage {
  @State statusText: string = '';

  build() {
    Column() {
      Text(this.statusText || '点击按钮开始扫码')
        .fontSize(16)
        .margin({ bottom: 20 })

      Button('开始安全扫码')
        .onClick(async () => {
          const context: common.Context = getContext(this);
          const result = await SafeScanService.safeScan(context);

          switch (result.status) {
            case ScanStatus.SUCCESS:
              this.statusText =
                `扫码成功: ${result.data?.originalValue}`;
              break;
            case ScanStatus.USER_CANCEL:
              this.statusText = '用户取消扫码';
              break;
            case ScanStatus.PARAM_ERROR:
              this.statusText = result.message;
              break;
            case ScanStatus.CAPABILITY_UNAVAILABLE:
              this.statusText = result.message;
              break;
            default:
              this.statusText = result.message;
              break;
          }
        })
    }
    .width('100%')
    .height('100%')
    .justifyContent(FlexAlign.Center)
  }
}
九、模拟器开发
9.1 模拟器扫码测试
在模拟器上进行扫码功能测试时,需要注意以下事项:
- 模拟器支持默认界面扫码功能
- 模拟器中可以使用相册扫码功能进行测试
- 模拟器不支持实时相机扫码(需要使用真机)
9.2 模拟器测试流程
在模拟器中测试默认界面扫码的推荐流程:
- 准备一张包含已知内容的二维码图片
- 将图片导入模拟器相册
- 启动应用,点击扫码按钮
- 在扫码界面中选择相册入口
- 选择导入的二维码图片进行识别
- 验证返回结果是否正确
十、总结与最佳实践
10.1 开发建议
在开发默认界面扫码功能时,建议遵循以下最佳实践:
- 优先使用 Promise 方式:代码更简洁,错误处理更清晰
- 合理配置 scanTypes:指定具体码类型可以提高扫码速度和准确率
- 处理用户取消:错误码 10005001 是正常业务逻辑,不应显示错误提示
- 检查设备兼容性:在调用扫码前检查设备是否支持
- 封装公共服务:将扫码逻辑封装为独立的 Service 类,便于复用
10.2 场景选择建议
| 场景 | 推荐方案 | 参数配置 |
|---|---|---|
| 支付扫码 | 仅 QR Code | scanTypes: [QR_CODE] |
| 商品扫码 | 条形码类型 | scanTypes: [EAN_8, EAN_13, CODE_128] |
| 物流分拣 | 多码识别 | enableMultiMode: true |
| 信息查询 | 全部类型 | scanTypes: [ALL] |
| 图片识别 | 开启相册 | enableAlbum: true |
总结
本文详细讲解了 HarmonyOS Scan Kit 默认界面扫码的完整开发流程。默认界面扫码是 Scan Kit 中最简单、最常用的扫码能力,开发者只需一行代码即可获得与系统体验完全一致的扫码功能。
默认界面扫码的核心优势在于:
- 零配置:系统相机权限预授权,无需申请权限
- 零 UI 开发:系统提供完整的扫码界面
- 零包体增加:系统级接口,不影响应用体积
- 高性能:系统级 AI 算法加持,复杂场景下依然高效
在下一篇文章中,我们将深入讲解自定义界面扫码的开发,实现完全个性化的扫码体验。
如果这篇文章对你有帮助,欢迎点赞👍、收藏⭐、关注🔔,你的支持是我持续创作的动力!
相关资源:
- 默认界面扫码:默认界面扫码
- Scan Kit 开发指南:开发指南
- Scan Kit 简介:Scan Kit简介
- ScanType 枚举:ScanType
- 接口文档:scanBarcode API
- 接入"扫码直达"服务:扫码直达
- 官方示例工程:Sample Code
- 开源鸿蒙跨平台社区:社区

讨论HarmonyOS开发技术,专注于API与组件、DevEco Studio、测试、元服务和应用上架分发等。
更多推荐
 6
6 0
0- 0


 已为社区贡献87条内容

所有评论(0)