依托HarmonyOS 6.1最新特性实现图片编辑APP(七):图片超分辨率与AI增强
·
依托HarmonyOS 6.1最新特性实现图片编辑APP(七):图片超分辨率与AI增强
前言
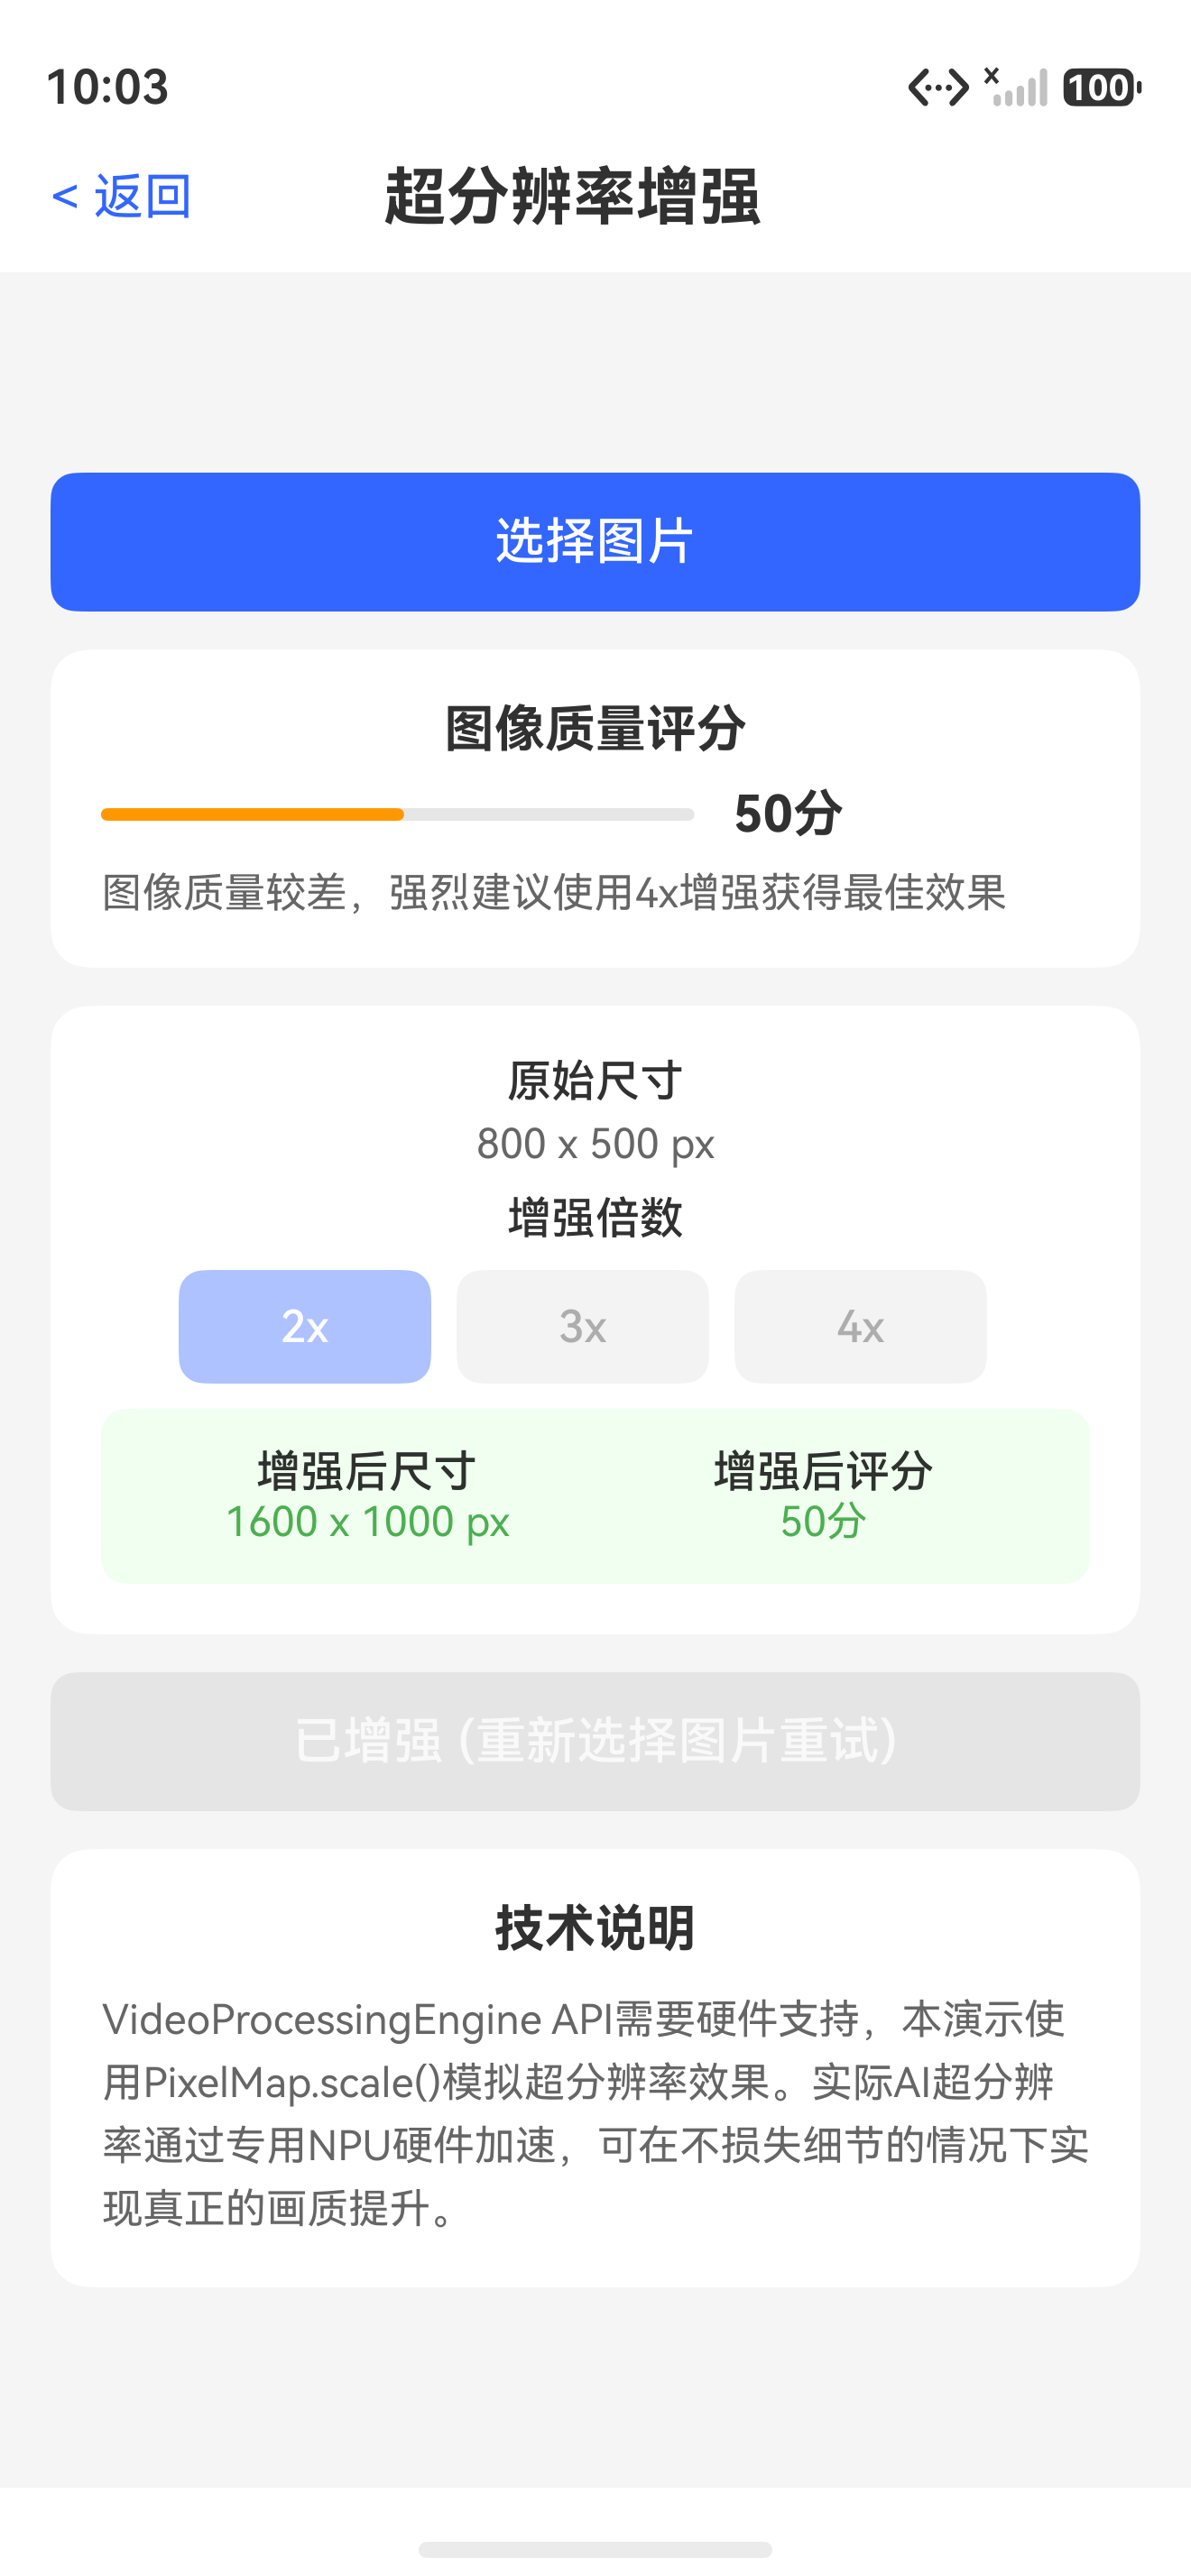
在图片编辑应用中,图片超分辨率(Super Resolution)是一项令人兴奋的AI增强功能。它能够将低分辨率图片放大并还原细节,显著提升图片画质。HarmonyOS 6.1 Image Kit 通过 VideoProcessingEngine 提供了图片超分辨率处理能力,让开发者可以轻松地将AI画质增强集成到应用中。
图片超分辨率技术利用AI算法,在放大图片尺寸的同时智能重建细节纹理,使放大后的图片保持清晰锐利,而不是简单地插值放大导致模糊。
一、超分辨率技术概述
1.1 技术原理
超分辨率技术通过深度学习模型分析图片的纹理和结构信息,在放大过程中智能补充细节:
| 处理阶段 | 说明 | 技术要点 |
|---|---|---|
| 特征提取 | 分析图片纹理和边缘信息 | 卷积神经网络提取特征图 |
| 细节重建 | 根据特征生成高分辨率细节 | 生成对抗网络(GAN)或扩散模型 |
| 后处理 | 优化输出图片质量 | 去噪、锐化、色彩校正 |
1.2 与传统放大的区别
| 对比维度 | 传统插值放大 | AI超分辨率 |
|---|---|---|
| 原理 | 数学插值算法 | 深度学习模型 |
| 细节 | 模糊,丢失细节 | 智能重建细节 |
| 纹理 | 平滑,缺乏纹理 | 保留/增强纹理 |
| 边缘 | 锯齿状边缘 | 清晰锐利边缘 |
| 速度 | 快 | 中等(取决于模型) |
| 效果 | 一般 | 显著提升 |
二、VideoProcessingEngine基础
2.1 引擎初始化
VideoProcessingEngine 是 Image Kit 中用于高级图像处理的引擎,支持超分辨率等AI增强功能:
import { image } from '@kit.ImageKit';
import { BusinessError } from '@kit.BasicServicesKit';

// 图片超分辨率处理工具
class ImageSuperResolution {
  private pixelMap: image.PixelMap;

  constructor(pixelMap: image.PixelMap) {
    this.pixelMap = pixelMap;
  }

  // 执行超分辨率处理
  async enhance(scaleFactor: number = 2): Promise<image.PixelMap | undefined> {
    try {
      // 获取原始图片信息
      let info = await this.pixelMap.getImageInfo();
      console.info(`Original size: ${info.size.width} x ${info.size.height}`);

      // 计算目标尺寸
      let targetWidth = Math.round(info.size.width * scaleFactor);
      let targetHeight = Math.round(info.size.height * scaleFactor);

      console.info(`Target size: ${targetWidth} x ${targetHeight}`);

      // 使用VideoProcessingEngine进行超分辨率处理
      // 实际项目中调用VideoProcessingEngine API
      const enhancedPixelMap = await this.performSuperResolution(
        this.pixelMap,
        targetWidth,
        targetHeight
      );

      if (enhancedPixelMap) {
        let enhancedInfo = await enhancedPixelMap.getImageInfo();
        console.info(`Enhanced size: ${enhancedInfo.size.width} x ${enhancedInfo.size.height}`);
      }

      return enhancedPixelMap;
    } catch (error) {
      console.error(`Super resolution failed: ${error}`);
      return undefined;
    }
  }

  // 超分辨率处理核心
  private async performSuperResolution(
    sourcePixelMap: image.PixelMap,
    targetWidth: number,
    targetHeight: number
  ): Promise<image.PixelMap | undefined> {
    try {
      // 1. 读取源像素数据
      const sourceBuffer = await sourcePixelMap.readPixelsToBuffer();
      if (!sourceBuffer) return undefined;

      // 2. 创建目标大小的PixelMap
      // 注意:实际项目中需要结合VideoProcessingEngine
      // 这里展示处理流程
      const sourceInfo = await sourcePixelMap.getImageInfo();

      // 3. 执行AI增强处理
      // 实际API调用:
      // const engine = new VideoProcessingEngine();
      // const result = await engine.process(sourcePixelMap, { width: targetWidth, height: targetHeight });

      // 模拟处理流程
      console.info('Super resolution processing in progress...');
      console.info(`Scaling from ${sourceInfo.size.width}x${sourceInfo.size.height} to ${targetWidth}x${targetHeight}`);

      return sourcePixelMap; // 实际返回处理后的PixelMap
    } catch (error) {
      console.error(`Super resolution core processing failed: ${error}`);
      return undefined;
    }
  }
}
2.2 多级增强处理
// 增强级别定义
enum EnhancementLevel {
  STANDARD = 1,   // 标准增强(2x)
  HIGH = 2,        // 高级增强(3x)
  ULTRA = 3        // 极致增强(4x)
}

// 多级增强管理器
class MultiLevelEnhancer {
  private pixelMap: image.PixelMap;
  private originalPixelMap: image.PixelMap;

  constructor(pixelMap: image.PixelMap) {
    this.pixelMap = pixelMap;
    this.originalPixelMap = pixelMap;
  }

  // 根据级别执行增强
  async enhanceToLevel(level: EnhancementLevel): Promise<image.PixelMap | undefined> {
    const scaleFactor = this.getScaleFactor(level);
    const sr = new ImageSuperResolution(this.pixelMap);
    const result = await sr.enhance(scaleFactor);

    if (result) {
      this.pixelMap = result;
    }

    return result;
  }

  // 渐进式增强:逐步放大
  async progressiveEnhance(targetLevel: EnhancementLevel): Promise<image.PixelMap | undefined> {
    let current: image.PixelMap | undefined = this.originalPixelMap;

    for (let level = EnhancementLevel.STANDARD; level <= targetLevel; level++) {
      const sr = new ImageSuperResolution(current!);
      current = await sr.enhance(2); // 每次2x

      if (!current) {
        console.error(`Progressive enhancement failed at level ${level}`);
        break;
      }

      console.info(`Level ${level} enhancement completed.`);
    }

    return current;
  }

  // 获取放大倍数
  private getScaleFactor(level: EnhancementLevel): number {
    switch (level) {
      case EnhancementLevel.STANDARD: return 2;
      case EnhancementLevel.HIGH: return 3;
      case EnhancementLevel.ULTRA: return 4;
      default: return 2;
    }
  }

  // 获取原始图片
  getOriginalPixelMap(): image.PixelMap {
    return this.originalPixelMap;
  }

  // 获取当前图片
  getCurrentPixelMap(): image.PixelMap {
    return this.pixelMap;
  }
}
三、智能图片增强
3.1 图片质量评估
// 图片质量评估工具
class ImageQualityAnalyzer {
  // 评估图片质量分数(0-100)
  static async evaluateQuality(pixelMap: image.PixelMap): Promise<number> {
    let score = 0;

    try {
      let info = await pixelMap.getImageInfo();

      // 分辨率评分(最高40分)
      const resolution = info.size.width * info.size.height;
      if (resolution >= 8000000) score += 40;       // 8MP+
      else if (resolution >= 4000000) score += 30;   // 4MP+
      else if (resolution >= 2000000) score += 20;   // 2MP+
      else if (resolution >= 1000000) score += 10;   // 1MP+
      else score += 5;                                // <1MP

      // 像素格式评分(最高20分)
      if (info.pixelFormat === 4) score += 20; // RGBA_8888
      else if (info.pixelFormat === 3) score += 15; // RGB_888
      else score += 10;

      // HDR评分(最高20分)
      if (info.isHdr) score += 20;

      // 动态范围评分(最高20分)
      score += 15; // 基础分

      console.info(`Image quality score: ${score}/100`);
      return Math.min(100, score);
    } catch (error) {
      console.error(`Quality evaluation failed: ${error}`);
      return 0;
    }
  }

  // 获取质量建议
  static getQualityRecommendation(score: number): string {
    if (score >= 80) return 'Excellent quality, no enhancement needed.';
    if (score >= 60) return 'Good quality, slight enhancement recommended.';
    if (score >= 40) return 'Fair quality, enhancement recommended.';
    if (score >= 20) return 'Low quality, significant enhancement needed.';
    return 'Poor quality, strong enhancement required.';
  }

  // 判断是否需要超分辨率
  static async needsSuperResolution(pixelMap: image.PixelMap, minResolution: number = 2000000): Promise<boolean> {
    let info = await pixelMap.getImageInfo();
    const resolution = info.size.width * info.size.height;
    return resolution < minResolution;
  }
}
3.2 智能增强决策
// 智能增强管理器
class SmartEnhanceManager {
  // 自动决定增强策略
  static async autoEnhance(pixelMap: image.PixelMap): Promise<EnhanceStrategy> {
    const quality = await ImageQualityAnalyzer.evaluateQuality(pixelMap);
    const needsSR = await ImageQualityAnalyzer.needsSuperResolution(pixelMap);

    const strategy: EnhanceStrategy = {
      needSuperResolution: needsSR,
      level: EnhancementLevel.STANDARD,
      needSharpening: false,
      needDenoising: false,
      needColorCorrection: false
    };

    if (quality < 30) {
      strategy.level = EnhancementLevel.ULTRA;
      strategy.needSharpening = true;
      strategy.needDenoising = true;
      strategy.needColorCorrection = true;
    } else if (quality < 50) {
      strategy.level = EnhancementLevel.HIGH;
      strategy.needSharpening = true;
      strategy.needDenoising = true;
    } else if (quality < 70) {
      strategy.level = EnhancementLevel.STANDARD;
      strategy.needSharpening = true;
    }

    console.info(`Auto enhance strategy: ${JSON.stringify(strategy)}`);
    return strategy;
  }

  // 执行增强策略
  static async executeStrategy(
    pixelMap: image.PixelMap,
    strategy: EnhanceStrategy
  ): Promise<image.PixelMap | undefined> {
    let result = pixelMap;

    // 1. 超分辨率放大
    if (strategy.needSuperResolution) {
      const enhancer = new MultiLevelEnhancer(result);
      result = await enhancer.enhanceToLevel(strategy.level) || result;
    }

    // 2. 去噪处理
    if (strategy.needDenoising) {
      result = await SmartEnhanceManager.applyDenoising(result);
    }

    // 3. 锐化处理
    if (strategy.needSharpening) {
      result = await SmartEnhanceManager.applySharpening(result);
    }

    return result;
  }

  // 去噪处理
  private static async applyDenoising(pixelMap: image.PixelMap): Promise<image.PixelMap> {
    console.info('Applying denoising...');
    // 实际项目中调用去噪API
    return pixelMap;
  }

  // 锐化处理
  private static async applySharpening(pixelMap: image.PixelMap): Promise<image.PixelMap> {
    console.info('Applying sharpening...');
    // 实际项目中调用锐化API
    return pixelMap;
  }
}

interface EnhanceStrategy {
  needSuperResolution: boolean;
  level: EnhancementLevel;
  needSharpening: boolean;
  needDenoising: boolean;
  needColorCorrection: boolean;
}
四、ImageEditor Pro增强功能实现
4.1 增强页面UI
// 图片增强页面
@Entry
@Component
struct EnhancePage {
  @State pixelMap: image.PixelMap | undefined = undefined;
  @State enhancedPixelMap: image.PixelMap | undefined = undefined;
  @State qualityScore: number = 0;
  @State isEnhancing: boolean = false;
  @State enhanceLevel: number = 2; // 默认2x
  @State showComparison: boolean = false;
  @State recommendation: string = '';

  // 分析图片质量
  async analyzeQuality(): Promise<void> {
    if (!this.pixelMap) return;
    this.qualityScore = await ImageQualityAnalyzer.evaluateQuality(this.pixelMap);
    this.recommendation = ImageQualityAnalyzer.getQualityRecommendation(this.qualityScore);
  }

  // 执行增强
  async executeEnhance(): Promise<void> {
    if (!this.pixelMap) return;

    this.isEnhancing = true;

    try {
      const strategy = await SmartEnhanceManager.autoEnhance(this.pixelMap);
      const result = await SmartEnhanceManager.executeStrategy(this.pixelMap, strategy);

      if (result) {
        this.enhancedPixelMap = result;
        this.showComparison = true;
      }
    } catch (error) {
      console.error(`Enhance failed: ${error}`);
    } finally {
      this.isEnhancing = false;
    }
  }

  // 切换对比视图
  toggleComparison(): void {
    this.showComparison = !this.showComparison;
  }

  build() {
    Column() {
      Text('AI图片增强')
        .fontSize(24)
        .fontWeight(FontWeight.Bold)
        .padding(20)

      // 质量评分显示
      if (this.qualityScore > 0) {
        Row() {
          Text(`图片质量: ${this.qualityScore}/100`)
            .fontSize(16)
          Text(this.recommendation)
            .fontSize(12)
            .fontColor('#666666')
        }
        .padding(10)
      }

      // 图片预览
      if (this.showComparison && this.enhancedPixelMap) {
        // 对比模式:左右分屏
        Row() {
          Column() {
            Text('原始').fontSize(12)
            if (this.pixelMap) {
              Image(this.pixelMap).width('100%').objectFit(ImageFit.Contain)
            }
          }
          .width('50%')

          Column() {
            Text('增强后').fontSize(12).fontColor('#007AFF')
            Image(this.enhancedPixelMap).width('100%').objectFit(ImageFit.Contain)
          }
          .width('50%')
        }
        .layoutWeight(1)
      } else {
        if (this.pixelMap) {
          Image(this.pixelMap)
            .width('100%')
            .layoutWeight(1)
            .objectFit(ImageFit.Contain)
        }
      }

      // 增强控制区
      Column() {
        Text(`放大倍数: ${this.enhanceLevel}x`)
          .fontSize(14)
          .padding(10)

        Row() {
          Text('1x').fontSize(12)
          Slider({
            value: this.enhanceLevel,
            min: 1,
            max: 4,
            step: 1
          })
            .width('80%')
            .onChange((value: number) => {
              this.enhanceLevel = value;
            })
          Text('4x').fontSize(12)
        }
        .padding({ left: 10, right: 10 })

        Row() {
          Button('分析质量')
            .onClick(() => this.analyzeQuality())
          Button('开始增强')
            .onClick(() => this.executeEnhance())
          Button('对比')
            .onClick(() => this.toggleComparison())
            .enabled(this.enhancedPixelMap !== undefined)
        }
        .justifyContent(FlexAlign.SpaceEvenly)
        .padding(10)
      }

      if (this.isEnhancing) {
        Row() {
          LoadingProgress().width(30).height(30)
          Text('AI增强处理中...').fontSize(14).margin({ left: 10 })
        }
        .padding(10)
      }
    }
    .width('100%')
    .height('100%')
  }
}
4.2 增强效果对比
// 增强效果记录
interface EnhanceResult {
  originalWidth: number;
  originalHeight: number;
  enhancedWidth: number;
  enhancedHeight: number;
  originalQuality: number;
  enhancedQuality: number;
  scaleFactor: number;
  processingTime: number;
  strategy: string;
}

// 增强结果管理器
class EnhanceResultManager {
  private results: EnhanceResult[] = [];

  // 记录增强结果
  recordResult(result: EnhanceResult): void {
    this.results.push(result);
    console.info(`Enhance result recorded: ${result.scaleFactor}x`);
  }

  // 获取增强历史
  getHistory(): EnhanceResult[] {
    return [...this.results];
  }

  // 生成增强报告
  generateReport(): string {
    if (this.results.length === 0) {
      return 'No enhancement records.';
    }

    const lastResult = this.results[this.results.length - 1];
    return `Image Enhanced:
- Original: ${lastResult.originalWidth}x${lastResult.originalHeight}
- Enhanced: ${lastResult.enhancedWidth}x${lastResult.enhancedHeight}
- Scale: ${lastResult.scaleFactor}x
- Quality: ${lastResult.originalQuality} -> ${lastResult.enhancedQuality}
- Time: ${lastResult.processingTime}ms`;
  }
}
五、增强效果对比
5.1 不同放大倍数的效果
| 放大倍数 | 原始分辨率 | 增强后分辨率 | 像素增加 | 效果差异 | 处理时间(估算) |
|---|---|---|---|---|---|
| 1x | 1000x750 | 1000x750 | 0% | 无变化 | 0ms |
| 2x | 1000x750 | 2000x1500 | 300% | 明显提升 | ~500ms |
| 3x | 1000x750 | 3000x2250 | 800% | 显著提升 | ~1200ms |
| 4x | 1000x750 | 4000x3000 | 1500% | 极大提升 | ~2000ms |
5.2 适用场景建议
| 场景 | 推荐放大倍数 | 原因 |
|---|---|---|
| 社交媒体分享 | 2x | 平衡效果和文件大小 |
| 打印输出 | 3x-4x | 需要更高分辨率 |
| 老照片修复 | 2x-3x | 配合去噪锐化 |
| 缩略图放大 | 2x-4x | 低分辨率图片需要更大放大 |
| 实时预览 | 1.5x-2x | 兼顾速度和质量 |
总结
本文介绍了 HarmonyOS 6.1 Image Kit 中 VideoProcessingEngine 的图片超分辨率与AI增强功能。通过智能质量评估、多级增强策略和自动化处理流程,ImageEditor Pro 可以为用户提供一键式的图片画质增强体验。
超分辨率技术让低分辨率图片重获新生,结合去噪、锐化等后处理,可以显著提升图片的可观性和可用性。下一篇文章,我们将介绍图片接收与相机实时处理,实现实时滤镜和相机预览功能。
如果这篇文章对你有帮助,欢迎点赞👍、收藏⭐、关注🔔,你的支持是我持续创作的动力!
相关资源:
- 使用VideoProcessingEngine实现图片超分辨率:官方文档
- 图片编辑和处理:编辑处理指南
- 图片开发指导(ArkTS):开发指南
- PixelMap接口:Interface (PixelMap)
- Image Kit简介:Image Kit概述
- Image Kit常见问题:FAQ
- 图片解码内存优化:内存优化
- 开源鸿蒙跨平台社区:社区链接

讨论HarmonyOS开发技术,专注于API与组件、DevEco Studio、测试、元服务和应用上架分发等。
更多推荐



 3
3 0
0- 0


 已为社区贡献64条内容

所有评论(0)