【共创稿事节】HarmonyOS `textRecognition` 文字识别:3 个坑翻车后,我终于跑通了
前言
看到社区有个有趣的提问是关于文字识别的, 原话如下:
在做发票文字提取功能,按照官方示例的十来行代码,结果一跑翻车啦:
- 第一次调 recognizeText 直接抛错,报运行失败;
- 处理完图片再识别,接口调用成功,但返回的文本是空的;
- 偶尔结果只有一半,或明明有文字却显示 未识别。
想搞清楚 textRecognition 从初始化到拿结果,到底哪一步容易漏或踩坑
问题地址: textRecognition 识别图片:直接调用抛错、换张图返回空文本、结果还不完整,哪里没写对?。
其实关于文字识别还是比较简单的(相对而言),这篇文章我会详细的把每一步为什么这样写讲清楚。你也可以直接跳到最后的完整示例,对照自己的项目排查。
相关效果图
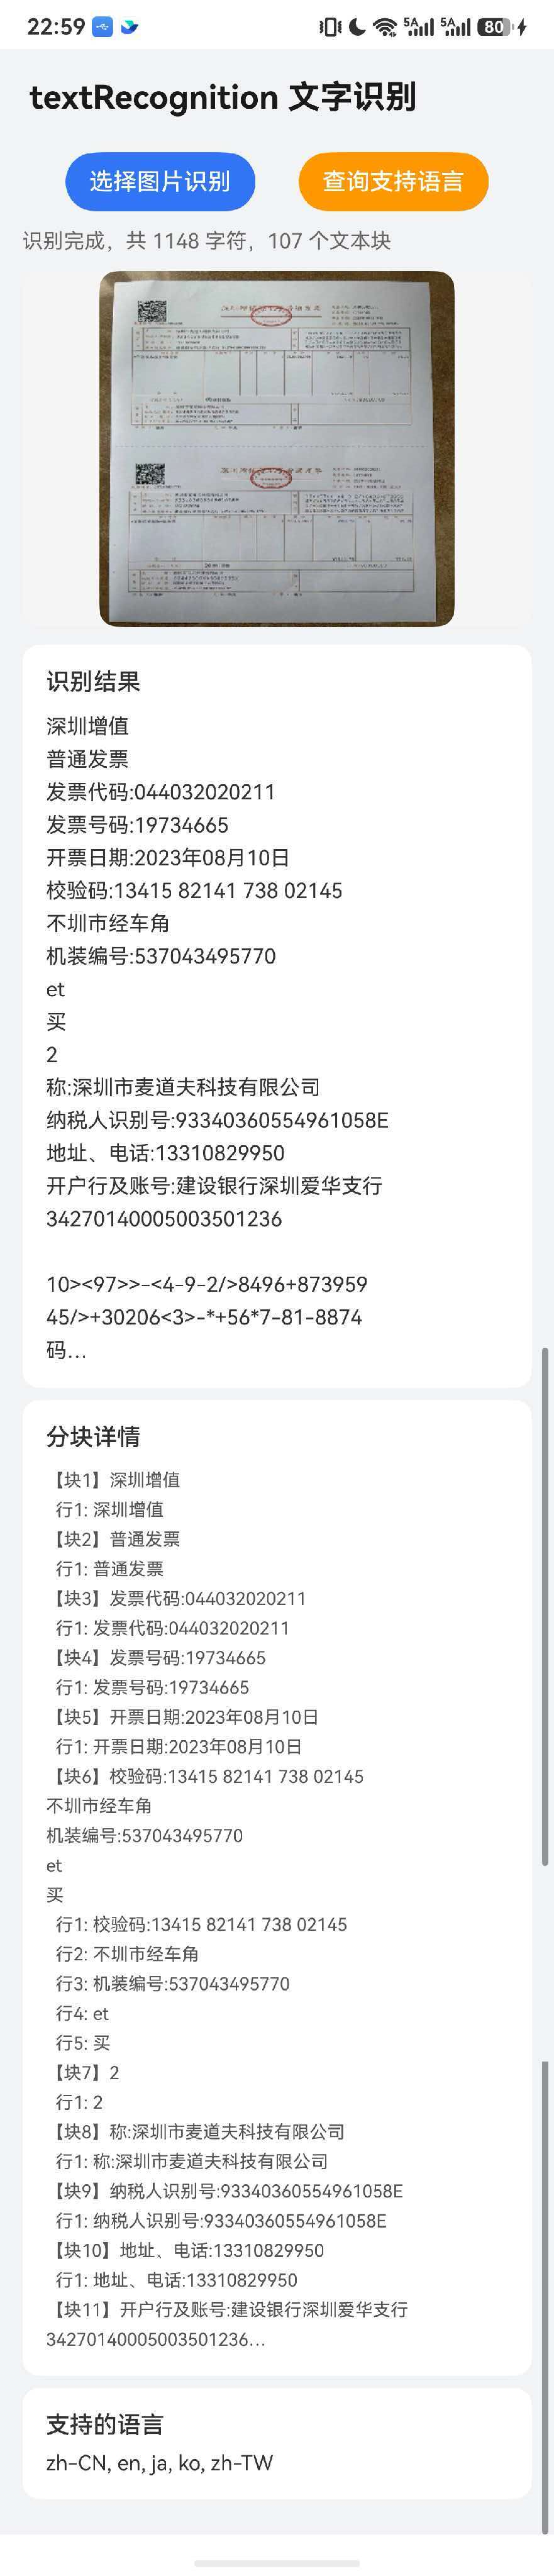
手里没有合适的发票,我从网上下载了一张发票,接下来主要是对该发票的识别

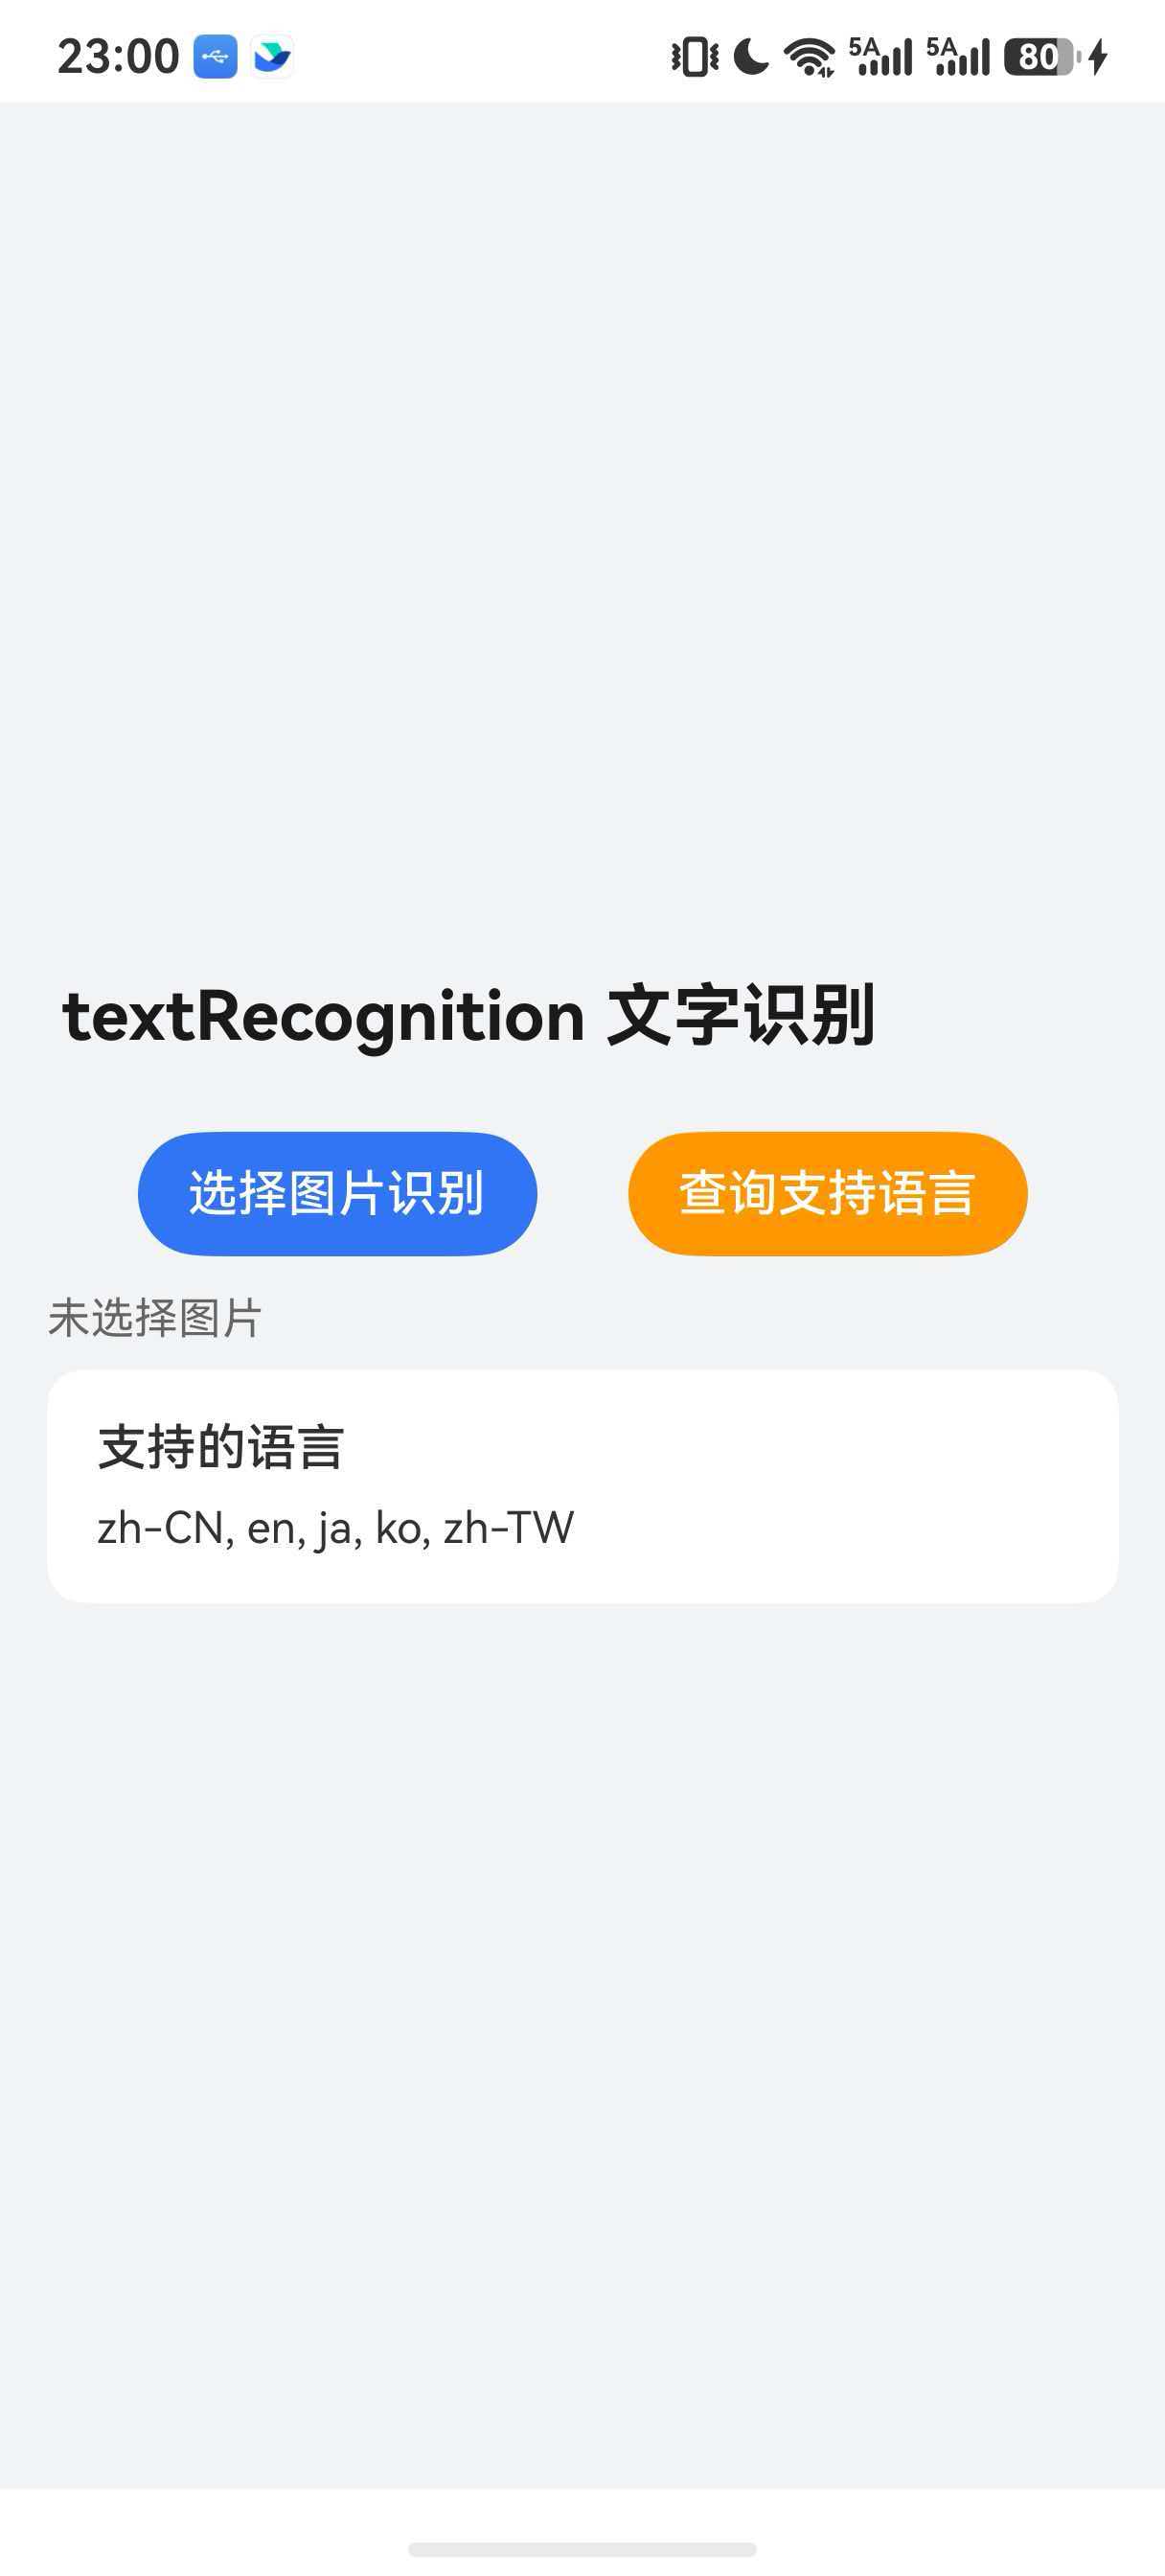
UI 界面如下

文字识别结果如下
语言识别结果如下
先记住这条链路
完整流程可以压缩成下面 6 步:
- 用
PhotoViewPicker选择图片,拿到file://URI。 - 通过
fileIo.openSync()打开 URI,拿到文件描述符fd。 - 用
fd创建ImageSource,再生成RGBA_8888格式的PixelMap。 - API 12 及以上先调用
textRecognition.init()。 - 保证
PixelMap一直存活到recognizeText()完成。 - 识别结束后按顺序释放
PixelMap、文件和 OCR 引擎资源。
后面所有代码,都是围绕这条链路展开的。
开始之前:导入和权限
用 textRecognition 需要从 @kit.CoreVisionKit 导入。图片处理用 @kit.ImageKit,选图用 @kit.CoreFileKit 的 picker,读文件也要 @kit.CoreFileKit 的 fileIo:
import { textRecognition } from '@kit.CoreVisionKit'
import { image } from '@kit.ImageKit'
import { picker } from '@kit.CoreFileKit'
import { fileIo as fs } from '@kit.CoreFileKit'
import { BusinessError } from '@kit.BasicServicesKit'
权限方面,用 PhotoViewPicker 选图不需要额外权限,picker 自己处理了。module.json5 里已有的 READ_IMAGEVIDEO 权限在 API 12+ 上其实也不需要了。如果你直接用 photoAccessHelper 访问相册而不是用 picker,那才需要。
如下图所示直接访问我的本地相册

先把图片正确交给 OCR
选图:picker 返回的 URI 不能直接用
选图这部分本身不难,用 PhotoViewPicker 就行:
const options = new picker.PhotoSelectOptions()
options.MIMEType = picker.PhotoViewMIMETypes.IMAGE_TYPE
options.maxSelectNumber = 1
const photoPicker = new picker.PhotoViewPicker()
const result: picker.PhotoSelectResult = await photoPicker.select(options)
const imageUri: string = result.photoUris[0]
拿到 imageUri 之后,关键问题来了。
坑 1:createImageSource(imageUri) 报路径错误
picker 返回的 URI 长这样:file://media/Photo/1925/IMG_xxx.jpg。很多人直接拿这个字符串传给 image.createImageSource(imageUri),然后报错:
path (media/Photo/1925/...) to realpath error: No such file or directory
[FileSourceStream] input the file path exception, errno:2.
CreateImageSourceExec error
原因是 createImageSource(path) 接受的是沙箱文件路径,不是 file:// URI。picker 返回的 URI 需要通过 fileIo 打开拿到 fd,再用 fd 创建 ImageSource:
const file: fs.File = fs.openSync(imageUri, fs.OpenMode.READ_ONLY)
const source: image.ImageSource = image.createImageSource(file.fd)
用完 fd 记得关:
fs.closeSync(file)
但是,closeSync 的时机有讲究——必须在 createPixelMap 完成之后再关。因为 createPixelMap 是异步的,fd 提前关了,PixelMap 数据就丢了。这个生命周期问题,也是华为开发者论坛相关问题中反复出现的排查重点,建议结合论坛问题与解决记录一起看。
OCR 引擎:API 12 之后必须初始化
这是第二个坑,也是最容易踩的。
坑 2:跳过 init() 直接调 recognizeText 报错 1001400001
在 API 12 之前,textRecognition 没有 init() 方法,直接调 recognizeText 就行。但从 API 12(HarmonyOS 5.0)开始,必须先调 init() 初始化引擎,否则报错:
BusinessError 1001400001: Failed to run OCR, please try again.
正确做法:
const initResult: boolean = await textRecognition.init()
if (!initResult) {
  // 初始化失败,设备可能不支持 OCR
  return
}
init() 返回 Promise<boolean>,true 表示成功。如果返回 false 或抛异常,说明当前设备不支持 OCR 能力。
页面销毁时记得释放:
aboutToDisappear(): void {
  textRecognition.release()
}
这一步很关键,不 release 的话 OCR 引擎资源不会被回收,多次进出页面可能内存泄漏。
PixelMap:格式不对,结果可能直接为空
图片加载到 PixelMap 这步是第三个坑的高发区。
坑 3:PixelMap 格式不是 RGBA_8888,识别结果为空
textRecognition 的 VisionInfo 接口只支持 RGBA_8888 格式的 PixelMap。如果你不指定格式,createPixelMap 默认可能返回 BGRA_8888 或其他格式,调用 recognizeText 不会报错,但返回的 value 是空字符串。
必须在 DecodingOptions 里显式指定:
const imageInfo: image.ImageInfo = await source.getImageInfo()
const decodingOptions: image.DecodingOptions = {
  editable: true,
  desiredPixelFormat: image.PixelMapFormat.RGBA_8888,
  desiredSize: { width: imageInfo.size.width, height: imageInfo.size.height }
}
const pm: image.PixelMap = await source.createPixelMap(decodingOptions)
这里有两点要注意:
editable: true——PixelMap 需要可编辑,某些后续操作(比如方向校正)可能会需要desiredSize保留原始尺寸——不要在这里压缩图片,OCR 对分辨率敏感,压缩后再识别准确率会下降
如果你想预览缩略图,可以单独创建一个小尺寸的 PixelMap 给 UI 展示用,OCR 用原始尺寸的。
fd 的生命周期:异步操作没结束,文件不能关
前面说过,fs.openSync 拿到的 fd 必须在 createPixelMap 完成后才能关。把完整流程放在一起看:
let file: fs.File | undefined = undefined
let source: image.ImageSource | undefined = undefined
try {
  // 1. 通过 URI 打开文件,拿到 fd
  file = fs.openSync(imageUri, fs.OpenMode.READ_ONLY)
  // 2. 用 fd 创建 ImageSource
  source = image.createImageSource(file.fd)
  // 3. 创建 RGBA_8888 格式的 PixelMap(异步操作)
  const pm: image.PixelMap = await source.createPixelMap(decodingOptions)
  this.pixelMapForOCR = pm

  // 4. 再创建一个缩略图给 UI 预览
  this.previewPixelMap = await source.createPixelMap(previewOpts)
} catch (e) {
  // 异常时也要关 fd
  if (file !== undefined) {
    fs.closeSync(file)
  }
  return
}
// 5. createPixelMap 都完成了,安全关闭 fd
if (file !== undefined) {
  fs.closeSync(file)
}
划重点:closeSync 一定要在所有 createPixelMap 的 await 之后。如果提前关了 fd,PixelMap 里就是空数据,OCR 识别出来自然是空的。
调用 recognizeText:结果怎么拿、怎么定位
前面四步都做对了,这一步就简单了:
const visionInfo: textRecognition.VisionInfo = { pixelMap: this.pixelMapForOCR }
const config: textRecognition.TextRecognitionConfiguration = {
  isDirectionDetectionSupported: true
}
const ocrResult: textRecognition.TextRecognitionResult =
  await textRecognition.recognizeText(visionInfo, config)
isDirectionDetectionSupported 建议设为 true。手机拍发票经常是歪的或倒着的,开启方向检测能自动纠正。如果你能确定图片方向是正的,设 false 可以提升性能。
识别结果的数据结构
TextRecognitionResult 是个嵌套结构:
TextRecognitionResult
  ├── value: string          // 全部识别文本,拼成一个字符串
  └── blocks: TextBlock[]    // 文本块数组
        ├── value: string    // 该块的文本
        └── lines: TextLine[]  // 行数组
              ├── value: string    // 该行的文本
              └── words: TextWord[]  // 词数组
                    ├── value: string        // 该词的文本
                    └── cornerPoints: PixelPoint[]  // 四角坐标
最常用的就是 result.value,直接拿到全部文字。如果你需要按块或按行定位(比如发票上提取某个字段),就遍历 blocks 和 lines:
const blocks: Array<textRecognition.TextBlock> = ocrResult.blocks
for (let i = 0; i < blocks.length; i++) {
  const block: textRecognition.TextBlock = blocks[i]
  console.info(`块${i + 1}: ${block.value}`)
  const lines: Array<textRecognition.TextLine> = block.lines
  for (let j = 0; j < lines.length; j++) {
    console.info(`  行${j + 1}: ${lines[j].value}`)
  }
}
每个 TextWord 还带有 cornerPoints(四个角的像素坐标),可以用来在图上画框高亮。
识别结果只有一半?先查 PixelMap 是否被提前释放
隐藏原因:结果只有一半
还有一种情况:识别结果只出来一部分,或者明明有文字却显示"未识别"。
排查后发现,是 PixelMap 在识别完成前被 release() 了。比如在 aboutToAppear 里创建了 PixelMap,识别还没跑完,页面切换触发 aboutToDisappear 把 PixelMap 释放了,recognizeText 还在用这块内存,结果就是数据不完整。
解决办法:PixelMap 的生命周期必须覆盖整个识别过程。在我的代码里,pixelMapForOCR 作为组件的私有成员,只在下一次选图时才释放上一张:
// 释放上一张的 PixelMap
if (this.pixelMapForOCR !== undefined) {
  this.pixelMapForOCR.release()
  this.pixelMapForOCR = undefined
}
页面销毁时才释放当前这张:
aboutToDisappear(): void {
  if (this.pixelMapForOCR !== undefined) {
    this.pixelMapForOCR.release()
  }
  textRecognition.release()
}
完整代码:把整条链路串起来
把上面所有步骤串起来,下面是通用文字识别的核心逻辑。我把完整代码贴出来,方便你直接对照:
 import { textRecognition } from '@kit.CoreVisionKit'
import { image } from '@kit.ImageKit'
import { picker } from '@kit.CoreFileKit'
import { fileIo as fs } from '@kit.CoreFileKit'
import { BusinessError } from '@kit.BasicServicesKit'

@Entry
@Component
struct Qa4 {
  @State recognizedText: string = ''
  @State statusMsg: string = '点击按钮选择图片进行文字识别'
  @State isRecognizing: boolean = false
  @State previewPixelMap: image.PixelMap | undefined = undefined
  @State blockDetails: string = ''
  @State supportedLangs: string = ''

  private pixelMapForOCR: image.PixelMap | undefined = undefined

  aboutToDisappear(): void {
    if (this.pixelMapForOCR !== undefined) {
      this.pixelMapForOCR.release()
    }
    if (this.previewPixelMap !== undefined) {
      this.previewPixelMap.release()
    }
    textRecognition.release()
  }

  private async pickAndRecognize(): Promise<void> {
    if (this.isRecognizing) {
      return
    }
    this.isRecognizing = true
    this.recognizedText = ''
    this.blockDetails = ''
    this.statusMsg = '选择图片中...'

    let imageUri: string = ''
    try {
      const options = new picker.PhotoSelectOptions()
      options.MIMEType = picker.PhotoViewMIMETypes.IMAGE_TYPE
      options.maxSelectNumber = 1
      const photoPicker = new picker.PhotoViewPicker()
      const result: picker.PhotoSelectResult = await photoPicker.select(options)
      if (result.photoUris.length === 0) {
        this.statusMsg = '未选择图片'
        this.isRecognizing = false
        return
      }
      imageUri = result.photoUris[0]
    } catch (e) {
      const err = e as BusinessError
      this.statusMsg = `选择图片失败: ${err.code}`
      this.isRecognizing = false
      return
    }

    this.statusMsg = '正在初始化 OCR 引擎...'

    try {
      const initResult: boolean = await textRecognition.init()
      if (!initResult) {
        this.statusMsg = 'OCR 引擎初始化失败'
        this.isRecognizing = false
        return
      }
    } catch (e) {
      const err = e as BusinessError
      this.statusMsg = `OCR init 失败: ${err.code}`
      this.isRecognizing = false
      return
    }

    this.statusMsg = '正在加载图片...'

    if (this.pixelMapForOCR !== undefined) {
      this.pixelMapForOCR.release()
      this.pixelMapForOCR = undefined
    }
    if (this.previewPixelMap !== undefined) {
      this.previewPixelMap.release()
      this.previewPixelMap = undefined
    }

    let file: fs.File | undefined = undefined
    let source: image.ImageSource | undefined = undefined
    try {
      file = fs.openSync(imageUri, fs.OpenMode.READ_ONLY)
      source = image.createImageSource(file.fd)

      const imageInfo: image.ImageInfo = await source.getImageInfo()
      const decodingOptions: image.DecodingOptions = {
        editable: true,
        desiredPixelFormat: image.PixelMapFormat.RGBA_8888,
        desiredSize: { width: imageInfo.size.width, height: imageInfo.size.height }
      }
      const pm: image.PixelMap = await source.createPixelMap(decodingOptions)
      this.pixelMapForOCR = pm

      const previewOpts: image.DecodingOptions = {
        editable: false,
        desiredSize: { width: 360, height: 360 }
      }
      try {
        this.previewPixelMap = await source.createPixelMap(previewOpts)
      } catch (_) {
        this.previewPixelMap = pm
      }
    } catch (e) {
      const err = e as BusinessError
      this.statusMsg = `图片加载失败: ${err.code} - ${err.message}`
      if (file !== undefined) {
        fs.closeSync(file)
      }
      this.isRecognizing = false
      return
    }

    if (file !== undefined) {
      fs.closeSync(file)
    }

    this.statusMsg = '正在识别文字...'

    try {
      const visionInfo: textRecognition.VisionInfo = { pixelMap: this.pixelMapForOCR as image.PixelMap }
      const config: textRecognition.TextRecognitionConfiguration = { isDirectionDetectionSupported: true }
      const ocrResult: textRecognition.TextRecognitionResult = await textRecognition.recognizeText(visionInfo, config)

      const fullText: string = ocrResult.value
      if (fullText.length === 0) {
        this.recognizedText = '(未识别到文字)'
        this.statusMsg = '识别完成,但结果为空'
        this.isRecognizing = false
        return
      }

      this.recognizedText = fullText
      this.statusMsg = `识别完成,共 ${fullText.length} 字符,${ocrResult.blocks.length} 个文本块`

      let detail: string = ''
      const blocks: Array<textRecognition.TextBlock> = ocrResult.blocks
      for (let i = 0; i < blocks.length; i++) {
        const block: textRecognition.TextBlock = blocks[i]
        detail += `【块${i + 1}】${block.value}\n`
        const lines: Array<textRecognition.TextLine> = block.lines
        for (let j = 0; j < lines.length; j++) {
          const line: textRecognition.TextLine = lines[j]
          detail += `  行${j + 1}: ${line.value}\n`
        }
      }
      this.blockDetails = detail
    } catch (e) {
      const err = e as BusinessError
      this.statusMsg = `识别失败: ${err.code} - ${err.message}`
      this.recognizedText = ''
    }

    this.isRecognizing = false
  }

  private async querySupportedLanguages(): Promise<void> {
    try {
      const langs: Array<string> = await textRecognition.getSupportedLanguages()
      this.supportedLangs = langs.join(', ')
    } catch (e) {
      const err = e as BusinessError
      this.supportedLangs = `查询失败: ${err.code}`
    }
  }

  build() {
    Scroll() {
      Column() {
        Text('textRecognition 文字识别')
          .fontSize(22)
          .fontWeight(FontWeight.Bold)
          .fontColor('#1A1A1A')
          .width('100%')
          .padding({ left: 20, right: 20, top: 20, bottom: 8 })

        Row() {
          Button('选择图片识别')
            .type(ButtonType.Capsule)
            .backgroundColor('#3274F6')
            .fontColor(Color.White)
            .enabled(!this.isRecognizing)
            .onClick(() => {
              this.pickAndRecognize()
            })

          Button('查询支持语言')
            .type(ButtonType.Capsule)
            .backgroundColor('#FF9800')
            .fontColor(Color.White)
            .onClick(() => {
              this.querySupportedLanguages()
            })
        }
        .width('92%')
        .justifyContent(FlexAlign.SpaceEvenly)
        .margin({ top: 16 })

        Text(this.statusMsg)
          .fontSize(14)
          .fontColor('#666666')
          .width('92%')
          .margin({ top: 12 })
          .maxLines(6)
          .textOverflow({ overflow: TextOverflow.Ellipsis })

        if (this.previewPixelMap !== undefined) {
          Image(this.previewPixelMap)
            .width('92%')
            .height(240)
            .objectFit(ImageFit.Contain)
            .borderRadius(12)
            .margin({ top: 12 })
            .backgroundColor('#F5F5F5')
        }

        if (this.recognizedText.length > 0) {
          Column() {
            Text('识别结果')
              .fontSize(16)
              .fontWeight(FontWeight.Medium)
              .margin({ bottom: 8 })

            Text(this.recognizedText)
              .fontSize(14)
              .fontColor('#333333')
              .lineHeight(22)
              .width('100%')
              .maxLines(20)
              .textOverflow({ overflow: TextOverflow.Ellipsis })
              .copyOption(CopyOptions.LocalDevice)
          }
          .width('92%')
          .padding(16)
          .backgroundColor(Color.White)
          .borderRadius(12)
          .margin({ top: 12 })
          .alignItems(HorizontalAlign.Start)
        }

        if (this.blockDetails.length > 0) {
          Column() {
            Text('分块详情')
              .fontSize(16)
              .fontWeight(FontWeight.Medium)
              .margin({ bottom: 8 })

            Text(this.blockDetails)
              .fontSize(12)
              .fontColor('#555555')
              .lineHeight(20)
              .width('100%')
              .maxLines(30)
              .textOverflow({ overflow: TextOverflow.Ellipsis })
          }
          .width('92%')
          .padding(16)
          .backgroundColor(Color.White)
          .borderRadius(12)
          .margin({ top: 8 })
          .alignItems(HorizontalAlign.Start)
        }

        if (this.supportedLangs.length > 0) {
          Column() {
            Text('支持的语言')
              .fontSize(16)
              .fontWeight(FontWeight.Medium)
              .margin({ bottom: 8 })

            Text(this.supportedLangs)
              .fontSize(14)
              .fontColor('#333333')
              .width('100%')
          }
          .width('92%')
          .padding(16)
          .backgroundColor(Color.White)
          .borderRadius(12)
          .margin({ top: 8, bottom: 24 })
          .alignItems(HorizontalAlign.Start)
        }
      }
      .width('100%')
    }
    .scrollBar(BarState.Auto)
    .edgeEffect(EdgeEffect.Spring)
    .width('100%')
    .height('100%')
    .backgroundColor('#F2F3F5')
  }
}
出错时怎么查:错误码速查
识别过程中可能遇到的 BusinessError:
| 错误码 | 含义 | 常见原因 |
|---|---|---|
| 200 | 运行超时 | 图片太大,缩小后重试 |
| 401 | 参数检查失败 | VisionInfo 里的 PixelMap 为空或格式不对 |
| 1001400001 | OCR 运行失败 | 没调 init()、PixelMap 已释放、格式非 RGBA_8888 |
| 1001400002 | OCR 服务异常 | 引擎内部错误,重启应用重试 |
支持哪些语言
textRecognition 目前支持简体中文、英文、日文、韩文、繁体中文。可以通过 getSupportedLanguages() 查询当前设备实际支持的语言列表:
const langs: Array<string> = await textRecognition.getSupportedLanguages()
返回 ['zh-CN', 'en', 'ja', 'ko', 'zh-TW'] 之类的数组。不同设备可能不同,最好运行时查一下。
写在最后
回头看,textRecognition 的 API 本身并不复杂,真正让人卡住的是数据和资源的交接:
- URI 不能直接当路径,要通过
fileIo.openSync转 fd - 必须先
init(),API 12 新增的要求,官方文档更新了但很多人没注意到 - PixelMap 格式必须是
RGBA_8888,不指定就可能是别的格式,识别结果为空 - fd 和 PixelMap 的生命周期,提前关 fd 或释放 PixelMap 都会导致识别失败或结果不完整
把这四点搞对了,textRecognition基本就能稳定跑通。发票、名片、截图提取文字都不在话下。

讨论HarmonyOS开发技术,专注于API与组件、DevEco Studio、测试、元服务和应用上架分发等。
更多推荐


 5
5 0
0- 0


 已为社区贡献397条内容

所有评论(0)