【共创稿事节】HarmonyOS7 ArkGraphics 3D 动态增删 Node 时,场景树与组件树 Diff 怎么对齐才不拖垮布局性能
文章目录
前言
ArkGraphics 3D 的自定义场景模式下,开发者通过 Scene API 管理场景树(Camera、Light、Geometry 等 Node),再通过 Component3D 把场景渲染到 ArkUI 界面上。问题来了:3D 场景树里的 Node 动态增删是常态——添加新几何体、移除临时对象、克隆已有节点——但 ArkUI 的声明式布局有一套自己的组件树 Diff 机制。如果每次增删 Node 都触发外层组件树的大范围重组,布局性能就会被拖垮。
这个问题的根因在于:3D 引擎的场景树和 ArkUI 的组件树是两套独立的树结构,它们的生命周期和更新机制完全不同。场景树的 Node 增删发生在引擎层,不需要也不应该驱动 ArkUI 组件树的重建。但如果你把 Scene 对象或 Node 引用装饰了 @State,ArkUI 就会把引擎层的变更当状态变更来处理,触发不必要的组件 Diff。
这篇文章用一份完整代码演示三个核心要点:
- Scene 引用不装饰 @State,3D 节点增删不触发 ArkUI 重组
- 仅最小状态桥接,只有 Component3D 渲染所需的
SceneOptions和 UI 展示所需的数据才用@State - 3D 节点 CRUD 走 Scene API,与 ArkUI 组件树完全解耦
同时顺带解决自定义场景模式的两个实际痛点:Component3D 没有内置手势控制(需要自己实现相机轨道)和节点删除路径查找不准(直接存 Node 引用比路径查找可靠)。
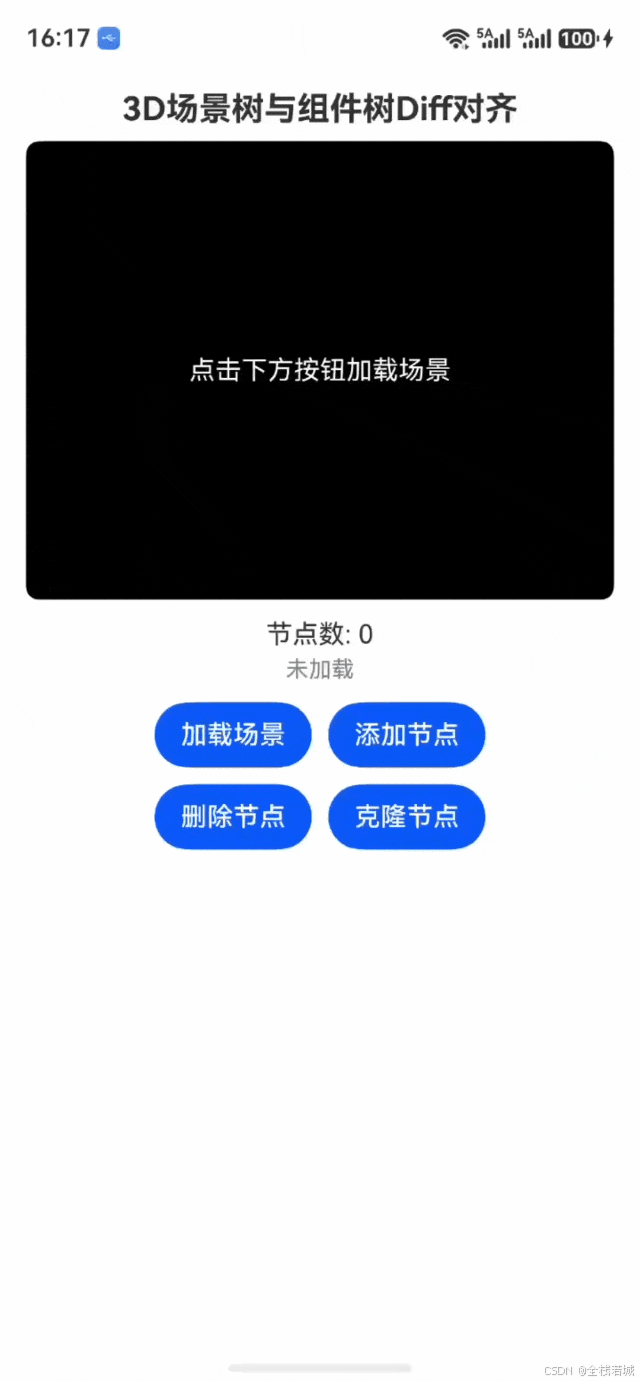
效果预览
问题分析:场景树更新为什么会影响组件树
先看一个典型错误写法:
// ❌ 错误:Scene 引用装饰了 @State
@State scene: Scene | null = null
@State nodeCount: number = 0
@State 的观测机制是:被装饰的变量发生赋值时,框架标记对应组件为"脏组件",在下一次 Vsync 信号到来时重新执行 build(),对组件树做 Diff。
当你做 this.scene.root.children.append(newNode) 时,scene 本身的引用没变,@State 不会触发刷新——这看起来没问题。但如果你为了同步 UI 显示(比如节点数量),在增删 Node 后手动改了某个 @State 变量,而 @State scene 也在 build() 中被 Component3D 读取,那么框架会重建整个 build() 区域,包括 Component3D。这就是性能损耗的来源。
更危险的是把 Node 数组做成 @State:
// ❌ 错误:Node 数组装饰了 @State,每次增删都触发重建
@State nodes: Node[] = []
Node 增删时 nodes 引用变化,触发 build() 重建,Component3D 被重新创建——3D 渲染上下文可能丢失。
正确做法:Scene 和 Node 引用放在非 @State 的私有成员上,只用 @State 桥接渲染和展示所需的最小数据。
核心设计:状态分层
┌─────────────────────────────────────┐
│  ArkUI 组件树(@State 驱动 Diff)     │
│  sceneOpt: SceneOptions  ← 渲染入口  │
│  nodeCount: number       ← 展示数据  │
│  statusText: string      ← 展示数据  │
├─────────────────────────────────────┤
│  3D 场景树(Scene API 驱动,不触发 Diff)│
│  scene: Scene | null      ← 不装饰@State │
│  camera: Camera | null    ← 不装饰@State │
│  nodeRegistry: Item[]     ← 不装饰@State │
└─────────────────────────────────────┘
- @State 层:只放 Component3D 渲染需要的
sceneOpt和 UI 显示需要的nodeCount、statusText。这三个变量的赋值频率极低——sceneOpt只在场景初始化时赋值一次,nodeCount和statusText在增删操作后更新,但不涉及 3D 对象的重建 - 非 @State 层:Scene、Camera、Node 引用全部放在
private成员上,增删操作直接调 Scene API(createNode、children.remove、cloneNode),不触发 ArkUI 重组
这样,3D 场景树的增删和 ArkUI 组件树的 Diff 就完全解耦了。
完整源码
下面是完整的可运行代码。你需要准备一个 .glb 格式的 3D 模型文件放入 resources/rawfile/ 目录,代码中用 decece.glb 作为示例文件名,替换成你自己的文件名即可。
import {
  Scene, SceneResourceParameters, SceneResourceFactory, SceneNodeParameters, Node, Container,
  Camera, Light, LightType, CubeGeometry, Geometry, Vec3, Quaternion
} from '@kit.ArkGraphics3D';

interface SceneNodeItem {
  node: Node
}

function vec3Sub(l: Vec3, r: Vec3): Vec3 {
  return { x: l.x - r.x, y: l.y - r.y, z: l.z - r.z }
}

function vec3Dot(l: Vec3, r: Vec3): number {
  return l.x * r.x + l.y * r.y + l.z * r.z
}

function vec3Cross(l: Vec3, r: Vec3): Vec3 {
  return { x: l.y * r.z - l.z * r.y, y: l.z * r.x - l.x * r.z, z: l.x * r.y - l.y * r.x }
}

function vec3Normalize(v: Vec3): Vec3 {
  let len: number = Math.sqrt(vec3Dot(v, v))
  if (len < 0.0001) {
    return { x: 0, y: 0, z: 1 }
  }
  return { x: v.x / len, y: v.y / len, z: v.z / len }
}

function lookAtRotation(eye: Vec3, target: Vec3, up: Vec3): Quaternion {
  let f: Vec3 = vec3Normalize(vec3Sub(target, eye))
  let r: Vec3 = vec3Normalize(vec3Cross(f, up))
  let u: Vec3 = vec3Cross(r, f)
  let m0: number = r.x
  let m1: number = r.y
  let m2: number = r.z
  let m3: number = u.x
  let m4: number = u.y
  let m5: number = u.z
  let m6: number = -f.x
  let m7: number = -f.y
  let m8: number = -f.z
  let t: number
  let q: Quaternion = { x: 0, y: 0, z: 0, w: 0 }
  if (m8 < 0) {
    if (m0 > m4) {
      t = 1.0 + m0 - m4 - m8
      q = { x: t, y: m1 + m3, z: m6 + m2, w: m5 - m7 }
    } else {
      t = 1.0 - m0 + m4 - m8
      q = { x: m1 + m3, y: t, z: m5 + m7, w: m6 - m2 }
    }
  } else {
    if (m0 < -m4) {
      t = 1.0 - m0 - m4 + m8
      q = { x: m6 + m2, y: m5 + m7, z: t, w: m1 - m3 }
    } else {
      t = 1.0 + m0 + m4 + m8
      q = { x: m5 - m7, y: m6 - m2, z: m1 - m3, w: t }
    }
  }
  let s: number = 0.5 / Math.sqrt(t)
  return { x: q.x * s, y: q.y * s, z: q.z * s, w: q.w * s }
}

@Entry
@Component
struct Qa23 {
  private scene: Scene | null = null
  private resourceFactory: SceneResourceFactory | null = null
  private camera: Camera | null = null
  private camDistance: number = 6
  private camTheta: number = 0
  private camPhi: number = Math.PI / 3
  private panStartTheta: number = 0
  private panStartPhi: number = 0
  private pinchStartDist: number = 6
  @State sceneOpt: SceneOptions | null = null
  @State nodeCount: number = 0
  @State statusText: string = '未加载'
  private nodeRegistry: SceneNodeItem[] = []

  private updateCameraPosition(): void {
    if (this.camera === null) {
      return
    }
    let x: number = this.camDistance * Math.sin(this.camPhi) * Math.sin(this.camTheta)
    let y: number = this.camDistance * Math.cos(this.camPhi)
    let z: number = this.camDistance * Math.sin(this.camPhi) * Math.cos(this.camTheta)
    let eye: Vec3 = { x: x, y: y, z: z }
    let target: Vec3 = { x: 0, y: 0, z: 0 }
    let up: Vec3 = { x: 0, y: 1, z: 0 }
    this.camera.position = eye
    this.camera.rotation = lookAtRotation(eye, target, up)
  }

  private async initScene(): Promise<void> {
    if (this.scene !== null) {
      return
    }
    try {
      this.scene = await Scene.load($rawfile('decece.glb'))
      this.resourceFactory = this.scene.getResourceFactory()

      this.camera = await this.resourceFactory.createCamera({ name: 'mainCamera' } as SceneNodeParameters)
      this.camera.enabled = true
      this.camera.fov = 60 * Math.PI / 180
      this.updateCameraPosition()

      let light: Light = await this.resourceFactory.createLight(
        { name: 'dirLight' } as SceneNodeParameters, LightType.DIRECTIONAL)
      light.enabled = true
      light.color = { r: 1.0, g: 1.0, b: 1.0, a: 1.0 }
      light.intensity = 1.5
      light.position = { x: 2, y: 4, z: 3 }

      let cubeGeom: CubeGeometry = new CubeGeometry()
      cubeGeom.size = { x: 1, y: 1, z: 1 }
      let meshRes = await this.resourceFactory.createMesh({ name: 'cubeMesh' } as SceneResourceParameters, cubeGeom)
      let geoNode: Geometry = await this.resourceFactory.createGeometry(
        { name: 'cubeNode' } as SceneNodeParameters, meshRes)
      geoNode.position = { x: 0, y: 0, z: 0 }

      this.sceneOpt = { scene: this.scene, modelType: ModelType.SURFACE } as SceneOptions
      this.syncNodeCount()
      this.statusText = '场景已加载'
    } catch (err) {
      let e = err as Error
      this.statusText = '加载失败: ' + e.message
    }
  }

  private syncNodeCount(): void {
    if (this.scene === null || this.scene.root === null) {
      this.nodeCount = 0
      return
    }
    this.nodeCount = this.countNodes(this.scene.root)
  }

  private countNodes(node: Node): number {
    let count: number = 1
    let childCount: number = node.children.count()
    for (let i = 0; i < childCount; i++) {
      let child: Node | null = node.children.get(i)
      if (child !== null) {
        count += this.countNodes(child)
      }
    }
    return count
  }

  private async addNode(): Promise<void> {
    if (this.scene === null || this.resourceFactory === null || this.scene.root === null) {
      return
    }
    let nodeName: string = 'dynamic_node_' + (this.nodeRegistry.length + 1)
    let cubeGeom: CubeGeometry = new CubeGeometry()
    cubeGeom.size = { x: 0.5, y: 0.5, z: 0.5 }
    let meshRes = await this.resourceFactory.createMesh(
      { name: nodeName + '_mesh' } as SceneResourceParameters, cubeGeom)
    let geoNode: Geometry = await this.resourceFactory.createGeometry(
      { name: nodeName } as SceneNodeParameters, meshRes)
    geoNode.position = { x: Math.random() * 4 - 2, y: Math.random() * 2, z: Math.random() * 4 - 2 }

    this.nodeRegistry.push({ node: geoNode } as SceneNodeItem)
    this.syncNodeCount()
    this.statusText = '已添加: ' + nodeName
  }

  private removeLastNode(): void {
    if (this.nodeRegistry.length === 0) {
      return
    }
    let lastItem: SceneNodeItem = this.nodeRegistry[this.nodeRegistry.length - 1]
    let targetNode: Node = lastItem.node
    let parentNode: Node | null = targetNode.parent
    if (parentNode !== null) {
      parentNode.children.remove(targetNode)
    }
    this.nodeRegistry.pop()
    this.syncNodeCount()
    this.statusText = '已移除: ' + targetNode.name
  }

  private async cloneFirstChild(): Promise<void> {
    if (this.scene === null || this.scene.root === null) {
      return
    }
    let children: Container<Node> = this.scene.root.children
    if (children.count() === 0) {
      this.statusText = '无可克隆节点'
      return
    }
    let source: Node | null = children.get(0)
    if (source === null) {
      return
    }
    let clonedName: string = 'clone_' + source.name + '_' + (this.nodeRegistry.length + 1)
    let cloned: Node | null = this.scene.cloneNode(source, this.scene.root, clonedName)
    if (cloned !== null) {
      cloned.position = { x: Math.random() * 4 - 2, y: Math.random() * 2, z: 2 }
      this.nodeRegistry.push({ node: cloned } as SceneNodeItem)
      this.syncNodeCount()
      this.statusText = '已克隆: ' + clonedName
    } else {
      this.statusText = '克隆失败'
    }
  }

  build() {
    Column() {
      Text('3D场景树与组件树Diff对齐')
        .fontSize(20)
        .fontWeight(FontWeight.Bold)
        .margin({ top: 16, bottom: 8 })

      if (this.sceneOpt !== null) {
        Component3D(this.sceneOpt)
          .width('100%')
          .height(280)
          .renderWidth('100%')
          .renderHeight('100%')
          .parallelGesture(
            GestureGroup(GestureMode.Exclusive,
              PanGesture({ fingers: 1 })
                .onActionStart(() => {
                  this.panStartTheta = this.camTheta
                  this.panStartPhi = this.camPhi
                })
                .onActionUpdate((event: GestureEvent) => {
                  this.camTheta = this.panStartTheta - event.offsetX * 0.01
                  this.camPhi = this.panStartPhi - event.offsetY * 0.01
                  if (this.camPhi < 0.1) {
                    this.camPhi = 0.1
                  }
                  if (this.camPhi > Math.PI - 0.1) {
                    this.camPhi = Math.PI - 0.1
                  }
                  this.updateCameraPosition()
                }),
              PinchGesture({ fingers: 2 })
                .onActionStart(() => {
                  this.pinchStartDist = this.camDistance
                })
                .onActionUpdate((event: GestureEvent) => {
                  this.camDistance = this.pinchStartDist / event.scale
                  if (this.camDistance < 1) {
                    this.camDistance = 1
                  }
                  if (this.camDistance > 20) {
                    this.camDistance = 20
                  }
                  this.updateCameraPosition()
                })
            )
          )
      } else {
        Column() {
          Text('点击下方按钮加载场景')
            .fontSize(16)
            .fontColor(Color.White)
        }
        .width('100%')
        .height(280)
        .justifyContent(FlexAlign.Center)
        .backgroundColor(Color.Black)
        .borderRadius(8)
      }

      Text('节点数: ' + this.nodeCount.toString())
        .fontSize(16)
        .margin({ top: 12 })

      Text(this.statusText)
        .fontSize(14)
        .fontColor(Color.Gray)
        .margin({ top: 4 })

      Column({ space: 10 }) {
        Row({ space: 10 }) {
          Button('加载场景')
            .onClick(() => {
              this.initScene()
            })
          Button('添加节点')
            .onClick(() => {
              this.addNode()
            })
        }
        Row({ space: 10 }) {
          Button('删除节点')
            .onClick(() => {
              this.removeLastNode()
            })
          Button('克隆节点')
            .onClick(() => {
              this.cloneFirstChild()
            })
        }
      }
      .margin({ top: 12 })
    }
    .width('100%')
    .height('100%')
    .padding({ left: 16, right: 16 })
  }
}
核心代码逐段解读
1. 状态分层:@State 只桥接渲染和展示
private scene: Scene | null = null          // 不装饰 @State
private resourceFactory: SceneResourceFactory | null = null  // 不装饰 @State
private camera: Camera | null = null         // 不装饰 @State
private nodeRegistry: SceneNodeItem[] = []   // 不装饰 @State

@State sceneOpt: SceneOptions | null = null  // 仅此三项用 @State
@State nodeCount: number = 0
@State statusText: string = '未加载'
为什么这样分:
scene、resourceFactory、camera、nodeRegistry是 3D 引擎层的对象,它们的增删改查都走 Scene API,不需要通知 ArkUI 框架。如果装饰@State,每次赋值都会触发 build() 重建,Component3D 被重新创建,3D 渲染上下文可能丢失sceneOpt是 Component3D 的渲染入口,只在场景初始化时赋值一次,之后不再变化。它用@State是为了让 build() 在初始化完成后从"加载中"切换到 Component3DnodeCount和statusText是 UI 展示数据,每次增删操作后更新,但它们的变化只影响两个 Text 组件,不会导致 Component3D 重建
关键原则:SceneOptions 创建后不再修改。SceneOptions 的 scene 属性指向同一个 Scene 实例,场景树内部的 Node 增删不会改变 sceneOpt 的引用,因此不会触发 Component3D 的重建。3D 引擎会在同一帧内感知到场景树的变化并重新渲染,不需要 ArkUI 层的介入。
2. 场景初始化:Scene.load + 创建相机和光源
this.scene = await Scene.load($rawfile('decece.glb'))
this.resourceFactory = this.scene.getResourceFactory()

this.camera = await this.resourceFactory.createCamera({ name: 'mainCamera' } as SceneNodeParameters)
this.camera.enabled = true
this.camera.fov = 60 * Math.PI / 180
this.updateCameraPosition()

let light: Light = await this.resourceFactory.createLight(
  { name: 'dirLight' } as SceneNodeParameters, LightType.DIRECTIONAL)
light.enabled = true
light.color = { r: 1.0, g: 1.0, b: 1.0, a: 1.0 }
light.intensity = 1.5
Scene.load() 加载 glTF 模型文件(.gltf 或 .glb),返回 Scene 实例。自定义场景模式下,框架不会自动创建相机和光源,需要手动通过 SceneResourceFactory 创建。
createCamera 和 createLight 都接收 SceneNodeParameters,至少需要 name 字段。创建后设置相机的位置、FoV 和光源的颜色、强度等属性,3D 场景才能正确渲染。
Component3D 的尺寸控制:
Component3D(this.sceneOpt)
  .width('100%')
  .height(280)
  .renderWidth('100%')
  .renderHeight('100%')
width/height 控制组件在 ArkUI 布局中的尺寸,renderWidth/renderHeight 控制 3D 渲染的分辨率。两者不一致时会自动缩放。这里组件高度 280vp,渲染分辨率跟随组件大小,不会出现拉伸。
3. 动态添加节点:createNode 走 Scene API
private async addNode(): Promise<void> {
  let nodeName: string = 'dynamic_node_' + (this.nodeRegistry.length + 1)
  let cubeGeom: CubeGeometry = new CubeGeometry()
  cubeGeom.size = { x: 0.5, y: 0.5, z: 0.5 }
  let meshRes = await this.resourceFactory.createMesh(
    { name: nodeName + '_mesh' } as SceneResourceParameters, cubeGeom)
  let geoNode: Geometry = await this.resourceFactory.createGeometry(
    { name: nodeName } as SceneNodeParameters, meshRes)
  geoNode.position = { x: Math.random() * 4 - 2, y: Math.random() * 2, z: Math.random() * 4 - 2 }

  this.nodeRegistry.push({ node: geoNode } as SceneNodeItem)
  this.syncNodeCount()
  this.statusText = '已添加: ' + nodeName
}
添加节点的流程:CubeGeometry 定义几何形状 → createMesh 创建网格资源 → createGeometry 创建几何节点并挂到场景树上。整个过程走 Scene API,不触碰任何 @State 变量(除了最后更新展示用的 nodeCount 和 statusText)。
关键点:nodeRegistry 存的是 Node 引用({ node: geoNode }),不是节点名称。这比通过 getNodeByPath 路径查找要可靠得多——路径拼接容易出错,而且路径格式取决于场景树的具体结构,不同模型文件的根节点名称不同,硬编码路径很容易出问题。
4. 动态删除节点:通过 Node 引用直接移除
private removeLastNode(): void {
  let lastItem: SceneNodeItem = this.nodeRegistry[this.nodeRegistry.length - 1]
  let targetNode: Node = lastItem.node
  let parentNode: Node | null = targetNode.parent
  if (parentNode !== null) {
    parentNode.children.remove(targetNode)
  }
  this.nodeRegistry.pop()
  this.syncNodeCount()
  this.statusText = '已移除: ' + targetNode.name
}
Node 的 parent 属性返回父节点引用,children 是 Container<Node> 类型,调用 remove(targetNode) 即可从父节点的子节点容器中移除。整个操作不需要路径查找,不需要遍历场景树,直接通过引用操作,O(1) 完成。
为什么不推荐 getNodeByPath:路径查找依赖场景树的具体层级结构,不同模型的路径不同。而且路径中的节点名称可能包含空格或特殊字符,拼接容易出错。直接存 Node 引用是最可靠的做法。
5. 克隆节点:cloneNode 同场景内复制
let cloned: Node | null = this.scene.cloneNode(source, this.scene.root, clonedName)
Scene.cloneNode 在当前场景内克隆一个节点,三个参数分别是:源节点、目标父节点、新名称。克隆的节点会继承源节点的所有属性(位置、旋转、缩放、网格、材质等),但位置可以重新设置,避免和源节点重叠。
注意 cloneNode 不支持跨场景克隆,源节点和目标父节点必须属于同一个 Scene。
6. 相机轨道控制:球坐标 + lookAt 四元数
自定义场景模式下 Component3D 没有内置手势控制,需要自己实现。这里用球坐标系(theta 水平角、phi 俯仰角、distance 距离)控制相机绕原点旋转:
private updateCameraPosition(): void {
  let x: number = this.camDistance * Math.sin(this.camPhi) * Math.sin(this.camTheta)
  let y: number = this.camDistance * Math.cos(this.camPhi)
  let z: number = this.camDistance * Math.sin(this.camPhi) * Math.cos(this.camTheta)
  let eye: Vec3 = { x: x, y: y, z: z }
  let target: Vec3 = { x: 0, y: 0, z: 0 }
  let up: Vec3 = { x: 0, y: 1, z: 0 }
  this.camera.position = eye
  this.camera.rotation = lookAtRotation(eye, target, up)
}
球坐标转笛卡尔坐标后设置相机位置,再通过 lookAtRotation 计算四元数让相机始终看向原点。这样无论相机绕到哪个角度,模型始终居中显示。
手势处理:
PanGesture({ fingers: 1 })
  .onActionStart(() => {
    this.panStartTheta = this.camTheta
    this.panStartPhi = this.camPhi
  })
  .onActionUpdate((event: GestureEvent) => {
    this.camTheta = this.panStartTheta - event.offsetX * 0.01
    this.camPhi = this.panStartPhi - event.offsetY * 0.01
    // phi 限制在 (0.1, π-0.1),防止翻转到极点
  })

PinchGesture({ fingers: 2 })
  .onActionStart(() => {
    this.pinchStartDist = this.camDistance
  })
  .onActionUpdate((event: GestureEvent) => {
    this.camDistance = this.pinchStartDist / event.scale
    // distance 限制在 [1, 20]
  })
关键设计:在 onActionStart 记录起始状态,onActionUpdate 用 起始值 + 累计偏移 * 系数 计算新值。这是因为 event.offsetX/offsetY 是手势开始到当前的累计偏移,不是每帧的增量。如果用增量累加,速度会越来越快,无法控制。用起始值加偏移的方式,灵敏度恒定,手感稳定。
phi 限制在 (0.1, π-0.1) 防止相机翻转到极点(正上方或正下方),极点处万向锁会导致旋转异常。distance 限制在 [1, 20] 防止相机贴到模型上或飞太远。
7. Node 的 Container API
Node 的子节点操作不使用 getChildren() 返回数组的方式,而是通过 children 属性(Container<Node> 类型)的方法:
| 操作 | API | 说明 |
|---|---|---|
| 获取子节点数量 | node.children.count() | 返回 number |
| 按索引获取子节点 | node.children.get(i) | 返回 Node | null |
| 追加子节点 | node.children.append(child) | 已存在则先移除再插入 |
| 移除子节点 | node.children.remove(child) | 按引用移除 |
| 清空所有子节点 | node.children.clear() | 移除全部 |
| 在兄弟节点后插入 | node.children.insertAfter(item, sibling) | sibling 为 null 时插入开头 |
这些操作都在引擎层完成,不会触发 ArkUI 的组件树 Diff。
总结
ArkGraphics 3D 场景树动态增删 Node 与 ArkUI 组件树 Diff 对齐的核心思路就三条:
- Scene 引用不装饰 @State:
scene、camera、nodeRegistry等引擎层对象放在private成员上,增删操作走 Scene API,不触发 ArkUI 重组 - 仅最小状态桥接:
sceneOpt只在初始化时赋值一次,nodeCount和statusText只影响 Text 组件,不导致 Component3D 重建。SceneOptions 创建后引用不变,3D 引擎内部感知场景树变化并重新渲染,不需要 ArkUI 层介入 - Node 操作用引用不用路径:存 Node 引用比
getNodeByPath路径查找更可靠,parent.children.remove(node)直接移除,O(1) 完成
额外解决了自定义场景模式的两个实际问题:
- Component3D 无内置手势:通过球坐标系 +
lookAtRotation四元数实现轨道控制,PanGesture 旋转、PinchGesture 缩放 - 手势灵敏度失控:在
onActionStart记录起始状态,onActionUpdate用起始值加累计偏移计算,避免增量累加导致的速度失控
这三条原则不仅适用于动态增删 Node,也适用于任何需要 3D 场景与 ArkUI 共存的场景——3D 引擎管自己的树,ArkUI 管自己的树,两者只在渲染入口(SceneOptions)处桥接,互不干扰。

讨论HarmonyOS开发技术,专注于API与组件、DevEco Studio、测试、元服务和应用上架分发等。
更多推荐


 4
4 0
0- 0


 已为社区贡献397条内容

所有评论(0)