【共创稿事节】3D场景中的后处理特效:从Bloom到Tone Mapping
新星共创者
·
目录
- 每日一句正能量
- 摘要
- 一、引言:为什么后处理特效如此重要?
- 二、Bloom特效
- 2.1 Bloom原理
- 2.2 Bloom实现
- 三、SSAO特效
- 3.1 SSAO原理
- 3.2 SSAO实现
- 四、Tone Mapping特效
- 4.1 Tone Mapping原理
- 4.2 Tone Mapping实现
- 五、后处理管线
- 5.1 后处理管线设计
- 5.2 后处理管线实现
- 六、性能优化
- 6.1 性能优化策略
- 6.2 性能优化实现
- 七、实战案例:游戏场景后处理
- 7.1 场景描述
- 7.2 完整后处理配置
- 八、常见问题与解决
- 八、结语:后处理特效是画面质量的"点睛之笔"
每日一句正能量
“把心放宽,把事看远,活得舒坦。”
容纳情绪、原谅他人、释怀过往,提升格局,不囿于眼前得失,以更长的时间维度来评估当下,避免因小失大、急功近利。心境的宽度决定生活的舒适度。
相信"后处理特效是画面质量的点睛之笔"。
摘要
摘要:后处理特效提升画面质量。本文深入探讨3D场景中的后处理特效,从Bloom、SSAO到Tone Mapping,提供HarmonyOS ArkGraphics后处理管线的完整实现方案,帮助开发者打造电影级的视觉效果。
一、引言:为什么后处理特效如此重要?
"画面看起来太平淡了,没有层次感。"
"场景太暗了,细节都看不清。"
"高光部分过曝,细节丢失了。"
后处理特效是提升画面质量的关键技术:
- 增强真实感:模拟真实世界的光学效果
- 提升层次感:通过光影对比增强画面层次
- 统一色调:通过色彩校正统一画面风格
- 优化性能:通过分辨率缩放降低计算量
二、Bloom特效
2.1 Bloom原理
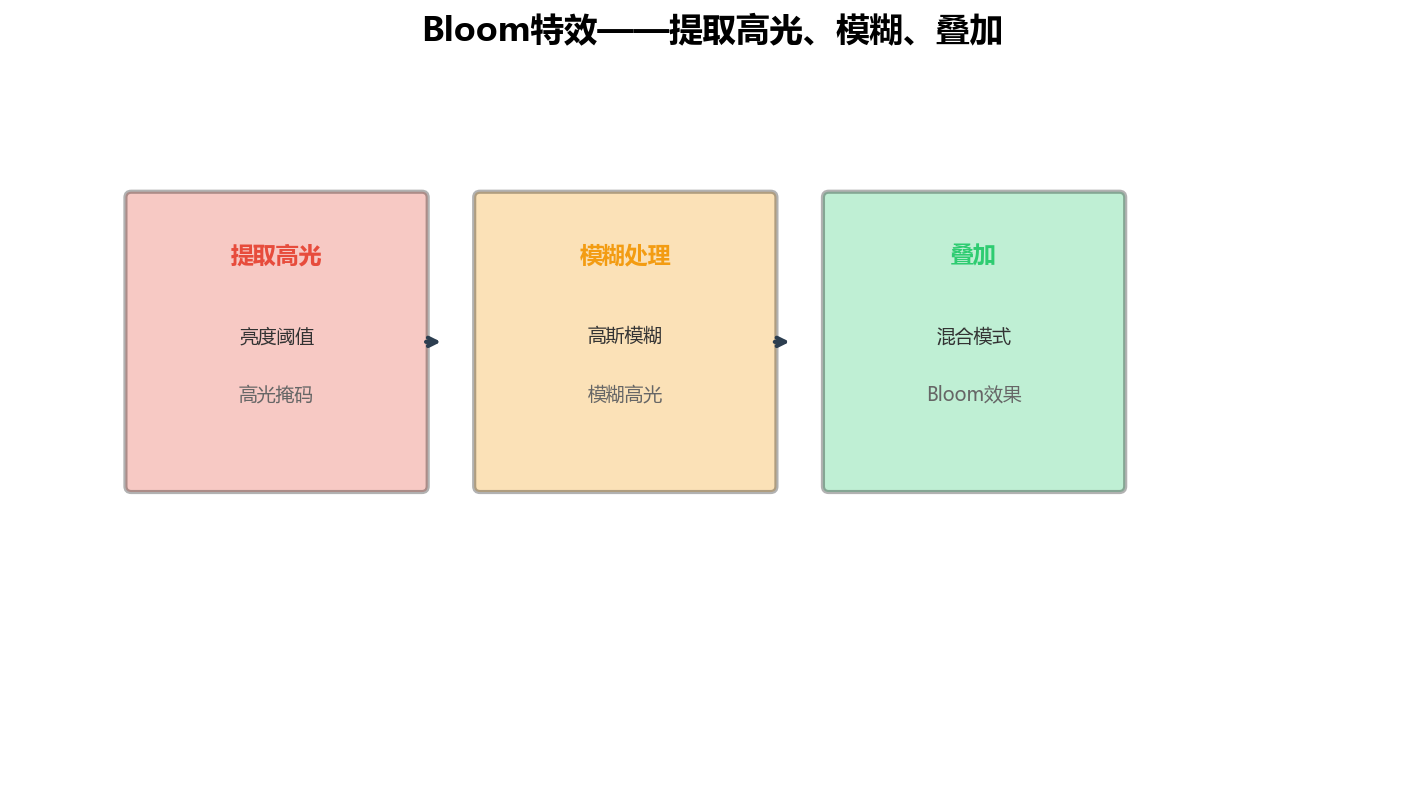
图1:Bloom特效——提取高光、模糊、叠加
| 步骤 | 描述 | 输入 | 输出 |
|---|---|---|---|
| 提取高光 | 提取亮度超过阈值的像素 | 原始画面 | 高光掩码 |
| 模糊处理 | 对高光区域进行高斯模糊 | 高光掩码 | 模糊高光 |
| 叠加 | 将模糊高光叠加到原始画面 | 原始画面 + 模糊高光 | Bloom效果 |
2.2 Bloom实现
// Bloom后处理器
class BloomProcessor {
  private gl: WebGLRenderingContext
  private threshold: number = 0.8
  private intensity: number = 1.0
  private blurRadius: number = 4.0

  constructor(gl: WebGLRenderingContext) {
    this.gl = gl
  }

  // 应用Bloom效果
  apply(inputTexture: WebGLTexture): WebGLTexture {
    // 提取高光
    const highlightTexture = this.extractHighlights(inputTexture)

    // 模糊处理
    const blurredTexture = this.blur(highlightTexture)

    // 叠加
    const resultTexture = this.composite(inputTexture, blurredTexture)

    return resultTexture
  }

  // 提取高光
  private extractHighlights(inputTexture: WebGLTexture): WebGLTexture {
    const gl = this.gl
    const shader = this.getExtractShader()

    gl.useProgram(shader)

    // 设置uniforms
    const thresholdLocation = gl.getUniformLocation(shader, 'u_threshold')
    gl.uniform1f(thresholdLocation, this.threshold)

    // 绑定输入纹理
    gl.activeTexture(gl.TEXTURE0)
    gl.bindTexture(gl.TEXTURE_2D, inputTexture)

    // 绘制全屏四边形
    this.drawFullscreenQuad()

    // 返回结果纹理
    return this.createResultTexture()
  }

  // 模糊处理
  private blur(inputTexture: WebGLTexture): WebGLTexture {
    const gl = this.gl
    const shader = this.getBlurShader()

    gl.useProgram(shader)

    // 设置uniforms
    const radiusLocation = gl.getUniformLocation(shader, 'u_radius')
    gl.uniform1f(radiusLocation, this.blurRadius)

    // 绑定输入纹理
    gl.activeTexture(gl.TEXTURE0)
    gl.bindTexture(gl.TEXTURE_2D, inputTexture)

    // 绘制全屏四边形
    this.drawFullscreenQuad()

    // 返回结果纹理
    return this.createResultTexture()
  }

  // 叠加
  private composite(originalTexture: WebGLTexture, bloomTexture: WebGLTexture): WebGLTexture {
    const gl = this.gl
    const shader = this.getCompositeShader()

    gl.useProgram(shader)

    // 设置uniforms
    const intensityLocation = gl.getUniformLocation(shader, 'u_intensity')
    gl.uniform1f(intensityLocation, this.intensity)

    // 绑定原始纹理
    gl.activeTexture(gl.TEXTURE0)
    gl.bindTexture(gl.TEXTURE_2D, originalTexture)

    // 绑定Bloom纹理
    gl.activeTexture(gl.TEXTURE1)
    gl.bindTexture(gl.TEXTURE_2D, bloomTexture)

    // 绘制全屏四边形
    this.drawFullscreenQuad()

    // 返回结果纹理
    return this.createResultTexture()
  }

  // 获取提取高光着色器
  private getExtractShader(): WebGLProgram {
    // 返回提取高光着色器
    return {} as WebGLProgram
  }

  // 获取模糊着色器
  private getBlurShader(): WebGLProgram {
    // 返回模糊着色器
    return {} as WebGLProgram
  }

  // 获取叠加着色器
  private getCompositeShader(): WebGLProgram {
    // 返回叠加着色器
    return {} as WebGLProgram
  }

  // 绘制全屏四边形
  private drawFullscreenQuad(): void {
    // 绘制全屏四边形的实现
  }

  // 创建结果纹理
  private createResultTexture(): WebGLTexture {
    // 创建结果纹理的实现
    return {} as WebGLTexture
  }
}
三、SSAO特效
3.1 SSAO原理
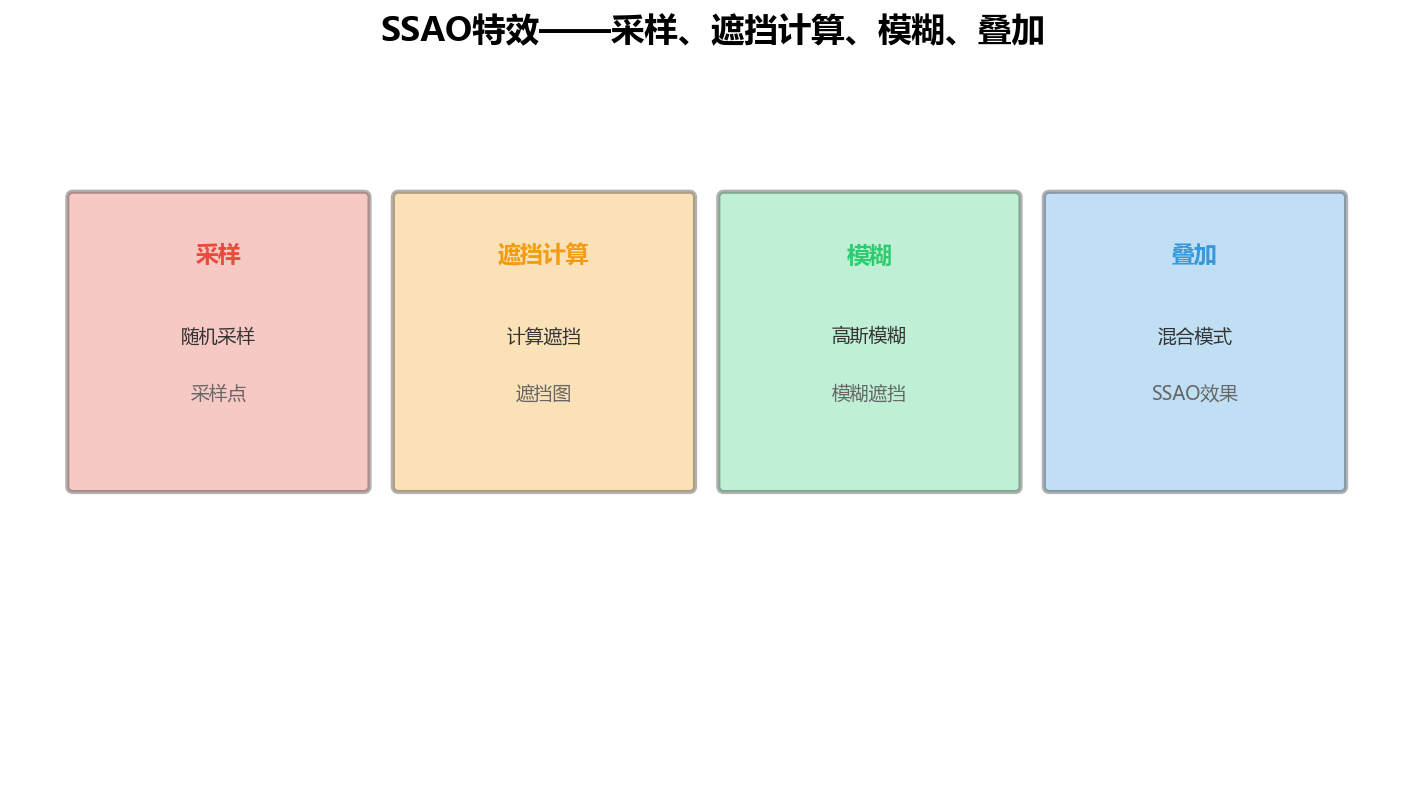
图2:SSAO特效——采样、遮挡计算、模糊、叠加
| 步骤 | 描述 | 输入 | 输出 |
|---|---|---|---|
| 采样 | 在屏幕空间随机采样 | 深度图、法线图 | 采样点 |
| 遮挡计算 | 计算每个像素的遮挡程度 | 采样点 | 遮挡图 |
| 模糊 | 对遮挡图进行模糊 | 遮挡图 | 模糊遮挡 |
| 叠加 | 将遮挡叠加到原始画面 | 原始画面 + 遮挡 | SSAO效果 |
3.2 SSAO实现
// SSAO后处理器
class SSAOProcessor {
  private gl: WebGLRenderingContext
  private sampleCount: number = 16
  private radius: number = 0.5
  private intensity: number = 1.0

  constructor(gl: WebGLRenderingContext) {
    this.gl = gl
  }

  // 应用SSAO效果
  apply(depthTexture: WebGLTexture, normalTexture: WebGLTexture): WebGLTexture {
    // 计算SSAO
    const ssaoTexture = this.computeSSAO(depthTexture, normalTexture)

    // 模糊处理
    const blurredTexture = this.blur(ssaoTexture)

    // 返回结果
    return blurredTexture
  }

  // 计算SSAO
  private computeSSAO(depthTexture: WebGLTexture, normalTexture: WebGLTexture): WebGLTexture {
    const gl = this.gl
    const shader = this.getSSAOShader()

    gl.useProgram(shader)

    // 设置uniforms
    const sampleCountLocation = gl.getUniformLocation(shader, 'u_sampleCount')
    gl.uniform1i(sampleCountLocation, this.sampleCount)

    const radiusLocation = gl.getUniformLocation(shader, 'u_radius')
    gl.uniform1f(radiusLocation, this.radius)

    // 绑定深度图
    gl.activeTexture(gl.TEXTURE0)
    gl.bindTexture(gl.TEXTURE_2D, depthTexture)

    // 绑定法线图
    gl.activeTexture(gl.TEXTURE1)
    gl.bindTexture(gl.TEXTURE_2D, normalTexture)

    // 绘制全屏四边形
    this.drawFullscreenQuad()

    // 返回结果纹理
    return this.createResultTexture()
  }

  // 模糊处理
  private blur(inputTexture: WebGLTexture): WebGLTexture {
    const gl = this.gl
    const shader = this.getBlurShader()

    gl.useProgram(shader)

    // 绑定输入纹理
    gl.activeTexture(gl.TEXTURE0)
    gl.bindTexture(gl.TEXTURE_2D, inputTexture)

    // 绘制全屏四边形
    this.drawFullscreenQuad()

    // 返回结果纹理
    return this.createResultTexture()
  }

  // 获取SSAO着色器
  private getSSAOShader(): WebGLProgram {
    // 返回SSAO着色器
    return {} as WebGLProgram
  }

  // 获取模糊着色器
  private getBlurShader(): WebGLProgram {
    // 返回模糊着色器
    return {} as WebGLProgram
  }

  // 绘制全屏四边形
  private drawFullscreenQuad(): void {
    // 绘制全屏四边形的实现
  }

  // 创建结果纹理
  private createResultTexture(): WebGLTexture {
    // 创建结果纹理的实现
    return {} as WebGLTexture
  }
}
四、Tone Mapping特效
4.1 Tone Mapping原理
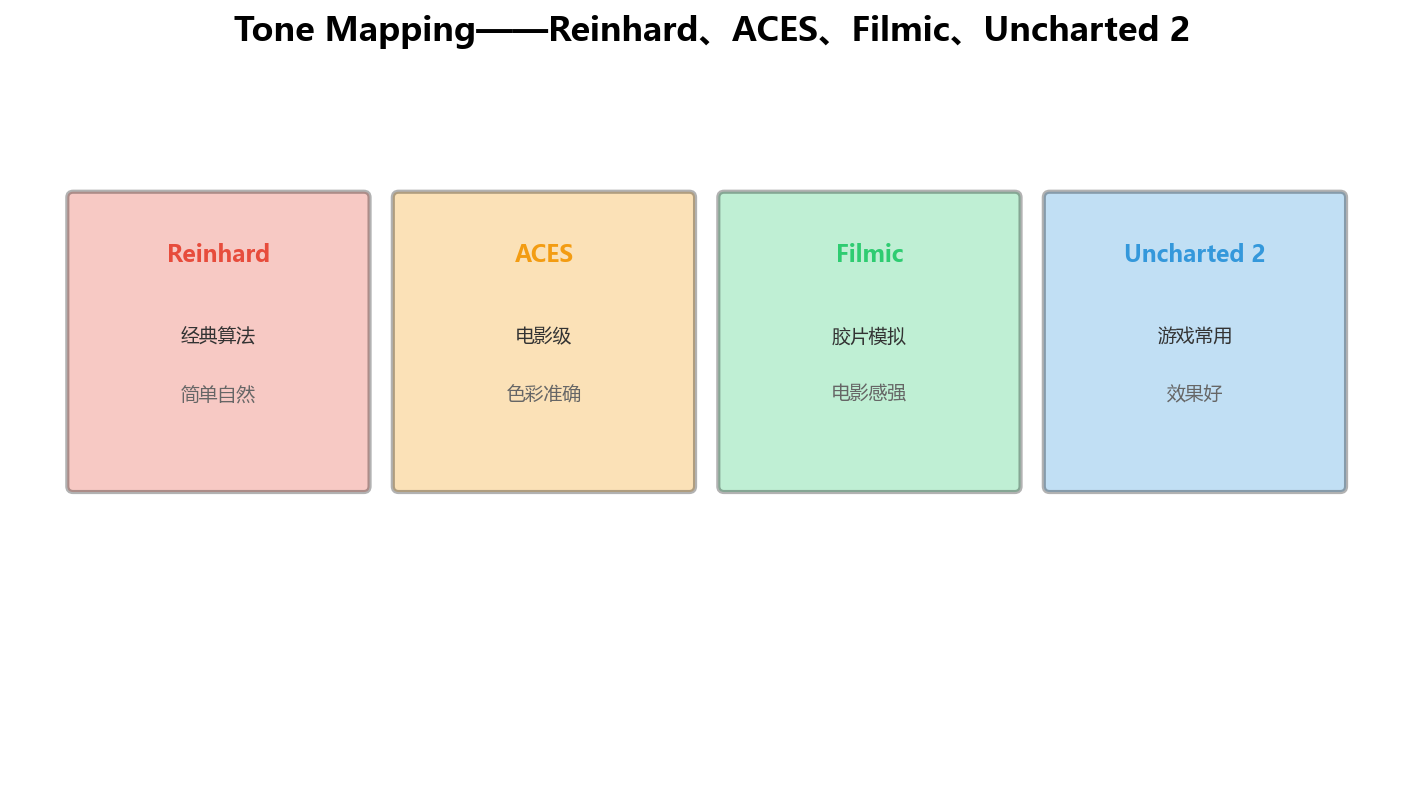
图3:Tone Mapping——Reinhard、ACES、Filmic
| 算法 | 描述 | 优点 | 缺点 |
|---|---|---|---|
| Reinhard | 经典算法 | 简单、自然 | 可能过曝 |
| ACES | 电影级算法 | 色彩准确 | 计算复杂 |
| Filmic | 胶片模拟 | 电影感强 | 参数多 |
| Uncharted 2 | 游戏常用 | 效果好 | 计算复杂 |
4.2 Tone Mapping实现
// Tone Mapping后处理器
class ToneMappingProcessor {
  private gl: WebGLRenderingContext
  private exposure: number = 1.0
  private gamma: number = 2.2

  constructor(gl: WebGLRenderingContext) {
    this.gl = gl
  }

  // 应用Tone Mapping
  apply(inputTexture: WebGLTexture): WebGLTexture {
    const gl = this.gl
    const shader = this.getToneMappingShader()

    gl.useProgram(shader)

    // 设置uniforms
    const exposureLocation = gl.getUniformLocation(shader, 'u_exposure')
    gl.uniform1f(exposureLocation, this.exposure)

    const gammaLocation = gl.getUniformLocation(shader, 'u_gamma')
    gl.uniform1f(gammaLocation, this.gamma)

    // 绑定输入纹理
    gl.activeTexture(gl.TEXTURE0)
    gl.bindTexture(gl.TEXTURE_2D, inputTexture)

    // 绘制全屏四边形
    this.drawFullscreenQuad()

    // 返回结果纹理
    return this.createResultTexture()
  }

  // 获取Tone Mapping着色器
  private getToneMappingShader(): WebGLProgram {
    // 返回Tone Mapping着色器
    return {} as WebGLProgram
  }

  // 绘制全屏四边形
  private drawFullscreenQuad(): void {
    // 绘制全屏四边形的实现
  }

  // 创建结果纹理
  private createResultTexture(): WebGLTexture {
    // 创建结果纹理的实现
    return {} as WebGLTexture
  }
}
五、后处理管线
5.1 后处理管线设计
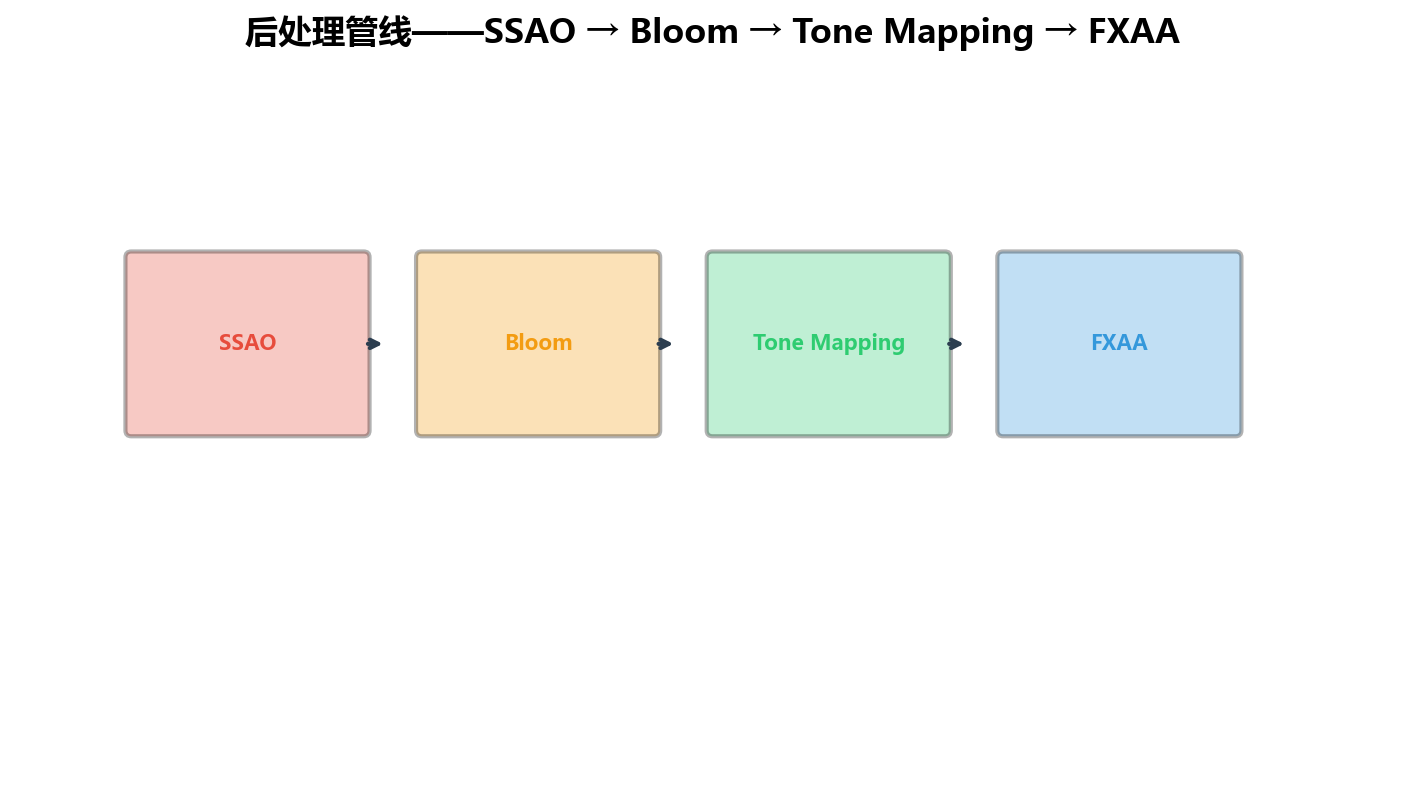
图4:后处理管线——SSAO → Bloom → Tone Mapping → FXAA
| 阶段 | 描述 | 输入 | 输出 |
|---|---|---|---|
| SSAO | 环境光遮蔽 | 深度图、法线图 | 遮挡图 |
| Bloom | 高光泛光 | 原始画面 | Bloom效果 |
| Tone Mapping | 色调映射 | HDR画面 | LDR画面 |
| FXAA | 抗锯齿 | LDR画面 | 最终画面 |
5.2 后处理管线实现
// 后处理管线
class PostProcessPipeline {
  private gl: WebGLRenderingContext
  private bloomProcessor: BloomProcessor
  private ssaoProcessor: SSAOProcessor
  private toneMappingProcessor: ToneMappingProcessor

  constructor(gl: WebGLRenderingContext) {
    this.gl = gl
    this.bloomProcessor = new BloomProcessor(gl)
    this.ssaoProcessor = new SSAOProcessor(gl)
    this.toneMappingProcessor = new ToneMappingProcessor(gl)
  }

  // 执行后处理
  execute(sceneTexture: WebGLTexture, depthTexture: WebGLTexture, normalTexture: WebGLTexture): WebGLTexture {
    // SSAO
    const ssaoTexture = this.ssaoProcessor.apply(depthTexture, normalTexture)

    // Bloom
    const bloomTexture = this.bloomProcessor.apply(sceneTexture)

    // 合并SSAO和Bloom
    const mergedTexture = this.merge(ssaoTexture, bloomTexture, sceneTexture)

    // Tone Mapping
    const toneMappedTexture = this.toneMappingProcessor.apply(mergedTexture)

    // 返回最终画面
    return toneMappedTexture
  }

  // 合并纹理
  private merge(ssaoTexture: WebGLTexture, bloomTexture: WebGLTexture, sceneTexture: WebGLTexture): WebGLTexture {
    const gl = this.gl
    const shader = this.getMergeShader()

    gl.useProgram(shader)

    // 绑定纹理
    gl.activeTexture(gl.TEXTURE0)
    gl.bindTexture(gl.TEXTURE_2D, sceneTexture)

    gl.activeTexture(gl.TEXTURE1)
    gl.bindTexture(gl.TEXTURE_2D, ssaoTexture)

    gl.activeTexture(gl.TEXTURE2)
    gl.bindTexture(gl.TEXTURE_2D, bloomTexture)

    // 绘制全屏四边形
    this.drawFullscreenQuad()

    // 返回结果纹理
    return this.createResultTexture()
  }

  // 获取合并着色器
  private getMergeShader(): WebGLProgram {
    // 返回合并着色器
    return {} as WebGLProgram
  }

  // 绘制全屏四边形
  private drawFullscreenQuad(): void {
    // 绘制全屏四边形的实现
  }

  // 创建结果纹理
  private createResultTexture(): WebGLTexture {
    // 创建结果纹理的实现
    return {} as WebGLTexture
  }
}
六、性能优化
6.1 性能优化策略
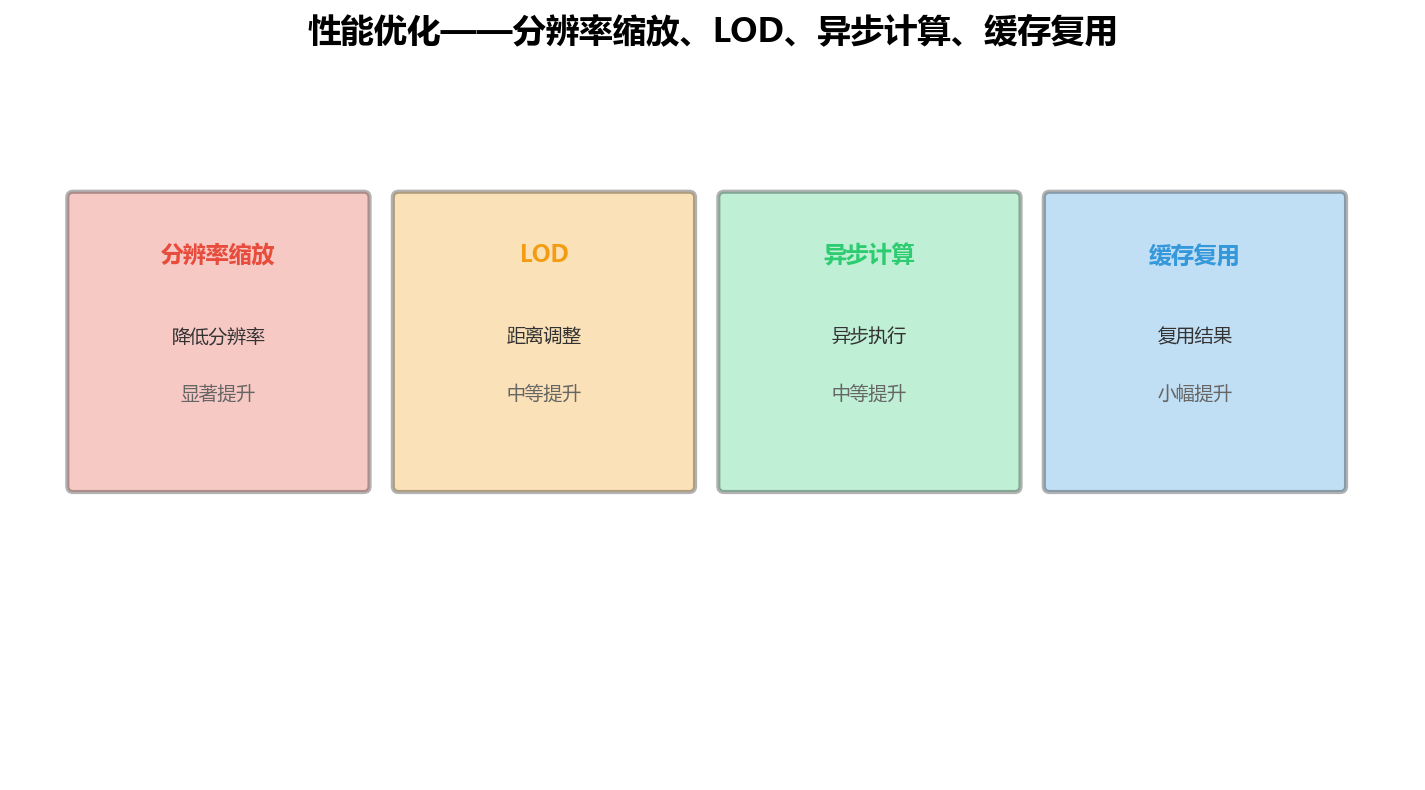
图5:性能优化——分辨率缩放、LOD、异步计算、缓存复用
| 优化策略 | 描述 | 效果 | 实现难度 |
|---|---|---|---|
| 分辨率缩放 | 降低后处理分辨率 | 显著提升 | 低 |
| LOD | 根据距离调整质量 | 中等提升 | 中 |
| 异步计算 | 异步执行后处理 | 中等提升 | 高 |
| 缓存复用 | 复用中间结果 | 小幅提升 | 低 |
6.2 性能优化实现
// 后处理优化器
class PostProcessOptimizer {
  private gl: WebGLRenderingContext
  private resolutionScale: number = 0.5

  constructor(gl: WebGLRenderingContext) {
    this.gl = gl
  }

  // 设置分辨率缩放
  setResolutionScale(scale: number): void {
    this.resolutionScale = scale
  }

  // 创建缩放后的渲染目标
  createScaledRenderTarget(width: number, height: number): WebGLFramebuffer {
    const scaledWidth = Math.floor(width * this.resolutionScale)
    const scaledHeight = Math.floor(height * this.resolutionScale)

    const texture = this.gl.createTexture()
    this.gl.bindTexture(this.gl.TEXTURE_2D, texture)
    this.gl.texImage2D(this.gl.TEXTURE_2D, 0, this.gl.RGBA, scaledWidth, scaledHeight, 0, this.gl.RGBA, this.gl.UNSIGNED_BYTE, null)

    const framebuffer = this.gl.createFramebuffer()
    this.gl.bindFramebuffer(this.gl.FRAMEBUFFER, framebuffer)
    this.gl.framebufferTexture2D(this.gl.FRAMEBUFFER, this.gl.COLOR_ATTACHMENT0, this.gl.TEXTURE_2D, texture, 0)

    return framebuffer!
  }

  // 异步执行后处理
  async executeAsync(pipeline: PostProcessPipeline, sceneTexture: WebGLTexture): Promise<WebGLTexture> {
    return new Promise((resolve) => {
      // 使用requestAnimationFrame异步执行
      requestAnimationFrame(() => {
        const result = pipeline.execute(sceneTexture, {} as WebGLTexture, {} as WebGLTexture)
        resolve(result)
      })
    })
  }
}
七、实战案例:游戏场景后处理
7.1 场景描述
以一个典型的3D游戏场景为例,展示后处理特效的应用:
| 场景元素 | 后处理需求 | 技术方案 | 效果 |
|---|---|---|---|
| 阳光照射 | 高光泛光 | Bloom | 柔和光晕 |
| 角落阴影 | 环境光遮蔽 | SSAO | 真实阴影 |
| HDR天空 | 色调映射 | ACES Tone Mapping | 自然色彩 |
| 快速运动 | 运动模糊 | Motion Blur | 动态模糊 |
| 夜景场景 | 暗角效果 | Vignette | 氛围感 |
7.2 完整后处理配置
// 游戏后处理配置
class GamePostProcessConfig {
  // 配置后处理管线
  static createPipeline(gl: WebGLRenderingContext): PostProcessPipeline {
    const pipeline = new PostProcessPipeline(gl)

    // 配置Bloom
    const bloomConfig = {
      threshold: 0.8,
      intensity: 1.2,
      blurRadius: 4.0
    }

    // 配置SSAO
    const ssaoConfig = {
      sampleCount: 16,
      radius: 0.5,
      intensity: 1.0
    }

    // 配置Tone Mapping
    const toneMappingConfig = {
      exposure: 1.0,
      gamma: 2.2,
      algorithm: 'ACES'
    }

    // 配置FXAA
    const fxaaConfig = {
      enabled: true,
      quality: 'high'
    }

    // 应用配置
    pipeline.setBloomConfig(bloomConfig)
    pipeline.setSSAOConfig(ssaoConfig)
    pipeline.setToneMappingConfig(toneMappingConfig)
    pipeline.setFXAAConfig(fxaaConfig)

    return pipeline
  }

  // 根据场景动态调整后处理
  static adjustForScene(scene: string, pipeline: PostProcessPipeline): void {
    switch (scene) {
      case 'day':
        pipeline.setBloomConfig({ threshold: 0.9, intensity: 0.8, blurRadius: 3.0 })
        pipeline.setToneMappingConfig({ exposure: 1.2, gamma: 2.2, algorithm: 'ACES' })
        break
      case 'night':
        pipeline.setBloomConfig({ threshold: 0.6, intensity: 1.5, blurRadius: 5.0 })
        pipeline.setToneMappingConfig({ exposure: 0.8, gamma: 2.2, algorithm: 'Filmic' })
        break
      case 'indoor':
        pipeline.setSSAOConfig({ sampleCount: 32, radius: 0.8, intensity: 1.2 })
        pipeline.setBloomConfig({ threshold: 0.7, intensity: 1.0, blurRadius: 4.0 })
        break
      default:
        break
    }
  }
}

// 场景后处理应用
class ScenePostProcess {
  private pipeline: PostProcessPipeline
  private currentScene: string = 'default'

  constructor(gl: WebGLRenderingContext) {
    this.pipeline = GamePostProcessConfig.createPipeline(gl)
  }

  // 切换场景
  switchScene(scene: string): void {
    if (this.currentScene !== scene) {
      GamePostProcessConfig.adjustForScene(scene, this.pipeline)
      this.currentScene = scene
    }
  }

  // 渲染场景
  render(sceneTexture: WebGLTexture, depthTexture: WebGLTexture, normalTexture: WebGLTexture): WebGLTexture {
    return this.pipeline.execute(sceneTexture, depthTexture, normalTexture)
  }
}
八、常见问题与解决
| 问题 | 现象 | 原因 | 解决方案 |
|---|---|---|---|
| 性能瓶颈 | 后处理导致卡顿 | 计算量大 | 分辨率缩放、LOD |
| 画面闪烁 | 后处理结果闪烁 | 时序问题 | 双缓冲、同步 |
| 颜色失真 | 颜色不正确 | 色彩空间错误 | 正确的色彩空间转换 |
| 边缘锯齿 | 边缘有锯齿 | 抗锯齿不足 | FXAA、MSAA |
| 内存占用高 | 内存不足 | 纹理过多 | 纹理复用、及时释放 |
| 兼容性问题 | 部分设备不支持 | 硬件差异 | 设备适配、降级方案 |
八、结语:后处理特效是画面质量的"点睛之笔"
后处理特效是画面质量的"点睛之笔":
- 增强真实感:模拟真实世界的光学效果
- 提升层次感:通过光影对比增强画面层次
- 统一色调:通过色彩校正统一画面风格
- 优化性能:通过分辨率缩放降低计算量
作为一名讲师,我在课上常说:**"后处理特效是画面质量的点睛之笔,让平凡的画面变得不平凡。"**
转载自:https://blog.csdn.net/u014727709/article/details/165126796
欢迎 👍点赞✍评论⭐收藏,欢迎指正

讨论HarmonyOS开发技术,专注于API与组件、DevEco Studio、测试、元服务和应用上架分发等。
更多推荐



 0
0 0
0- 0


 已为社区贡献861条内容

所有评论(0)