《ReactNative鸿蒙化从Hello World到应用》
React Native 是一个强大的跨平台移动应用开发框架,适合各种规模和类型的项目。如果你想快速开发高性能的移动应用,React Native 是一个不错的选择。
准备:
下载node.js:Node.js — 在任何地方运行 JavaScript
下载完成后一直点下一步继续安装完成。
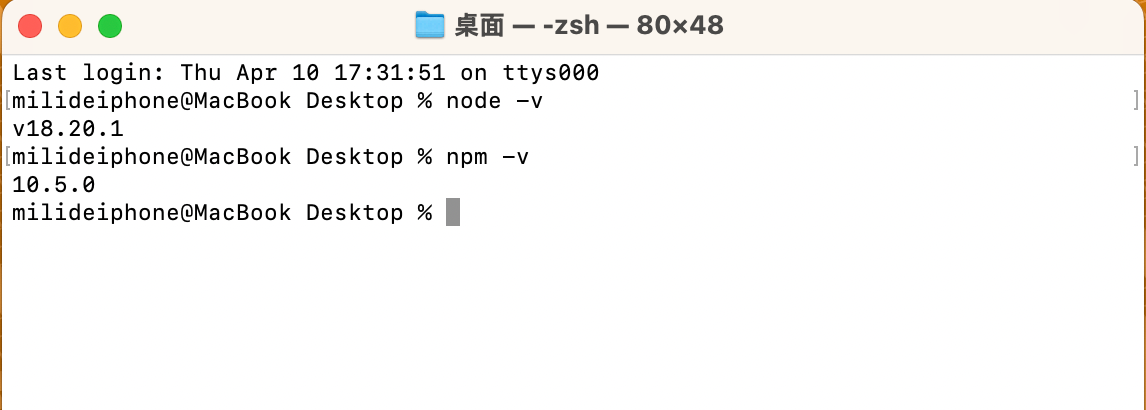
安装完成后,在终端输入:node -v 查看node版本
npm -v 查看npm版本
下载安装React Native:搭建开发环境 · React Native 中文网
在终端输入:npm install -g expo-cli
安装DevEco Studio,其中DevEco Studio的api版本要大于13
文档中心![]() https://developer.huawei.com/consumer/cn/doc/harmonyos-guides-V5/ide-software-install-V5
https://developer.huawei.com/consumer/cn/doc/harmonyos-guides-V5/ide-software-install-V5
一:环境配置
官方文档地址:GitCode - 全球开发者的开源社区,开源代码托管平台
Windows 环境变量设置方法:
hdc环境配置
hdc 是 OpenHarmony 为开发人员提供的用于调试的命令行工具,鸿蒙 React Native 工程使用 hdc 进行真机调试。hdc 工具通过 OpenHarmony SDK 获取,存放于 SDK 的 toolchains 目录下,请将 {DevEco Studio安装路径}/sdk/{SDK版本}/openharmony/toolchains 的完整路径添加到环境变量中。
a. 在此电脑 > 属性 > 高级系统设置 > 高级 > 环境变量中,编辑系统变量path,添加hdc工具路径。
b. 在此电脑 > 属性 > 高级系统设置 > 高级 > 环境变量中,添加 HDC 端口变量名为:HDC_SERVER_PORT,变量值可设置为任意未被占用的端口,如 7035。

安装文档中心配置 CAPI 版本环境变量
当前RN框架提供的 Demo 工程默认为 CAPI 版本,您需要配置环境变量 RNOH_C_API_ARCH = 1。
-
Windows 环境:
在此电脑 > 属性 > 高级系统设置 > 高级 > 环境变量中,在系统变量中点击新建,添加变量名为:
RNOH_C_API_ARCH,变量值为1。 -

Mac环境配置:
终端输入:open ~/.zshrc
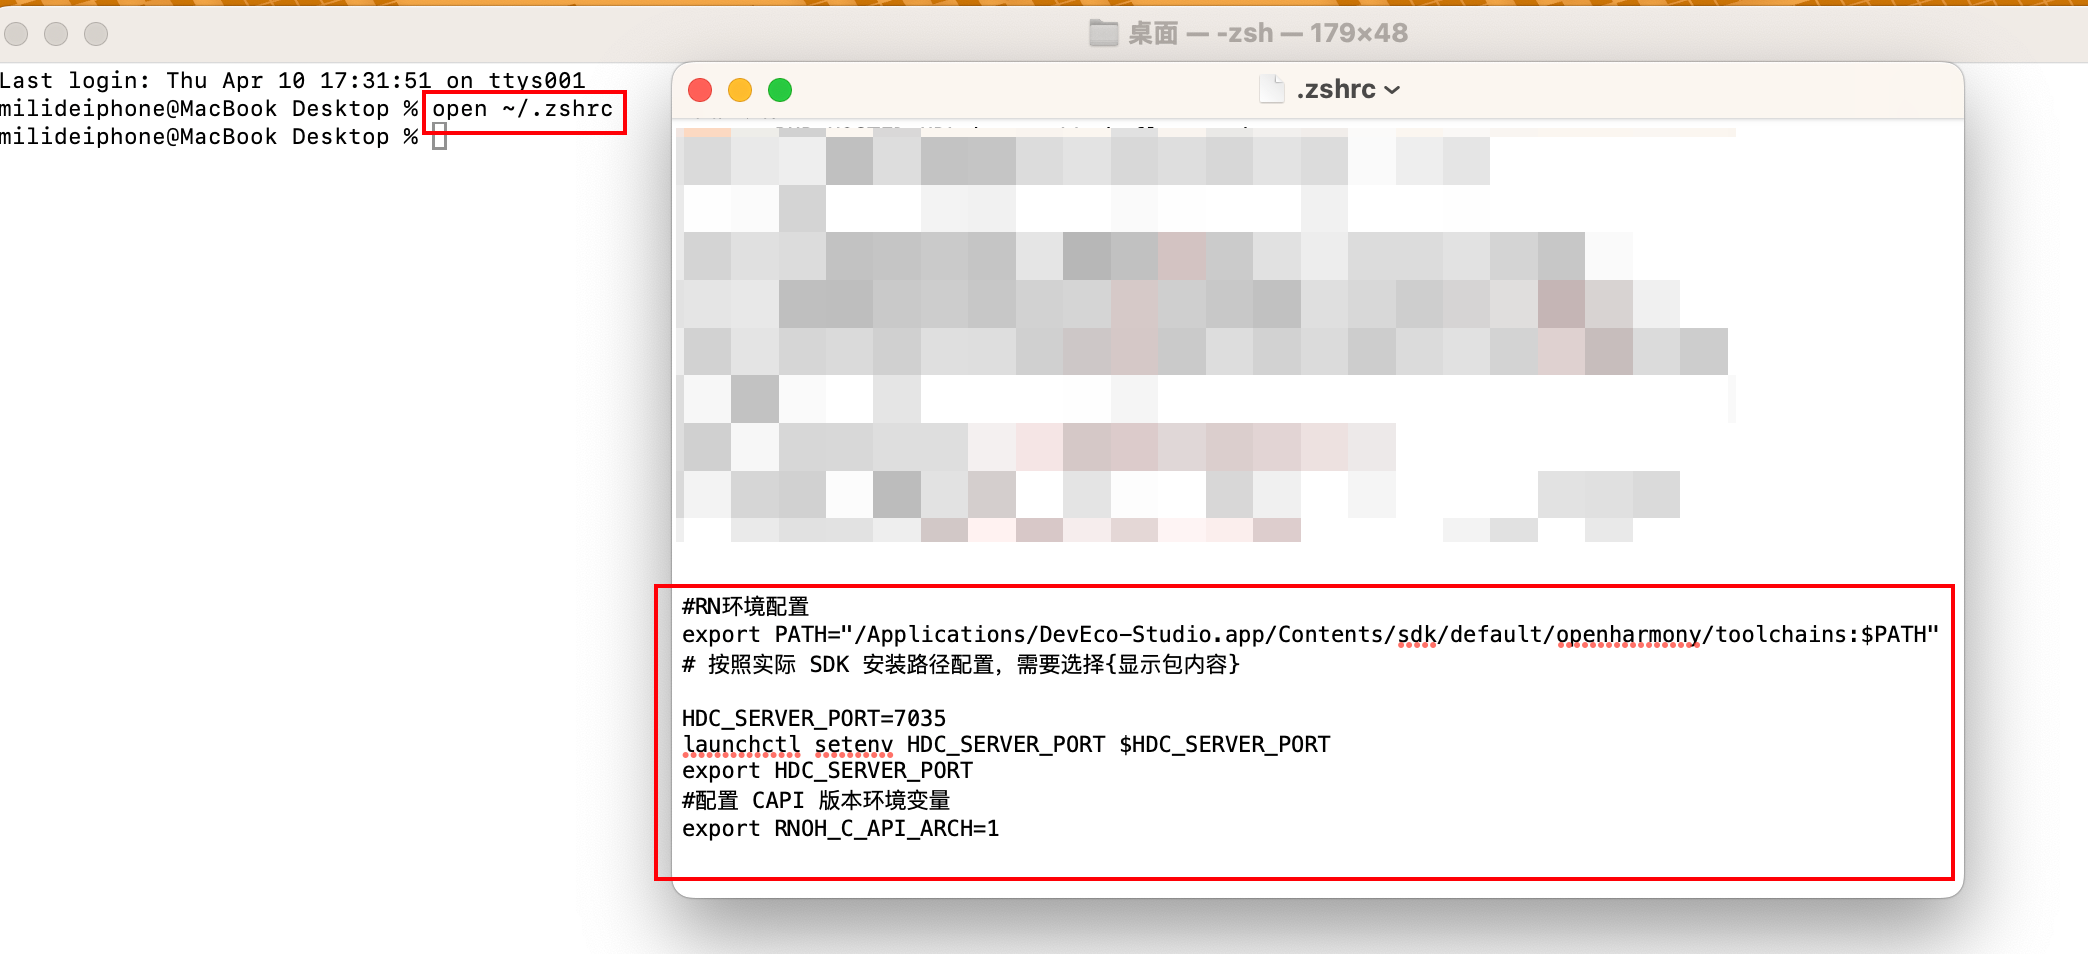
如果没有.zshrc文件,输入touch ~/.zshrc 创建环境配置文件。
二:创建新项目React Native侧:
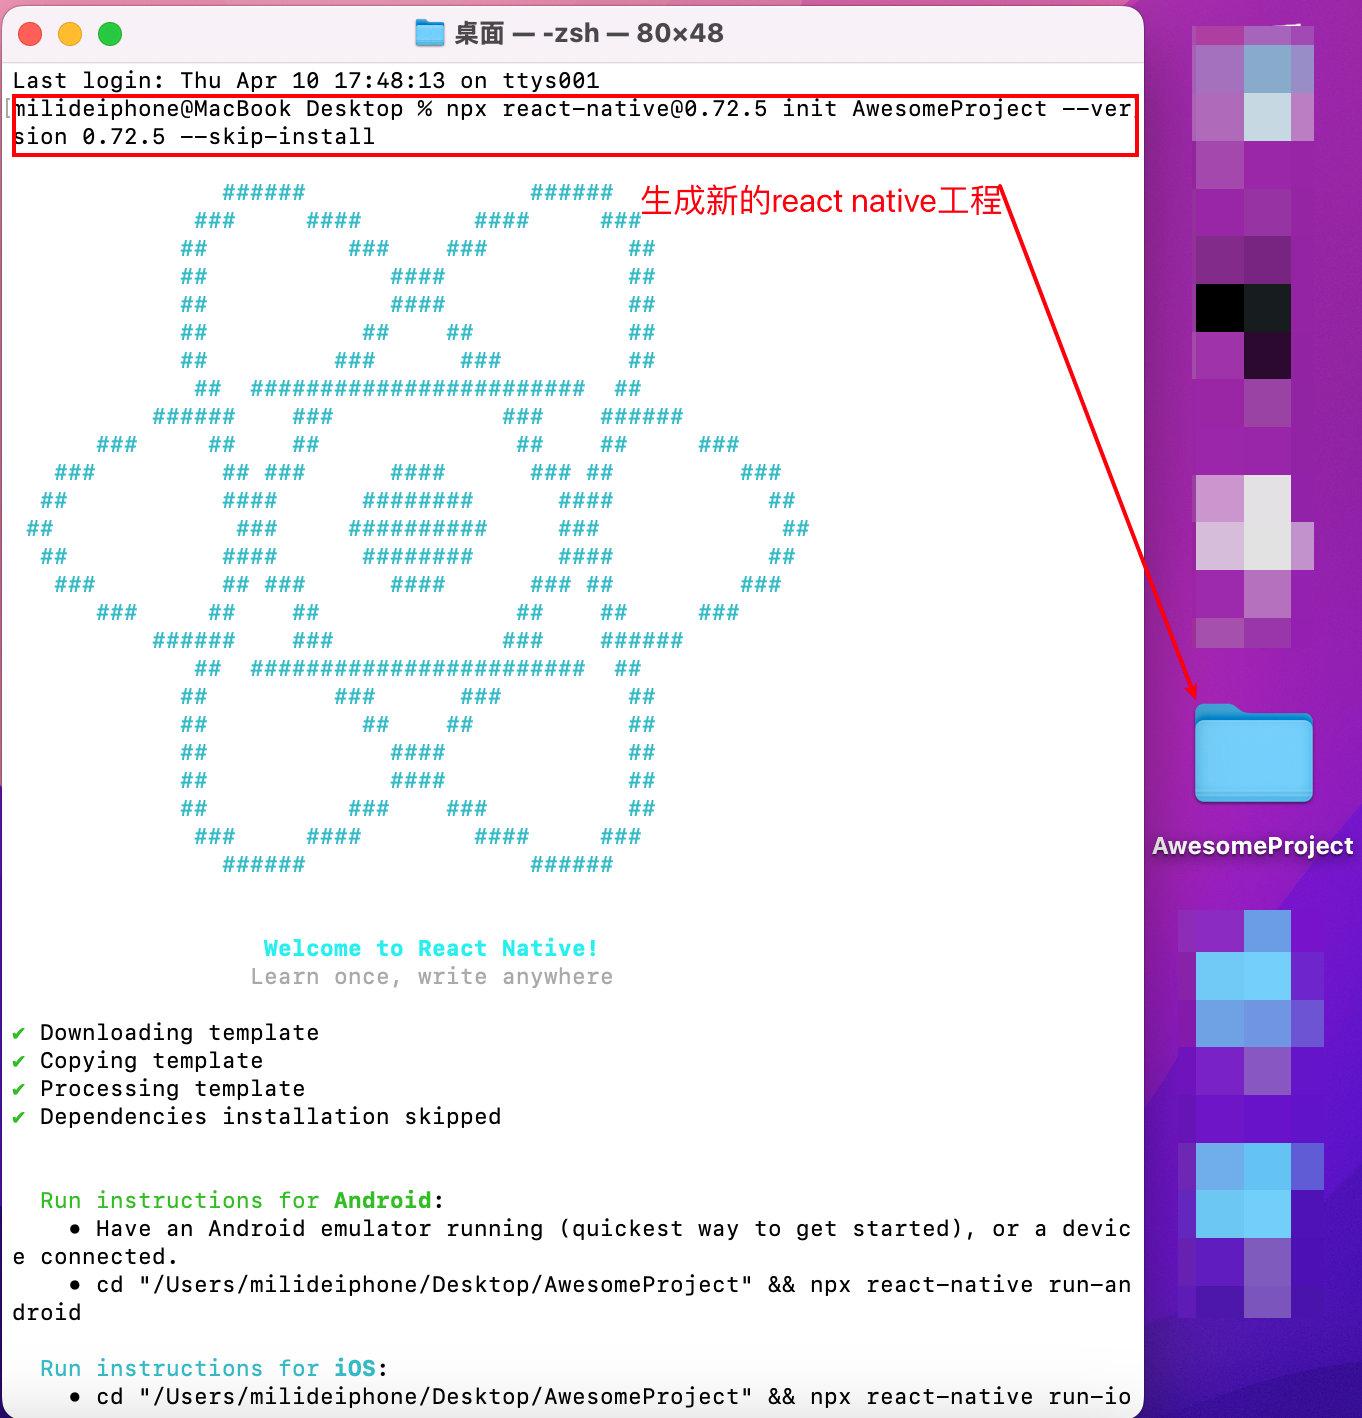
终端输入:npx react-native@0.72.5 init AwesomeProject --version 0.72.5 --skip-install
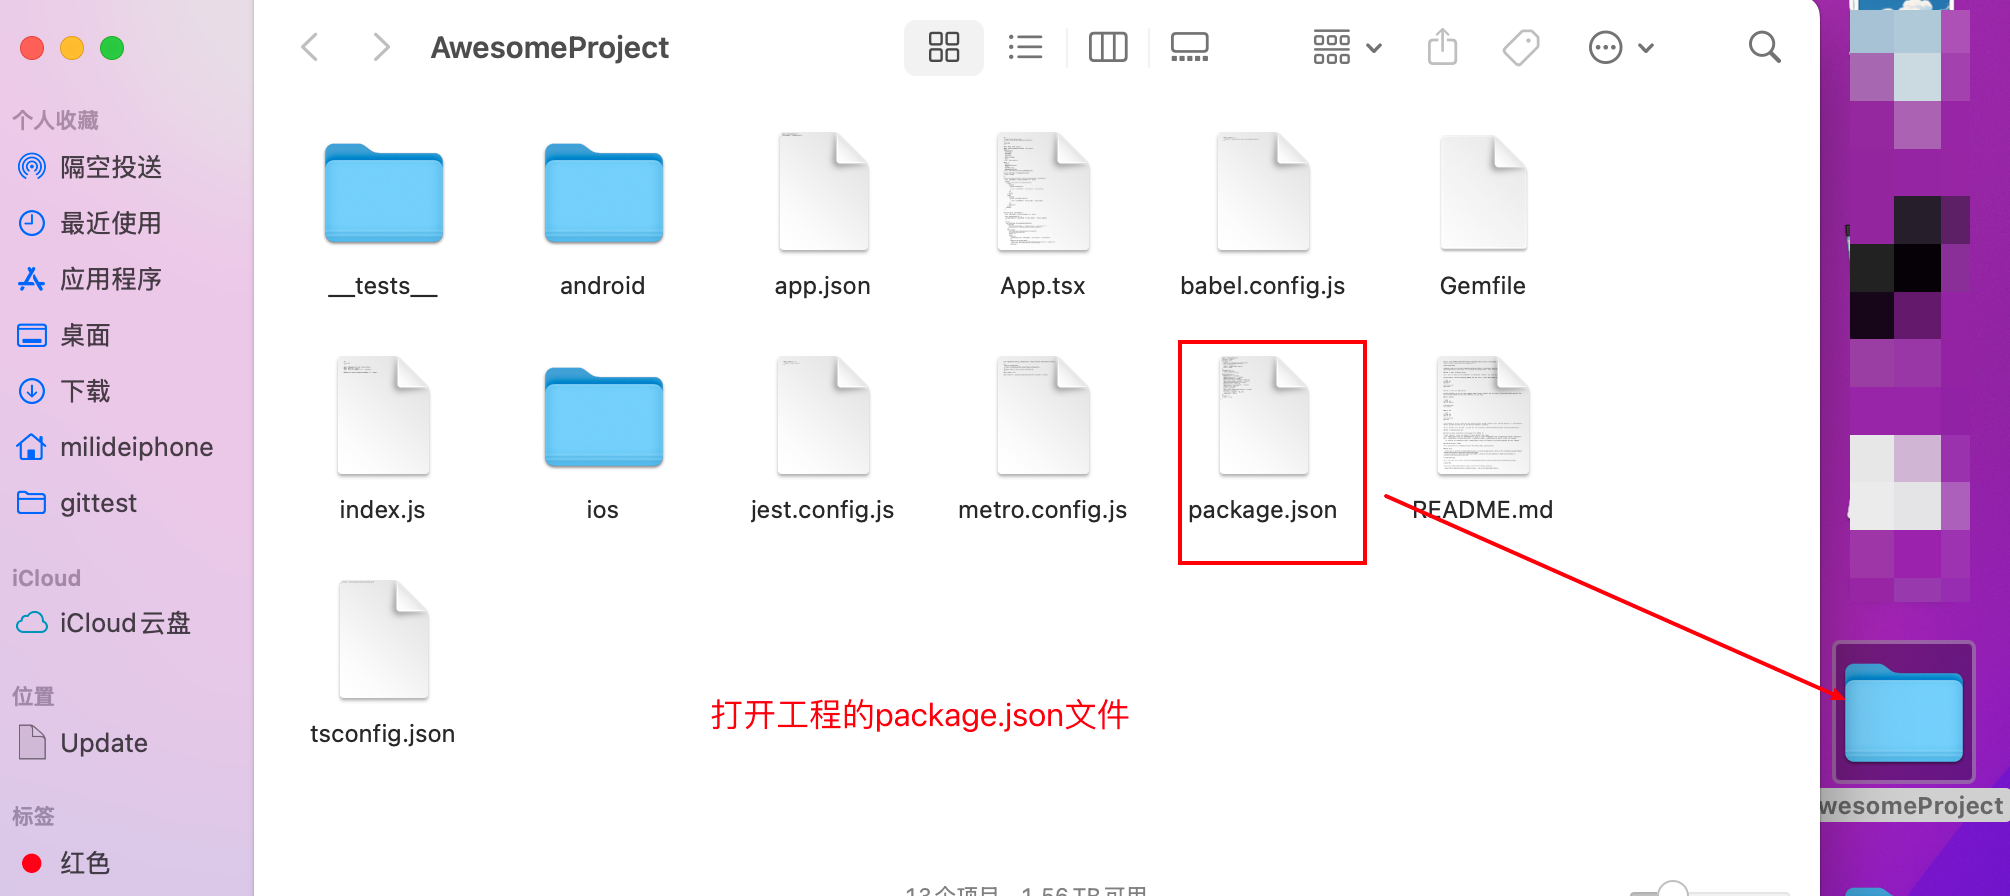
打开工程的package.json文件,在 scripts 下新增 OpenHarmony 的依赖
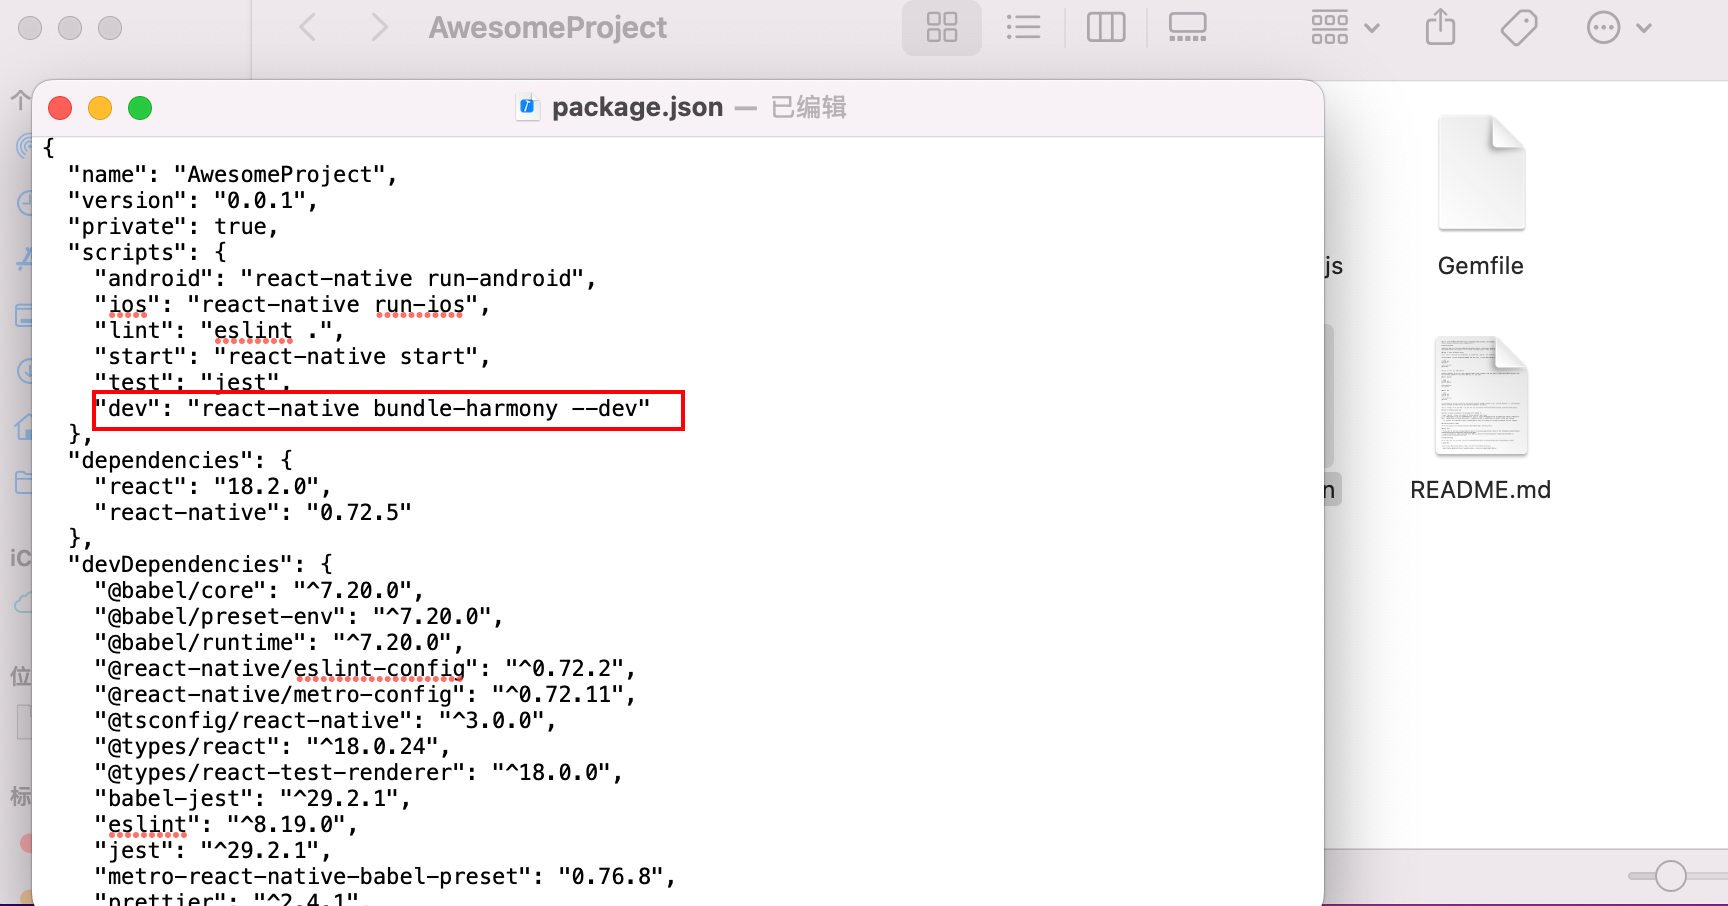
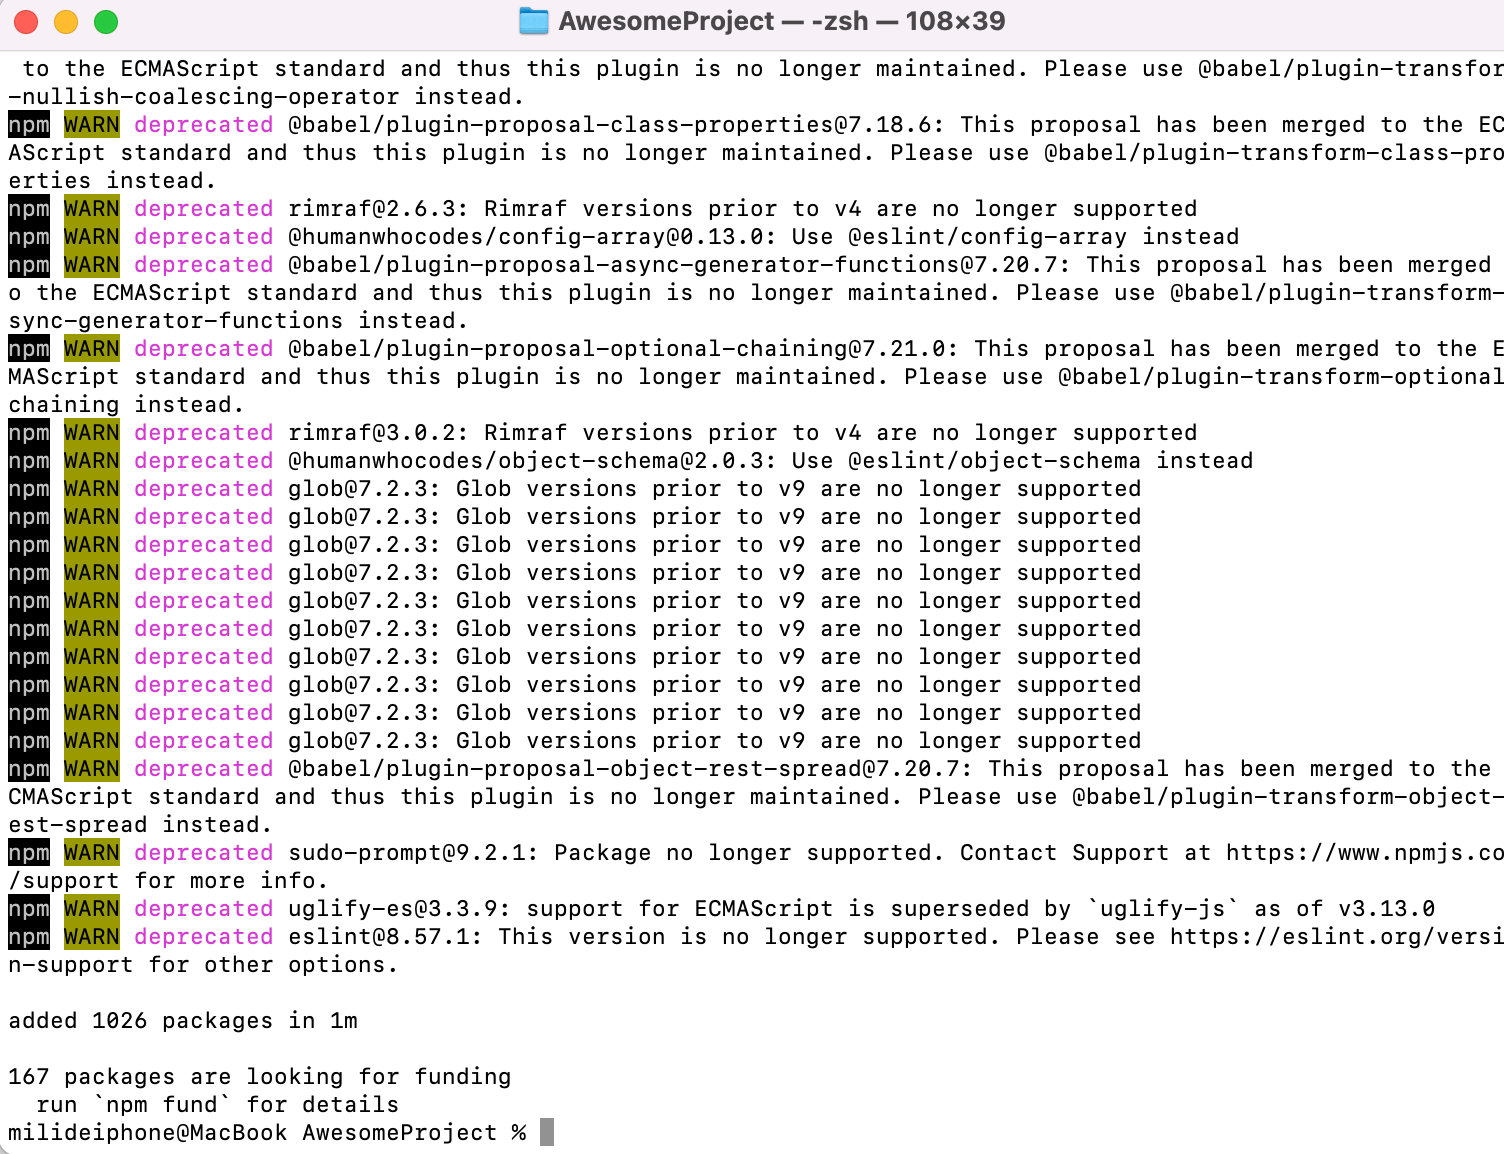
终端进入AwesomeProject目录,并运行安装依赖包命令:npm i @react-native-oh/react-native-harmony@0.72.53

安装完成:
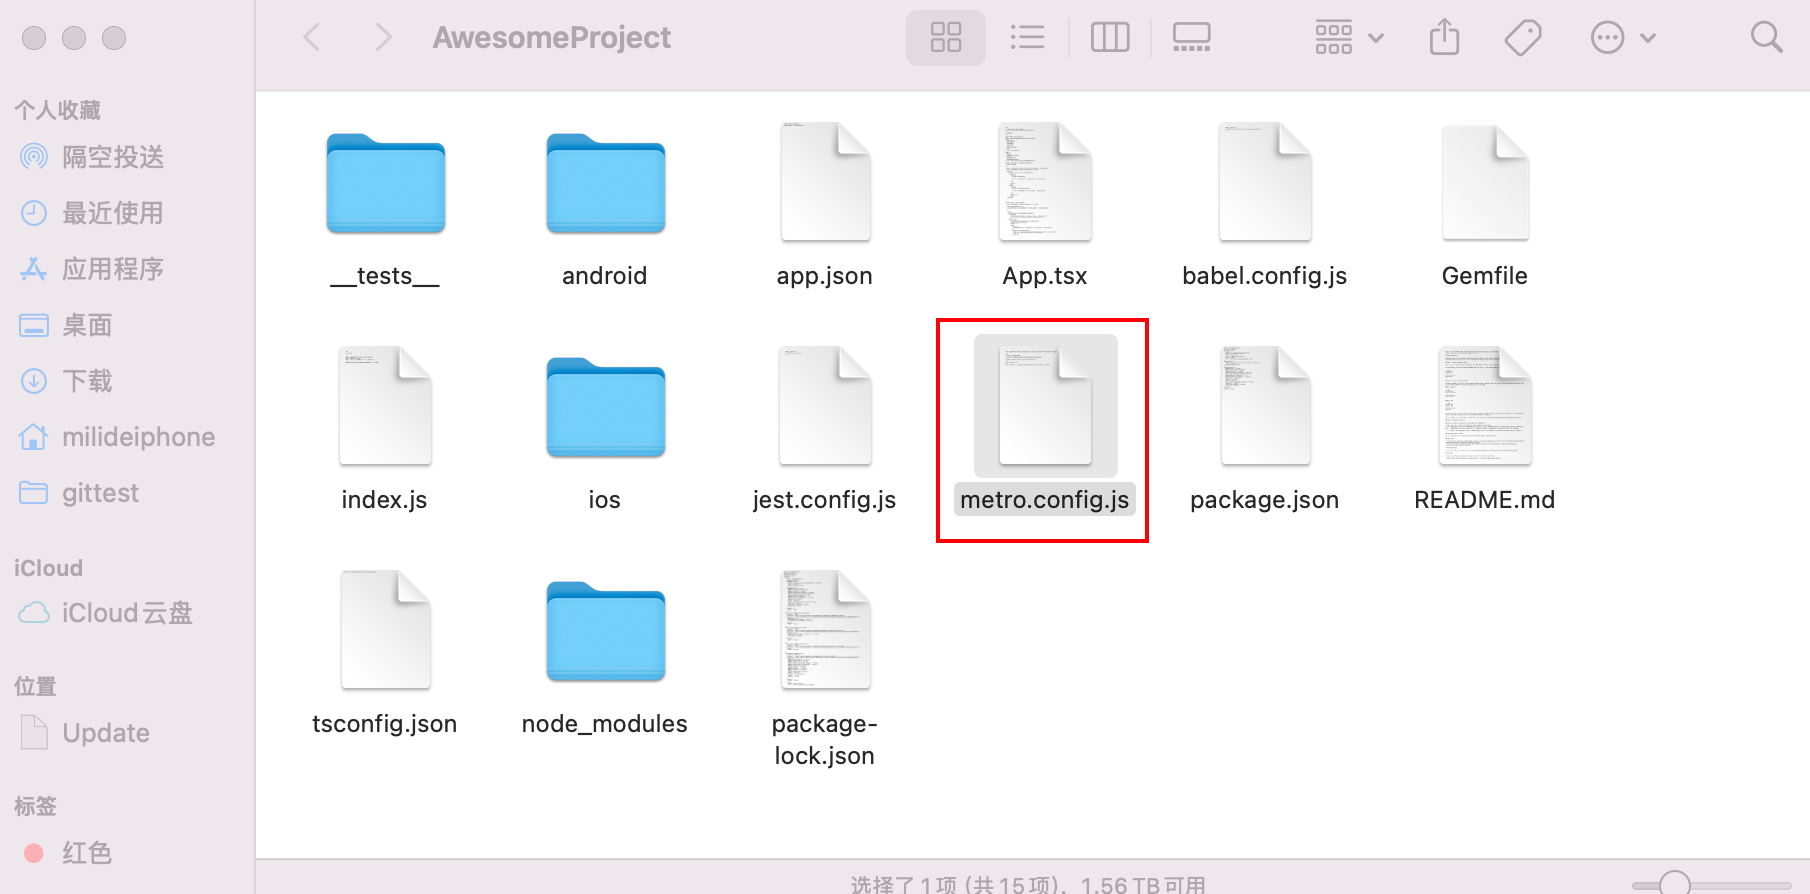
1.打开 AwsomeProject\metro.config.js,并添加 OpenHarmony 的适配代码。配置文件的详细介绍,可以参考React Native 中文网。修改完成后的文件内容如下:
全部删掉,替换成:
const {mergeConfig, getDefaultConfig} = require('@react-native/metro-config');
const {createHarmonyMetroConfig} = require('@react-native-oh/react-native-harmony/metro.config');

/**
* @type {import("metro-config").ConfigT}
*/
const config = {
  transformer: {
    getTransformOptions: async () => ({
      transform: {
        experimentalImportSupport: false,
        inlineRequires: true,
      },
    }),
  },
};

module.exports = mergeConfig(getDefaultConfig(__dirname), createHarmonyMetroConfig({
  reactNativeHarmonyPackageName: '@react-native-oh/react-native-harmony',
}), config);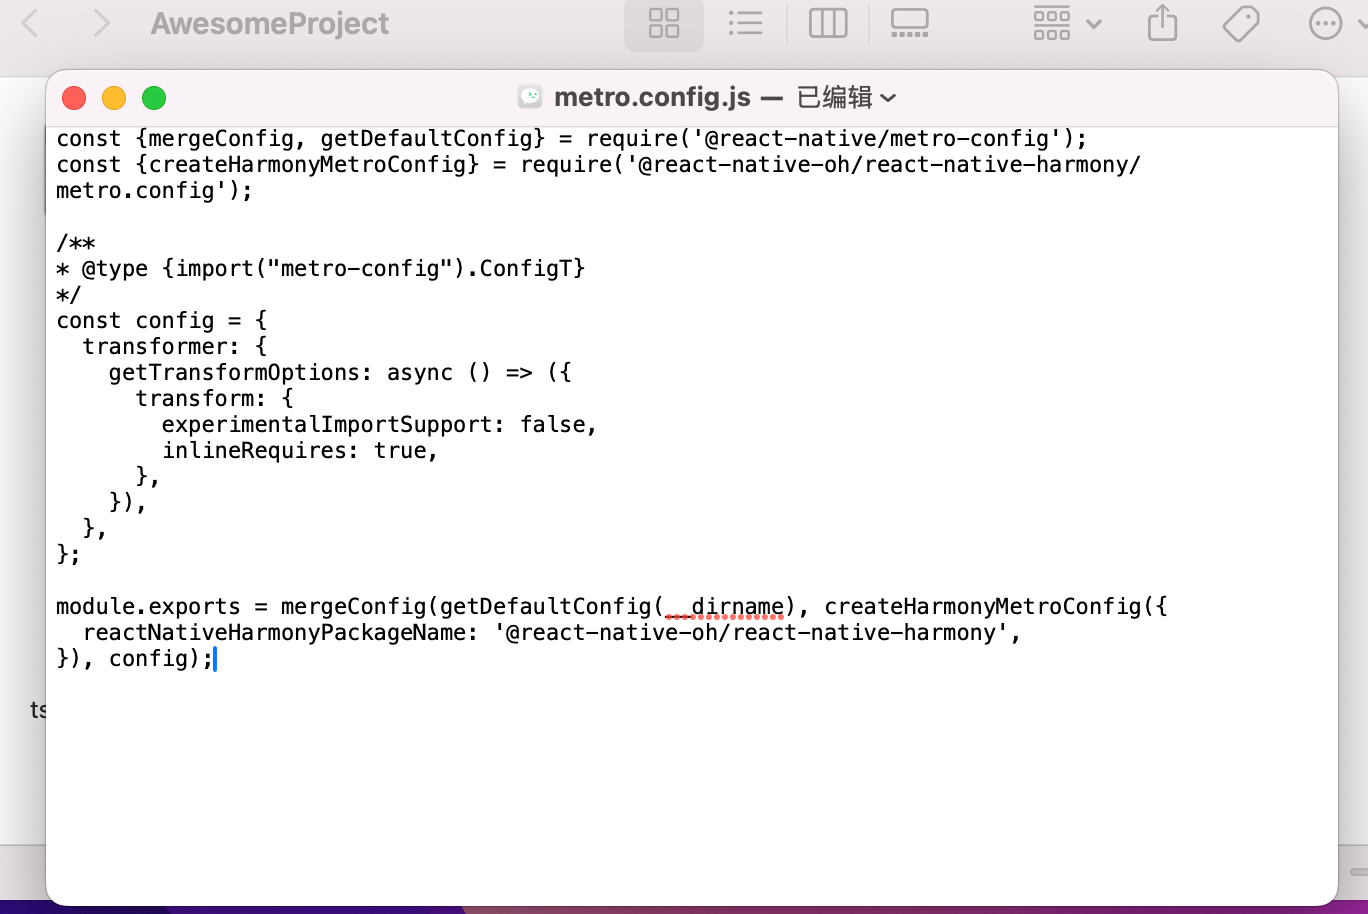
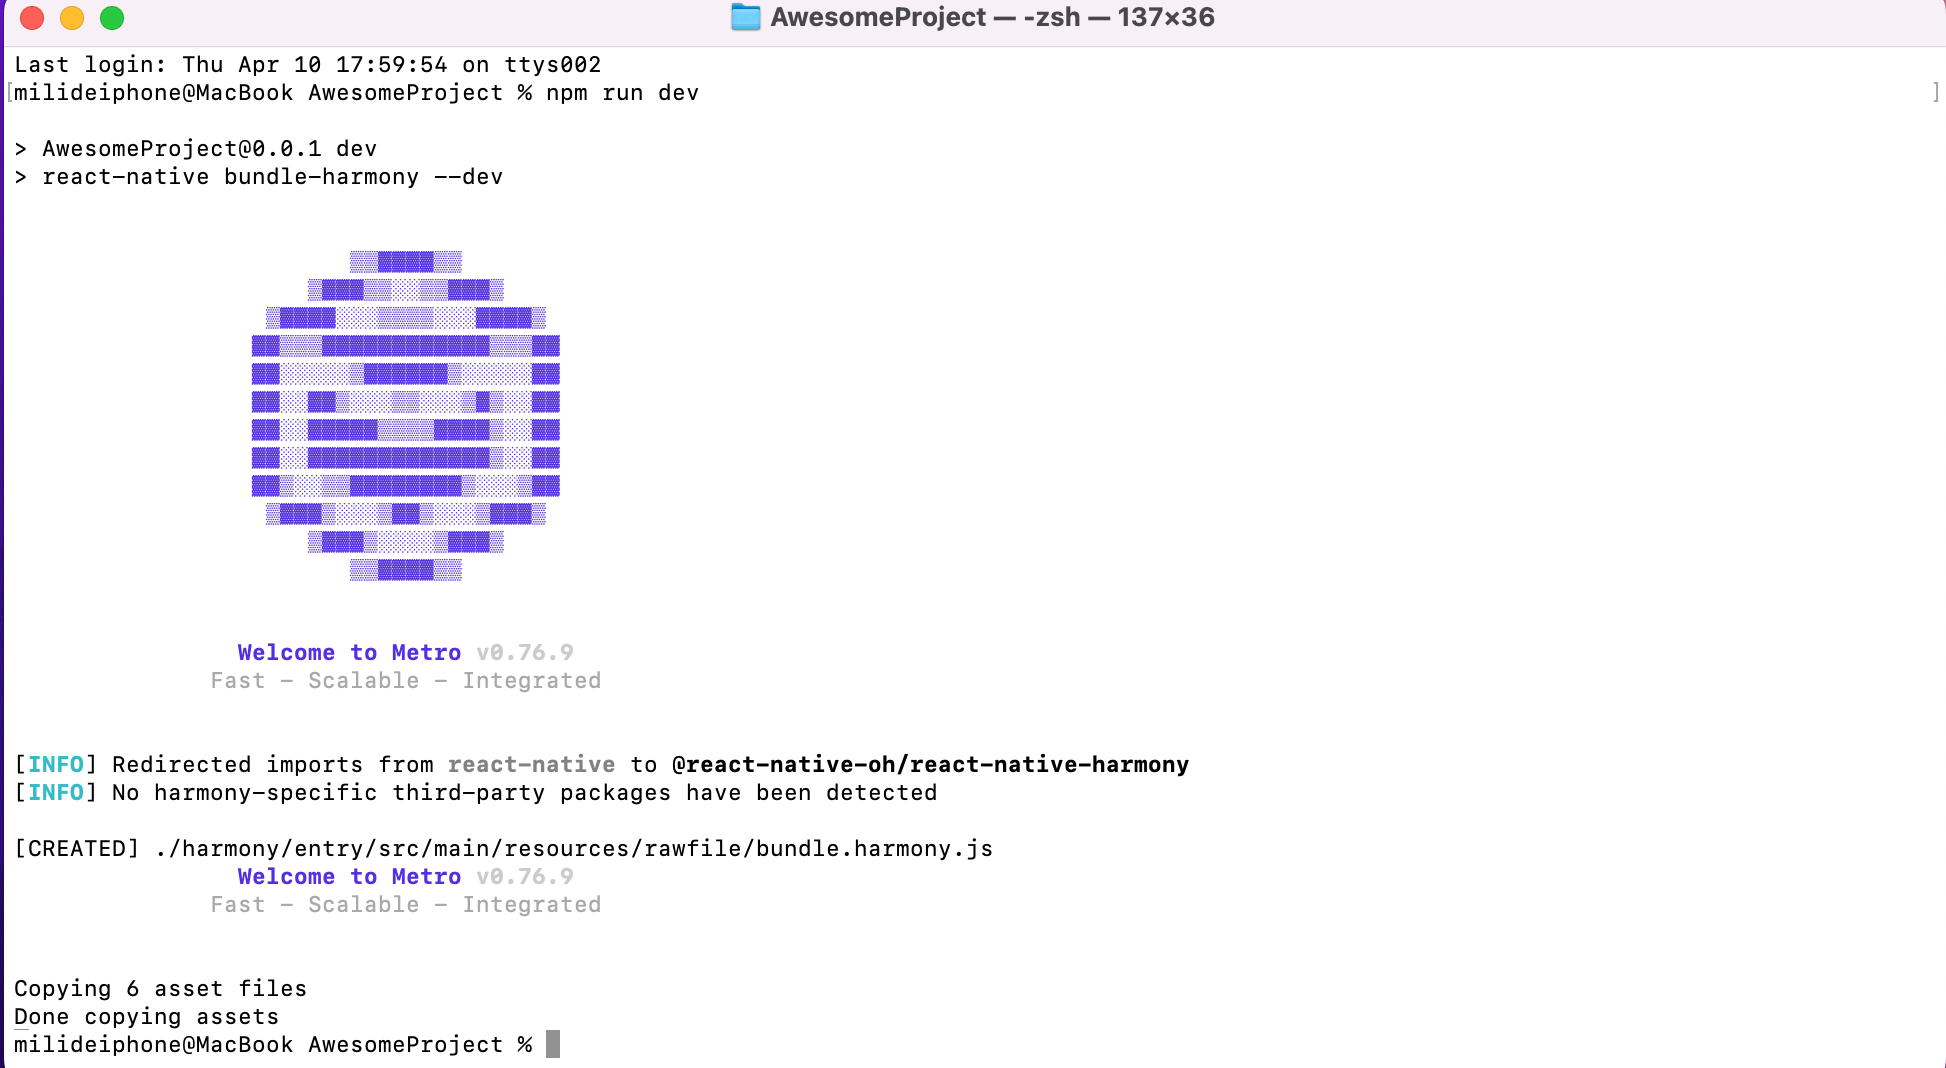
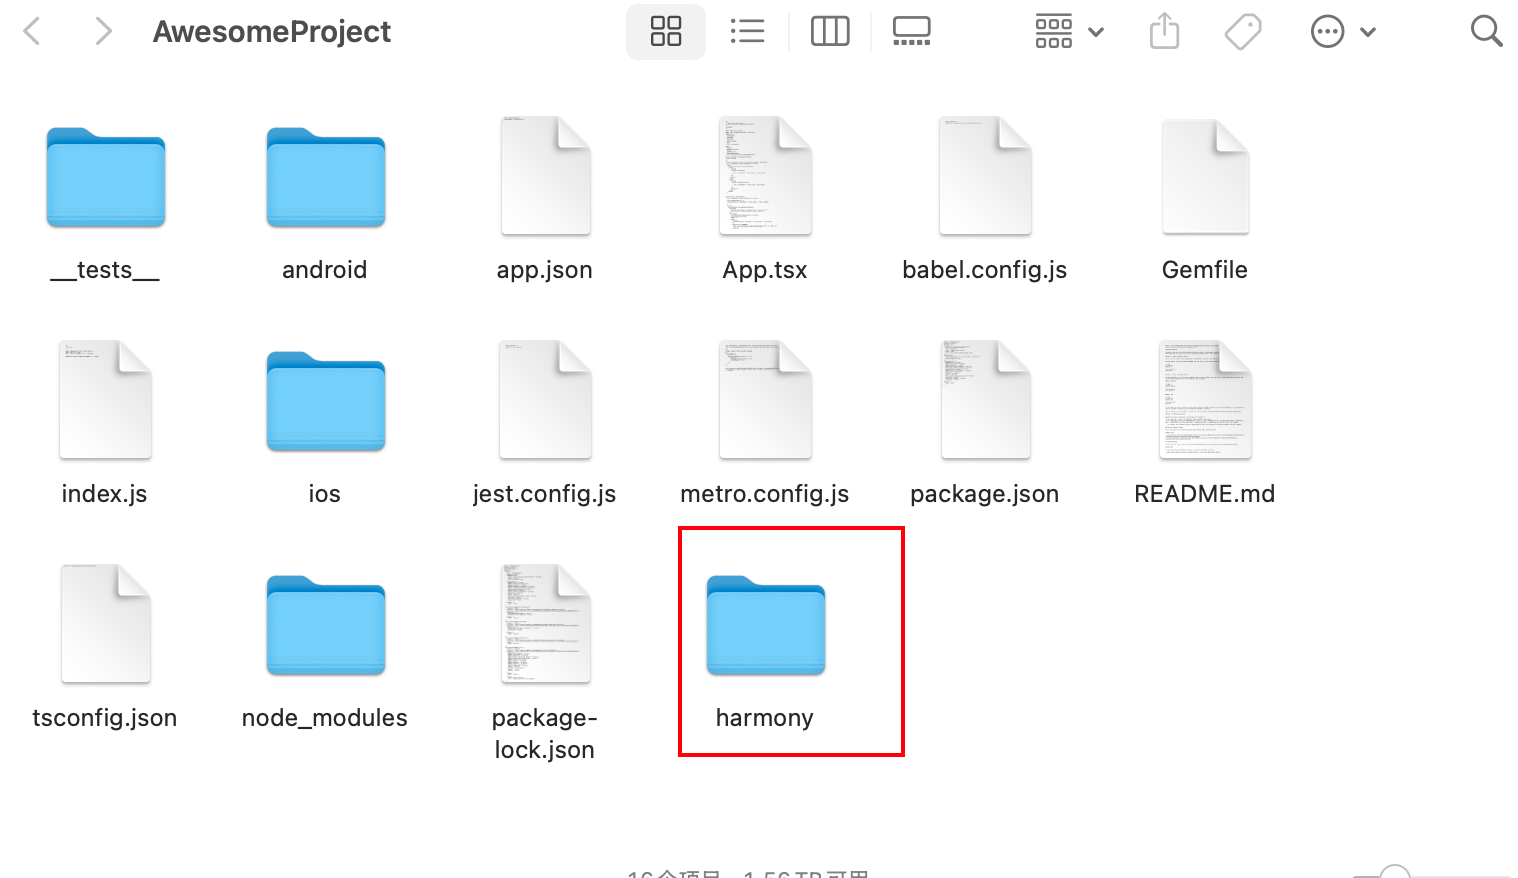
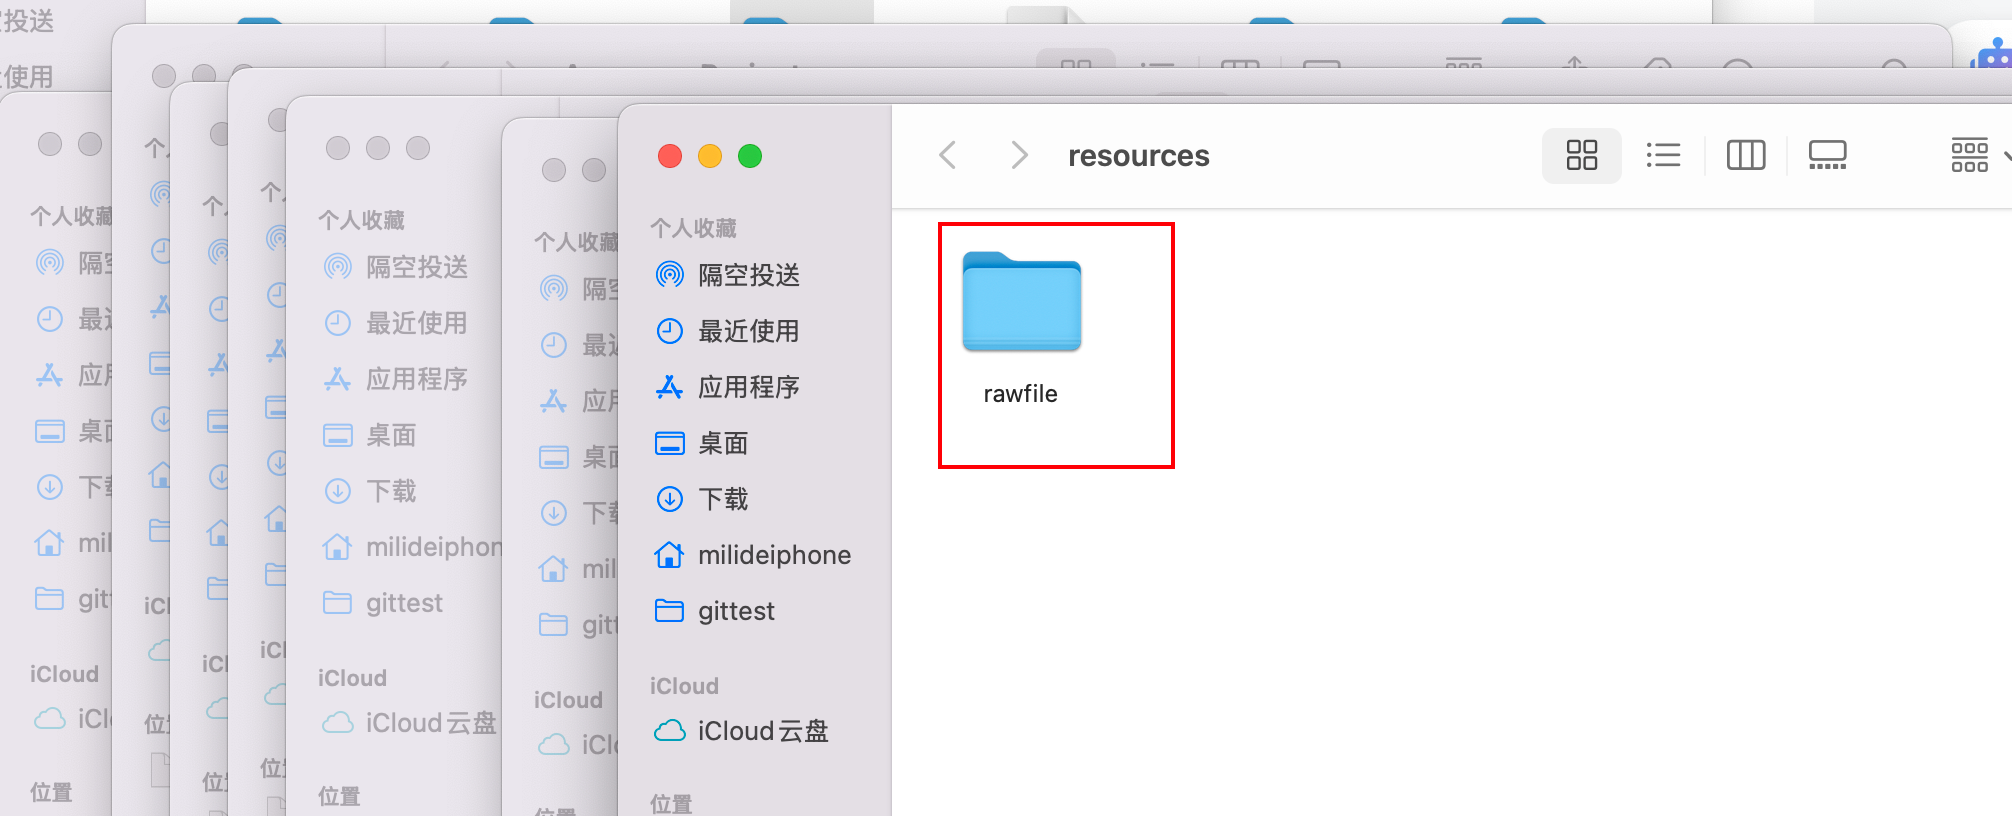
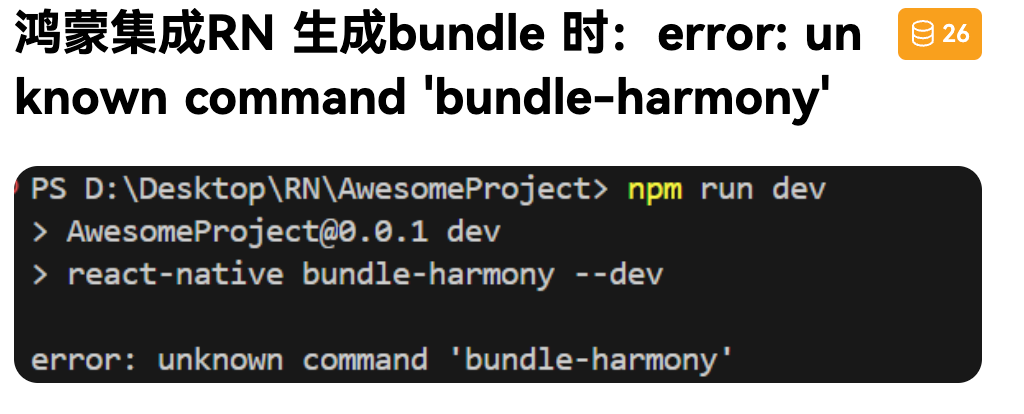
2.在 AwesomeProject 目录下运行生成 bundle 文件的命令。运行成功后,会在 AwesomeProject/harmony/entry/src/main/resources/rawfile 目录下生成 bundle.harmony.js 和 assets 文件夹,assets 用来存放图片(如果 bundle 中不涉及本地图片,则没有 assets 文件夹)。
在RN的终端输入:npm run dev
三:鸿蒙侧:
只支持api13的工程项目:
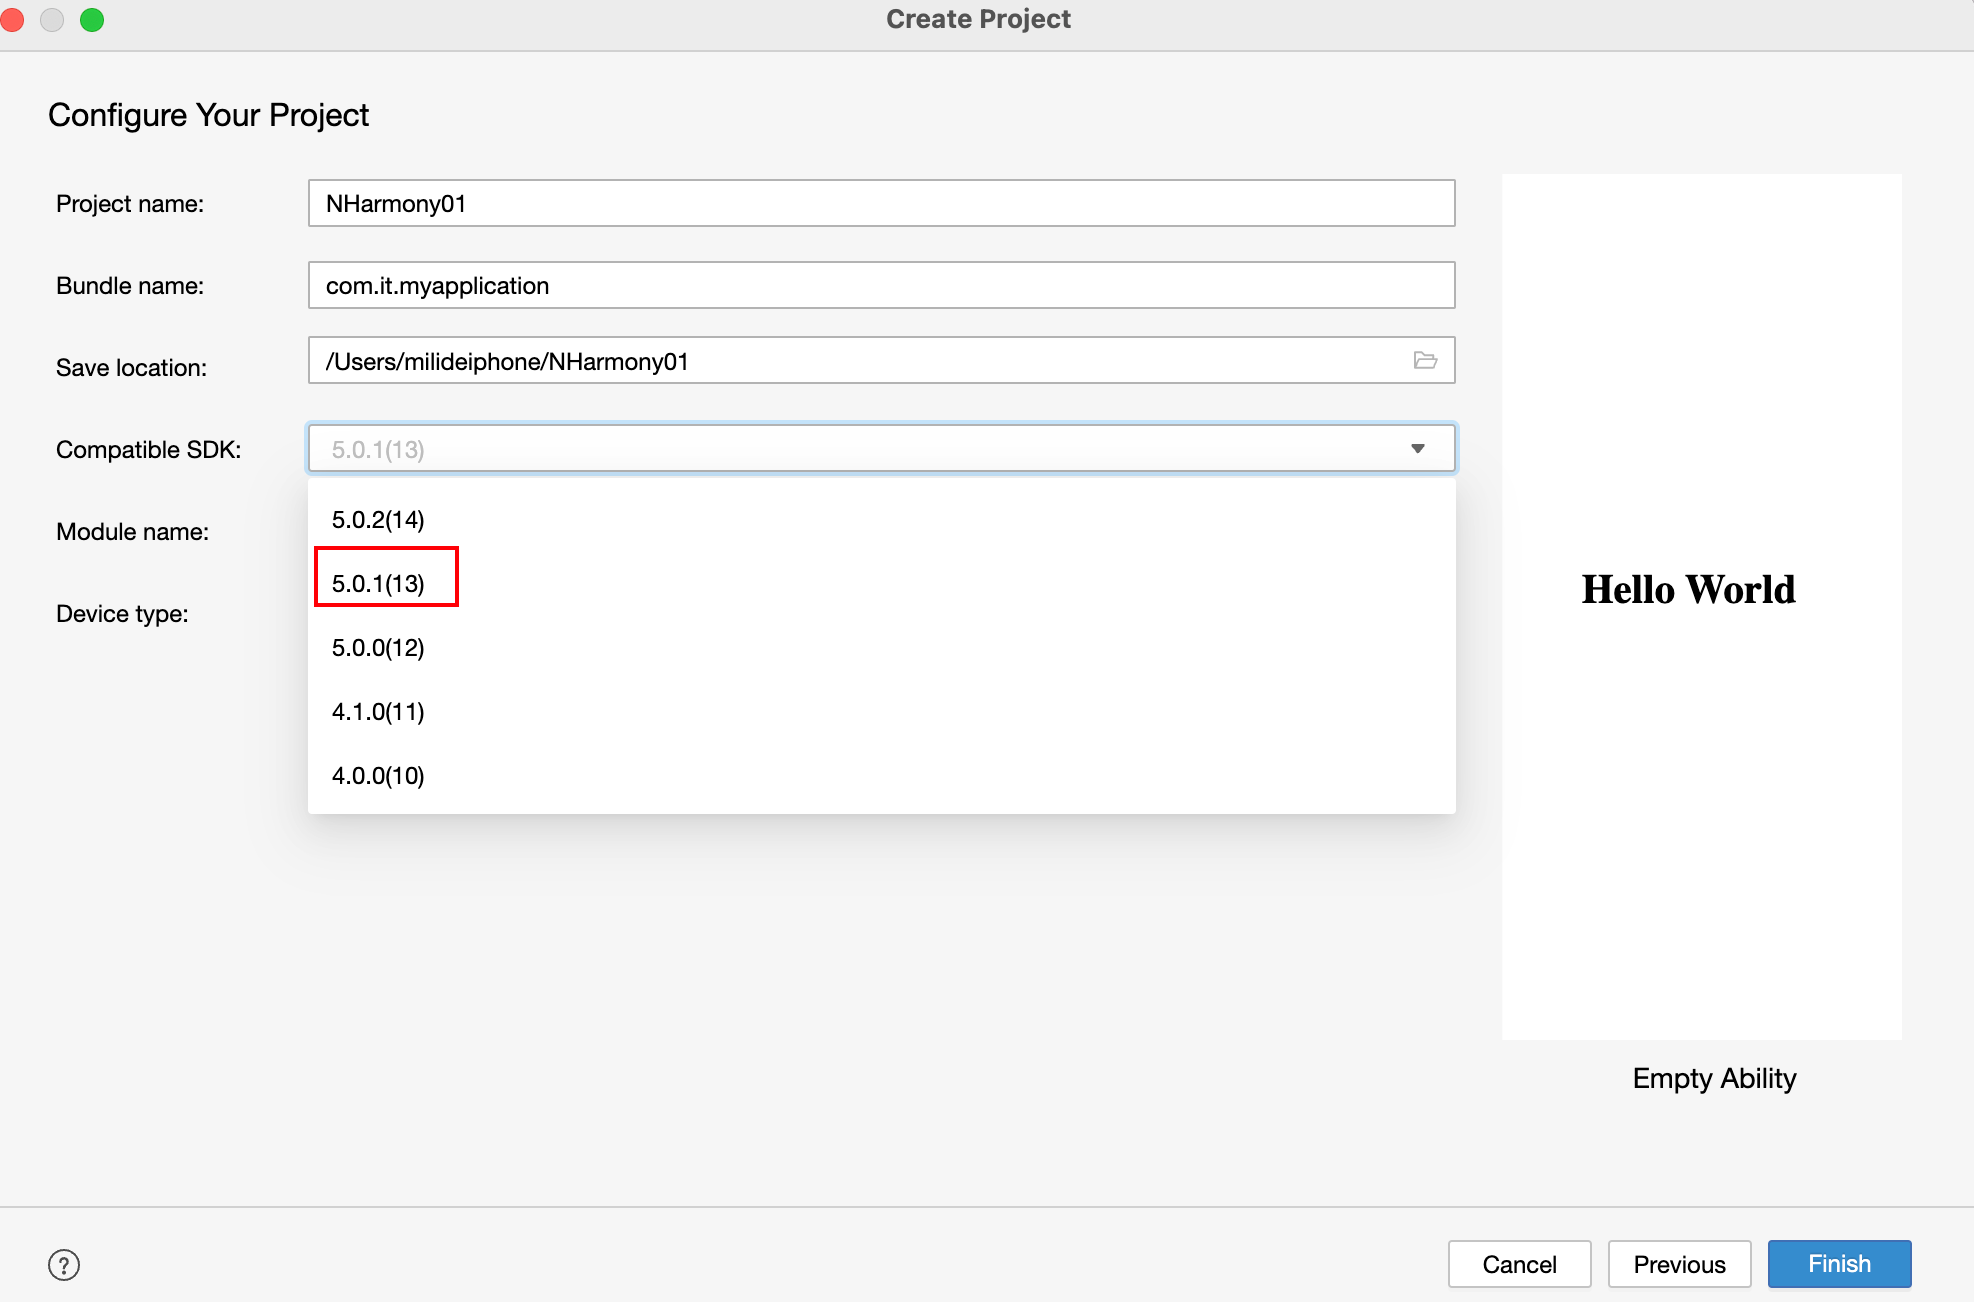
创建完成后,进入entry目录的终端:
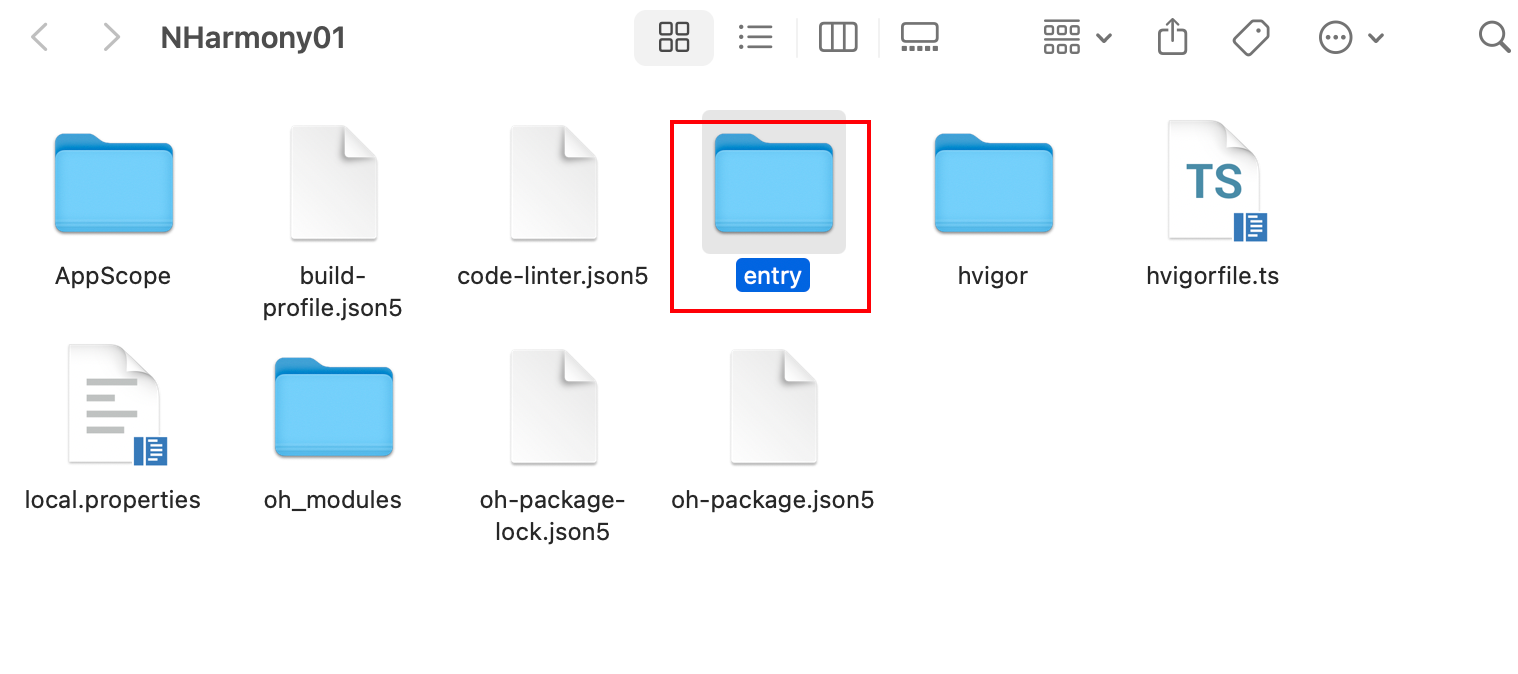
终端输入:ohpm i @rnoh/react-native-openharmony@0.72.53

在原生工程中集成RNOH
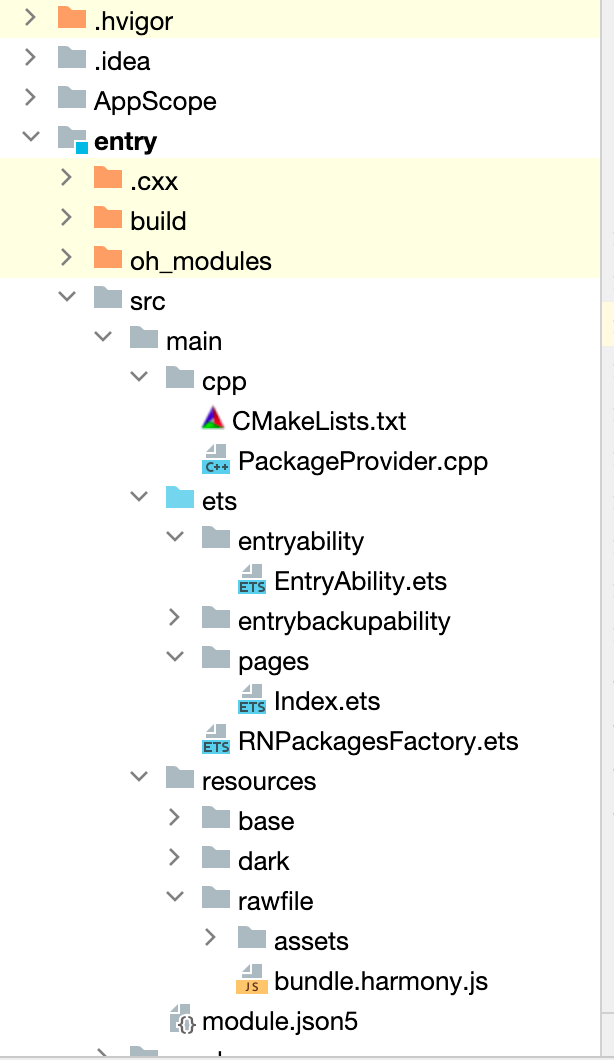
1.补充CPP侧代码
- 在
MyApplication/entry/src/main目录下新建 cpp 文件夹。 - 在 cpp 目录下新增
CMakeLists.txt,并将 RNOH 的适配层代码添加到编译构建中生成librnoh_app.so:
project(rnapp)
cmake_minimum_required(VERSION 3.4.1)
set(CMAKE_SKIP_BUILD_RPATH TRUE)
set(OH_MODULE_DIR "${CMAKE_CURRENT_SOURCE_DIR}/../../../oh_modules")
set(RNOH_APP_DIR "${CMAKE_CURRENT_SOURCE_DIR}")

set(RNOH_CPP_DIR "${OH_MODULE_DIR}/@rnoh/react-native-openharmony/src/main/cpp")
set(RNOH_GENERATED_DIR "${CMAKE_CURRENT_SOURCE_DIR}/generated")
set(CMAKE_ASM_FLAGS "-Wno-error=unused-command-line-argument -Qunused-arguments")
set(CMAKE_CXX_FLAGS "-fstack-protector-strong -Wl,-z,relro,-z,now,-z,noexecstack -s -fPIE -pie")
add_compile_definitions(WITH_HITRACE_SYSTRACE)
set(WITH_HITRACE_SYSTRACE 1) # for other CMakeLists.txt files to use

add_subdirectory("${RNOH_CPP_DIR}" ./rn)

add_library(rnoh_app SHARED
    "./PackageProvider.cpp"
    "${RNOH_CPP_DIR}/RNOHAppNapiBridge.cpp"
)

target_link_libraries(rnoh_app PUBLIC rnoh)
2.在 cpp 目录下新增 PackageProvider.cpp,该文件需要满足以下要求:
- 需要导入
RNOH/PackageProvider; - 实现
getPackages方法,用于创建三方库或自定义 TurboModule 或 Fabric 的 package 对象。
此处不涉及三方库与自定义 TurboModule 或组件,需要返回空数组。
#include "RNOH/PackageProvider.h"

using namespace rnoh;

std::vector<std::shared_ptr<Package>> PackageProvider::getPackages(Package::Context ctx) {
    return {};
}
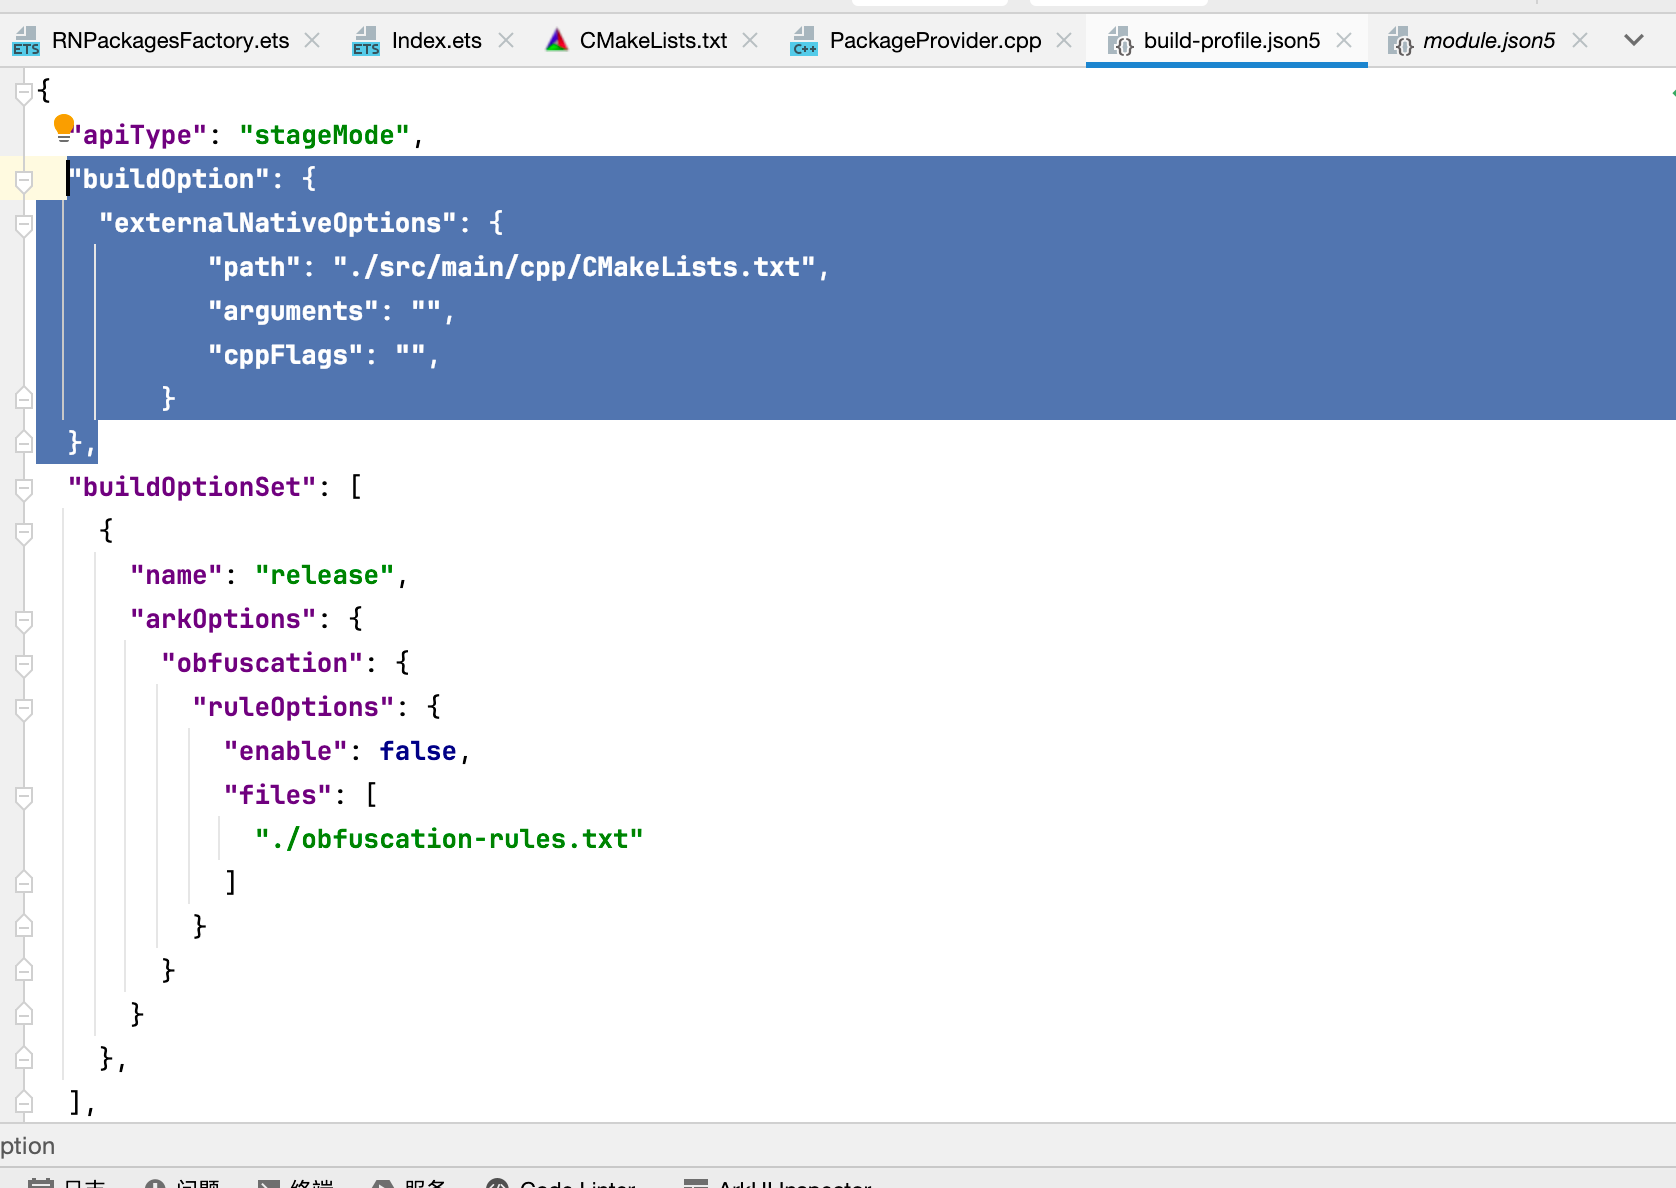
3.打开 MyApplicaton\entry\build-profile.json5,将 cpp 中的代码添加到鸿蒙的编译构建任务中,详细介绍可以参考模块级build-profile.json5:
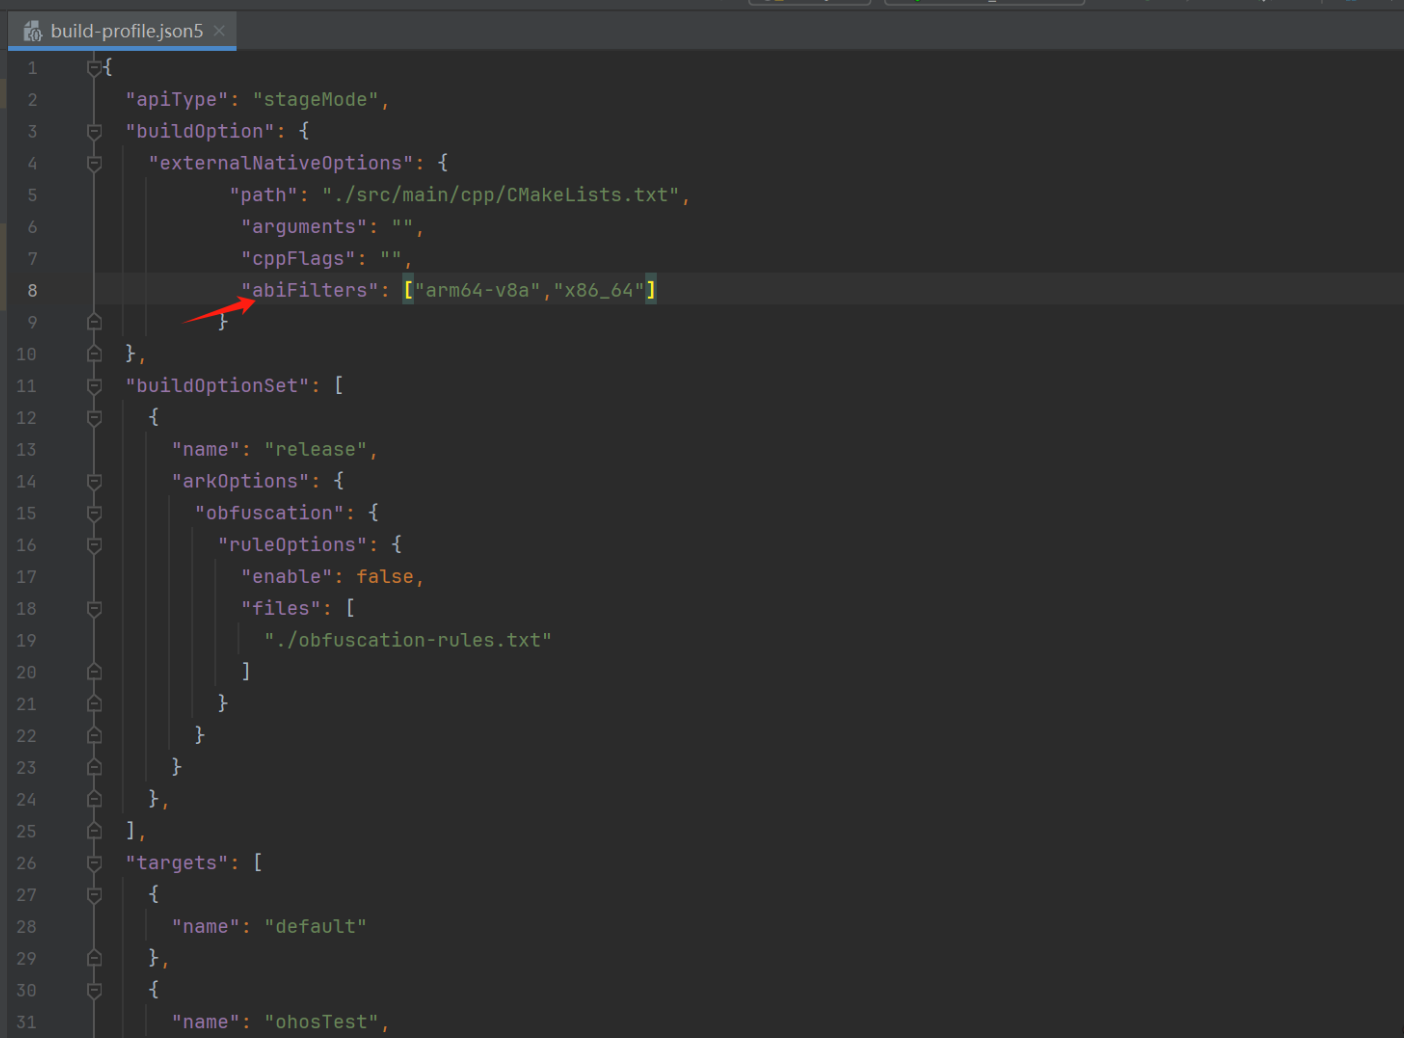
"buildOption": {
    "externalNativeOptions": {
           "path": "./src/main/cpp/CMakeLists.txt",
           "arguments": "",
           "cppFlags": "",
        }
  },
补充ArkTS侧的代码
- 打开
MyApplicaton\entry\src\main\ets\entryability\EntryAbility.ets,引入并使用RNAbility,该文件需要满足以下的要求:- 如果需要扩展使用对应的生命周期函数,请在代码中使用 super,
RNAbility在生命周期函数中进行了对应的操作,需要使用 super 保证功能不丢失; - 需要重写
getPagePath,返回程序的入口 page。
- 如果需要扩展使用对应的生命周期函数,请在代码中使用 super,
import { RNAbility } from '@rnoh/react-native-openharmony';

export default class EntryAbility extends RNAbility {
  getPagePath() {
    return 'pages/Index';
  }
}
2.在 MyApplicaton\entry\src\main\ets 目录下新增 RNPackagesFactory.ets,该文件需要满足以下要求:
- 在
@rnoh/react-native-openharmony导入RNPackageContext和RNPackage; - 在文件中导出
createRNPackages方法,用于创建三方库或自定义 TurboModule、Fabric的package 对象。
此处不涉及三方库与自定义TurboModule或组件,需要返回空数组。
import { RNPackageContext, RNPackage } from '@rnoh/react-native-openharmony/ts';
export function createRNPackages(ctx: RNPackageContext): RNPackage[] {
  return [];
}
3.打开 MyApplicaton\entry\src\main\ets\pages\Index.ets,添加RNOH的使用代码,修改后如下:
RNApp的参数appKey需要与RN工程中AppRegistry.registerComponent注册的appName保持一致,否则会导致白屏。
import {
  AnyJSBundleProvider,
  ComponentBuilderContext,
  FileJSBundleProvider,
  MetroJSBundleProvider,
  ResourceJSBundleProvider,
  RNApp,
  RNOHErrorDialog,
  RNOHLogger,
  TraceJSBundleProviderDecorator,
  RNOHCoreContext
} from '@rnoh/react-native-openharmony';
import { createRNPackages } from '../RNPackagesFactory';

@Builder
export function buildCustomRNComponent(ctx: ComponentBuilderContext) {}

const wrappedCustomRNComponentBuilder = wrapBuilder(buildCustomRNComponent)

@Entry
@Component
struct Index {
  @StorageLink('RNOHCoreContext') private rnohCoreContext: RNOHCoreContext | undefined = undefined
  @State shouldShow: boolean = false
  private logger!: RNOHLogger

  aboutToAppear() {
    this.logger = this.rnohCoreContext!.logger.clone("Index")
    const stopTracing = this.logger.clone("aboutToAppear").startTracing();

    this.shouldShow = true
    stopTracing();
  }

  onBackPress(): boolean | undefined {
    // NOTE: this is required since `Ability`'s `onBackPressed` function always
    // terminates or puts the app in the background, but we want Ark to ignore it completely
    // when handled by RN
    this.rnohCoreContext!.dispatchBackPress()
    return true
  }

  build() {
    Column() {
      if (this.rnohCoreContext && this.shouldShow) {
        if (this.rnohCoreContext?.isDebugModeEnabled) {
          RNOHErrorDialog({ ctx: this.rnohCoreContext })
        }
        RNApp({
          rnInstanceConfig: {
            createRNPackages,
            enableNDKTextMeasuring: true, // 该项必须为true,用于开启NDK文本测算
            enableBackgroundExecutor: false,
            enableCAPIArchitecture: true, // 该项必须为true,用于开启CAPI
            arkTsComponentNames: []
          },
          initialProps: { "foo": "bar" } as Record<string, string>,
          appKey: "AwesomeProject",
          wrappedCustomRNComponentBuilder: wrappedCustomRNComponentBuilder,
          onSetUp: (rnInstance) => {
            rnInstance.enableFeatureFlag("ENABLE_RN_INSTANCE_CLEAN_UP")
          },
          jsBundleProvider: new TraceJSBundleProviderDecorator(
            new AnyJSBundleProvider([
              new MetroJSBundleProvider(),
              // NOTE: to load the bundle from file, place it in
              // `/data/app/el2/100/base/com.rnoh.tester/files/bundle.harmony.js`
              // on your device. The path mismatch is due to app sandboxing on OpenHarmony
              new FileJSBundleProvider('/data/storage/el2/base/files/bundle.harmony.js'),
              new ResourceJSBundleProvider(this.rnohCoreContext.uiAbilityContext.resourceManager, 'hermes_bundle.hbc'),
              new ResourceJSBundleProvider(this.rnohCoreContext.uiAbilityContext.resourceManager, 'bundle.harmony.js')
            ]),
            this.rnohCoreContext.logger),
        })
      }
    }
    .height('100%')
    .width('100%')
  }
}
四:最后加载bundle包
将RN侧的rawfile文件拷贝到鸿蒙侧的rawfile
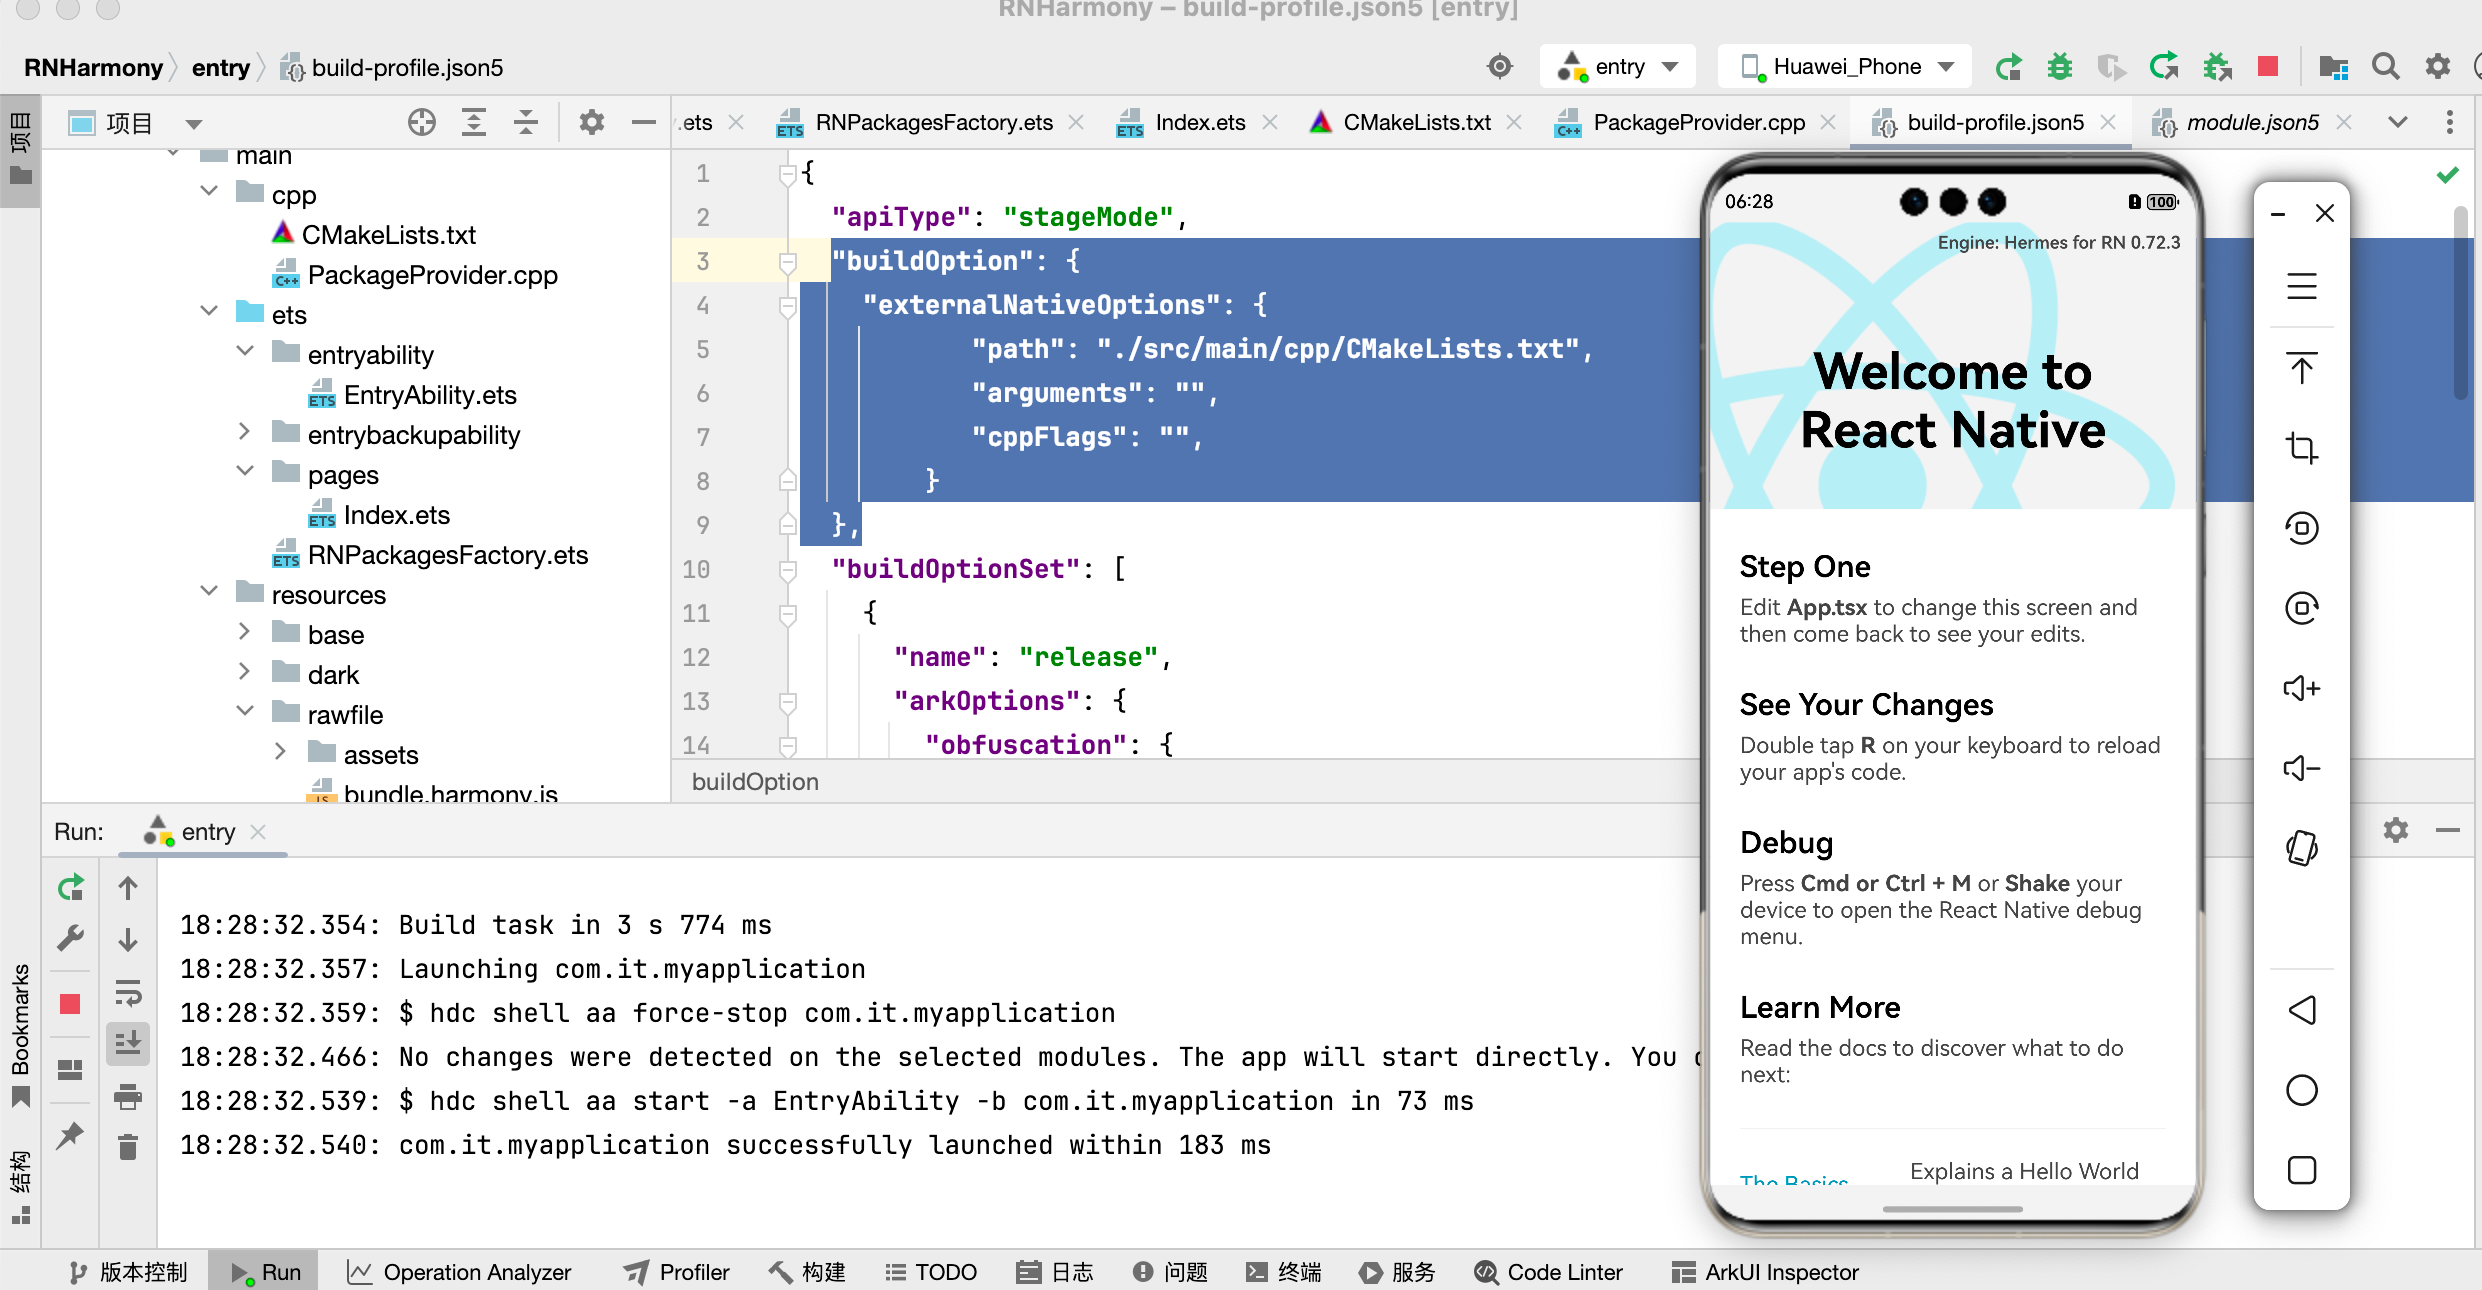
鸿蒙侧运行:
五:热更新
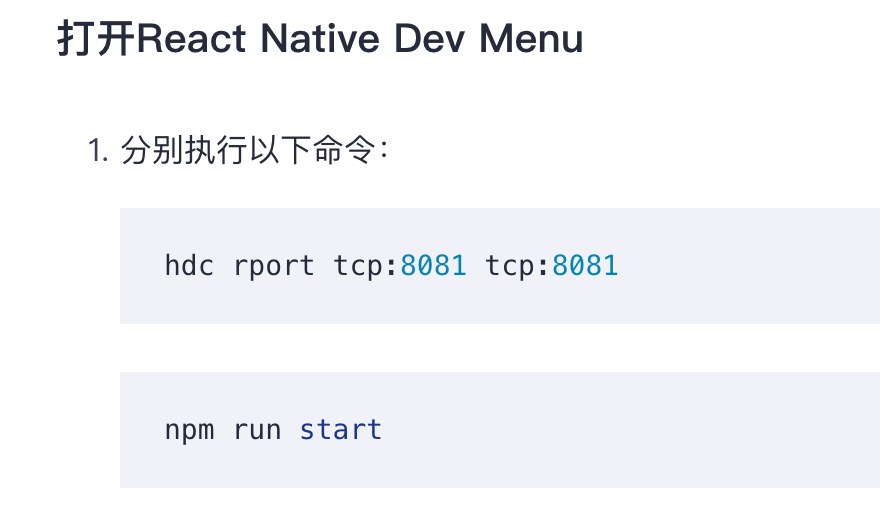
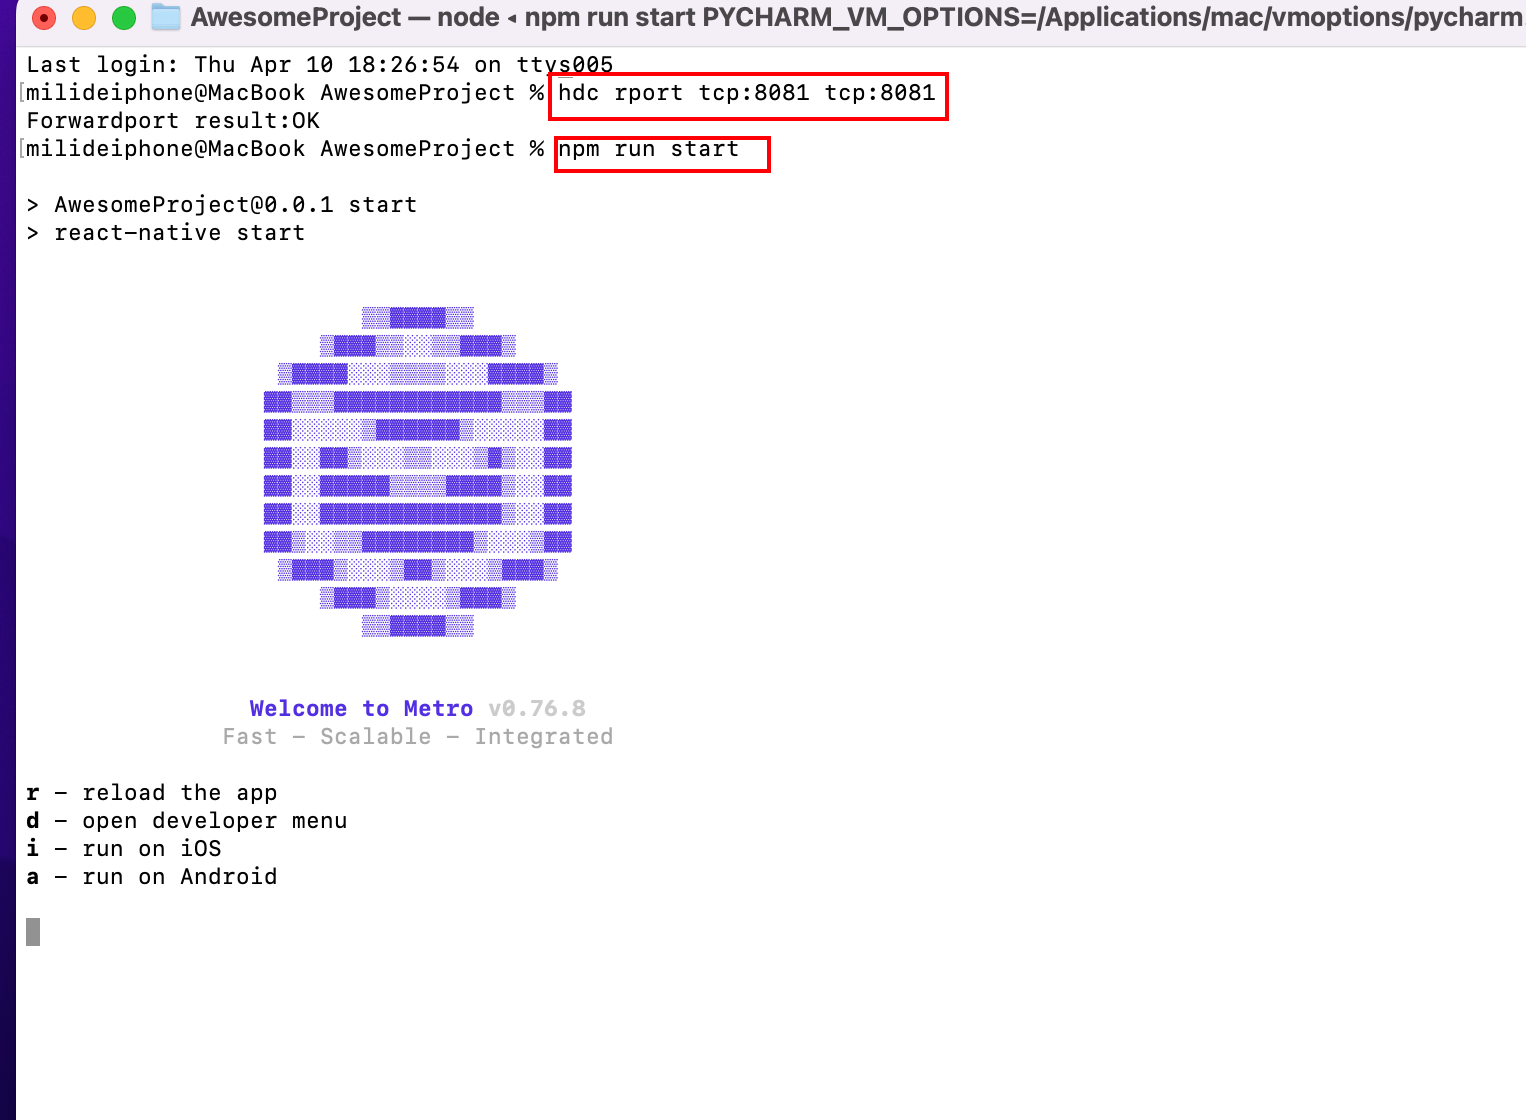
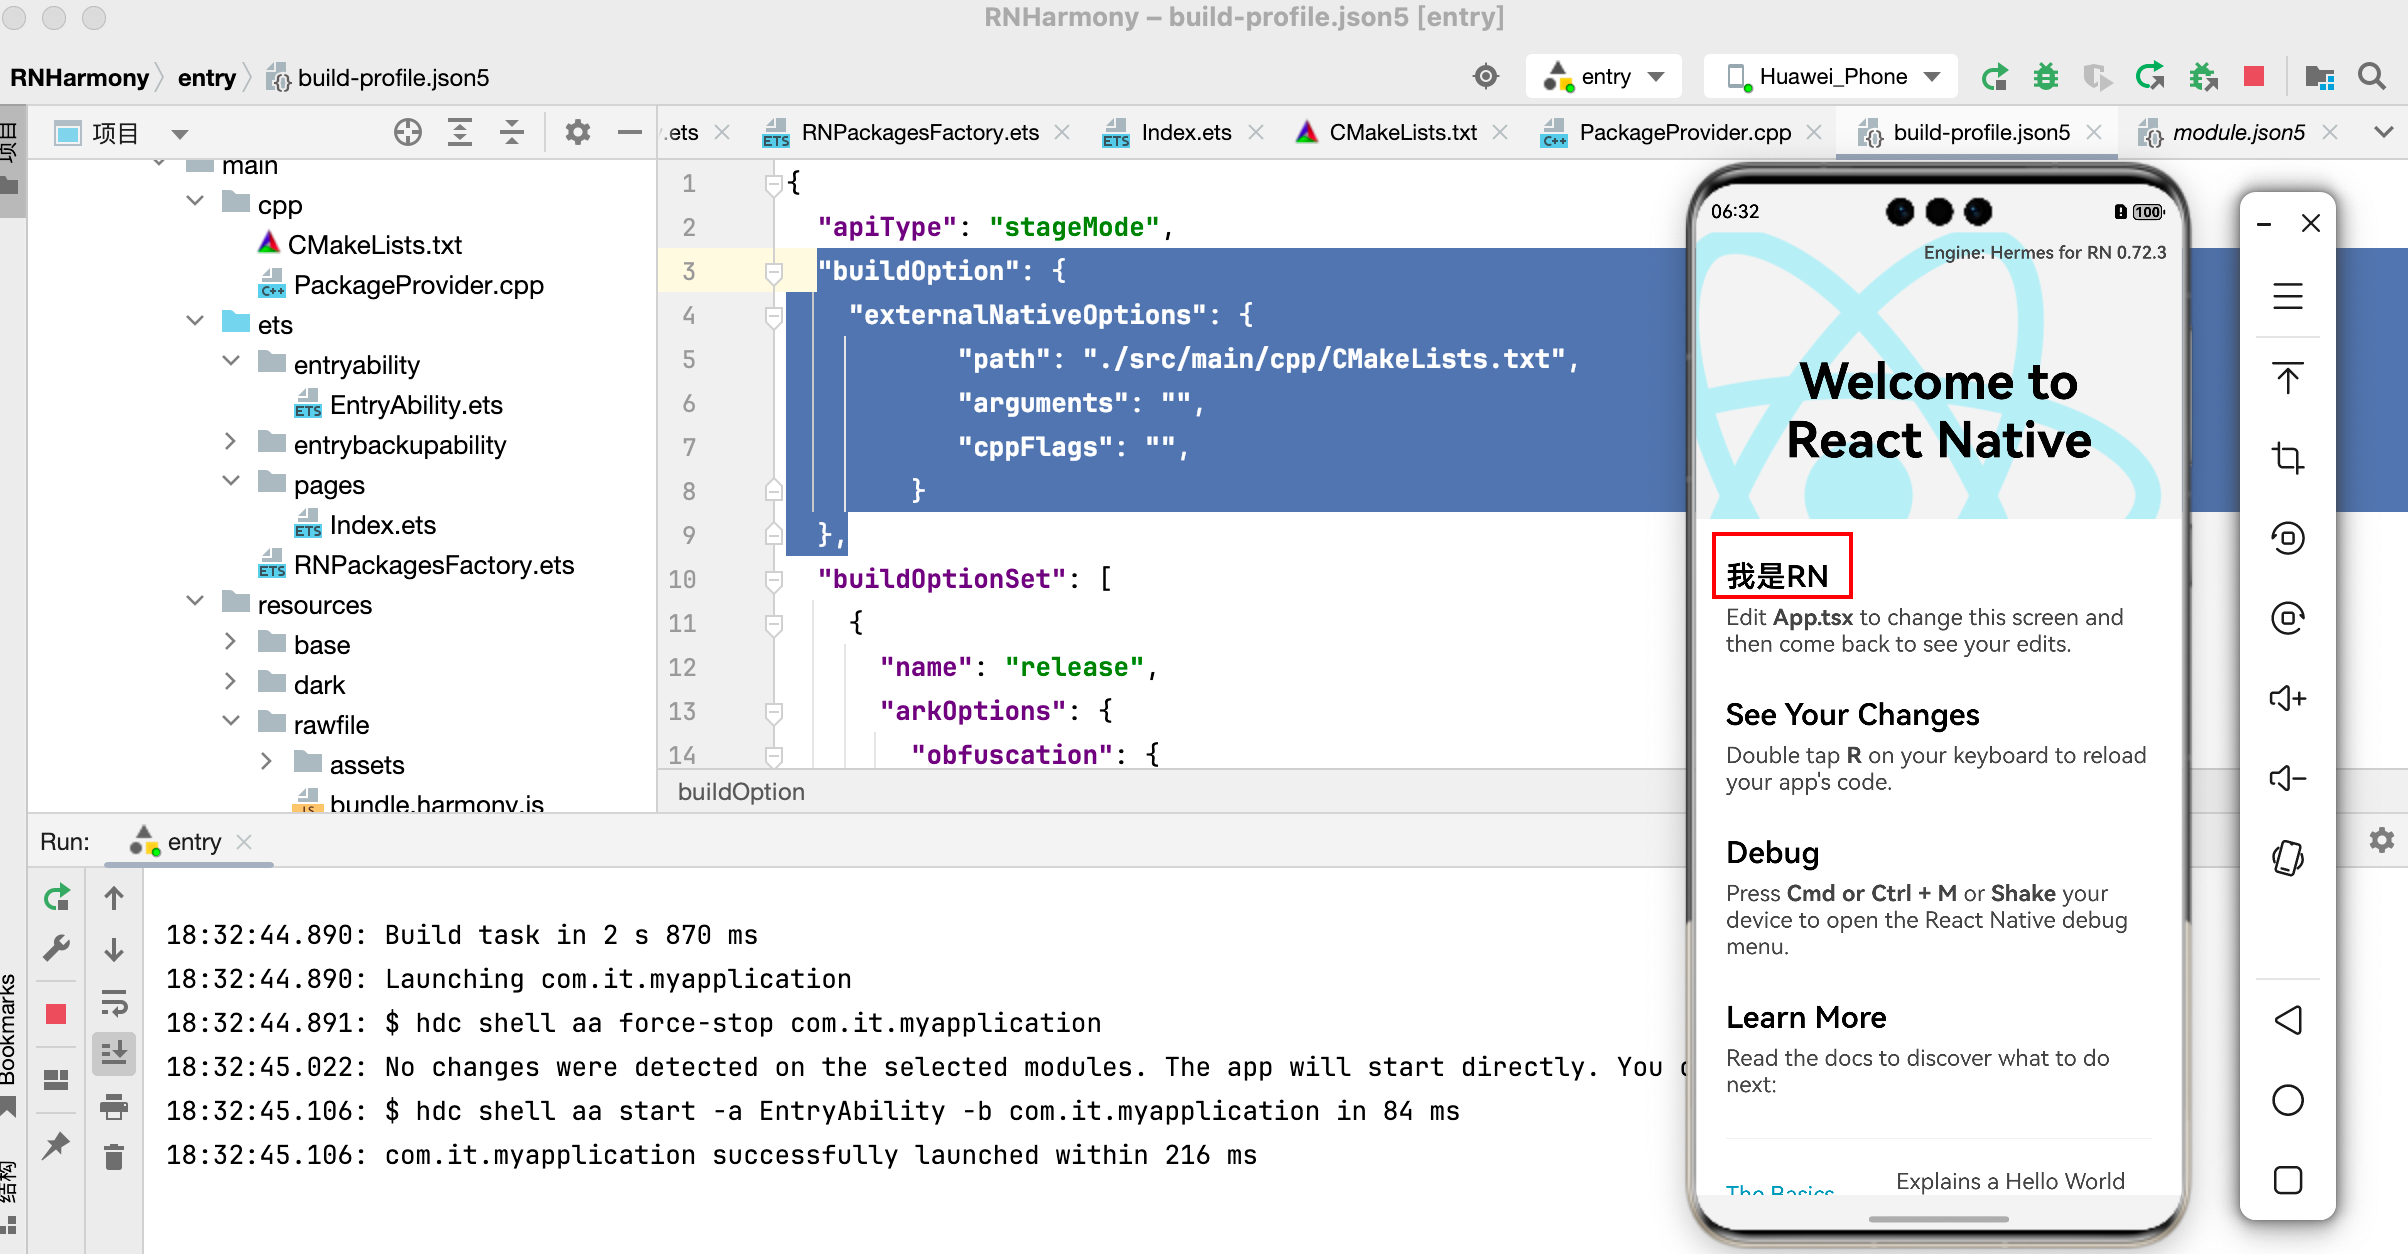
六:


npm uninstall @react-native-oh/react-native-harmony
npm install @react-native-oh/react-native-harmony@0.72.53 --save
认识React Native
React Native 是由 Facebook 开发的一个开源框架,用于构建原生移动应用。它结合了 React 的声明式编程范式和 JavaScript 的灵活性,允许开发者使用相同的代码库为 iOS 和 Android 平台创建高性能、美观且用户体验良好的应用。
总之,React Native 是一个强大的跨平台移动应用开发框架,适合各种规模和类型的项目。如果你想快速开发高性能的移动应用,React Native 是一个不错的选择。
基础知识:
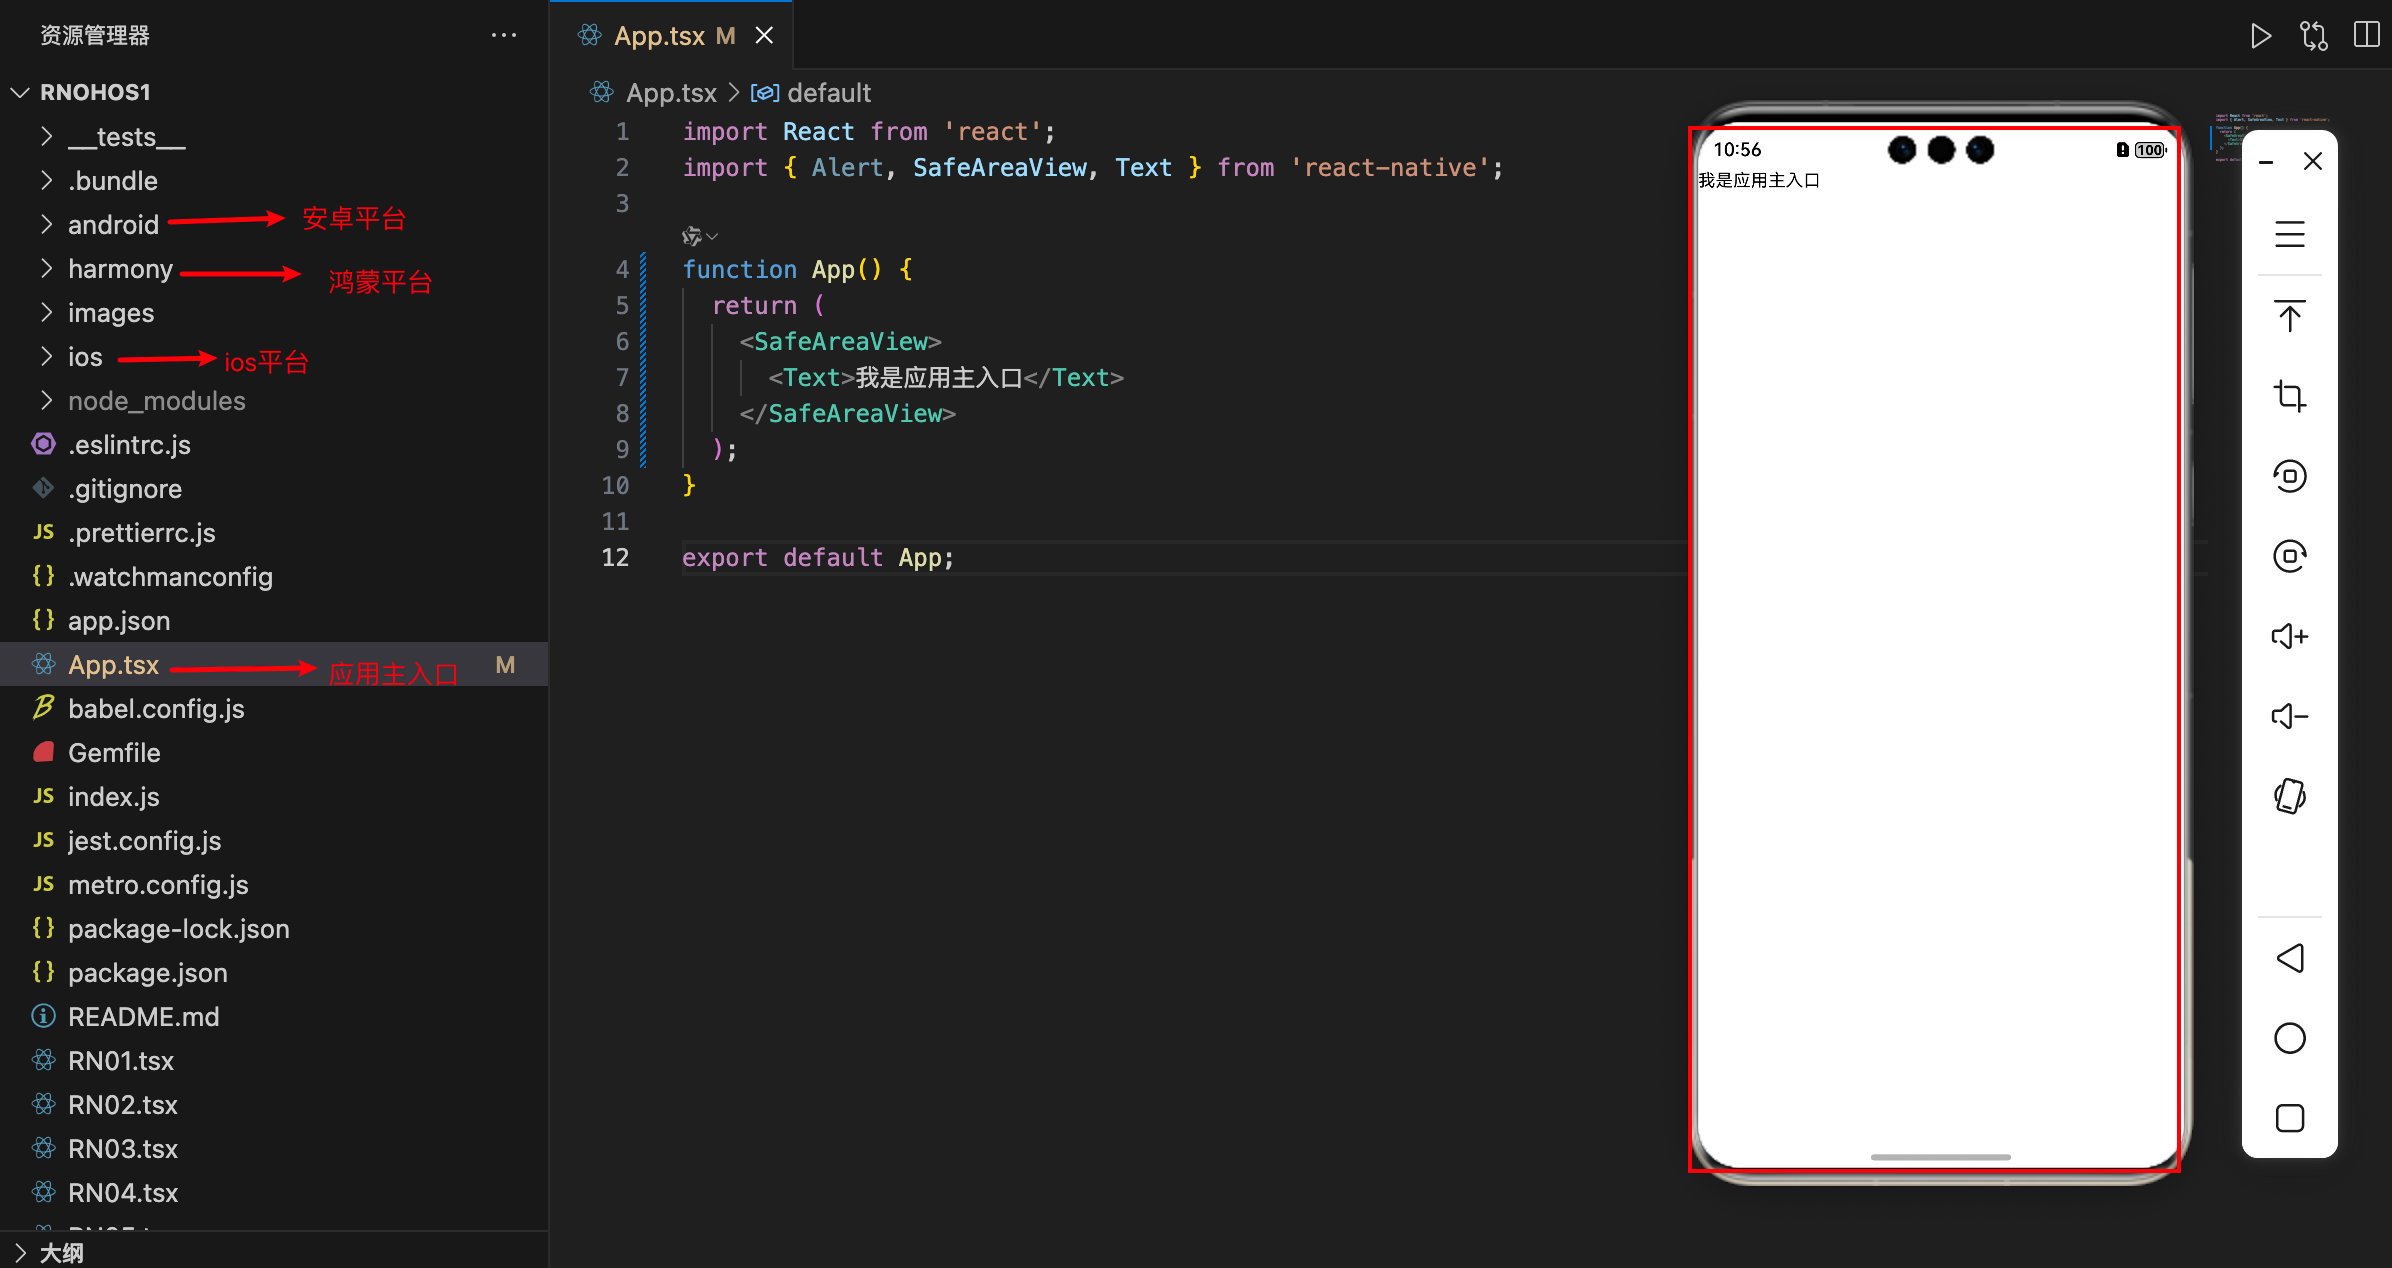
项目结构:
缓存清除并重新下载依赖

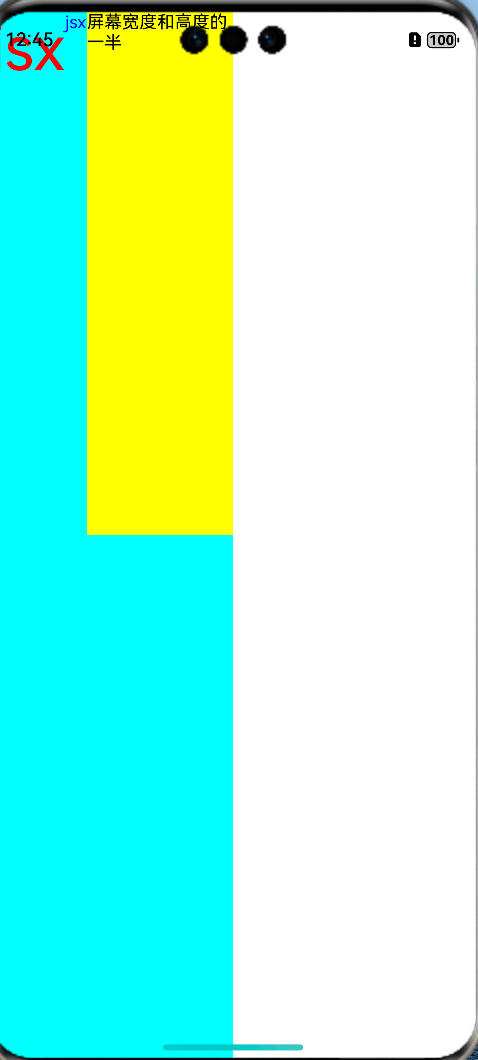
1.<View></View>:
import React from 'react';
import { View, Text, Image, ScrollView, TextInput, Dimensions } from 'react-native';

//获取屏幕的宽高
const screenWidth =Math.round( Dimensions.get('window').width);
const screenHight =Math.round( Dimensions.get('window').height);
/*
1
*/
function App() {
  return (
    <View style={{ backgroundColor:'aqua',flex: 1 ,flexDirection: 'row',width:'50%'}}>
      <Text style={{color:'red',fontSize:50}}>jsx</Text>
      <Text style={{color:'blue'}}>jsx</Text>
      <View style={{backgroundColor:'yellow',flex:1,width:screenWidth/2,height:screenHight/2}}>
        <Text>屏幕宽度和高度的一半</Text>
      </View>
    </View>

  );
}

export default App;
示意图:
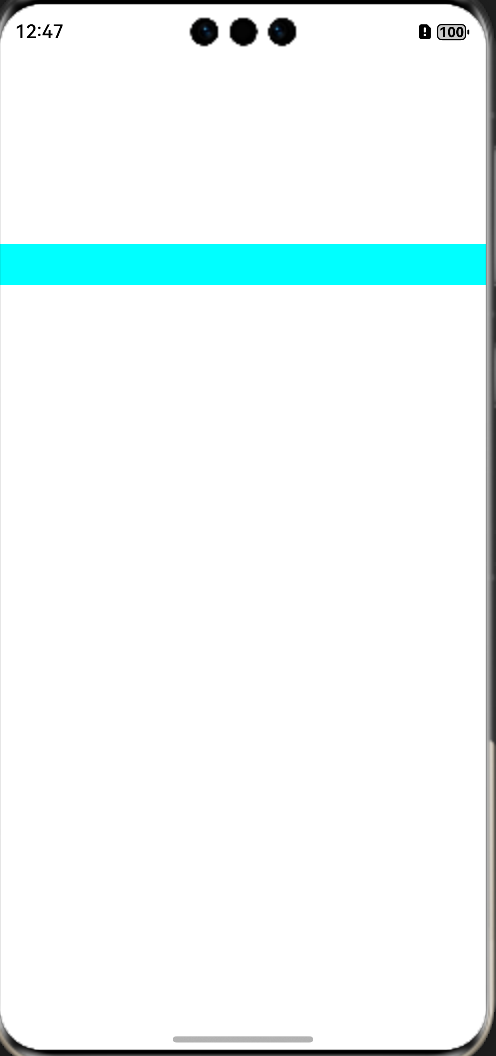
2.transform 平移、缩放
import React from 'react';
import { View, Text } from 'react-native';
/**
 * 1.transform   平移、缩放
 */
function App() {
  return (
    <View>
      <Text style={{backgroundColor:'aqua',transform:[{translateY:200},{scale:2}]}}>RN02</Text>
    </View>
  );
}

export default App;
示意图:
3.TouchableOpacity 点击透明
import React from 'react';
import { View, Text, Touchable, TouchableOpacity, Alert } from 'react-native';
/**
 * TouchableOpacity 点击之后的透明度标签、支持绑定事件
 * activeOpacity={1} 表示点击后不透明
 */

const onPress = () => {
  Alert.alert('点击了');
};

function App() {
  return (
    <TouchableOpacity activeOpacity={1} onPress={onPress}>
      <Text style={{ transform: [{translateY:400}] }}>TouchableOpacity</Text>
    </TouchableOpacity>
  );
}

export default App;
示意图:
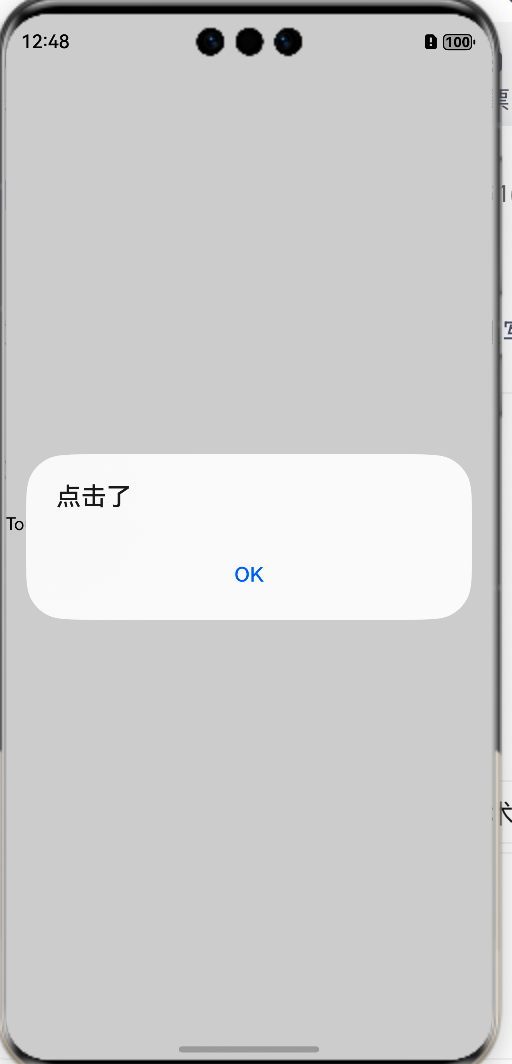
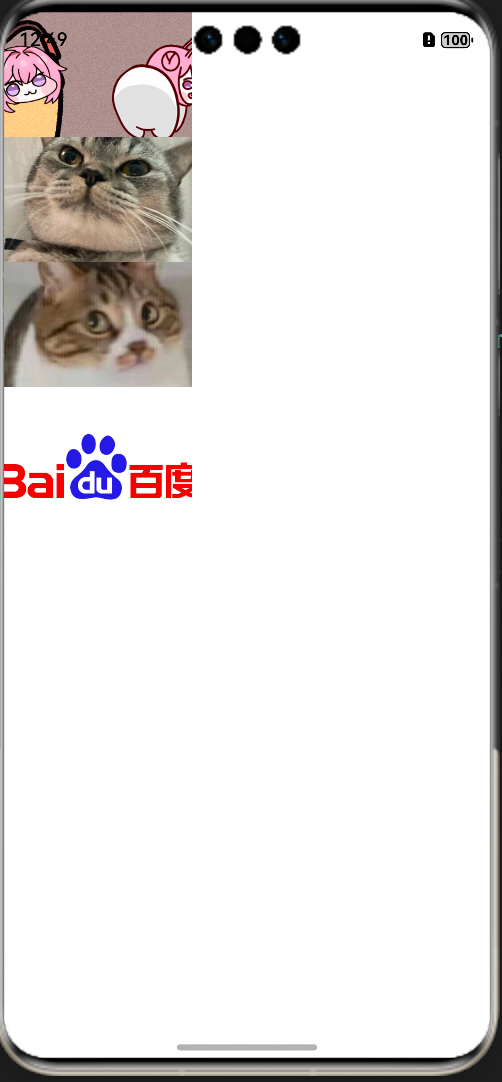
4.</Image> 图片
import React from 'react';
import { View, Image } from 'react-native';
function App() {
  return (
    <View>
      <Image style={{width:150,height:100}} source={require('./images/image01.gif')}></Image>
      <Image style={{width:150,height:100}}  source={require('./images/image01.png')}></Image>
      <Image style={{width:150,height:100}}  source={require('./images/image01.jpg')}></Image>
      <Image style={{width:150,height:100}}  source={{uri:'https://www.baidu.com/img/bd_logo1.png'}}></Image>
    </View>
  );
}

export default App;
示意图:
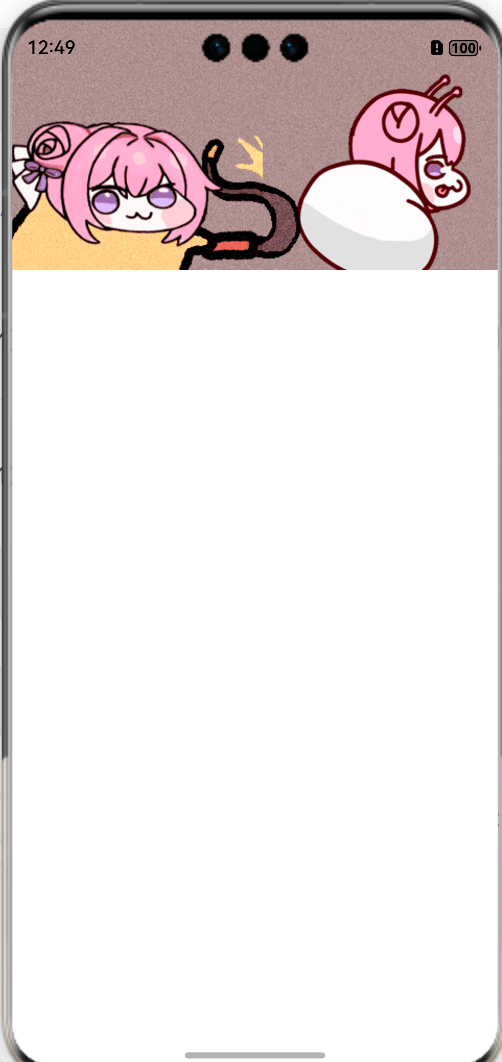
5.</ImageBackground> 背景图
import React from 'react';
import { View, Image, ImageBackground, SafeAreaView, Text } from 'react-native';
function App() {
  return (
    <ImageBackground style={{width:400,height:200}} source={require('./images/image01.gif')}>
      <Text></Text>
    </ImageBackground>
  );
}

export default App;
示意图:
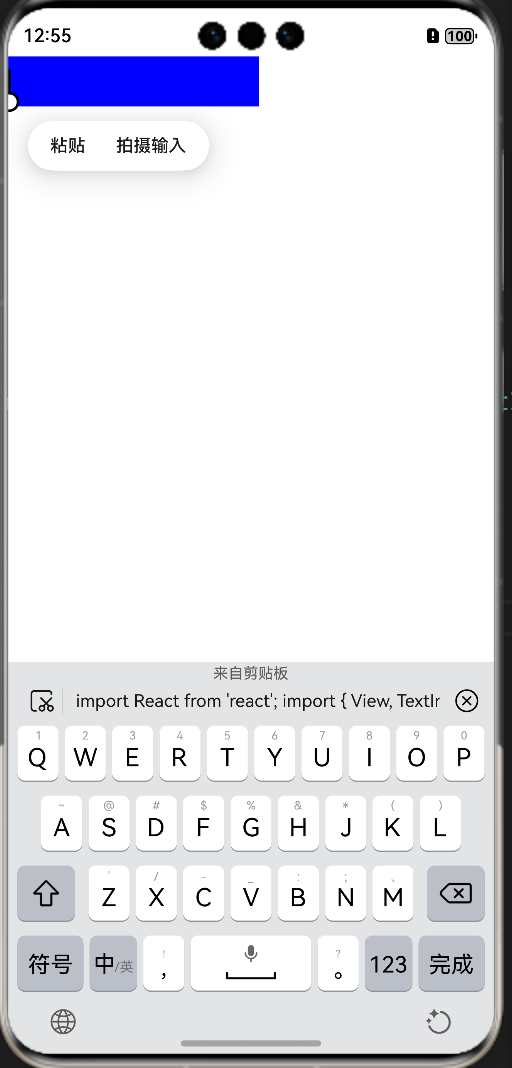
6.</TextInput> 文本输入框
import React from 'react';
import { View, TextInput, Alert, SafeAreaView } from 'react-native';

const onChangeValue = (value: any) => {
  Alert.alert(value);
}
function App() {
  return (
    <SafeAreaView>
   <TextInput style={{width: 200, height: 40,backgroundColor:'blue'}} onChangeText={onChangeValue}></TextInput>
    </SafeAreaView>
  );
}

export default App;
示意图:
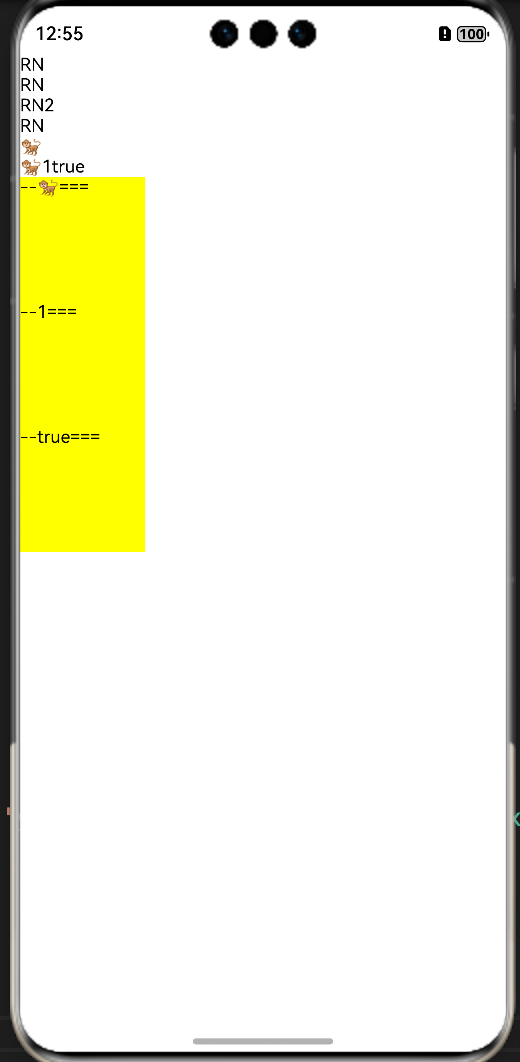
7.语法 ts
import React from 'react';
import {  SafeAreaView, Text, View } from 'react-native';
/*
插值表达式
*/
let str1:string = 'hello';
const name:string ='RN'
const age:number = 1;
const sex:boolean = true;
const height:number = 1.8;
const str:string = `${name} ${age} ${sex} ${height}`;
const arr1:string[] = ['🐒','1','true'];
//接口
interface IUser{
  name:string;
  age:number;
  sex:boolean;
  height:number;
}
const user:IUser = {name:'RN',age:1,sex:true,height:1.8};
const obj1:{name:string} = {name:'RN'};
const obj ={name:'RN'};
const arr=['🐒',1,'true'];
function App() {
  return (
    <SafeAreaView>
    <Text>RN</Text>
    <Text>{`RN`}</Text>
    <Text>{`RN${1+1}`}</Text>
    <Text>{obj.name}</Text>
    <Text>{arr[0]}</Text>
    <Text>{arr}</Text>
    {arr.map((item,index)=><View key={index} style={{backgroundColor:'yellow',width:100,height:100}}><Text>--{item+'==='}</Text></View>)}
    </SafeAreaView>
  );
}

export default App;
示意图:
8.函数组件&类组件
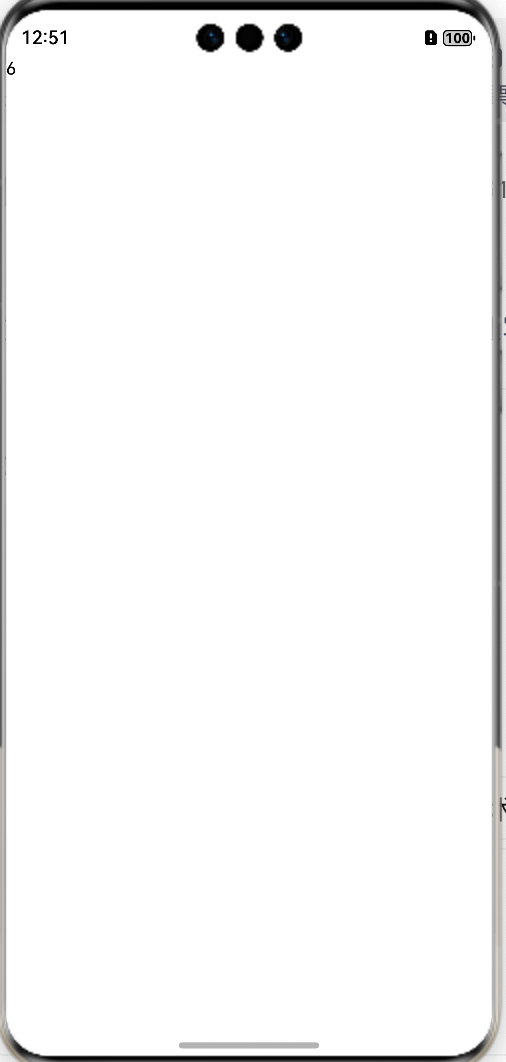
区别:函数组件是一个静态的,页面不会刷新,没有生命周期、类组件是一个动态的,页面可以刷新,有生命周期。
import React from 'react';
import {  SafeAreaView, Text, View } from 'react-native';
/*
函数组件   页面不会更新
类组件     页面会更新
*/

// function App() {
//   let num:number = 0;
//   const onPress = () => {
//     setInterval(() => {
//     num++;
//     }, 1000);
//   }
//   return (
//     <SafeAreaView>
//     <Text onPress={onPress}>{num}</Text>
//     </SafeAreaView>
//   );
// }

class App extends React.Component {
  state = {
    num: 0
  }
  //生命周期
  componentDidMount() {

  }
  render() {
     setInterval(() => {
      this.setState({
        num: this.state.num + 1
      })
    }, 1000);
    return (
      <SafeAreaView>
        <Text>{this.state.num}</Text>
     </SafeAreaView>
    )
  }
}

export default App;
示意图:
9.组件封装、通信
import { run } from 'jest';
import React from 'react';
import {  SafeAreaView, Text, View } from 'react-native';

//我是父组件
function App(){
  return(
    <SafeAreaView>
      <Text>======props=====</Text>
    <Text>我是text</Text>
    <Sub colos1='red'>
      <View style={{backgroundColor:'yellow'}}><Text>我是插槽传递过来的</Text></View>
    </Sub>
    </SafeAreaView>
  )
}


//我是子组件
//插槽 类似于 vue中 slot
function Sub(props:any){
  return(
    <View>
      <Text style={{color:props.colos1}}>我是子组件</Text>
      <View>{props.children}</View>
      </View>
  )
}
export default App;
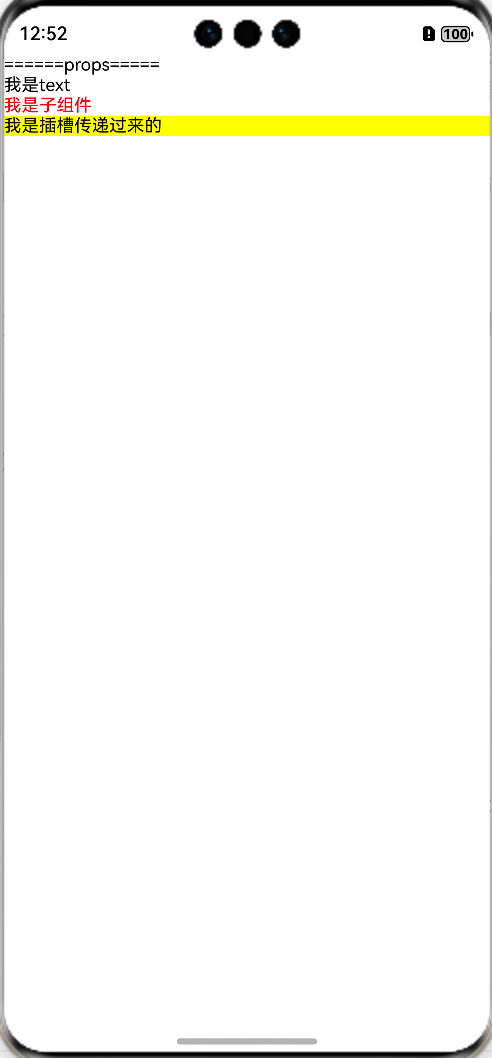
示意图:
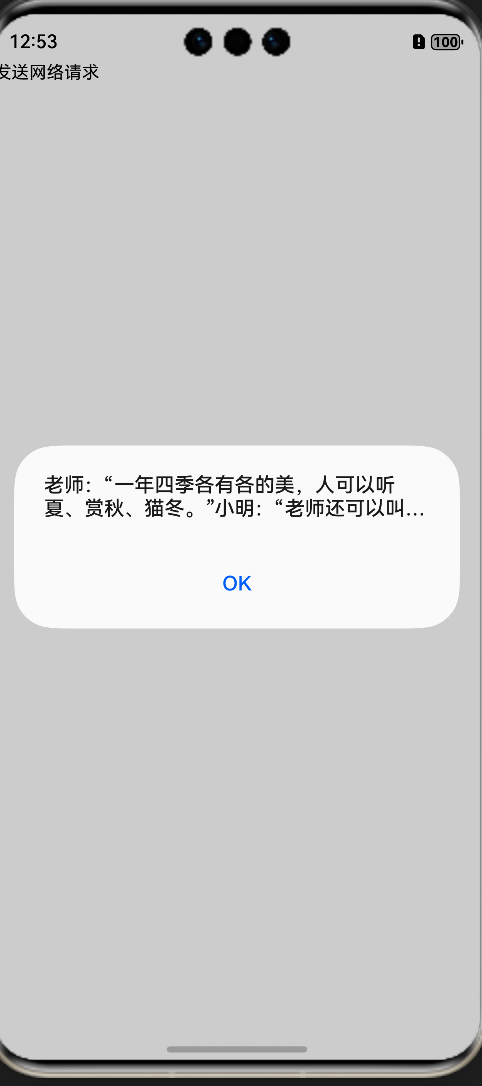
10.网络请求 axios
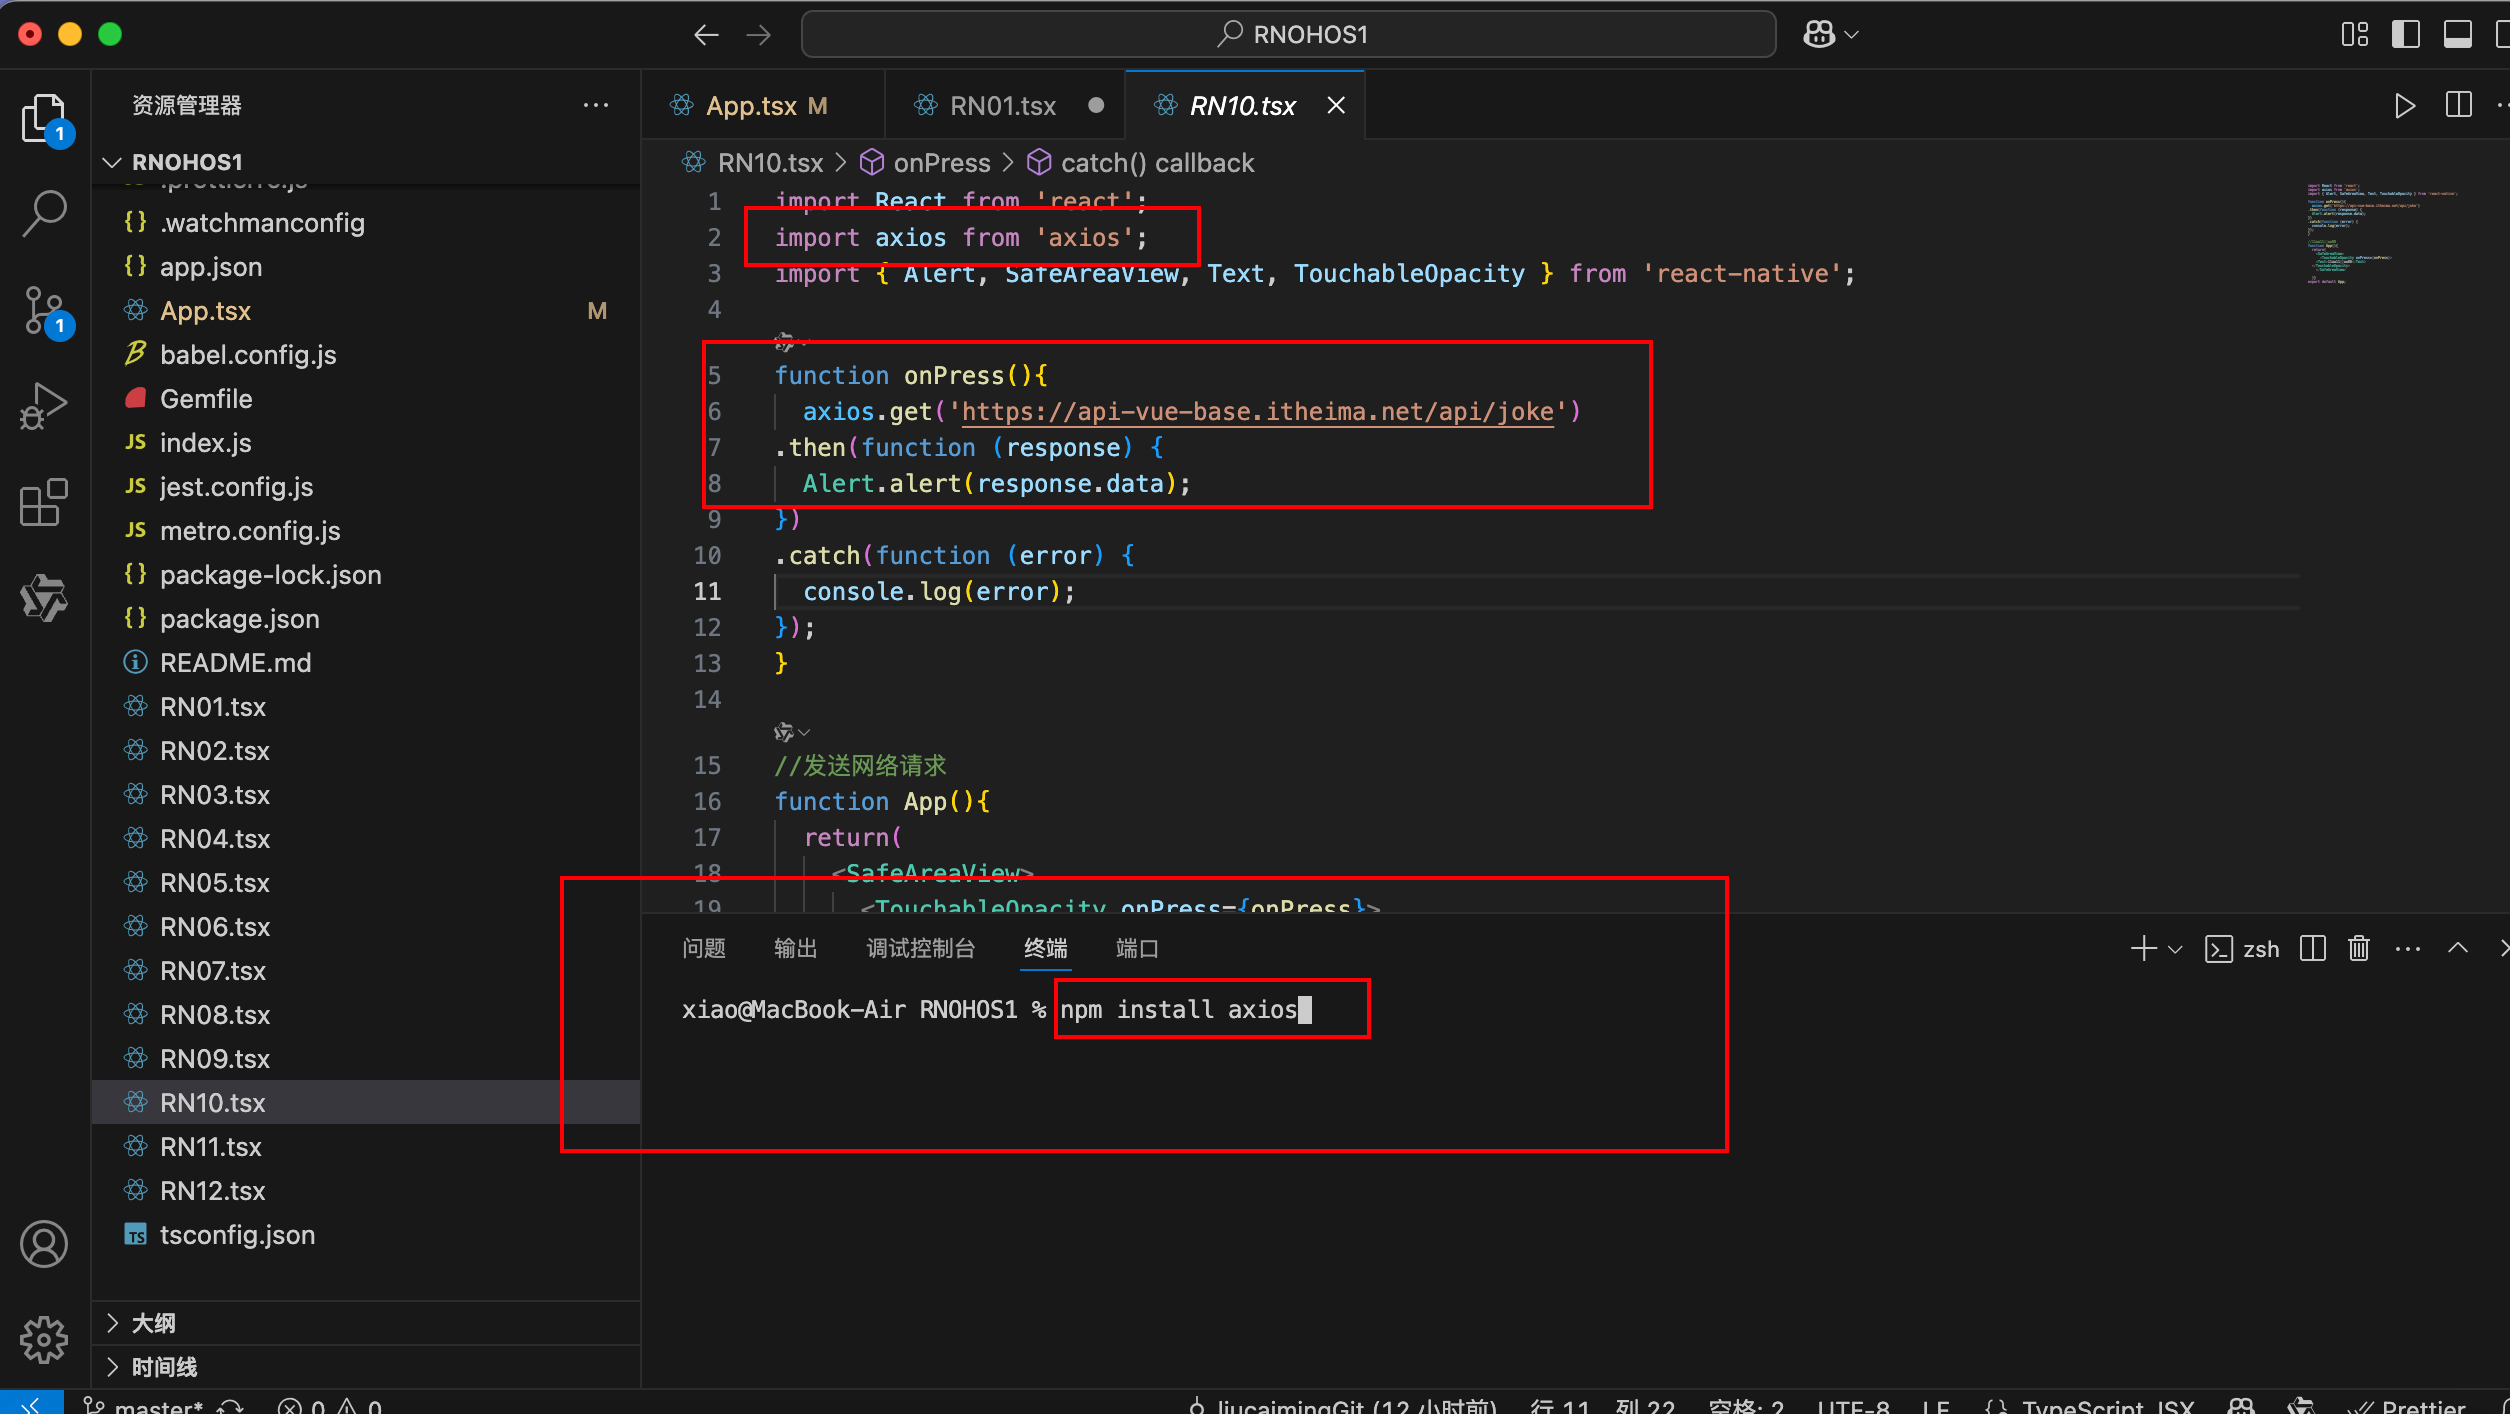
项目终端下载axios
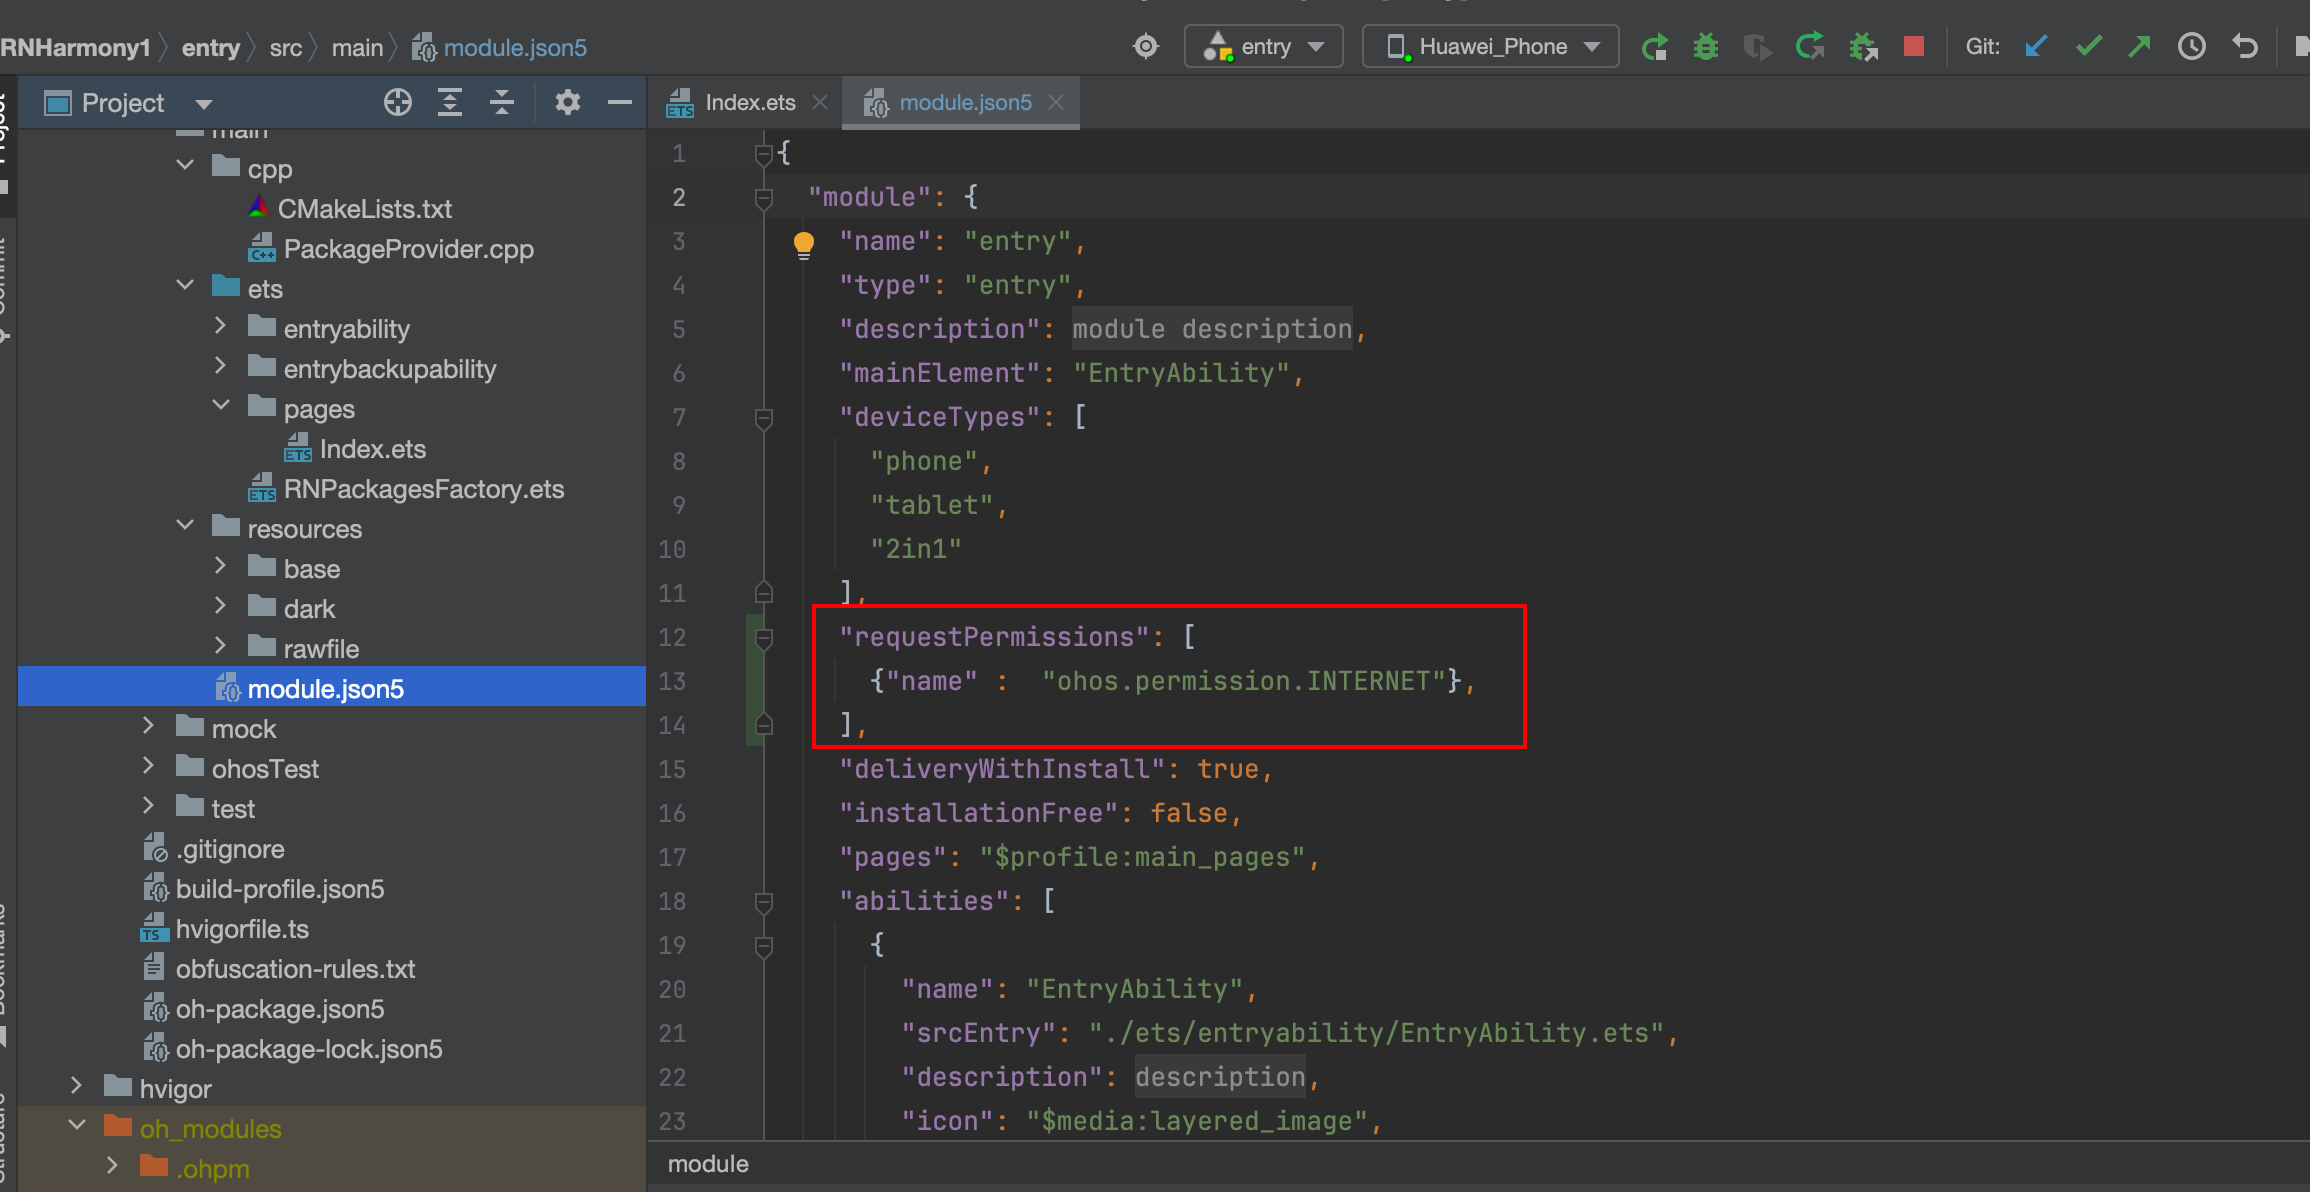
DevEco-Studio编译器的module.json5中配置网络权限
代码示例:
import React from 'react';
import axios from 'axios';
import { Alert, SafeAreaView, Text, TouchableOpacity } from 'react-native';

function onPress(){
  axios.get('https://api-vue-base.itheima.net/api/joke')
.then(function (response) {
  Alert.alert(response.data);
})
.catch(function (error) {
  console.log(error);
});
}

//发送网络请求
function App(){
  return(
    <SafeAreaView>
      <TouchableOpacity onPress={onPress}>
    <Text>发送网络请求</Text>
  </TouchableOpacity>
    </SafeAreaView>

  )}
export default App;
示意图:
11.事件 this指向
import React from 'react';
import { SafeAreaView, Text} from 'react-native';

class  App extends React.Component {
state = {
  data: 100
}

fun(){
  console.log(this.state)
}
//1.正确的写法 箭头函数
// fun=()=>{
//   console.log(this.state)
// }

//4.通过构造函数来绑定
  constructor(props: {} | Readonly<{}>) {
    super(props); // 修复的关键点:调用父类构造函数并传递 props
    this.fun = this.fun.bind(this);
  }
  render() {
    return (
      <SafeAreaView>
        <Text onPress={this.fun}>{this.state.data}</Text>
        {/**2.通过 bind 绑定this */}
        {/* <Text onPress={this.fun.bind(this)}>{this.state.data}</Text> */}
        {/**3.通过 匿名函数 绑定this */}
        {/* <Text onPress={()=>{this.fun()}}>{this.state.data}</Text> */}
      </SafeAreaView>
    )
  }
}
export default App;
12.生命周期
import React from 'react';
import { Alert, SafeAreaView, Text } from 'react-native';

interface AppState {
  data: string;
  num: number | null;
  show: boolean;
}

class App extends React.Component<{}, AppState> {
  // 1.1 构造函数
  constructor(props: {}) {
    super(props);
    console.log('1.1 构造函数');
    this.state = {
      data: '初始数据',
      num: null // 初始化为 null 或一个初始数字
      , show: false
    };
  }

  handlePress = () => {
    this.setState({
      num: Date.now()
    });
  };
  handleStop  = () => {
    this.setState({
      show: !this.state.show
    });
  };

//1.2  render 函数

//1.3 组件挂载完毕
componentDidMount() {
    console.log('1.3 组件挂载完毕');
  }
  render() {
    return (
      <SafeAreaView>
        <Text onPress={this.handlePress}>{this.state.num}</Text>
        <Text onPress={this.handlePress}>切换显示</Text>
        {this.state.show?<Btn />:<></>}
      </SafeAreaView>
    );
  }
}

class Btn extends React.Component<{}, AppState> {
  componentWillUnmount(): void {
    Alert.alert('组件销毁了');
  }
  render(): React.ReactNode {
    return (
      <SafeAreaView>
        <Text>组件销毁了</Text>
      </SafeAreaView>
    );
  }
}

export default App;
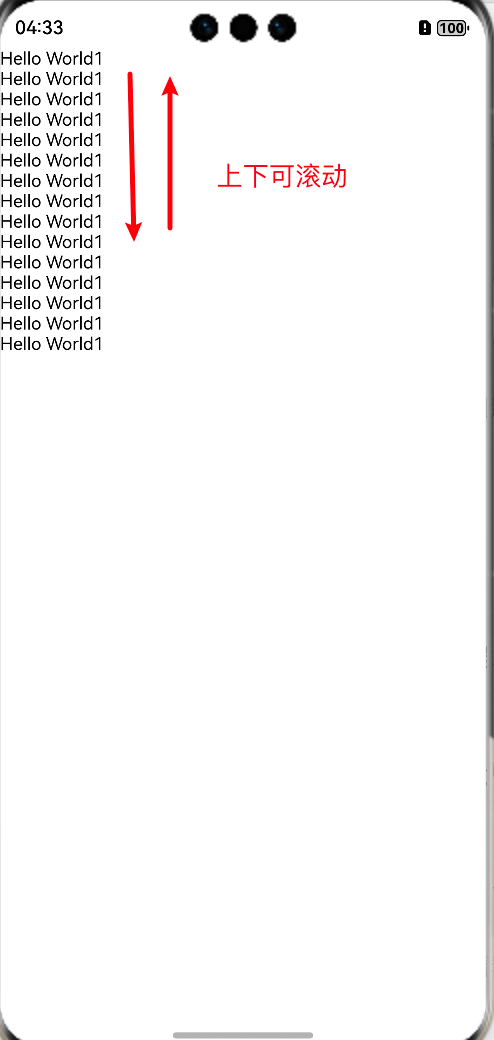
13.</ScrollView> 滚动容器
import React, { useState } from 'react';
import { SafeAreaView, ScrollView, Text, TextInput, View } from 'react-native';

function App(){
  return (
    <SafeAreaView>
       <ScrollView>
        <Text>Hello World1</Text>
        <Text>Hello World1</Text>
        <Text>Hello World1</Text>
        <Text>Hello World1</Text>
        <Text>Hello World1</Text>
        <Text>Hello World1</Text>
        <Text>Hello World1</Text>
        <Text>Hello World1</Text>
        <Text>Hello World1</Text>
        <Text>Hello World1</Text>
        <Text>Hello World1</Text>
        <Text>Hello World1</Text>
        <Text>Hello World1</Text>
        <Text>Hello World1</Text>
        <Text>Hello World1</Text>
       </ScrollView>
    </SafeAreaView>
  );
}

export default App;
示意图:
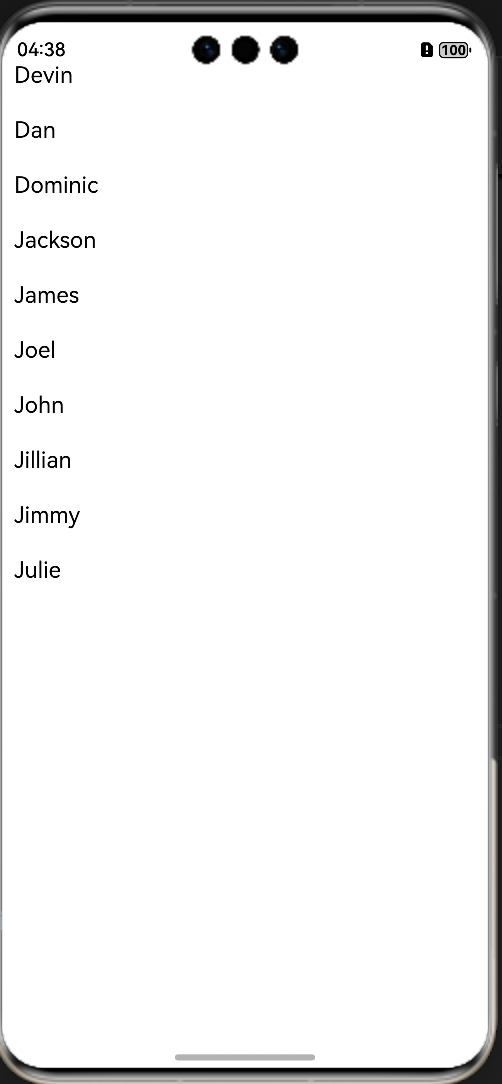
14. </SectionList>长列表
import React from 'react';
import { SectionList, StyleSheet, Text, View } from 'react-native';

const styles = StyleSheet.create({
  container: {
   flex: 1,
   paddingTop: 22
  },
  sectionHeader: {
    paddingTop: 2,
    paddingLeft: 10,
    paddingRight: 10,
    paddingBottom: 2,
    fontSize: 14,
    fontWeight: 'bold',
    backgroundColor: 'rgba(247,247,247,1.0)',
  },
  item: {
    padding: 10,
    fontSize: 18,
    height: 44,
  },
})

const SectionListBasics = () => {
    return (
      <View style={styles.container}>
        <SectionList
          sections={[
            {title: 'D', data: ['Devin', 'Dan', 'Dominic']},
            {title: 'J', data: ['Jackson', 'James', 'Jillian', 'Jimmy', 'Joel', 'John', 'Julie']},
          ]}
          renderItem={({item}) => <Text style={styles.item}>{item}</Text>}
          renderSectionHeader={({section}) => <Text style={styles.sectionHeader}>{section.title}</Text>}
          keyExtractor={(item, index) => index}
        />
      </View>
    );
}

export default SectionListBasics;
示意图:
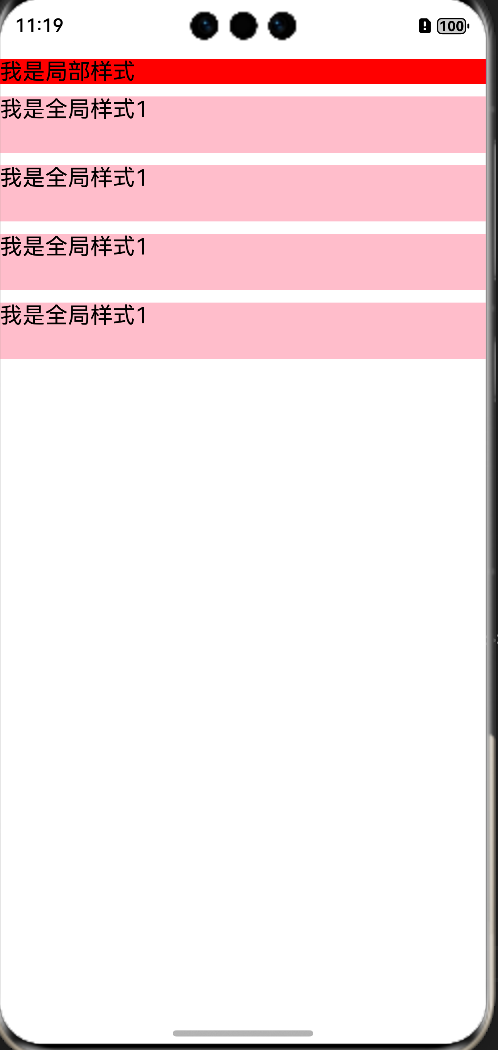
15.样式
全局样式&局部样式
import React from 'react';
import { FlatList, SafeAreaView, StyleSheet, Text, View } from 'react-native';

const styles = StyleSheet.create({
  item: {
    marginTop: 10,
    fontSize: 18,
    width: '100%',
    height: 45,
    backgroundColor: 'pink',
  },
});

function App() {
  return (
   <SafeAreaView>
    <Text style={{width:'100%',height:20,marginTop:10,backgroundColor:'red',fontSize:18}}>我是局部样式</Text>
    <Text style={styles.item}>我是全局样式1</Text>
    <Text style={styles.item}>我是全局样式1</Text>
    <Text style={styles.item}>我是全局样式1</Text>
    <Text style={styles.item}>我是全局样式1</Text>
   </SafeAreaView>
  );
}

export default App;
示意图:
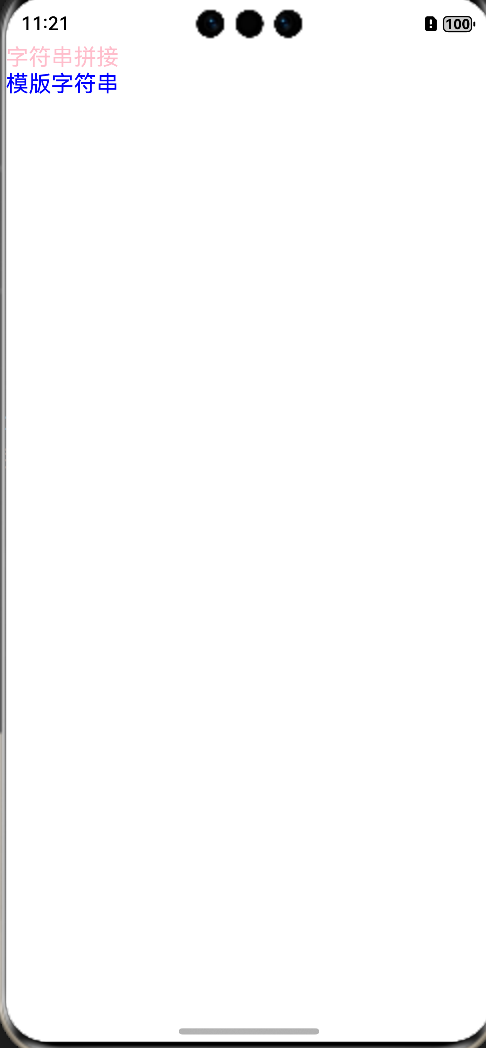
16.字符串
字符串拼接&模版字符串
import React from 'react';
import { FlatList, SafeAreaView, StyleSheet, Text, View } from 'react-native';


function App() {
  const data:string='拼接'
  const  data1:string='模版'
  return (
   <SafeAreaView>
   <Text style={{color:'pink',fontSize:18}}>{'字符串'+data}</Text>
    <Text style={{color:'blue',fontSize:18}}>{`${data1}字符串`}</Text>
   </SafeAreaView>
  );
}

export default App;
示意图:
核心知识:
一:三方库适配
更多推荐
 已为社区贡献3条内容



所有评论(0)