OpenHarmony开发实战:常用组件与布局(ArkTS(1),flutter热更新原理
由于“首页”和“我的”页面中有多处图片和文字的组合,因此提取出ItemData类。在MainViewModel.ets文件中对页面使用的资源进行定义,在MainViewModel.ets文件中定义数据。img?: Resource;others?: Resource;
本节主要介绍“登录”页面的实现,效果图如下:

界面使用Column容器组件布局,由Image、Text、TextInput、Button、LoadingProgress等基础组件构成,主要代码如下:
// LoginPage.ets
@Entry
@Component
struct LoginPage {
…
build() {
Column() {
Image(r(′app.media.logo′))...Text(r('app.media.logo')) ... Text(r(′app.media.logo′))...Text(r(‘app.string.login_page’))
…
Text($r(‘app.string.login_more’))
…
TextInput({ placeholder: $r(‘app.string.account’) })
…
TextInput({ placeholder: $r(‘app.string.password’) })
…
Row() {
Text(r(′app.string.messagelogin′)).blueTextStyle()Text(r('app.string.message_login')).blueTextStyle() Text(r(′app.string.messagelogin′)).blueTextStyle()Text(r(‘app.string.forgot_password’)).blueTextStyle()
}
…
Button(r(′app.string.login′),type:ButtonType.Capsule)....Text(r('app.string.login'), { type: ButtonType.Capsule }) .... Text(r(′app.string.login′),type:ButtonType.Capsule)....Text(r(‘app.string.register_account’))
…
if (this.isShowProgress) {
LoadingProgress()
…
}
Blank()
Text(KaTeX parse error: Expected '}', got 'EOF' at end of input: …is.imageButton(r(‘app.media.login_method1’))
this.imageButton(r(′app.media.loginmethod2′))this.imageButton(r('app.media.login_method2')) this.imageButton(r(′app.media.loginmethod2′))this.imageButton(r(‘app.media.login_method3’))
}
}
…
}
}
获取用户输入
当用户登录前,需要获取用户输入的帐号和密码才能执行登录逻辑。给TextInput设置onChange事件,在onChange事件里面实时获取用户输入的文本信息。
// LoginPage.ets
TextInput({ placeholder: $r(‘app.string.account’) })
.maxLength(CommonConstants.INPUT_ACCOUNT_LENGTH)
.type(InputType.Number)
.inputStyle()
.onChange((value: string) => {
this.account = value;
})
控制LoadingProgress显示和隐藏
给登录按钮绑定onClick事件,调用login方法模拟登录。定义变量isShowProgress结合条件渲染if用来控制LoadingProgress的显示和隐藏。当用户点击按钮时设置isShowProgress为true,即显示LoadingProgress;使用定时器setTimeout设置isShowProgress 2秒后为false,即隐藏LoadingProgress,然后执行跳转到首页的逻辑。
// LoginPage.ets
@Entry
@Component
struct LoginPage {
@State account: string = ‘’;
@State password: string = ‘’;
@State isShowProgress: boolean = false;
private timeOutId = null;
…
login() {
if (this.account === ‘’ || this.password === ‘’) {
prompt.showToast({
message: $r(‘app.string.input_empty_tips’)
})
} else {
this.isShowProgress = true;
if (this.timeOutId === null) {
this.timeOutId = setTimeout(() => {
this.isShowProgress = false;
this.timeOutId = null;
router.replaceUrl({ url: ‘pages/MainPage’ });
}, CommonConstants.LOGIN_DELAY_TIME);
}
}
}
…
build() {
Column() {
…
Button($r(‘app.string.login’), { type: ButtonType.Capsule })
…
.onClick(() => {
this.login();
})
…
if (this.isShowProgress) {
LoadingProgress()
.color(r(′app.color.loadingcolor′)).width(r('app.color.loading_color')) .width(r(′app.color.loadingcolor′)).width(r(‘app.float.login_progress_size’))
.height($r(‘app.float.login_progress_size’))
.margin({ top: $r(‘app.float.login_progress_margin_top’) })
}
…
}
…
}
}
实现页面跳转
页面间的跳转可以使用router模块相关API来实现,使用前需要先导入该模块,然后使用router.replace()方法实现页面跳转。
// LoginPage.ets
import router from ‘@ohos.router’;
login() {
if (this.account === ‘’ || this.password === ‘’) {
…
} else {
this.isShowProgress = true;
if (this.timeOutId === -1) {
this.timeOutId = setTimeout(() => {
this.isShowProgress = false;
this.timeOutId = -1;
router.replaceUrl({ url: ‘pages/MainPage’ });
}, CommonConstants.LOGIN_DELAY_TIME);
}
}
}
实现“首页”和“我的”页面
定义资源数据
由于“首页”和“我的”页面中有多处图片和文字的组合,因此提取出ItemData类。在MainViewModel.ets文件中对页面使用的资源进行定义,在MainViewModel.ets文件中定义数据。
// ItemData.ets
export default class PageResource {
title: Resource;
img?: Resource;
others?: Resource;
constructor(title: Resource, img?: Resource, others?: Resource) {
this.title = title;
this.img = img;
this.others = others;
}
}
// MainViewModel.ets
import ItemData from ‘./temData’;
export class MainViewModel {
…
getFirstGridData(): Array {
let firstGridData: ItemData[] = [
new ItemData($r(‘app.string.my_love’), r(′app.media.love′)),newItemData(r('app.media.love')), new ItemData(r(′app.media.love′)),newItemData(r(‘app.string.history_record’), $r(‘app.media.record’)),
…
];
return firstGridData;
}
…
}
export default new MainViewModel();
实现页面框架
从前面介绍章节的示意图可以看出,本示例由两个tab页组成,使用Tabs组件来实现,提取tabBar的公共样式,同时设置TabContent和Tabs的backgroundColor来实现底部tabBar栏背景色突出的效果。
// MainPage.ets
Tabs({
barPosition: BarPosition.End,
controller: this.tabsController
}) {
TabContent() {
…
}
…
.backgroundColor($r(‘app.color.mainPage_backgroundColor’)) // “首页”的页面背景色
.tabBar(this.TabBuilder(CommonConstants.HOME_TITLE, CommonConstants.HOME_TAB_INDEX,
$r(‘app.media.home_selected’), $r(‘app.media.home_normal’)))
…
}
…
.backgroundColor(Color.White) // 底部tabBar栏背景色
…
.onChange((index: number) => {
this.currentIndex = index;
})
…
实现“首页”内容
“首页”效果如下所示:

从上面效果如可以看出“首页”由三部分内容组成分别是轮播图、2*4栅格图、4*4栅格图。首先使用Swiper组件实现轮播图,无需设置图片大小。
// Home.ets
Swiper(this.swiperController) {
ForEach(mainViewModel.getSwiperImages(), (img: Resource) => {
Image(img).borderRadius($r(‘app.float.home_swiper_borderRadius’))
}, (img: Resource) => JSON.stringify(img.id))
}
…
.autoPlay(true)
…
然后使用Grid组件实现2*4栅格图,代码如下
// Home.ets
Grid() {
ForEach(mainViewModel.getFirstGridData(), (item: ItemData) => {
GridItem() {
Column() {
Image(item.img)
.width(r(′app.float.homehomeCellsize′)).height(r('app.float.home_homeCell_size')) .height(r(′app.float.homehomeCellsize′)).height(r(‘app.float.home_homeCell_size’))
Text(item.title)
.fontSize($r(‘app.float.little_text_size’))
.margin({ top: $r(‘app.float.home_homeCell_margin’) })
}
}
}, (item: ItemData) => JSON.stringify(item))
}
.columnsTemplate(‘1fr 1fr 1fr 1fr’)
.rowsTemplate(‘1fr 1fr’)
…
使用Grid组件实现4*4栅格列表栏,其中单个栅格中有一张背景图片和两行字体不同的文本,因此在Column组件中放置两个Text组件,并设置背景图,注意Grid组件必须设置高度,否则可能出现页面空白。
// Home.ets
Grid() {
ForEach(mainViewModel.getSecondGridData(), (secondItem: ItemData) => {
GridItem() {
Column() {
Text(secondItem.title)
…
Text(secondItem.others)
…
自我介绍一下,小编13年上海交大毕业,曾经在小公司待过,也去过华为、OPPO等大厂,18年进入阿里一直到现在。
深知大多数HarmonyOS鸿蒙开发工程师,想要提升技能,往往是自己摸索成长或者是报班学习,但对于培训机构动则几千的学费,着实压力不小。自己不成体系的自学效果低效又漫长,而且极易碰到天花板技术停滞不前!
因此收集整理了一份《2024年HarmonyOS鸿蒙开发全套学习资料》,初衷也很简单,就是希望能够帮助到想自学提升又不知道该从何学起的朋友,同时减轻大家的负担。

既有适合小白学习的零基础资料,也有适合3年以上经验的小伙伴深入学习提升的进阶课程,基本涵盖了95%以上HarmonyOS鸿蒙开发知识点,真正体系化!
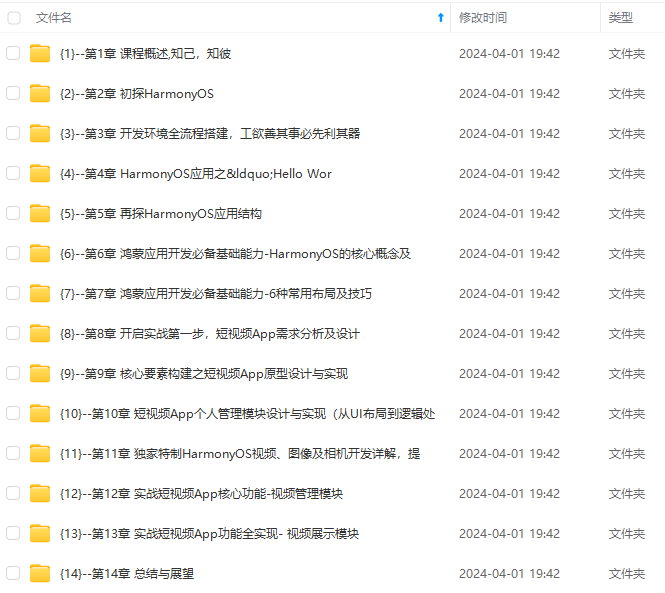
由于文件比较大,这里只是将部分目录大纲截图出来,每个节点里面都包含大厂面经、学习笔记、源码讲义、实战项目、讲解视频,并且会持续更新
如果你觉得这些内容对你有帮助,可以添加VX:vip204888 (备注鸿蒙获取)
一个人可以走的很快,但一群人才能走的更远。不论你是正从事IT行业的老鸟或是对IT行业感兴趣的新人,都欢迎扫码加入我们的的圈子(技术交流、学习资源、职场吐槽、大厂内推、面试辅导),让我们一起学习成长!
以上经验的小伙伴深入学习提升的进阶课程,基本涵盖了95%以上HarmonyOS鸿蒙开发知识点,真正体系化!**
由于文件比较大,这里只是将部分目录大纲截图出来,每个节点里面都包含大厂面经、学习笔记、源码讲义、实战项目、讲解视频,并且会持续更新
如果你觉得这些内容对你有帮助,可以添加VX:vip204888 (备注鸿蒙获取)
[外链图片转存中…(img-XuRsDneG-1712690817563)]
一个人可以走的很快,但一群人才能走的更远。不论你是正从事IT行业的老鸟或是对IT行业感兴趣的新人,都欢迎扫码加入我们的的圈子(技术交流、学习资源、职场吐槽、大厂内推、面试辅导),让我们一起学习成长!

讨论HarmonyOS开发技术,专注于API与组件、DevEco Studio、测试、元服务和应用上架分发等。
更多推荐


 5
5 0
0- 0


 已为社区贡献8条内容

所有评论(0)