React Native for 鸿蒙0.77.1 环境搭建指南
在上一章节中已经完成了 bundle 文件的生成,接下来将它加载到 DevEco Studio 中以运行 MyApplication 项目。使用 React Native 内置的命令行工具来创建一个新项目。到此,React Native for 鸿蒙的开发环境已经搭建完成!在 DevEco Studio 中点击运行按钮,选择连接的设备运行应用。中的对应文件进行一一替换,修改版本信息并运行。将上述命
React Native for 鸿蒙0.77.1 环境搭建指南
当前React Native鸿蒙版本基于社区RN 0.77.1进行适配,发布版本信息如下:
| 名称 | 版本号 |
|---|---|
| react-native-harmony.tgz | 0.77.33 |
| react-native-harmony-cli.tgz | 0.77.33 |
配套IDE、SDK版本和手机ROM:
| 名称 | 版本号 |
|---|---|
| DevEco Studio | DevEco Studio 6.0.1.248SP2 |
| HarmonyOS SDK | HarmonyOS SDK 6.0.1.112(SP32) |
| 手机ROM | ALN-AL00 206.0.0.112(SP7C00E112R4P8) ALN-AL80 206.0.0.112(SP7C00E112R4P8) BRA-AL00 206.0.0.112(SP7C00E112R4P6) |
前置条件
在开始之前,请确保您的开发环境满足以下要求:
- 操作系统: macOS 10.15+ 或 Windows 10+
- Node.js: 版本 18 或更高
- DevEco Studio: 最新版本
- OpenHarmony SDK: API 21
- React Native: 0.77.1 版本
环境变量设置
1. 配置 HDC 工具路径
打开终端,执行以下命令编辑配置文件:
# 对于 zsh 用户(推荐)
open ~/.zshrc

# 对于 bash 用户
vi ~/.bash_profile
在配置文件中添加以下内容:
# 添加 HDC 工具路径到 PATH(注意您的实际 SDK 安装路径)
export PATH="/Users/jianguo/Library/OpenHarmony/Sdk/20/openharmony/toolchains:$PATH"

# 设置 HDC 服务器端口
HDC_SERVER_PORT=7035
launchctl setenv HDC_SERVER_PORT $HDC_SERVER_PORT
export HDC_SERVER_PORT
注意: HDC 端口变量名为
HDC_SERVER_PORT,变量值可设置为任意未被占用的端口,如7035。
2. 配置 CAPI 版本环境变量
当前 RN 框架提供的 Demo 工程默认为 CAPI 版本,您需要配置环境变量:
export RNOH_C_API_ARCH=1
将上述命令添加到您的 shell 配置文件中(~/.bash_profile、~/.bashrc 或 ~/.zshrc)。
3. 使配置生效
编辑完成后,执行以下命令使配置的环境变量生效:
# 对于 zsh 用户
source ~/.zshrc

# 对于 bash 用户
source ~/.bash_profile
4. 验证配置
重新打开终端,检查环境变量是否设置成功:
echo $RNOH_C_API_ARCH
echo $HDC_SERVER_PORT
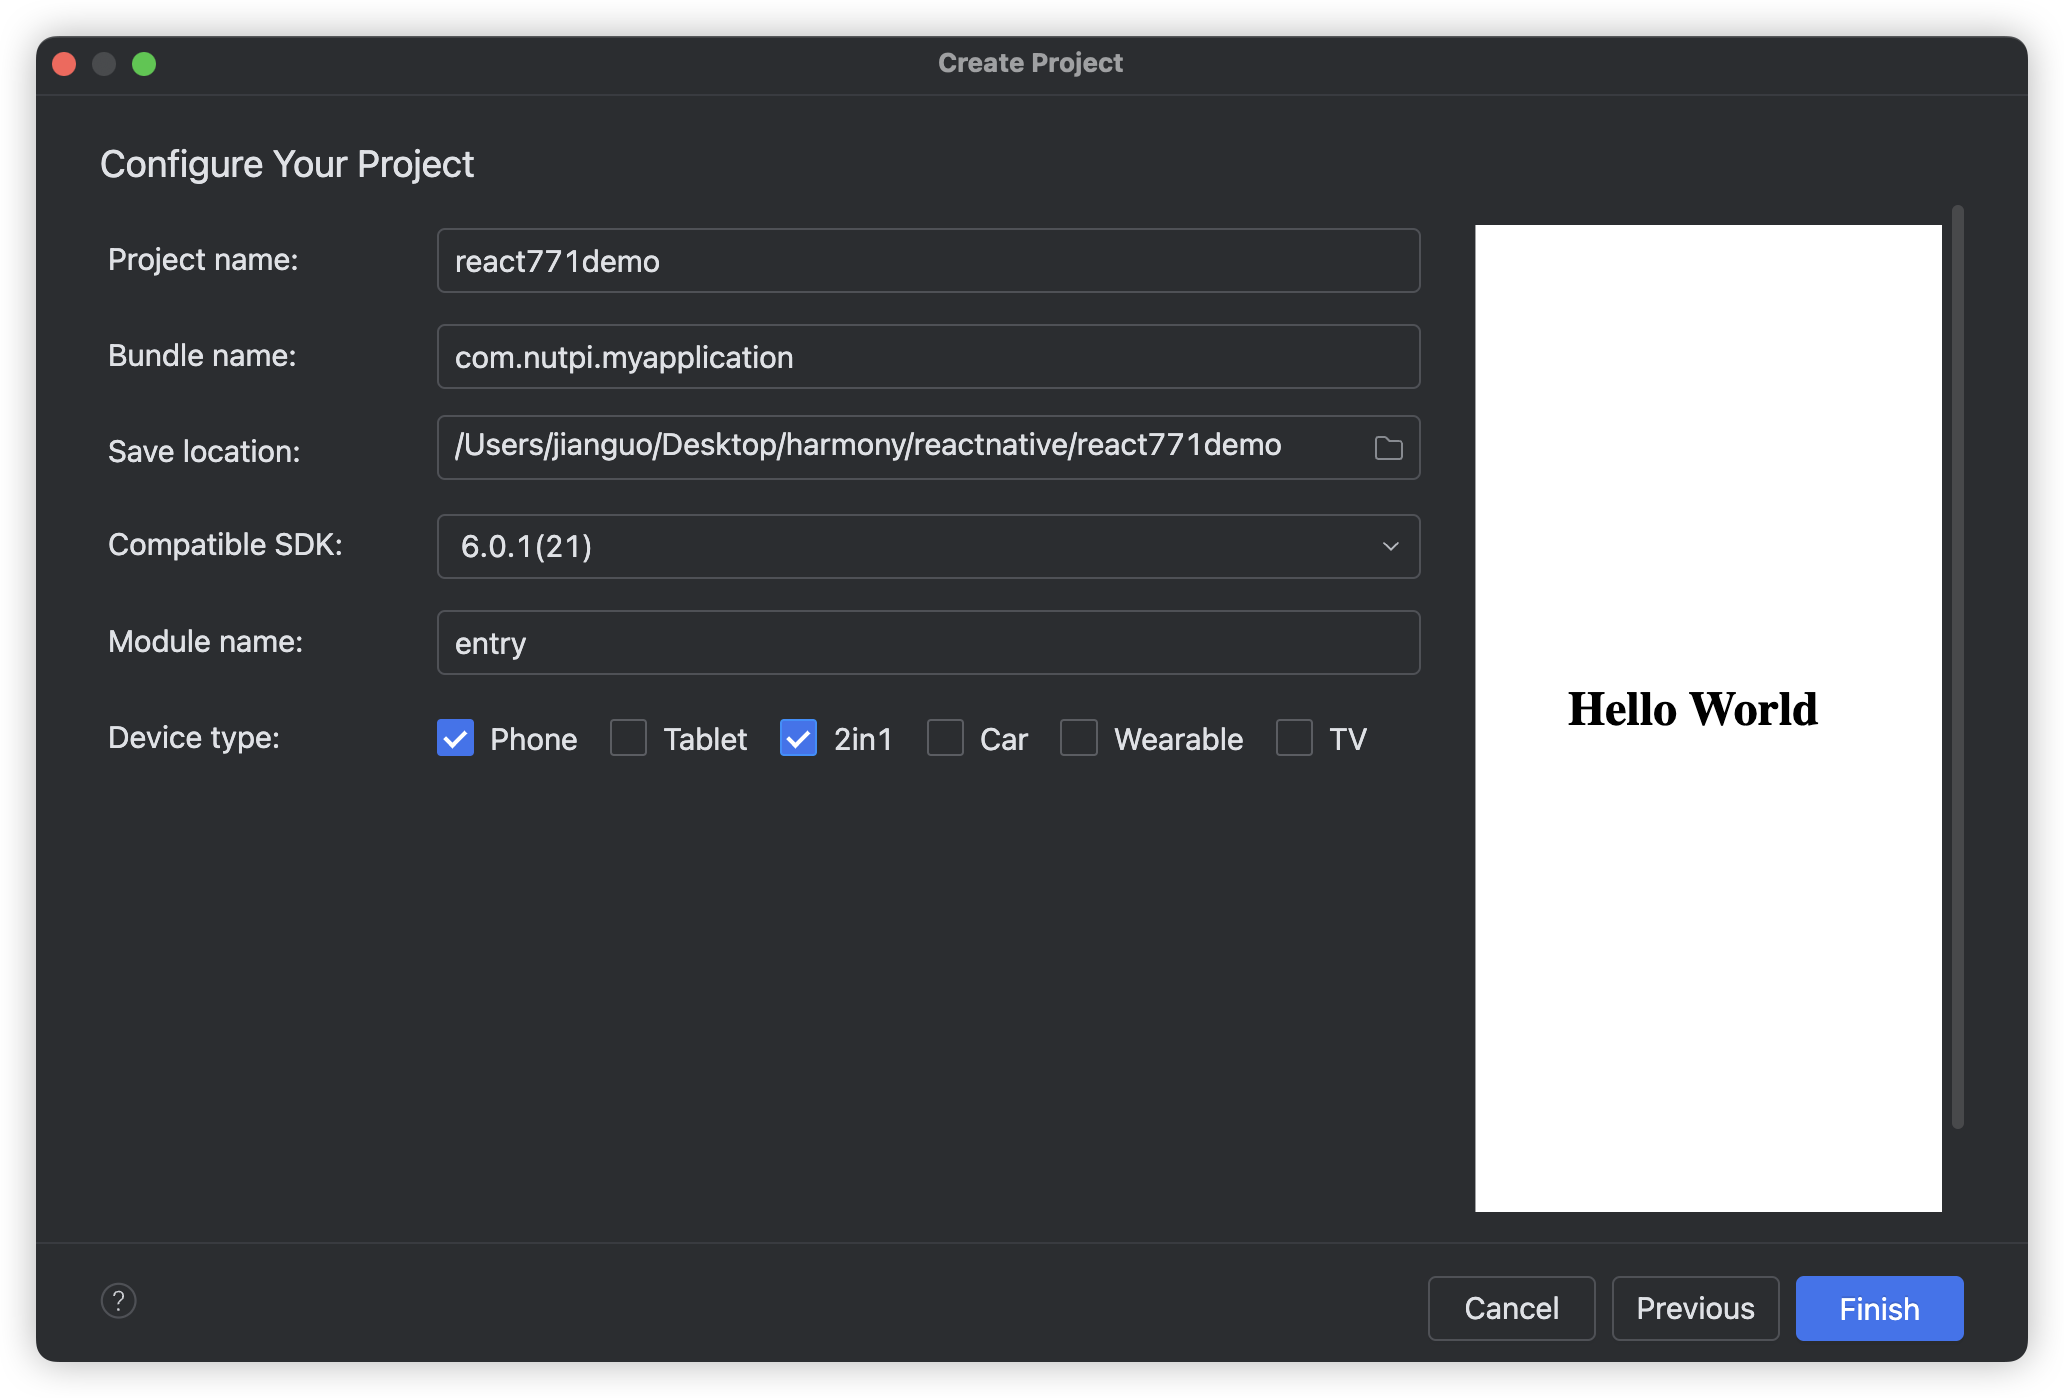
创建 React Native 项目
1. 创建新项目
使用 React Native 内置的命令行工具来创建一个新项目。目前 React Native for OpenHarmony 仅支持 0.72.5 版本的 React Native:
npx @react-native-community/cli init RnDemo771 --version 0.77.1
2. 跳过 iOS 依赖安装(可选)
npx @react-native-community/cli init RnDemo771 --version 0.77.1 --skip-install
jianguo@jianguodeMacBook-Pro reactnative % npx react-native@0.77.1 init RnDemo771 --version 0.77.1 --skip-install
Need to install the following packages:
react-native@0.77.1
Ok to proceed? (y) y

npm warn deprecated inflight@1.0.6: This module is not supported, and leaks memory. Do not use it. Check out lru-cache if you want a good and tested way to coalesce async requests by a key value, which is much more comprehensive and powerful.
npm warn deprecated rimraf@3.0.2: Rimraf versions prior to v4 are no longer supported
npm warn deprecated glob@7.2.3: Glob versions prior to v9 are no longer supported

  WARNING: You should run npx react-native@latest to ensure you're always using the most current version of the CLI. NPX has cached version (0.77.1) != current release (0.83.1)


🚨️ The `init` command is deprecated.

- Switch to npx @react-native-community/cli init for the identical behavior.
- Refer to the documentation for information about alternative tools: https://reactnative.dev/docs/getting-started
Exiting...
jianguo@jianguodeMacBook-Pro reactnative %
安装鸿蒙依赖包并生成bundle
版本信息
本节中使用的各类文件的版本配套关系,可以参考 React Native For OpenHarmony 版本信息。
快速开始: 您也可以直接使用 docs/Zips/AwesomeProjectReplace 文件夹 中的对应文件进行一一替换,修改版本信息并运行。
1. 修改 package.json
打开 RnDemo771 目录下的 package.json,在 scripts 下新增 OpenHarmony 的打包命令。完整的 package.json 配置如下:
{
  "name": "RnDemo771",
  "version": "0.0.1",
  "private": true,
  "scripts": {
    "android": "react-native run-android",
    "ios": "react-native run-ios",
    "lint": "eslint .",
    "start": "react-native start",
    "test": "jest",
    "dev": "react-native bundle-harmony --dev true"
  },
  "dependencies": {
    "@react-native-oh/react-native-harmony": "^0.77.40",
    "react": "18.3.1",
    "react-native": "0.77.1"
  },
  "devDependencies": {
    "@babel/core": "^7.25.2",
    "@babel/preset-env": "^7.25.3",
    "@babel/runtime": "^7.25.0",
    "@react-native-community/cli": "15.0.1",
    "@react-native-community/cli-platform-android": "15.0.1",
    "@react-native-community/cli-platform-ios": "15.0.1",
    "@react-native-oh/react-native-harmony-cli": "^0.77.40",
    "@react-native/babel-preset": "0.77.1",
    "@react-native/eslint-config": "0.77.1",
    "@react-native/metro-config": "0.77.1",
    "@react-native/typescript-config": "0.77.1",
    "@types/jest": "^29.5.13",
    "@types/react": "^18.2.6",
    "@types/react-test-renderer": "^18.0.0",
    "eslint": "^8.19.0",
    "jest": "^29.6.3",
    "prettier": "2.8.8",
    "react-test-renderer": "18.3.1",
    "typescript": "5.0.4"
  },
  "engines": {
    "node": ">=18"
  }
}
关键配置说明:
dev脚本:使用react-native bundle-harmony --dev true命令打包鸿蒙应用- 注意
--dev true参数,用于生成开发模式的 bundle
2. 安装鸿蒙依赖包
在 RnDemo771 项目根目录下依次运行以下命令安装鸿蒙相关依赖包:
2.1 安装 React Native Harmony 核心包
npm install @react-native-oh/react-native-harmony@0.77.40
2.2 安装 React Native Harmony CLI 工具
从 React Native 0.76 版本开始,*-harmony 相关命令(如 bundle-harmony、run-harmony 等)被拆分到独立的 CLI 包中。必须安装此依赖,否则会遇到 unknown command 'bundle-harmony' 错误。
npm install --save-dev @react-native-oh/react-native-harmony-cli@0.77.40
预期输出:
added 63 packages, and audited 1001 packages in 6s

175 packages are looking for funding
  run `npm fund` for details

found 0 vulnerabilities
注意:
- 如果遇到
EPERM: operation not permitted错误,可能是 npm 缓存或全局目录权限问题,建议清理 npm 缓存后重试:npm cache clean --force- 如果要使用 Codegen,请在此处配置 Codegen 相关命令,详细请参考 Codegen
3. 生成 Bundle 文件
在 RnDemo771 项目根目录下运行打包命令:
npm run dev
预期输出:
> RnDemo771@0.0.1 dev
> react-native bundle-harmony --dev true

                Welcome to Metro v0.81.5
              Fast - Scalable - Integrated

[INFO] No harmony-specific third-party packages have been detected

info Created harmony/entry/src/main/resources/rawfile/bundle.harmony.js
info Copied 6 assets
成功后会在 harmony/entry/src/main/resources/rawfile/ 目录下生成 bundle.harmony.js 文件和相关资源文件。
4. 添加 Metro 配置
在 RnDemo771 项目根目录下创建或修改 metro.config.js:
const {mergeConfig, getDefaultConfig} = require('@react-native/metro-config');
const {createHarmonyMetroConfig} = require('@react-native-oh/react-native-harmony/metro.config');

/**
 * @type {import("metro-config").ConfigT}
 */
const config = {
  transformer: {
    getTransformOptions: async () => ({
      transform: {
        experimentalImportSupport: false,
        inlineRequires: true,
      },
    }),
  },
};

module.exports = mergeConfig(
  getDefaultConfig(__dirname),
  createHarmonyMetroConfig({
    reactNativeHarmonyPackageName: '@react-native-oh/react-native-harmony',
  }),
  config
);
5. 添加 React Native 配置到 Harmony 工程
在 harmony/entry 目录下执行以下命令:
cd harmony/entry
ohpm i @rnoh/react-native-openharmony@0.77.40
cd ../..
在原生工程中集成RNOH
1. 配置 CPP 侧代码
创建 cpp 目录
在 MyApplication/entry/src/main 目录下新建 cpp 文件夹。
创建 CMakeLists.txt
在 cpp 目录下新增 CMakeLists.txt,将 RNOH 的适配层代码添加到编译构建中:
project(rnapp)
cmake_minimum_required(VERSION 3.4.1)
set(CMAKE_SKIP_BUILD_RPATH TRUE)
set(OH_MODULE_DIR "${CMAKE_CURRENT_SOURCE_DIR}/../../../oh_modules")
set(RNOH_APP_DIR "${CMAKE_CURRENT_SOURCE_DIR}")

set(RNOH_CPP_DIR "${OH_MODULE_DIR}/@rnoh/react-native-openharmony/src/main/cpp")
set(RNOH_GENERATED_DIR "${CMAKE_CURRENT_SOURCE_DIR}/generated")
set(CMAKE_ASM_FLAGS "-Wno-error=unused-command-line-argument -Qunused-arguments")
set(CMAKE_CXX_FLAGS "-fstack-protector-strong -Wl,-z,relro,-z,now,-z,noexecstack -s -fPIE -pie")
add_compile_definitions(WITH_HITRACE_SYSTRACE)
set(WITH_HITRACE_SYSTRACE 1) # for other CMakeLists.txt files to use

add_subdirectory("${RNOH_CPP_DIR}" ./rn)

add_library(rnoh_app SHARED
    "./PackageProvider.cpp"
    "${RNOH_CPP_DIR}/RNOHAppNapiBridge.cpp"
)

target_link_libraries(rnoh_app PUBLIC rnoh)
创建 PackageProvider.cpp
在 cpp 目录下新增 PackageProvider.cpp,该文件需要满足以下要求:
- 需要导入
RNOH/PackageProvider - 实现
getPackages方法,用于创建三方库或自定义 TurboModule 或 Fabric 的 package 对象
#include "RNOH/PackageProvider.h"

using namespace rnoh;

std::vector<std::shared_ptr<Package>> PackageProvider::getPackages(Package::Context ctx) {
    return {};
}
配置 build-profile.json5
打开 MyApplication/entry/build-profile.json5,将 cpp 中的代码添加到应用工程的编译构建任务中:
{
  "apiType": "stageMode",
  "buildOption": {
    "externalNativeOptions": {
      "path": "./src/main/cpp/CMakeLists.txt",
      "arguments": "",
      "cppFlags": ""
    }
  },
  "buildOptionSet": [
    {
      "name": "release",
      "arkOptions": {
        "obfuscation": {
          "ruleOptions": {
            "enable": false,
            "files": [
              "./obfuscation-rules.txt"
            ]
          }
        }
      }
    }
  ],
  "targets": [
    {
      "name": "default"
    },
    {
      "name": "ohosTest"
    }
  ]
}
注意: 如果在
x86_64架构的模拟器上运行应用,需在externalNativeOptions配置中额外添加abiFilters字段,并包含x86_64架构参数。默认仅构建适用于arm64-v8a架构的版本。
参考: 详细介绍可以参考模块级build-profile.json5。
2. 配置 ArkTS 侧代码
修改 EntryAbility.ets
打开 MyApplication/entry/src/main/ets/entryability/EntryAbility.ets,引入并使用 RNAbility:
import { AbilityConstant, ConfigurationConstant, UIAbility, Want } from '@kit.AbilityKit';
import { hilog } from '@kit.PerformanceAnalysisKit';
import { window } from '@kit.ArkUI';
import { RNAbility } from '@rnoh/react-native-openharmony';

const DOMAIN = 0x0000;

export default class EntryAbility extends RNAbility {
  getPagePath() {
    return 'pages/Index';
  }

  onDestroy(): void {
    hilog.info(DOMAIN, 'testTag', '%{public}s', 'Ability onDestroy');
  }

  onWindowStageCreate(windowStage: window.WindowStage): void {
    // Main window is created, set main page for this ability
    hilog.info(DOMAIN, 'testTag', '%{public}s', 'Ability onWindowStageCreate');

    windowStage.loadContent('pages/Index', (err) => {
      if (err.code) {
        hilog.error(DOMAIN, 'testTag', 'Failed to load the content. Cause: %{public}s', JSON.stringify(err));
        return;
      }
      hilog.info(DOMAIN, 'testTag', 'Succeeded in loading the content.');
    });
  }

  onWindowStageDestroy(): void {
    // Main window is destroyed, release UI related resources
    hilog.info(DOMAIN, 'testTag', '%{public}s', 'Ability onWindowStageDestroy');
  }

  onForeground(): void {
    // Ability has brought to foreground
    hilog.info(DOMAIN, 'testTag', '%{public}s', 'Ability onForeground');
  }

  onBackground(): void {
    // Ability has back to background
    hilog.info(DOMAIN, 'testTag', '%{public}s', 'Ability onBackground');
  }
}
重要要求:
- 需要重写
getPagePath,返回程序的入口 page - 如果需要扩展使用对应的生命周期函数:
- 请在代码中调用
super(由于RNAbility在生命周期函数中进行了对应的操作,因此建议使用super以确保原有功能不丢失) - 需确保函数的参数列表与父类保持兼容
- 建议添加
override关键字,以提升代码可读性并增强编译器检查
- 请在代码中调用
扩展示例:
import { RNAbility } from '@rnoh/react-native-openharmony';

export default class EntryAbility extends RNAbility {
  getPagePath() {
    return 'pages/Index';
  }

  override onCreate(want: Want): void {
    super.onCreate(want);
    hilog.info(0x0000, 'testTag', '%{public}s', 'EntryAbility onCreate');
  }
}
创建 RNPackagesFactory.ets
在 MyApplication/entry/src/main/ets 目录下新增 RNPackagesFactory.ets:
import { RNPackageContext, RNPackage } from '@rnoh/react-native-openharmony/ts';

export function createRNPackages(ctx: RNPackageContext): RNPackage[] {
  return [];
}
要求:
- 在
@rnoh/react-native-openharmony导入RNPackageContext和RNPackage - 在文件中导出
createRNPackages方法,用于创建三方库或自定义 TurboModule、Fabric 的 package 对象 - 此处不涉及三方库与自定义 TurboModule 或组件,需要返回空数组
修改 Index.ets
打开 MyApplication/entry/src/main/ets/pages/Index.ets,添加 RNOH 的使用代码:
import {
  AnyJSBundleProvider,
  ComponentBuilderContext,
  FileJSBundleProvider,
  MetroJSBundleProvider,
  ResourceJSBundleProvider,
  RNApp,
  RNOHErrorDialog,
  RNOHLogger,
  TraceJSBundleProviderDecorator,
  RNOHCoreContext
} from '@rnoh/react-native-openharmony';
import { createRNPackages } from '../RNPackagesFactory';

@Builder
export function buildCustomRNComponent(ctx: ComponentBuilderContext) {}

const wrappedCustomRNComponentBuilder = wrapBuilder(buildCustomRNComponent)

@Entry
@Component
struct Index {
  @StorageLink('RNOHCoreContext') private rnohCoreContext: RNOHCoreContext | undefined = undefined
  @State shouldShow: boolean = false
  private logger!: RNOHLogger

  aboutToAppear() {
    this.logger = this.rnohCoreContext!.logger.clone("Index")
    const stopTracing = this.logger.clone("aboutToAppear").startTracing();

    this.shouldShow = true
    stopTracing();
  }

  onBackPress(): boolean | undefined {
    // NOTE: this is required since `Ability`'s `onBackPressed` function always
    // terminates or puts the app in the background, but we want Ark to ignore it completely
    // when handled by RN
    this.rnohCoreContext!.dispatchBackPress()
    return true
  }

  build() {
    Column() {
      if (this.rnohCoreContext && this.shouldShow) {
        if (this.rnohCoreContext?.isDebugModeEnabled) {
          RNOHErrorDialog({ ctx: this.rnohCoreContext })
        }
        RNApp({
          rnInstanceConfig: {
            createRNPackages,
            enableNDKTextMeasuring: true, // 该项必须为true,用于开启NDK文本测算
            enableBackgroundExecutor: false,
            enableCAPIArchitecture: true, // 该项必须为true,用于开启CAPI
            arkTsComponentNames: []
          },
          initialProps: { "foo": "bar" } as Record<string, string>,
          appKey: "AwesomeDemo", // 尤其要注意,这个是你的rn的项目的名称
          wrappedCustomRNComponentBuilder: wrappedCustomRNComponentBuilder,
          onSetUp: (rnInstance) => {
            rnInstance.enableFeatureFlag("ENABLE_RN_INSTANCE_CLEAN_UP")
          },
          jsBundleProvider: new TraceJSBundleProviderDecorator(
            new AnyJSBundleProvider([
              new MetroJSBundleProvider(),
              // NOTE: to load the bundle from file, place it in
              // `/data/app/el2/100/base/com.rnoh.tester/files/bundle.harmony.js`
              // on your device. The path mismatch is due to app sandboxing on OpenHarmony
              new FileJSBundleProvider('/data/storage/el2/base/files/bundle.harmony.js'),
              new ResourceJSBundleProvider(this.rnohCoreContext.uiAbilityContext.resourceManager, 'hermes_bundle.hbc'),
              new ResourceJSBundleProvider(this.rnohCoreContext.uiAbilityContext.resourceManager, 'bundle.harmony.js')
            ]),
            this.rnohCoreContext.logger),
        })
      }
    }
    .height('100%')
    .width('100%')
  }
}
重要:
RNApp的参数appKey需要与 RN 工程中AppRegistry.registerComponent注册的appName保持一致,否则会导致白屏。
加载bundle包
在上一章节中已经完成了 bundle 文件的生成,接下来将它加载到 DevEco Studio 中以运行 MyApplication 项目。
1. 拷贝 Bundle 文件
将 RN 侧的 rawfile 文件拷贝到鸿蒙侧的 rawfile 目录:
- 源路径:
AwesomeProject/harmony/entry/src/main/resources/rawfile/ - 目标路径:
MyApplication/entry/src/main/resources/rawfile/
2. 运行项目
连接设备
用数据线将真机与电脑连接,打开新的命令行工具并执行以下命令进行反向端口转发:
hdc list targets
hdc rport tcp:8081 tcp:8081
命令说明:
hdc list targets: 列出已连接的设备hdc rport tcp:8081 tcp:8081: 将设备的 8081 端口反向映射到电脑的 8081 端口,使设备能访问电脑上的 Metro 服务器
常见问题:
如果遇到 [Fail]TCP Port listen failed at 8081 错误,可能是因为:
-
已存在转发规则: 检查并删除现有的端口转发
# 查看现有转发规则 hdc fport ls # 如果看到已有 8081 转发,可以重启 hdc server 清除 hdc kill hdc start # 然后重新执行转发命令 hdc rport tcp:8081 tcp:8081 -
本机 8081 端口被占用: 检查并释放端口
# macOS/Linux 查看端口占用
lsof -nP -iTCP:8081 -sTCP:LISTEN

# 如果有进程占用,kill 对应的进程 ID
kill -9 <PID>
启动 Metro 服务器
在 RN 工程目录中执行以下命令启动 RN 应用:
npm run start
预期输出:
Metro waiting on exp://192.168.x.x:8081
Scan the QR code above with Expo Go (Android) or the Camera app (iOS)
运行鸿蒙应用
在 DevEco Studio 中点击运行按钮,选择连接的设备运行应用。
常见问题排查
问题 1: unknown command 'bundle-harmony'
错误信息:
error: unknown command 'bundle-harmony'
react-native-harmony is installed but @react-native-oh/react-native-harmony-cli is not.
解决方案:
从 React Native 0.76 版本开始,鸿蒙相关命令需要单独安装 CLI 包:
npm install --save-dev @react-native-oh/react-native-harmony-cli@0.77.40
问题 2: hdc rport 端口监听失败
错误信息:
[Fail]TCP Port listen failed at 8081
解决方案:
方法一:清除现有转发规则
hdc kill
hdc start
hdc rport tcp:8081 tcp:8081
方法二:使用其他端口
# 使用 8082 端口
hdc rport tcp:8082 tcp:8082

# 同时需要在启动 Metro 时指定端口
npm run start -- --port 8082
问题 3: DevEco Studio 中应用白屏
可能原因:
-
appKey 不匹配: 检查
Index.ets中RNApp的appKey参数是否与index.js中AppRegistry.registerComponent的第一个参数一致// index.js AppRegistry.registerComponent('RnDemo771', () => App);// Index.ets RNApp({ appKey: "RnDemo771", // 必须与 index.js 中的名称一致 // ... }) -
Bundle 文件未正确加载: 确认
bundle.harmony.js已拷贝到harmony/entry/src/main/resources/rawfile/目录 -
Metro 服务器未启动: 确保执行了
npm run start并且端口转发正常
问题 4: Metro 打包时提示模块找不到
解决方案:
清理并重新安装依赖:
# 清理缓存
npm cache clean --force
rm -rf node_modules
rm -f package-lock.json

# 重新安装
npm install

# 清理 Metro 缓存
npx react-native start --reset-cache
示例代码
App.tsx 完整示例
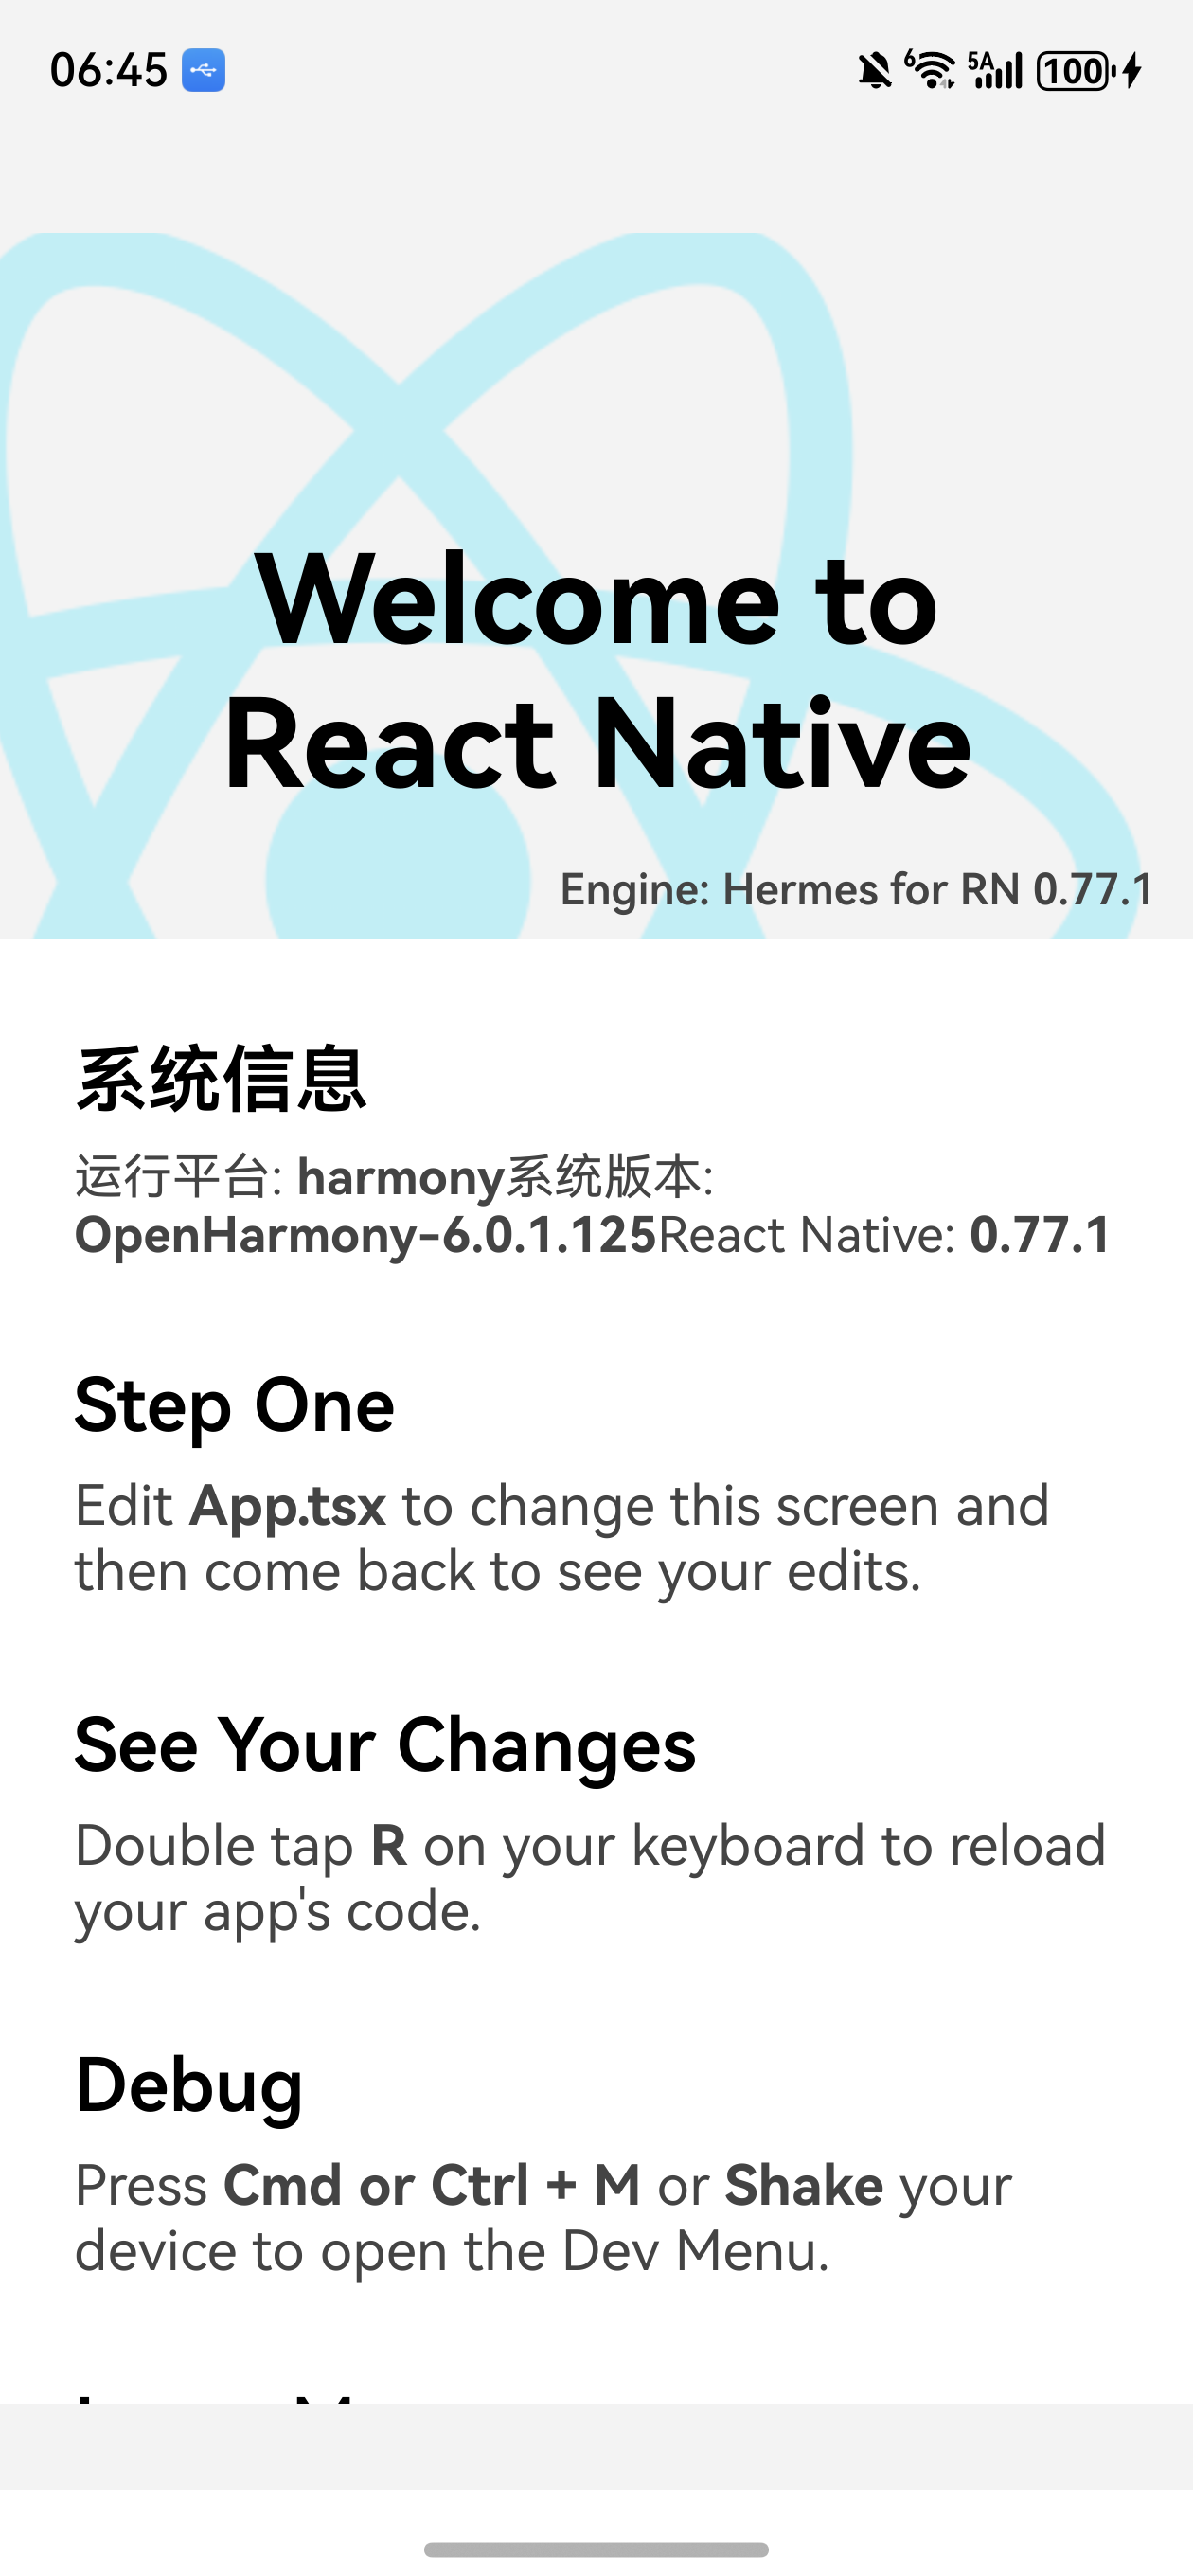
以下示例展示了如何在页面中显示运行平台、系统版本和 React Native 版本信息:
/**
 * Sample React Native App
 * https://github.com/facebook/react-native
 *
 * @format
 */

import React from 'react';
import type {PropsWithChildren} from 'react';
import {
  SafeAreaView,
  ScrollView,
  StatusBar,
  StyleSheet,
  Text,
  useColorScheme,
  View,
  Platform,
} from 'react-native';

import {
  Colors,
  DebugInstructions,
  Header,
  LearnMoreLinks,
  ReloadInstructions,
} from 'react-native/Libraries/NewAppScreen';

const packageJson = require('./package.json');

type SectionProps = PropsWithChildren<{
  title: string;
}>;

function Section({children, title}: SectionProps): React.JSX.Element {
  const isDarkMode = useColorScheme() === 'dark';
  return (
    <View style={styles.sectionContainer}>
      <Text
        style={[
          styles.sectionTitle,
          {
            color: isDarkMode ? Colors.white : Colors.black,
          },
        ]}>
        {title}
      </Text>
      <Text
        style={[
          styles.sectionDescription,
          {
            color: isDarkMode ? Colors.light : Colors.dark,
          },
        ]}>
        {children}
      </Text>
    </View>
  );
}

function App(): React.JSX.Element {
  const isDarkMode = useColorScheme() === 'dark';

  const backgroundStyle = {
    backgroundColor: isDarkMode ? Colors.darker : Colors.lighter,
  };

  return (
    <SafeAreaView style={backgroundStyle}>
      <StatusBar
        barStyle={isDarkMode ? 'light-content' : 'dark-content'}
        backgroundColor={backgroundStyle.backgroundColor}
      />
      <ScrollView
        contentInsetAdjustmentBehavior="automatic"
        style={backgroundStyle}>
        <Header />
        <View
          style={{
            backgroundColor: isDarkMode ? Colors.black : Colors.white,
          }}>
          <Section title="系统信息">
            <Text style={styles.infoText}>
              运行平台: <Text style={styles.highlight}>{Platform.OS}</Text>
            </Text>
            <Text style={styles.infoText}>
              系统版本: <Text style={styles.highlight}>{Platform.Version}</Text>
            </Text>
            <Text style={styles.infoText}>
              React Native: <Text style={styles.highlight}>{packageJson.dependencies['react-native']}</Text>
            </Text>
          </Section>
          <Section title="Step One">
            Edit <Text style={styles.highlight}>App.tsx</Text> to change this
            screen and then come back to see your edits.
          </Section>
          <Section title="See Your Changes">
            <ReloadInstructions />
          </Section>
          <Section title="Debug">
            <DebugInstructions />
          </Section>
          <Section title="Learn More">
            Read the docs to discover what to do next:
          </Section>
          <LearnMoreLinks />
        </View>
      </ScrollView>
    </SafeAreaView>
  );
}

const styles = StyleSheet.create({
  sectionContainer: {
    marginTop: 32,
    paddingHorizontal: 24,
  },
  sectionTitle: {
    fontSize: 24,
    fontWeight: '600',
  },
  sectionDescription: {
    marginTop: 8,
    fontSize: 18,
    fontWeight: '400',
  },
  highlight: {
    fontWeight: '700',
  },
  infoText: {
    marginTop: 8,
    fontSize: 16,
    fontWeight: '400',
  },
});

export default App;
代码关键点说明:
-
导入 Platform API: 用于获取平台和系统信息
import { Platform } from 'react-native'; -
读取 package.json: 获取 React Native 版本号
const packageJson = require('./package.json'); -
系统信息展示:
Platform.OS: 在鸿蒙设备显示harmony,Android 显示android,iOS 显示iosPlatform.Version: 显示系统版本号或 API LevelpackageJson.dependencies['react-native']: 显示 RN 版本号
效果图
下一步
到此,React Native for 鸿蒙的开发环境已经搭建完成!您可以:
- 开发新功能: 在
App.tsx中编写 React Native 代码 - 添加三方库: 安装并配置支持鸿蒙的第三方组件
- 调试应用: 使用 Chrome DevTools 或 Flipper 进行调试
- 打包发布: 使用 DevEco Studio 生成正式的 HAP 包
推荐资源
快速命令参考
# 启动 Metro 服务器
npm run start

# 生成鸿蒙 Bundle
npm run dev

# 清理缓存重新打包
npm run start -- --reset-cache

# 查看已连接设备
hdc list targets

# 端口转发
hdc rport tcp:8081 tcp:8081

# 查看端口转发列表
hdc fport ls

# 查看设备日志
hdc hilog
祝您开发愉快! 🎉
到此环境已经搭建好。

讨论HarmonyOS开发技术,专注于API与组件、DevEco Studio、测试、元服务和应用上架分发等。
更多推荐


 12
12 0
0- 0


 已为社区贡献76条内容

所有评论(0)