HarmonyOS 通知意图
就例如说我们某个微信好友发消息给我们我们点击系统通知可以直接跳到你们的聊天界面。然后abilityName要用 哪个 Ability写入口文件的名字上去就好了。按我这样写 绑定给通知 请求对象的wantAgent属性就好了。之前的文章 我们讲了 harmonyos 中的 基础和进度条通知。通知意图简单说 就是当我们点击某个通知 如下图。然后 我们点出通知 后 将应用切到后台然后点击通知。这就是 最
·
之前的文章 我们讲了 harmonyos 中的 基础和进度条通知
那么 今天 我们来说说 任何给通知添加意图
通知意图 简单说 就是 当我们点击某个通知 如下图
然后 就会拉起某个 应用
就例如说 我们某个微信好友发消息给我们 我们 点击系统通知 可以直接跳到你们的聊天界面
好 回到编辑器 我们编写组件代码如下
import notificationManager from "@ohos.notificationManager"
@Entry
@Component
struct Dom {

  @State ids:number = 0;

  aboutToAppear(){
  }

  build() {
    Column({space: 30}) {
      Button("发送基本文本通知").onClick(()=>{
        let request: notificationManager.NotificationRequest = {
          id: this.ids++,
          content:{
            contentType: notificationManager.ContentType.NOTIFICATION_CONTENT_BASIC_TEXT,
            normal:{
              title:'通知标题'+ this.ids,
              text:'通知内容详情',
              additionalText: '通知附加内容'
            }
          }
        }
        notificationManager.publish(request).then(()=> {
          console.log('发送通知成功')
        }).catch(reason => {
          console.log('发送通知失败',JSON.stringify(reason))
        })
      })
    }
    .width('100%')
    .height('100%')
  }
}
这就是 最基本的 一个通知模板 之前我们也讲过了
然后 我们改写代码如下
import notificationManager from "@ohos.notificationManager"
import wantAgent, { WantAgent } from "@ohos.app.ability.wantAgent";
@Entry
@Component
struct Dom {

  @State ids:number = 0;
  wantAgentInstance: WantAgent
  aboutToAppear(){
  }

  build() {
    Column({space: 30}) {
      Button("发送基本文本通知").onClick(async ()=>{
        let wantInfo:wantAgent.WantAgentInfo = {
            wants:[{
              bundleName: "com.example.sediment",
              abilityName:'EntryAbility'
            }],
            requestCode:0,
            operationType:wantAgent.OperationType.START_ABILITY,
            wantAgentFlags:[wantAgent.WantAgentFlags.CONSTANT_FLAG]
        }
        let wantAgentInstance = await wantAgent.getWantAgent(wantInfo);
        let request: notificationManager.NotificationRequest = {
          id: this.ids++,
          wantAgent: wantAgentInstance,
          content:{
            contentType: notificationManager.ContentType.NOTIFICATION_CONTENT_BASIC_TEXT,
            normal:{
              title:'通知标题'+ this.ids,
              text:'通知内容详情',
              additionalText: '通知附加内容'
            }
          }
        }
        notificationManager.publish(request).then(()=> {
          console.log('发送通知成功')
        }).catch(reason => {
          console.log('发送通知失败',JSON.stringify(reason))
        })
      })
    }
    .width('100%')
    .height('100%')
  }
}
首先 是导包
import wantAgent, { WantAgent } from "@ohos.app.ability.wantAgent";
然后 我们声明对象
bundleName 你要哪个应用?
我们应用的 app.json5 中 就有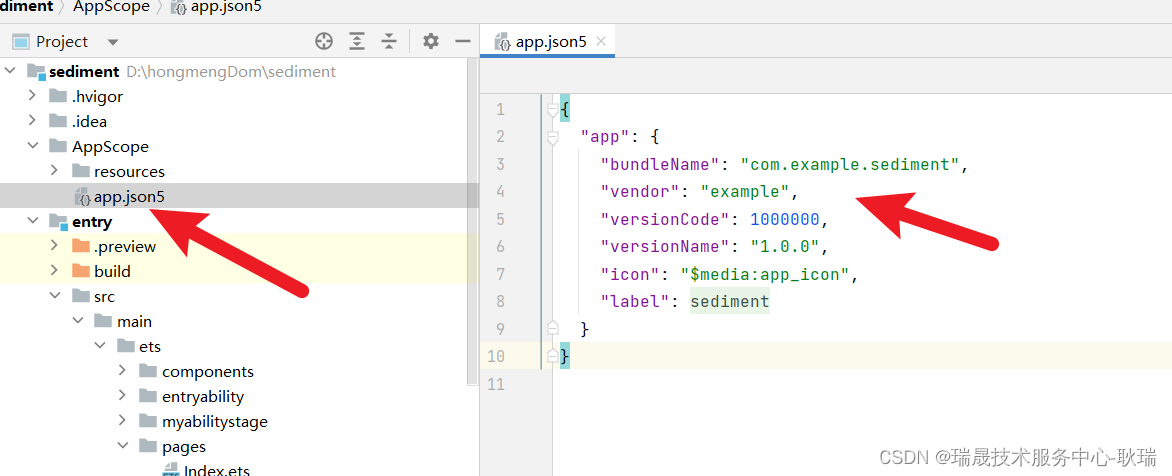
然后 abilityName 要用 哪个 Ability 写入口文件的名字上去就好了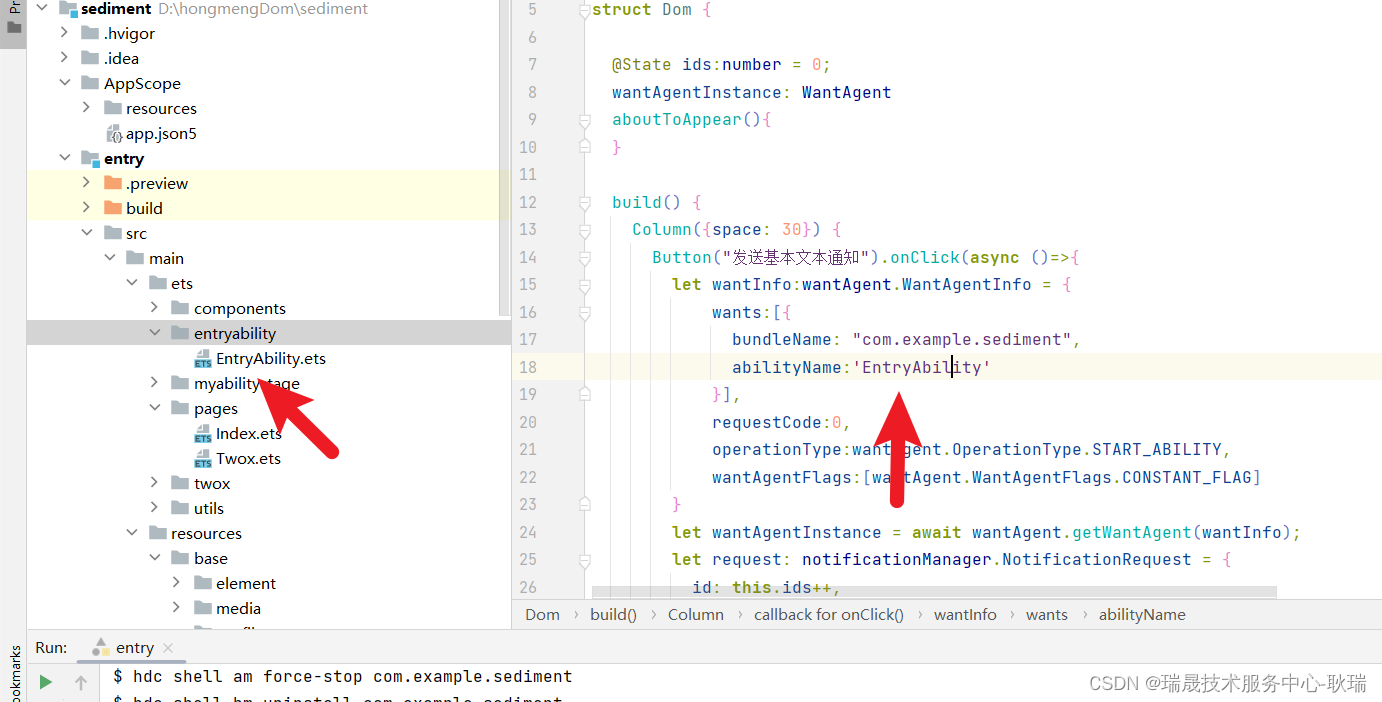
按我这样写 绑定给通知 请求对象的 wantAgent属性就好了
然后 我们运行代码
然后 我们点出通知 后 将应用切到后台 然后点击通知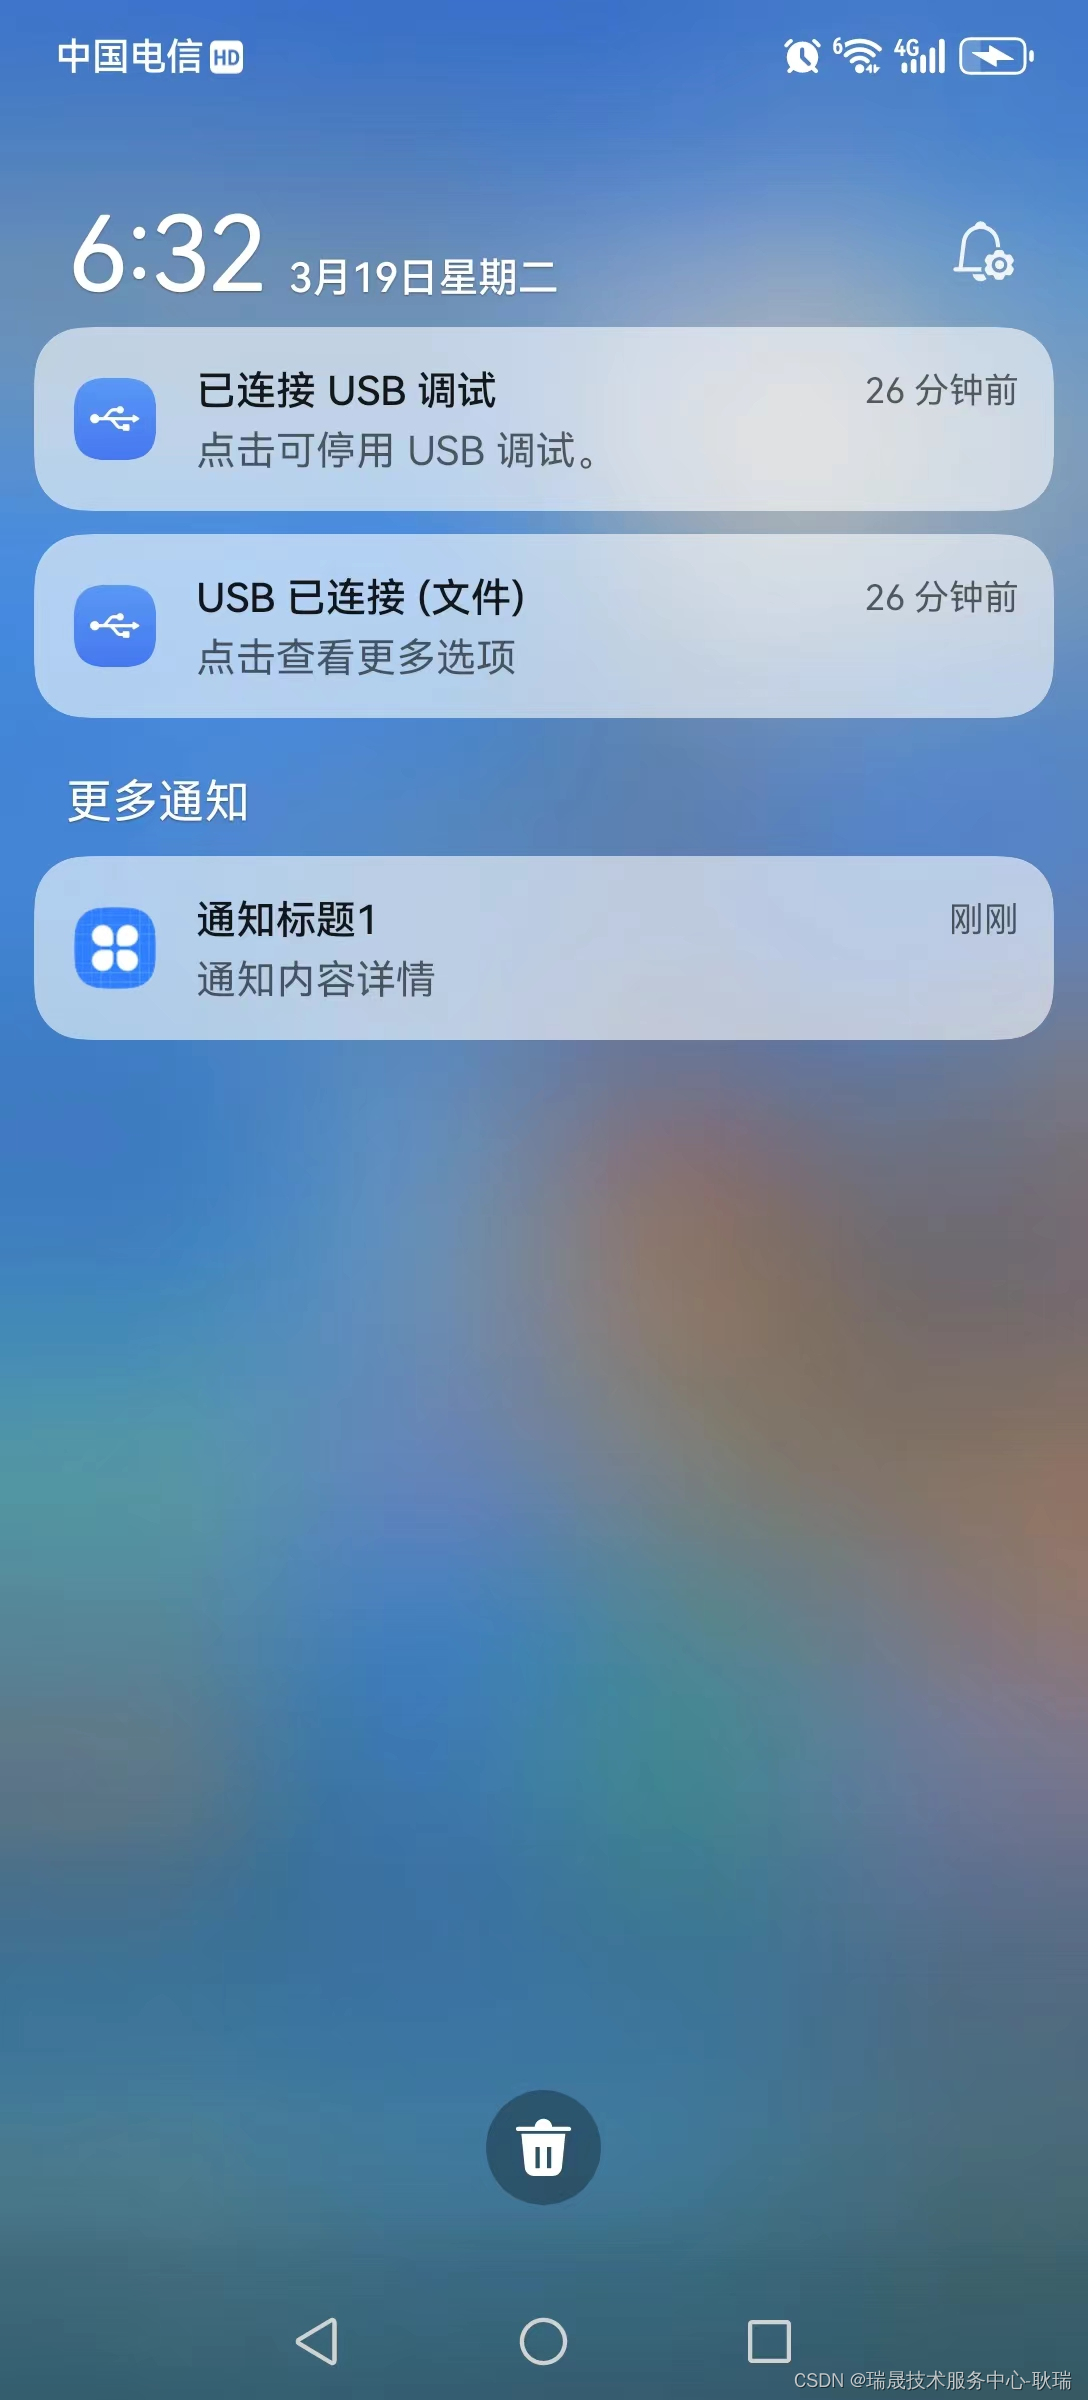
你会发现 直接就跳转进来了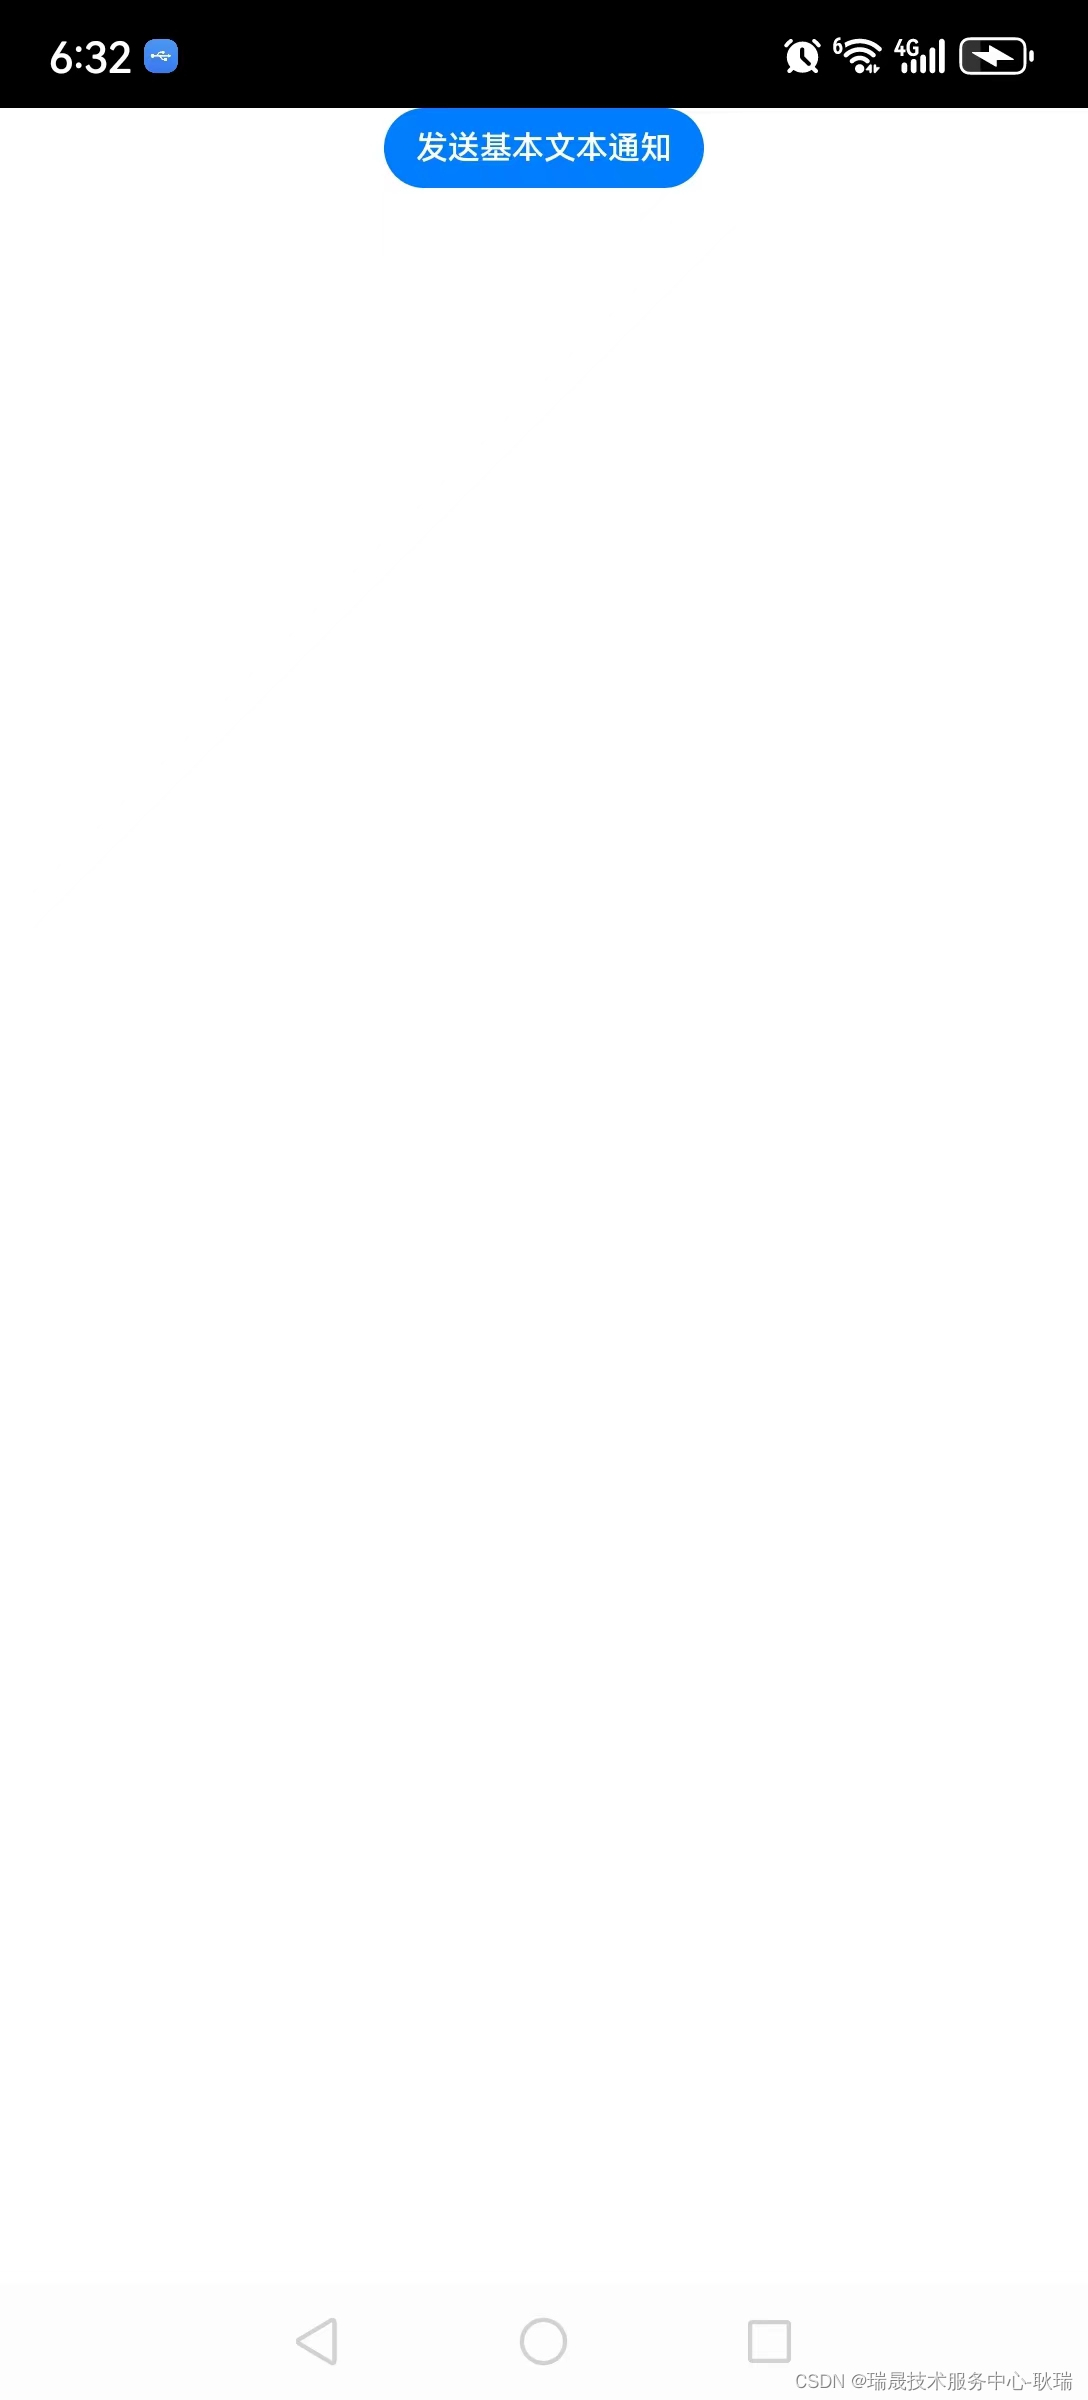

讨论HarmonyOS开发技术,专注于API与组件、DevEco Studio、测试、元服务和应用上架分发等。
更多推荐
 10
10 0
0- 0


 已为社区贡献66条内容

所有评论(0)