HarmonyOS NEXT实战:从零开发一款个人财务记账应用
本文介绍了使用HarmonyOS NEXT和ArkTS开发个人财务记账应用的完整实践。文章从项目架构设计入手,采用三Tab页面结构(首页、统计、设置),详细说明了目录组织和数据模型定义,包含交易记录和分类体系。重点讲解了数据持久化实现,通过Preferences存储交易数据并封装增删查接口。技术亮点包括:内存缓存优化、Canvas绘制饼图、半模态弹窗交互以及响应式UI设计。该项目适合作为Harmo
HarmonyOS NEXT实战:从零开发一款个人财务记账应用
前言
在日常开发中,我们总需要一个工具来管理个人收支。市面上虽然有众多记账APP,但自己动手实现一个不仅能深入理解移动应用开发,还能完全掌控数据隐私。本文将带你使用 HarmonyOS NEXT 和 ArkTS 从零开发一款功能完整的个人财务记账应用,涵盖数据持久化、Canvas 图表绘制、响应式 UI 等核心技术点。
项目亮点:
- 三 Tab 页面架构:首页流水、统计图表、设置中心
- Preferences 数据持久化存储交易记录
- Canvas 饼图动态绘制支出分类占比
- 半模态弹窗(bindSheet)实现新增记账
- 完整的收支分类体系与预算管理
一、项目架构设计
1.1 功能模块划分
应用采用经典的三 Tab 架构:
├── 首页(HomePage)
│   ├── 月度总览卡片(收入/支出/结余)
│   ├── 交易流水列表
│   └── 新增记账入口
├── 统计(StatisticsPage)
│   ├── 月度收支汇总
│   ├── 支出分类饼图
│   └── 分类明细排行
└── 设置(SettingsPage)
    ├── 月度预算设置
    ├── 分类预览
    └── 数据管理
1.2 目录结构
entry/src/main/ets/
├── components/              # 公共组件
│   ├── AddTransactionContent.ets  # 新增记账表单
│   ├── PieChart.ets              # 饼图组件
│   └── TransactionItem.ets       # 交易列表项
├── data/
│   └── FinanceDatabase.ets       # 数据持久化层
├── models/
│   └── FinanceModels.ets         # 数据模型定义
└── pages/
    ├── Index.ets                 # 主入口(Tab容器)
    ├── HomePage.ets              # 首页
    ├── StatisticsPage.ets        # 统计页
    └── SettingsPage.ets          # 设置页
二、数据模型设计
2.1 核心数据结构
在 FinanceModels.ets 中定义了三个核心接口:
// 分类实体
export interface Category {
  id: string;           // 分类ID
  name: string;         // 分类名称
  icon: string;         // emoji图标
  color: string;        // 主题色
  type: 'expense' | 'income';  // 类型标识
}

// 交易记录
export interface Transaction {
  id: string;
  type: 'expense' | 'income';
  categoryId: string;
  amount: number;
  date: string;         // YYYY-MM-DD 格式
  note: string;
  timestamp: number;    // 时间戳,用于排序
}
2.2 预置分类体系
应用内置了 11 个常用分类,覆盖日常生活场景:
export const PRESET_CATEGORIES: Category[] = [
  // 支出分类(9个)
  { id: 'food', name: '餐饮', icon: '🍜', color: '#FF6B6B', type: 'expense' },
  { id: 'transport', name: '交通', icon: '🚌', color: '#4ECDC4', type: 'expense' },
  { id: 'shopping', name: '购物', icon: '🛍', color: '#FFB347', type: 'expense' },
  { id: 'entertainment', name: '娱乐', icon: '🎮', color: '#A78BFA', type: 'expense' },
  { id: 'housing', name: '居住', icon: '🏠', color: '#60A5FA', type: 'expense' },
  { id: 'communication', name: '通讯', icon: '📱', color: '#F472B6', type: 'expense' },
  { id: 'health', name: '健康', icon: '❤️', color: '#34D399', type: 'expense' },
  { id: 'education', name: '教育', icon: '📚', color: '#FB923C', type: 'expense' },
  { id: 'other', name: '其他', icon: '🎁', color: '#94A3B8', type: 'expense' },
  // 收入分类(2个)
  { id: 'salary', name: '工资', icon: '💼', color: '#10B981', type: 'income' },
  { id: 'investment', name: '理财', icon: '📈', color: '#F59E0B', type: 'income' },
];
【截图位置:分类选择界面,展示9宫格图标】
三、数据持久化实现
3.1 Preferences 封装
HarmonyOS 提供了轻量级数据存储方案 preferences,适合存储键值对数据。我们将交易记录序列化为 JSON 字符串存储:
import { preferences } from '@kit.ArkData';

const STORE_NAME = 'finance_tracker_store';
const KEY_TRANSACTIONS = 'transactions';

export class FinanceDatabase {
  private store_: preferences.Preferences | null = null;
  private cache_: Transaction[] = [];  // 内存缓存
  private loaded_: boolean = false;

  // 初始化
  async init(context: Context): Promise<void> {
    if (this.store_ !== null) return;

    this.store_ = await preferences.getPreferences(context, STORE_NAME);
    await this.loadFromStore();
  }

  // 从存储加载数据到内存
  private async loadFromStore(): Promise<void> {
    const raw = await this.store_.get(KEY_TRANSACTIONS, '[]');
    const jsonStr: string = raw as string;
    this.cache_ = JSON.parse(jsonStr) as Transaction[];
    this.loaded_ = true;
  }

  // 持久化保存
  private async saveToStore(): Promise<void> {
    const jsonStr = JSON.stringify(this.cache_);
    await this.store_.put(KEY_TRANSACTIONS, jsonStr);
    await this.store_.flush();  // 立即写入磁盘
  }
}
3.2 增删查接口
export class FinanceDatabase {
  // 获取某月交易记录
  getTransactionsByMonth(year: number, month: number): Transaction[] {
    const prefix = `${year}-${month.toString().padStart(2, '0')}`;
    return this.getAllTransactions()
      .filter(tx => tx.date.startsWith(prefix));
  }

  // 新增交易
  async addTransaction(tx: Transaction): Promise<void> {
    this.cache_.push(tx);
    await this.saveToStore();
  }

  // 删除交易
  async deleteTransaction(id: string): Promise<void> {
    const idx = this.cache_.findIndex(tx => tx.id === id);
    if (idx !== -1) {
      this.cache_.splice(idx, 1);
      await this.saveToStore();
    }
  }

  // 计算月支出总额
  getMonthExpense(transactions: Transaction[]): number {
    return transactions
      .filter(tx => tx.type === 'expense')
      .reduce((sum, tx) => sum + tx.amount, 0);
  }
}
关键技术点:
- 使用内存缓存
cache_避免频繁读取磁盘 flush()确保数据立即持久化- 异步操作使用
Promise封装,便于 UI 层调用
四、主入口与 Tab 导航
4.1 Index 主页面
使用 Tabs 组件实现底部导航,barPosition: BarPosition.End 将 Tab 栏放在底部:
@Entry
@Component
struct Index {
  @State private currentTabIndex: number = 0;
  @State private refreshKey: number = 0;  // 用于触发子页面刷新

  aboutToAppear(): void {
    financeDB.init(getContext(this));  // 初始化数据库
  }

  build() {
    Column() {
      Tabs({ index: this.currentTabIndex, barPosition: BarPosition.End }) {
        TabContent() {
          HomePage({
            refreshKey: this.refreshKey,
            onDataChanged: () => { this.refreshKey++; }
          })
        }
        .tabBar(this.buildTabBar(0, '首页', '💰'))

        TabContent() {
          StatisticsPage({ refreshKey: this.refreshKey })
        }
        .tabBar(this.buildTabBar(1, '统计', '📊'))

        TabContent() {
          SettingsPage({
            refreshKey: this.refreshKey,
            onDataReset: () => { this.refreshKey++; }
          })
        }
        .tabBar(this.buildTabBar(2, '设置', '⚙️'))
      }
      .width('100%')
      .height('100%')
      .onChange((index: number) => {
        this.currentTabIndex = index;
        if (index === 0 || index === 1) {
          this.refreshKey++;  // 切页时刷新数据
        }
      })
    }
  }

  @Builder
  buildTabBar(index: number, label: string, icon: string) {
    Column() {
      Text(icon).fontSize(22).margin({ bottom: 2 })
      Text(label)
        .fontSize(10)
        .fontColor(this.currentTabIndex === index ? '#007DFF' : '#999999')
    }
    .width('100%')
    .padding({ top: 6, bottom: 8 })
  }
}
4.2 跨页面数据同步
使用 @Prop @Watch 实现父子组件数据联动:
// 父组件传递 refreshKey
HomePage({ refreshKey: this.refreshKey })

// 子组件监听变化
@Component
export struct HomePage {
  @Prop @Watch('onRefreshKeyChange') refreshKey: number = 0;

  onRefreshKeyChange(): void {
    this.refreshData();  // refreshKey 变化时自动刷新
  }
}
五、首页:月度总览与交易流水
5.1 渐变总览卡片
使用 linearGradient 实现蓝绿渐变背景,视觉效果更佳:
@Builder
buildSummaryCard(income: number, expense: number, balance: number) {
  Column() {
    Text(`${this.currentYear}年${this.currentMonth}月`)
      .fontSize(14)
      .fontColor('rgba(255,255,255,0.8)')

    Text(`¥${balance.toFixed(2)}`)
      .fontSize(36)
      .fontWeight(FontWeight.Bold)
      .fontColor('#FFFFFF')
      .margin({ top: 8 })

    Text('本月结余')
      .fontSize(13)
      .fontColor('rgba(255,255,255,0.7)')

    // 收入/支出分割线
    Row() {
      Column() {
        Text('收入').fontSize(12)
        Text(`¥${income.toFixed(1)}`).fontSize(16)
      }
      Divider().vertical(true).color('rgba(255,255,255,0.2)')
      Column() {
        Text('支出').fontSize(12)
        Text(`¥${expense.toFixed(1)}`).fontSize(16)
      }
    }

    // 悬浮添加按钮
    Stack() {
      Button() {
        Text('+').fontSize(28).fontColor('#FFFFFF')
      }
      .width(56)
      .height(56)
      .backgroundColor('#007DFF')
      .borderRadius(28)
      .shadow({ radius: 8, color: 'rgba(0,125,255,0.4)', offsetY: 4 })
    }
    .margin({ top: -28 })
  }
  .linearGradient({
    direction: GradientDirection.Bottom,
    colors: [['#007DFF', 0], ['#00B4D8', 1]]
  })
  .borderRadius(20)
}
5.2 交易列表渲染
使用 ForEach 高性能渲染列表,需提供唯一 key 函数:
Scroll() {
  Column() {
    ForEach(this.transactions, (tx: Transaction) => {
      TransactionItem({
        tx: tx,
        onDelete: (id: string) => { this.handleDelete(id); }
      })
    }, (tx: Transaction) => tx.id)  // key生成函数
  }
}
.layoutWeight(1)
5.3 TransactionItem 组件
每条记录显示分类图标、名称、金额、日期:
@Component
export struct TransactionItem {
  tx: Transaction;
  onDelete?: (id: string) => void;

  build() {
    Row() {
      // 分类图标(圆形背景 + emoji)
      Stack() {
        Circle().width(44).height(44).fill(this.getCategoryColor())
        Text(this.getCategoryIcon()).fontSize(20)
      }

      // 分类名称 + 备注
      Column() {
        Text(this.getCategoryName()).fontSize(16)
        if (this.tx.note !== '') {
          Text(this.tx.note).fontSize(13).fontColor('#999999')
        }
      }
      .layoutWeight(1)

      // 金额
      Column() {
        Text(formatAmount(this.tx.amount, this.tx.type))
          .fontColor(this.tx.type === 'income' ? '#10B981' : '#333333')
        Text(formatDate(this.tx.date)).fontSize(12)
      }
    }
    .gesture(
      GestureGroup(GestureMode.Exclusive,
        LongPressGesture().onAction(() => {
          this.onDelete?.(this.tx.id);  // 长按删除
        })
      )
    )
  }
}
六、半模态弹窗实现新增记账
6.1 bindSheet 绑定
HarmonyOS 提供了半模态弹窗能力,适合表单输入场景:
@Component
export struct HomePage {
  @State private showAddSheet: boolean = false;

  build() {
    Column() {
      // ... 页面内容
    }
    .bindSheet($$this.showAddSheet, () => {
      this.addSheetBuilder()  // 弹窗内容构建器
    }, {
      height: SheetSize.LARGE,
      backgroundColor: '#FFFFFF'
    })
  }
}
6.2 表单组件实现
AddTransactionContent 封装了完整的记账表单:
@Component
export struct AddTransactionContent {
  onAdd?: (result: AddSheetResult) => void;
  onCancel?: () => void;

  @State private selectedType: 'expense' | 'income' = 'expense';
  @State private selectedCategoryId: string = 'food';
  @State private amountText: string = '';
  @State private noteText: string = '';

  build() {
    Column() {
      // 顶部标题栏
      Row() {
        Text('新增记账').fontSize(20)
        Blank()
        Button('取消').onClick(() => this.onCancel?.())
      }

      // 支出/收入切换
      Row() {
        this.buildTypeButton('expense', '支出')
        this.buildTypeButton('income', '收入')
      }
      .backgroundColor('#F5F5F5')
      .borderRadius(22)

      // 金额输入
      Row() {
        Text('¥').fontSize(32)
        TextInput({ text: $$this.amountText, placeholder: '0.00' })
          .type(InputType.Number)
      }

      // 分类网格选择
      Grid() {
        ForEach(this.getFilteredCategories(), (cat: Category) => {
          GridItem() {
            Column() {
              Stack() {
                Circle().width(44).height(44).fill(cat.color)
                Text(cat.icon).fontSize(20)
              }
              Text(cat.name).fontSize(12)
            }
            .onClick(() => { this.selectedCategoryId = cat.id; })
          }
        }, (cat: Category) => cat.id)
      }
      .columnsTemplate('1fr 1fr 1fr 1fr 1fr')  // 5列网格

      // 备注 + 保存按钮
      TextInput({ text: $$this.noteText, placeholder: '添加备注...' })
      Button('保存').onClick(() => this.handleSave())
    }
    .padding(24)
  }

  private handleSave(): void {
    const amount = parseFloat(this.amountText);
    if (isNaN(amount) || amount <= 0) return;

    const tx: Transaction = {
      id: generateId(),
      type: this.selectedType,
      categoryId: this.selectedCategoryId,
      amount: amount,
      date: getTodayDate(),
      note: this.noteText,
      timestamp: Date.now()
    };
    this.onAdd?.({ tx: tx });
  }
}
七、Canvas 饼图绘制
7.1 PieChart 组件核心逻辑
使用 Canvas 绘制支出分类占比饼图,支持图例和中心文字:
@Component
export struct PieChart {
  data: Map<string, number> = new Map();  // 分类ID -> 金额
  total: number = 0;

  private canvasCtx: CanvasRenderingContext2D = new CanvasRenderingContext2D();

  build() {
    Column() {
      Canvas(this.canvasCtx)
        .width('100%')
        .aspectRatio(1)
        .constraintSize({ maxHeight: 280 })
        .onReady(() => {
          this.drawChart();
        })

      // 图例
      Flex({ wrap: FlexWrap.Wrap }) {
        ForEach(this.getLegendItems(), (item: SliceData) => {
          Row() {
            Circle().width(10).height(10).fill(item.color)
            Text(item.label).fontSize(12)
          }
        })
      }
    }
  }

  private drawChart(): void {
    const ctx = this.canvasCtx;
    const radius = Math.min(ctx.width, ctx.height) * 0.38;
    const centerX = ctx.width / 2;
    const centerY = ctx.height / 2;

    if (this.total <= 0) {
      // 无数据时绘制空圆
      ctx.beginPath();
      ctx.arc(centerX, centerY, radius, 0, Math.PI * 2);
      ctx.fillStyle = '#F0F0F0';
      ctx.fill();
      return;
    }

    const slices = this.getLegendItems();
    let startAngle = -Math.PI / 2;  // 从12点方向开始

    for (const slice of slices) {
      const sliceAngle = slice.ratio * Math.PI * 2;

      // 绘制扇形
      ctx.beginPath();
      ctx.moveTo(centerX, centerY);
      ctx.arc(centerX, centerY, radius, startAngle, startAngle + sliceAngle);
      ctx.closePath();
      ctx.fillStyle = slice.color;
      ctx.fill();

      // 绘制百分比标签(占比>5%才显示)
      if (slice.ratio > 0.05) {
        const midAngle = startAngle + sliceAngle / 2;
        const labelX = centerX + Math.cos(midAngle) * radius * 0.65;
        const labelY = centerY + Math.sin(midAngle) * radius * 0.65;
        ctx.fillStyle = '#FFFFFF';
        ctx.fillText(`${(slice.ratio * 100).toFixed(0)}%`, labelX, labelY);
      }

      startAngle += sliceAngle;
    }

    // 中心圆(环形效果)
    ctx.beginPath();
    ctx.arc(centerX, centerY, radius * 0.45, 0, Math.PI * 2);
    ctx.fillStyle = '#FFFFFF';
    ctx.fill();

    // 中心文字
    ctx.fillText(`¥${this.total.toFixed(0)}`, centerX, centerY - 4);
  }
}
7.2 数据转换逻辑
将 Map<string, number> 转换为绘制所需的 SliceData 数组:
private getLegendItems(): SliceData[] {
  const items: SliceData[] = [];
  if (this.total <= 0) return items;

  this.data.forEach((value: number, key: string) => {
    const cat = getCategoryById(key);
    items.push({
      categoryId: key,
      value: value,
      ratio: value / this.total,
      color: cat?.color ?? '#94A3B8',
      label: `${cat?.name ?? '未知'} ¥${value.toFixed(0)}`
    });
  });

  return items.sort((a, b) => b.value - a.value);  // 按金额降序
}
八、统计页面:分类排行
8.1 收支汇总卡片
三个等宽卡片展示收入、支出、结余:
@Builder
buildSummaryRow(income: number, expense: number, balance: number) {
  Row() {
    this.statCard('收入', `¥${income.toFixed(1)}`, '#10B981')
    this.statCard('支出', `¥${expense.toFixed(1)}`, '#FF6B6B')
    this.statCard('结余', `¥${balance.toFixed(1)}`, balance >= 0 ? '#007DFF' : '#FF4444')
  }
}

@Builder
statCard(label: string, value: string, color: ResourceColor) {
  Column() {
    Text(label).fontSize(13).fontColor('#999999')
    Text(value).fontSize(18).fontWeight(FontWeight.Bold).fontColor(color)
  }
  .layoutWeight(1)
  .padding(12)
  .backgroundColor('#FFFFFF')
  .borderRadius(12)
}
8.2 分类明细列表
使用进度条直观展示各分类支出占比:
@Builder
buildCategoryList() {
  Column() {
    ForEach(this.getSortedCategoryExpenses(), (item: CategoryExpenseItem) => {
      Row() {
        // 分类图标
        Stack() {
          Circle().width(36).height(36).fill(item.color)
          Text(item.icon).fontSize(16)
        }

        // 名称 + 占比
        Column() {
          Text(item.name).fontSize(15)
          Text(`${(item.ratio * 100).toFixed(1)}%`).fontSize(12)
        }
        .layoutWeight(1)

        // 金额
        Text(`¥${item.amount.toFixed(1)}`).fontSize(15)

        // 进度条
        Row()
          .width(item.ratio > 0 ? Math.max(item.ratio * 80, 4) : 0)
          .height(6)
          .backgroundColor(item.color)
          .borderRadius(3)
      }
      .padding({ left: 16, right: 16 })
      .backgroundColor('#FFFFFF')
    })
  }
}
九、设置页面:预算与数据管理
9.1 月度预算设置
使用 bindContentCover 实现全屏弹窗:
@Component
export struct SettingsPage {
  @State private monthlyBudget: number = 5000;
  @State private showBudgetInput: boolean = false;

  build() {
    Scroll() {
      Column() {
        // 预算设置入口
        Row() {
          Text('每月预算上限')
          Blank()
          Text(`¥${this.monthlyBudget.toFixed(0)}`).fontColor('#007DFF')
        }
        .onClick(() => { this.showBudgetInput = true; })

        // ... 其他设置项
      }
    }
    .bindContentCover($$this.showBudgetInput, () => {
      this.budgetDialogBuilder()
    })
  }

  @Builder
  budgetDialogBuilder() {
    Column() {
      Text('设置月度预算').fontSize(18)
      TextInput({ text: $$this.budgetText, placeholder: '输入预算金额' })
        .type(InputType.Number)
      Row() {
        Button('取消').onClick(() => { this.showBudgetInput = false; })
        Button('确定').onClick(() => { this.handleSaveBudget(); })
      }
    }
    .padding(24)
    .backgroundColor('#FFFFFF')
    .borderRadius(20)
  }

  private handleSaveBudget(): void {
    const amount = parseFloat(this.budgetText);
    if (!isNaN(amount) && amount > 0) {
      this.monthlyBudget = amount;
      financeDB.setBudget(amount);
    }
    this.showBudgetInput = false;
  }
}
9.2 数据清除功能
二次确认弹窗防止误操作:
@Builder
resetConfirmBuilder() {
  Column() {
    Text('确认清除').fontSize(18)
    Text('所有交易数据将被永久删除,此操作不可恢复。')
      .fontSize(14)
      .fontColor('#666666')

    Row() {
      Button('取消').onClick(() => { this.showResetConfirm = false; })
      Button('确认清除')
        .backgroundColor('#FF6B6B')
        .onClick(() => { this.handleResetData(); })
    }
  }
  .padding(24)
}

private handleResetData(): void {
  financeDB.clearAll().then(() => {
    this.showResetConfirm = false;
    this.onDataReset?.();  // 通知父组件刷新
  });
}
十、关键技术总结
10.1 响应式数据流
Index (refreshKey)
    ↓ @Prop
HomePage / StatisticsPage / SettingsPage
    ↓ @Watch
自动刷新数据
父组件修改 refreshKey,所有子组件监听变化后自动调用 refreshData()。
10.2 数据持久化最佳实践
- 内存缓存 + 磁盘同步:
cache_数组存储内存数据,saveToStore()异步持久化 - 序列化存储:JSON.stringify/parse 处理复杂对象
- 立即刷盘:
flush()确保数据不丢失
10.3 Canvas 绘图注意事项
onReady()回调中获取有效的 canvas 尺寸ctx.width/height而非canvas.width/height- 绘制顺序:底层扇形 → 分割线 → 中心圆 → 文字
10.4 半模态弹窗使用场景
- 新增/编辑表单(高度可自定义)
- 筛选条件选择
- 操作确认(替代 AlertDialog)
十一、项目配置文件
11.1 app.json5(应用级配置)
{
  "app": {
    "bundleName": "com.example.finance",
    "versionCode": 1000000,
    "versionName": "1.0.0",
    "icon": "$media:layered_image",
    "label": "$string:app_name"
  }
}
11.2 module.json5(模块级配置)
{
  "module": {
    "name": "entry",
    "type": "entry",
    "deviceTypes": ["phone"],
    "pages": "$profile:main_pages",
    "abilities": [{
      "name": "EntryAbility",
      "exported": true,
      "skills": [{
        "actions": ["ohos.want.action.home"],
        "entities": ["entity.system.home"]
      }]
    }]
  }
}
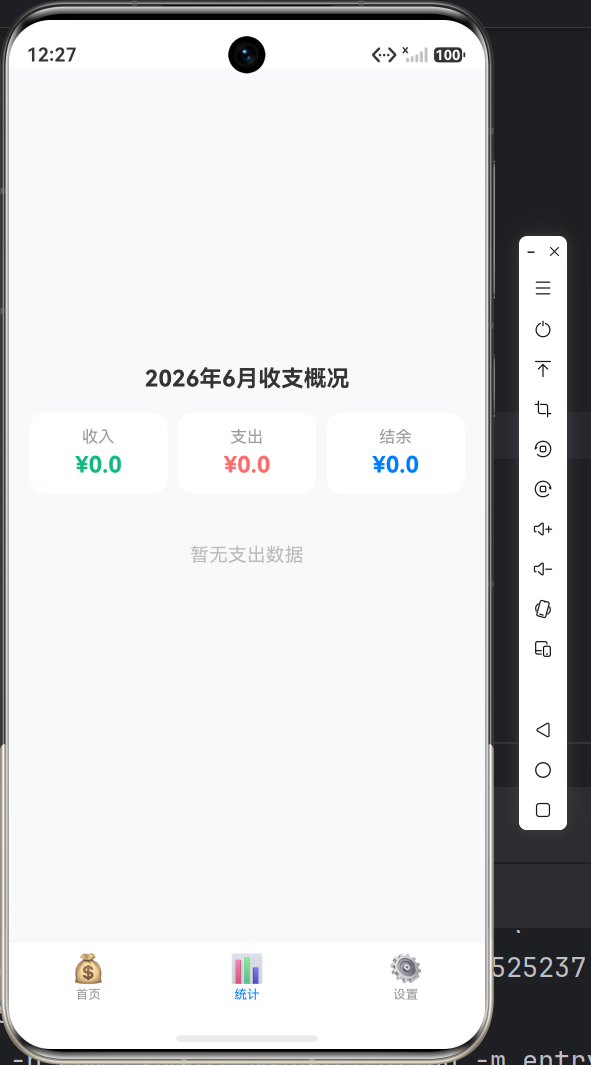
十二、运行效果展示
十三、扩展方向
当前应用已具备基础记账功能,后续可扩展:
- 数据导入导出:支持 CSV/Excel 格式
- 账单识别:接入 OCR 识别票据
- 多账户管理:现金、银行卡、支付宝等
- 预算提醒:支出超预算时推送通知
- 数据同步:接入云存储实现多端同步
- 图表增强:折线图展示趋势、柱状图对比
总结
本文从零实现了一款 HarmonyOS NEXT 记账应用,涵盖了 ArkTS 开发的核心知识点:
- UI 组件:Tabs、List、Grid、Canvas、bindSheet
- 状态管理:@State、@Prop、@Watch
- 数据持久化:preferences API
- 手势交互:长按删除
- 图表绘制:Canvas 2D API
希望通过这个实战项目,帮助你快速掌握 HarmonyOS 应用开发。代码已在文中完整呈现,可直接复制运行。如有问题,欢迎在评论区交流讨论!
开发环境:
- DevEco Studio 5.0+
- HarmonyOS SDK API 23
- hvigor 构建工具

讨论HarmonyOS开发技术,专注于API与组件、DevEco Studio、测试、元服务和应用上架分发等。
更多推荐
 2
2 0
0- 0


 已为社区贡献11条内容

所有评论(0)