【HarmonyOS实战】 GasStationPage完整解析:一个页面教会你所有核心技术
前面 19 篇文章把各个技术点都讲了一遍,这篇文章来"拼图"——把从头到尾串一遍,让你看清楚这些技术是怎么组合在一起的,理解整个页面的设计思路。这是系列文章里最综合的一篇,强烈建议和的源码对照阅读。项目预览├─ stationInfoList = STATION_LIST → bindBuilder 里的 ForEach 渲染列表├─ mapOptions 初始化 → MapComponent 接
文章目录
前言
前面 19 篇文章把各个技术点都讲了一遍,这篇文章来"拼图"——把 GasStationPage.ets 从头到尾串一遍,让你看清楚这些技术是怎么组合在一起的,理解整个页面的设计思路。
这是系列文章里最综合的一篇,强烈建议和 GasStationPage.ets 的源码对照阅读。
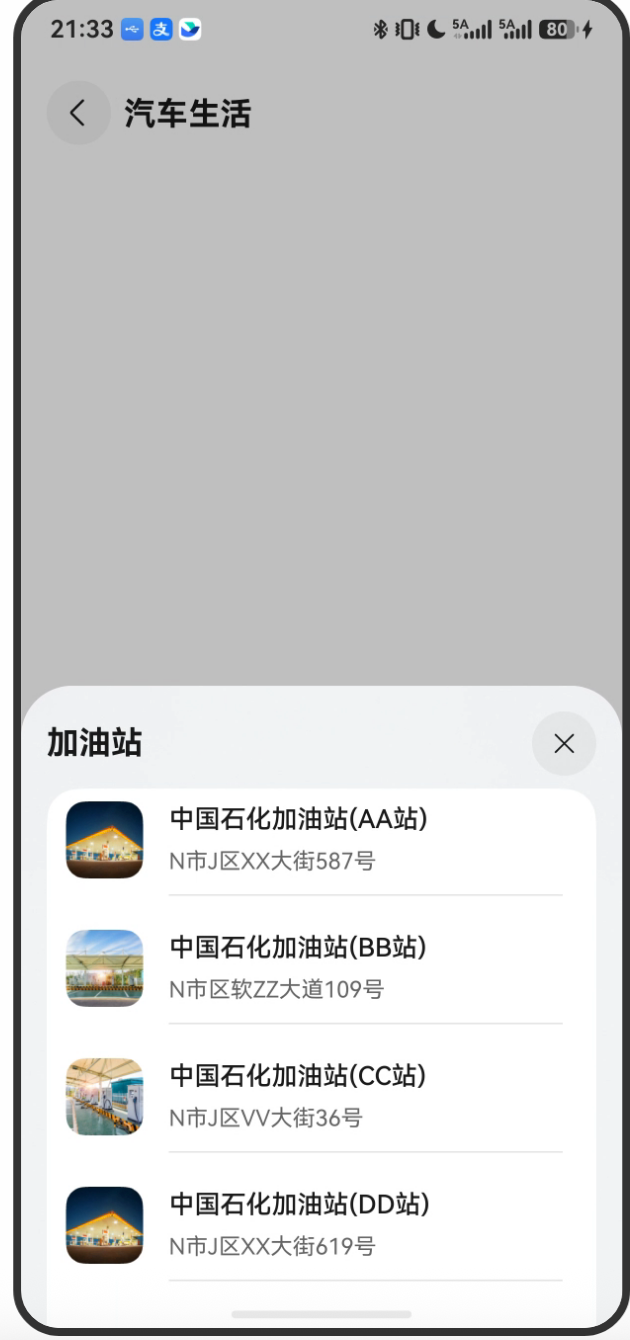
项目预览
一、页面整体结构
@Builder
export function GasStationPageBuilder() {   // ← 路由入口(route_map.json 注册)
  GasStationPage();
}

@Component
struct GasStationPage {
  // ─────────── 状态变量 ───────────
  @State stationInfoList: StationData[] = [];   // 加油站列表
  @StorageProp('bottomRectHeight') bottomRectHeight: number = 0;  // 底部安全区域
  @StorageProp('topRectHeight') topRectHeight: number = 0;        // 顶部安全区域
  @State latitude: number = 0;         // 当前地图中心纬度
  @State longitude: number = 0;        // 当前地图中心经度
  @State imageScale: number = 0;       // Marker 缩放比例
  @State currentLatitude: number = 0;  // 用户实际位置纬度
  @State currentLongitude: number = 0; // 用户实际位置经度
  @State isCalculated: boolean = false; // 是否已计算距离
  @State closeMap: boolean = true;     // 是否关闭地图
  @State isShow: boolean = false;      // 是否显示底部弹窗

  // ─────────── 路由和地图相关 ───────────
  pageInfos: NavPathStack = new NavPathStack();           // 路由栈
  private curMarker: map.Marker | undefined;              // 当前选中标记
  private mapOptions?: mapCommon.MapOptions;              // 地图配置
  private mapController?: map.MapComponentController;    // 地图控制器
  private callback?: AsyncCallback<map.MapComponentController>; // 初始化回调

  // ─────────── 方法 ───────────
  async init(): Promise<void> { ... }
  moveToGasStation(latitude?: number, longitude?: number): void { ... }
  openOrCloseMap(open?: boolean): void { ... }

  // ─────────── 构建函数 ───────────
  @Builder stationInfoCard(gasStation: StationData): void { ... }
  @Builder bindBuilder() { ... }
  @Builder titleBuilder() { ... }

  // ─────────── 主 build ───────────
  build() { ... }
}
二、状态变量设计
2.1 为什么这么多 @State?
每一个 @State 变量的变化都会触发相关 UI 刷新:
| 状态变量 | 触发 UI 刷新时机 |
|---|---|
stationInfoList |
加油站列表数据加载后,ForEach 重新渲染 |
isShow |
控制 bindSheet 显示/隐藏 |
isCalculated |
控制距离文字是否显示 |
imageScale |
传给动画,但不直接控制 UI(通过 mapUtil 处理) |
currentLatitude/Longitude |
用于距离计算,当值变化时距离文字更新 |
2.2 私有变量不用 @State
curMarker、mapController、mapOptions、callback 都是 private 且不加 @State。这些是技术实现细节,不需要触发 UI 刷新,所以不应该是状态变量。
提示:不是所有变量都需要 @State。只有"变化时需要刷新 UI 的变量"才需要 @State,滥用 @State 会造成不必要的渲染。
三、init() 方法解析
async init(): Promise<void> {
  // 第一步:加载加油站静态数据
  this.stationInfoList = STATION_LIST;

  // 第二步:创建地图配置
  this.mapOptions = {
    position: {
      target: {
        latitude: this.latitude,
        longitude: this.longitude,
      },
      zoom: 16,
    },
    myLocationControlsEnabled: true,
    mapType: mapCommon.MapType.STANDARD,
  };

  // 第三步:创建地图初始化回调(地图就绪后执行)
  this.callback = async (err, mapController): Promise<void> => {
    if (err) {
      Logger.error('testTag', `init fail, code: ${err.code}, message: ${err.message}`);
      return;
    }

    this.mapController = mapController;

    // 开启用户位置图层
    this.mapController.setMyLocationEnabled(true);

    // 监听定位按钮点击
    this.mapController.on('myLocationButtonClick', () => {
      Logger.info('testTag', 'Jump to my location');
      mapUtil.moveToMyLocation(mapController).then(() => {
        this.isShow = true;
      });
    });

    // 监听标记点击
    this.mapController.on('markerClick', (marker) => {
      this.isShow = true;
      marker.setInfoWindowVisible(true);
      this.curMarker = marker;
      this.imageScale = 1.5;
      mapUtil.imageAnimation(marker, this.imageScale);
      mapUtil.moveToCurrentPosition(marker.getPosition().latitude, marker.getPosition().longitude, mapController);
    });

    // 初始定位到用户位置
    mapUtil.moveToMyLocation(mapController);

    // 获取用户当前坐标(用于距离计算)
    this.currentLatitude = (await mapUtil.getMyLocation()).latitude;
    this.currentLongitude = (await mapUtil.getMyLocation()).longitude;
    this.latitude = this.currentLatitude;
    this.longitude = this.currentLongitude;

    // 为所有加油站添加标记
    this.stationInfoList.forEach(async (stationItem: StationData) => {
      await mapUtil.addMapMaker(stationItem.latitude, stationItem.longitude,
        this.mapController as map.MapComponentController);
    });
  };
}
注意顺序:
- 先设置
stationInfoList(让 UI 有数据) - 再设置
mapOptions(地图配置,在 MapComponent 渲染之前要准备好) - 最后创建
callback(地图就绪后才执行里面的内容)
四、两个业务方法
4.1 moveToGasStation:移动到指定加油站
moveToGasStation(latitude?: number, longitude?: number): void {
  if (latitude && longitude) {
    this.latitude = latitude;       // 更新地图中心
    this.longitude = longitude;
  }
  this.isShow = true;               // 显示底部列表
  mapUtil.moveToCurrentPosition(
    this.latitude,
    this.longitude,
    this.mapController as map.MapComponentController
  );
}
用户点击底部列表里的加油站卡片时调用,地图镜头移动到该加油站位置。
4.2 openOrCloseMap:控制地图显示/隐藏
openOrCloseMap(open?: boolean): void {
  this.isCalculated = true;    // 标记已经可以计算距离了

  if (open) {
    this.closeMap = false;     // 强制打开
  } else {
    this.closeMap = !this.closeMap;  // 切换开关状态
  }
}
点击加油站卡片时调用 openOrCloseMap(true),把 isCalculated 置为 true,这样距离显示就会出现。
五、三个 @Builder 构建函数
5.1 stationInfoCard:单个加油站卡片
这是列表里每个加油站卡片的 UI,包含:
- 左侧:加油站图片(48×48)
- 右侧:
- 名称(16px,粗体)
- 地址(14px,灰色)
- 距离(14px,isCalculated=true 时显示)
- 分割线
- 点击事件:打开地图 + 移动到该加油站
@Builder
stationInfoCard(gasStation: StationData): void {
  Column({ space: Constants.SPACE_12 }) {
    Row({ space: Constants.SPACE_16 }) {
      Image(gasStation.image)
        .width(Constants.GAS_STATION_IMAGE_WIDTH)
        .height(Constants.GAS_STATION_IMAGE_HEIGHT);
      Column({ space: Constants.SPACE_12 }) {
        Row() {
          Column({ space: Constants.SPACE_6 }) {
            Text(gasStation.name) ...
            Text(gasStation.addr) ...
          }
          .alignItems(HorizontalAlign.Start);

          if (this.isCalculated) {         // 条件渲染:有数据才显示
            Text(`${CalculateUtil.getDistance(...)}${单位}`) ...
          }
        }
        .width(Constants.PERCENT_70)
        .justifyContent(FlexAlign.SpaceBetween);

        Divider() ...           // 分割线
      };
    }
    .height(Constants.GAS_STATION_IMAGE_HEIGHT)
    .width(Constants.FULL_PERCENT)
    .onClick(() => {
      if (gasStation) {
        this.openOrCloseMap(true);         // 打开地图状态
        this.moveToGasStation(gasStation.latitude, gasStation.longitude);  // 移动镜头
      } else {
        this.getUIContext().getPromptAction().showToast({
          message: $r('app.string.Stay_tuned')  // Toast 提示
        });
      }
    });
  }
  ...
}
5.2 bindBuilder:底部弹窗内容
可滚动的加油站列表,用 Scroll + List + ForEach 实现。
5.3 titleBuilder:顶部标题栏
返回按钮 + "汽车生活"标题,用 .position() 固定在距顶部 50px 的位置,叠加在地图上方。
六、build() 方法:整体布局
build() {
  NavDestination() {            // Navigation 子页面容器
    Stack() {                   // 叠加布局

      // 底层:全屏地图
      MapComponent({
        mapOptions: this.mapOptions,
        mapCallback: this.callback,
      });

      // 上层:标题栏(叠加在地图上)
      this.titleBuilder();
    }
    .width('100%')
    .height('100%')
    .bindSheet($$this.isShow, this.bindBuilder(), {  // 底部半屏弹窗
      detents: [400, SheetSize.MEDIUM],
      dragBar: false,
      title: { title: $r('app.string.gas_station') },
      blurStyle: BlurStyle.COMPONENT_THICK,
      backgroundColor: $r('app.color.bind_sheet_background'),
      onWillDismiss: ((action: DismissSheetAction) => {
        if (this.curMarker) {
          this.imageScale = 1;
          mapUtil.imageAnimation(this.curMarker, this.imageScale);
        }
        action.dismiss();
      })
    });
  }
  .onReady((context: NavDestinationContext) => {
    this.pageInfos = context.pathStack;   // 获取路由栈
  })
  .hideToolBar(true)     // 隐藏系统工具栏
  .hideTitleBar(true)    // 隐藏系统标题栏
  .height('100%')
  .width('100%')
  .onWillAppear(() => {
    // 页面即将显示时初始化
    this.init().then(() => {
      setTimeout(() => {
        this.isShow = true;     // 1秒后显示底部弹窗
      }, Constants.TIME);       // 1000ms,等地图加载完成
    });
  });
}
七、数据流总结
onWillAppear → init()
  ├─ stationInfoList = STATION_LIST  → bindBuilder 里的 ForEach 渲染列表
  ├─ mapOptions 初始化               → MapComponent 接收配置
  └─ callback 定义                   → 地图就绪后触发

地图就绪 → callback()
  ├─ mapController 保存
  ├─ setMyLocationEnabled(true)      → 地图显示蓝点
  ├─ on('myLocationButtonClick')     → 按钮点击事件注册
  ├─ on('markerClick')               → 标记点击事件注册
  ├─ moveToMyLocation()              → 镜头移动到当前位置
  ├─ getMyLocation() × 2            → currentLatitude/Longitude 赋值
  └─ forEach addMapMaker()           → 每个加油站添加标记

setTimeout 1s → isShow = true       → bindSheet 弹窗显示

用户点击列表项
  └─ openOrCloseMap(true)            → isCalculated = true(显示距离)
  └─ moveToGasStation(lat, lon)      → 地图镜头移动
总结
GasStationPage 是整个项目里最复杂的一个页面,综合使用了:
- NavDestination:Navigation 子页面容器,处理路由生命周期
- Stack 叠加布局:地图在底层,标题栏叠加在上层
- MapComponent + MapComponentController:地图组件和控制器
- bindSheet:底部半屏弹窗,展示加油站列表
- @Builder:三个构建函数分离关注点
- @State + 响应式:多个状态变量驱动 UI 自动更新
- @StorageProp:读取全局安全区域高度
读懂这个页面,HarmonyOS 应用开发的核心技术你已经掌握了大半。
下一篇讲 List + ForEach,深入分析列表渲染的最佳实践和性能优化。

讨论HarmonyOS开发技术,专注于API与组件、DevEco Studio、测试、元服务和应用上架分发等。
更多推荐


 1
1 0
0- 0


 已为社区贡献108条内容

所有评论(0)