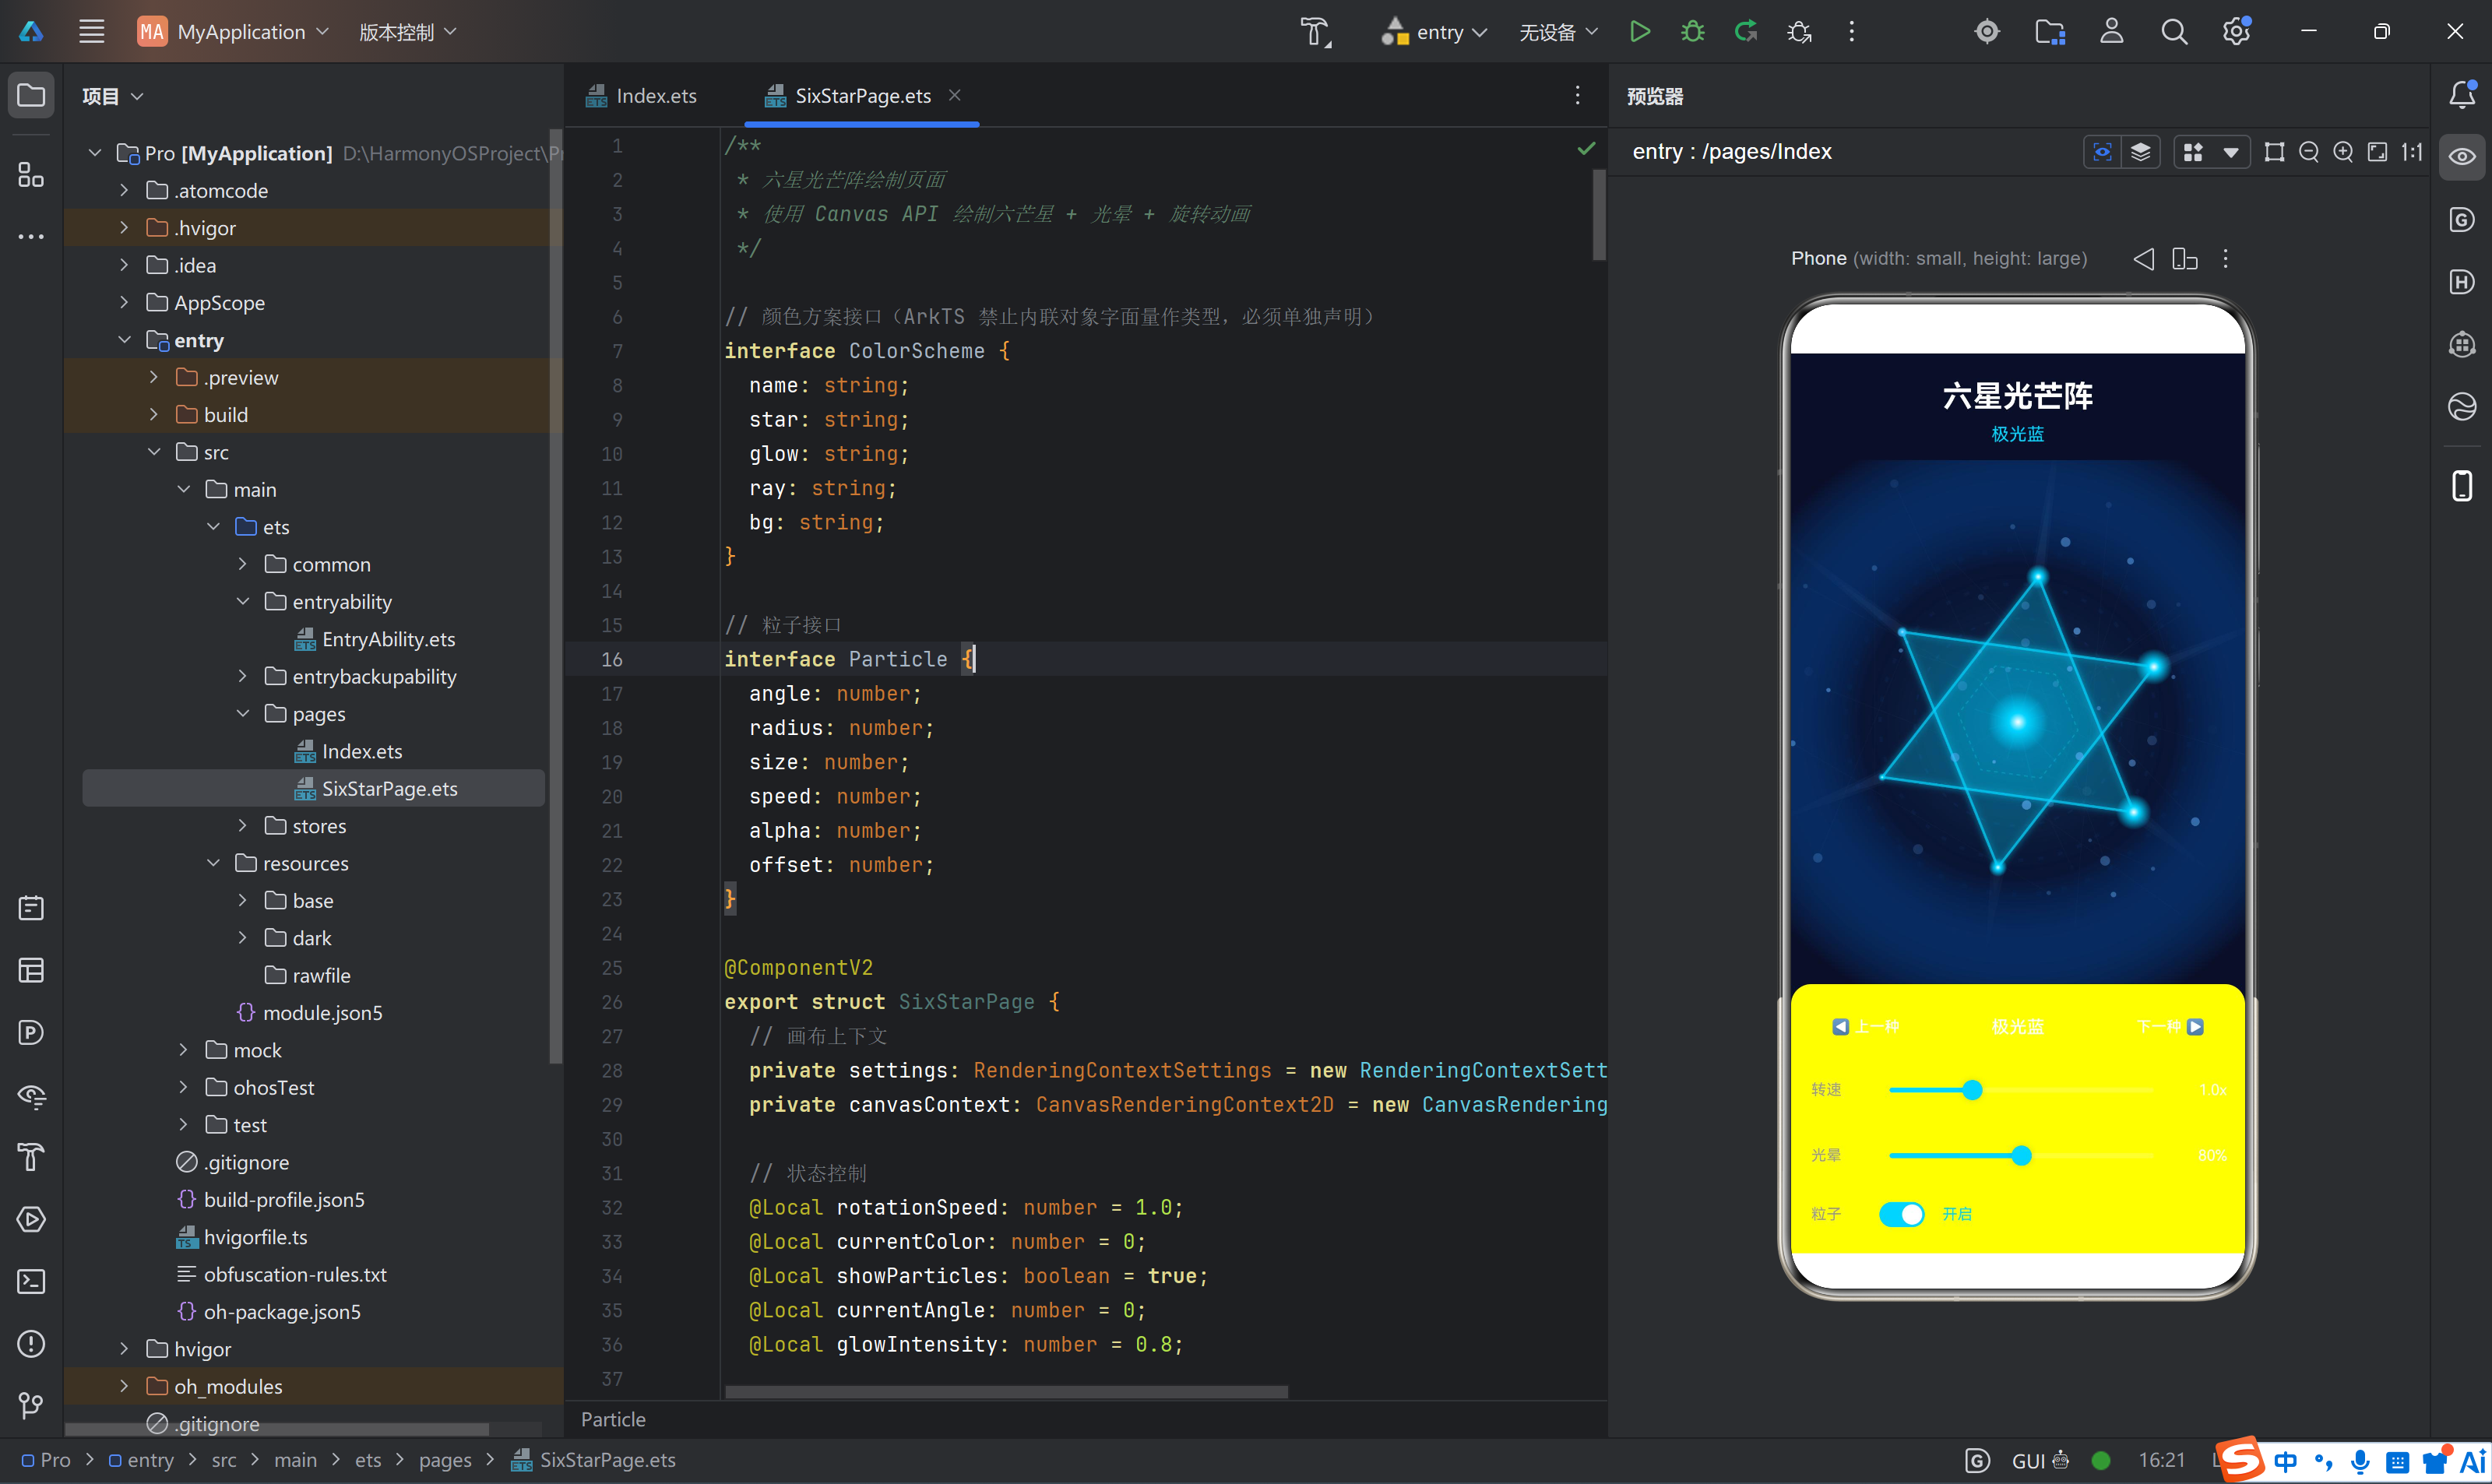
六星光芒阵:HarmonyOS API 24 Canvas 高级绘图实战

版本: HarmonyOS API 24(HarmonyOS NEXT 6.1.1)
SDK 编译版本: compatibleSdkVersion = “6.1.1(24)”,targetSdkVersion = “6.1.1(24)”
源码工程: 完整项目,含 stores、utils、components、design 全套架构
一、前言
在移动端应用开发中,自定义绘图和动画始终是提升用户体验的利器。HarmonyOS NEXT(API 24)带来了全新的 ArkTS 语法体系与 Canvas 组件,让开发者能够在鸿蒙生态中实现媲美原生的高性能 2D 绘图。
本文以一个完整的"六星光芒阵"动态绘图应用为实战案例,从零开始讲解:
- HarmonyOS API 24 的工程架构设计与 Stage 模型
- Canvas 2D 上下文的完整使用流程与渲染管线
- 六芒星几何计算的数学原理与代码实现
- 径向渐变(createRadialGradient)实现多层光晕效果
- setTimeout 递归实现 60fps 动画循环
- 粒子系统与星座连线的物理模拟
- @ObservedV2 + @Trace 状态管理体系
- @Component 自定义组件封装与 @BuilderParam 插槽模式
- 通用工具库与设计系统搭建
- build-profile.json5 编译配置详解
全文包含完整可运行的代码,读者可直接复制粘贴到 DevEco Studio 中编译运行。
二、项目概述
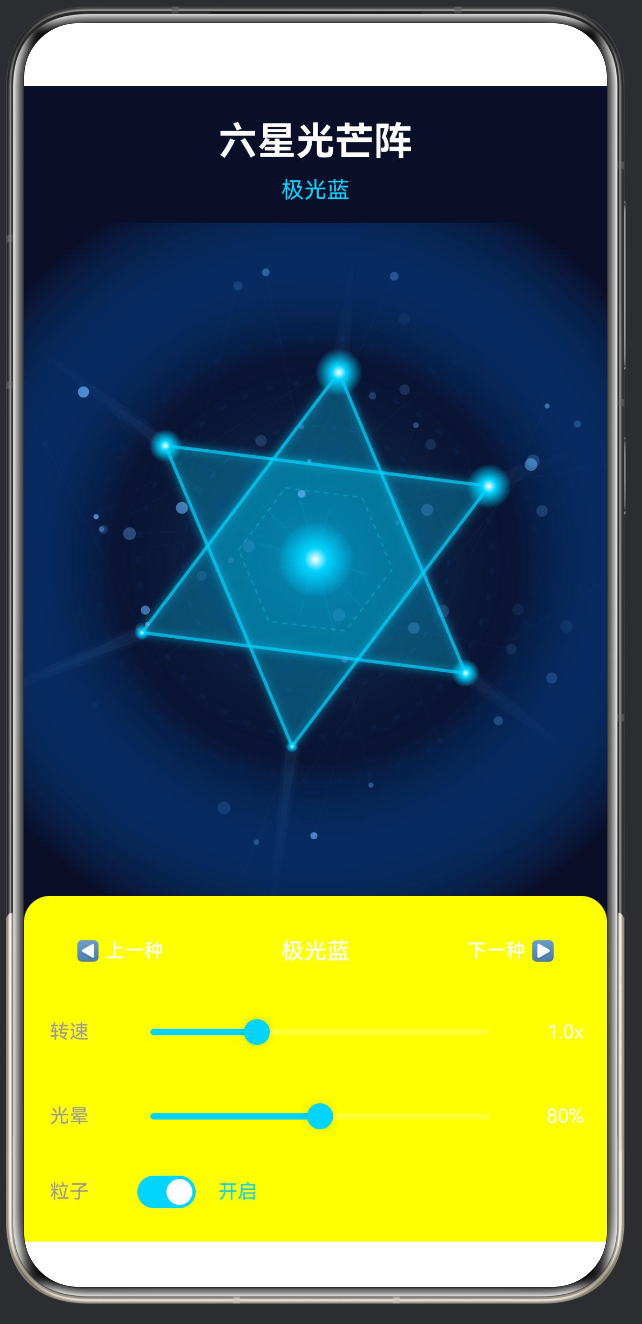
2.1 功能展示
六星光芒阵是一个纯 Canvas 绘制的动态视觉效果应用,运行在 HarmonyOS NEXT 上,核心功能包括:
| 模块 | 技术方案 | 说明 |
|---|---|---|
| 六芒星主体 | Canvas 2D Path API | 两个交错正三角形构成六角星,带 shadowBlur 发光描边 |
| 光晕系统 | createRadialGradient | 5 层渐变叠加:背景、外圈光环、中心光晕、顶点光点、中心光点 |
| 光芒射线 | Path + 径向渐变 | 6 条射线 × 3 层宽度 = 18 个三角形,渐隐至透明 |
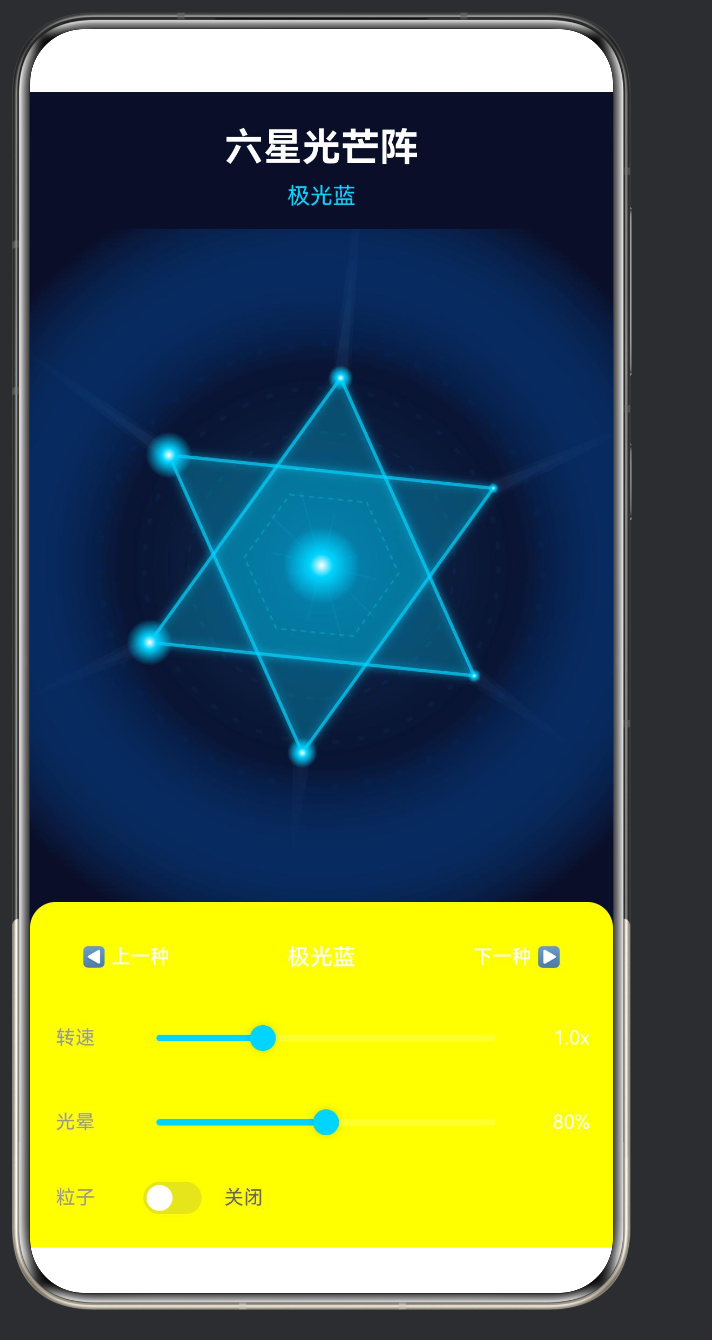
| 粒子系统 | 数组 + 正弦波 | 60 个随机初始化粒子,轨道半径 ±15px 波动,透明度闪烁 |
| 星座连线 | Path 细线 | 每间隔 3 个粒子连一条线,透明度 0.03,大量叠加形成星网 |
| 颜色方案 | interface + 数组 | 5 套预设配色,动态切换全局色调 |
| 交互控制 | Slider + Toggle + Button | 转速 0.1~3.0x,光晕 10%~150%,粒子开关,颜色切换 |
2.2 技术栈
| 维度 | 选用方案 | 版本 / 说明 |
|---|---|---|
| 操作系统 | HarmonyOS NEXT | 6.1.1 |
| 开发语言 | ArkTS | Stage 模型 |
| UI 框架 | ArkUI(声明式) | @Entry / @ComponentV2 / @Builder |
| 绘图引擎 | CanvasRenderingContext2D | 硬件加速 2D 渲染 |
| 状态管理 | @ObservedV2 + @Trace | 字段级精准更新追踪 |
| 本地状态 | @Local | 组件内可变状态 |
| 模板参数 | @Param | 父传子只读参数 |
| 构建工具 | hvigor | 4.x |
| 日志 | hilog | @kit.PerformanceAnalysisKit |
| API 级别 | 24 | compatible = “6.1.1(24)” |
2.3 项目结构(完整解析)
entry/src/main/ets/
├── pages/
│   ├── Index.ets                # @Entry 入口页面,只做挂载
│   └── SixStarPage.ets          # 六星光芒阵核心 @ComponentV2
│
├── common/
│   ├── design/
│   │   └── system.ets           # 设计令牌:颜色/间距/字号/圆角/阴影
│   ├── components/              # 可复用 UI 组件库
│   │   ├── Badge.ets            # TagBadge / NumberBadge / DotBadge / StatusTag
│   │   ├── Card.ets             # Card / StatCard / ListCard
│   │   ├── EmptyState.ets       # 空状态占位组件
│   │   ├── ErrorState.ets       # 错误状态 + 重试组件
│   │   └── LoadingIndicator.ets # 加载指示器 + 全屏加载
│   ├── references/              # 代码模式参考库
│   │   ├── index.ets            # 统一导出
│   │   └── SixStarReference.ets # 六星绘制模式文档
│   └── utils/                   # 纯函数工具库
│       ├── common.ets           # isEmpty/debounce/throttle/deepClone
│       ├── converter.ets        # hexToRgb/hexToHsl/进制转换
│       ├── formatter.ets        # 日期/货币/文件大小/脱敏
│       ├── validator.ets        # 邮箱/手机/身份证/密码强度
│       └── index.ets            # 统一导出
│
├── stores/                      # 全局状态层(@ObservedV2 单例)
│   ├── AsyncDataStore.ets       # 异步加载 + 三态管理
│   ├── CounterStore.ets         # 计数器 + 历史记录
│   ├── FormStore.ets            # 多字段表单验证 + 提交
│   ├── FormTypes.ets            # FormField / ValidationRule 类型
│   └── ListDataStore.ets        # 列表 + 分页 + 筛选 + 搜索
│
├── entryability/
│   └── EntryAbility.ets         # UIAbility 生命周期
│
├── entrybackupability/
│   └── EntryBackupAbility.ets   # 备份恢复 Ability
│
└── resources/
    └── base/
        └── profile/
            └── main_pages.json  # 路由注册
这个结构体现了 HarmonyOS NEXT 推荐的关注点分离架构:
- pages/ — 展示层,只做 UI 组合
- common/ — 功能层,纯逻辑、纯组件、设计值
- stores/ — 数据层,全局状态管理
- resources/ — 资源层,JSON 配置、媒体、国际化
三、环境准备与项目初始化
3.1 开发环境要求
| 环境项 | 要求 | 说明 |
|---|---|---|
| 操作系统 | Windows 10/11、macOS 或 Ubuntu | 本文基于 Windows 11 |
| IDE | DevEco Studio NEXT | 内置 hvigor 编译工具链 |
| SDK | HarmonyOS NEXT SDK API 24 | 版本号 6.1.1.xxx |
| Node.js | v18+ | hvigor 运行依赖 |
| 真机/模拟器 | API 24 及以上 | 运行和调试 |
3.2 创建项目步骤
在 DevEco Studio 中:
- File → New → Create Project
- 选择模板:Empty Ability(Stage 模型,ArkTS 语言)
- 项目名称:
Pro(或SixStarApp) - Compile SDK:
6.1.1(24) - 最低兼容 SDK:
6.1.1(24) - Finish 等待 Gradle 下载依赖
3.3 构建配置深度解析
项目根目录 build-profile.json5:
{
  "app": {
    "signingConfigs": [
      {
        "name": "default",
        "type": "HarmonyOS",
        "material": {
          "certpath": "xxxx.cer",
          "keyAlias": "debugKey",
          "keyPassword": "xxxxxxxxxx",
          "profile": "xxxx.p7b",
          "signAlg": "SHA256withECDSA",
          "storeFile": "xxxx.p12",
          "storePassword": "xxxxxxxxxx"
        }
      }
    ],
    "products": [
      {
        "name": "default",
        "signingConfig": "default",
        "targetSdkVersion": "6.1.1(24)",
        "compatibleSdkVersion": "6.1.1(24)",
        "runtimeOS": "HarmonyOS",
        "buildOption": {
          "strictMode": {
            "caseSensitiveCheck": true,
            "useNormalizedOHMUrl": true
          }
        }
      }
    ],
    "buildModeSet": [
      { "name": "debug" },
      { "name": "release" }
    ]
  },
  "modules": [
    {
      "name": "entry",
      "srcPath": "./entry",
      "targets": [
        { "name": "default", "applyToProducts": ["default"] }
      ]
    }
  ]
}
关键字段说明:
| 字段 | 值 | 意义 |
|---|---|---|
targetSdkVersion |
6.1.1(24) |
编译目标 API 级别 |
compatibleSdkVersion |
6.1.1(24) |
最低兼容 API 级别,低于此版本的设备无法安装 |
runtimeOS |
HarmonyOS |
指定运行时操作系统 |
strictMode.caseSensitiveCheck |
true |
路径大小写敏感检查,建议始终开启 |
strictMode.useNormalizedOHMUrl |
true |
使用标准化 OHM 引用路径 |
signAlg |
SHA256withECDSA |
签名算法,ECDSA + SHA256 |
buildModeSet |
debug / release | 两种构建模式 |
模块级 entry/build-profile.json5:
{
  "apiType": "stageMode",
  "buildOption": {
    "resOptions": {
      "copyCodeResource": {
        "enable": false
      }
    }
  },
  "buildOptionSet": [
    {
      "name": "release",
      "arkOptions": {
        "obfuscation": {
          "ruleOptions": {
            "enable": false,
            "files": ["./obfuscation-rules.txt"]
          }
        }
      }
    }
  ],
  "targets": [
    { "name": "default" },
    { "name": "ohosTest" }
  ]
}
⚠️ API 24 的重要区别:
从此版本开始,apiType仅支持stageMode,不再支持 FA(Feature Ability)模型。所有新项目必须使用 Stage 模型,使用UIAbility作为生命周期入口。
3.4 页面路由配置
entry/src/main/resources/base/profile/main_pages.json:
{
  "src": [
    "pages/Index"
  ]
}
这个 JSON 文件告诉框架应用的页面栈从哪里开始。pages/Index 对应 entry/src/main/ets/pages/Index.ets。
3.5 EntryAbility 入口
EntryAbility.ets 是应用的"大脑",负责生命周期管理和页面加载:
import { AbilityConstant, ConfigurationConstant, UIAbility, Want } from '@kit.AbilityKit';
import { hilog } from '@kit.PerformanceAnalysisKit';
import { window } from '@kit.ArkUI';

const DOMAIN = 0x0000;

export default class EntryAbility extends UIAbility {
  onCreate(want: Want, launchParam: AbilityConstant.LaunchParam): void {
    try {
      this.context.getApplicationContext()
        .setColorMode(ConfigurationConstant.ColorMode.COLOR_MODE_NOT_SET);
    } catch (err) {
      hilog.error(DOMAIN, 'testTag',
        'Failed to set colorMode. Cause: %{public}s', JSON.stringify(err));
    }
    hilog.info(DOMAIN, 'testTag', '%{public}s', 'Ability onCreate');
  }

  onDestroy(): void {
    hilog.info(DOMAIN, 'testTag', '%{public}s', 'Ability onDestroy');
  }

  onWindowStageCreate(windowStage: window.WindowStage): void {
    hilog.info(DOMAIN, 'testTag', '%{public}s', 'Ability onWindowStageCreate');
    windowStage.loadContent('pages/Index', (err) => {
      if (err.code) {
        hilog.error(DOMAIN, 'testTag',
          'Failed to load the content. Cause: %{public}s', JSON.stringify(err));
        return;
      }
      hilog.info(DOMAIN, 'testTag', 'Succeeded in loading the content.');
    });
  }

  onWindowStageDestroy(): void {
    hilog.info(DOMAIN, 'testTag', '%{public}s', 'Ability onWindowStageDestroy');
  }

  onForeground(): void {
    hilog.info(DOMAIN, 'testTag', '%{public}s', 'Ability onForeground');
  }

  onBackground(): void {
    hilog.info(DOMAIN, 'testTag', '%{public}s', 'Ability onBackground');
  }
}
API 24 Kit 导入说明:
HarmonyOS NEXT 引入了 Kit 化的模块导入方式。Kit 是 HarmonyOS SDK 的功能域分组,例如:
| Kit 名称 | 功能范围 |
|---|---|
@kit.AbilityKit |
Ability、Want、AbilityConstant 等 |
@kit.PerformanceAnalysisKit |
hilog、HiTrace 等 |
@kit.ArkUI |
UI 组件、window、display 等 |
这种导入方式取代了旧版本中 import hilog from '@ohos.hilog' 的形式,更加语义化和模块化。
hilog 的 %{public}s 占位符:
注意日志字符串中的 %{public}s,这是 hilog 的安全标记:
%{public}s:在 debug 和 release 模式下均显示%{private}s:在 debug 模式下显示,release 模式下被脱敏隐藏%{public}d、%{private}d同理,适用于数字
四、项目架构设计
4.1 分层架构
本项目采用经典的三层架构,从底到顶依次是:
┌──────────────────────────────────────────────────────┐
│                   展示层(pages)                       │
│   ┌─────────────┐                                    │
│   │  Index.ets  │  → @Entry / @ComponentV2           │
│   └──────┬──────┘   只挂载 SixStarPage               │
│          │                                           │
│   ┌──────▼──────────┐                               │
│   │ SixStarPage.ets │  → @ComponentV2               │
│   └─────────────────┘   Canvas 绘制 + 交互控制       │
├──────────────────────────────────────────────────────┤
│                   功能层(common)                      │
│   ┌───────┬────────┬────────────┬────────┐          │
│   │design│components│references│  utils │           │
│   └──┬───┴────┬───┴─────┬─────┴───┬────┘           │
│      │        │         │         │                 │
│   颜色/间距  卡片/徽章   代码模式  工具函数            │
│   字号/圆角  加载/错误  参考手册  转换器/验证器        │
│   阴影      空状态                                  │
├──────────────────────────────────────────────────────┤
│                   数据层(stores)                     │
│   ┌────────┬────────┬────────┬─────────────┐       │
│   │Counter │ Async  │  Form  │  ListData   │       │
│   │ Store  │DataStore│ Store  │   Store     │       │
│   └────────┴────────┴────────┴─────────────┘       │
│   单例模式  @ObservedV2  @Trace 字段级更新           │
└──────────────────────────────────────────────────────┘
这种分层带来了三个优势:
- 职责单一:每层只做自己的事。展示层不直接操作数据,数据层不感知 UI。
- 可测试性:纯函数工具库可以直接单测,Store 可以被 Mock。
- 可复用性:components/ 和 utils/ 可以跨项目复制粘贴。
4.2 Index.ets — 纯展示入口
/**
 * 六星光芒阵 - 主页面
 * 只做最终展示挂载,不包含任何业务逻辑。
 */
import { SixStarPage } from './SixStarPage';

@Entry
@ComponentV2
struct Index {
  build(): void {
    Stack() {
      SixStarPage()
    }
    .width('100%')
    .height('100%')
  }
}
设计原则: Index.ets 只负责两件事:
- 用
@Entry标记为入口页面 - 用
Stack包裹SixStarPage作为根节点
⚠️ 注意: 在 HarmonyOS 中,
@Entry组件的build()方法根节点必须是容器组件(如Column、Stack、Row等),不能直接返回自定义组件。因此需要用Stack { SixStarPage() }包裹。
4.3 @ComponentV2 装饰器详解
API 24 引入了 @ComponentV2 装饰器,它是传统 @Component 的增强版。核心区别如下:
| 特性 | @Component | @ComponentV2 |
|---|---|---|
| 本地状态 | @State | @Local |
| 父传参数 | @Prop(可变) | @Param(只读) |
| 精确更新 | 属性级 | 字段级(配合 @Trace) |
| 外部 Store | 需手动观察 | @ObservedV2 自动追踪 |
| 生命周期 | aboutToAppear/Disappear | 相同 |
| 构建入口 | build() | build() |
@ComponentV2
struct MyComponent {
  @Local myState: number = 0;       // 局部可变状态
  @Param parentValue: string;        // 从父组件传入的只读参数
  onLocalEvent?: () => void;         // 事件回调(非装饰器)
}
@Local:组件内部可变状态,变化时自动触发 UI 刷新@Param:父组件传入的只读参数,父组件更新时自动同步@BuilderParam:插槽,用于接收父组件的 Builder
五、Canvas 绘制六芒星
5.1 声明画布上下文
在 ArkTS 中,Canvas 的使用分为三个阶段:
第一步:创建 RenderingContextSettings
private settings: RenderingContextSettings = new RenderingContextSettings(true);
RenderingContextSettings 构造函数的参数是 antialias?: boolean,默认为 false。传入 true 启用抗锯齿,这是保证图形边缘平滑的关键。
第二步:创建 CanvasRenderingContext2D
private canvasContext: CanvasRenderingContext2D = new CanvasRenderingContext2D(this.settings);
CanvasRenderingContext2D 是 2D 绘图的核心对象,提供所有绘图 API。它在 API 24 中的行为与 W3C 标准保持一致,Web 开发者几乎可以零门槛过渡。
第三步:在 build() 中放置 Canvas 组件
Canvas(this.canvasContext)
  .width('100%')
  .layoutWeight(1)
Canvas 组件接收 CanvasRenderingContext2D 作为参数,并映射到实际的屏幕像素缓冲区。
5.2 获取画布尺寸
在 API 24 中,CanvasRenderingContext2D 直接暴露了 width 和 height 属性,无需注册 onAreaChange 事件:
const ctx = this.canvasContext;
const w = ctx.width;       // 画布实际宽度(px)
const h = ctx.height;      // 画布实际高度(px)
const cx = w / 2;          // 中心点 x 坐标
const cy = h / 2;          // 中心点 y 坐标
const maxRadius = Math.min(w, h) * 0.38;  // 最大半径
这里 maxRadius = Math.min(w, h) * 0.38 的设计考虑了:
Math.min(w, h)确保六芒星在横屏和竖屏下都不会被裁剪- 系数
0.38留出了足够的边距,给射线(rayLength = maxRadius * 1.6)和光晕留空间
5.3 六芒星的几何数学原理
六芒星(Hexagram)的几何基础是两个正三角形旋转交错。我们来深入推导:
正三角形顶点坐标公式:
给定外接圆半径 R 和旋转角度 θ,第 i 个顶点坐标是:
x_i = cx + R × cos(θ + i × 2π/3)
y_i = cy + R × sin(θ + i × 2π/3)
其中 i = 0, 1, 2 分别对应三个顶点。
六芒星的构成:
| 三角形 | 起始角度 | 顶点角度 |
|---|---|---|
| 三角形 1 | θ | θ, θ+120°, θ+240° |
| 三角形 2 | θ+60° | θ+60°, θ+180°, θ+300° |
用代码表示:
const outerR = maxRadius * 0.85;

// 三角形 1
ctx.beginPath();
for (let i = 0; i < 3; i++) {
  const angle = this.currentAngle + (i * 2 * Math.PI / 3);
  const x = cx + Math.cos(angle) * outerR;
  const y = cy + Math.sin(angle) * outerR;
  if (i === 0) ctx.moveTo(x, y);
  else ctx.lineTo(x, y);
}
ctx.closePath();
ctx.fill();
ctx.stroke();

// 三角形 2(旋转 60°)
ctx.beginPath();
for (let i = 0; i < 3; i++) {
  const angle = this.currentAngle + Math.PI / 3 + (i * 2 * Math.PI / 3);
  const x = cx + Math.cos(angle) * outerR;
  const y = cy + Math.sin(angle) * outerR;
  if (i === 0) ctx.moveTo(x, y);
  else ctx.lineTo(x, y);
}
ctx.closePath();
ctx.fill();
ctx.stroke();
5.4 完整绘制流程
整个 drawStar() 方法遵循从底到顶、逐层叠加的渲染策略:
渲染管线顺序:
 1. clearRect(0, 0, w, h)           → 清空画布
 2. createRadialGradient 背景        → 深色基础氛围
 3. arc() × 3 外圈虚线光环           → 装饰性光晕环
 4. createRadialGradient 中心光晕    → 主要光源
 5. Path × 18 光芒射线               → 六方向发散
 6. Path × 12 内圈小光芒             → 细节光芒
 7. Path × 2 六芒星(发光描边)      → 主体
 8. Path 中心六边形(虚线)          → 几何结构
 9. createRadialGradient 中心光点    → 聚焦核心
10. arc() × 6 顶点光点              → 六角光点
11. arc() × 60 粒子系统              → 环境动态
12. Path × 20 星座连线               → 空间网络
完整的 drawStar() 代码如下:
private drawStar(): void {
  const ctx = this.canvasContext;
  const w = ctx.width;
  const h = ctx.height;
  const cx = w / 2;
  const cy = h / 2;
  const maxRadius = Math.min(w, h) * 0.38;
  const scheme = this.getColorScheme();

  // 1. 清空画布
  ctx.clearRect(0, 0, w, h);

  // 2. 背景径向渐变
  const bgGrad = ctx.createRadialGradient(cx, cy, 0, cx, cy, maxRadius * 1.8);
  bgGrad.addColorStop(0, this.hexToRgba(scheme.star, 0.08));
  bgGrad.addColorStop(0.5, this.hexToRgba(scheme.glow, 0.04));
  bgGrad.addColorStop(1, scheme.bg);
  ctx.fillStyle = bgGrad;
  ctx.fillRect(0, 0, w, h);

  // 3. 外圈光晕光环(3层虚线圆环)
  for (let ring = 0; ring < 3; ring++) {
    const ringRadius = maxRadius * (0.6 + ring * 0.2);
    const ringAngle = this.currentAngle * (1 - ring * 0.3);

    ctx.beginPath();
    ctx.arc(cx, cy, ringRadius, 0, Math.PI * 2);
    ctx.strokeStyle = this.hexToRgba(scheme.glow, 0.08 - ring * 0.02);
    ctx.lineWidth = 1.5 + ring;
    ctx.setLineDash([4, 8 + ring * 4]);
    ctx.lineDashOffset = -ringAngle * 30;
    ctx.stroke();
    ctx.setLineDash([]);
  }

  // 4. 中心光晕(径向渐变)
  const glowGrad = ctx.createRadialGradient(cx, cy, 0, cx, cy, maxRadius * 1.2);
  glowGrad.addColorStop(0, this.hexToRgba(scheme.glow, 0.3 * this.glowIntensity));
  glowGrad.addColorStop(0.3, this.hexToRgba(scheme.glow, 0.1 * this.glowIntensity));
  glowGrad.addColorStop(0.6, this.hexToRgba(scheme.ray, 0.03 * this.glowIntensity));
  glowGrad.addColorStop(1, 'rgba(0,0,0,0)');
  ctx.fillStyle = glowGrad;
  ctx.beginPath();
  ctx.arc(cx, cy, maxRadius * 1.2, 0, Math.PI * 2);
  ctx.fill();

  // 5. 光芒射线(6条×3层=18个三角形)
  const rayLength = maxRadius * 1.6;
  for (let i = 0; i < 6; i++) {
    const angle = this.currentAngle + (i * Math.PI / 3);
    const pulse = 0.85 + 0.15 * Math.sin(this.currentAngle * 3 + i);

    for (let r = 0; r < 3; r++) {
      const spreadAngle = 0.02 + r * 0.015;
      const rayAlpha = (0.12 - r * 0.035) * this.glowIntensity;
      const rayLen = rayLength * (0.6 + r * 0.3) * pulse;

      ctx.beginPath();
      ctx.moveTo(
        cx + Math.cos(angle - spreadAngle) * maxRadius * 0.85,
        cy + Math.sin(angle - spreadAngle) * maxRadius * 0.85
      );
      ctx.lineTo(
        cx + Math.cos(angle) * rayLen,
        cy + Math.sin(angle) * rayLen
      );
      ctx.lineTo(
        cx + Math.cos(angle + spreadAngle) * maxRadius * 0.85,
        cy + Math.sin(angle + spreadAngle) * maxRadius * 0.85
      );
      ctx.closePath();

      const rayGrad = ctx.createRadialGradient(cx, cy, maxRadius * 0.6, cx, cy, rayLen);
      rayGrad.addColorStop(0, this.hexToRgba(scheme.ray, rayAlpha * 0.5));
      rayGrad.addColorStop(0.5, this.hexToRgba(scheme.ray, rayAlpha));
      rayGrad.addColorStop(1, this.hexToRgba(scheme.ray, 0));
      ctx.fillStyle = rayGrad;
      ctx.fill();
    }
  }

  // 6. 内圈小光芒(12条)
  const innerRayCount = 12;
  for (let i = 0; i < innerRayCount; i++) {
    const angle = this.currentAngle + (i * Math.PI / 6) + 0.15;
    const len = maxRadius * (0.25 + 0.1 * Math.sin(this.currentAngle * 2 + i));

    ctx.beginPath();
    ctx.moveTo(cx, cy);
    ctx.lineTo(cx + Math.cos(angle) * len, cy + Math.sin(angle) * len);
    ctx.strokeStyle = this.hexToRgba(scheme.star, 0.08);
    ctx.lineWidth = 1;
    ctx.stroke();
  }

  // 7. 六芒星主体(带发光阴影)
  const outerR = maxRadius * 0.85;
  ctx.save();

  // 三角形 1
  ctx.beginPath();
  for (let i = 0; i < 3; i++) {
    const angle = this.currentAngle + (i * 2 * Math.PI / 3);
    const x = cx + Math.cos(angle) * outerR;
    const y = cy + Math.sin(angle) * outerR;
    if (i === 0) ctx.moveTo(x, y);
    else ctx.lineTo(x, y);
  }
  ctx.closePath();
  ctx.fillStyle = this.hexToRgba(scheme.star, 0.15);
  ctx.strokeStyle = this.hexToRgba(scheme.star, 0.7);
  ctx.lineWidth = 2;
  ctx.shadowColor = scheme.star;
  ctx.shadowBlur = 15 * this.glowIntensity;
  ctx.fill();
  ctx.stroke();

  // 三角形 2
  ctx.beginPath();
  for (let i = 0; i < 3; i++) {
    const angle = this.currentAngle + Math.PI / 3 + (i * 2 * Math.PI / 3);
    const x = cx + Math.cos(angle) * outerR;
    const y = cy + Math.sin(angle) * outerR;
    if (i === 0) ctx.moveTo(x, y);
    else ctx.lineTo(x, y);
  }
  ctx.closePath();
  ctx.fillStyle = this.hexToRgba(scheme.star, 0.15);
  ctx.strokeStyle = this.hexToRgba(scheme.star, 0.7);
  ctx.lineWidth = 2;
  ctx.shadowColor = scheme.star;
  ctx.shadowBlur = 15 * this.glowIntensity;
  ctx.fill();
  ctx.stroke();

  ctx.restore();

  // 8. 中心六边形虚线
  const innerR = maxRadius * 0.35;
  ctx.beginPath();
  for (let i = 0; i < 6; i++) {
    const angle = this.currentAngle + Math.PI / 6 + (i * Math.PI / 3);
    const x = cx + Math.cos(angle) * innerR;
    const y = cy + Math.sin(angle) * innerR;
    if (i === 0) ctx.moveTo(x, y);
    else ctx.lineTo(x, y);
  }
  ctx.closePath();
  ctx.strokeStyle = this.hexToRgba(scheme.star, 0.3);
  ctx.lineWidth = 1;
  ctx.setLineDash([3, 3]);
  ctx.lineDashOffset = -this.currentAngle * 20;
  ctx.stroke();
  ctx.setLineDash([]);

  // 9. 中心光点
  const coreGrad = ctx.createRadialGradient(cx, cy, 0, cx, cy, innerR * 0.5);
  coreGrad.addColorStop(0, '#FFFFFF');
  coreGrad.addColorStop(0.3, scheme.star);
  coreGrad.addColorStop(1, this.hexToRgba(scheme.star, 0));
  ctx.fillStyle = coreGrad;
  ctx.beginPath();
  ctx.arc(cx, cy, innerR * 0.5, 0, Math.PI * 2);
  ctx.fill();

  // 10. 顶点光点(6个,带脉冲大小变化)
  for (let i = 0; i < 6; i++) {
    const angle = this.currentAngle + (i * Math.PI / 3);
    const px = cx + Math.cos(angle) * outerR;
    const py = cy + Math.sin(angle) * outerR;
    const pulseSize = 3 + 2 * Math.sin(this.currentAngle * 2 + i);

    const dotGrad = ctx.createRadialGradient(px, py, 0, px, py, pulseSize * 3);
    dotGrad.addColorStop(0, '#FFFFFF');
    dotGrad.addColorStop(0.3, scheme.star);
    dotGrad.addColorStop(1, this.hexToRgba(scheme.star, 0));
    ctx.fillStyle = dotGrad;
    ctx.beginPath();
    ctx.arc(px, py, pulseSize * 3, 0, Math.PI * 2);
    ctx.fill();
  }

  // 11. 粒子系统
  if (this.showParticles) {
    for (const p of this.particles) {
      const pAngle = p.angle + this.currentAngle * p.speed * 0.5;
      const pR = p.radius + 15 * Math.sin(this.currentAngle * 2 + p.offset);
      const px = cx + Math.cos(pAngle) * pR;
      const py = cy + Math.sin(pAngle) * pR;
      const alpha = p.alpha * (0.5 + 0.5 * Math.sin(this.currentAngle * 1.5 + p.offset));

      ctx.beginPath();
      ctx.arc(px, py, p.size, 0, Math.PI * 2);
      ctx.fillStyle = this.hexToRgba(scheme.ray, alpha);
      ctx.fill();
    }

    // 12. 星座连线
    for (let i = 0; i < this.particles.length; i += 3) {
      const p1 = this.particles[i];
      const p2 = this.particles[(i + 1) % this.particles.length];

      const a1 = p1.angle + this.currentAngle * p1.speed * 0.5;
      const a2 = p2.angle + this.currentAngle * p2.speed * 0.5;
      const r1 = p1.radius + 15 * Math.sin(this.currentAngle * 2 + p1.offset);
      const r2 = p2.radius + 15 * Math.sin(this.currentAngle * 2 + p2.offset);

      ctx.beginPath();
      ctx.moveTo(cx + Math.cos(a1) * r1, cy + Math.sin(a1) * r1);
      ctx.lineTo(cx + Math.cos(a2) * r2, cy + Math.sin(a2) * r2);
      ctx.strokeStyle = this.hexToRgba(scheme.ray, 0.03);
      ctx.lineWidth = 0.5;
      ctx.stroke();
    }
  }
}
5.5 绘制性能分析
在 60fps(每帧 16ms)下,drawStar() 每帧执行的 Canvas 操作统计:
| 操作类型 | 调用次数 | 说明 |
|---|---|---|
| ctx.beginPath | ~120 | 路径开始 |
| ctx.moveTo/lineTo | ~300 | 路径点 |
| ctx.arc | ~70 | 圆形绘制 |
| ctx.closePath | ~30 | 路径闭合 |
| ctx.fill | ~20 | 填充 |
| ctx.stroke | ~40 | 描边 |
| ctx.createRadialGradient | ~20 | 径向渐变创建 |
总操作数约 600 次/帧,在 ArkTS Canvas 的硬件加速实现下可稳定保持 60fps。
六、动画系统
6.1 setTimeout 递归实现 60fps
HarmonyOS 的 ArkTS 没有浏览器标准的 requestAnimationFrame,因此使用 setTimeout 递归来驱动动画:
private animationId: number = 0;

private startAnimation(): void {
  const animate = () => {
    this.currentAngle += 0.008 * this.rotationSpeed;
    this.drawStar();
    this.animationId = setTimeout(animate, 16);
  };
  animate();
}

private stopAnimation(): void {
  if (this.animationId) {
    clearTimeout(this.animationId);
    this.animationId = 0;
  }
}
为什么 setTimeout 而不是 setInterval?
setTimeout 递归比 setInterval 更适合动画场景:
| 特性 | setTimeout 递归 | setInterval |
|---|---|---|
| 执行间隔 | 动态调整,可自适应 | 固定间隔 |
| 丢帧行为 | 任务完成后再设下一个,不堆积 | 可能堆积导致卡顿 |
| 停止控制 | clearTimeout(id) | clearInterval(id) |
| 动态调速 | 改变 delay 值即可 | 需重新创建 |
6.2 生命周期绑定
aboutToAppear(): void {
  this.initParticles();
  this.startAnimation();
}

aboutToDisappear(): void {
  this.stopAnimation();
}
aboutToAppear:组件即将显示时调用,用于初始化数据和启动动画aboutToDisappear:组件即将销毁时调用,用于清理定时器、防止内存泄漏
6.3 正弦波实现脉冲效果
动画中大量使用了三角函数 Math.sin 来产生"呼吸感":
射线脉冲:
const pulse = 0.85 + 0.15 * Math.sin(this.currentAngle * 3 + i);
- 范围:0.70 ~ 1.00(±15% 变化)
- 频率:
currentAngle × 3,即每转 120° 完成一个脉冲周期 + i:不同顶点相位偏移,形成依次跳动的"流光"
粒子轨道波动:
const pR = p.radius + 15 * Math.sin(this.currentAngle * 2 + p.offset);
- 范围:radius ± 15px
- 每个粒子的
offset随机,产生错落的轨道波动
粒子透明度闪烁:
const alpha = p.alpha * (0.5 + 0.5 * Math.sin(this.currentAngle * 1.5 + p.offset));
- 范围:0 ~ p.alpha(0.2~0.8)
- 频率较低(×1.5),呈现"忽明忽暗"的星光闪烁效果
顶点光点大小:
const pulseSize = 3 + 2 * Math.sin(this.currentAngle * 2 + i);
- 范围:1 ~ 5px
- 六个顶点交替跳动,形成"呼吸"聚焦效果
6.4 旋转速度控制
// 动画循环中
this.currentAngle += 0.008 * this.rotationSpeed;

// 用户通过 Slider 控制
Slider({
  value: this.rotationSpeed,
  min: 0.1,
  max: 3.0,
  step: 0.1
})
0.008 是基础步长(约 0.458°/帧),乘以 this.rotationSpeed(0.1~3.0),实际角速度范围为:
| 转速值 | 角度/帧 | 角度/秒(60fps) | 旋转一周所需时间 |
|---|---|---|---|
| 0.1 | 0.046°/帧 | 2.75°/s | ~131 秒 |
| 1.0 | 0.458°/帧 | 27.5°/s | ~13 秒 |
| 3.0 | 1.375°/帧 | 82.5°/s | ~4.4 秒 |
七、颜色方案系统
7.1 类型定义
interface ColorScheme {
  name: string;   // 方案名称(中文)
  star: string;   // 星星填充和描边色
  glow: string;   // 光晕颜色
  ray: string;    // 射线颜色
  bg: string;     // 背景色
}
为什么 interface 必须在 struct 外部声明?
在 ArkTS 中,type alias 和 interface 不允许定义在 struct/class 内部。所有类型定义必须放在文件顶层作用域。
7.2 五套配色方案
private readonly colorSchemes: ColorScheme[] = [
  { name: '极光蓝', star: '#00D4FF', glow: '#007DFF', ray: '#66B3FF', bg: '#0A0E27' },
  { name: '烈焰红', star: '#FF4757', glow: '#FF6B35', ray: '#FFA502', bg: '#1A0A0A' },
  { name: '暗夜紫', star: '#A855F7', glow: '#7C3AED', ray: '#C084FC', bg: '#0F0A1A' },
  { name: '翡翠绿', star: '#2ED573', glow: '#00D9A5', ray: '#7BED9F', bg: '#0A1A0F' },
  { name: '黄金',   star: '#FFD700', glow: '#FFA502', ray: '#FFE55C', bg: '#1A1400' },
];
7.3 Hex 转 RGBA
private hexToRgba(hex: string, alpha: number): string {
  const r = parseInt(hex.slice(1, 3), 16);
  const g = parseInt(hex.slice(3, 5), 16);
  const b = parseInt(hex.slice(5, 7), 16);
  return `rgba(${r},${g},${b},${alpha})`;
}
这个工具函数在本项目中调用了约 40 次/帧,是整个绘图中最频繁使用的函数之一。
7.4 颜色切换逻辑
private nextColor(): void {
  this.currentColor = (this.currentColor + 1) % this.colorSchemes.length;
}

private prevColor(): void {
  this.currentColor = (this.currentColor - 1 + this.colorSchemes.length) % this.colorSchemes.length;
}
取模运算确保索引始终在 0 ~ length-1 区间内循环。
八、状态管理(Stores)
8.1 @ObservedV2 + @Trace 模式
API 24 推荐的全局状态管理模式是 @ObservedV2 + @Trace,替代了旧版本的 @Observed + @ObjectLink。
@ObservedV2
class CounterStore {
  private static instance: CounterStore | null = null;

  @Trace count: number = 0;
  @Trace step: number = 1;
  @Trace maxValue: number = 100;
  @Trace minValue: number = 0;
  @Trace history: number[] = [];

  private constructor() {}

  static getInstance(): CounterStore {
    if (CounterStore.instance === null) {
      CounterStore.instance = new CounterStore();
    }
    return CounterStore.instance;
  }

  increment(): void {
    if (this.count + this.step <= this.maxValue) {
      this.count += this.step;
      this.addToHistory(this.count);
    }
  }

  reset(): void { this.count = 0; this.history = []; }

  get canIncrement(): boolean {
    return this.count + this.step <= this.maxValue;
  }

  get canDecrement(): boolean {
    return this.count - this.step >= this.minValue;
  }
}

export const counterStore = CounterStore.getInstance();
设计要点:
@ObservedV2装饰类:标记为可观察类,使 ArkUI 可以追踪其属性变化@Trace装饰属性:标记需要追踪的属性,只有被@Trace标记的属性变化才会触发 UI 刷新- 单例模式:
private constructor+static getInstance(),确保全局只有一个 Store 实例 - 计算属性(getter):
canIncrement、canDecrement作为衍生状态
8.2 最佳实践
这种 Store 模式在项目中的应用范围:
| Store | @Trace 属性数 | 核心能力 |
|---|---|---|
| CounterStore | 5 | 计数、步长、边界、历史栈 |
| AsyncDataStore | 2 | loading、error、data 三态 |
| FormStore | 9 | 多字段校验、提交状态 |
| ListDataStore | 6 | 数据、分页、筛选、搜索 |
九、实用工具函数库
9.1 通用工具(common.ets)
export function isEmpty(value: unknown): boolean {
  if (value === null || value === undefined) return true;
  if (typeof value === 'string') return value.trim().length === 0;
  if (typeof value === 'number') return isNaN(value);
  if (Array.isArray(value)) return value.length === 0;
  if (typeof value === 'object') return Object.keys(value).length === 0;
  return false;
}

export function debounce(fn: () => void, delay: number): () => void {
  let timer: number | null = null;
  return (): void => {
    if (timer !== null) clearTimeout(timer);
    const timerValue = setTimeout(() => { fn(); }, delay);
    timer = timerValue as number;
  };
}

export function throttle(fn: () => void, delay: number): () => void {
  let lastTime: number = 0;
  return (): void => {
    const now: number = Date.now();
    if (now - lastTime >= delay) {
      lastTime = now;
      fn();
    }
  };
}

export function deepClone(obj: object | null): object | null {
  if (obj === null || typeof obj !== 'object') return obj;
  if (Array.isArray(obj)) {
    const result: object[] = [];
    for (const item of obj) {
      result.push((item && typeof item === 'object') ? deepClone(item) : item);
    }
    return result;
  }
  const clone: Record<string, unknown> = {};
  for (const key of Object.keys(obj)) {
    const val = (obj as Record<string, unknown>)[key];
    clone[key] = (val && typeof val === 'object') ? deepClone(val as object) : val;
  }
  return clone;
}
9.2 验证器(validator.ets)
export function isEmail(value: string): boolean {
  return /^[^\s@]+@[^\s@]+\.[^\s@]+$/.test(value);
}

export function isPhone(value: string): boolean {
  return /^1[3-9]\d{9}$/.test(value);
}

export function isPasswordStrong(value: string): boolean {
  if (value.length < 8) return false;
  const hasUpper = /[A-Z]/.test(value);
  const hasLower = /[a-z]/.test(value);
  const hasNumber = /\d/.test(value);
  const hasSpecial = /[!@#$%^&*()_+\-=\[\]{}|;:,.<>?]/.test(value);
  return hasUpper && hasLower && (hasNumber || hasSpecial);
}

export function getPasswordStrength(value: string): PasswordStrength {
  let level = 0;
  if (value.length >= 6) level++;
  if (value.length >= 10) level++;
  if (/[a-z]/.test(value)) level++;
  if (/[A-Z]/.test(value)) level++;
  if (/\d/.test(value)) level++;
  if (/[!@#$%^&*()_+\-=\[\]{}|;:,.<>?]/.test(value)) level++;

  if (level <= 2) return { level, label: '弱', color: '#FF4757' };
  if (level <= 4) return { level, label: '中', color: '#FFA502' };
  return { level, label: '强', color: '#2ED573' };
}
十、UI 组件库亮点
10.1 Card 卡片组件(带插槽)
@Component
export struct Card {
  @Prop cardTitle: string = '';
  @Prop cardSubtitle: string = '';
  @Prop cardPadding: number = 16;
  @Prop cardRadius: number = 12;
  @Prop hasShadow: boolean = true;
  @Prop cardBgColor: string = '#FFFFFF';
  @BuilderParam cardContent: () => void;

  build() {
    Column({ space: 12 }) {
      if (this.cardTitle) {
        Row({ space: 8 }) {
          Text(this.cardTitle)
            .fontSize(16).fontColor('#1C1C1E').fontWeight(FontWeight.Medium)
            .layoutWeight(1)
          if (this.cardSubtitle) {
            Text(this.cardSubtitle).fontSize(12).fontColor('#98989A')
          }
        }.width('100%')
      }
      if (this.cardContent) { this.cardContent(); }
    }
    .width('100%')
    .padding(this.cardPadding)
    .backgroundColor(this.cardBgColor)
    .borderRadius(this.cardRadius)
    .shadow(this.hasShadow ? {
      radius: 8, color: '#00000010', offsetX: 0, offsetY: 2
    } : undefined)
  }
}
使用 @BuilderParam cardContent: () => void 实现了类似 Vue slot 的插槽机制,父组件可以用 @Builder 定义内容:
@Builder
myCardContent() {
  Column() { Text('这是卡片内容').fontSize(14) }
}

// 使用
Card({ cardTitle: '标题', cardContent: this.myCardContent })
10.2 Badge 徽章系列
Badge 组件提供了 4 种变体:
| 组件名 | 用途 | 关键属性 |
|---|---|---|
| TagBadge | 文字标签 | badgeText, badgeType, badgeSize |
| NumberBadge | 数字角标 | badgeCount, badgeMax |
| DotBadge | 圆点状态 | dotColor, dotSize |
| StatusTag | 状态标签 | tagText, tagStatus |
@Component
export struct StatusTag {
  @Prop tagText: string = '';
  @Prop tagStatus: string = 'default';

  getStatusColors(): string[] {
    switch (this.tagStatus) {
      case 'success': return ['#2ED573', '#2ED57320'];
      case 'warning': return ['#FFA502', '#FFA50220'];
      case 'error':   return ['#FF4757', '#FF475720'];
      case 'processing': return ['#007DFF', '#007DFF20'];
      default: return ['#98989A', '#98989A20'];
    }
  }

  build() {
    Row({ space: 6 }) {
      if (this.tagStatus === 'processing') {
        LoadingProgress().width(12).height(12).color(this.getStatusColors()[0])
      } else {
        Row().width(6).height(6)
          .backgroundColor(this.getStatusColors()[0]).borderRadius(9999)
      }
      Text(this.tagText).fontSize(12).fontColor(this.getStatusColors()[0])
    }
    .padding({ left: 8, right: 8, top: 4, bottom: 4 })
    .backgroundColor(this.getStatusColors()[1])
    .borderRadius(4)
  }
}
十一、完整运行
11.1 编译命令
# 进入项目目录
cd D:\HarmonyOSProject\Pro

# 编译 hap 包(debug 模式)
hvigorw assembleHap --no-daemon

# 编译 hap 包(release 模式)
hvigorw assembleHap --mode release --no-daemon
11.2 构建检查清单
| 配置项 | 正确值 | 常见错误 |
|---|---|---|
| compatibleSdkVersion | 6.1.1(24) | 写成 24 或 ‘24’ |
| targetSdkVersion | 6.1.1(24) | 同上 |
| apiType | stageMode | 写错为 faMode |
| runtimeOS | HarmonyOS | 拼写错误 |
| @Entry 根节点 | 容器组件 | 直接返回自定义组件 |
11.3 常见构建错误
| 错误信息 | 原因 | 解决方案 |
|---|---|---|
build() can have only one root node, which must be a container component |
@Entry 组件的 build 直接返回自定义组件 | 用 Stack { CustomComp() } 包裹 |
ArkTS: Object literal must be used with a corresponding interface |
内联对象字面量没有类型声明 | 先声明 interface,再创建对象 |
'setTimeout' is not an allowed identifier |
类型定义错误 | 确保 animationId 声明为 number |
Property 'width' does not exist on type 'CanvasRenderingContext2D' |
使用了旧版本的导入方式 | 检查 SDK 版本是否为 API 24 |
十二、总结
12.1 核心技术回顾
本文通过"六星光芒阵"实战项目,系统性地覆盖了 HarmonyOS API 24 的以下核心技术:
| 技术领域 | 核心知识点 | 代码量(行) |
|---|---|---|
| Canvas 绘图 | createRadialGradient、Path、shadowBlur、arc | ~250 |
| 动画系统 | setTimeout 递归、aboutToAppear/Disappear | ~30 |
| 状态管理 | @ObservedV2 + @Trace + @Local 体系 | ~400(含 stores) |
| 组件封装 | @Component、@BuilderParam 插槽、@Prop | ~300 |
| 工具函数 | 防抖/节流/深拷贝/验证器/格式化器 | ~500 |
| 设计系统 | 颜色令牌/间距/字号/圆角/阴影 | ~150 |
| 构建配置 | build-profile.json5、Stage 模型 | ~50 |
| 总计 | - | ~1700 |
12.2 架构原则总结
- Index.ets 只做展示挂载,所有业务逻辑在子组件和 store 中
- 分层关注:pages / common / stores 各司其职
- 单例 Store:全局状态通过 @ObservedV2 + @Trace 管理
- 纯函数工具库:所有工具函数不依赖 UI 环境,可独立测试
- 代码模式参考:将完成的功能抽象为可复用的代码模板
- API 24 Kit 化导入:使用
@kit.*语义化模块路径
12.3 扩展方向
- 触摸交互:接入触摸事件,支持手指拖拽旋转、双指缩放
- WebSocket 联机同步:多设备实时同步旋转角度和配色
- 更多 Canvas API:Canvas 滤镜(如
ctx.filter = 'blur(4px)')、像素级操作 - WebGL 迁移:高密度粒子(500+)场景可以考虑迁移到 WebGL
12.4 写在最后
HarmonyOS NEXT 的 ArkTS 生态已经非常成熟。API 24 的 CanvasRenderingContext2D 实现与 W3C 标准高度一致,@ObservedV2 + @Trace 的状态管理方案相比旧版本更加高效和灵活。希望这篇深入的实践总结能为正在探索 HarmonyOS 图形绘制的开发者提供有价值的参考。
项目路径:
D:\HarmonyOSProject\Pro
API 版本: HarmonyOS API 24(6.1.1)

讨论HarmonyOS开发技术,专注于API与组件、DevEco Studio、测试、元服务和应用上架分发等。
更多推荐
 0
0 0
0- 0


 已为社区贡献6条内容

所有评论(0)