鸿蒙 Flutter 接入鸿蒙系统能力:通知(本地 / 推送)与后台任务
在鸿蒙生态(HarmonyOS)中,系统级能力的接入是提升应用体验的核心手段,而通知(本地通知、推送通知)与后台任务更是保障应用交互性、实时性的关键功能。作为跨平台技术的主流选择,Flutter 与鸿蒙的融合已日趋成熟,通过 ohos_flutter 生态插件,开发者可高效实现 Flutter 应用对鸿蒙系统能力的调用。本文将从环境准备、核心功能实现、进阶优化、问题排查四个维度,手把手教你完成鸿蒙 Flutter 应用中本地通知、推送通知与后台任务的接入,全程附完整代码、官方文档链接与实战技巧,助力开发者快速落地生产级应用。
一、前置准备:鸿蒙 Flutter 开发环境与依赖配置
在接入系统能力前,需确保开发环境符合鸿蒙 Flutter 开发要求,并引入核心依赖插件。本节将详细说明环境配置步骤与关键依赖选择。
1.1 开发环境要求
- 鸿蒙系统版本:HarmonyOS 3.0 及以上(通知高级特性与后台任务 API 需 3.0+ 支持)
- Flutter 版本:3.10.0 及以上(建议使用稳定版,适配鸿蒙 Flutter 引擎)
- 开发工具:DevEco Studio 4.0+(集成鸿蒙原生开发能力)、Android Studio(Flutter 开发主工具)
- 核心依赖:
- 鸿蒙 Flutter 引擎:
ohos_flutter_engine(提供 Flutter 与鸿蒙系统的桥接能力) - 通知插件:
ohos_flutter_notification(封装鸿蒙本地通知与推送通知 API) - 后台任务插件:
ohos_flutter_background_task(适配鸿蒙后台任务调度机制) - 推送 SDK:鸿蒙 Push Kit(华为官方推送服务,需集成原生 SDK 配合 Flutter 调用)
- 鸿蒙 Flutter 引擎:
1.2 环境配置步骤
步骤 1:安装鸿蒙 Flutter 引擎
鸿蒙 Flutter 引擎是 Flutter 应用运行在鸿蒙设备上的核心,需替换默认 Flutter 引擎为鸿蒙适配版:
bash
运行
# 1. 克隆鸿蒙 Flutter 引擎仓库(官方维护)
git clone https://gitee.com/openharmony-sig/ohos_flutter_engine.git
cd ohos_flutter_engine
git checkout stable-3.10.0-ohos  # 切换到与 Flutter 版本匹配的分支

# 2. 配置 Flutter 引擎路径(修改 Flutter 配置文件)
export FLUTTER_ENGINE=/path/to/ohos_flutter_engine  # 临时生效
# 永久生效:添加到 ~/.bashrc 或 ~/.zshrc
echo 'export FLUTTER_ENGINE=/path/to/ohos_flutter_engine' >> ~/.bashrc
source ~/.bashrc
步骤 2:创建鸿蒙 Flutter 项目
使用 DevEco Studio 或 Flutter 命令行创建支持鸿蒙的 Flutter 项目:
bash
运行
# 创建 Flutter 项目(指定鸿蒙平台)
flutter create --platforms=ohos my_ohos_flutter_app
cd my_ohos_flutter_app

# 验证鸿蒙平台配置
flutter devices  # 确保能识别鸿蒙设备或模拟器
步骤 3:引入核心依赖
在 pubspec.yaml 中添加通知与后台任务插件依赖,同时配置鸿蒙原生权限与 SDK:
yaml
dependencies:
  flutter:
    sdk: flutter
  # 鸿蒙通知插件(支持本地通知 + 推送通知桥接)
  ohos_flutter_notification: ^1.2.0  # 最新版本参考 GitHub 仓库
  # 鸿蒙后台任务插件
  ohos_flutter_background_task: ^0.8.0
  # 华为 Push Kit 适配(推送核心依赖)
  huawei_push: ^6.11.0+300  # 需配合鸿蒙原生 SDK 集成

dev_dependencies:
  flutter_test:
    sdk: flutter
  flutter_lints: ^2.0.0

# 鸿蒙平台配置(添加权限与 SDK 依赖)
ohos:
  device_type: [phone, tablet]  # 支持的设备类型
  min_api_version: 9  # 最低鸿蒙 API 版本(对应 HarmonyOS 3.0)
  target_api_version: 10  # 目标 API 版本(对应 HarmonyOS 4.0)
  dependencies:
    # 引入鸿蒙 Push Kit 原生 SDK
    - name: com.huawei.hms:push-ohos
      version: 6.11.0.300
步骤 4:配置鸿蒙原生权限
在鸿蒙项目的 config.json(路径:ohos/app/src/main/config.json)中添加必要权限:
json
{
  "module": {
    "reqPermissions": [
      // 通知权限(必须)
      {
        "name": "ohos.permission.NOTIFICATION",
        "reason": "需要发送通知提醒用户",
        "usedScene": {
          "ability": ["com.example.myapp.MainAbility"],
          "when": "always"
        }
      },
      // 后台任务权限(后台任务需申请)
      {
        "name": "ohos.permission.RUN_BACKGROUND_TASKS",
        "reason": "需要在后台同步数据",
        "usedScene": {
          "ability": ["com.example.myapp.MainAbility"],
          "when": "always"
        }
      },
      // 网络权限(推送与后台同步需用到)
      {
        "name": "ohos.permission.INTERNET",
        "reason": "需要网络连接获取推送消息",
        "usedScene": {
          "ability": ["com.example.myapp.MainAbility"],
          "when": "always"
        }
      }
    ]
  }
}
1.3 关键依赖说明与官方文档链接
- ohos_flutter_notification:鸿蒙官方维护的 Flutter 通知插件,支持本地通知的创建、取消、自定义样式,以及推送通知的接收与处理。官方仓库:https://gitee.com/openharmony-sig/ohos_flutter_notification
- ohos_flutter_background_task:适配鸿蒙后台任务调度机制,支持周期性任务、延时任务、长时后台任务等。官方仓库:https://gitee.com/openharmony-sig/ohos_flutter_background_task
- 华为 Push Kit:鸿蒙生态推送服务,提供高到达率的推送能力,支持透传消息、通知栏消息等。官方文档:https://developer.harmonyos.com/cn/docs/documentation/doc-guides/push-intro-0000001150039214
- 鸿蒙权限文档:详细说明系统权限申请流程与使用规范。官方文档:https://developer.harmonyos.com/cn/docs/documentation/doc-guides/permission-overview-0000001052928997
二、核心功能实现:本地通知接入
本地通知是应用在设备本地触发的通知(无需网络),适用于闹钟提醒、日程通知、任务完成提示等场景。ohos_flutter_notification 插件提供了完整的本地通知 API,支持基础通知、自定义样式、进度条通知等高级特性。
2.1 本地通知基础流程
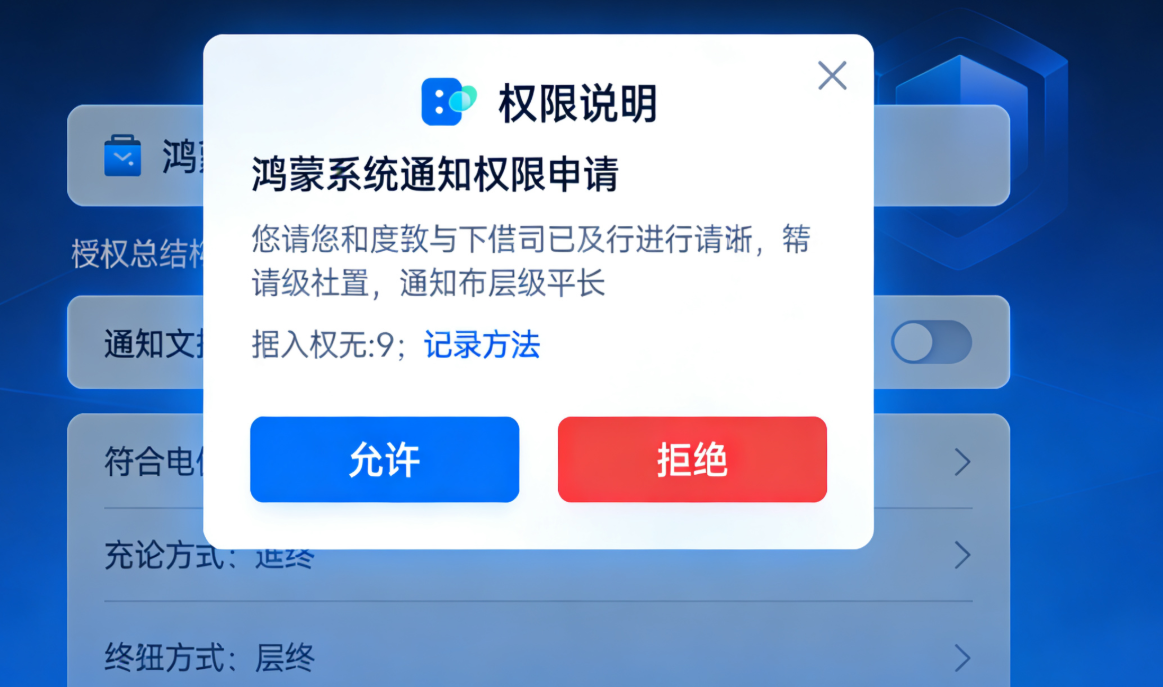
- 申请通知权限(鸿蒙系统需动态申请);
- 初始化通知插件;
- 构建通知参数(标题、内容、触发时间、样式等);
- 发送通知;
- 处理通知点击事件。
2.2 完整实现代码
步骤 1:权限申请与插件初始化
在 Flutter 项目的 main.dart 中初始化插件并申请权限:
dart
import 'package:flutter/material.dart';
import 'package:ohos_flutter_notification/ohos_flutter_notification.dart';
import 'package:permission_handler/permission_handler.dart'; // 权限申请辅助插件

void main() async {
  WidgetsFlutterBinding.ensureInitialized();
  // 初始化鸿蒙通知插件
  await OhosFlutterNotification.initialize();
  // 申请通知权限
  await requestNotificationPermission();
  runApp(const MyApp());
}

// 申请通知权限
Future<void> requestNotificationPermission() async {
  final status = await Permission.notification.status;
  if (status.isDenied) {
    // 动态申请权限
    await Permission.notification.request();
  } else if (status.isPermanentlyDenied) {
    // 权限被永久拒绝,引导用户去设置页开启
    openAppSettings();
  }
}

class MyApp extends StatelessWidget {
  const MyApp({super.key});

  @override
  Widget build(BuildContext context) {
    return MaterialApp(
      home: Scaffold(
        appBar: AppBar(title: const Text("鸿蒙 Flutter 通知与后台任务")),
        body: const NotificationDemo(),
      ),
    );
  }
}
步骤 2:基础本地通知发送
实现立即发送、延时发送、重复发送三种基础通知:
dart
class NotificationDemo extends StatefulWidget {
  const NotificationDemo({super.key});

  @override
  State<NotificationDemo> createState() => _NotificationDemoState();
}

class _NotificationDemoState extends State<NotificationDemo> {
  // 通知 ID(用于取消、更新通知)
  static const int _notificationId = 1001;

  // 发送立即通知
  Future<void> sendImmediateNotification() async {
    final notification = OhosNotification(
      id: _notificationId,
      title: "基础本地通知",
      content: "这是一条立即触发的鸿蒙本地通知",
      // 通知优先级(HIGH 会弹出横幅)
      importance: NotificationImportance.HIGH,
      // 通知通道(鸿蒙需指定通道,用于分类管理)
      channelId: "basic_channel",
      channelName: "基础通知",
      channelDescription: "用于展示普通通知",
      // 通知图标(需放在鸿蒙项目的 resources/base/media 目录)
      smallIcon: "ic_notification",
      // 点击通知后跳转的路由(Flutter 内部路由)
      payload: "/notification_detail?type=immediate",
    );
    // 发送通知
    await OhosFlutterNotification.showNotification(notification);
    ScaffoldMessenger.of(context).showSnackBar(
      const SnackBar(content: Text("立即通知已发送")),
    );
  }

  // 发送延时通知(5秒后触发)
  Future<void> sendDelayedNotification() async {
    final notification = OhosNotification(
      id: _notificationId + 1,
      title: "延时本地通知",
      content: "这是一条5秒后触发的通知",
      channelId: "delayed_channel",
      channelName: "延时通知",
      channelDescription: "用于展示延时触发的通知",
      smallIcon: "ic_notification",
      // 设置延时触发时间(单位:毫秒)
      triggerTime: DateTime.now().millisecondsSinceEpoch + 5000,
      payload: "/notification_detail?type=delayed",
    );
    await OhosFlutterNotification.showNotification(notification);
    ScaffoldMessenger.of(context).showSnackBar(
      const SnackBar(content: Text("延时通知已预约,5秒后触发")),
    );
  }

  // 发送重复通知(每1分钟触发一次)
  Future<void> sendRepeatingNotification() async {
    final notification = OhosNotification(
      id: _notificationId + 2,
      title: "重复本地通知",
      content: "这是一条每分钟重复的通知",
      channelId: "repeating_channel",
      channelName: "重复通知",
      channelDescription: "用于展示周期性重复的通知",
      smallIcon: "ic_notification",
      triggerTime: DateTime.now().millisecondsSinceEpoch,
      // 设置重复间隔(单位:毫秒,鸿蒙最小重复间隔为1分钟)
      repeatInterval: 60 * 1000,
      payload: "/notification_detail?type=repeating",
    );
    await OhosFlutterNotification.showNotification(notification);
    ScaffoldMessenger.of(context).showSnackBar(
      const SnackBar(content: Text("重复通知已启动,每分钟触发一次")),
    );
  }

  @override
  Widget build(BuildContext context) {
    return Padding(
      padding: const EdgeInsets.all(16.0),
      child: Column(
        crossAxisAlignment: CrossAxisAlignment.stretch,
        children: [
          ElevatedButton(
            onPressed: sendImmediateNotification,
            child: const Text("发送立即通知"),
          ),
          const SizedBox(height: 16),
          ElevatedButton(
            onPressed: sendDelayedNotification,
            child: const Text("发送5秒延时通知"),
          ),
          const SizedBox(height: 16),
          ElevatedButton(
            onPressed: sendRepeatingNotification,
            child: const Text("发送每分钟重复通知"),
          ),
        ],
      ),
    );
  }
}
步骤 3:处理通知点击事件
当用户点击通知时,需跳转至对应页面,通过监听通知点击回调实现:
dart
// 在 main.dart 中添加通知点击监听
void main() async {
  WidgetsFlutterBinding.ensureInitialized();
  await OhosFlutterNotification.initialize();
  // 监听通知点击事件
  OhosFlutterNotification.onNotificationTap.listen((payload) {
    // payload 为通知中设置的路由参数,此处可跳转至对应页面
    print("通知被点击,payload: $payload");
    // 示例:通过全局导航键跳转
    navigatorKey.currentState?.pushNamed(payload);
  });
  await requestNotificationPermission();
  runApp(const MyApp());
}

// 全局导航键,用于通知点击跳转
final GlobalKey<NavigatorState> navigatorKey = GlobalKey<NavigatorState>();

class MyApp extends StatelessWidget {
  const MyApp({super.key});

  @override
  Widget build(BuildContext context) {
    return MaterialApp(
      navigatorKey: navigatorKey,
      initialRoute: "/",
      routes: {
        "/": (context) => const HomePage(),
        "/notification_detail": (context) => const NotificationDetailPage(),
      },
    );
  }
}

// 通知详情页
class NotificationDetailPage extends StatelessWidget {
  const NotificationDetailPage({super.key});

  @override
  Widget build(BuildContext context) {
    final String? type = ModalRoute.of(context)?.settings.arguments as String?;
    return Scaffold(
      appBar: AppBar(title: const Text("通知详情")),
      body: Center(child: Text("当前点击的通知类型:$type")),
    );
  }
}
步骤 4:取消通知与自定义样式
实现取消单个通知、取消所有通知,以及大图通知、进度条通知等自定义样式:
dart
// 取消单个通知
Future<void> cancelNotification(int id) async {
  await OhosFlutterNotification.cancelNotification(id);
  ScaffoldMessenger.of(context).showSnackBar(
    SnackBar(content: Text("通知 $id 已取消")),
  );
}

// 取消所有通知
Future<void> cancelAllNotifications() async {
  await OhosFlutterNotification.cancelAllNotifications();
  ScaffoldMessenger.of(context).showSnackBar(
    const SnackBar(content: Text("所有通知已取消")),
  );
}

// 发送大图通知
Future<void> sendBigPictureNotification() async {
  final notification = OhosNotification(
    id: _notificationId + 3,
    title: "大图本地通知",
    content: "这是一条包含大图的通知",
    channelId: "big_pic_channel",
    channelName: "大图通知",
    channelDescription: "用于展示包含大图的通知",
    smallIcon: "ic_notification",
    // 大图通知样式(大图需放在鸿蒙项目的 resources/base/media 目录)
    style: NotificationStyle.bigPicture(
      bigPicture: "big_notification_image", // 大图资源名
      bigPictureTitle: "大图通知标题",
      bigPictureContent: "大图通知详细内容,支持多行显示",
    ),
  );
  await OhosFlutterNotification.showNotification(notification);
}

// 发送进度条通知(模拟下载进度)
Future<void> sendProgressNotification() async {
  const int progressId = 1005;
  // 初始化进度条通知(0%)
  await OhosFlutterNotification.showNotification(
    OhosNotification(
      id: progressId,
      title: "下载中",
      content: "正在下载文件...",
      channelId: "progress_channel",
      channelName: "进度条通知",
      channelDescription: "用于展示进度类通知",
      smallIcon: "ic_notification",
      style: NotificationStyle.progress(
        progress: 0, // 初始进度(0-100)
        indeterminate: false, // 是否为不确定进度(转圈)
      ),
    ),
  );

  // 模拟进度更新(每1秒更新10%)
  for (int i = 10; i <= 100; i += 10) {
    await Future.delayed(const Duration(seconds: 1));
    await OhosFlutterNotification.showNotification(
      OhosNotification(
        id: progressId,
        title: "下载中",
        content: "已下载 $i%",
        channelId: "progress_channel",
        style: NotificationStyle.progress(
          progress: i,
          indeterminate: false,
        ),
      ),
    );
  }

  // 下载完成后更新通知
  await OhosFlutterNotification.showNotification(
    OhosNotification(
      id: progressId,
      title: "下载完成",
      content: "文件已成功下载",
      channelId: "progress_channel",
      smallIcon: "ic_notification",
    ),
  );
}
2.3 本地通知关键注意事项
- 通知通道:鸿蒙系统要求通知必须归属某个通道,通道一旦创建不可修改(需卸载应用重新创建),建议在应用初始化时统一创建常用通道;
- 图标资源:通知图标需放在鸿蒙项目的
resources/base/media目录,支持 PNG、SVG 格式,建议尺寸为 48x48(小图标)、1080x540(大图); - 权限处理:若用户拒绝通知权限,需在应用内引导用户前往设置页开启,可通过
openAppSettings()跳转; - 重复通知间隔:鸿蒙系统限制重复通知的最小间隔为 1 分钟,不可设置小于 60 秒的间隔。
三、核心功能实现:推送通知接入(华为 Push Kit)
推送通知是通过服务器向设备发送的远程通知,适用于消息提醒、活动推送、内容更新等场景。鸿蒙生态中,推荐使用华为 Push Kit 实现推送功能,支持透传消息、通知栏消息,且到达率高、延迟低。
3.1 推送通知接入流程
- 注册华为开发者账号,创建应用并开通 Push Kit;
- 集成华为 Push SDK 与 Flutter 插件;
- 获取设备 Token(唯一标识设备);
- 服务器端发送推送消息;
- 客户端接收并处理推送消息(前台 / 后台 / 杀死进程状态)。
3.2 前期准备(华为开发者平台配置)
步骤 1:创建应用并开通 Push Kit
- 登录 华为开发者联盟,进入「应用市场 → 应用管理 → 创建应用」;
- 填写应用信息(应用名称、包名等,需与 Flutter 项目包名一致);
- 应用创建完成后,进入「开发 → 推送服务」,点击「开通服务」,并同意相关协议;
- 下载
agconnect-services.json文件(包含应用配置信息),放入 Flutter 项目的android/app目录(鸿蒙项目会自动读取)。
步骤 2:配置签名信息
- 在华为开发者平台的应用详情页,进入「开发 → 应用签名」,上传应用的签名证书指纹(SHA-256);
- 签名证书指纹获取方法:使用鸿蒙 SDK 提供的
keytool工具,执行以下命令:
bash
运行
keytool -list -v -keystore your_app_key.keystore
- 填写密钥库密码、别名,即可获取 SHA-256 指纹。
3.3 客户端实现代码
步骤 1:集成 Push Kit Flutter 插件
在 pubspec.yaml 中添加华为 Push 插件依赖:
yaml
dependencies:
  huawei_push: ^6.11.0+300  # 与原生 SDK 版本一致
步骤 2:初始化 Push SDK 并获取设备 Token
dart
import 'package:huawei_push/huawei_push.dart';

class PushDemo extends StatefulWidget {
  const PushDemo({super.key});

  @override
  State<PushDemo> createState() => _PushDemoState();
}

class _PushDemoState extends State<PushDemo> {
  String? _deviceToken;

  @override
  void initState() {
    super.initState();
    // 初始化 Push SDK
    initPushKit();
    // 监听 Token 变化
    listenToken();
    // 监听推送消息
    listenPushMessages();
  }

  // 初始化 Push SDK
  Future<void> initPushKit() async {
    try {
      // 初始化华为 Push SDK
      await Push.init();
      print("Push SDK 初始化成功");
    } catch (e) {
      print("Push SDK 初始化失败:$e");
    }
  }

  // 监听设备 Token(Token 是推送的唯一设备标识)
  Future<void> listenToken() async {
    Push.getTokenStream.listen((token) {
      setState(() {
        _deviceToken = token;
      });
      print("设备 Token 获取成功:$token");
      // 将 Token 上传至应用服务器(用于服务器端发送推送)
      uploadTokenToServer(token);
    }, onError: (error) {
      print("Token 获取失败:$error");
    });
  }

  // 将 Token 上传至应用服务器
  Future<void> uploadTokenToServer(String token) async {
    // 示例:通过 HTTP 请求上传 Token
    final response = await http.post(
      Uri.parse("https://your-server.com/api/device/token"),
      headers: {"Content-Type": "application/json"},
      body: jsonEncode({"token": token, "deviceType": "harmonyos"}),
    );
    if (response.statusCode == 200) {
      print("Token 上传成功");
    } else {
      print("Token 上传失败:${response.body}");
    }
  }

  @override
  Widget build(BuildContext context) {
    return Padding(
      padding: const EdgeInsets.all(16.0),
      child: Column(
        crossAxisAlignment: CrossAxisAlignment.stretch,
        children: [
          const Text("华为 Push Kit 推送演示"),
          const SizedBox(height: 16),
          Text("设备 Token:${_deviceToken ?? '获取中...'}"),
        ],
      ),
    );
  }
}
步骤 3:接收与处理推送消息
推送消息分为「通知栏消息」和「透传消息」,需分别处理不同状态(前台、后台、杀死进程):
dart
// 监听推送消息
Future<void> listenPushMessages() async {
  // 监听通知栏消息点击事件(应用后台/杀死进程时,点击通知会触发)
  Push.onNotificationOpenedApp.listen((message) {
    print("通知栏消息点击:${message.toString()}");
    // 处理点击事件,跳转至对应页面
    final payload = message.data?["payload"];
    if (payload != null) {
      navigatorKey.currentState?.pushNamed(payload);
    }
  });

  // 监听透传消息(应用前台/后台时接收,杀死进程时需通过服务接收)
  Push.onMessageReceived.listen((message) {
    print("透传消息接收:${message.toString()}");
    // 透传消息需自定义处理(如显示本地通知、更新 UI 等)
    showTransparentNotification(message);
  });

  // 监听应用在后台时接收的通知栏消息(需在鸿蒙原生配置)
  Push.onNotificationReceivedInApp.listen((message) {
    print("应用前台接收通知栏消息:${message.toString()}");
    // 前台时可自定义通知展示逻辑
  });
}

// 透传消息显示为本地通知
Future<void> showTransparentNotification(RemoteMessage message) async {
  final title = message.notification?.title ?? "透传消息";
  final content = message.notification?.body ?? message.data?["content"] ?? "收到一条新消息";
  final payload = message.data?["payload"] ?? "/push_detail";

  await OhosFlutterNotification.showNotification(
    OhosNotification(
      id: DateTime.now().millisecondsSinceEpoch % 10000,
      title: title,
      content: content,
      channelId: "push_channel",
      channelName: "推送通知",
      channelDescription: "用于展示服务器推送的消息",
      smallIcon: "ic_notification",
      payload: payload,
    ),
  );
}
步骤 4:鸿蒙原生配置(处理杀死进程状态的推送)
当应用被杀死时,推送消息需通过鸿蒙原生的 Service 接收,需在鸿蒙项目中添加以下配置:
- 在
config.json中添加推送服务配置:
json
{
  "module": {
    "abilities": [
      {
        "name": "com.huawei.hms.flutter.push.service.PushService",
        "type": "service",
        "visible": true,
        "exported": true
      }
    ]
  }
}
- 在
entry/src/main/java/com/example/myapp目录下创建PushReceiver.java(接收推送回调):
java
运行
import com.huawei.hms.flutter.push.receiver.HmsPushReceiver;
import ohos.aafwk.ability.AbilityContext;
import ohos.rpc.RemoteException;

public class PushReceiver extends HmsPushReceiver {
    @Override
    public void onTokenReceived(AbilityContext context, String token) throws RemoteException {
        super.onTokenReceived(context, token);
        // Token 变化时的回调(可选)
    }

    @Override
    public void onNotificationOpened(AbilityContext context, String message) throws RemoteException {
        super.onNotificationOpened(context, message);
        // 应用杀死进程时,点击通知的回调(可跳转至应用首页)
    }
}
3.4 服务器端发送推送消息(Java 示例)
服务器端需通过华为 Push Kit API 发送推送消息,以下是 Java 语言的示例代码(需引入华为 Push SDK):
java
运行
import com.huawei.push.message.AndroidConfig;
import com.huawei.push.message.AndroidNotification;
import com.huawei.push.message.Notification;
import com.huawei.push.message.PushMessage;
import com.huawei.push.reponse.PushResponse;
import com.huawei.push.service.HmsPushService;
import com.huawei.push.service.HmsPushServiceFactory;
import com.huawei.push.util.ValidatorUtils;

import java.util.ArrayList;
import java.util.List;

public class PushServerDemo {
    // 华为开发者平台的应用配置
    private static final String APP_ID = "your_app_id";
    private static final String APP_SECRET = "your_app_secret";
    private static final String PUSH_URL = "https://push-api.cloud.huawei.com/v1/%s/messages:send";

    public static void main(String[] args) {
        // 创建 Push 服务客户端
        HmsPushService hmsPushService = HmsPushServiceFactory.createHmsPushService(
                APP_ID, APP_SECRET, String.format(PUSH_URL, APP_ID));

        // 构建推送消息
        PushMessage pushMessage = buildPushMessage();

        // 推送目标设备 Token(可批量推送)
        List<String> tokens = new ArrayList<>();
        tokens.add("device_token_1");
        tokens.add("device_token_2");

        try {
            // 发送推送
            PushResponse response = hmsPushService.send(pushMessage, tokens);
            System.out.println("推送发送成功:" + response);
        } catch (Exception e) {
            System.out.println("推送发送失败:" + e.getMessage());
        }
    }

    // 构建推送消息(通知栏消息)
    private static PushMessage buildPushMessage() {
        // 安卓(鸿蒙)平台配置
        AndroidNotification androidNotification = new AndroidNotification.Builder()
                .setTitle("服务器推送通知")
                .setBody("这是一条来自服务器的鸿蒙推送消息")
                .setClickAction(new AndroidNotification.ClickAction.Builder()
                        .setType(1) // 1:跳转应用内页面
                        .setIntent("intent://com.example.myapp/notification_detail?payload=/push_detail#Intent;scheme=push;launchFlags=0x10000000;end")
                        .build())
                .build();

        AndroidConfig androidConfig = new AndroidConfig.Builder()
                .setNotification(androidNotification)
                .setCollapseKey(-1) // 消息折叠策略
                .build();

        // 构建推送消息
        return new PushMessage.Builder()
                .setAndroidConfig(androidConfig)
                .setNotification(new Notification.Builder()
                        .setTitle("服务器推送通知")
                        .setBody("这是一条来自服务器的鸿蒙推送消息")
                        .build())
                .setData("{\"payload\":\"/push_detail\",\"content\":\"推送消息详细内容\"}") // 透传数据
                .build();
    }
}
3.5 推送通知关键注意事项
- Token 有效性:设备 Token 可能会变化(如应用重装、系统升级),需定期上传最新 Token 至服务器;
- 推送格式:华为 Push Kit 支持通知栏消息和透传消息,通知栏消息由系统自动展示,透传消息需客户端自定义处理;
- 到达率优化:为提升推送到达率,建议开启「华为推送增强服务」,并在服务器端设置合理的重试策略;
- 合规性:推送消息需符合鸿蒙系统的合规要求,避免发送垃圾信息,否则可能被用户投诉或系统限制。
四、核心功能实现:后台任务接入
后台任务是应用在后台(无界面交互)状态下执行的任务,适用于数据同步、定时刷新、消息推送等场景。鸿蒙系统对后台任务有严格的调度机制,ohos_flutter_background_task 插件封装了鸿蒙后台任务 API,支持周期性任务、延时任务、长时任务等。
4.1 鸿蒙后台任务类型说明
| 任务类型 | 适用场景 | 限制条件 |
|---|---|---|
| 周期性任务 | 定时数据同步(如每小时) | 最小周期为 15 分钟,后台运行时间≤10 秒 |
| 延时任务 | 延时执行单次任务(如 5 分钟后) | 最大延时≤24 小时,后台运行时间≤10 秒 |
| 长时后台任务 | 持续运行的任务(如下载) | 需申请 ohos.permission.RUN_BACKGROUND_TASKS 权限,仅在充电时可长时间运行 |
| 应急后台任务 | 紧急数据上传(如崩溃日志) | 系统触发(如应用被杀死前),运行时间≤30 秒 |
4.2 后台任务完整实现代码
步骤 1:申请后台任务权限
已在「前置准备」的 config.json 中添加 ohos.permission.RUN_BACKGROUND_TASKS 权限,需确保动态申请(部分鸿蒙版本要求):
dart
// 申请后台任务权限
Future<void> requestBackgroundPermission() async {
  final status = await Permission.backgroundRefresh.status;
  if (status.isDenied) {
    await Permission.backgroundRefresh.request();
  } else if (status.isPermanentlyDenied) {
    openAppSettings();
  }
}
步骤 2:周期性后台任务(每 15 分钟同步数据)
dart
import 'package:ohos_flutter_background_task/ohos_flutter_background_task.dart';

class BackgroundTaskDemo extends StatefulWidget {
  const BackgroundTaskDemo({super.key});

  @override
  State<BackgroundTaskDemo> createState() => _BackgroundTaskDemoState();
}

class _BackgroundTaskDemoState extends State<BackgroundTaskDemo> {
  // 后台任务 ID
  static const String _periodicTaskId = "periodic_sync_task";

  @override
  void initState() {
    super.initState();
    // 申请后台任务权限
    requestBackgroundPermission();
    // 初始化后台任务
    initBackgroundTask();
  }

  // 初始化后台任务(注册任务回调)
  Future<void> initBackgroundTask() async {
    // 注册周期性任务回调
    OhosFlutterBackgroundTask.registerPeriodicTaskCallback(
      taskId: _periodicTaskId,
      callback: (taskId) async {
        print("周期性后台任务触发:$taskId");
        // 执行后台任务(如数据同步)
        await syncDataInBackground();
        // 任务执行完成后调用(必须调用,否则系统会限制后续任务)
        OhosFlutterBackgroundTask.completeTask(taskId);
      },
    );
  }

  // 启动周期性后台任务(每15分钟执行一次)
  Future<void> startPeriodicTask() async {
    try {
      await OhosFlutterBackgroundTask.startPeriodicTask(
        taskId: _periodicTaskId,
        interval: 15 * 60 * 1000, // 周期:15分钟(最小15分钟)
        initialDelay: 0, // 初始延迟:立即启动
        description: "每15分钟同步数据", // 任务描述(用于系统权限申请)
      );
      ScaffoldMessenger.of(context).showSnackBar(
        const SnackBar(content: Text("周期性后台任务已启动")),
      );
    } catch (e) {
      print("启动周期性任务失败:$e");
      ScaffoldMessenger.of(context).showSnackBar(
        SnackBar(content: Text("启动周期性任务失败:$e")),
      );
    }
  }

  // 停止周期性后台任务
  Future<void> stopPeriodicTask() async {
    await OhosFlutterBackgroundTask.stopPeriodicTask(taskId: _periodicTaskId);
    ScaffoldMessenger.of(context).showSnackBar(
      const SnackBar(content: Text("周期性后台任务已停止")),
    );
  }

  // 后台数据同步逻辑
  Future<void> syncDataInBackground() async {
    try {
      // 示例:同步用户数据至服务器
      final response = await http.post(
        Uri.parse("https://your-server.com/api/data/sync"),
        headers: {"Content-Type": "application/json"},
        body: jsonEncode({"userId": "123", "data": "同步的数据"}),
      );
      if (response.statusCode == 200) {
        print("后台数据同步成功");
        // 同步成功后可发送本地通知提醒用户
        await OhosFlutterNotification.showNotification(
          OhosNotification(
            id: DateTime.now().millisecondsSinceEpoch % 10000,
            title: "数据同步成功",
            content: "后台已成功同步您的最新数据",
            channelId: "sync_channel",
            channelName: "数据同步通知",
            smallIcon: "ic_notification",
          ),
        );
      } else {
        print("后台数据同步失败:${response.body}");
      }
    } catch (e) {
      print("后台数据同步异常:$e");
    }
  }

  @override
  Widget build(BuildContext context) {
    return Padding(
      padding: const EdgeInsets.all(16.0),
      child: Column(
        crossAxisAlignment: CrossAxisAlignment.stretch,
        children: [
          const Text("鸿蒙后台任务演示"),
          const SizedBox(height: 16),
          ElevatedButton(
            onPressed: startPeriodicTask,
            child: const Text("启动15分钟周期性同步任务"),
          ),
          const SizedBox(height: 16),
          ElevatedButton(
            onPressed: stopPeriodicTask,
            child: const Text("停止周期性同步任务"),
          ),
        ],
      ),
    );
  }
}
步骤 3:延时后台任务与长时后台任务
dart
// 启动延时后台任务(5分钟后执行)
Future<void> startDelayedTask() async {
  try {
    await OhosFlutterBackgroundTask.startDelayedTask(
      taskId: "delayed_task_1",
      delay: 5 * 60 * 1000, // 延时:5分钟
      callback: (taskId) async {
        print("延时后台任务触发:$taskId");
        // 执行延时任务(如发送提醒)
        await sendDelayReminder();
        OhosFlutterBackgroundTask.completeTask(taskId);
      },
      description: "5分钟后发送提醒",
    );
    ScaffoldMessenger.of(context).showSnackBar(
      const SnackBar(content: Text("延时后台任务已预约,5分钟后执行")),
    );
  } catch (e) {
    print("启动延时任务失败:$e");
  }
}

// 发送延时提醒
Future<void> sendDelayReminder() async {
  await OhosFlutterNotification.showNotification(
    OhosNotification(
      id: DateTime.now().millisecondsSinceEpoch % 10000,
      title: "延时提醒",
      content: "这是5分钟前预约的提醒",
      channelId: "reminder_channel",
      channelName: "延时提醒",
      smallIcon: "ic_notification",
    ),
  );
}

// 启动长时后台任务(如下载文件)
Future<void> startLongRunningTask() async {
  try {
    await OhosFlutterBackgroundTask.startLongRunningTask(
      taskId: "long_running_task_1",
      callback: (taskId) async {
        print("长时后台任务触发:$taskId");
        // 执行长时任务(如下载大文件)
        await downloadLargeFile(taskId);
        OhosFlutterBackgroundTask.completeTask(taskId);
      },
      description: "后台下载文件",
    );
    ScaffoldMessenger.of(context).showSnackBar(
      const SnackBar(content: Text("长时后台任务已启动")),
    );
  } catch (e) {
    print("启动长时任务失败:$e");
  }
}

// 后台下载大文件
Future<void> downloadLargeFile(String taskId) async {
  // 示例:下载大文件并更新进度
  final url = "https://your-server.com/large_file.zip";
  final savePath = "/sdcard/Download/large_file.zip";

  await dio.download(
    url,
    savePath,
    onReceiveProgress: (received, total) {
      if (total != -1) {
        final progress = (received / total * 100).toInt();
        print("下载进度:$progress%");
        // 可选:更新通知栏进度
        OhosFlutterNotification.showNotification(
          OhosNotification(
            id: 2001,
            title: "文件下载中",
            content: "已下载 $progress%",
            channelId: "download_channel",
            style: NotificationStyle.progress(progress: progress),
          ),
        );
      }
    },
  );

  // 下载完成
  await OhosFlutterNotification.showNotification(
    OhosNotification(
      id: 2001,
      title: "下载完成",
      content: "大文件已成功下载至 $savePath",
      channelId: "download_channel",
    ),
  );
}
4.3 后台任务关键注意事项
- 任务时长限制:普通后台任务(周期性、延时)的运行时间不得超过 10 秒,长时任务需在充电状态下运行,否则系统会强制终止;
- 电量优化:避免频繁创建后台任务,建议合并同类任务(如将多个定时同步任务合并为一个周期性任务);
- 任务优先级:可通过
priority参数设置任务优先级(高优先级任务更难被系统终止),但需合理使用,避免过度消耗资源; - 兼容性:部分鸿蒙设备可能对后台任务有额外限制,需在多设备上测试兼容性。
五、进阶优化:通知与后台任务的高级特性
5.1 通知高级特性
1. 通知分组(适用于多条同类通知)
dart
// 发送分组通知
Future<void> sendGroupedNotifications() async {
  const String groupKey = "chat_group";
  const String groupName = "聊天消息";

  // 创建通知组(仅需创建一次)
  await OhosFlutterNotification.createNotificationGroup(
    groupKey: groupKey,
    groupName: groupName,
  );

  // 发送第一条分组通知
  await OhosFlutterNotification.showNotification(
    OhosNotification(
      id: 3001,
      title: "张三",
      content: "今天有空吗?",
      channelId: "chat_channel",
      groupKey: groupKey,
      groupSummary: false, // 是否为分组摘要通知
    ),
  );

  // 发送第二条分组通知
  await OhosFlutterNotification.showNotification(
    OhosNotification(
      id: 3002,
      title: "李四",
      content: "项目进度怎么样了?",
      channelId: "chat_channel",
      groupKey: groupKey,
      groupSummary: false,
    ),
  );

  // 发送分组摘要通知(展示在分组顶部)
  await OhosFlutterNotification.showNotification(
    OhosNotification(
      id: 3000,
      title: groupName,
      content: "您有2条未读消息",
      channelId: "chat_channel",
      groupKey: groupKey,
      groupSummary: true, // 标记为摘要通知
    ),
  );
}
2. 通知优先级与免打扰适配
dart
// 发送高优先级通知(突破免打扰模式)
Future<void> sendHighPriorityNotification() async {
  await OhosFlutterNotification.showNotification(
    OhosNotification(
      id: 3003,
      title: "紧急通知",
      content: "这是一条紧急通知,即使免打扰也会提醒",
      channelId: "emergency_channel",
      channelName: "紧急通知",
      channelDescription: "用于展示紧急通知",
      importance: NotificationImportance.MAX, // 最高优先级
      priority: NotificationPriority.HIGH, // 高优先级
      // 允许突破免打扰模式
      bypassDnd: true,
    ),
  );
}
5.2 后台任务优化
1. 后台任务电量优化
dart
// 优化后台任务:仅在设备充电且有网络时执行
Future<void> startOptimizedPeriodicTask() async {
  await OhosFlutterBackgroundTask.startPeriodicTask(
    taskId: "optimized_sync_task",
    interval: 15 * 60 * 1000,
    // 设置任务执行条件:充电且有网络
    constraints: BackgroundTaskConstraints(
      requiresCharging: true,
      requiresNetworkType: NetworkType.connected,
    ),
    callback: (taskId) async {
      await syncDataInBackground();
      OhosFlutterBackgroundTask.completeTask(taskId);
    },
  );
}
2. 后台任务重试机制
dart
// 后台任务失败重试
Future<void> syncDataInBackgroundWithRetry() async {
  int retryCount = 0;
  const int maxRetryCount = 3;

  while (retryCount < maxRetryCount) {
    try {
      final response = await http.post(
        Uri.parse("https://your-server.com/api/data/sync"),
        body: jsonEncode({"userId": "123"}),
      );
      if (response.statusCode == 200) {
        print("数据同步成功");
        return;
      } else {
        print("数据同步失败,状态码:${response.statusCode}");
      }
    } catch (e) {
      print("数据同步异常:$e");
    }

    retryCount++;
    // 指数退避重试(1秒、2秒、4秒)
    await Future.delayed(Duration(seconds: 1 << retryCount));
  }

  print("重试次数已达上限,同步失败");
}
六、问题排查与常见错误解决方案
6.1 通知相关问题
| 问题现象 | 可能原因 | 解决方案 |
|---|---|---|
| 通知不显示 | 1. 未申请通知权限;2. 通知通道未创建;3. 图标资源不存在 | 1. 检查权限申请代码;2. 确保通道已创建;3. 核对图标资源路径 |
| 通知点击无响应 | 1. 未监听 onNotificationTap;2. 路由配置错误 |
1. 确认监听回调已注册;2. 检查 payload 与路由匹配 |
| 重复通知无法取消 | 通知 ID 重复或未正确传入 ID | 确保每个通知的 ID 唯一,取消时传入正确 ID |
| 大图通知显示异常 | 图片资源尺寸不符合要求或路径错误 | 使用推荐尺寸(1080x540),核对资源名 |
6.2 推送相关问题
| 问题现象 | 可能原因 | 解决方案 |
|---|---|---|
| Token 获取失败 | 1. Push SDK 初始化失败;2. 应用签名不匹配 | 1. 检查日志排查初始化错误;2. 核对应用签名与华为开发者平台配置 |
| 推送消息接收不到 | 1. Token 错误;2. 服务器配置错误;3. 应用处于杀死状态未配置原生服务 | 1. 确认 Token 有效性;2. 检查服务器推送参数;3. 配置 PushReceiver 与 Service |
| 透传消息前台不接收 | 未监听 onMessageReceived 回调 |
注册透传消息监听回调 |
6.3 后台任务相关问题
| 问题现象 | 可能原因 | 解决方案 |
|---|---|---|
| 后台任务无法启动 | 1. 未申请后台任务权限;2. 任务周期小于 15 分钟 | 1. 检查权限申请;2. 调整周期≥15 分钟 |
| 后台任务执行时间过长被终止 | 任务运行时间超过 10 秒(普通任务) | 拆分任务为多个子任务,或使用长时任务 |
| 后台任务在设备休眠后不执行 | 未设置唤醒锁或依赖网络 / 充电条件 | 1. 申请唤醒锁;2. 调整任务约束条件 |
6.4 调试技巧
- 日志打印:在关键步骤打印日志(如权限申请结果、通知发送状态、推送回调),通过 DevEco Studio 的 Logcat 查看;
- 鸿蒙开发者工具:使用 DevEco Studio 的「设备管理器」查看应用权限状态、通知通道配置;
- 华为 Push 调试平台:通过 华为 Push 调试平台 测试推送消息是否能正常接收;
- 权限检查工具:使用
permission_handler插件的Permission.notification.status检查权限状态。
七、总结与学习资源推荐
本文详细讲解了鸿蒙 Flutter 应用接入本地通知、推送通知(华为 Push Kit)与后台任务的完整流程,涵盖基础实现、高级特性、优化技巧与问题排查。通过 ohos_flutter_notification、ohos_flutter_background_task 等插件,开发者可高效调用鸿蒙系统能力,提升应用的交互性与实时性。
推荐学习资源
- 鸿蒙官方文档:HarmonyOS 开发者文档
- 华为 Push Kit 文档:Push Kit 开发指南
- 鸿蒙 Flutter 插件仓库:openharmony-sig/ohos_flutter_plugins
- Flutter 官方文档:Flutter 跨平台开发指南
- 鸿蒙后台任务文档:后台任务开发指南
随着鸿蒙生态的持续发展,Flutter 与鸿蒙的融合将更加深入,更多系统级能力将通过插件开放给开发者。建议开发者关注官方仓库与社区动态,及时适配新特性,打造更优质的鸿蒙应用。如果在接入过程中遇到问题,可通过鸿蒙开发者论坛、GitHub Issues 等渠道寻求帮助,也欢迎在评论区分享你的实战经验!

讨论HarmonyOS开发技术,专注于API与组件、DevEco Studio、测试、元服务和应用上架分发等。
更多推荐
 24
24 0
0- 0


 已为社区贡献27条内容

所有评论(0)